- 02/01/2017
- 1 Min Read
- By: Gerry Tseng
Replacing the Front Lower Control Arms on a 2004 Saab 9-3 Arc

Replacing the front lower control arms on a 2004 Saab 9-3 Arc is a fairly-easy DIY that takes about 1-2 hours to complete.
Parts & Tools You’ll Need:
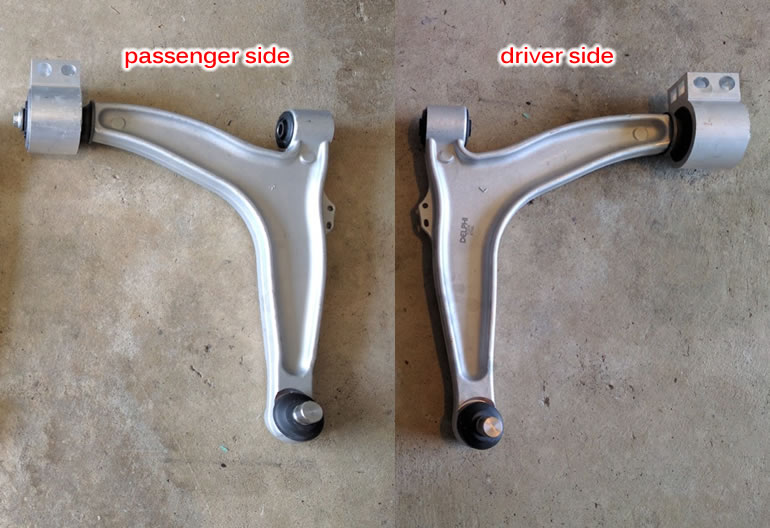
- Front Right Lower Control Arm (passenger side)
- Front Left Lower Control Arm (driver side)
- Floor Jack, Jack Stands + Wheel Chocks
- Ratchet & Sockets
- E-Torx Sockets
- Torque Wrench
- Wrenches
- Pry Bar (optional)
- Breaker Bar (optional)
- Bench Vise (optional)
- Impact Wrench (optional)
- About 1-2 Hours Of Free Time
Ready To Replace Your Front Lower Control Arms?
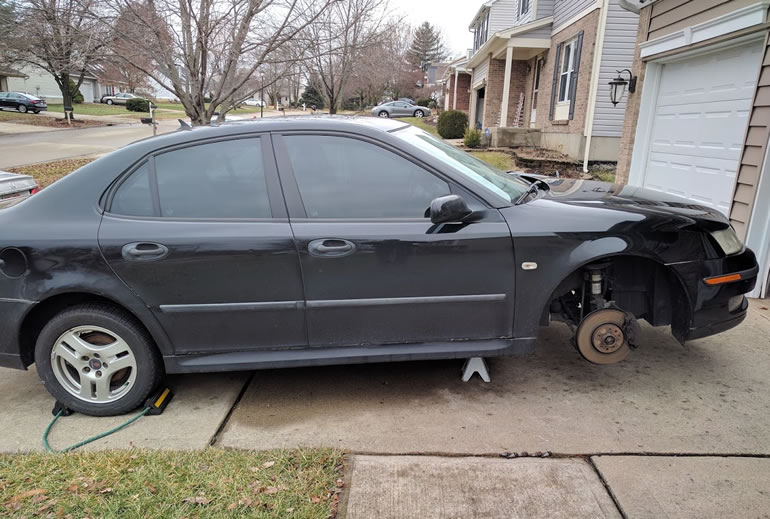
1.) Place wheel chocks at the rear wheels, jack up the front of the car, set it on jack stands and remove the rear wheels:
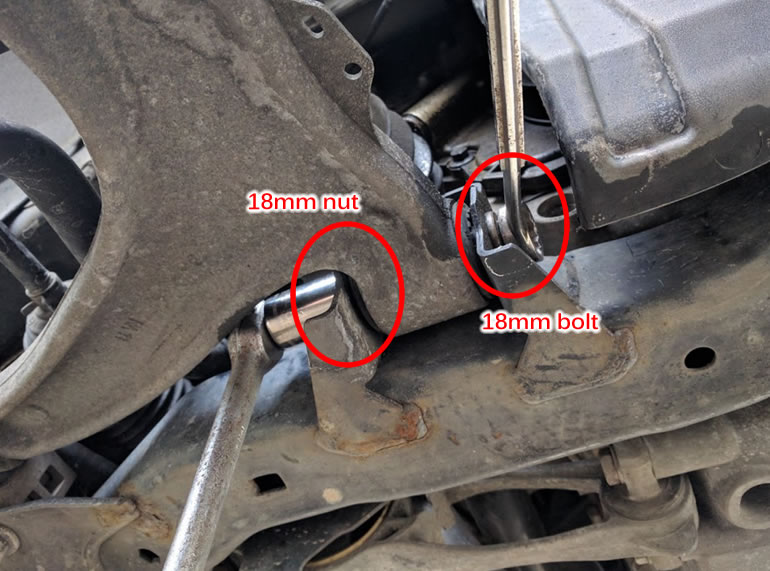
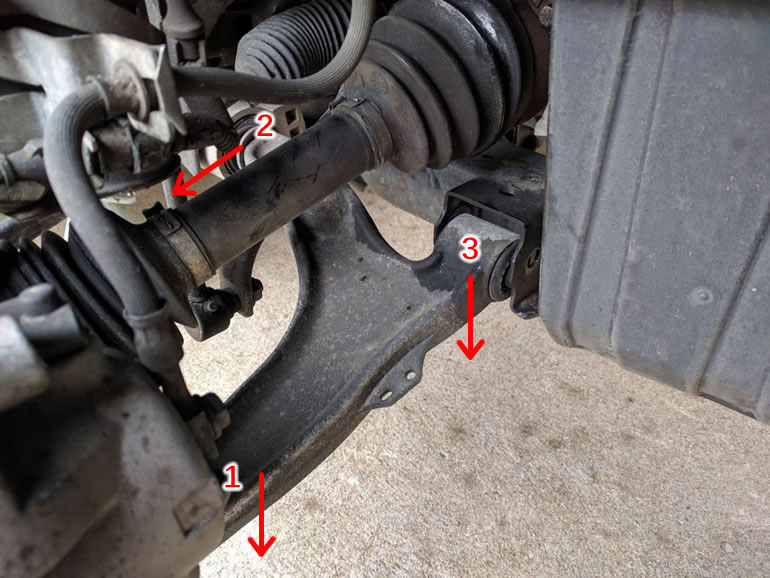
2.) Here I’m starting with the passenger side. Begin by removing the front attachment’s bolt & nut from the lower control arm using an 18mm socket and 18mm wrench:
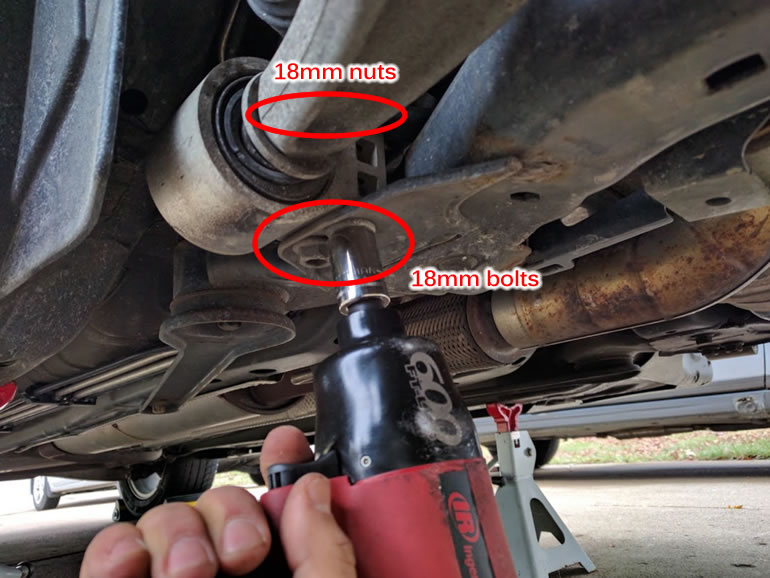
3.) Remove the rear attachment’s bolts & nuts from the lower control arm using an 18mm socket for the bolts underneath and 18mm wrench as a counter-hold for the nuts on top:
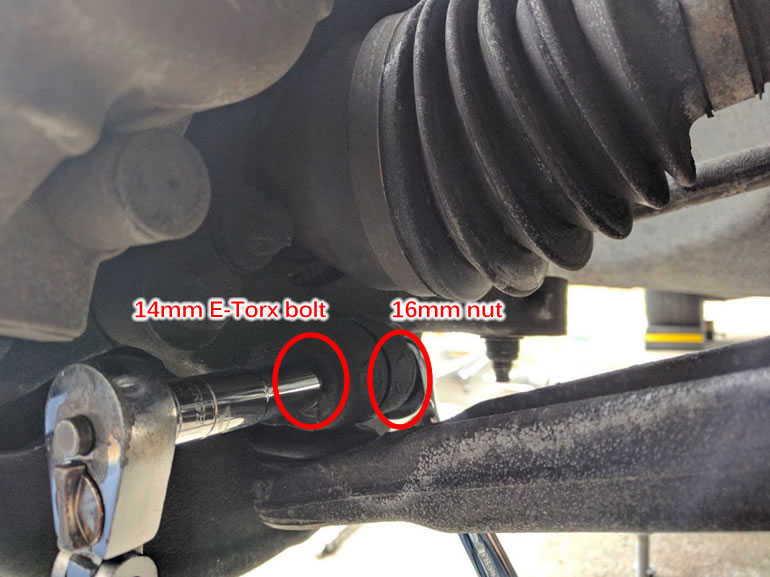
4.) Remove the bolt & nut connecting the control arm’s ball joint to the spindle using a 14mm E-Torx socket and a 16mm wrench, then work the control arm off the car:
5.) You may need to use a pry car to carefully get it out so take your time and use some muscle to eventually get it off:
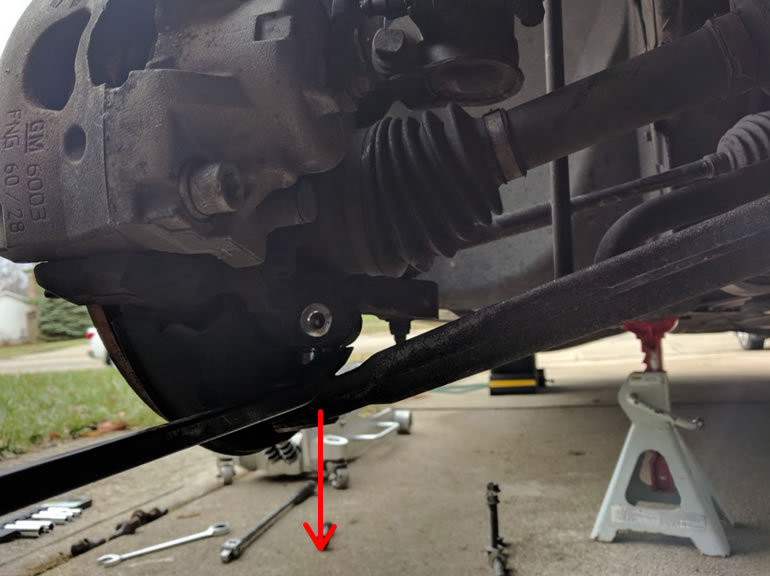
6.) It can be a pain to get the control arm off so here’s the order that worked for me. After you disconnect the ball joint from the spindle, work the rear off next and the front will drop last:
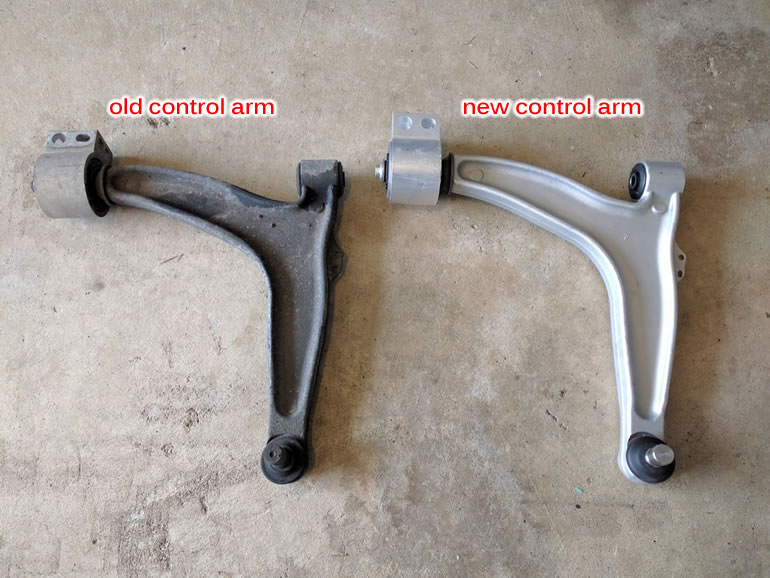
7.) Compare the old control arm with the new one. My old one had a very loose ball joint and needed to be replaced:
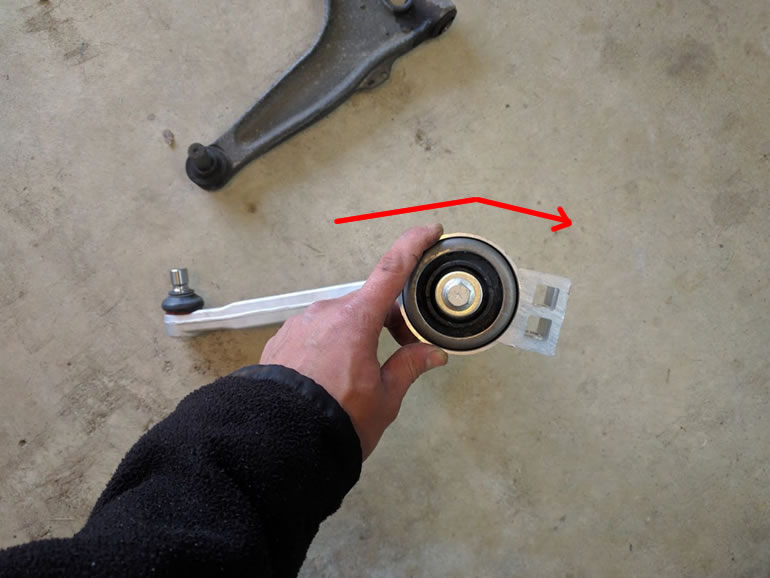
8.) Before you install the new control arms, do yourself a favor and set the rear mounting points at an angle so they’re easier to put in. The WIS says to remove the sway bar for the job but this trick bypasses that. I used a bench vise to carefully orient the rear to an angle that works well:
9.) Installation is the reverse of removal. Carefully position the new control arm so that the bolts all slide in easily. Torque the front and rear attachment points to 48 ft-lb + 90 degrees and the ball joint attachment point to 37 ft-lb.
10.) Repeat the above steps for the driver side. When you’re all done install the wheels, lower the car and torque the wheel bolts to 80 ft-lb.
11.) Clear your tools from the area and take the car for a quick test drive to ensure all is good.
Enjoy years of reliability with your new front lower control arms!