- 08/01/2023
- 7 Min Read
- By: Gareth Foley
Everything You Need To Know About BMW N55 & S55 Valvetronic Eccentric Shaft Replacement

Engineers have been looking for ways to improve the internal combustion engine since its creation. Various reasons have spawned updates and evolutions, but these days, the general driver is efficiency. Greenhouse emissions are bad, and carbon-neutral modes of transportation don’t exist yet, so turbos, catalytic converters, and particulate filters are the norm. However, many manufacturers have found ways of applying the updates in ways that also improve performance. BMW’s Valvetronic, a way of using variable camshaft lift to determine throttle position, was one such advancement that nearly all of their engines use today.
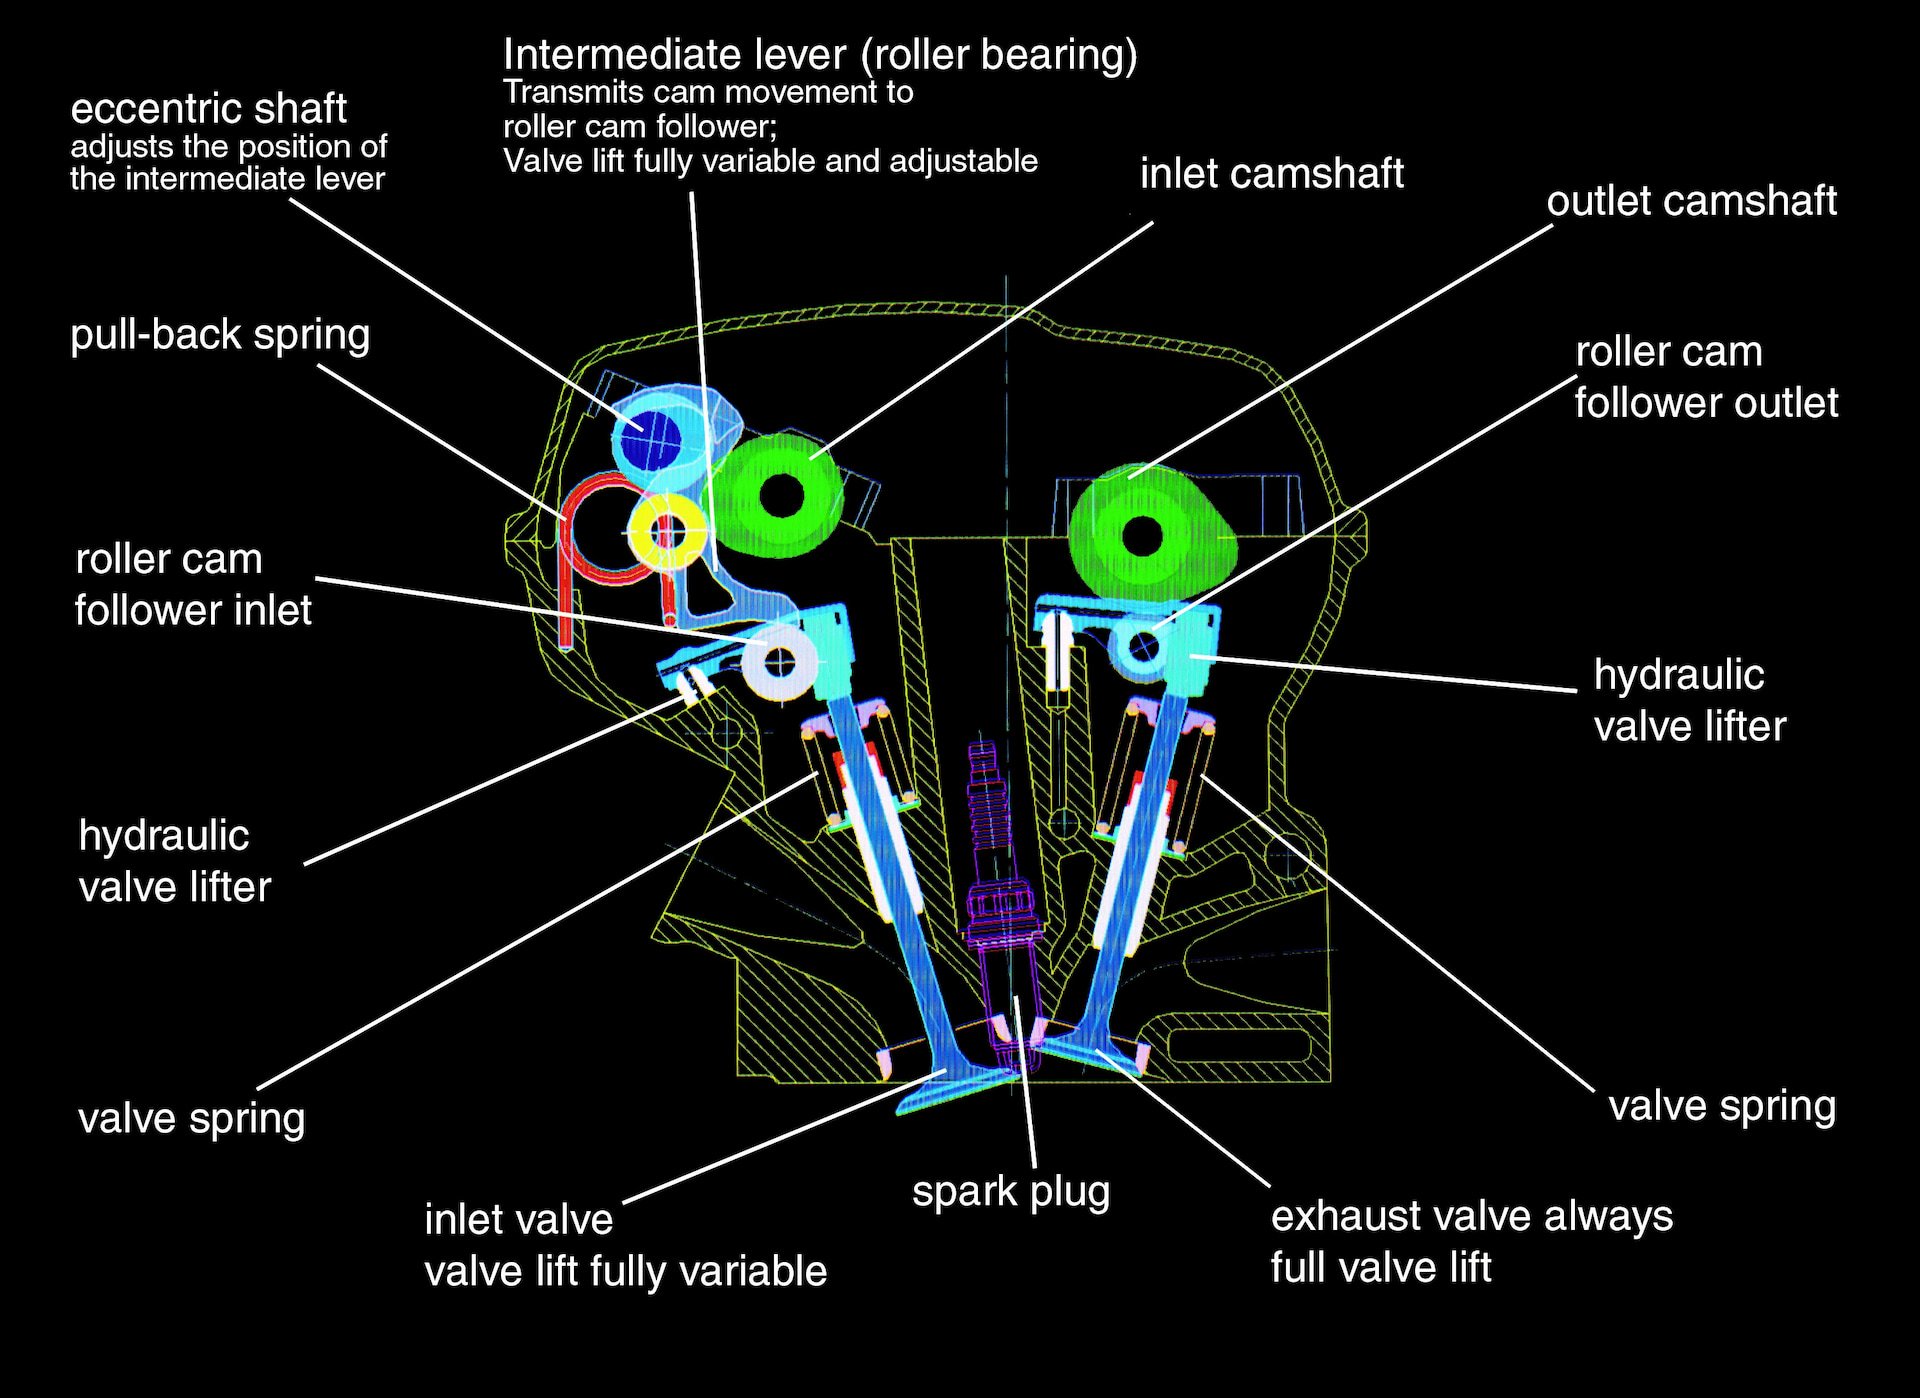
BMW Valvetronic
All engines with overhead camshafts have some kind of buffer between the camshaft and the top of the valve, whether a finger-follower, tappet, or rocker arm. The Valvetronic puts an arm between the lifter and the camshaft, which regulates how much of the camshaft’s lift is applied to the valve. The arms, called Intermediate Levers, ride on the Eccentric Shaft and are actuated by an electronic motor. The engine computer controls the motor and drives a gear that rotates the Eccentric Shaft, determining how much cam lift is used at any time. Although BMW’s engines have throttle bodies as fail-safes, the Valvetronic system effectively regulates the air entering each cylinder. When the Valvetronic system is functioning (it will be by default), the throttle body remains in the fully open position, which helps reduce pumping losses while improving volumetric efficiency.
BMW N55 Valvetronic Faults
The N55 engine (and S55 by default) use BMW’s third-generation Valvetronic system. With the update came a built-in Eccentric Shaft position sensor and a brushless actuator motor design for quicker and more precise adjustments. Unfortunately, the update also brought about a common system failure.
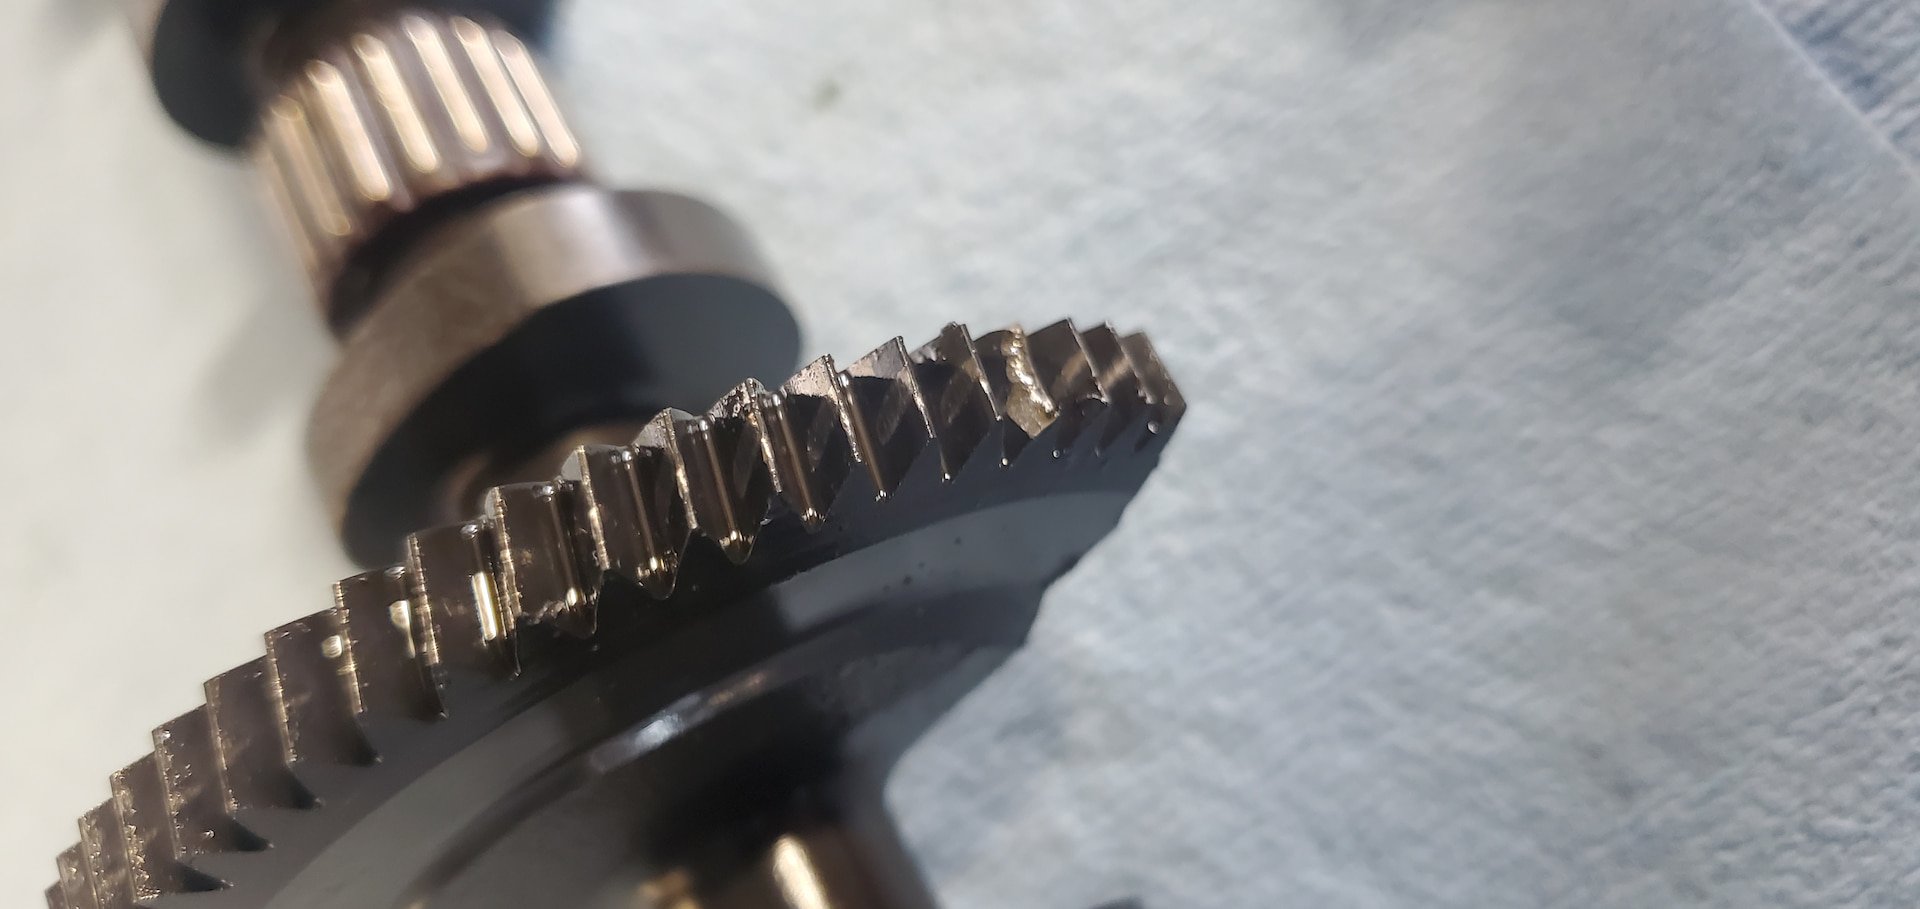
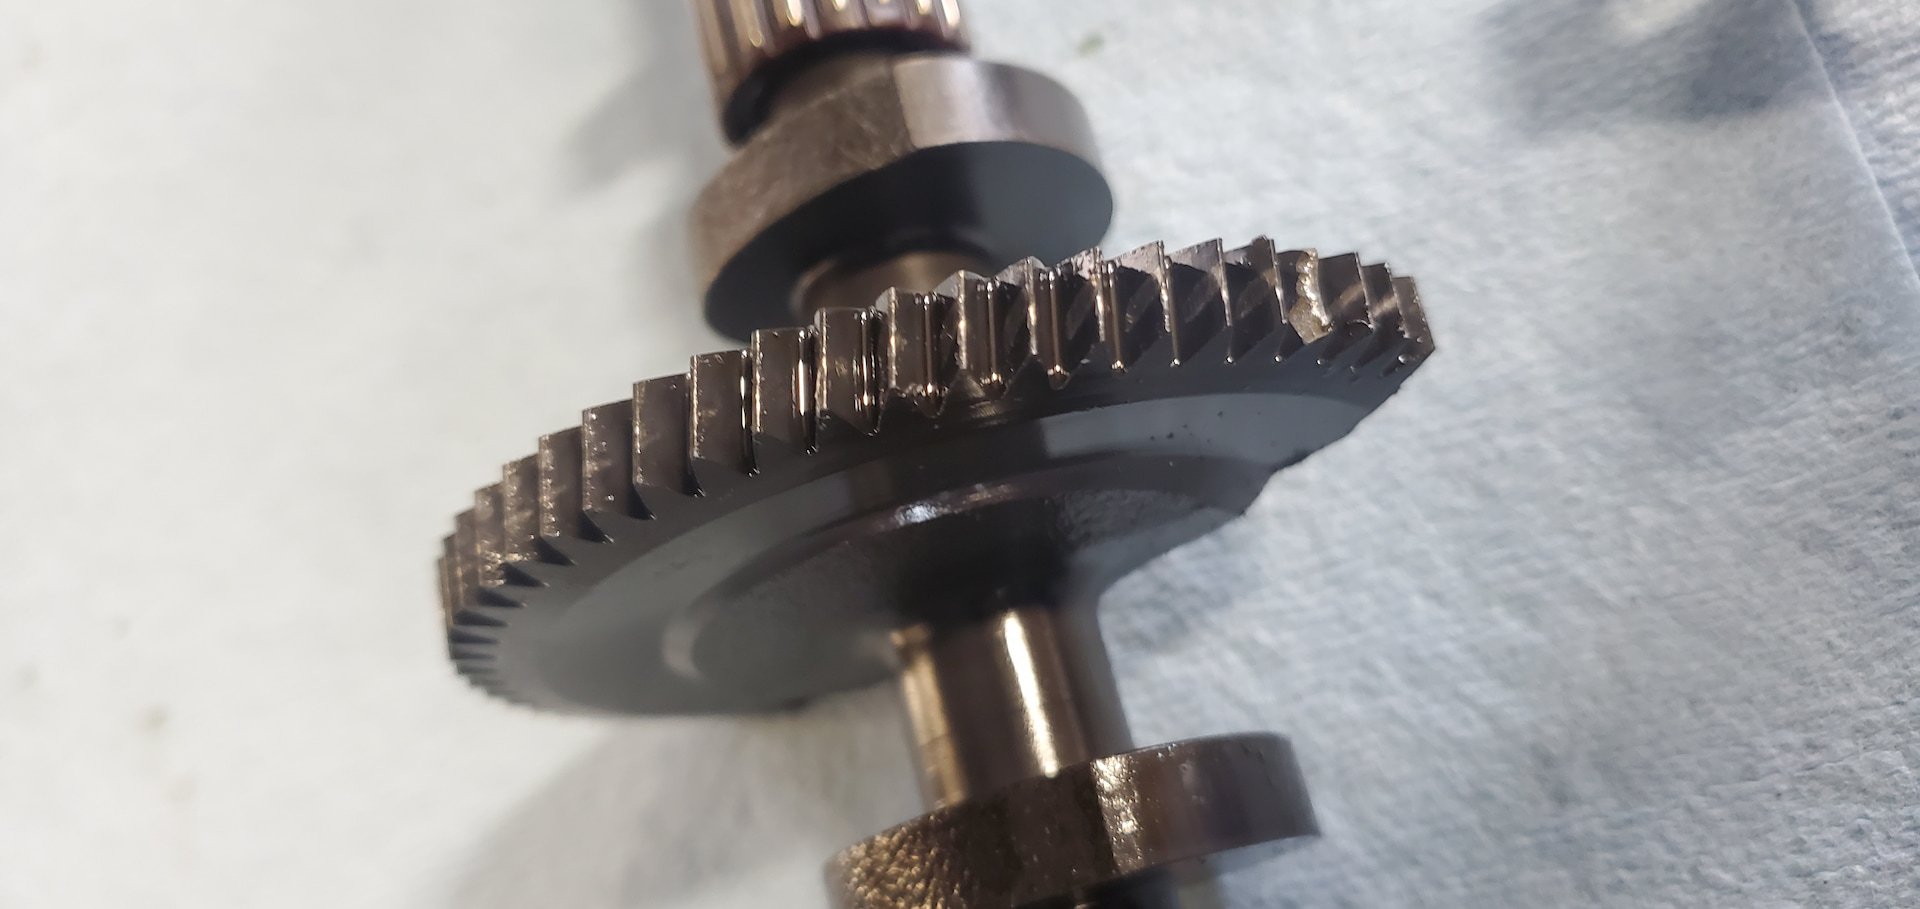
The system heavily relies on quick and precise adjustments since the intake valve lift directly controls engine speed/power output, but that can become an issue for the N55 and its variants. For the N55, numerous cases of excessive wear on the eccentric shaft gear that the actuator motor’s worm drive engages are caused by poor lubrication. An oil squirter is intended to supply oil to both gears, but its passage is so small that the slightest bit of lapsed maintenance can cause problems. On vehicles that have not received adequate oil changes or have received oil changes in extended intervals, the oil squirter will clog, preventing oil flow/lubrication to the actuator/eccentric shaft interface and causing excessive wear of the eccentric shaft. The inability to properly position the Eccentric shaft will ultimately cause faults in the Valvetronic system.
Any problems in this system due to excessive eccentric shaft wear can result in the following faults.
BMW N55/S55 Valvetronic Eccentric Shaft Failure Codes:
P1014 - Valvetronic Reference Eccentric Shaft Sensor Parity Error
P1017 - Valvetronic Eccentric Shaft Sensor Plausibility
P1023 - Valvetronic Adjustment Range
P1030 - Valvetronics Monitoring Sluggish Movement
P10DF - Valvetronic Overload Protection Output Stage System Shutdown
P10E0 - Valvetronic Overload Protection Control Motor System Shutdown
P10E1 - Valvetronic System No Travel Detected
P10E7 - Valvetronic Overload Protection Output Stage Overload
P10E8 - Valvetronic Overload Protection Control Motor Overload
As with all fault codes, it’s imperative to diagnose/understand the running conditions that are occurring before replacing parts. If you pull out your scanner and encounter a few of these codes, your fate is essentially sealed. Consider an Eccentric Shaft replacement in the near future.
Replacing A BMW N55/S55 Eccentric Shaft
If you tackle an Eccentric Shaft replacement, ensure you have some decent wrenching experience, an experienced friend to support you, or both. While it won’t require a mechanical engineering degree, it does involve getting into critical engine areas that need precise procedures.
Before starting, ensure you have all the necessary parts, tools, and instructions. Solvents, assembly lube, and a pack of rags should also be present so you can disassemble, clean, and reassemble the system with fresh components. Regarding tools, the one necessity that likely already isn’t in your toolbox is BMW special tool 117 110 (p/n 83300496671), an Intermediate Lever Spring Tool. There is no way you can reinstall the intermediate lever springs without this tool, and not having this tool for removing these springs is also potentially dangerous as they are preloaded.
Removing the injectors and the injector wells can also be a bit tricky without the right tools. You don’t necessarily have to use the BMW tools, but we highly recommend them for their simplicity. For early N55s, use BMW special tool 130 270. Later N55 engines require BMW special tool 130 320.
How To Replace A BMW N55/S55 Eccentric Shaft
Although we haven’t produced a video DIY on this procedure, we’re still here to offer the steps in a way that you can take advantage of to save yourself a couple of bucks by replacing the shaft yourself.
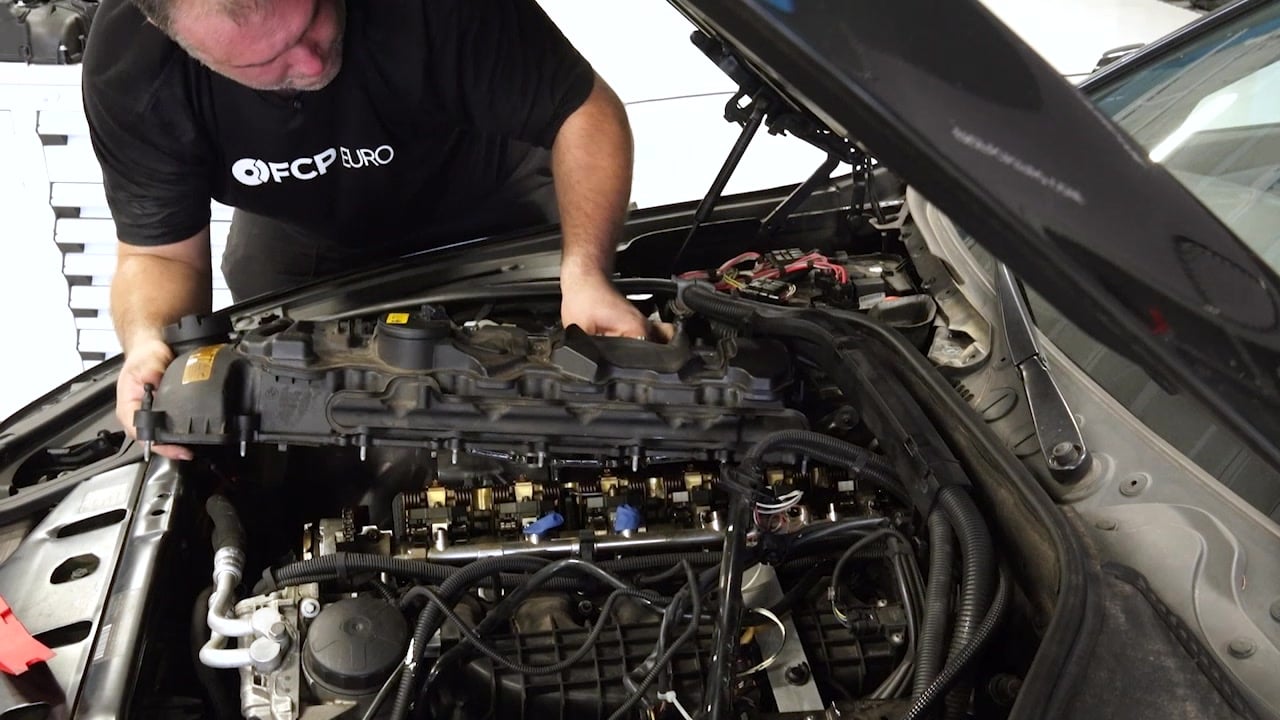
Step 1 (N55 engine): Remove The Valve Cover
We have a blog article on removing the valve cover on the N55 engine that you can reference. Depending on the car, you may need to remove the cowl covers from the back of the engine bay for access. Furthermore, you must disconnect the high-pressure fuel line for the injectors, remove the ignition coils, and any other wiring that sits atop the valve cover.
Step 1 (S55 engine): Remove The Valve Cover
In order to remove the valve cover, you will need to remove the charge air cooler and charge pipes from the turbochargers. Depending on the car, you may need to remove the cowl covers from the back of the engine bay for access. You’ll also need to remove the carbon fiber chassis brace from the strut towers. Furthermore, you must disconnect the high-pressure fuel line for the injectors, remove the ignition coils, and any other wiring that sits atop the valve cover.
Step 2: Remove The Injectors For Cylinders 1-4
Remove injectors for cylinders 1-4 along with the injector wells. For early production N55s (up to 1/2011 and engine serial number 14407684), use BMW special tool 130 270 (p/n 83300496669), and for later production N55s (from 1/2011 and engine serial number 14407685), use BMW special tool 130 320 (p/n 83300496885) to safely remove the injectors from the cylinder head. Once the injectors are removed, you can remove the injector/spark plug wells for cylinders 1 and 2 and 3 and 4.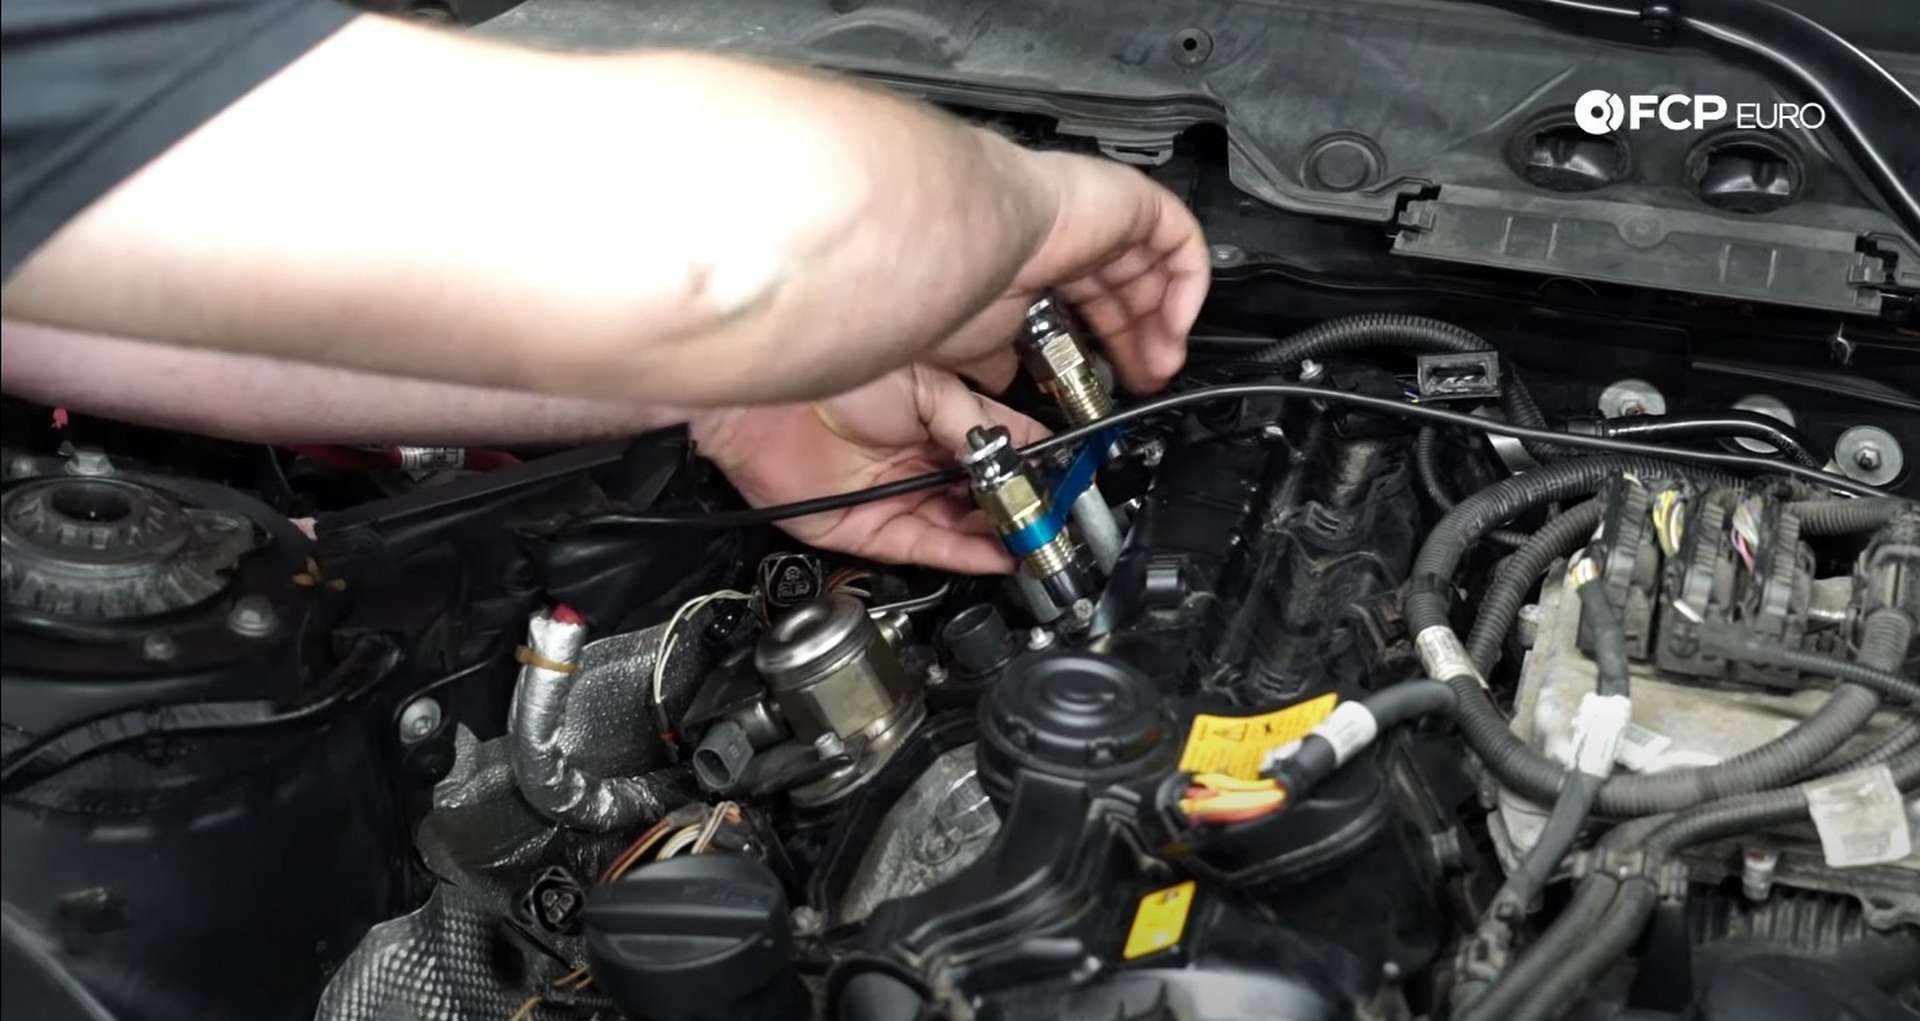
Step 3: Remove The Eccentric Shaft actuator
This is a balancing act between supporting the eccentric shaft with a wrench and advancing the eccentric shaft actuator with a 4mm Allen key; the eccentric shaft can only be supported on the flats (at the rear of the eccentric shaft). First, adjust the eccentric shaft to the maximum stroke (towards the intake manifold). You need to rotate the eccentric shaft actuator worm drive with a 4mm Allen key while supporting the eccentric shaft with an open-ended or adjustable wrench. Remove the minimum stroke stop from the cylinder head once the eccentric shaft is at the maximum stroke position.
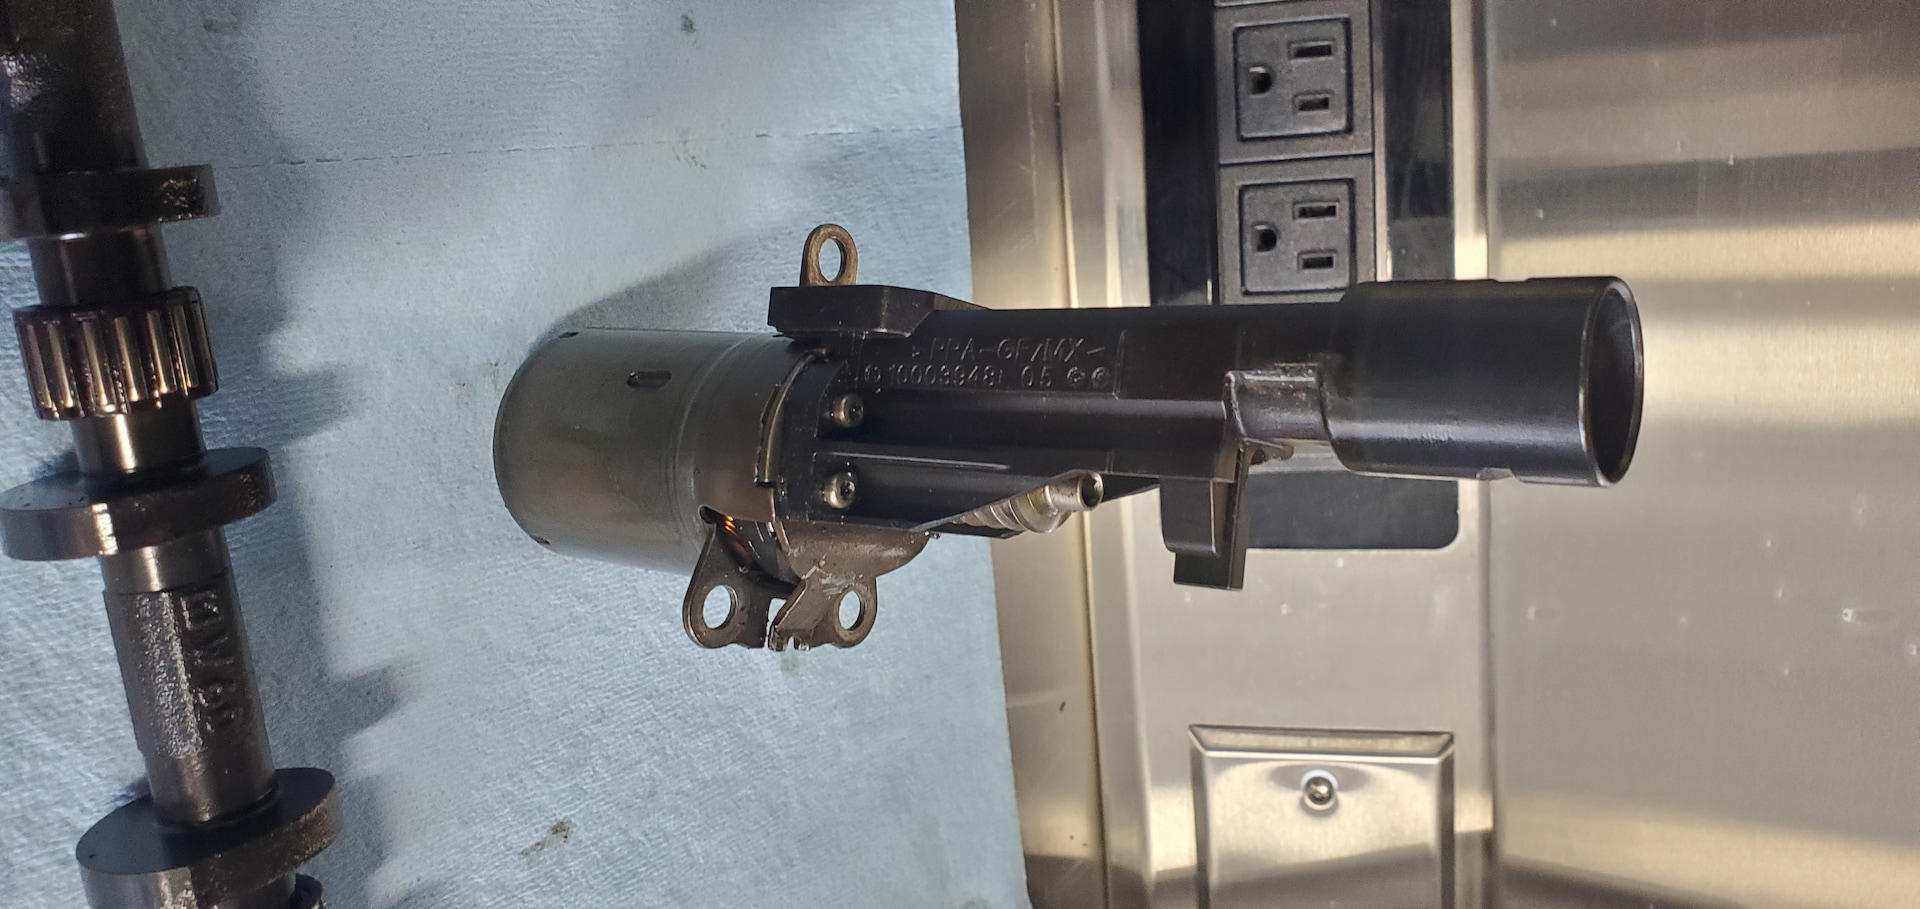
After removing the minimum stroke stop, slowly adjust the eccentric shaft to the minimum stroke using the 4mm Allen on the actuator motor drive gear while supporting the eccentric shaft with your wrench of choice. Continue to move the eccentric shaft until it releases from the eccentric shaft actuator worm drive. Once released from the worm drive, turn the eccentric shaft another 90° until it's fully relaxed. You can now remove the eccentric shaft actuator from the cylinder head (x3 M6x20 torx screws)
Step 4: Remove Eccentric Shaft Accessories
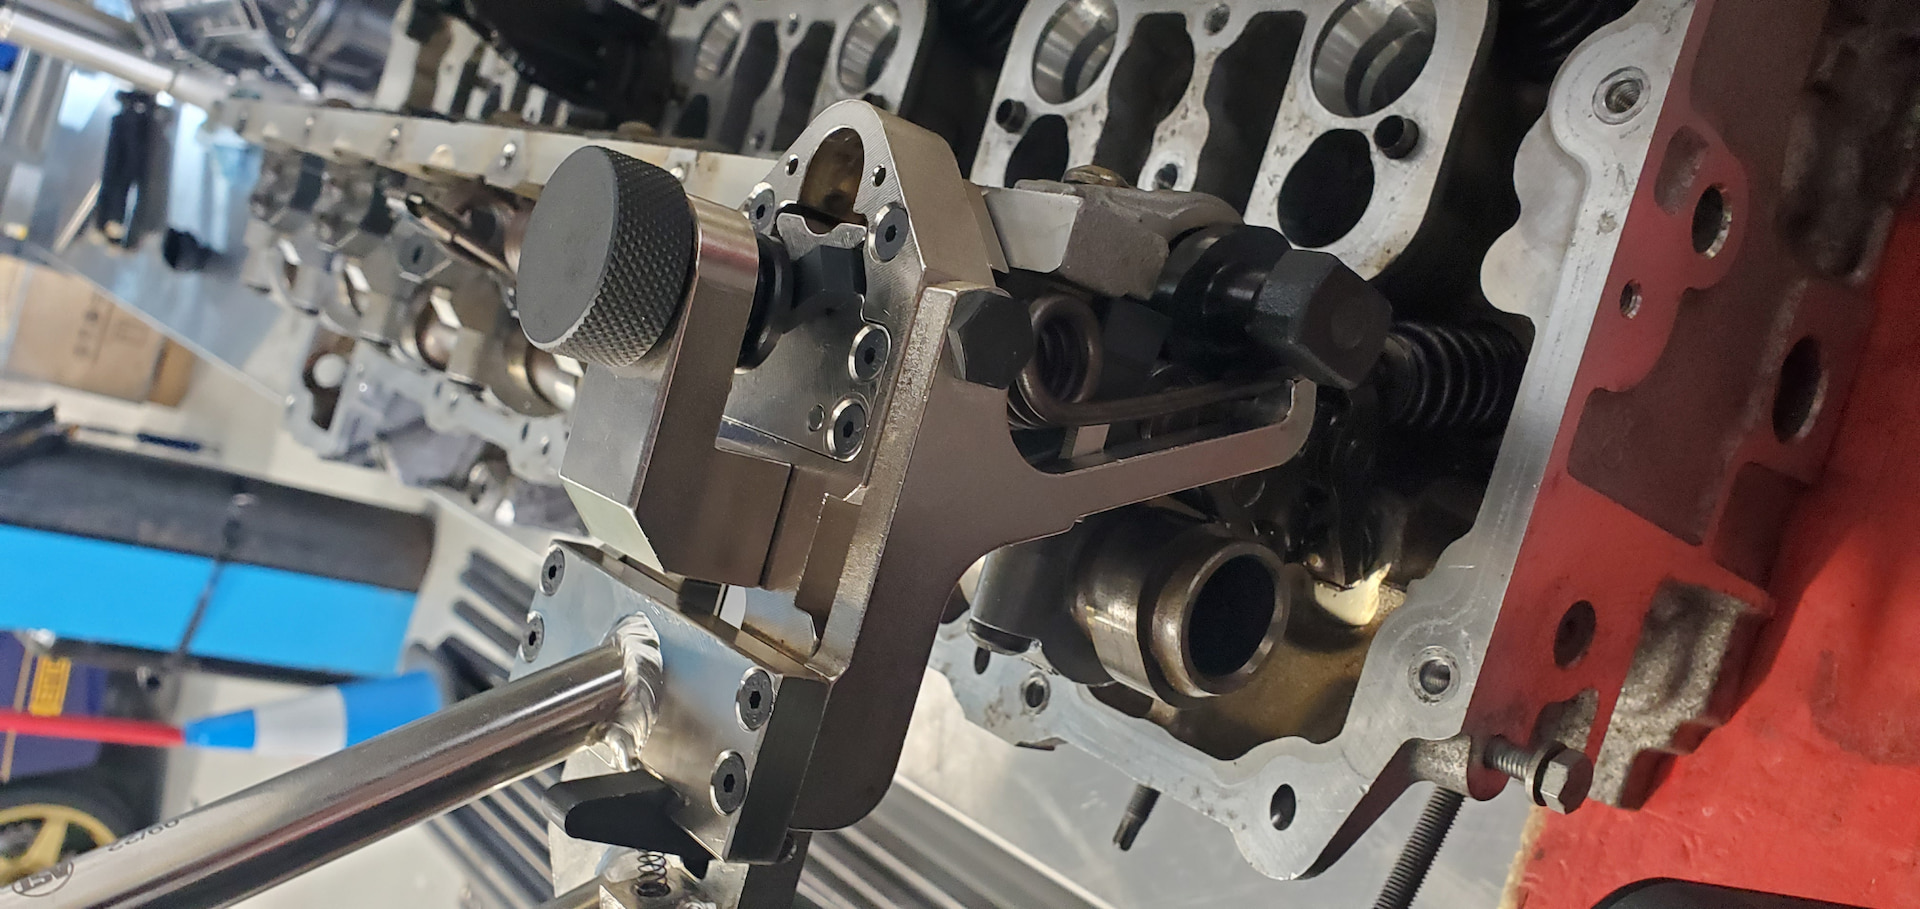
This is where BMW special tool 117 110 (p/n 83300496671) comes into play. One of the intermediate lever supports is secured using the same screw which locks the oil squirter for the eccentric shaft into place. Before going further, remove this oil squirter by removing the e-torx bolt.
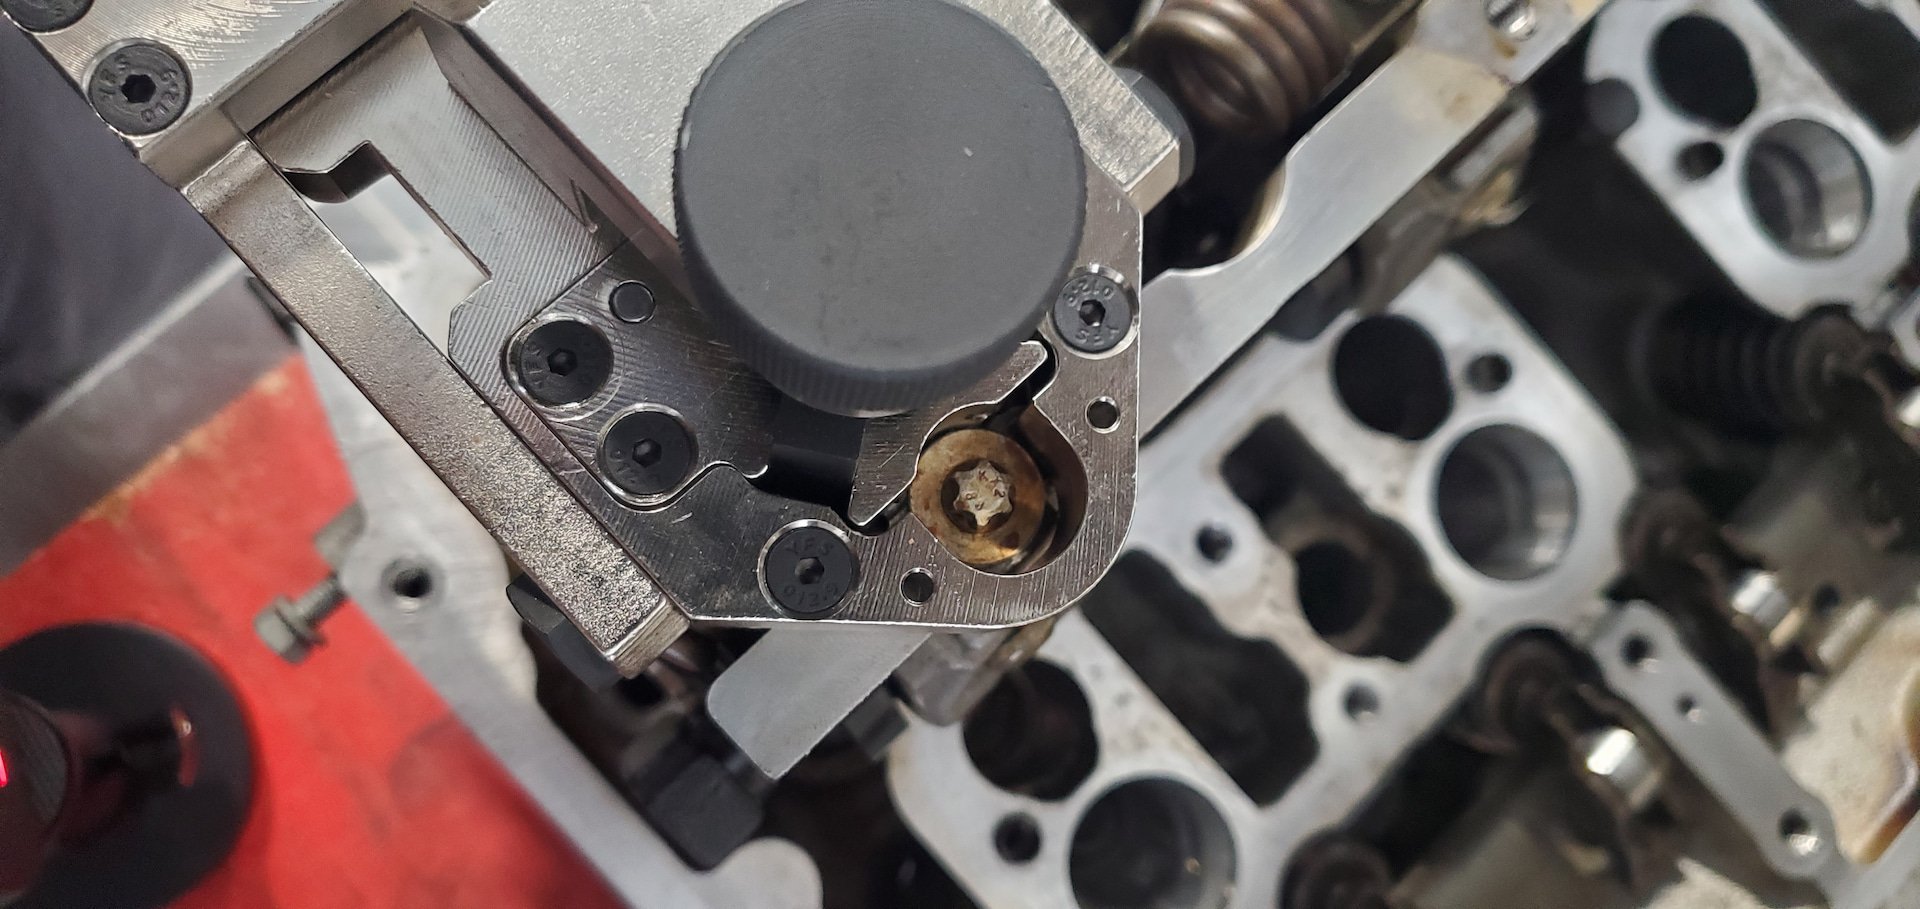
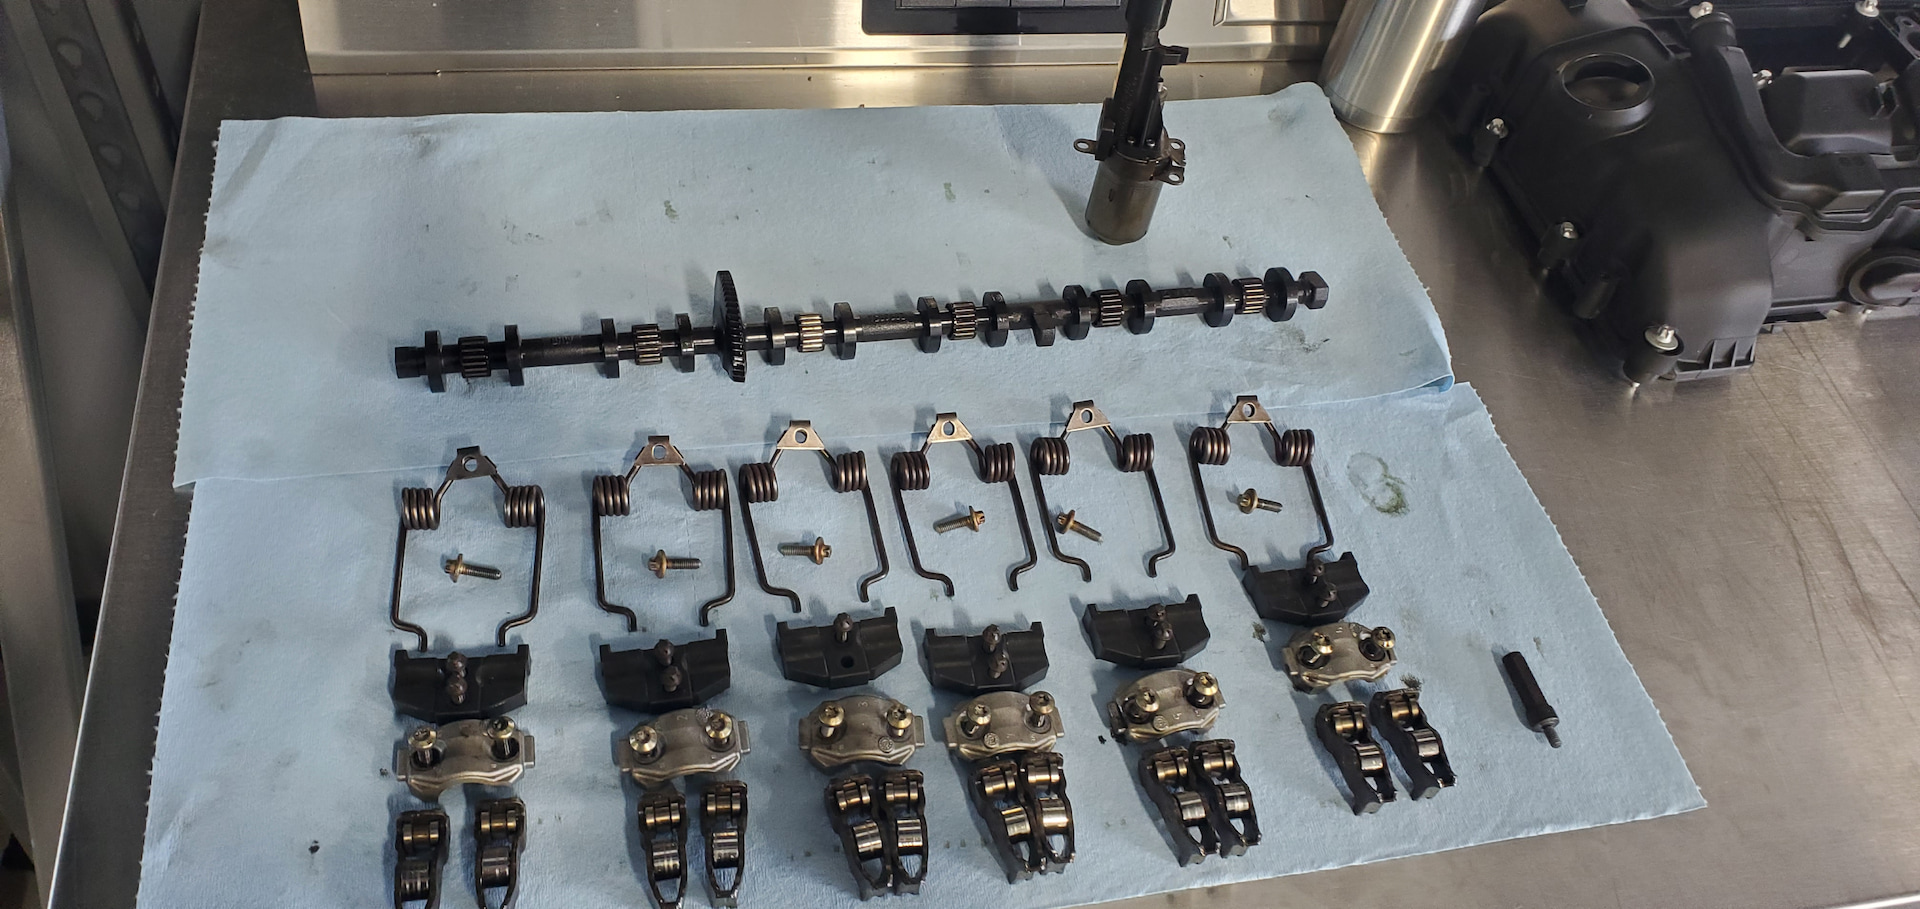
Before releasing any bolt that secures the intermediate lever springs to the intermediate lever supports in place, make sure that the special tool has properly locked onto the spring at the lower and upper portions. Once the tool is locked on the spring, you can remove the screw securing the intermediate lever spring. Once tension from the spring has been removed by the special tool, you can remove the spring, intermediate levers, and intermediate lever support. Make sure to keep these parts in order, as they need to return to the same positions they came from.
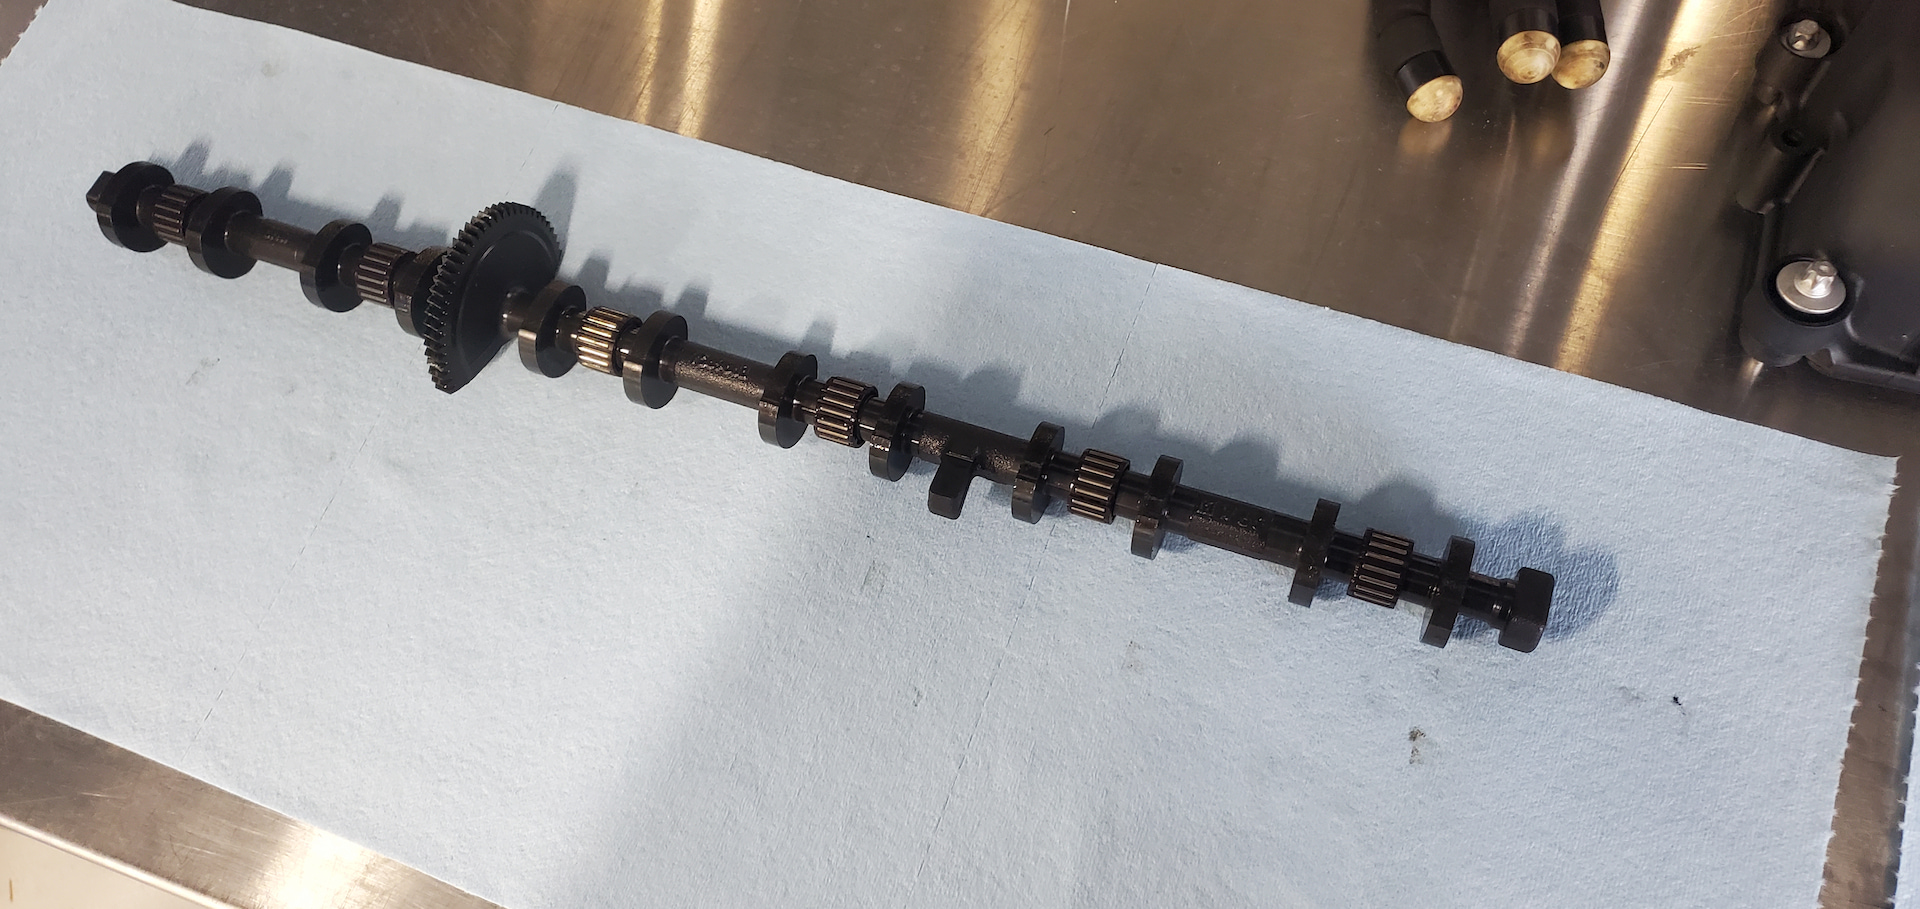
Step 5: Remove The Eccentric Shaft
Once the intermediate lever springs, levers, and lever supports are out of the way, you can remove the eccentric shaft itself. The eccentric shaft caps are secured with M6x27 Torx screws. You do not need to remove these in any particular order since there is no load on the eccentric shaft. Ensure you note the eccentric shaft caps and their installed orientation before removing them. Keep the caps organized just like the other parts you have removed, as they need to return to the positions they were removed from. Once the eccentric shaft caps have been removed from the cylinder head, you can remove the eccentric shaft.
Step 6: Prepare The New Eccentric Shaft For Installation
The eccentric shaft rides on caged needle bearings. These simply slide over the journals of the eccentric shaft. Oiling these needle bearings before installation is recommended to ensure they have lubrication before the first start-up. If the vehicle sits for a long period of time before the engine is started, assembly lube may be a better option. But regular engine oil is just fine for a repair on a recently used engine.
Step 7: Install The Eccentric Shaft
Install the eccentric shaft onto the cylinder head and reinstall the bearing caps in the original correct order/orientation. Torque the screws to the recommended torque spec.
Step 8: Reinstall The Eccentric Shaft Accessories
This step is the most involved. The intermediate levers need to be positioned back into their original order for each cylinder, along with the intermediate lever supports. Once the intermediate lever supports and intermediate levers are in position, use the intermediate lever tool to compress the spring to reinstall it in position. Once the spring is properly positioned on the intermediate levers and the mounting hole on top of the intermediate lever support is centered, you can lock the spring down. Note: During this process, the intermediate levers may get pushed off the eccentric shaft lobes. Use a small flathead screwdriver to push the intermediate levers into position. They will click into place.
Step 9: Reinstall The Eccentric Shaft Actuator
With the eccentric shaft in its neutral position, install the eccentric shaft actuator. Once the actuator is installed, use an open-ended wrench to support the end of the eccentric shaft and spin the worm drive gear on the actuator to engage the eccentric shaft. Keep moving the eccentric shaft until it is completely engaged on the worm drive gear. Reinstall the minimum and maximum stroke stop limits.
Step 10: Button Up The Engine
Reinstall the spark plug recess wells, injectors, valve cover, high-pressure fuel rail, feed lines, and any other items that needed removing to gain access to the top of the cylinder head. Be sure to torque the valve cover in the proper sequence or risk an oil leak or cracking the cover.
Step 11: Perform A Valvetronic Stop Limit Test
You must test to ensure the proper functioning of the Valvetronic system. This test will monitor the minimum and maximum lift limits as well as response time. Clear any prior faults.
Key Torque Specifications
Item |
Size |
Torque |
|
Eccentric shaft cap to cylinder head |
M6x27 |
8.5Nm |
|
Intermediate lever support to cylinder head |
M6x23 |
10Nm |
|
Oil spray nozzle to intermediate lever support |
M6x30 |
10Nm |
|
Return spring to cylinder head |
M6x20 |
10Nm |
|
Servomotor to cylinder head |
M6x16 |
10Nm |
|
Stop screw of eccentric shaft to cylinder head |
M6 |
10Nm |
|
Cylinder head cover to cylinder head |
M6 |
8.5Nm |
|
Ignition coils and injector slot to cylinder head |
M6x20 |
8.5Nm |
And with that, you should be all set to fix BMW's shortsightedness yourself! Once repaired, your N55 or S55 will be back to making fantastic noises and ridiculous horsepower. If you enjoyed and relied on this DIY to fix your own BMW, let us know on any of our social media channels. Be sure to also keep your eyes on our YouTube channel and this DIY Blog for more great content!