- 02/01/2017
- 3 Min Read
- By: West Kenyon
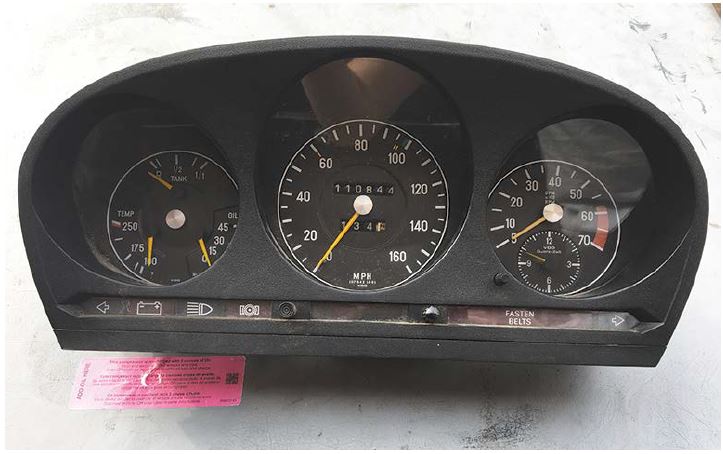
Mercedes R107 & W116 Instrument Cluster Restoration

Perhaps I am OCD, as my family would like to suggest, but looking at a dirty, dingy instrument
cluster is very disturbing to me. It needs to be crisp and clean, with all the bulbs working and all
gauges functioning, and accurately. And so this brings us to the restoration of Mercedes parts, specifically the instrument cluster that was used on the W/R107 and W116 series cars.
The first step is to go through each function and note what is and is not working on the cluster.
Items to check, all bulbs. There are a number of bulbs that light the following: 3 bulbs light the
three individual gauge galleries. Six bulbs in total light two turn signals, one battery, one brake,
one high beam and one seatbelt indicators. Your model may have additional indicator lights so
check your manual for details. Once the lights have been checked, take notice of all dial gauges
and be sure each function smoothly and accurately. An inaccurate fuel reading is more than
likely a bad fuel sender unit and not the gauge itself and so on for the individual gauges.
With list in hand, and thanks to Mercedes for making it very easy to remove the cluster for servicing, we are going to begin our process with thecluster out of the car and ready for disassembly. If any of your gauges are not working and arenot able to be repaired, each gauge is available from Mercedes along other cluster housing parts.
Begin by removing loose dirt and dust with a very soft brush. I use a very soft artist brush. Next,
examine the case for any cracks, missing screws broken wires etc., before digging in, and make
notes and take pictures as you go.
Now remove the rubber gasket surrounding the cluster housing. This is used to create the
pressure fit to keep the cluster in place. More than likely this is going to be petrified and will
need to be replaced. The gasket is available from Mercedes-Benz for $70 part no.1145420280.
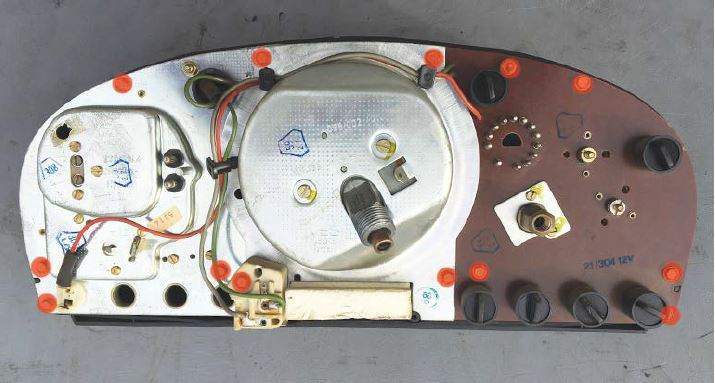
Next, place the cluster face down on a soft rag or other clean soft surface and remove the 13
screws holding the three gauge panels to the housing (marked in red on photo below), and
remove gauges. WARNING: Always store gauges face up to avoid scratching the faceplates
and damaging the needles. Also, never touch the faceplates. Natural oils in the skin will cause
deterioration of the paint and numbering. The gauges will more than likely have a light film of
dust on them. Leave it be for now and we will get to that in a bit.
Gently separating the housing will be the next step. Begin by separating the lower frame trim
from the bottom front (highlighted in yellow on photo. This piece is held on originally by double
sided tape and if like mine will be more than willing to separate for you. If not, do not force as a
prior owner could have beat you to this and glued it. If that is the case, proceed at your own risk.
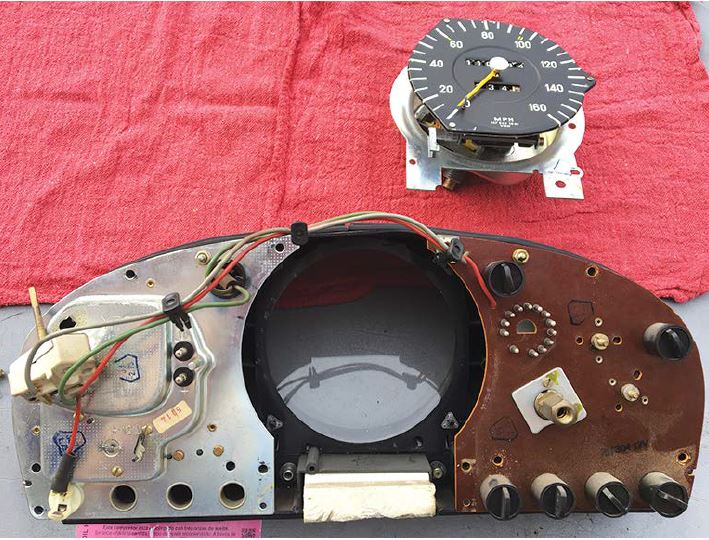
Continue by pulling the front “frame” from the main housing. NOTE, the plastic “window” may or
may not want to come with the framing. In either event, be careful not to scratch it worse than it
already may be. The photo above shows the housing separated.
The idiot lights (is that politically correct any longer?), assemblies may now be removed or may
simply already be falling out. If yours are damaged, they are available for about $25 per side.
At this point, the cluster has been completely disassembled and is ready for a good cleaning. I
used compressed air and a 50-50 solution of Oil Eater to distilled water on a rag to clean the
exterior parts of the housing NOT THE CLEAR PLASTIC. DO NOT use more than a DRY
microfiber cloth to clean the interior gauge surrounds. If you do, it will most likely ruin the matte
finish and will require a repaint.
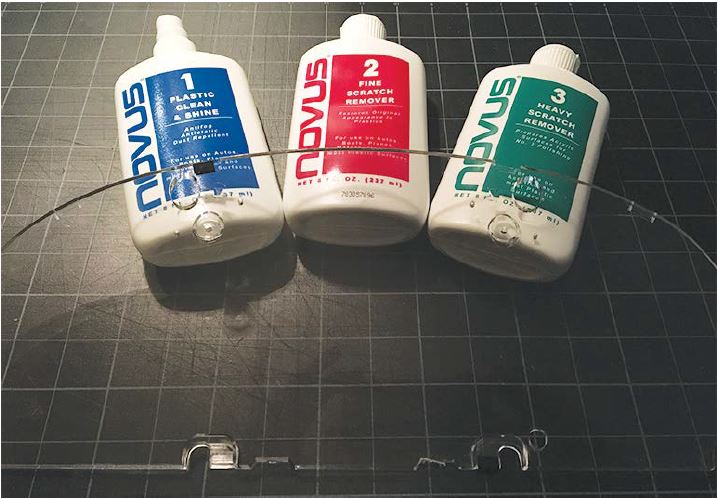
My plastic screen was unfortunately quite scratched, but was able to restore it to 98% perfect
with a little 1000 and 2000 grit wet/dry sand paper and the Novus plastic restoration system. It
does require a bit of elbow grease for excellent results. The remaining 2% I was unable to fully
restore were two fairly deep scratches that ended up being reduced considerably and no longer
show unless the plastic is tipped in the right direction. I let it go as it is in the very upper portion
of the tach “window” and I doubt the angle of the light will ever get focused enough to see it.
Now clean the warning light covering, but first remove the multi colored “lenses”. To do this, very
gently press out the plastic “rivets”. This will avoid any cleaning liquid from remaining in between
the clear plastic and the color “gels”.
While at this stage, hold the color light strips up to the light and you will most likely notice the
colors have faded. Now would be the time to replace if they are bad enough with a new set or
you can simply use AVERY plastic notebook dividers and cut in to appropriate strips and
slip between the original color “gels”. The dark orange and dark green enriched the colors to
illuminate like new and, for only $6. If this were an item that would be seen on a regular basis I
would have replaced with a new product, but considering this is only on for a few seconds or
minutes this seemed like a very good solution for me.
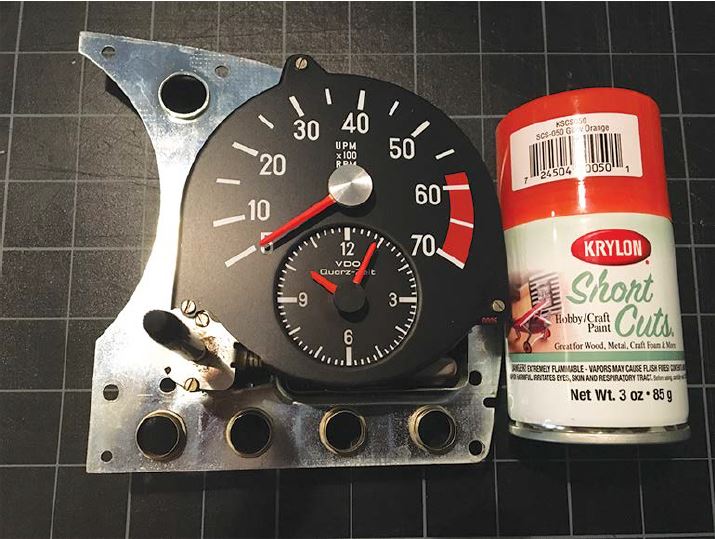
The next stage will be to refinish the needles on the gauges. This is not as hard, and easier than
it may look. There are two options for you. One is to get a bottle of model paint, (oil based only)
or a spray paint. I prefer a spray paint which delivers a very even and smooth finish.
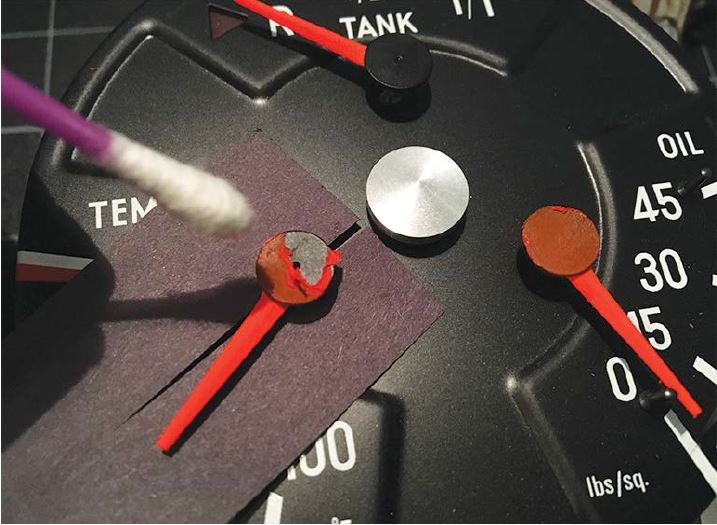
To start, gently wipe the needles with a clean and dry Q-Tip. The needles are chamfered so be
sure to wipe both sides equally.
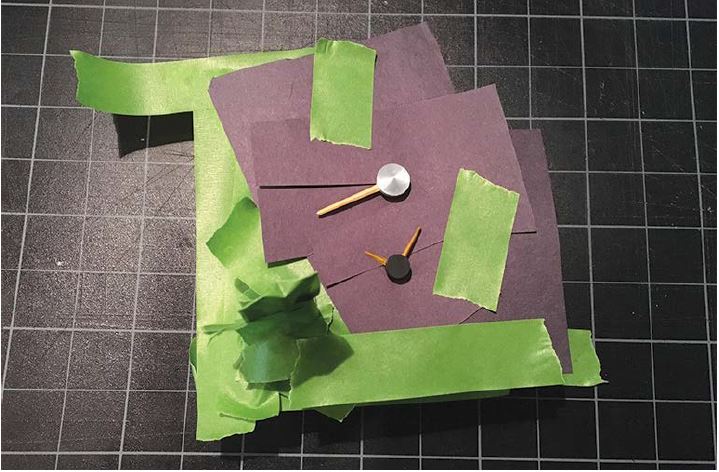
With the cleaning done, it’s time to cover the faceplate with construction paper and painters tape
or masking tape as shown in photo below. Be very certain that there is absolutely no way any
spray paint can get under, over or in between your covering. Remember, if you are spraying it
will be ejected with force that can seep into the finest of openings.
When the face is fully covered, apply a thin coating of Vaseline with a Q-Tip to the tops and
sides of each needle center. DO NOT touch the needle during this process or the paint will not
stick in that area. Any clean up if accidentally touched must be done throughly with rubbing
alcohol.
Now proceed to spray the needles with several quick and varied passes to obtain full coverage.
DO NOT “wet” the needles with paint. The amount of coverage should dry nearly instantly. My
recommendation is to practice on a piece of paper or board first to get the feel of the spare
pattern, pressure and amount dispensed.
After approximately 5 min. remove the masking making sure not to touch the needles with your
hand or the paper. Then proceed to to gently wipe the needle centers with a clean, dry Q-Tip
avoiding any residue to fall on the needle or faceplate.
I highly recommend NOT removing the needles as you can easily damage the gauge.
Remember also, these units are getting old and items like the clock will easily break.
The next stage of restoration is to spray the cluster light reflectors that have substantially
yellowed. The yellowing will substantially reduce the brightness of the cluster at night and it’s
worth the time.
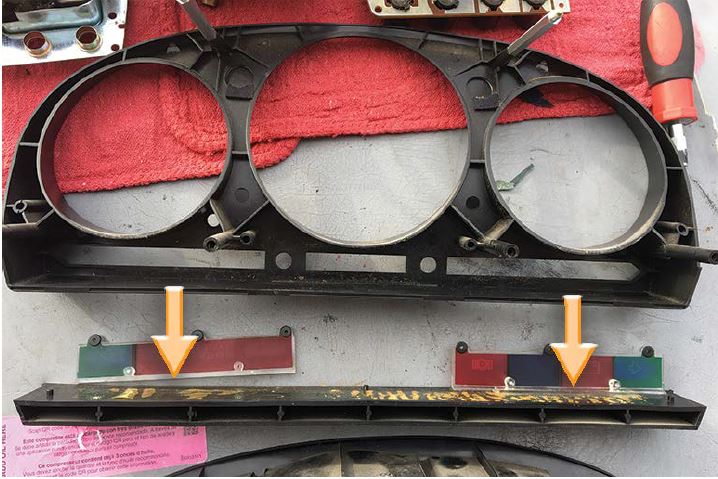
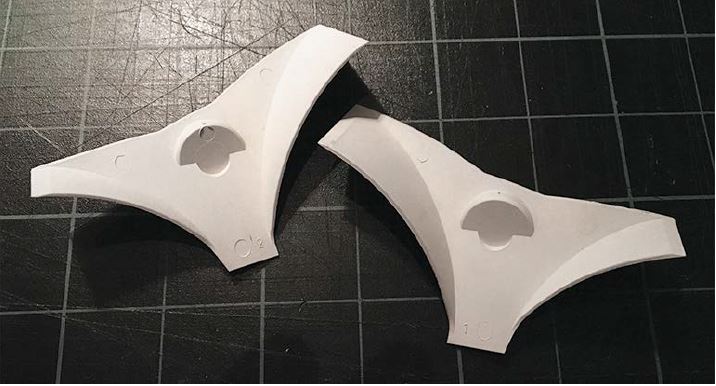
First step is to remove the “speed nuts” that hold the reflectors (indicated by orange arrows in
photo below). Do this VERY CAREFULLY! If you break the plastic pins from the reflectors from
the reflector you will render them useless. I used a very thin jewelers screwdriver and gently
loosened from all sides. Watch not to scratch the clear plastic in the process.

At this stage, you are ready to reassemble the cluster. When doing so, be sure to keep your
working environment very clean and free of lint. Any dirt or lint will be trapped on the inside of
the gauge cluster and require it to be disassembled for a re-clean. Using compressed air is a
good way to keep the inside lint free before reassembly. When finished, be sure to hook
everything up before starting the car.
HELPFUL PARTS
- Mercedes Dash Light Rheostat - 0005424125
- Mercedes Instrument Panel Light Bulb - 0008250094
- Mercedes Instrument Panel Light Bulb - 0005446794