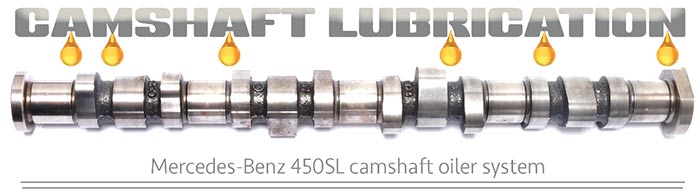
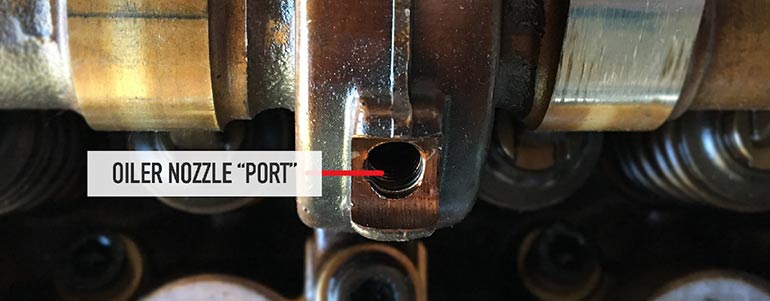
Part of Mercedes maintenance is to make sure your Mercedes camshaft oilers are not clogged. The two camshaft oilers are not at all complicated to clean and change out and if you are uncertain of when the plastic oiler fittings were last changed, you should do so immediately.
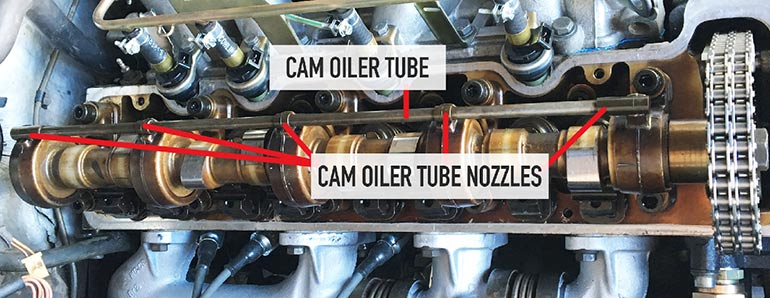
THE OILER TUBE & NOZZLES
When removing the metal oiler tube, be careful not to bend it. You must also be careful not to leave any of the plastic barbs from the plastic oiler “nozzles” inside the engine.
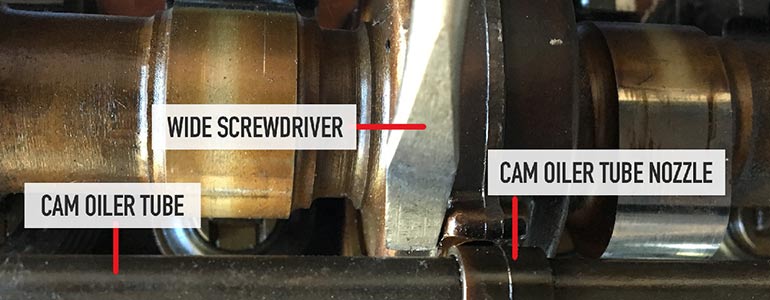
To remove, gently pry upward at the end as shown with the flat end of a large screwdriver until the first nozzle comes free. NOTE: It’s easier to start with one of the three central nozzles. Continue to gently work down the line to reduce the possibility of braking off any of the plastic barbs from the nozzles and bending the tube.
Once the oiler tubing and nozzles have been removed, check each nozzle to make certain it is whole and that you do not need to go back and extract broken pieces from your engine. If there is a piece broken off the nozzle it is somewhere in the system - find it.
Now remove the nozzle end caps and then proceed to slide off the center nozzles.
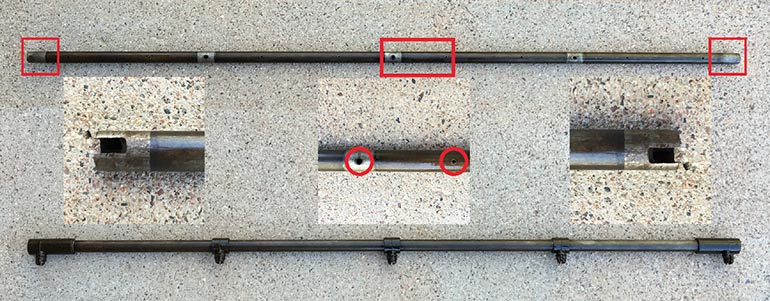
When everything has been taken apart, thoroughly inspect the metal oiler tube for any debris or sludge on the interior. To do this, hold the tube up to a good light source and make sure it is very clean. Now you will take a sewing needle or pin, and run it through each of the 11 holes along the tube that feed the various nozzles and the holes that drip along the entire camshaft. The two end caps are not fed by a hole. Examine once again the interior to make sure you have not pressed any debris inside and if at this point it is completely clean, you may wish to blow it threw with your shop air for good measure. Any dirt remaining in the line will only serve as a dam to collect future dirt or end up clogging the oiling points you just cleared.
Remember, it is much easier and cheaper to do this job thoroughly, than having to replace a camshaft later.
If your oiler tube is badly fouled, you can use several products to release the buildup. DO NOT use any metal wire brushes or any abrasive substances to clean. For me personally, carb or brake cleaner works very well. Also allowing the part to soak in a small bit of diesel fuel works wonders along with a soft nylon bristle pipe cleaner brush. If it is the case however, that your oiler system was badly clogged, you will also want to be sure to check your cam lobes very well to insure they have not been starved for oil which would result in excessive wear on the cam.
Once you are ready to reinstall the nozzles it will be in the revers order of removal. Smearing a bit of motor oil along the oiler tube will help the nozzles slide on much easier. As noted in the photo above of the lose cam oiler, the end cap nozzles are notched inside and can only be installed one way.
Once the camshaft oiler kit nozzles have been seated in the correct location, simply align pipe and nozzles and tap STRAIGHT down with a small rubber mallet, making sure to seat each “nozzle” fully on the cam. When tapping end cap nozzles into place, ONLY tap directly above nozzle barb fitting. If you strike along the tail of the end cap fitting, you WILL crack the nozzle. If a nozzle should break or crack on installation, you must replace it with a new one. If you have to remove the entire oiler once installed for any reason, you must refit all new nozzles. They are not reusable! IMPORTANT: It is critical that when you are sliding the nozzles back on the oiler tube, the 3 central nozzles must align with the holes in the tube. Make absolutely certain you have not covered the holes over with the nozzle. Check three times and repair once!
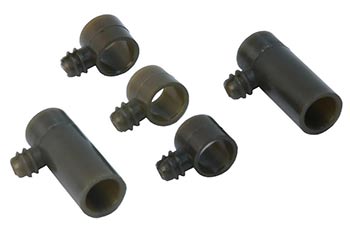
PARTS NEEDED: Two Mercedes Camshaft Oiler Kits (one kit shown below)
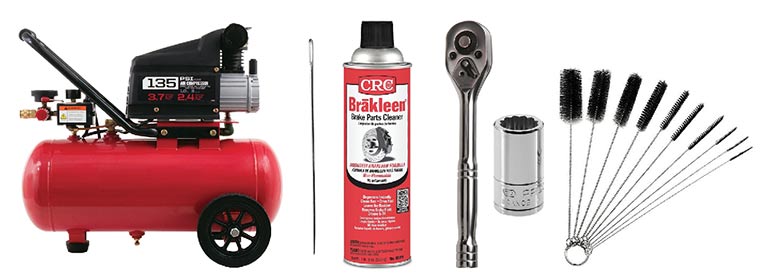
HELPFUL TOOLS: