- 02/01/2017
- 1 Min Read
- By: West Kenyon
Mercedes 450SL Alternator and Air Pump Replacement


When it comes to working on your classic or any model year car for that matter, it will generally save you a significant amount of money. As I have mentioned in prior articles, it also gives you full opportunity to learn the ins and outs of your car.
Today we will jump into the removing the alternator and air pump or smog pump from the 1975 Mercedes 450SL. These two accessories are relatively straight forward to remove but do require the removal of a few items and they are as follows: Upper radiator hose, fan/fan shroud, plastic coolant tank (not needed to remove just alternator), and depending on how much room you desire, the window washer fluid reservoir. For this article I will not cover the particulars in removing the fan, reservoirs, etc. So let’s jump right in.
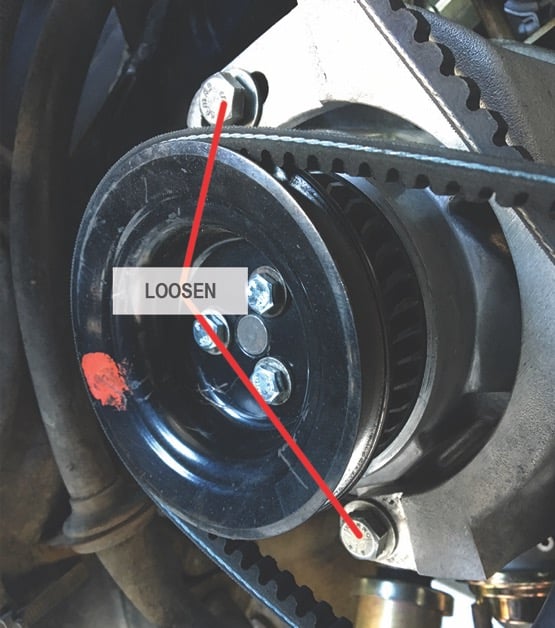
Removing the alternator will require the tensioner bolts to be loosened and one bolt removed in order to easily remove the belt.
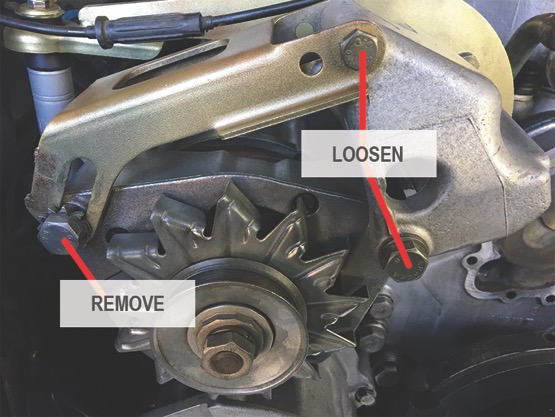
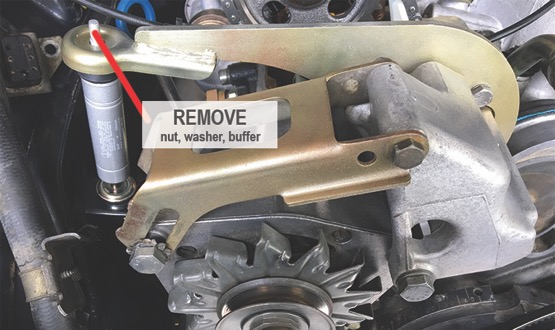
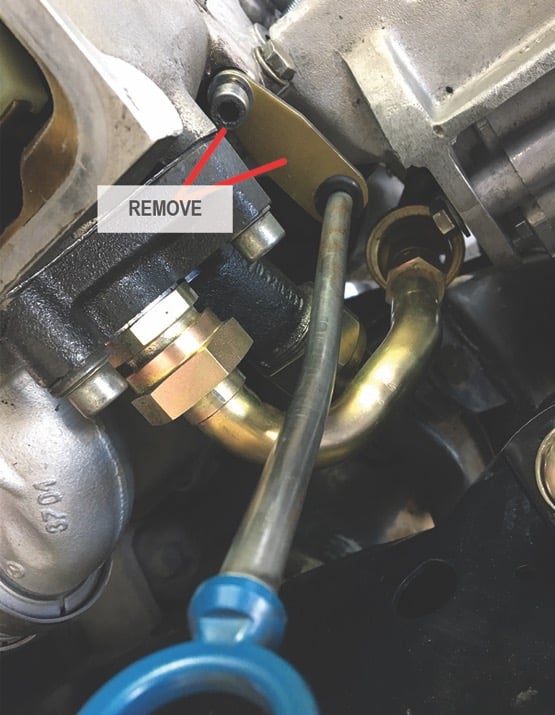
Once the belt has been removed from the alternator pulley, you will now remove the retaining nut, washer, and rubber buffer from the engine torque damper.
Now remove the two upper bolts securing the alternator to the front of the engine and one lower.
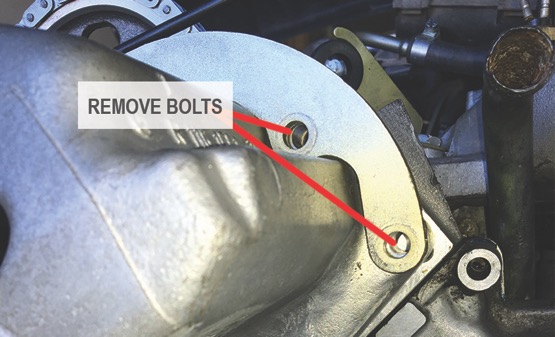
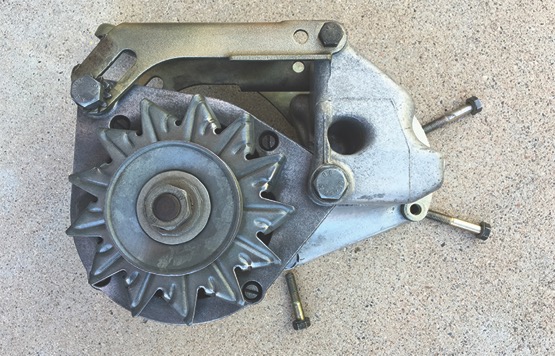
Note that the alternator, alternator bracket, and torque damper bracket will be removed as one unit with the removal of three bolts. Two upper and one lower as shown below.
With the alternator removed you may now proceed to the air or smog pump.
The air pump is a bit more troublesome to extract, but with the extreme ease of the alternator removal there needs to be at least one somewhat challenging job.
The easiest way to remove the pump is to remove the entire system, “pluming” and all. To begin, remove the belt from the pump pulley by loosening the two tensioning bolts as shown.
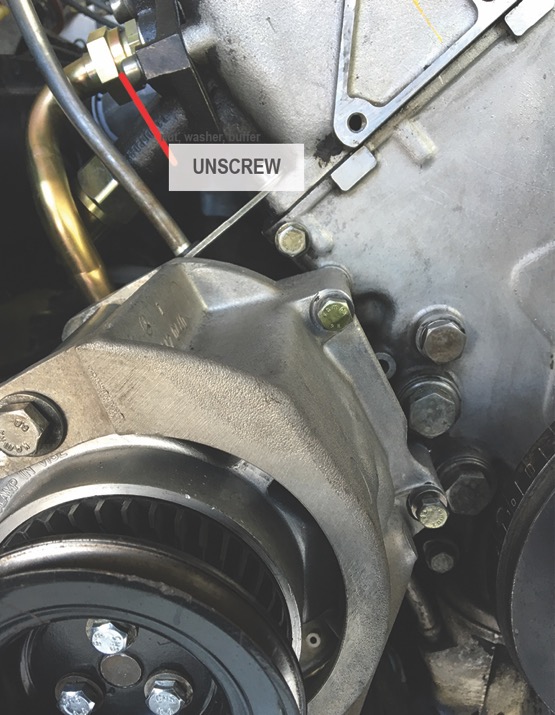
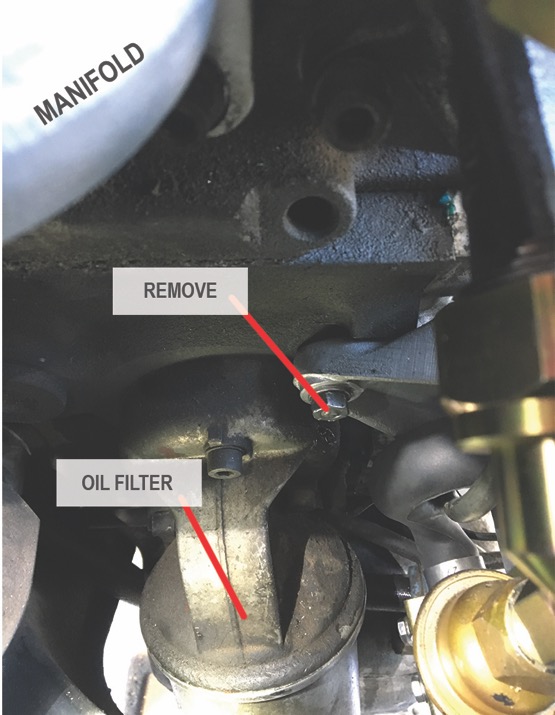
Next unscrew the main air line from the chain tensioner/air hook up. It will also be necessary to remove the hex cap screw that serves to affix the oil dipstick tube as indicated in the photo.
Now remove the rear nut from the stud holding the pump to the side of the engine block, then proceed to the two front bolts. The pump will then be moved (slid) across the front of the engine to the left a few inches in order to clear the rear stud. The entire pump assembly can then be lifted straight up and out.
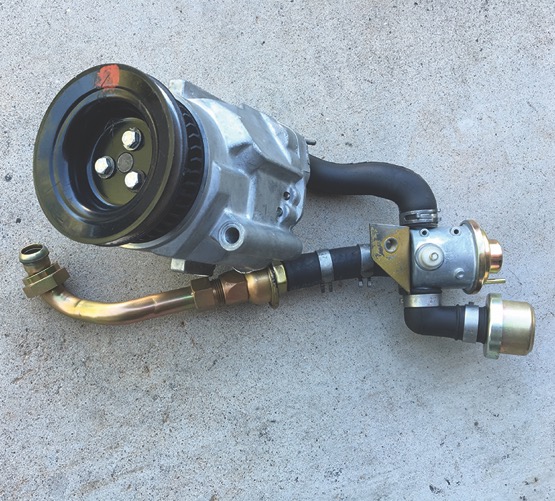
The pump and plumbing should look like this when removed as a unit.
If your pump is original it will more than likely need replacing, along with the various components associated with the emissions system. I have covered that in a previous article entitled: Mercedes 450SL Emissions System.
Returning the alternator and air pump will be a reverse of the removal process. One step that I will cover in a subsequent article will be how to properly tension the belts after the reinstall. Mercedes-Benz has a specific tension the belts must be under and it is good to follow those manufacture directions for optimum performance and the longevity of the various components.
Potential Parts Needed
- 1 - Air Pump (Smog Pump)
- 1 - Air Line “Muffler”
- 1 - Blow-off Valve
- 3 - Rubber Hose Lines
- 1 - Check Valve
- 1 - Metal Connecting Pipe
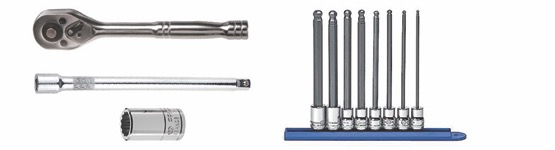
Helpful Tools