- 03/08/2019
- 4 Min Read
- By: Jose Martinez
How to Replace the Oil Tank Level Sensor On An Air-Cooled Porsche 911

If your Porsche 911 has an erratic or non-functioning oil level gauge, that typically means that it's time to replace your oil level sensor inside the oil tank. Requiring no special tools and roughly an hour of your time this project will have your oil level gauge functioning properly once again.
Your air-cooled Porsche 911 has a substantial amount of oil to help with engine cooling duties. Depending on the year, it can contain anywhere between eight to fourteen quarts worth. Therefore, it's critical to maintain the proper level of oil in the tank. Old age and high mileage can lead to the failure of the oil level sender (located inside the tank), causing the needle on the oil level gauge to fluctuate randomly and even fail altogether. Replacing the oil level sensor by following this quick DIY will restore the function of the oil gauge.
Model Years Applicable:
This job applies to all Porsche 911 models up to 1989, excluding 1972. 1972 has a different style oil tank and a more complicated replacement procedure that I won't be covering here.
Note: You do not need to drain the oil tank to replace the sensor if you keep the car level. However, some oil may drip out of the tank when you remove the sensor.
Tools Needed To Replace Oil Level Sensor:
- Metric Wrench Set
- Metric Socket Set
- Shop Towels
- Oil Drain Pan
- Nitrile Gloves
- Safety Glasses
- Degreaser
- Plastic Trim Removal Tool Set
Parts Needed To Replace Oil Level Sensor:
- Oil Tank Level Sensor 90164154100 (1972 and earlier)
- Oil Tank Level Sensor 91164154102 (1973 and later)
- Oil Tank Level Sensor Gasket (all years; if not included with sensor)
- 5 new sealing washers
Note: The engine oil level can only be checked accurately using the dipstick when the engine is at operating temperature, running, and idling. This is described in step six of this procedure. The dash oil gauge is only a reference, so verify your car has the correct oil level before removing the oil level sensor.
Step 1: Remove Right Rear Wheel
Put your parking brake on, chock the left wheels, and lift the right side of the car using step 2B of this procedure. Lift just enough to remove the right rear wheel and put a jack stand under that corner of the car to keep it level; as if the wheel were installed.
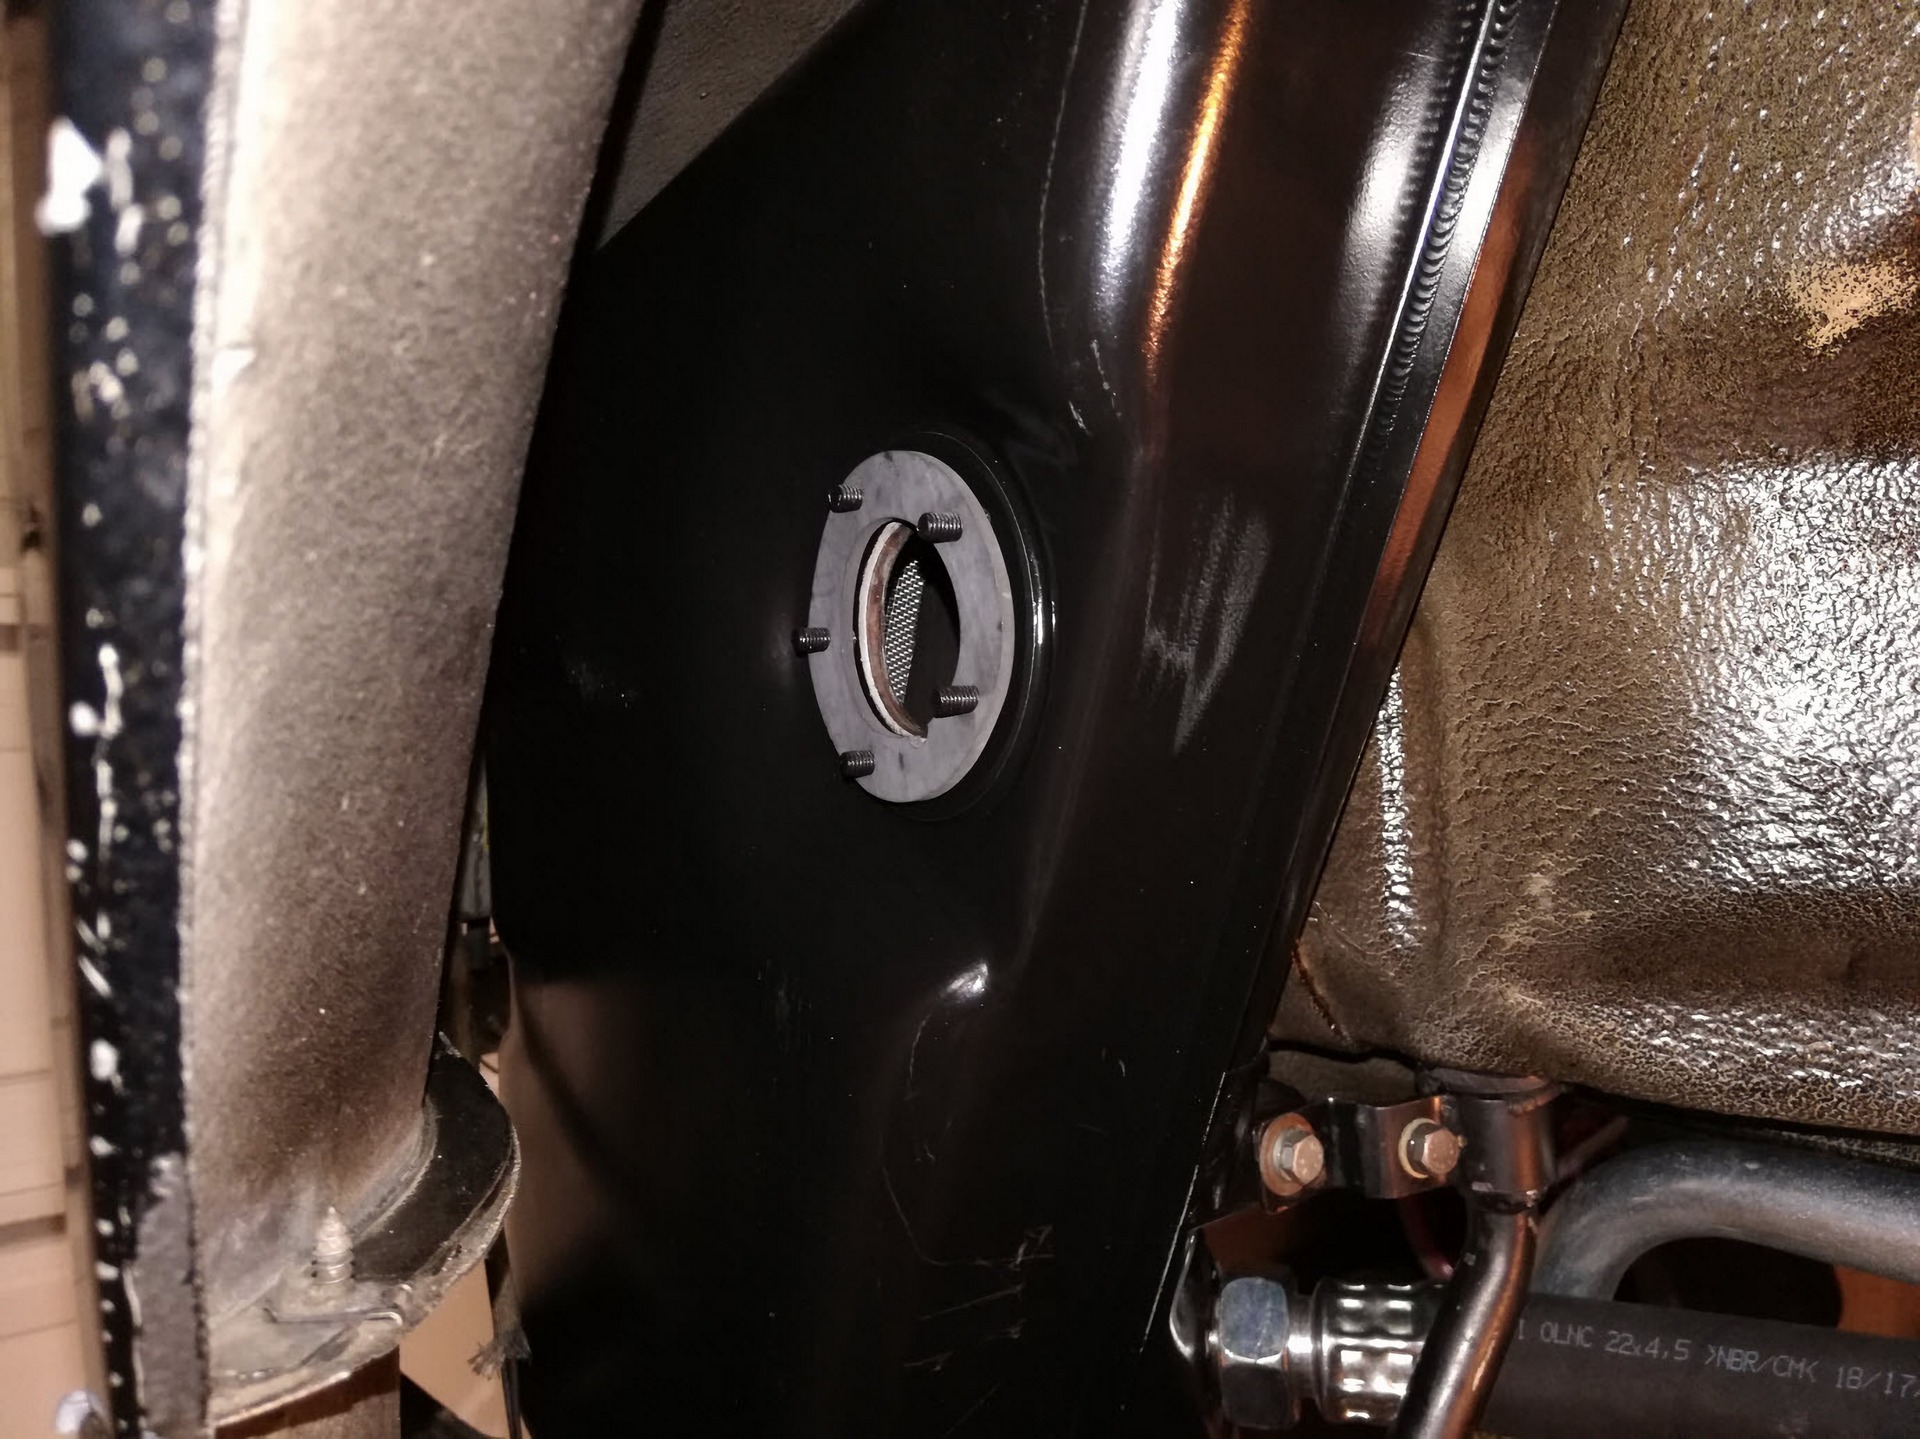
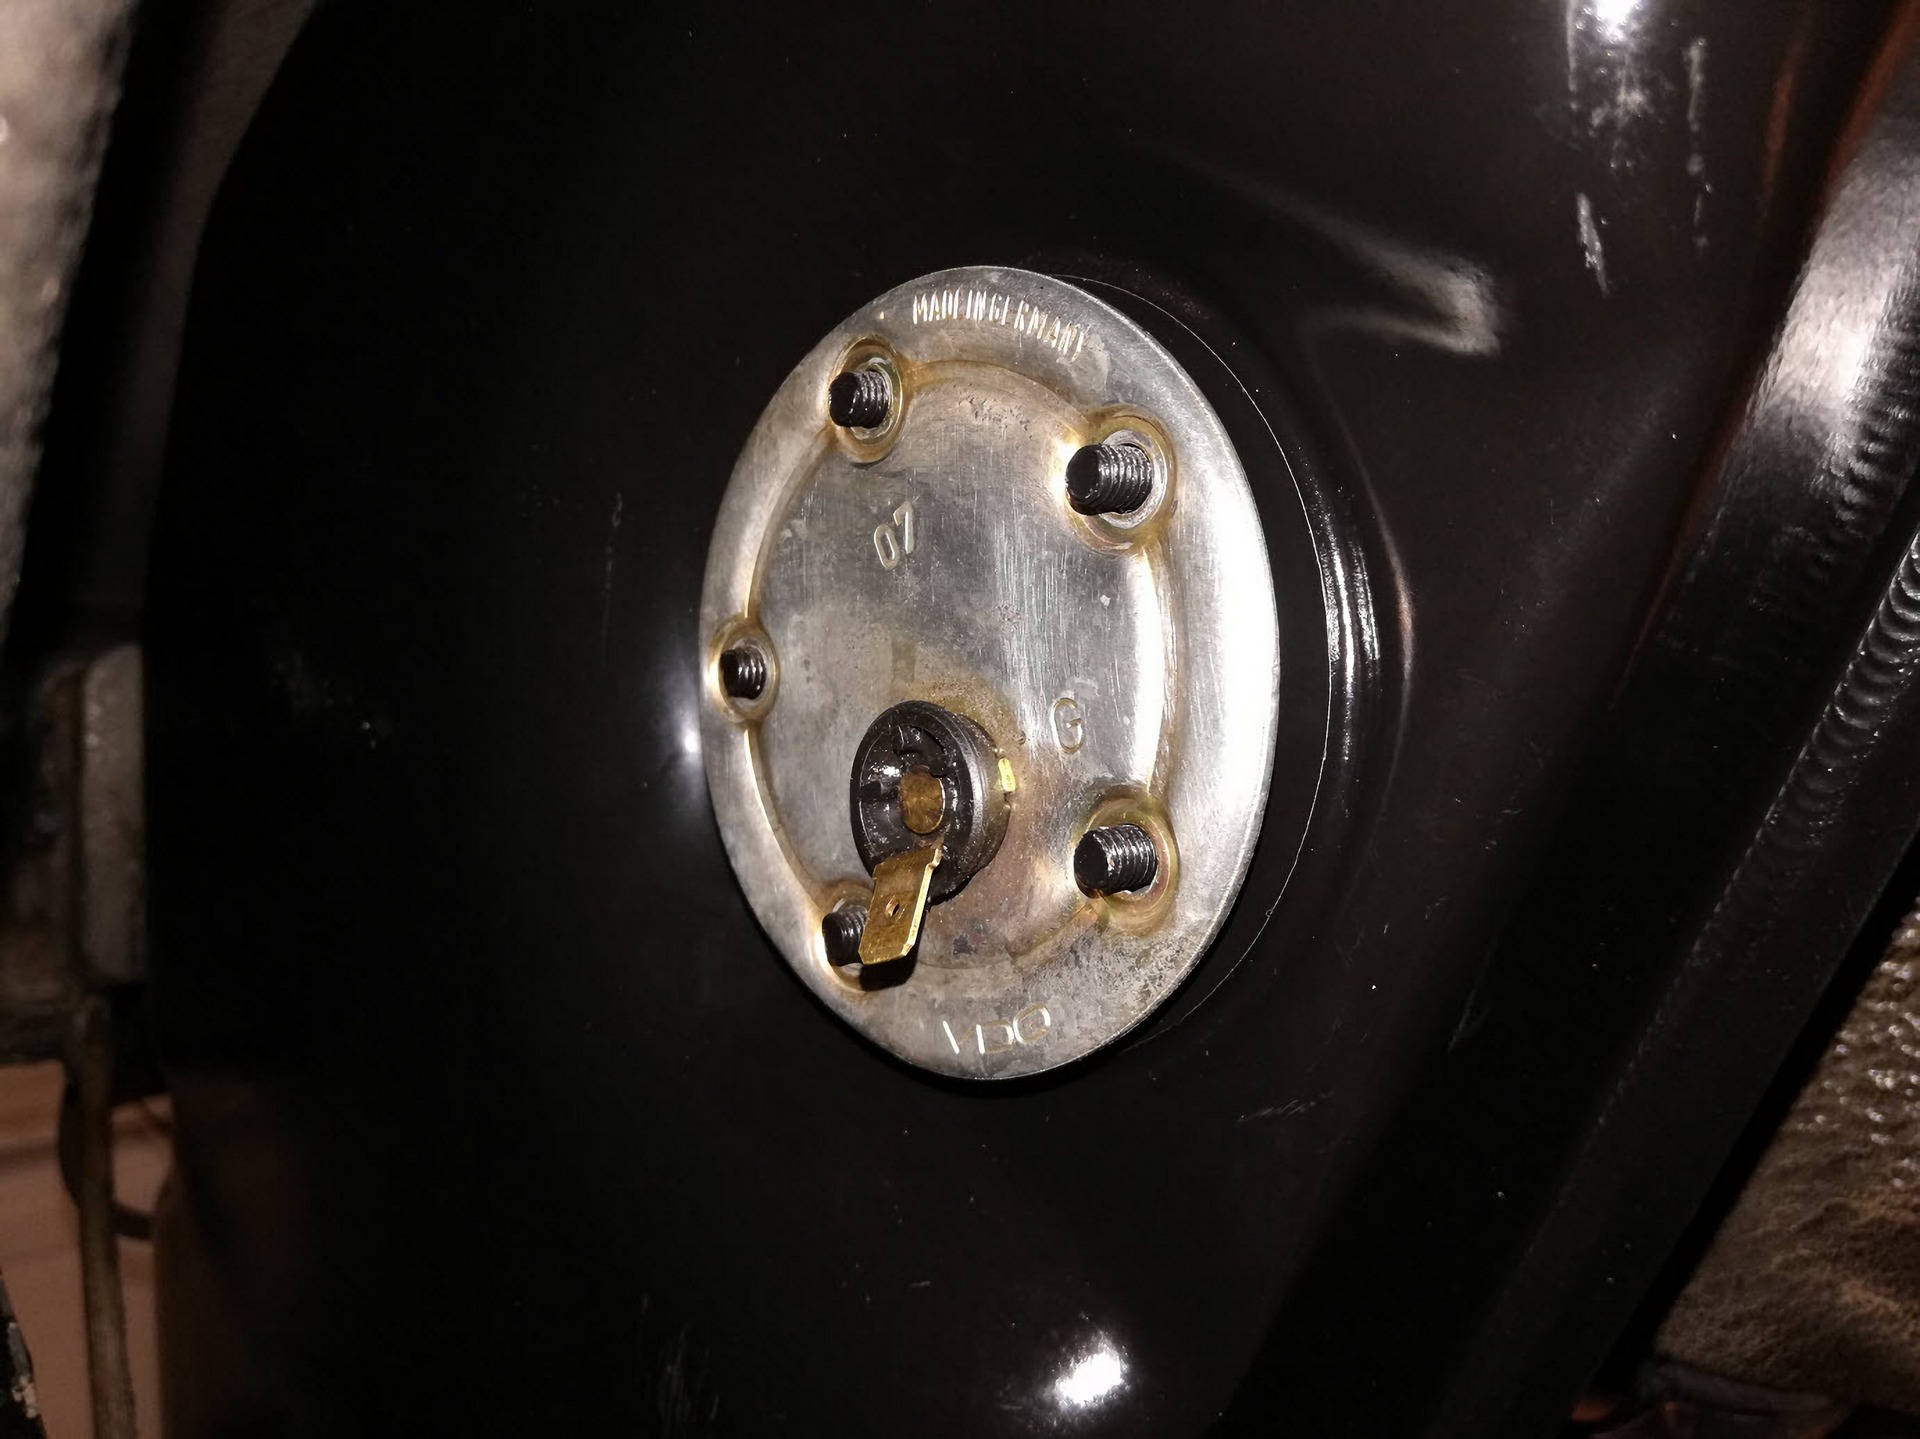
Looking into the wheel well, locate the oil tank under the rear right corner of the car. On the flat surface of the oil tank, you will see a small circular plate with two wires connected to it. This is the oil tank level sensor.
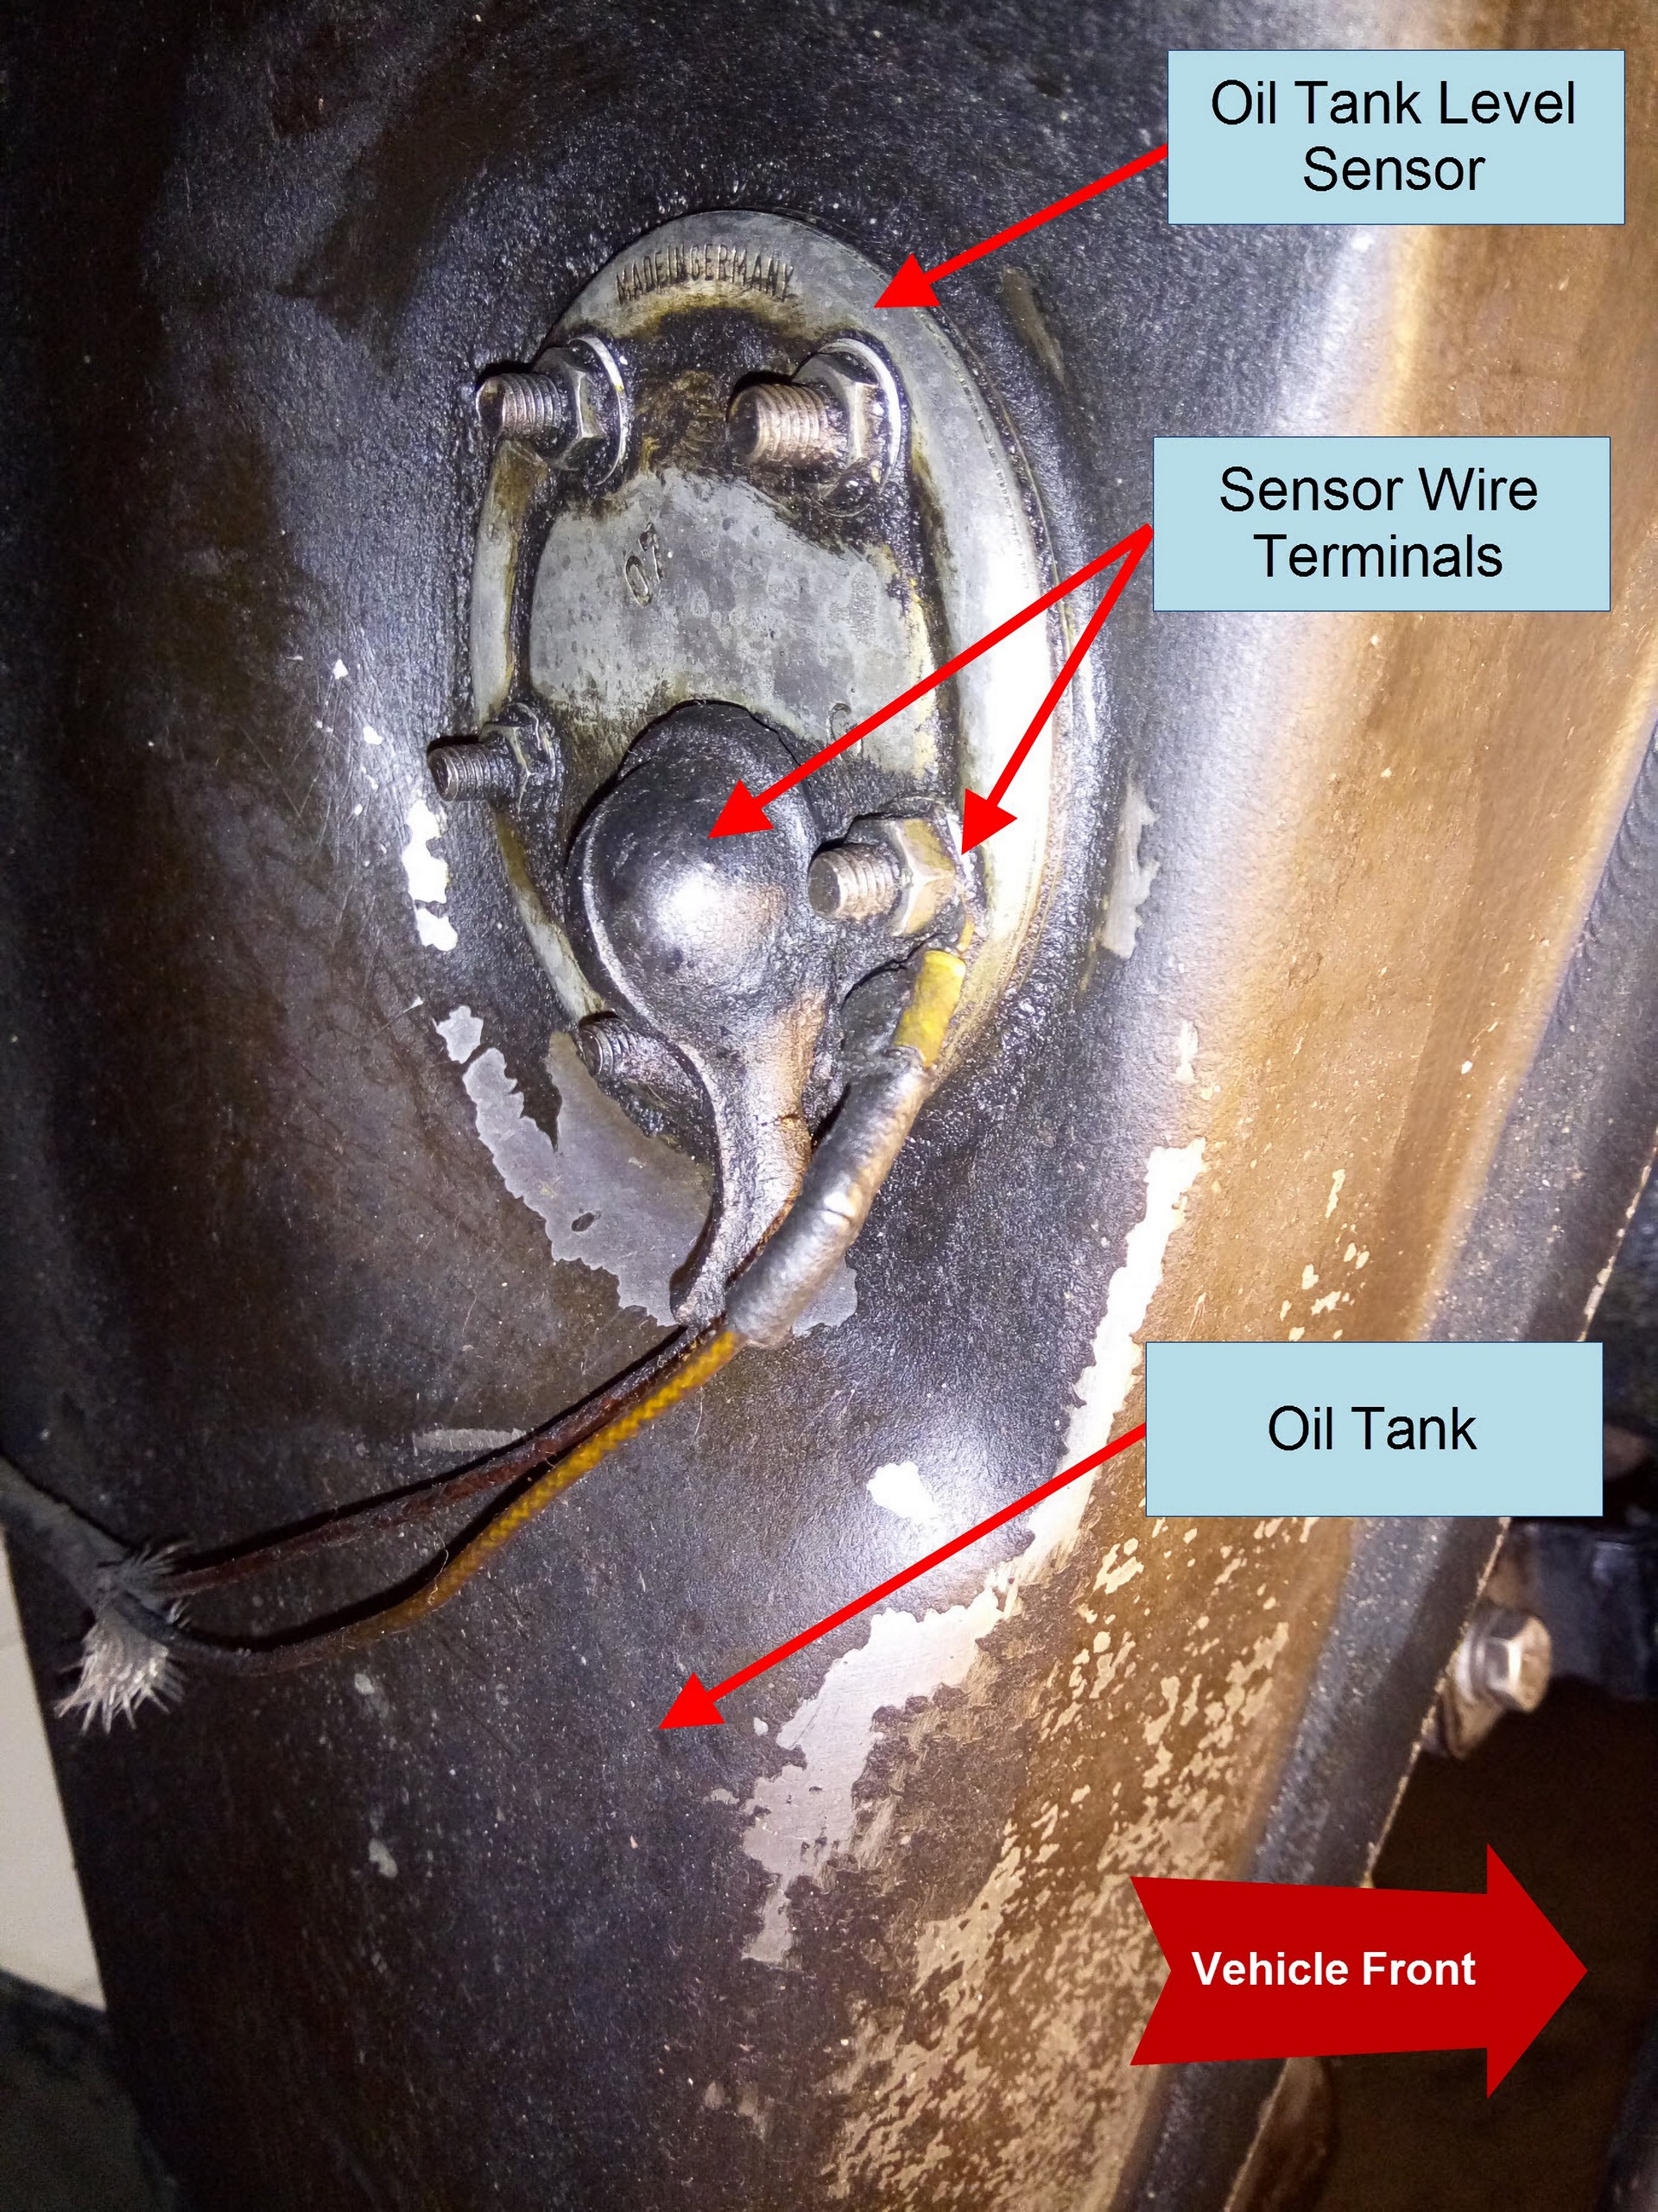
Step 2: Clean Surrounding Area
If your car hasn't undergone regular maintenance or has very high miles, the oil tank is probably incredibly dirty from oil leaks and exposure to road debris. Before removing the oil tank level sensor, clean the area around the plate and the plate itself to prevent any debris from getting inside the tank opening. Be careful not to damage the wires connected to the plate terminals while doing this.
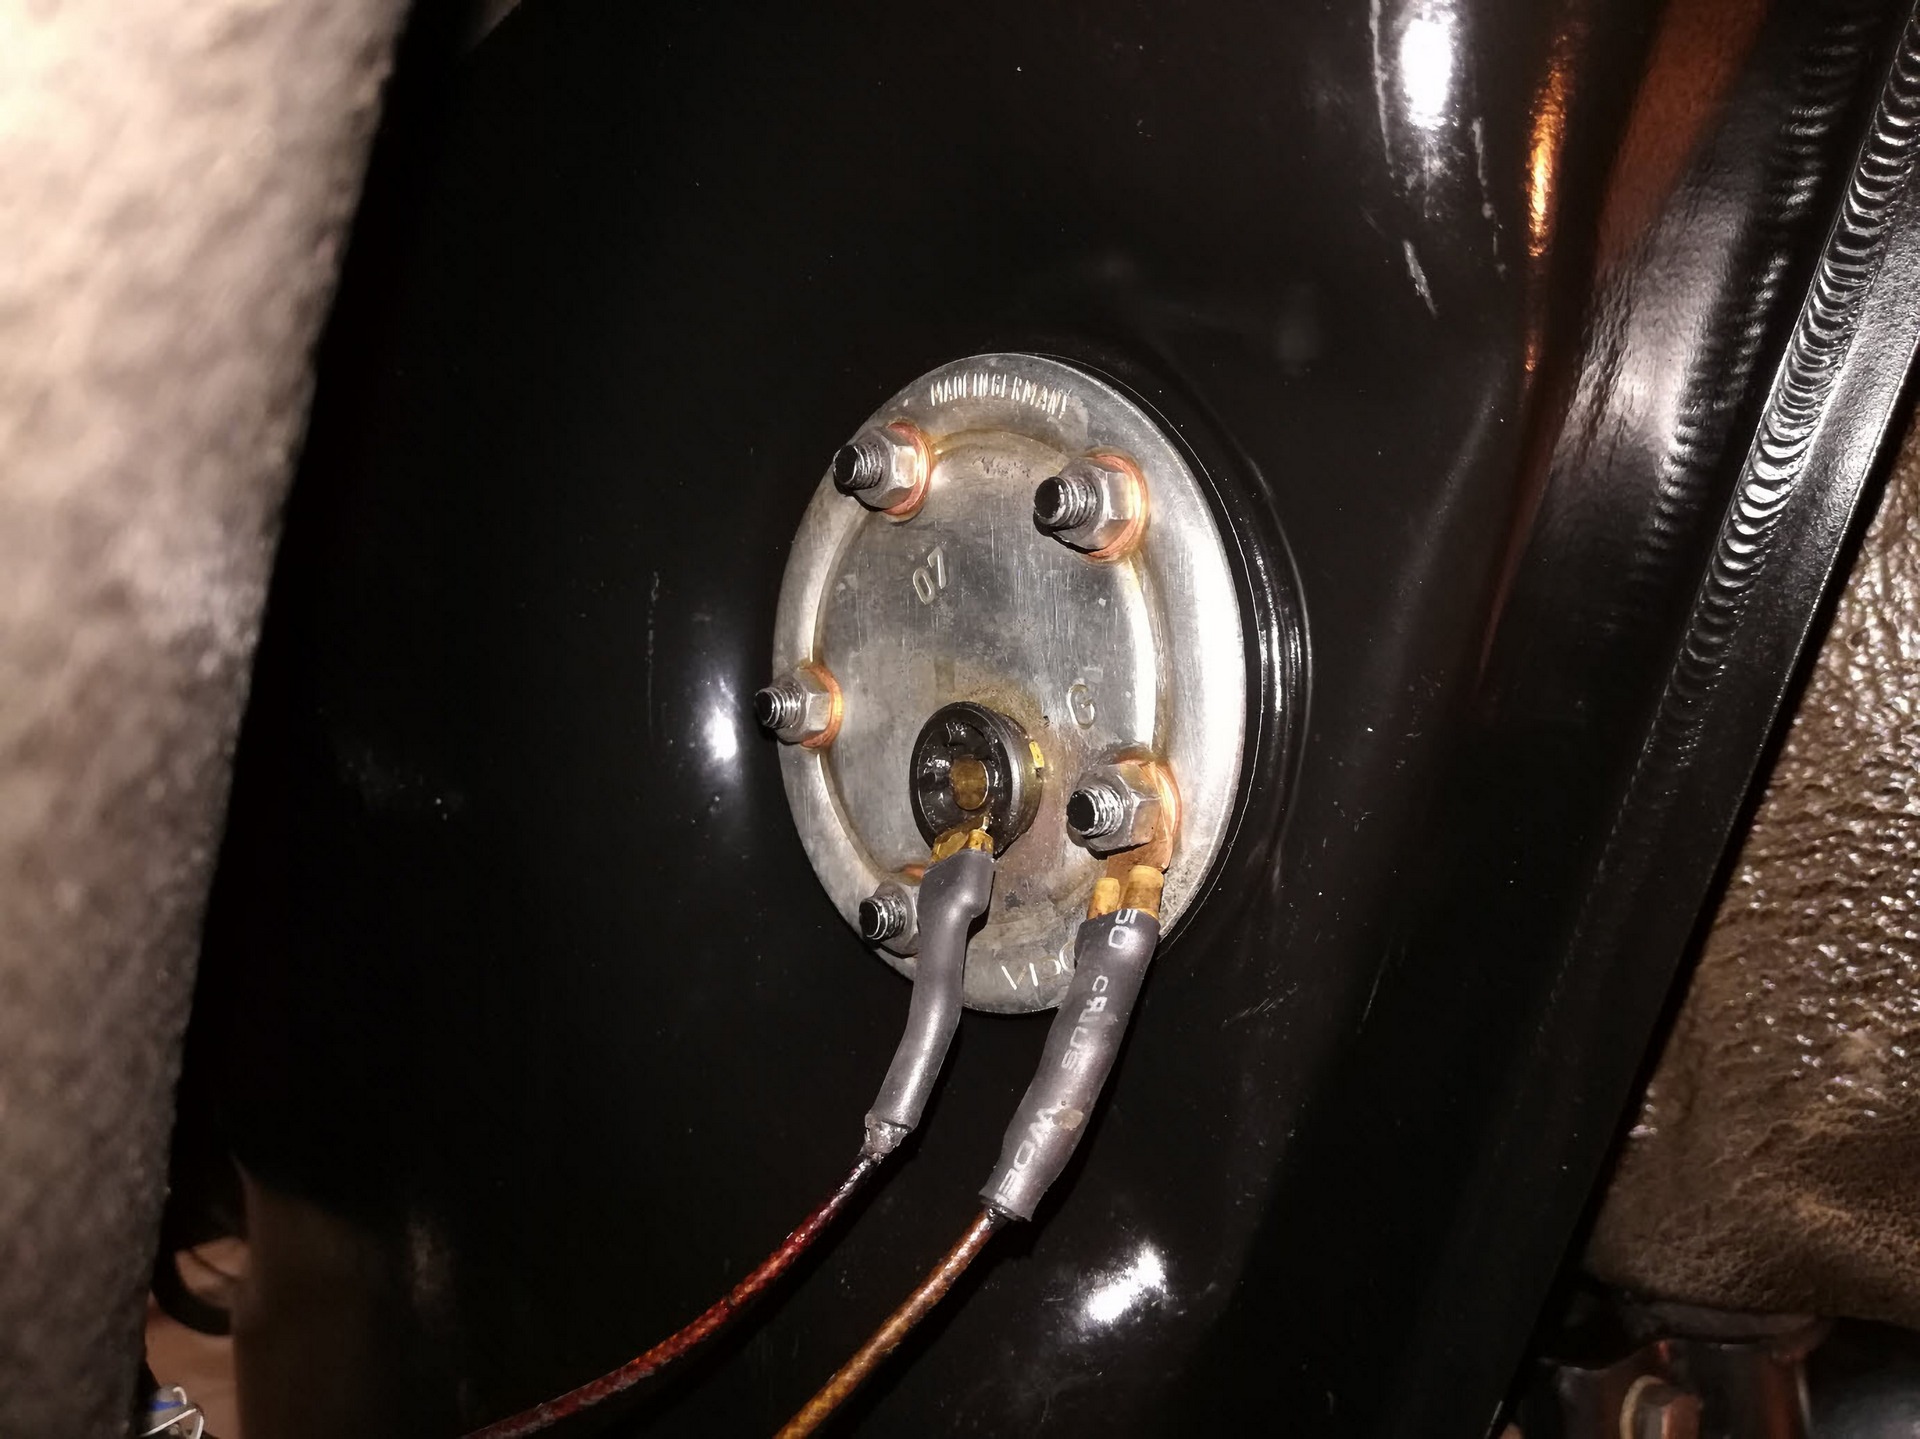
Take note of the orientation of the sensor plate terminals and wires with respect to the oil tank so that they can be re-installed the same way.
Step 3: Remove The Old Sensor
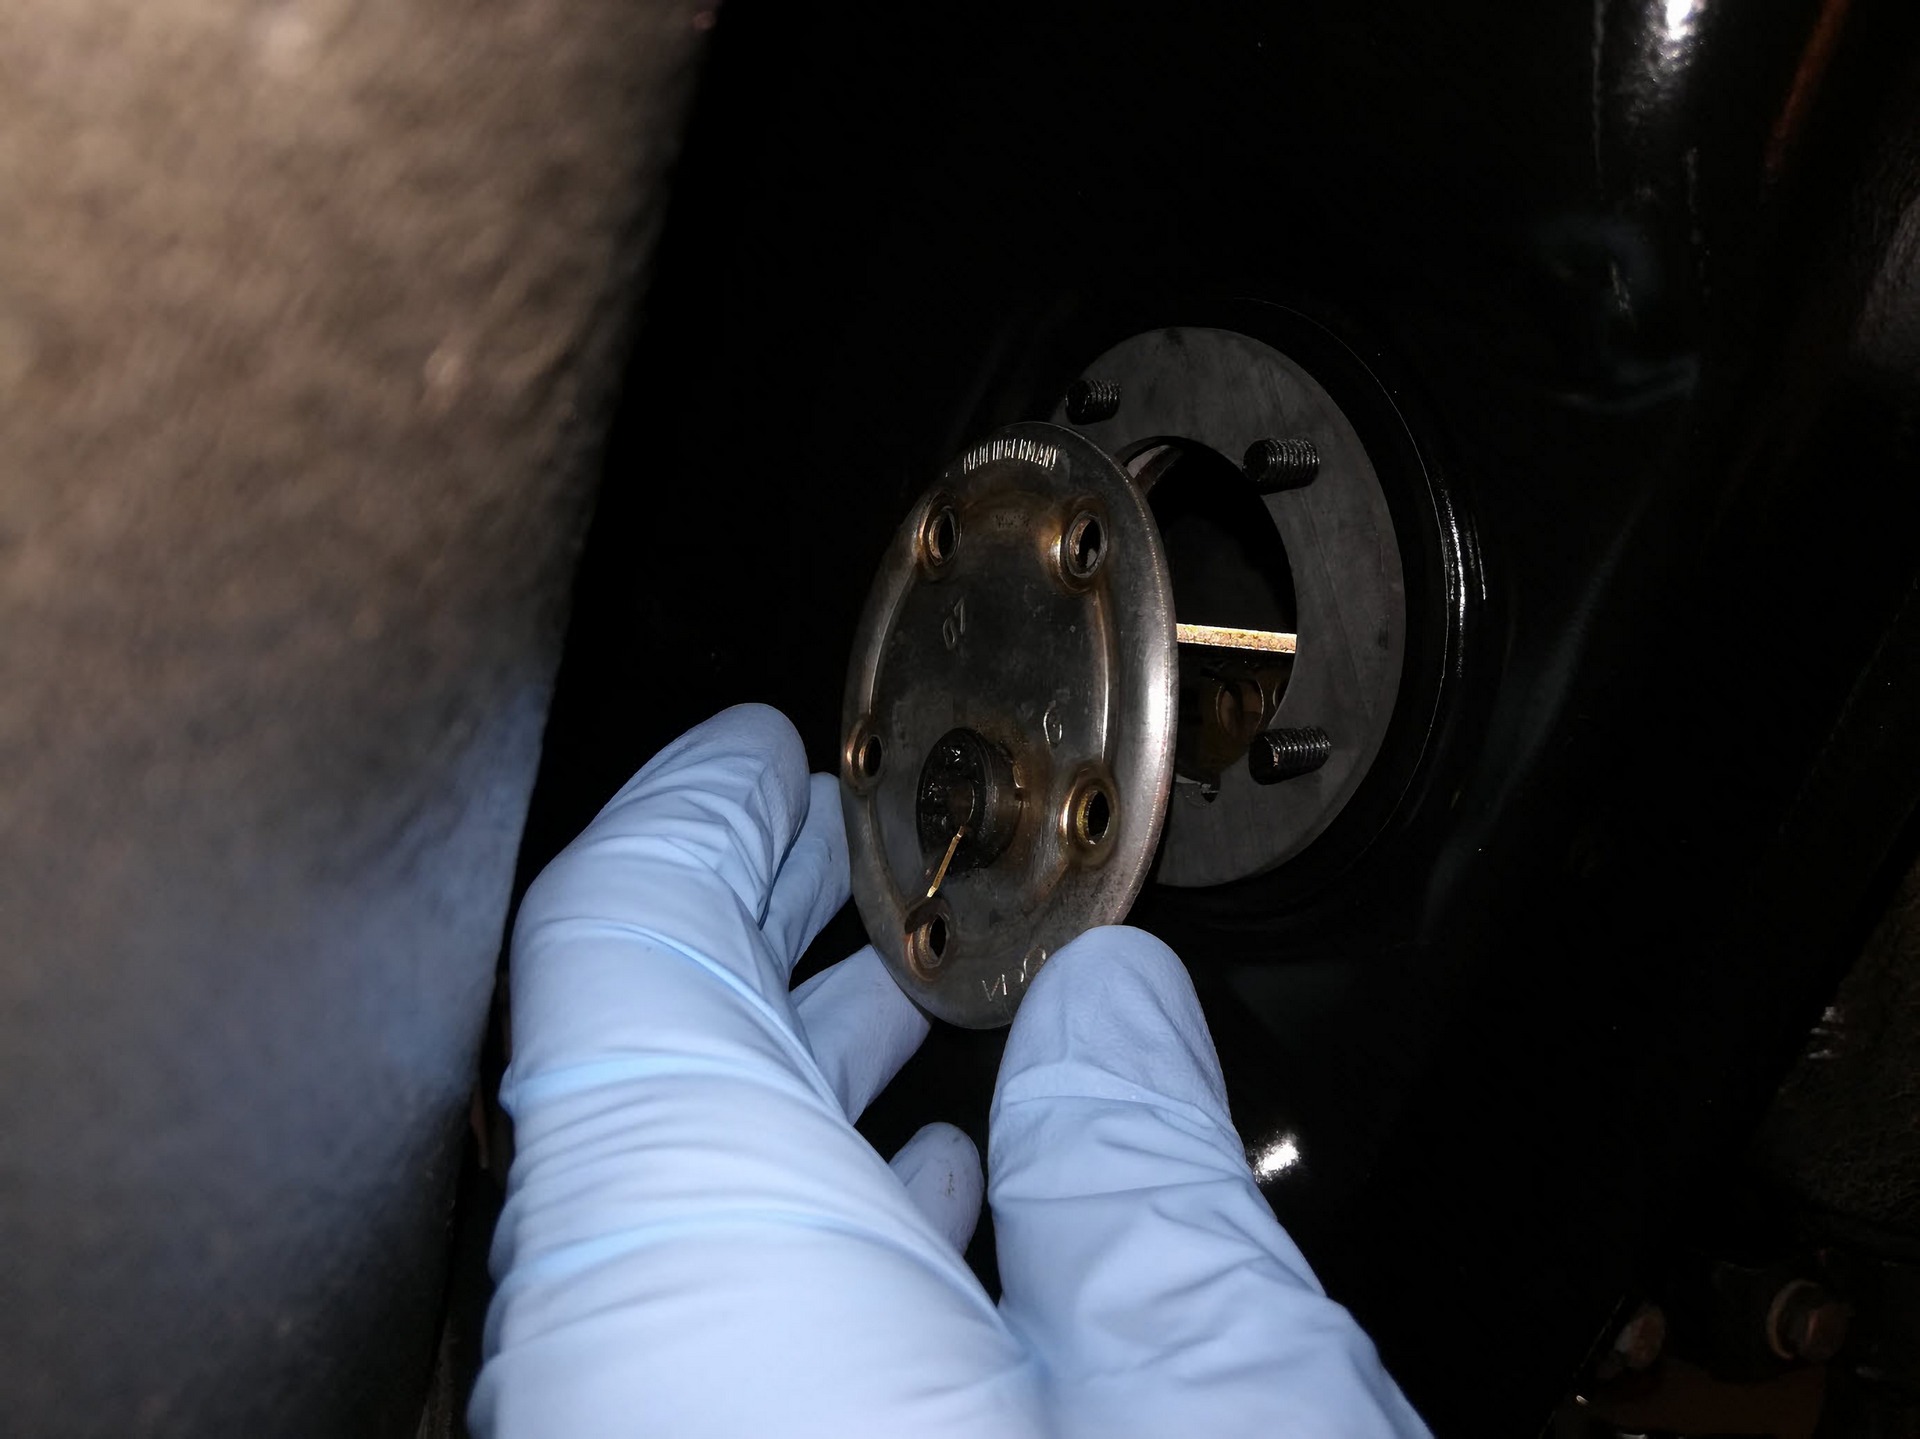
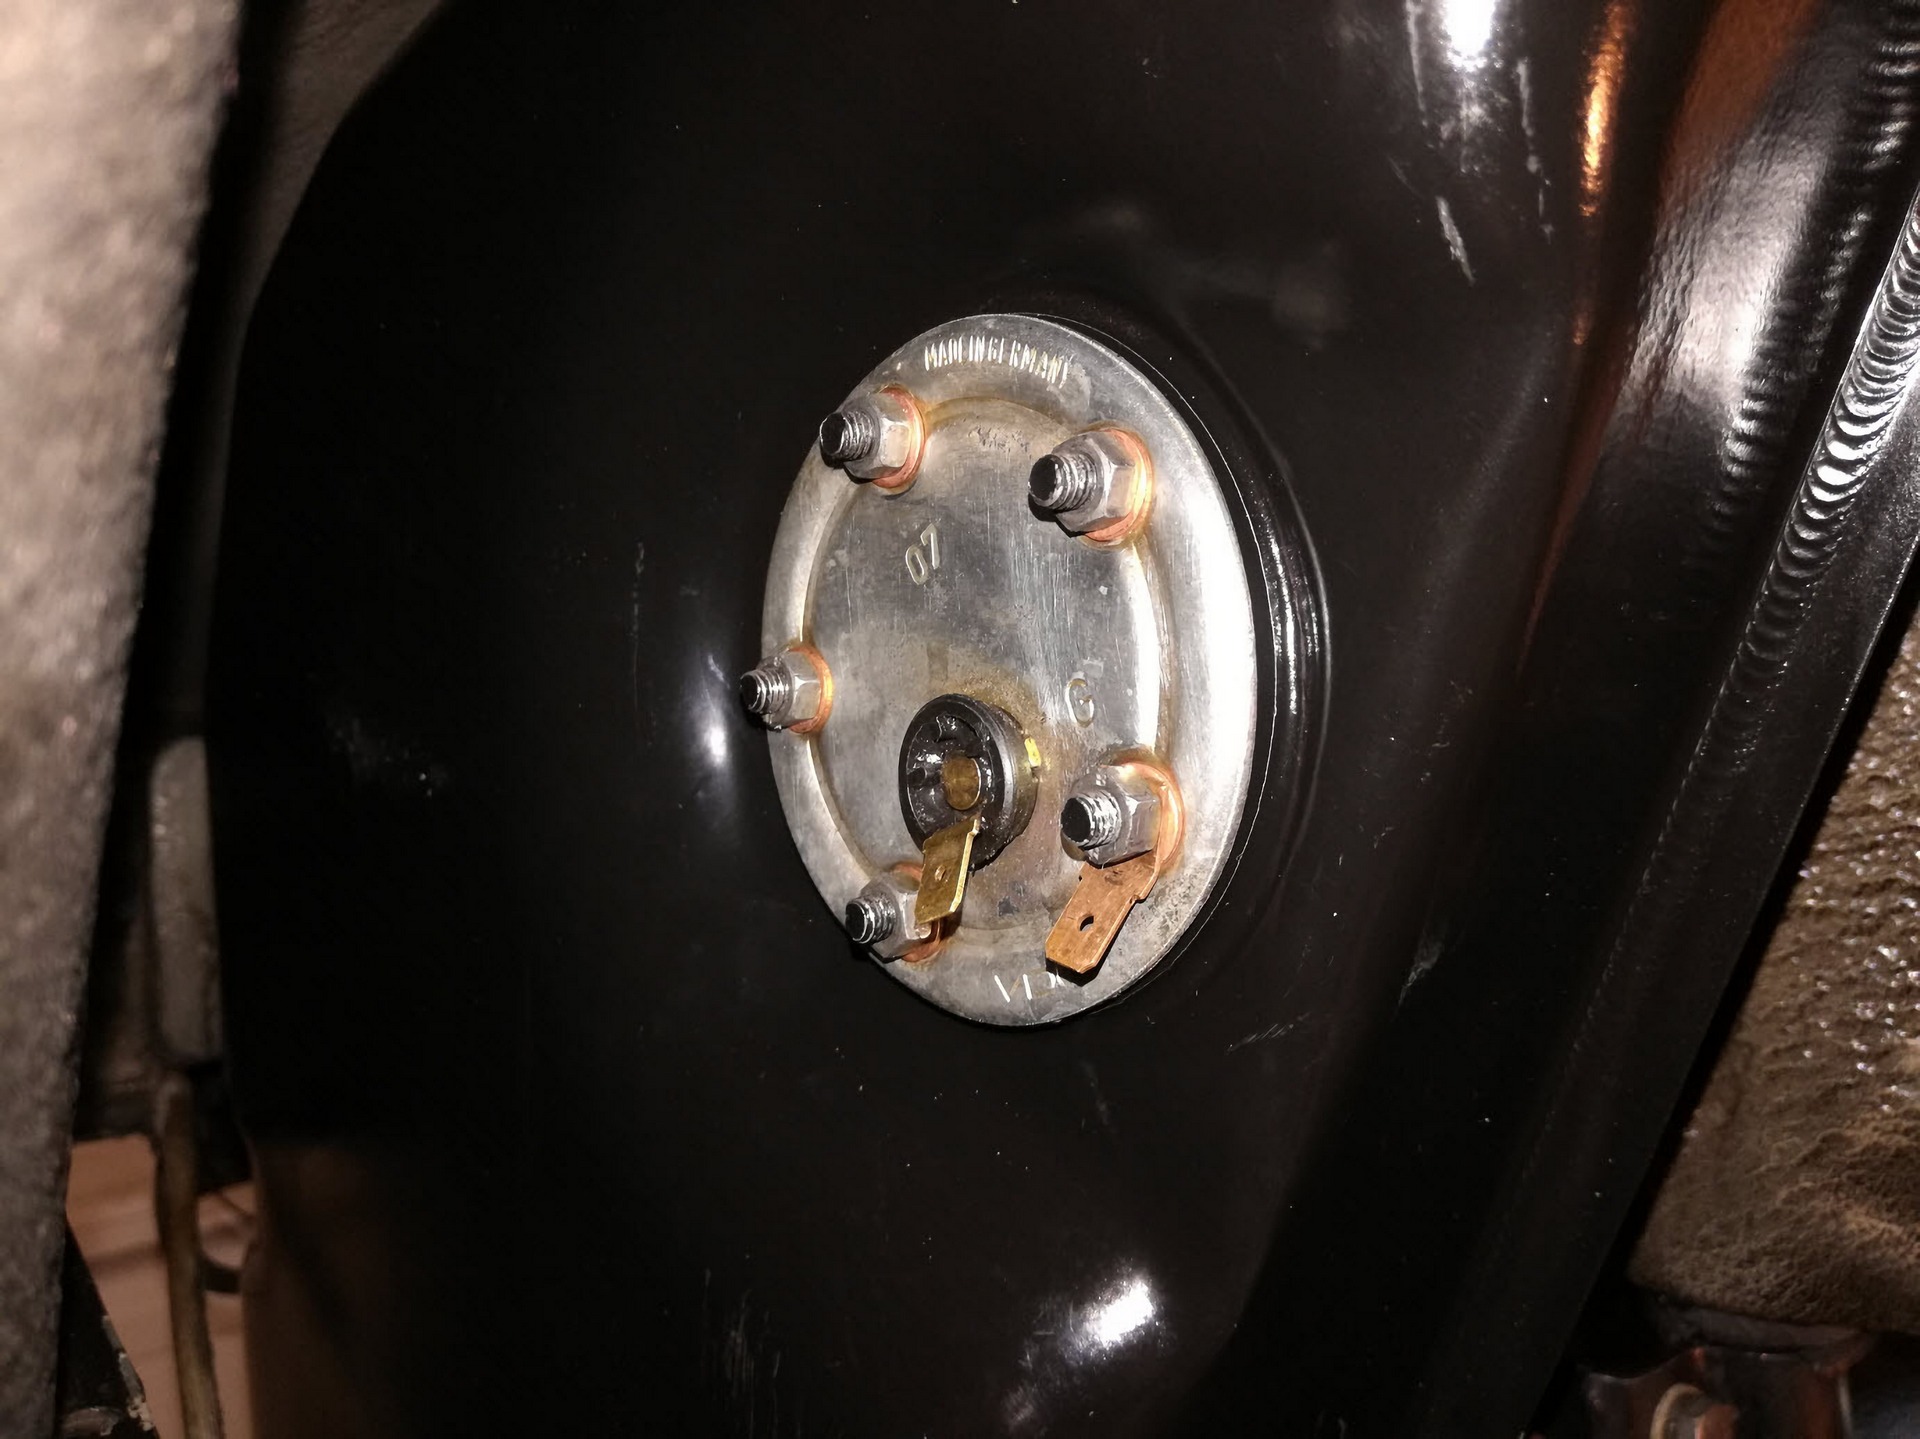
Carefully disconnect both wires from the plate terminals. Using a wrench, loosen and remove the five nuts and sealing washers from the plate mounting studs. One of the terminals is attached to a stud and will come off as well. Set the nuts, washers, and terminal aside for later reuse.
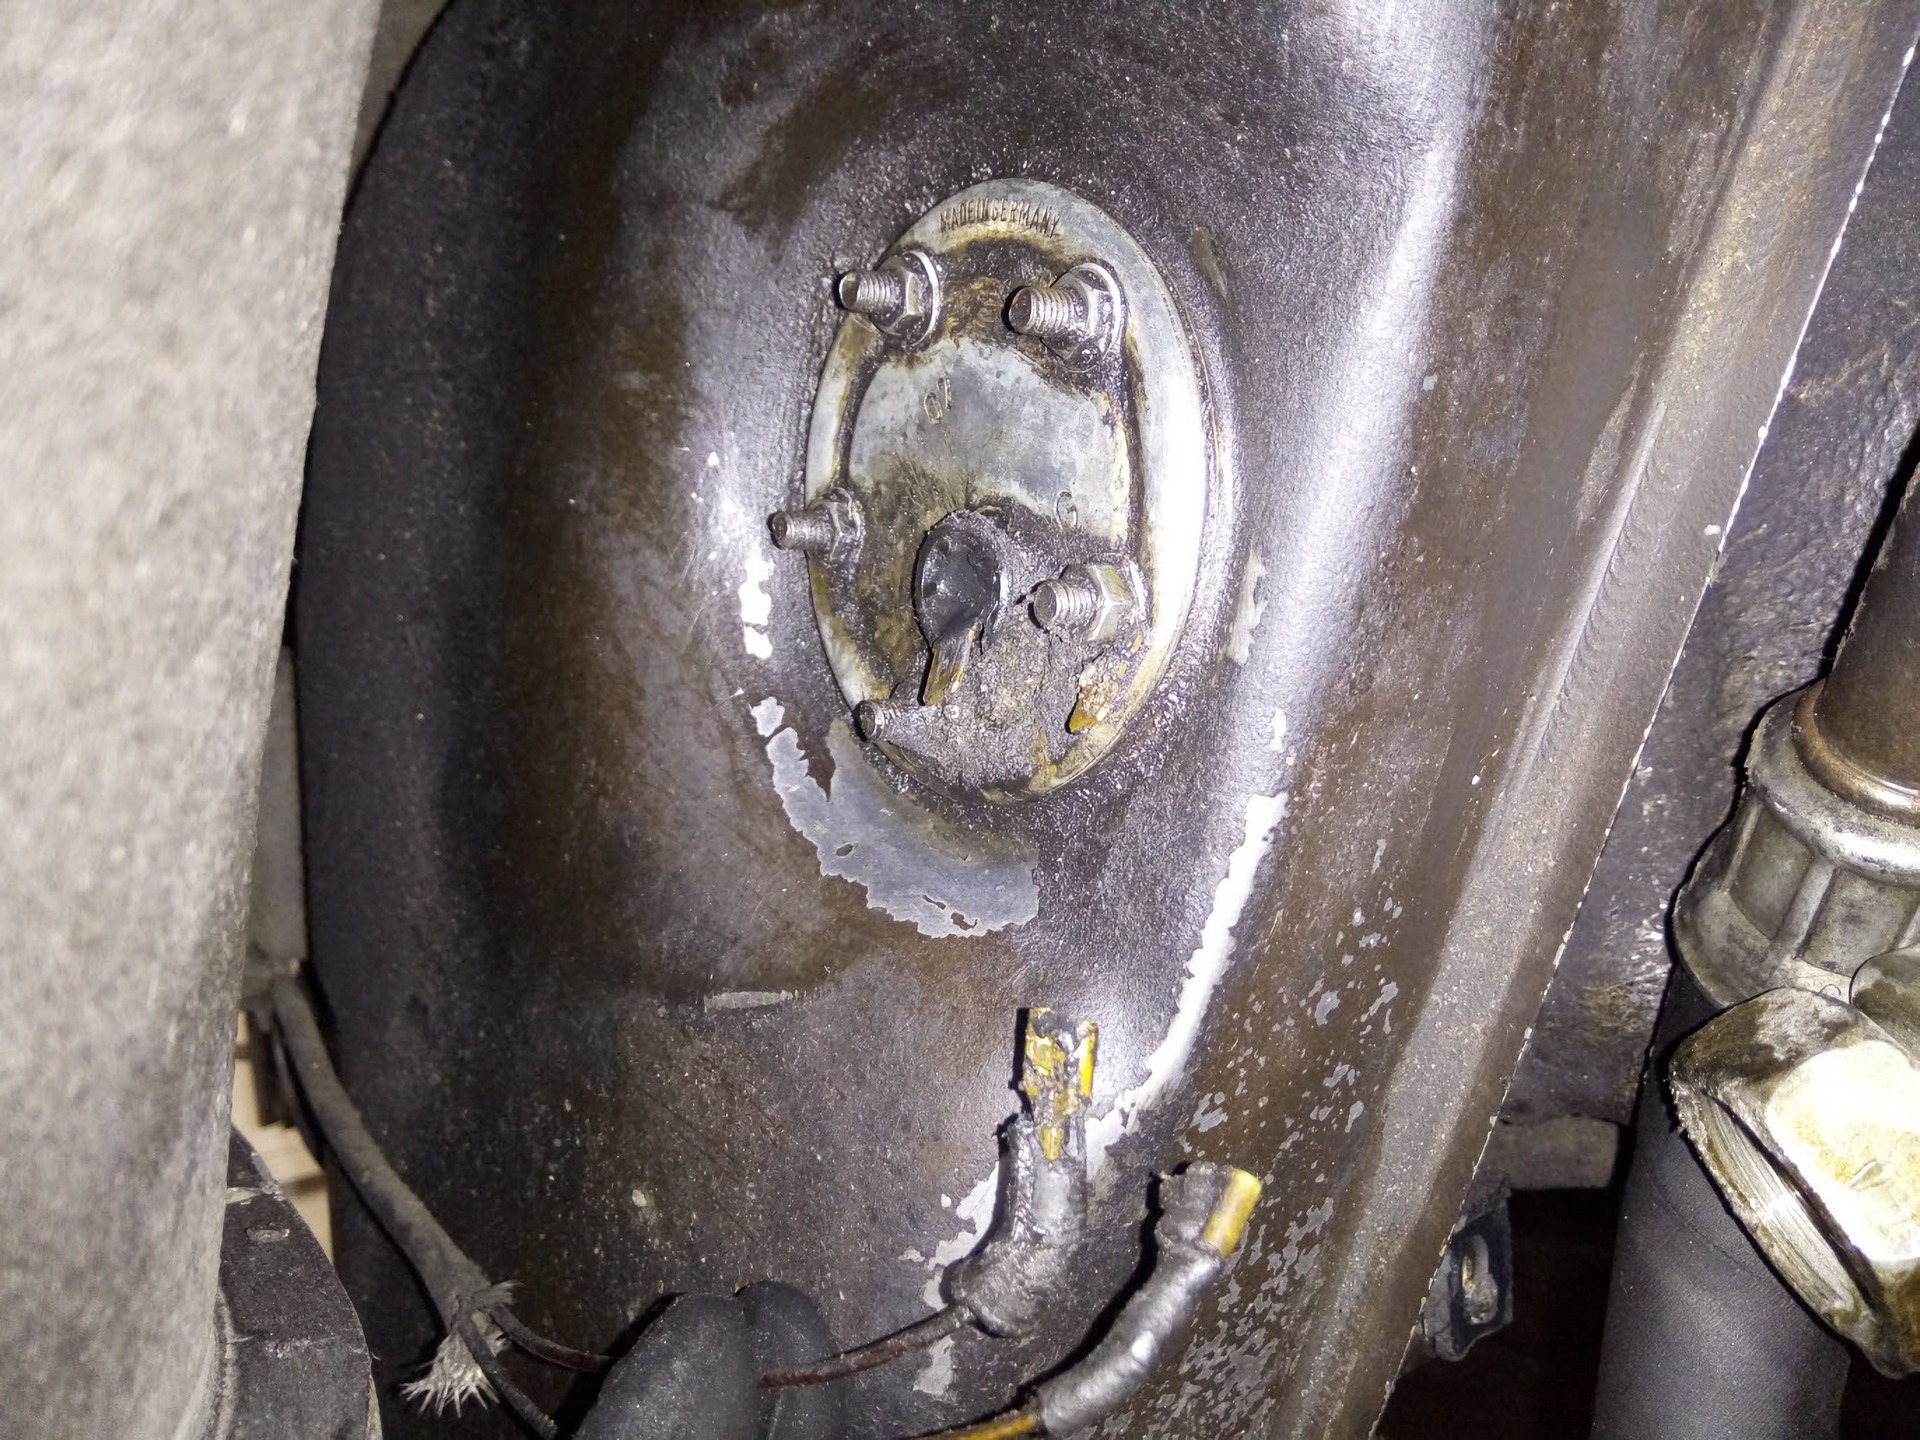
Using a plastic trim tool, gently pry around the edge of the plate all the way around to release it from the gasket underneath it. The old gasket may come off in pieces due to old age.
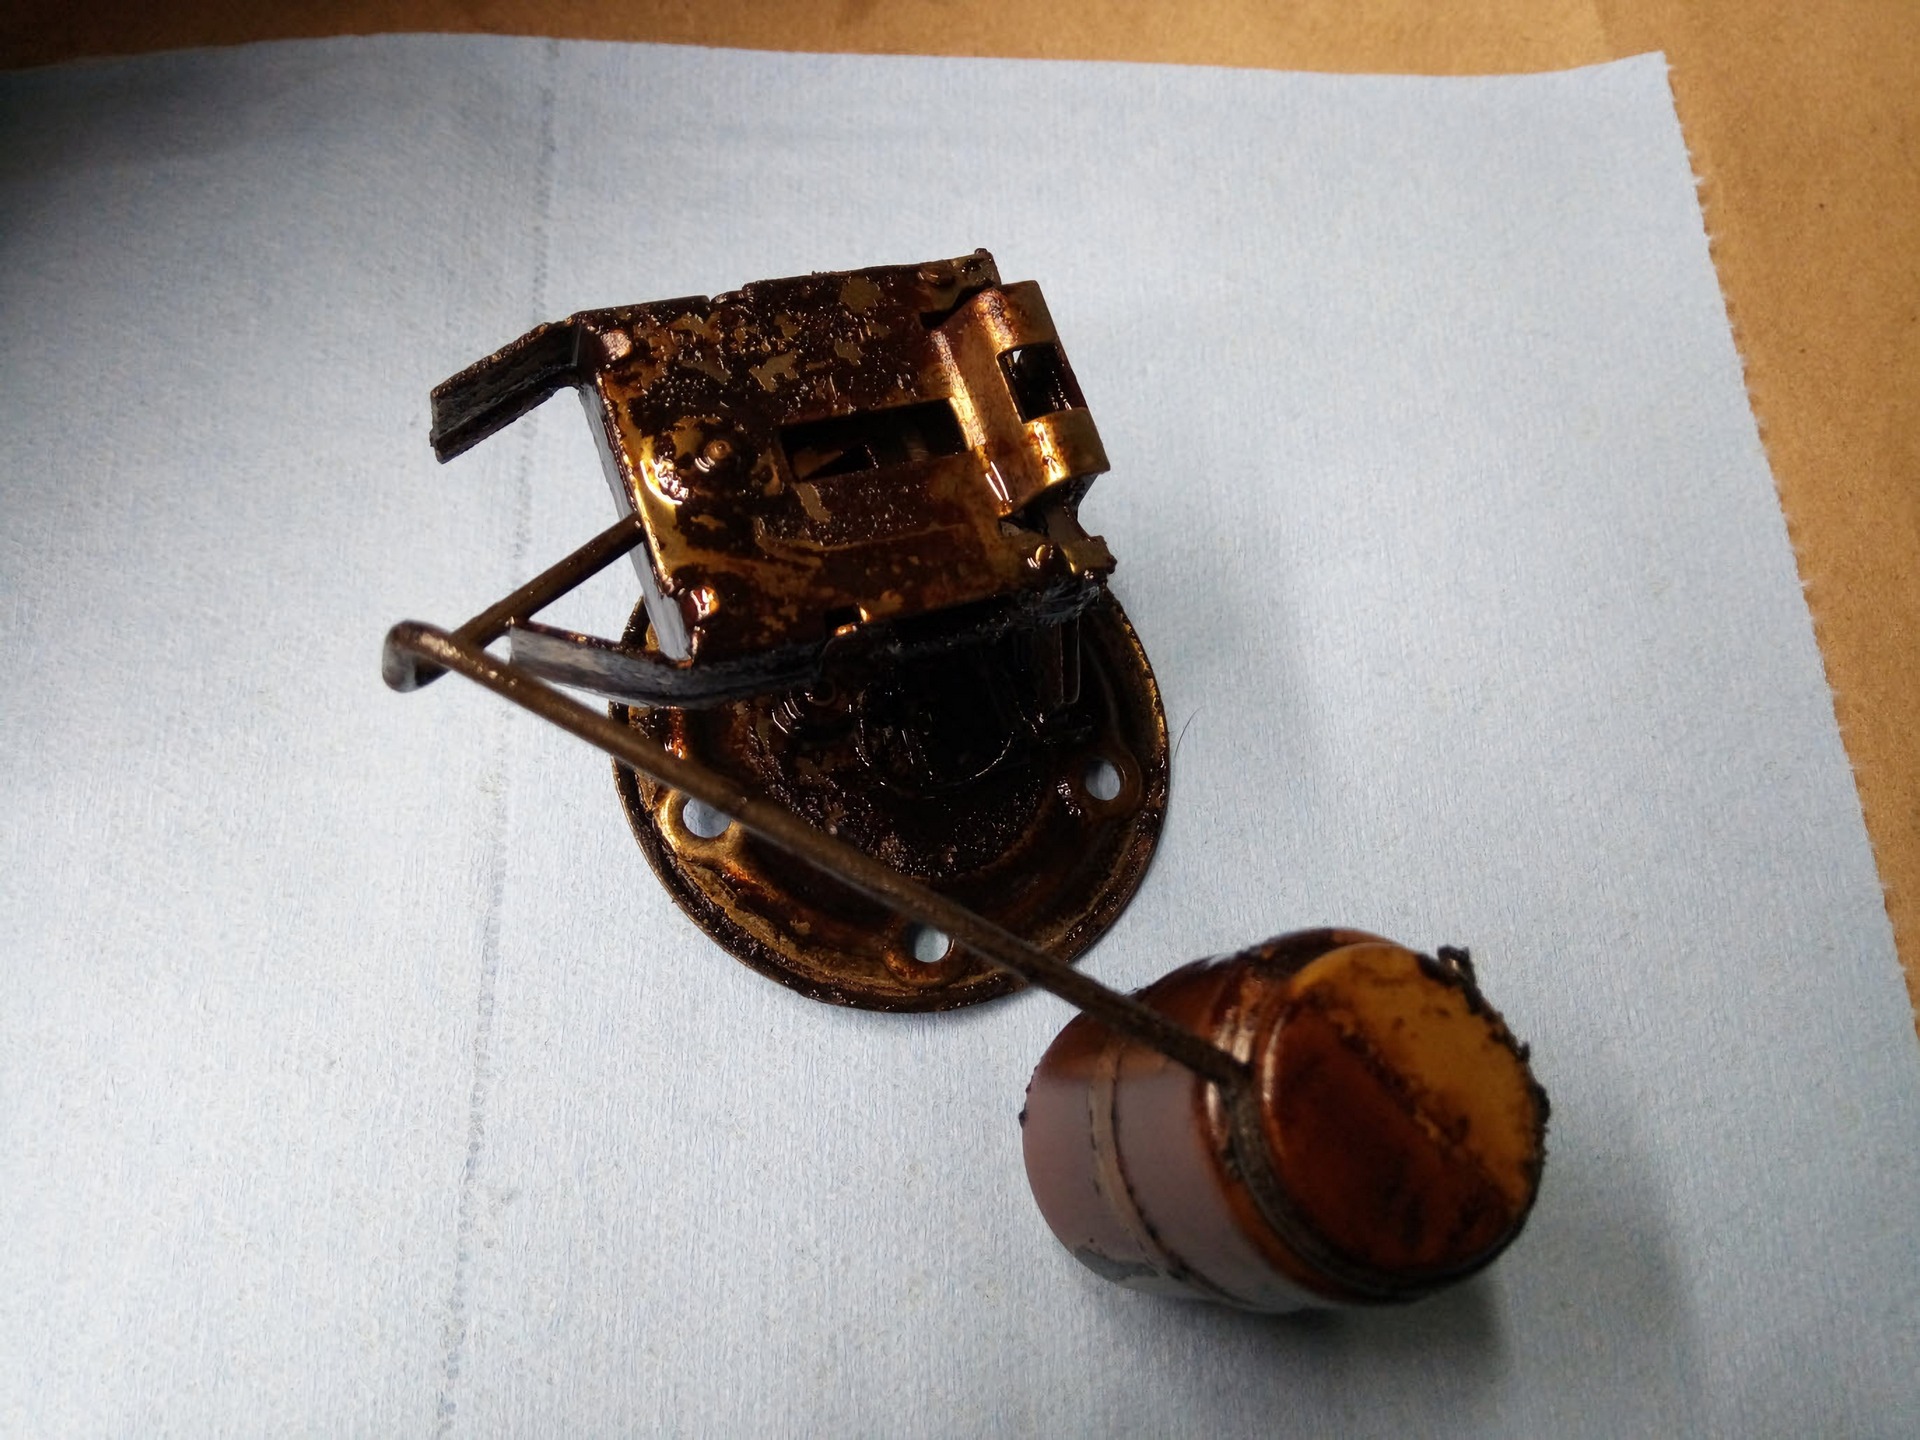
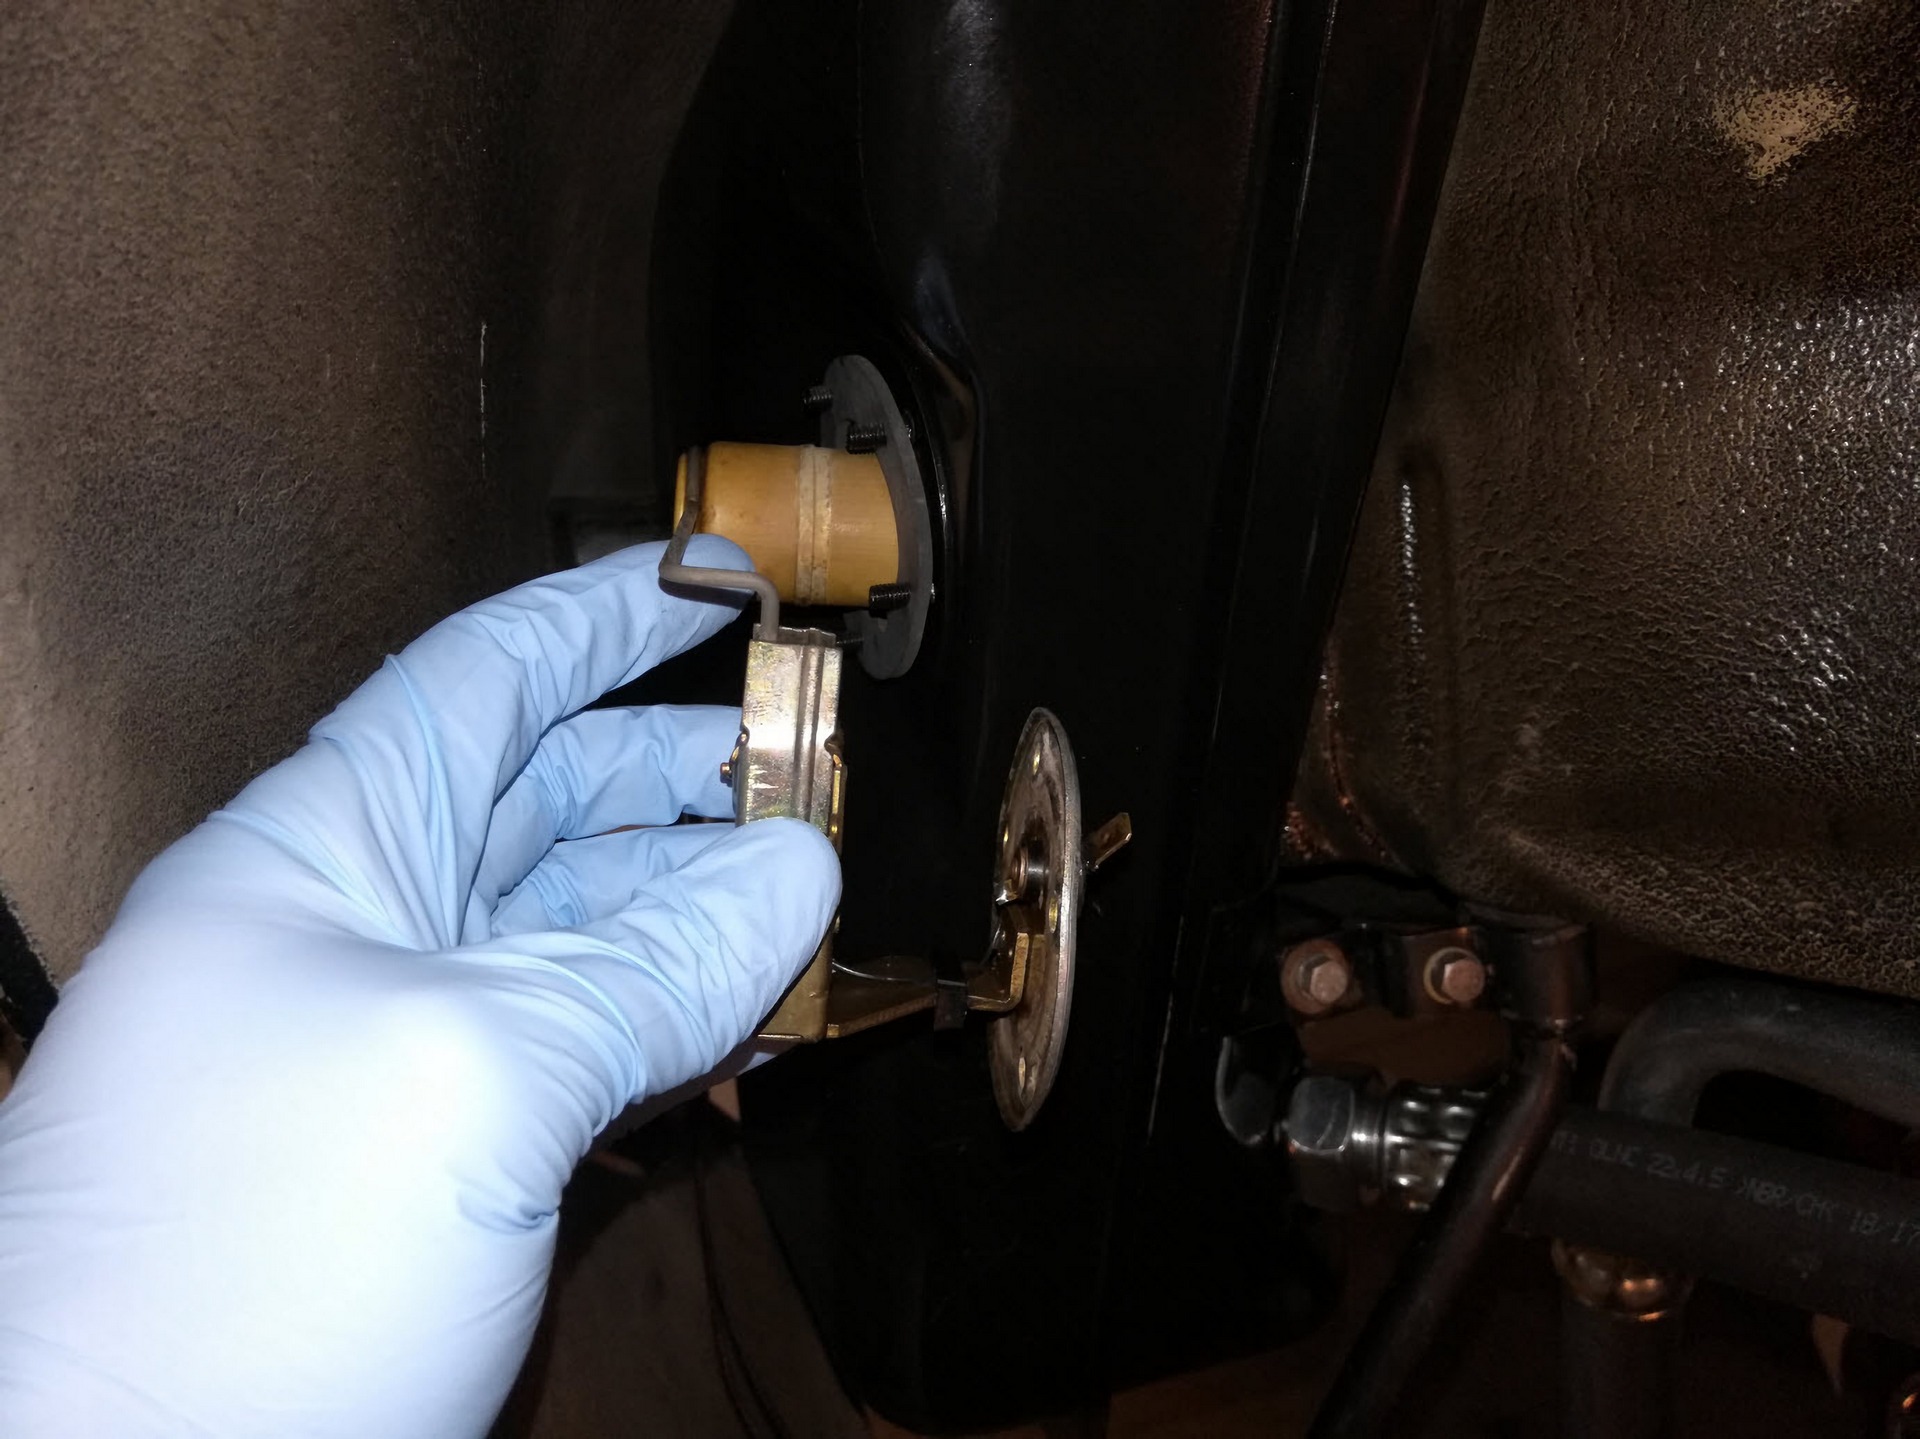
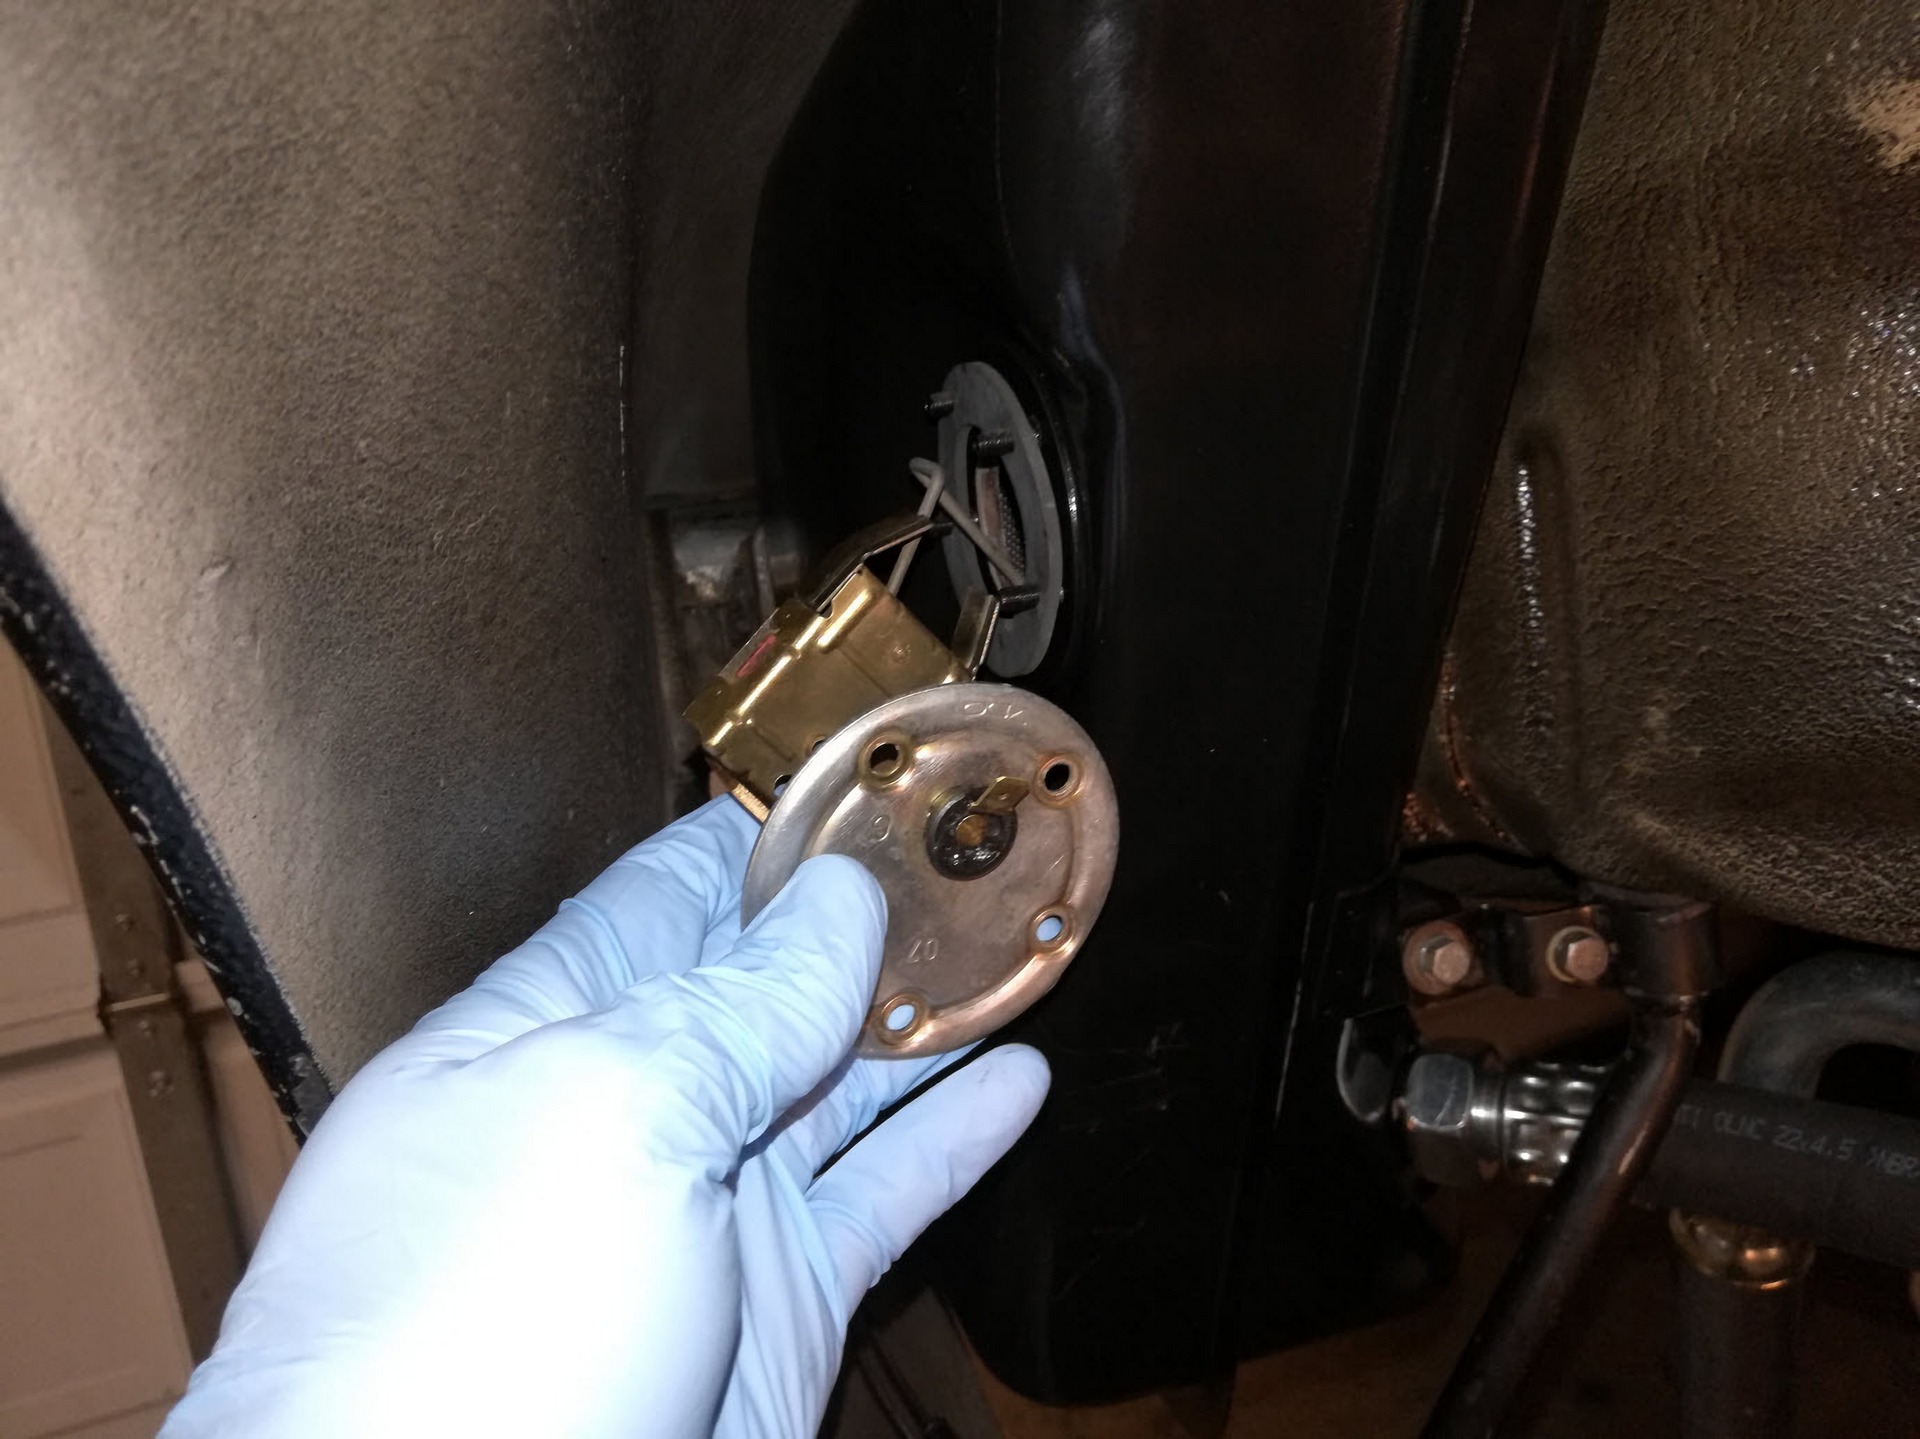
Once the plate is released, carefully begin to pull the assembly out of the tank. Once you have the main body (attached to the back of the plate) out, you will need to rotate the whole unit to maneuver the wire arm and the float out of the tank opening. Do not pull on the assembly if it gets hung up inside the tank. Have shop towels and an oil pan ready to catch any oil drips.
If it doesn't come out of the tank, try removing the dipstick under the oil tank cap. The sensor has the tendency to get caught up on the dipstick.
Step 4: Remove Old Gasket Material
Using the plastic trim tool or a plastic scraper, scrape off any pieces of gasket material stuck to the oil tank opening. Again, make sure not to drop any pieces inside the tank. Clean the back side of the sensor plate of any old gasket material as well. Wipe the mating surfaces of the tank and sensor plate clean.
Step 5: Install New Gasket and Sensor
Compare the hole pattern in your new gasket to the hole pattern in the sensor mounting plate. Notice that two holes are spaced further apart than the rest; this is for the installation orientation of the sensor in the tank. New gaskets will commonly have a notch in them to identify the two holes that are furthest apart and are made of either rubber or cork.
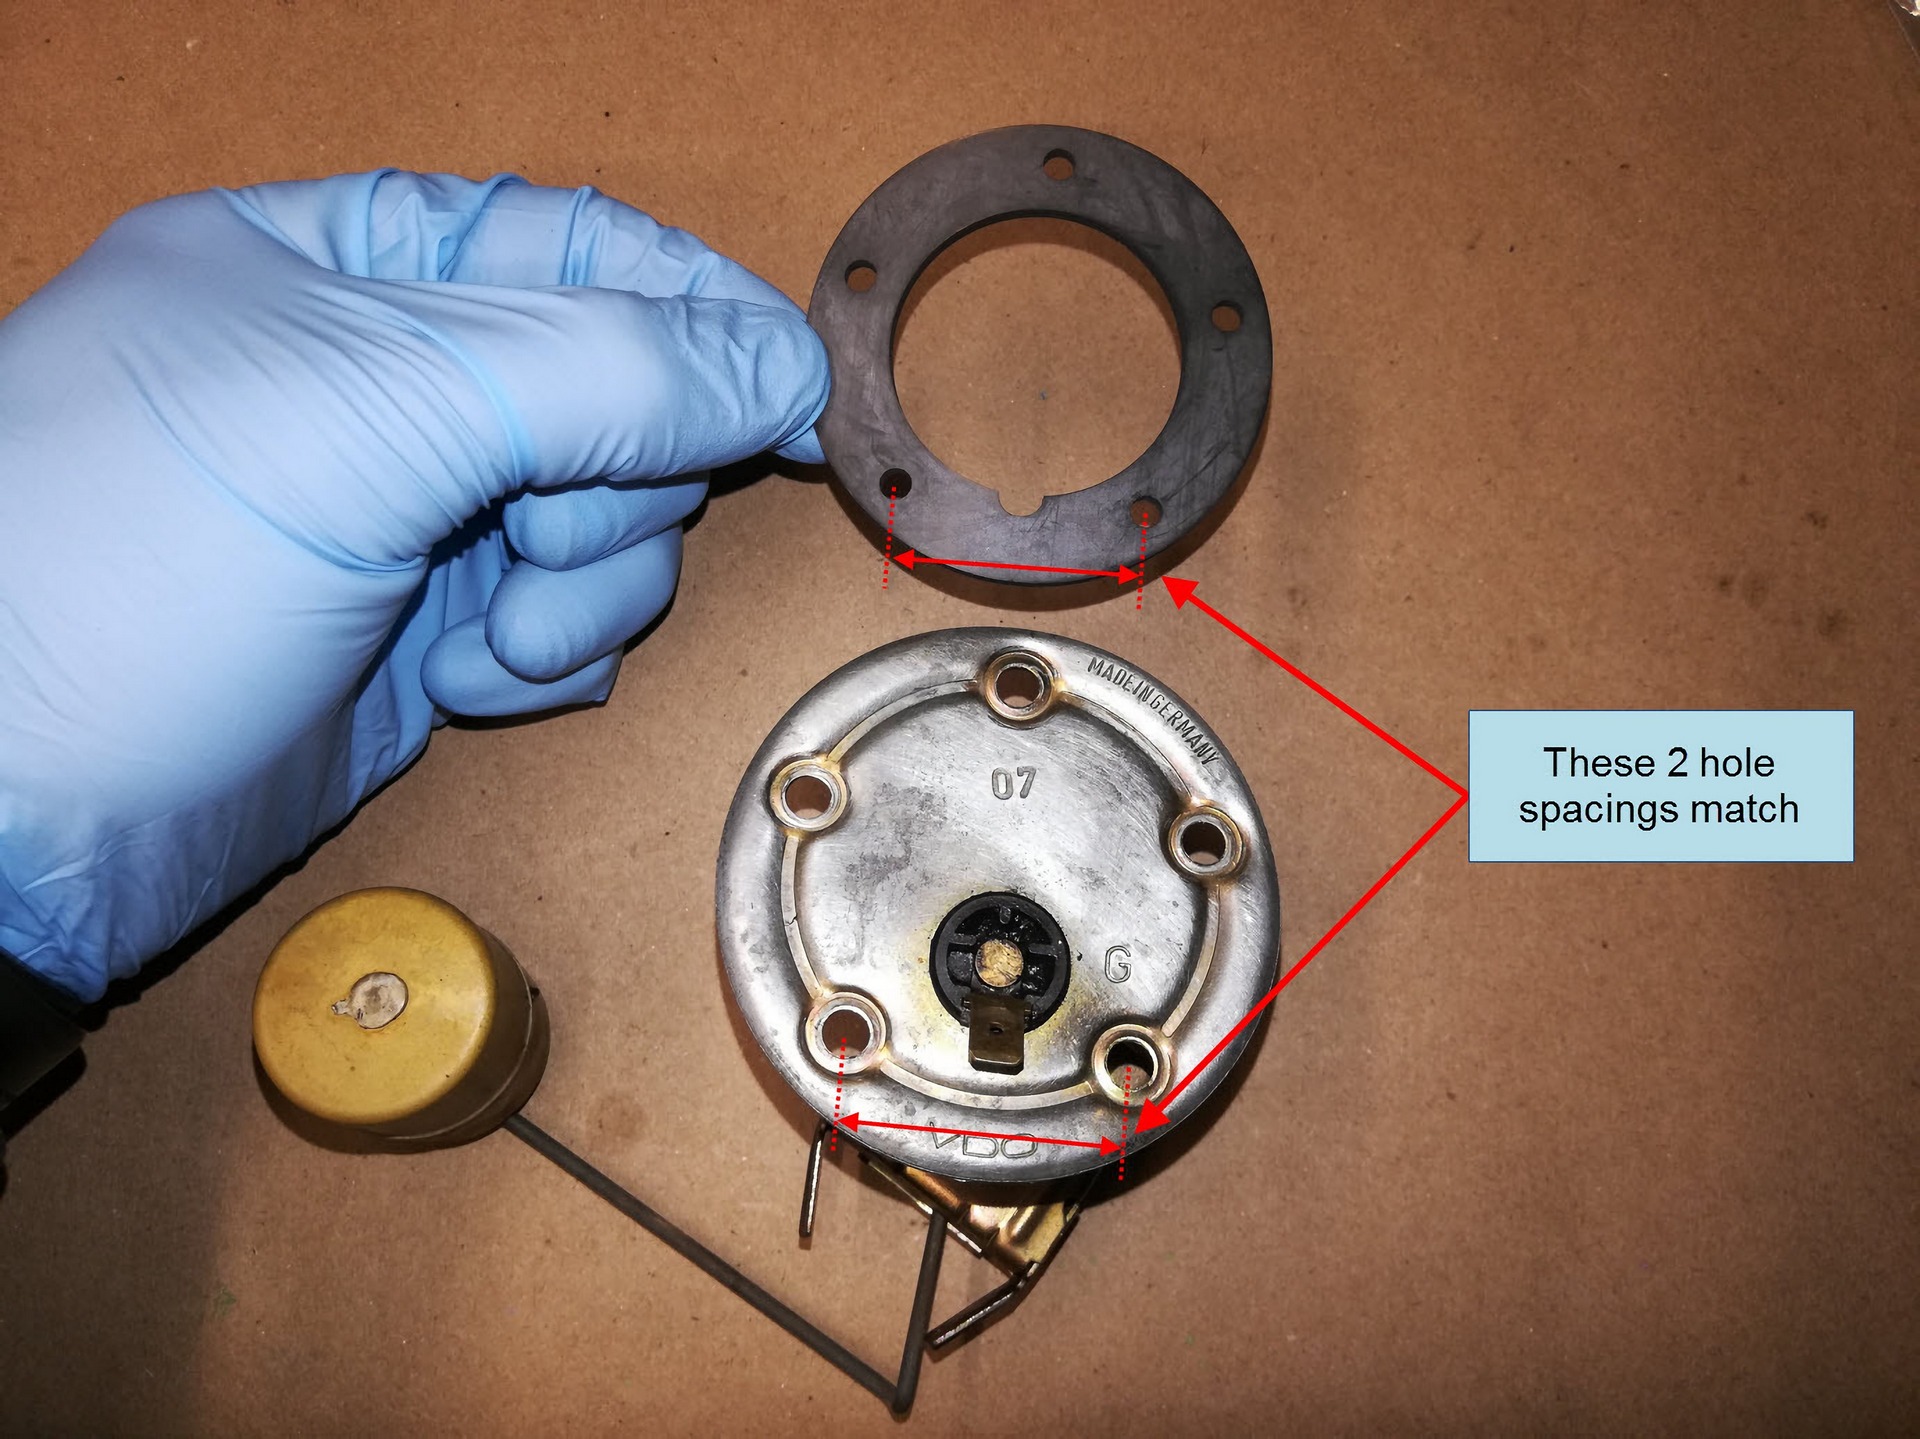
Install the new gasket with the holes spaced furthest apart over the oil tank studs with the same spacing. Push the gasket all the way down against the tank surface.
Insert the new oil level sensor into the tank starting with the float, and then rotate it entirely inside the tank.
Rotate the sensor plate so that the two holes spaced furthest apart line up with the corresponding tank studs. Gently press the sensor plate down against the gasket.
The same as with the removal of the old sensor, if it gets hung up on something inside the tank, try pulling the dipstick underneath the oil tank cap and put it back in once the sensor is fully seated against the gasket.
Install new sealing washers and re-install the old nuts finger tight. Note which stud originally had the removable ground terminal and put it back in its original location.
Slowly tighten the nuts in a star pattern until they are snug. Reconnect the wires to the sensor terminals as they were before.
That's it, the new oil tank level sensor installation is complete! All you need to do now is start the car, and the oil level gauge needle should now stand at attention. If after running the engine you find any oil leakage around the sensor plate, tighten all the nuts just a little bit more.
If you found this DIY helpful, check back here often for updates and be sure to subscribe to our YouTube channel. If you have any questions or comments about this job, leave them in the comments below!


