- 12/17/2020
- 10 Min Read
- By: Christian Schaefer
How To Replace The Alternator & Drive Belt On A Mercedes W212 & W204

Every single system in your Mercedes needs electrical power. The battery may be what you think of first when it comes to electrical power, but the battery would nearly be useless without the charging system. The two core elements of the charging system are the alternator and the voltage regulator. If either fails, the battery won’t get charged as you drive along, and you’ll get a battery warning light on the dashboard. Thankfully, changing the alternator or voltage regulator isn’t an intensive job.
The alternators on these Mercedes engines sit below the passenger’s side bank of cylinders. Space to work in is limited, and you’ll be working blind at times, but replacing the alternator or voltage regulator yourself is far easier than that sounds. Though, are you sure that your issue is the alternator? If you want to be sure about what the cause of the battery light is, check out our guide to your car’s electrical system.
Mercedes models and years applicable:
|
|
|
|
|
|
|
|
|
|
|
|
Symptoms of a bad alternator on a Mercedes W212:
- Dim lights
- Hard starting
- Constantly dying battery
- Intermittently malfunctioning electronics
- Hesitation when accelerating from a stop
- Battery failure light
The electrical system is a major component in every area of the vehicle. Without systems like your headlights, anti-lock brakes, and airbag system getting the electrical power they need, the vehicle can become unsafe to drive. However, a battery change, voltage regulator replacement, or alternator replacement aren’t difficult to do yourself.
Mercedes’ alternators typically last between 100,000 and 120,000 miles. If it lasts any longer, you are likely on borrowed time and should replace it, just to be safe. However, voltage regulators can fail earlier than that, leading to a cheaper fix over a complete alternator change.
How much will it cost to replace the alternator & drive belt system on a Mercedes W212?
The Mercedes drive belt kit and a remanufactured alternator will run you just shy of $500. If the alternator is in good shape, and you just need to change the voltage regulator, that’ll run you $56.19. If you don’t want to reuse the air injection valve (combi valve) gasket, a new one is $2.38.
Thankfully, you don’t need any special tools for this job, allowing you to knock it out with simple hand tools. Factor in around another $300 for the labor cost if you’re looking at having a professional complete this job for you. They’ll charge you their price for parts, too, so the overall total will get close to $1000.
How long will it take to replace the alternator & drive belt system on a Mercedes W212?
You will need to work in some tight spaces when removing and installing the alternator, but it won’t eat up an afternoon. All of the belt drive components are right on the front of the engine and are relatively easy to access. To be safe, put aside around two hours to complete the job.
Tools required to replace the alternator & drive belt on a Mercedes W212:
- Flex-Head ⅜”-Drive Ratchet
- ¼”-Drive Ratchet
- E10 Socket
- E12 Socket
- E14 Socket
- 13mm Socket
- 17mm Socket
- 10mm Wrench
- T20 Socket (Optional)
- Large Ratcheting Breaker Bar
- Torque Wrench
Parts required to replace the alternator & drive belt on a Mercedes W212:
- Mercedes Drive Belt Kit
- Bosch Voltage Regulator
- Bosch Remanufactured Alternator
- Mercedes Air Pump Gasket
Steps required to replace the alternator & drive belt on a Mercedes W212:
Step 1: Remove the belt drive system
The alternator connects to the battery via a live positive cable. To prevent this cable from arcing while the alternator is out, disconnect the battery immediately. To get to the battery, remove the airbox for the cabin filter. The airbox sits behind the passenger’s side strut tower.
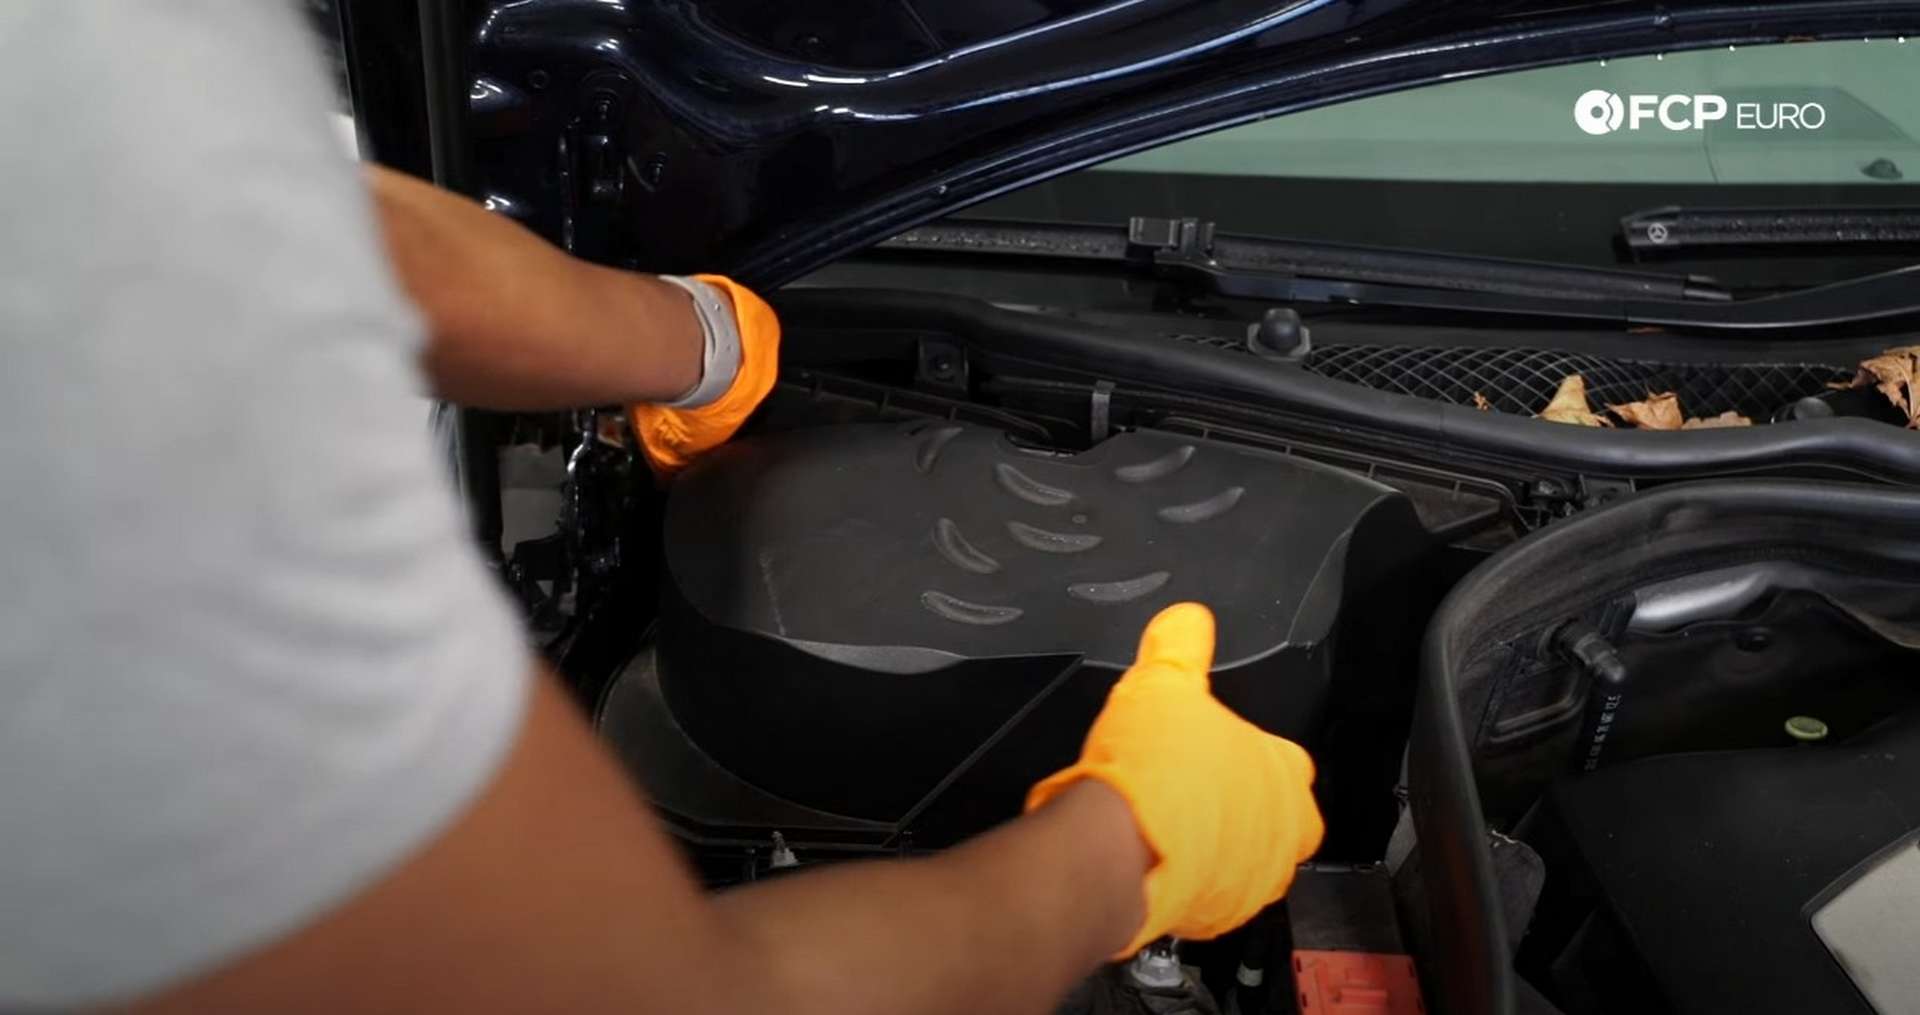
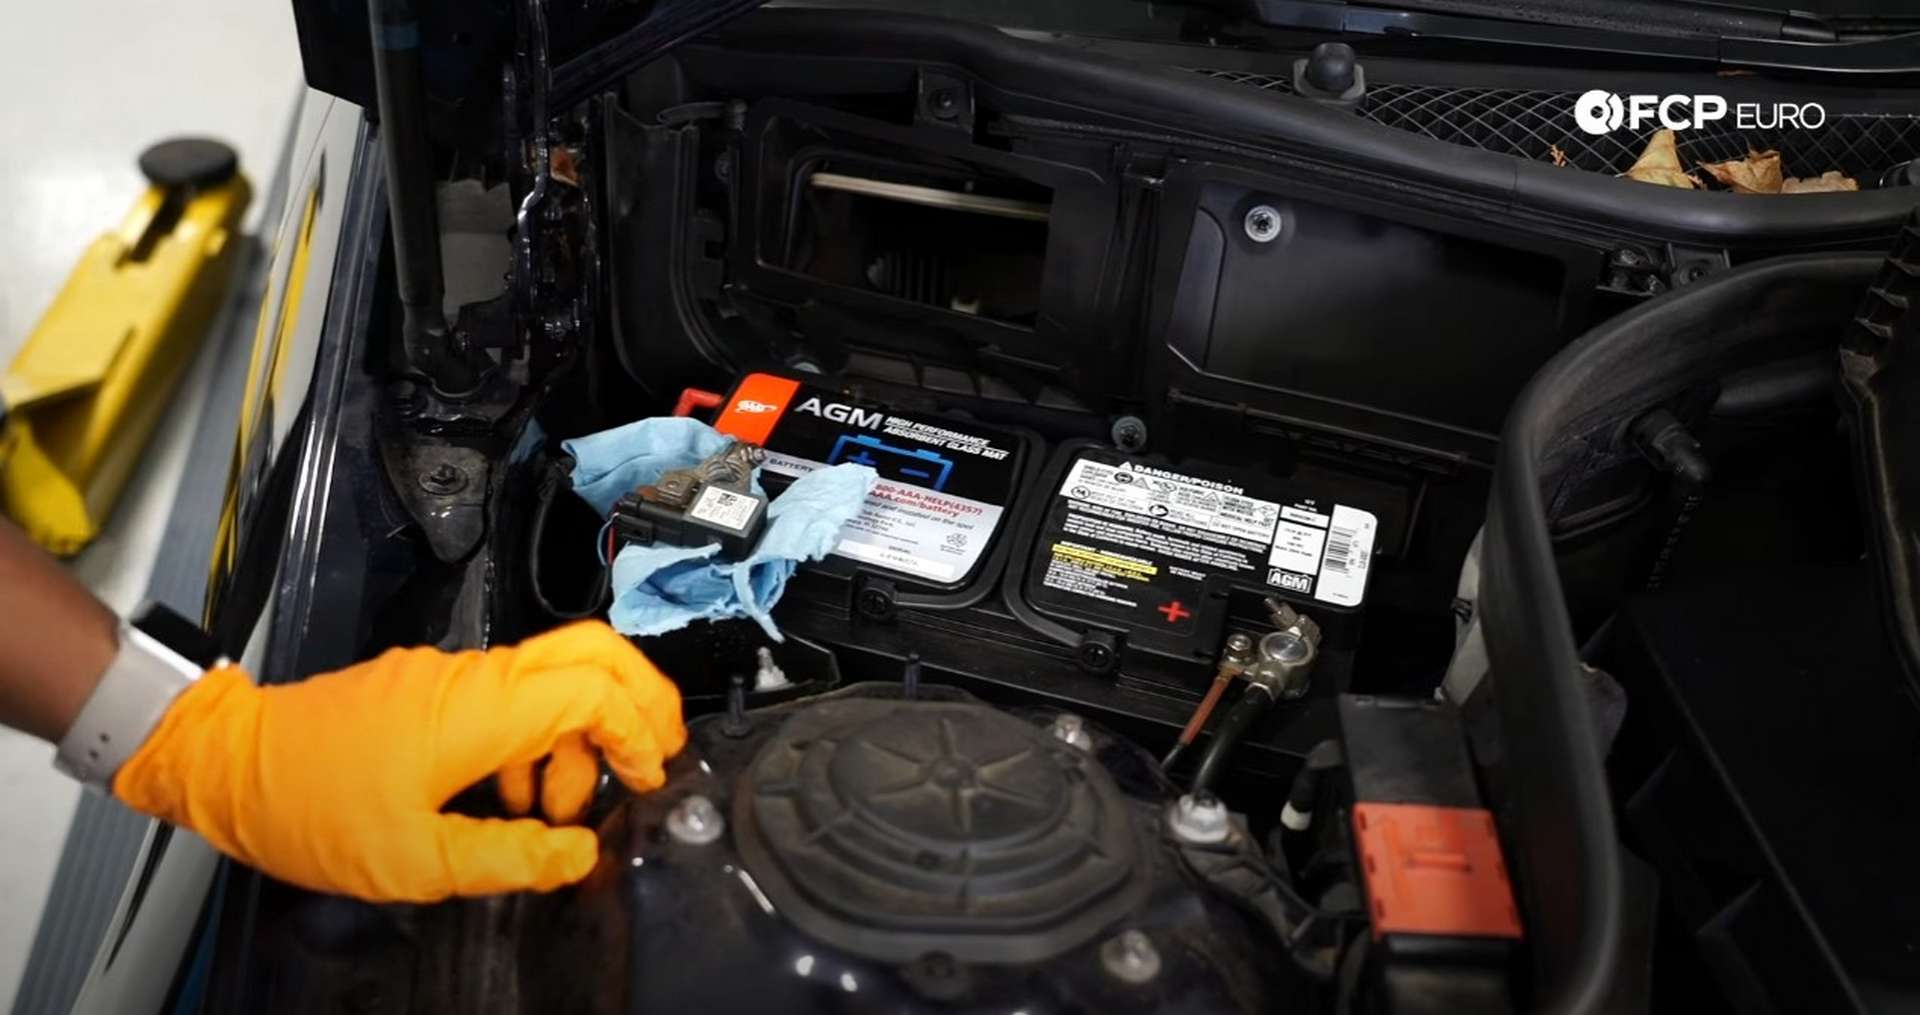
Pop off the three clips that hold the airbox cover to the chassis, and remove the airbox. Beneath it sits the battery. Use a 10mm socket or wrench to loosen the negative battery cable and then remove it from the battery. Tuck the cable away from the battery, so there is no chance for it to touch the negative battery post.
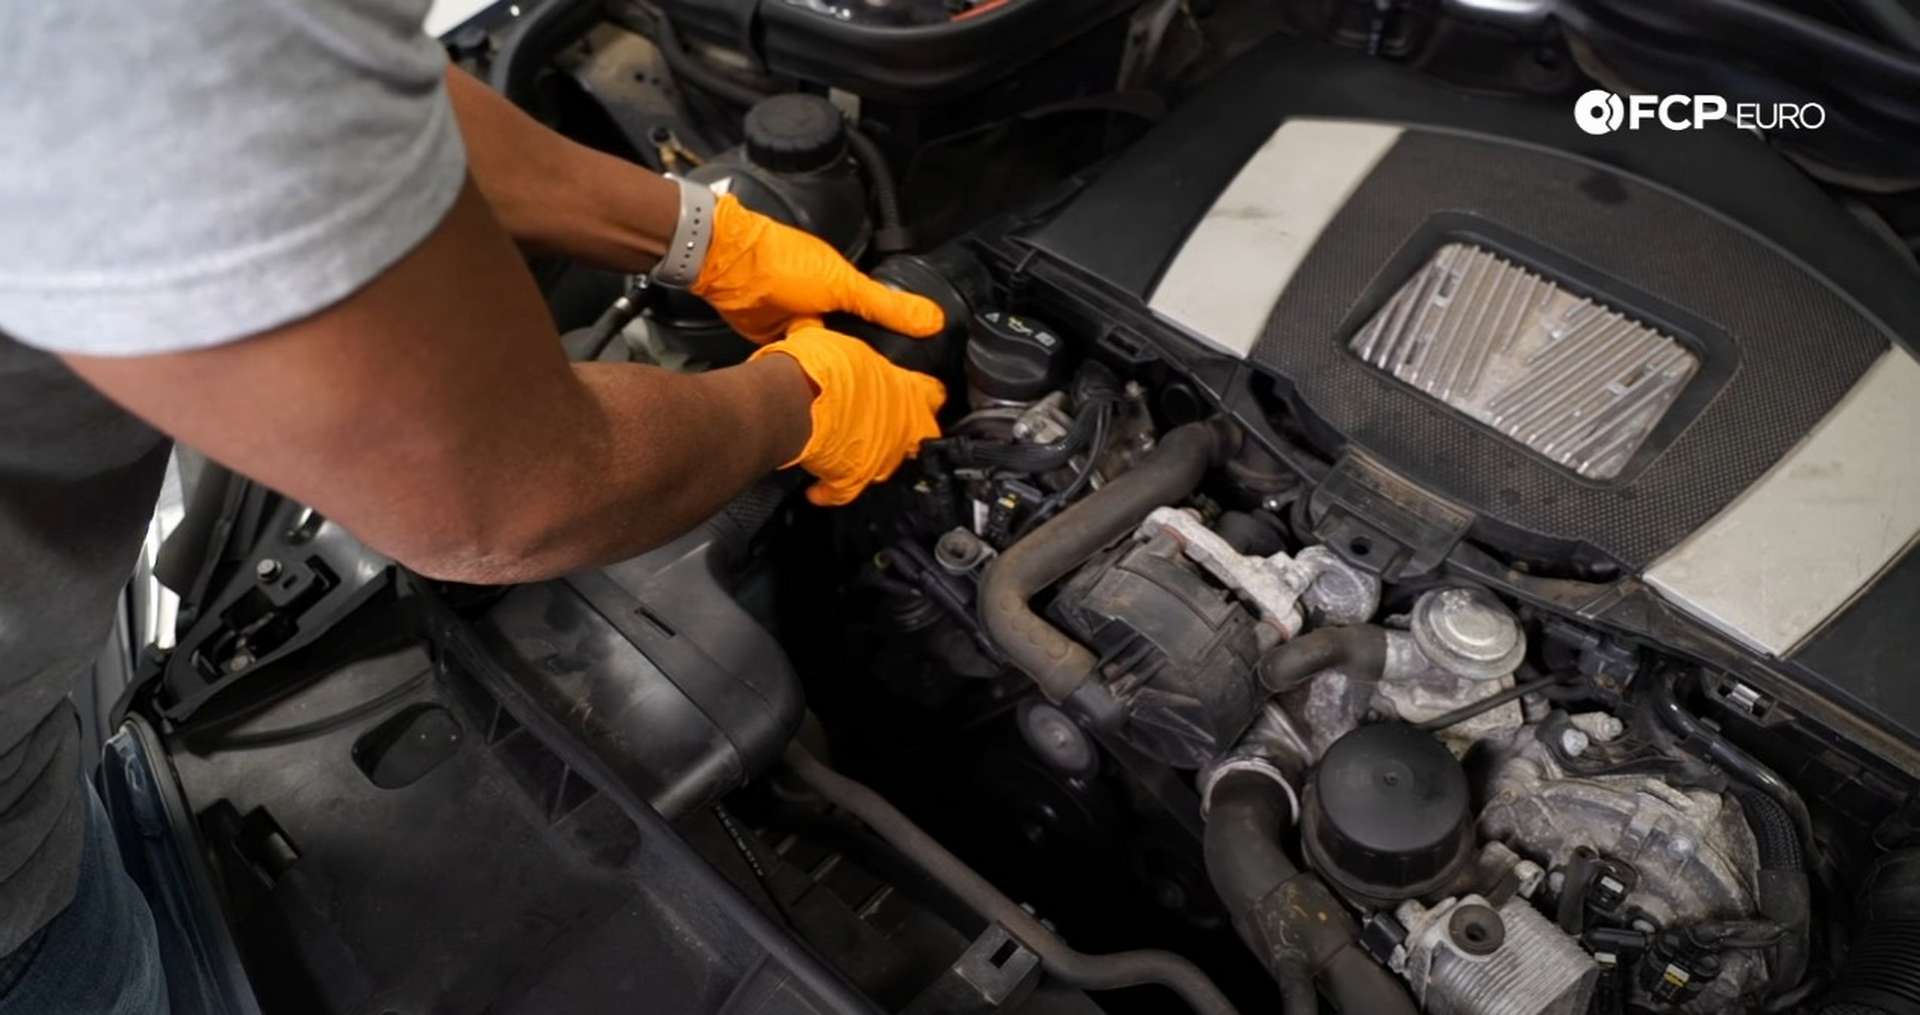
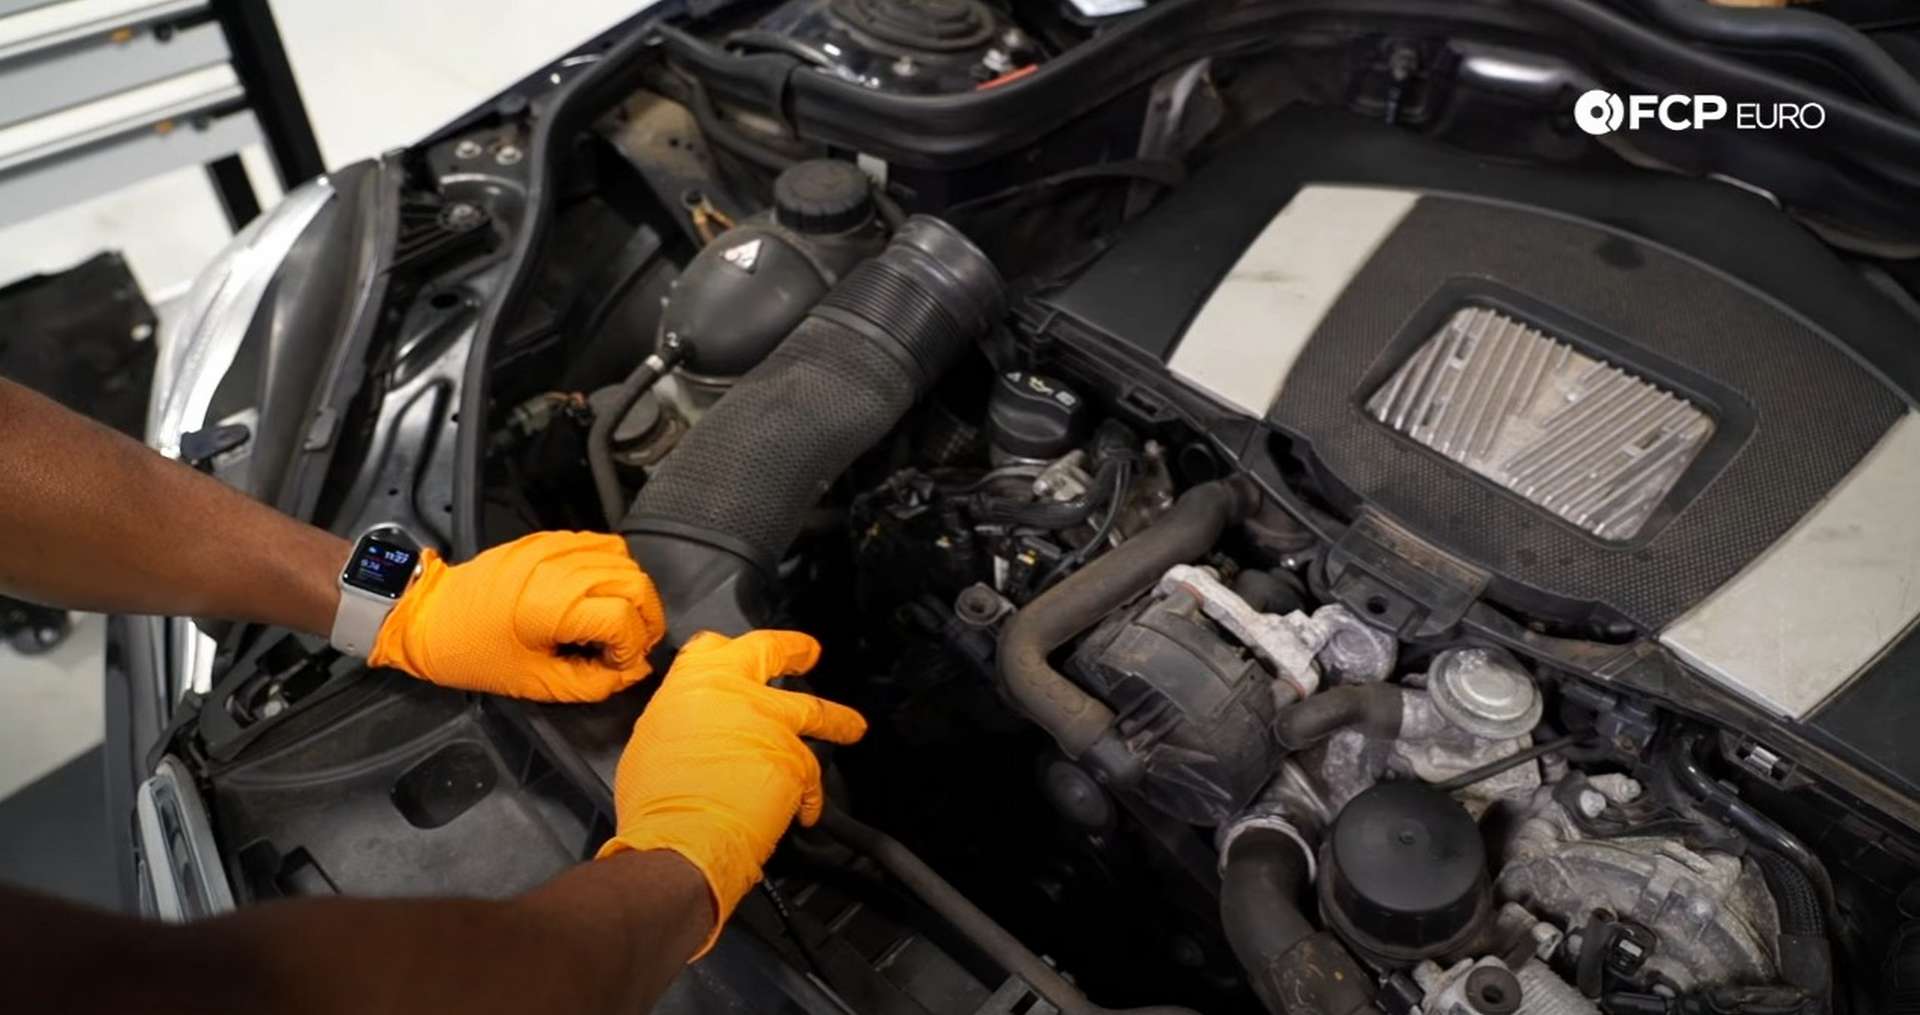
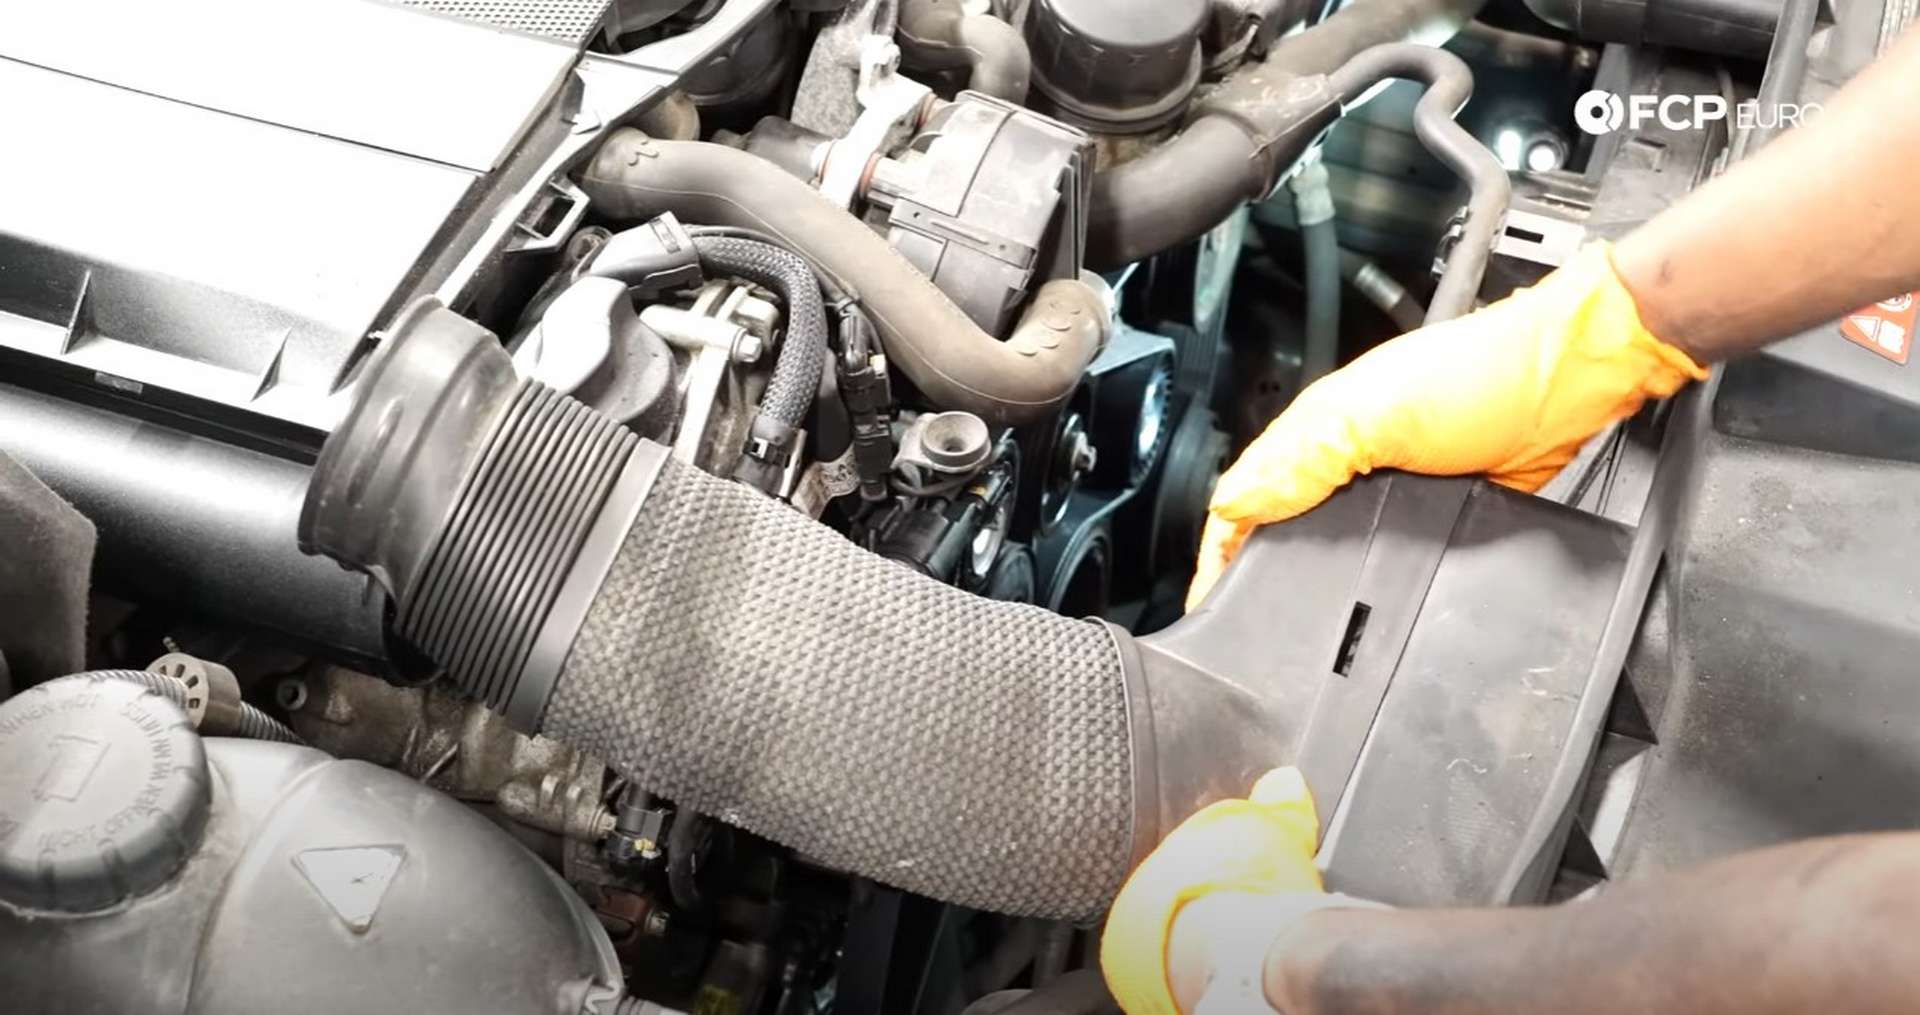
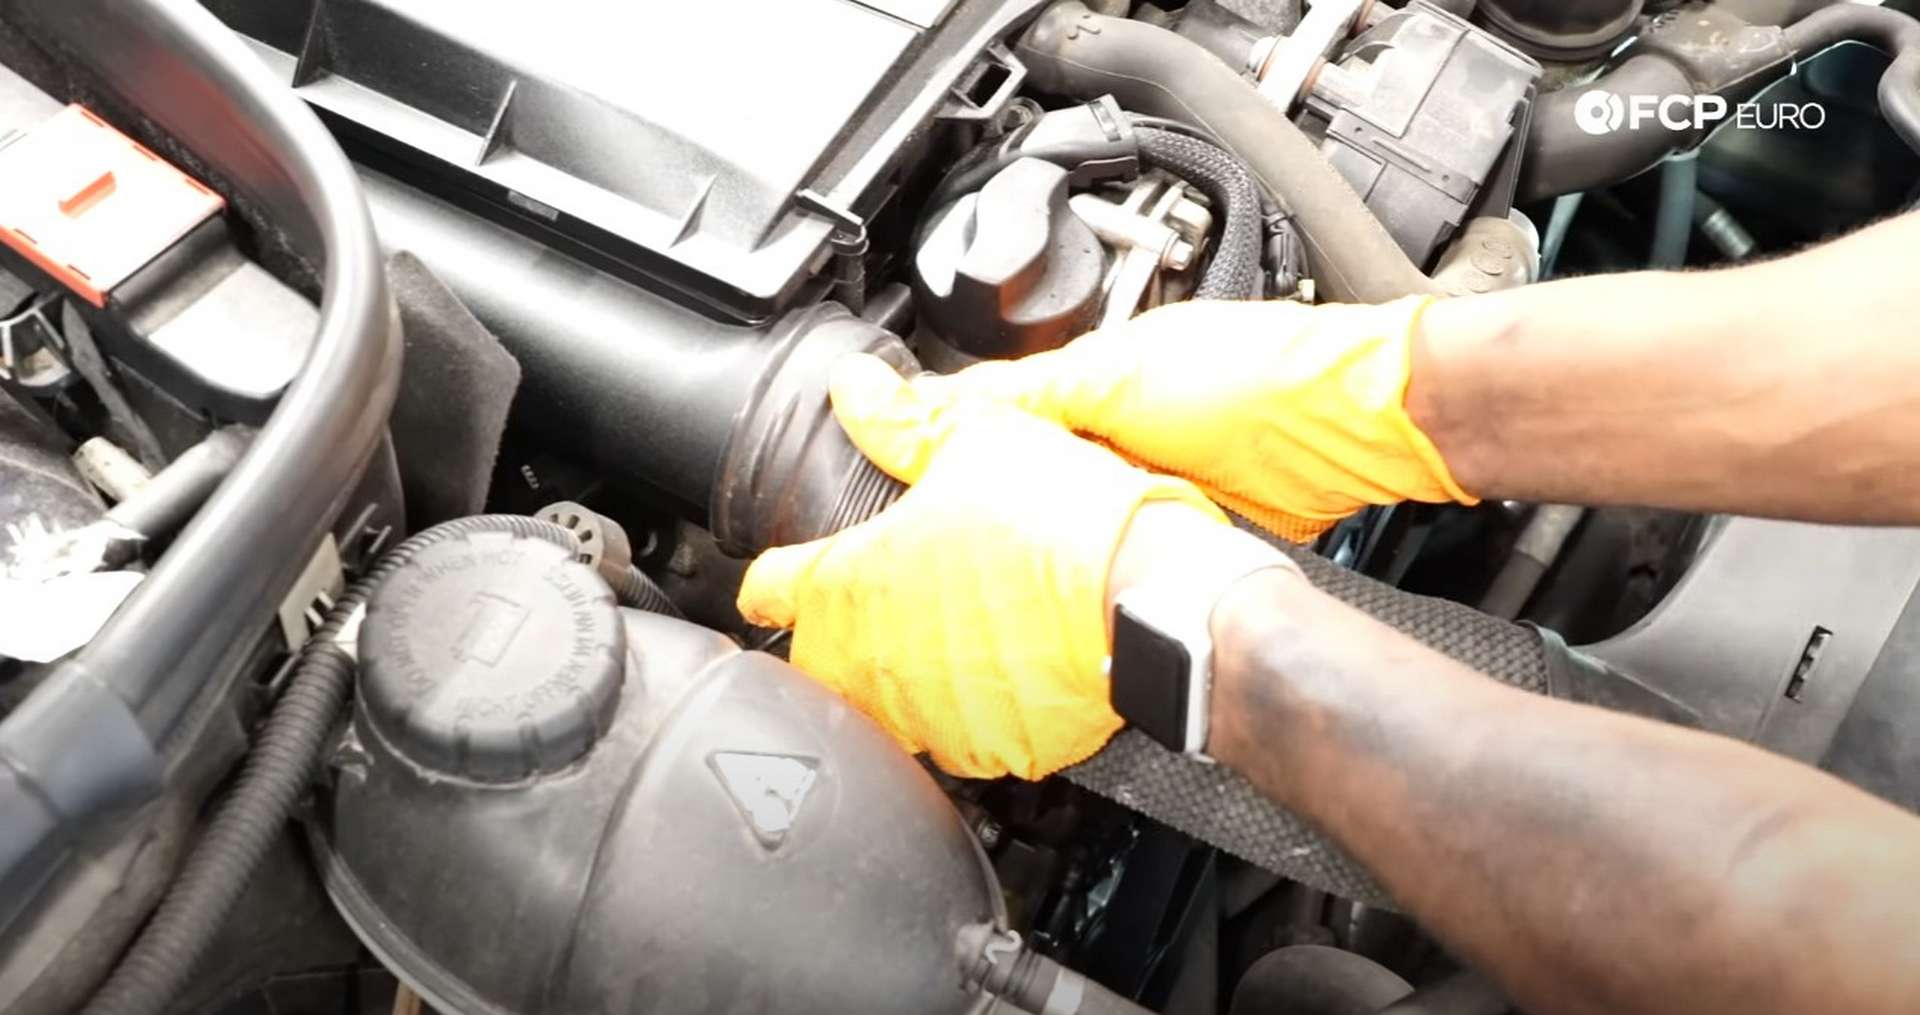
Next, remove the front portion of the engine cover. Simply pull it off of its locating pins and set it aside. Then, remove the passenger’s side intake snorkel. Pinch the engine side of the intake and wiggle it back to free it from the engine. Then, push down the tab on the other end and pull it up to remove it from the engine bay.
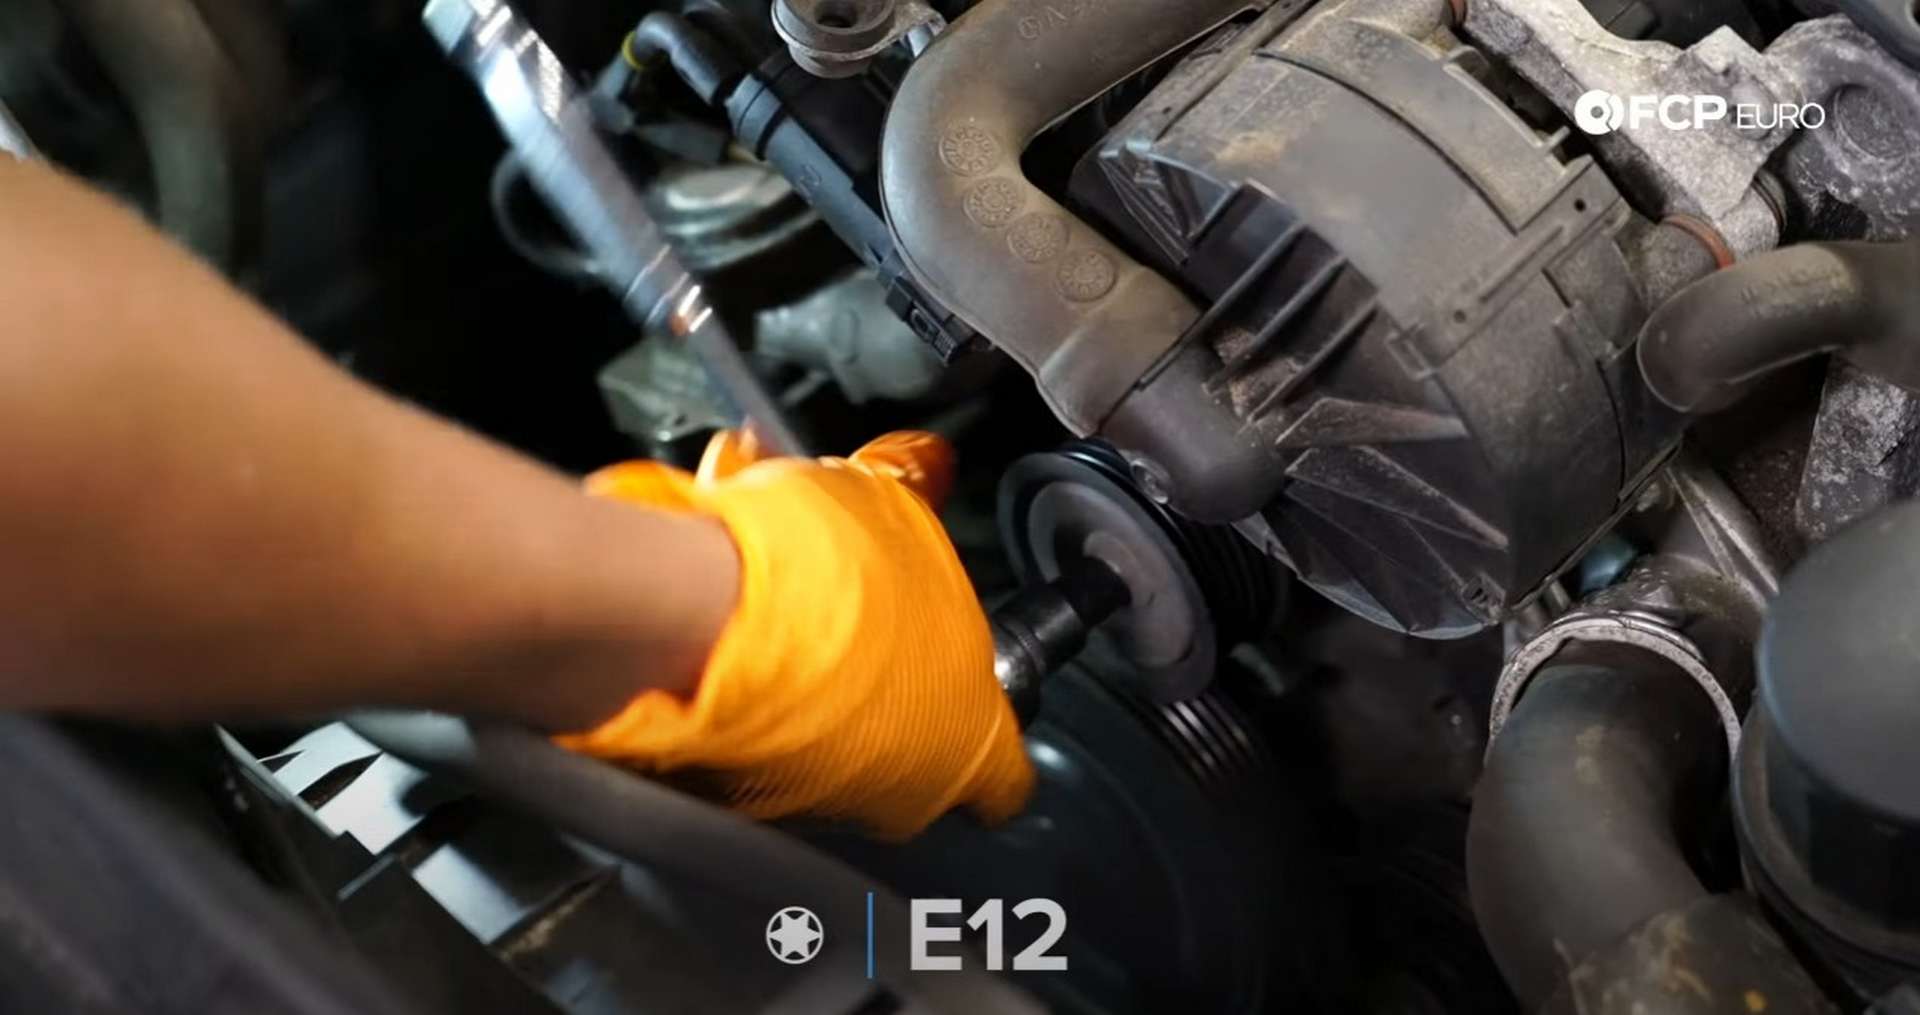
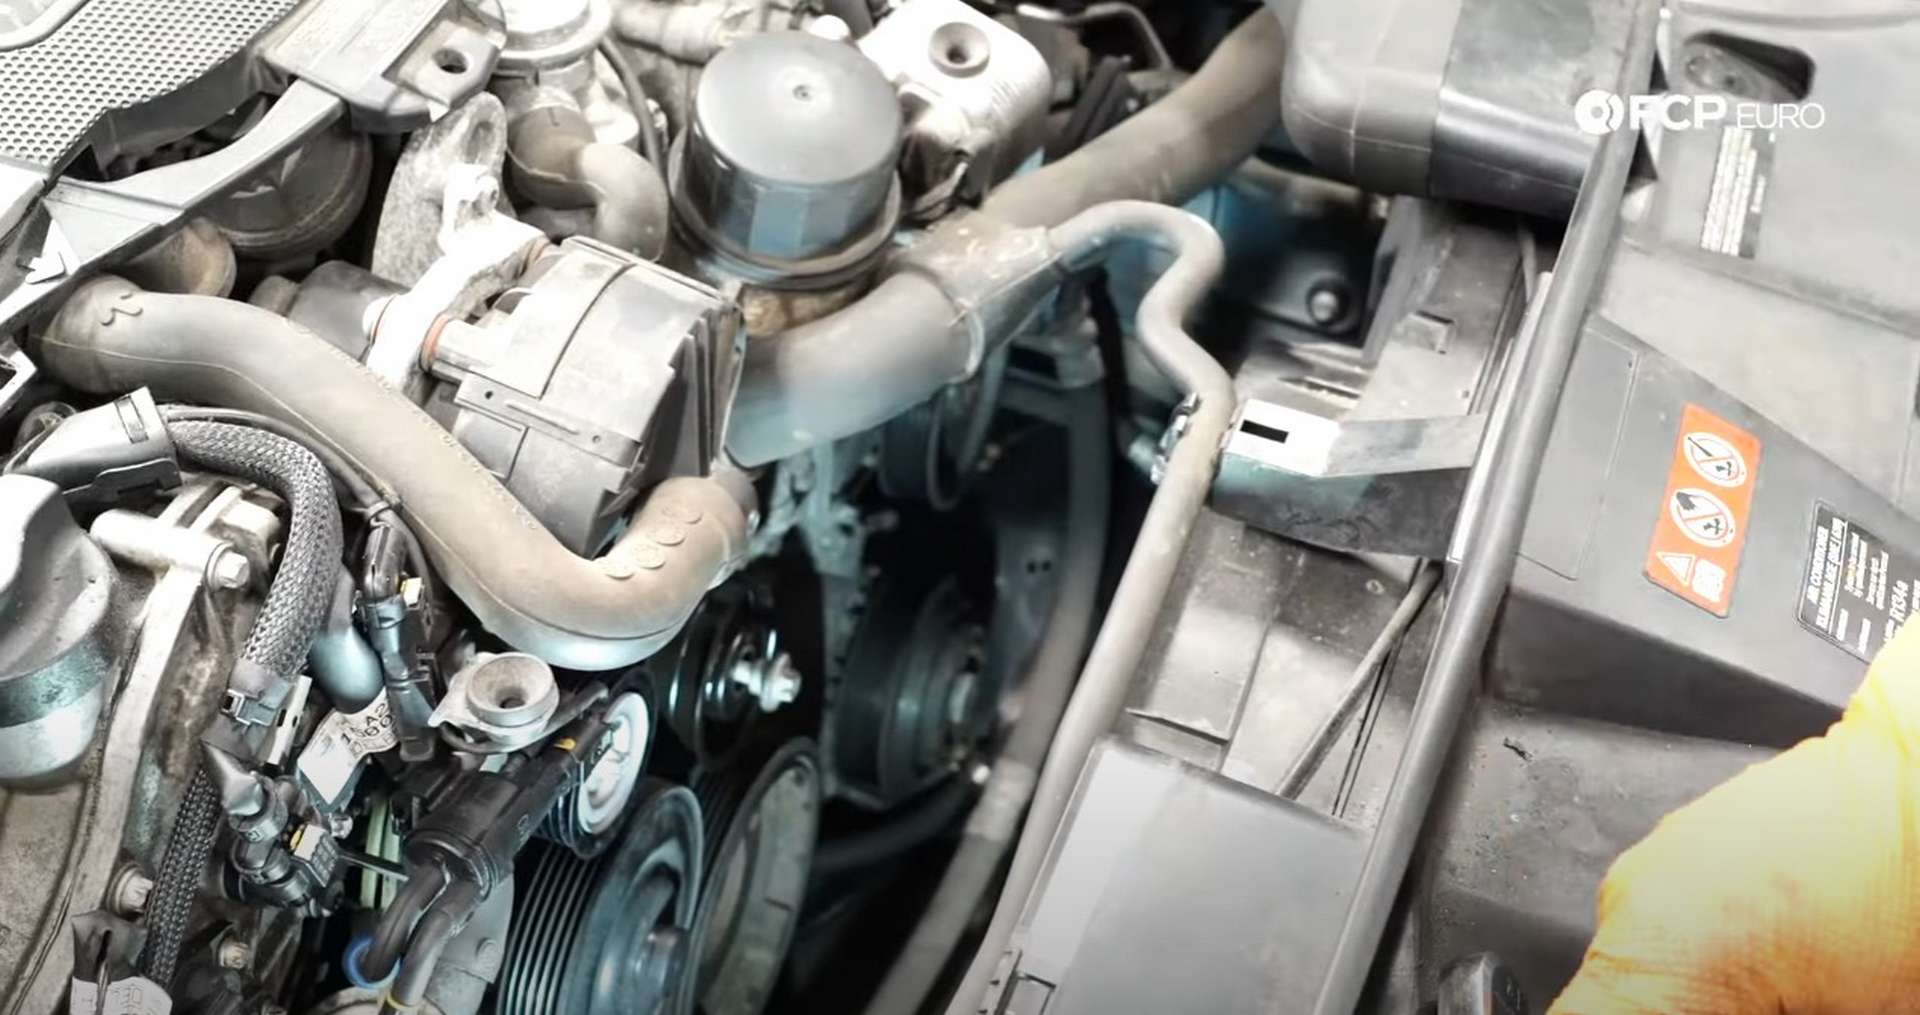
With the intake out of the way, use a pair of diagonal cutters to cut the drive belt, then pull the old belt out. Next, use an E12 socket to remove the idler pulley that sits on the water pump.
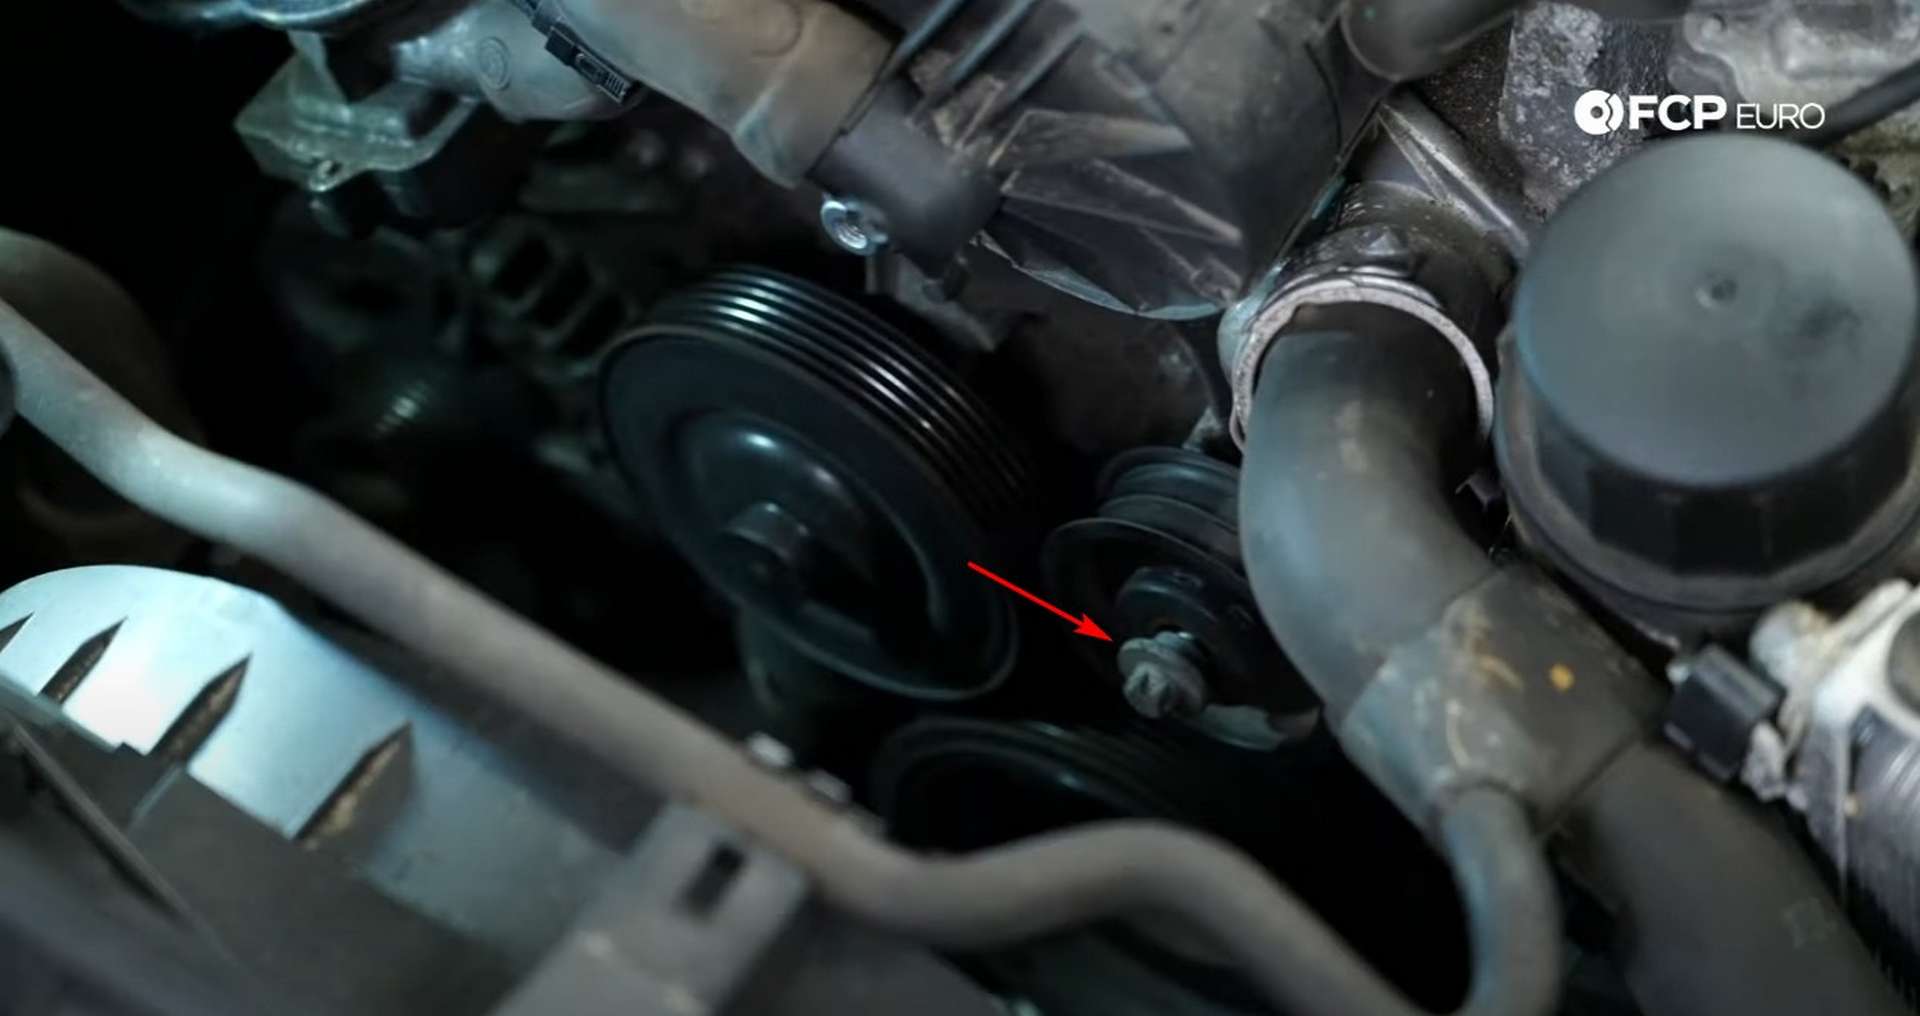
Use an E14 socket to remove the pulley below the engine’s water inlet. Below the second pulley is the belt tensioner. Loosen the exposed bolt with an E14 socket. Then use a 17mm socket to rotate and hold the tensioner counter-clockwise.
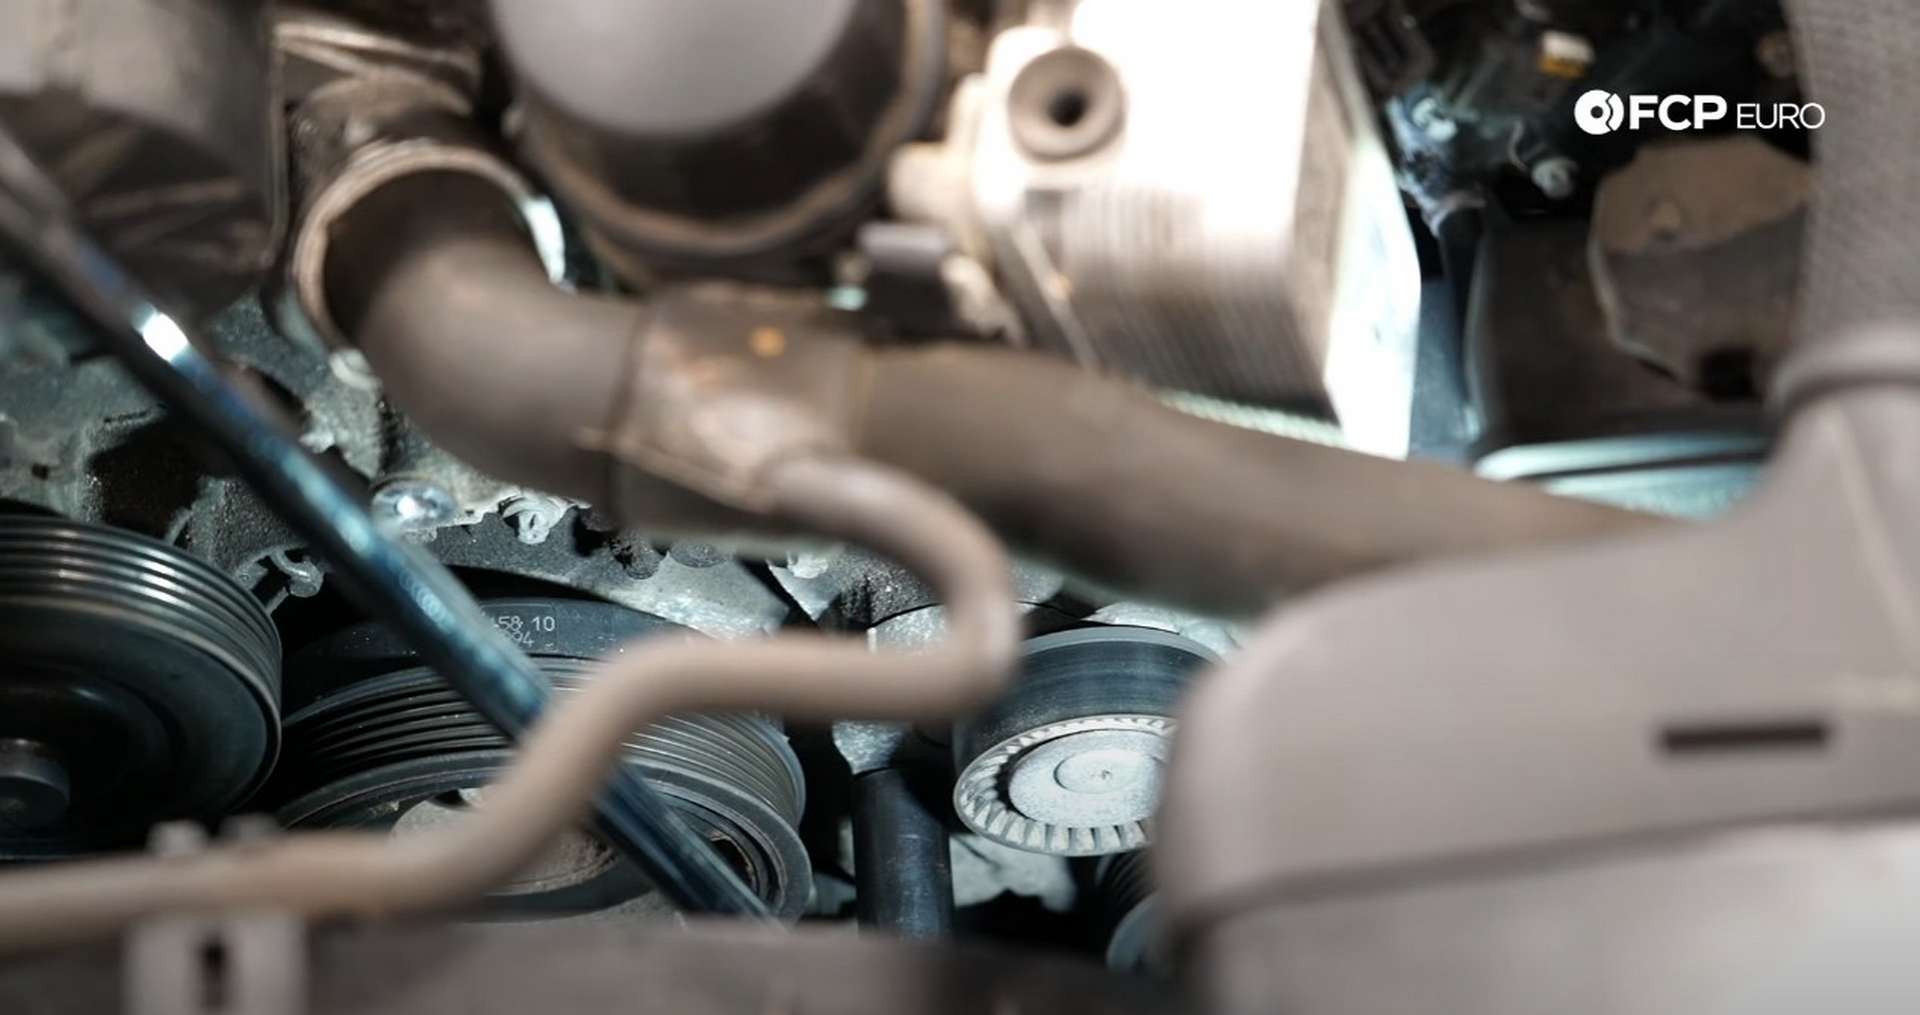
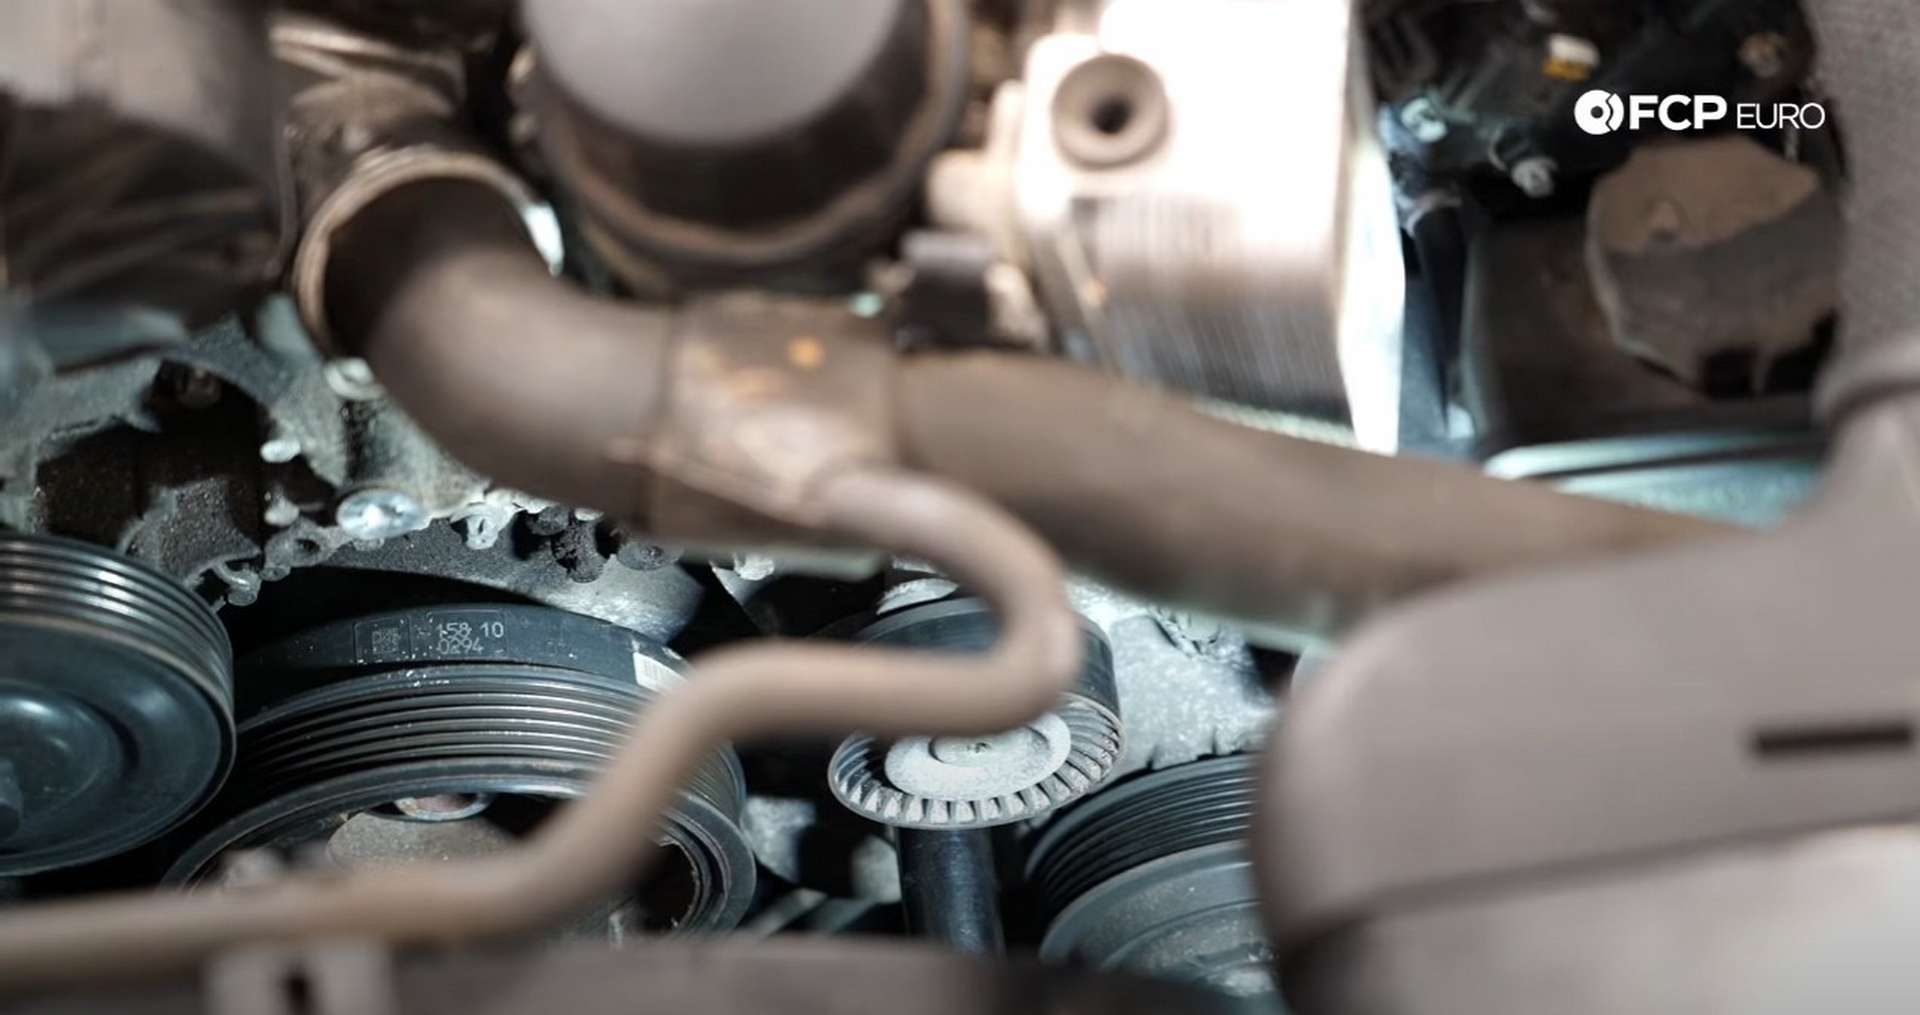
You won’t see it, but there is a raised section on the portion of the tensioner that rotates. As you rotate the tensioner, that raised section will move past a hole on the tensioner’s mounting flange. Place a 5mm hex-wrench into the flange’s hole and then release the hold on the tensioner. The raised section will hit the hex-wrench, preventing it from rotating and giving you access to the other bolt that mounts the tensioner to the engine.
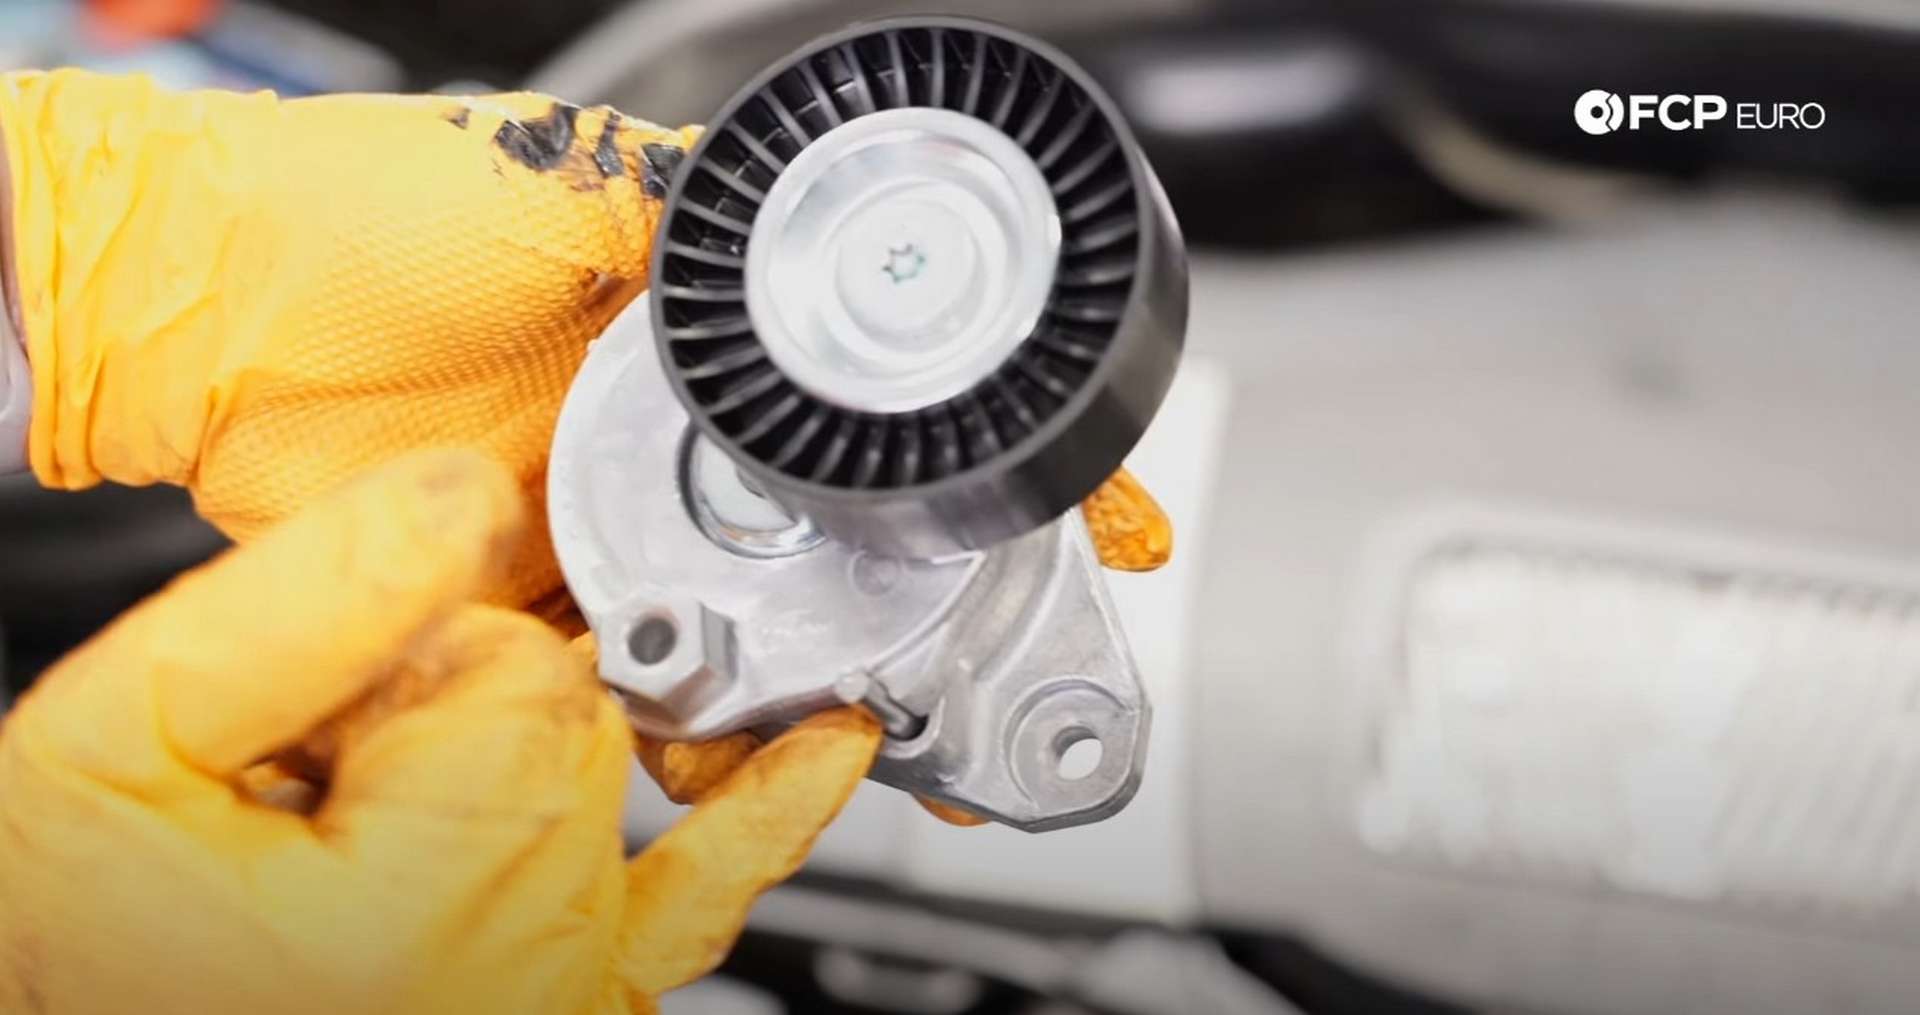

Use an E14 socket to remove the tensioner’s two mounting bolts. After that, check the condition of the two pulleys and the tensioner by spinning them. The bearings inside the pulleys are supposed to be nearly silent. If you hear any gritty or crunchy noises as they spin, the bearings are wearing out, and you’ll need to replace them.
Step 2: Remove the alternator
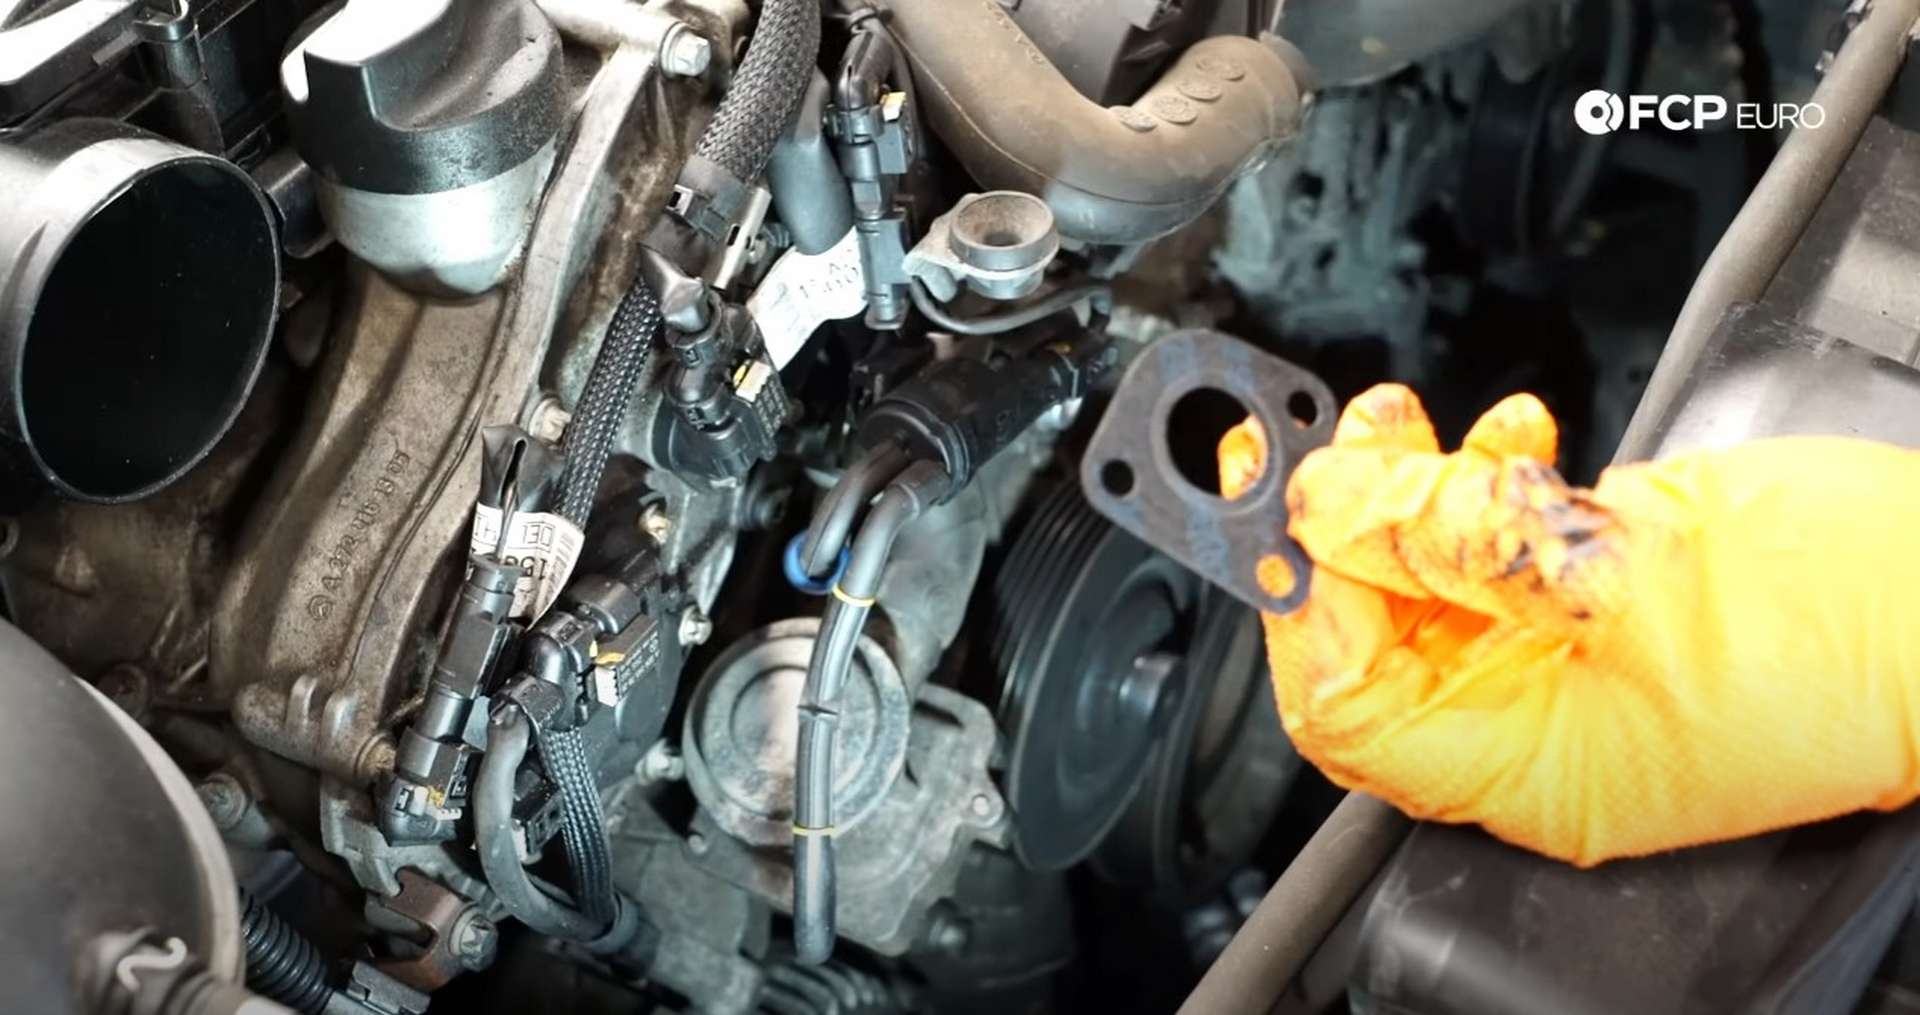
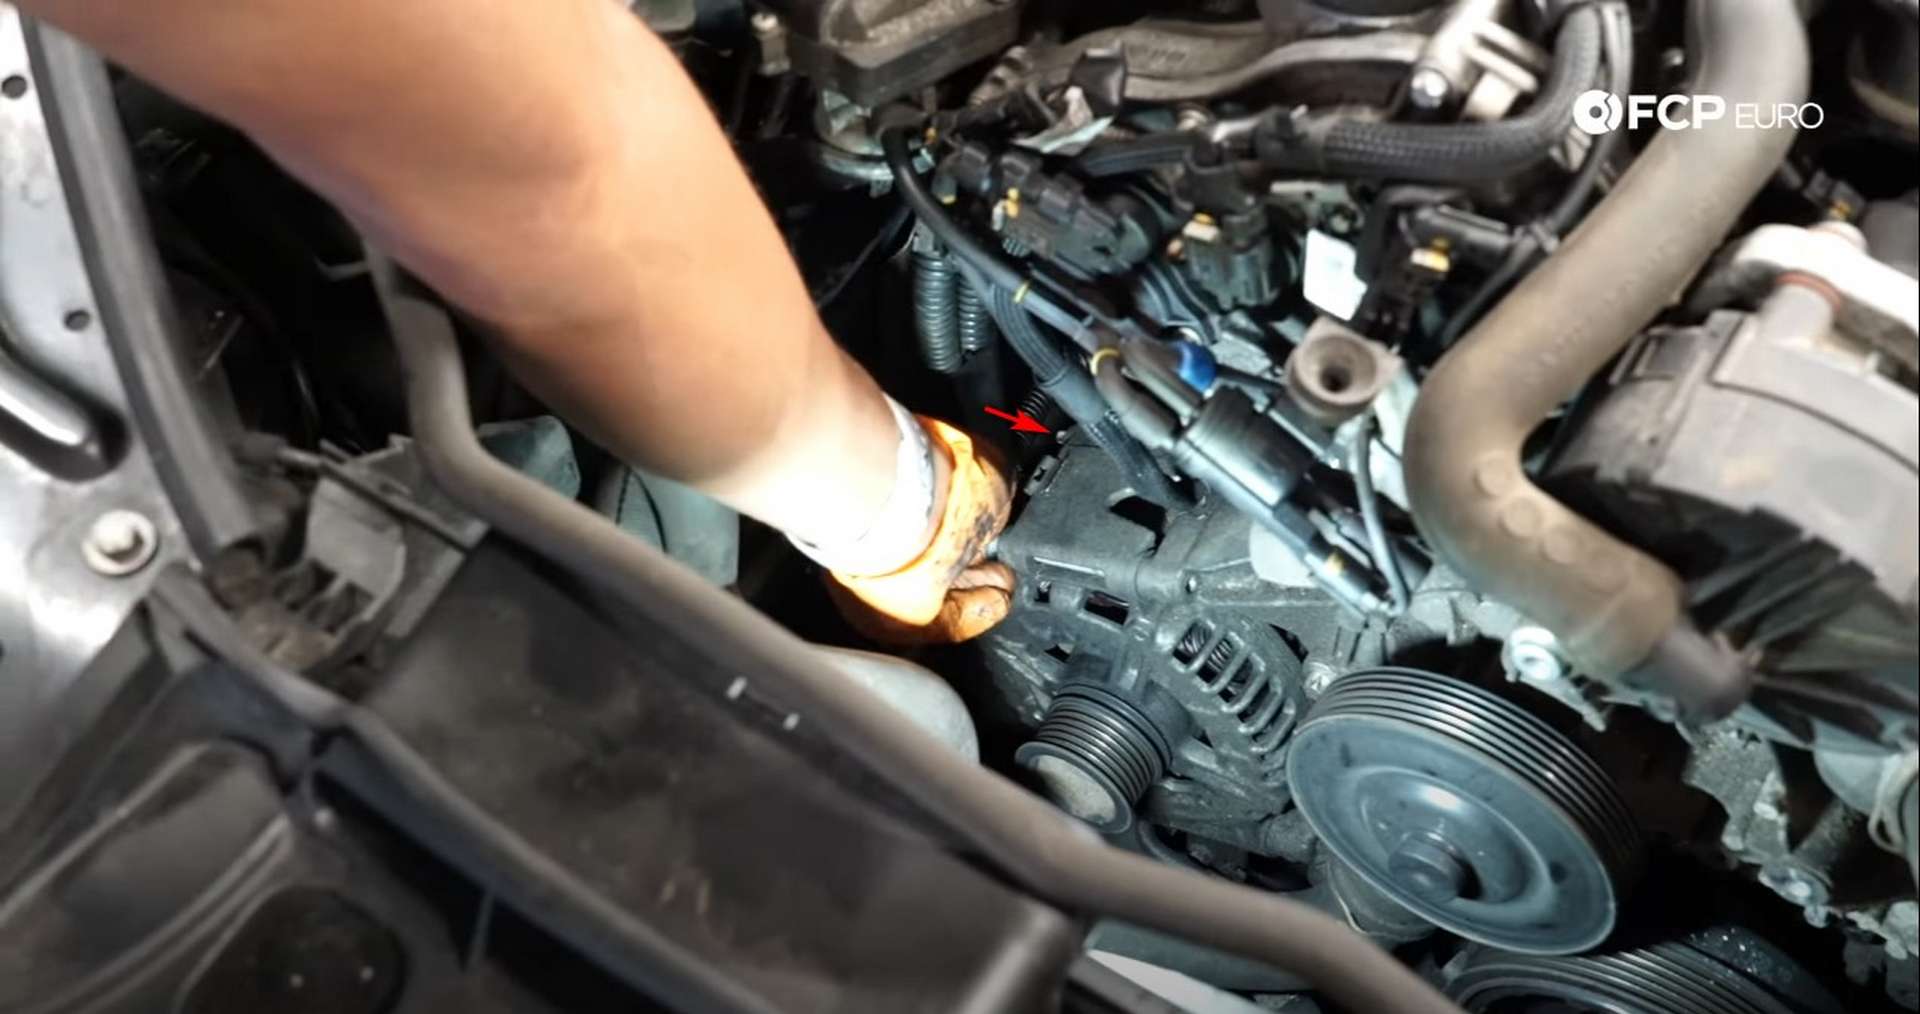
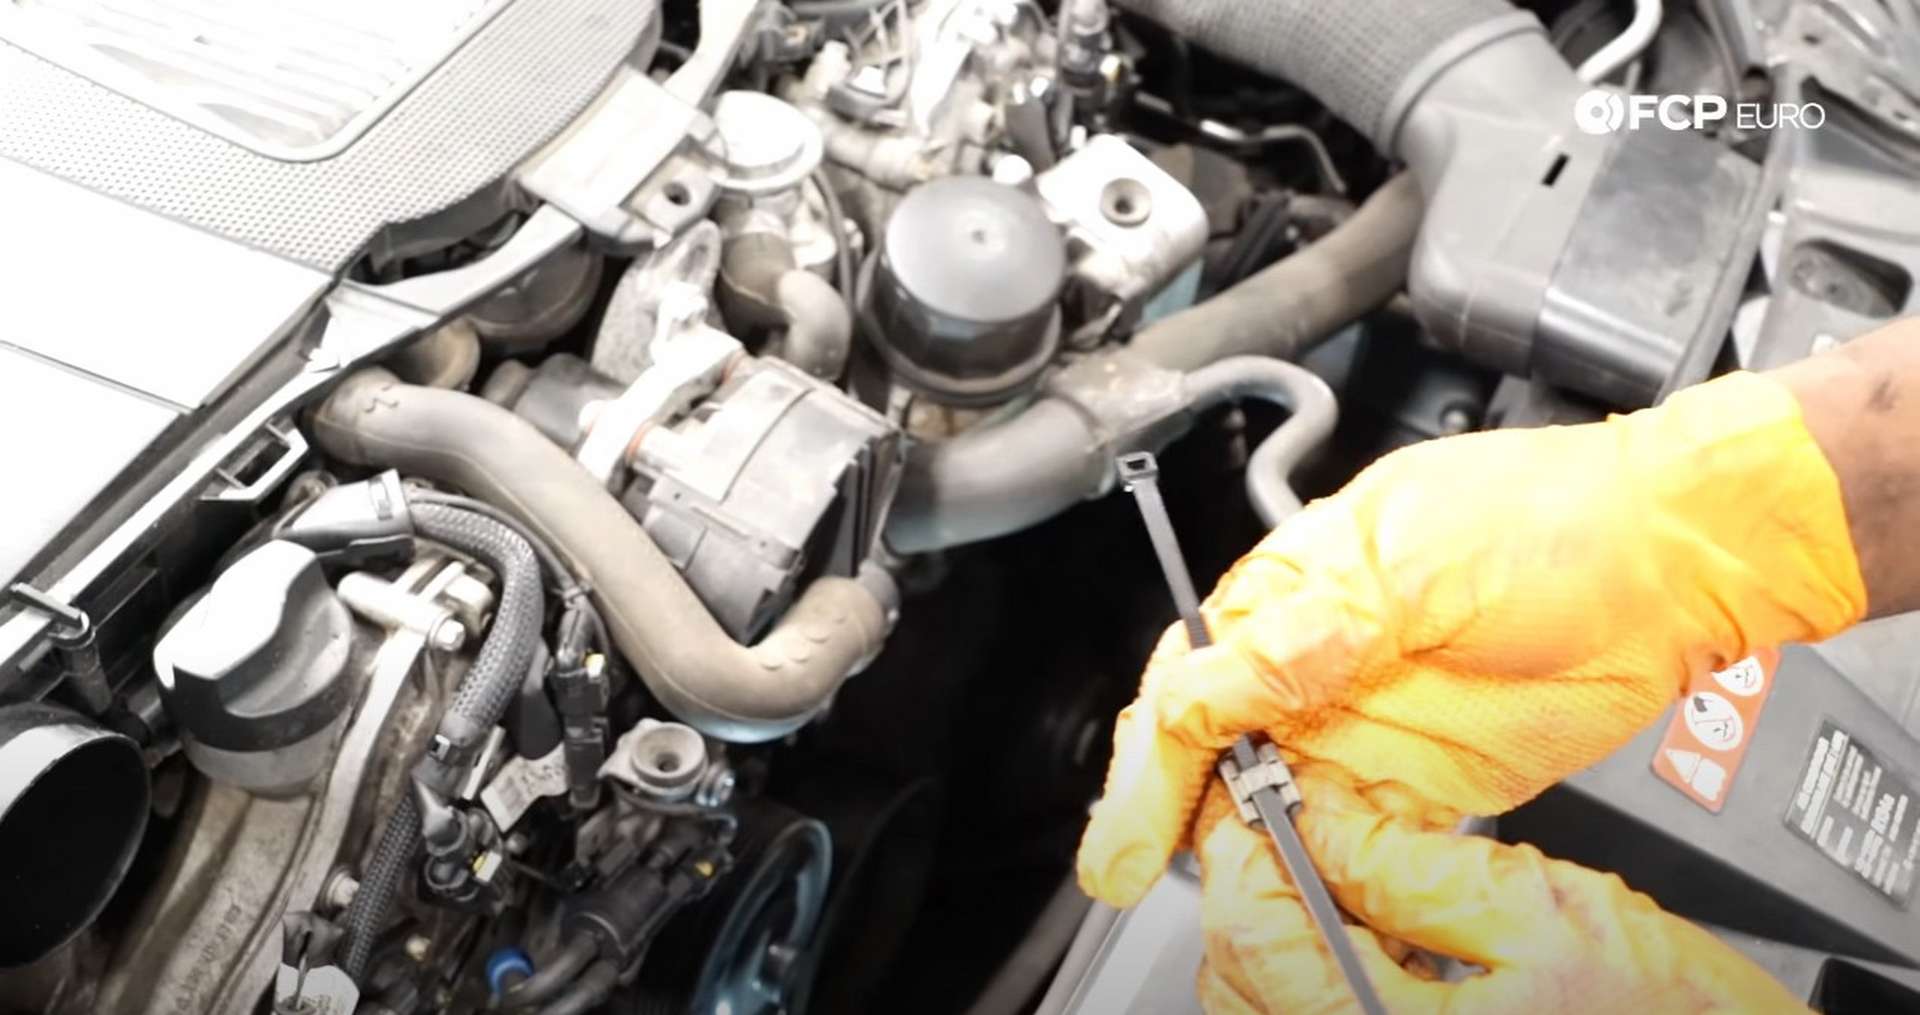
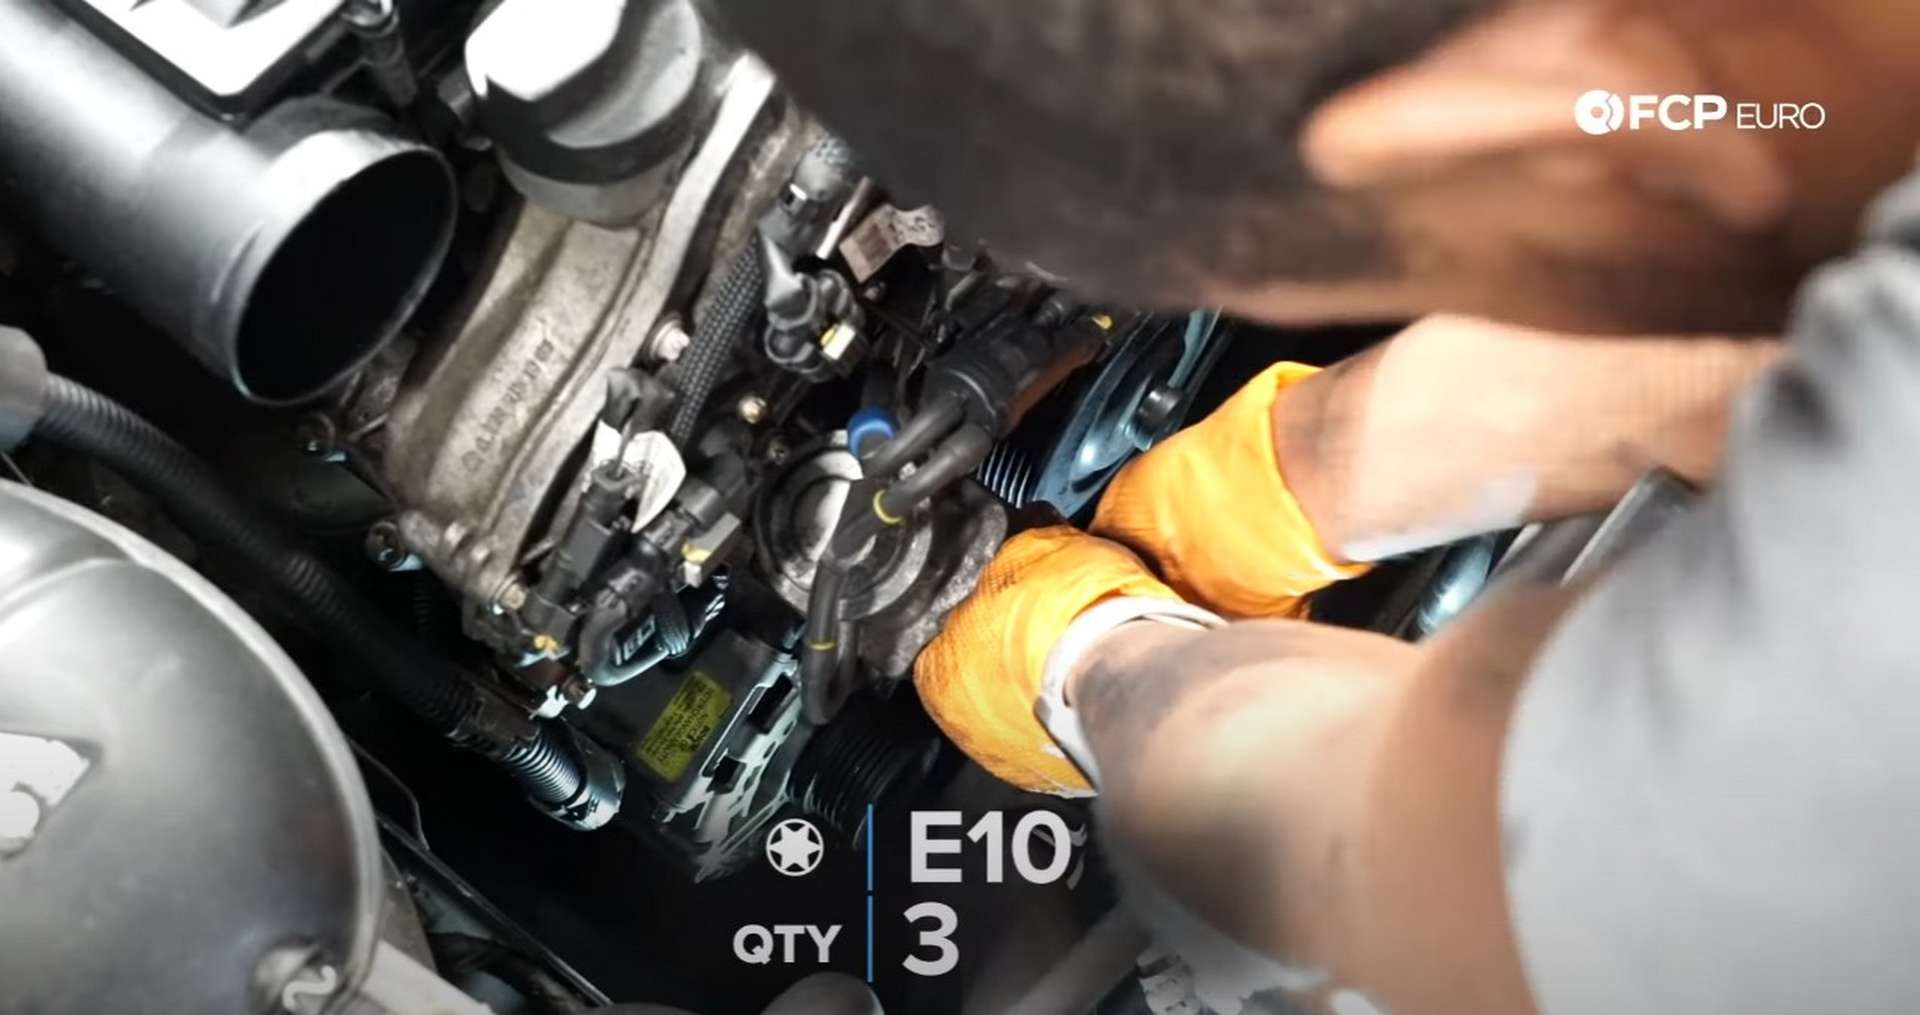
Mounted at the front of the passenger’s side cylinder bank is the combi valve. Use an E10 socket to remove its three mounting bolts.
The valve will stay connected to the engine via the vacuum lines connected to it. Follow the lines up to the black changeover valve above the combi valve, then slide the changeover valve out of its bracket. Next, disconnect the large air hose on the right side of the combi valve and then swing the valve up and out of the way.
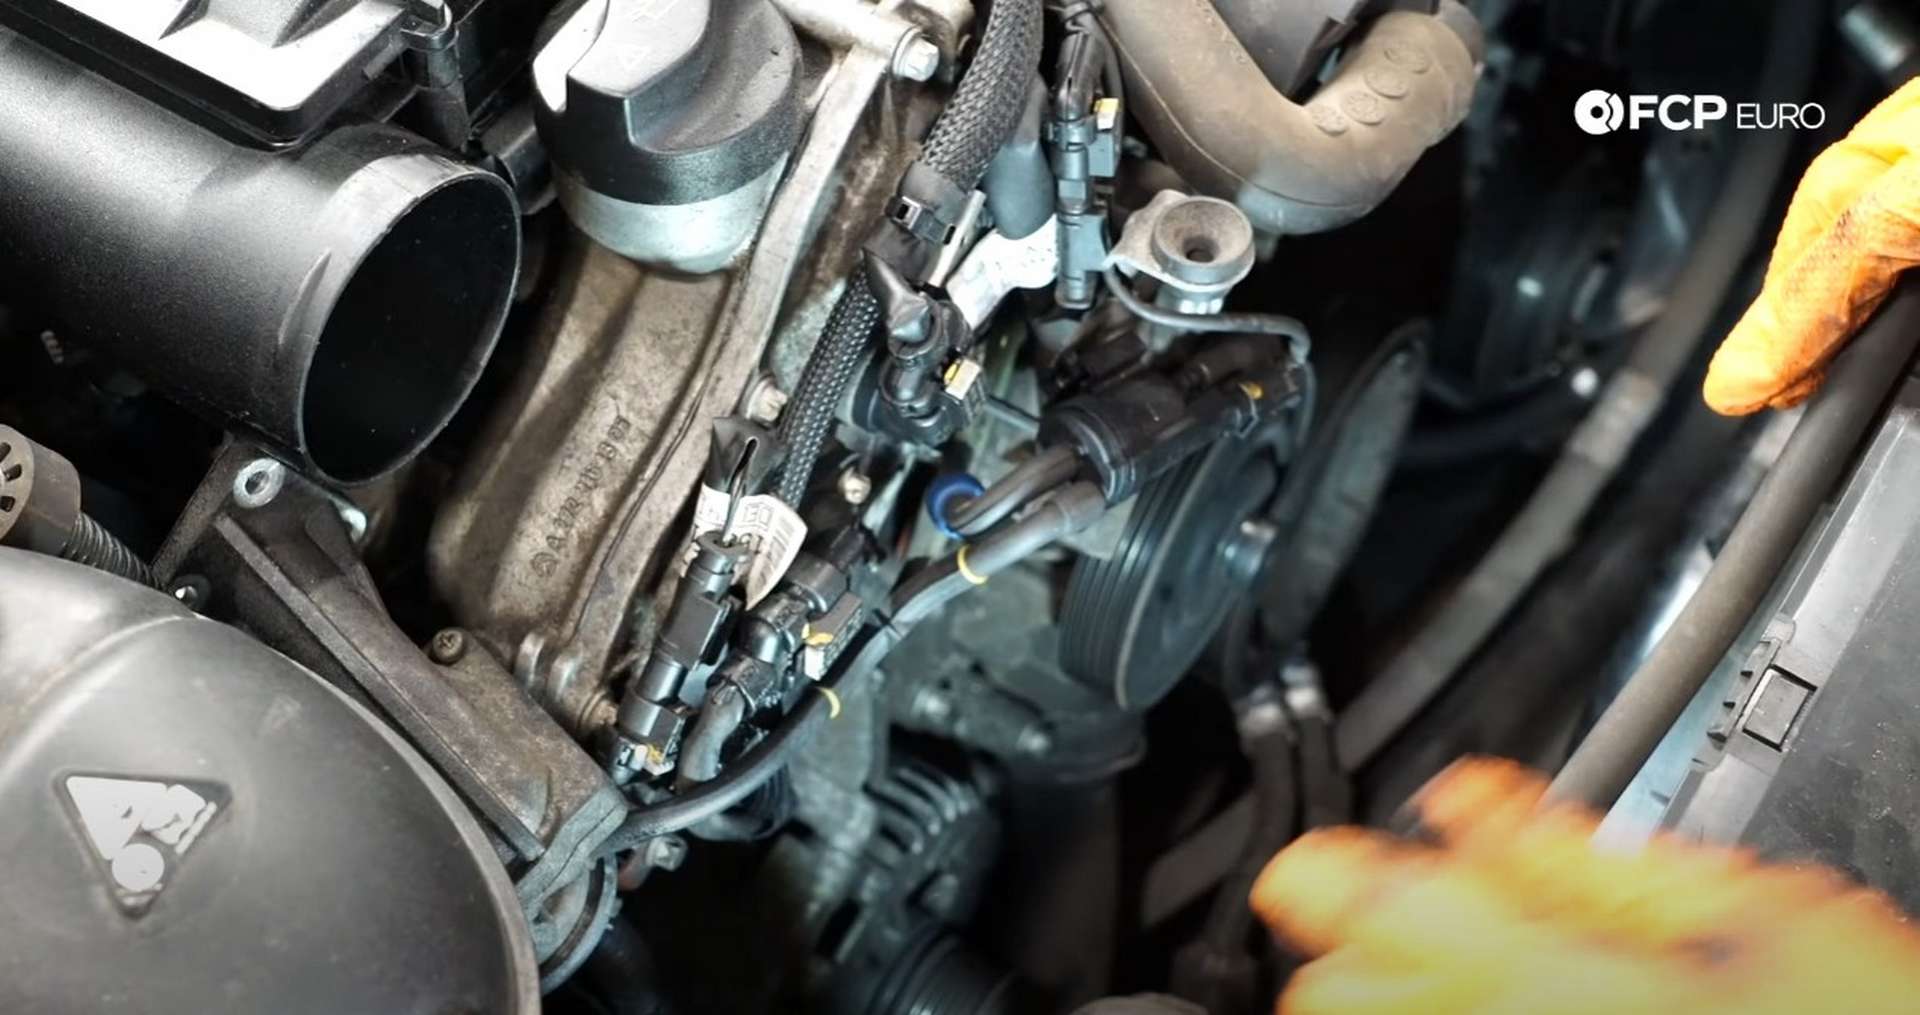
The alternator sits below those valves. A wiring harness is zip-tied to the left side of the alternator. Use a flathead screwdriver to remove it from the spring clip holding it to the alternator, or cut it with some diagonal cutters.
Use an E12 socket to break the top two alternator bolts loose. Once they are cracked loose, they can be threaded out by hand.

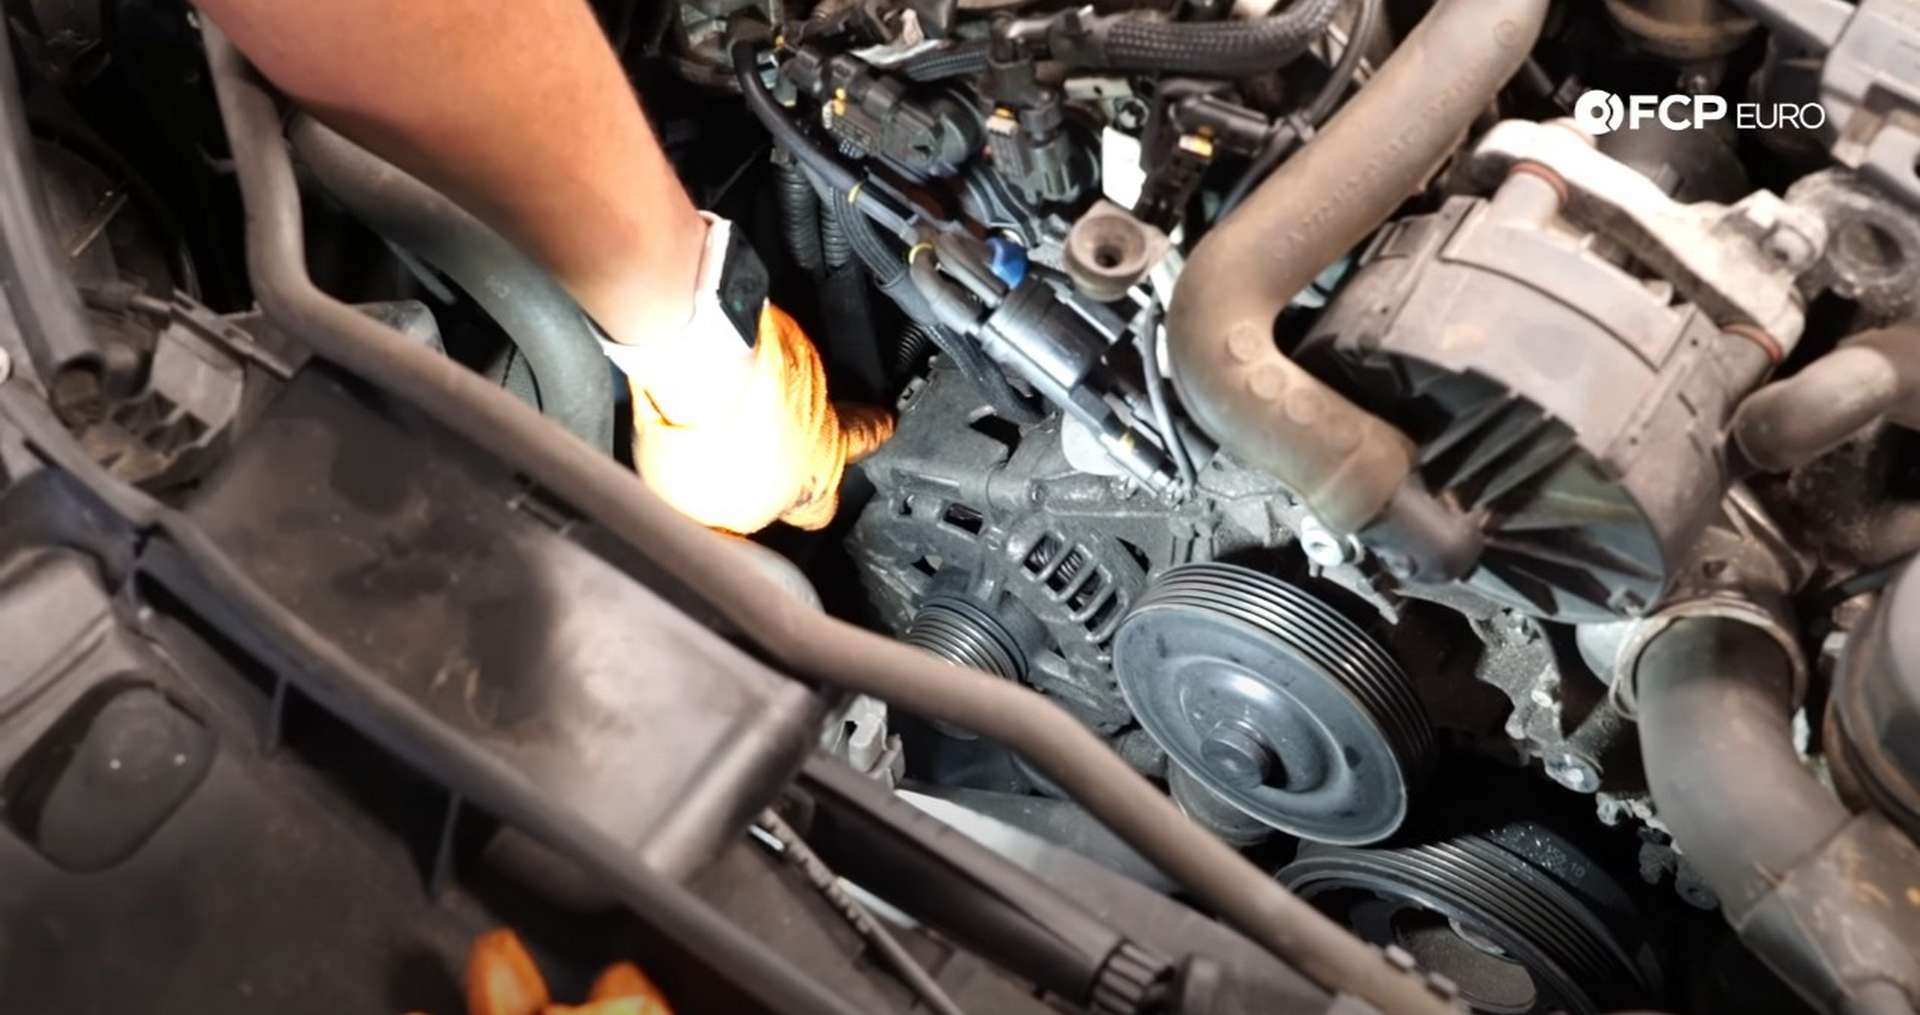
The lower alternator bolts sit below the alternator in the same relative position as the top pair. There is hardly any room to work, so use a 10mm wrench to break the bolts loose. You can also reach the bolts from under the car if you remove the splash shields.
With the bolts out, slide the alternator forward and rotate it so you have access to the back of it. First, disconnect the electrical plug for the voltage regulator. Then remove the protective cap and use a 13mm socket to remove the nut securing the battery lead to the alternator.
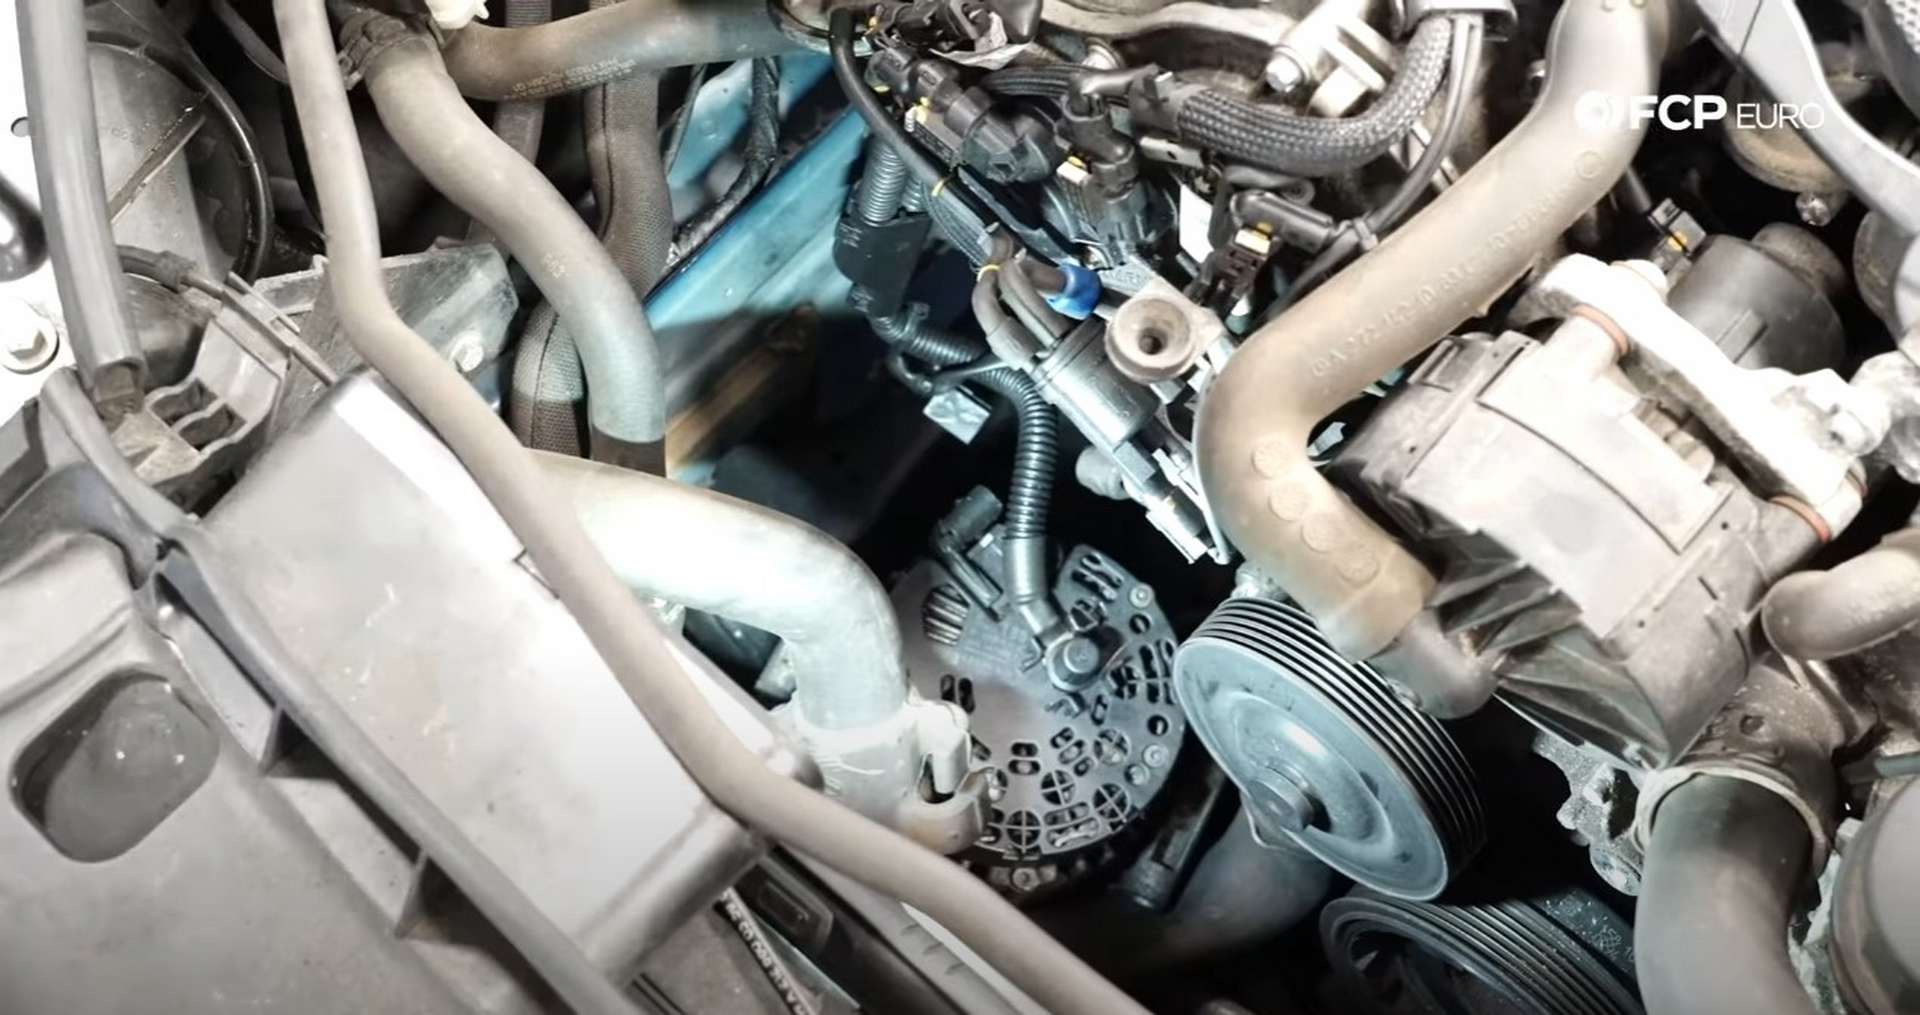
Push the battery lead aside and pull the alternator out of the engine bay.
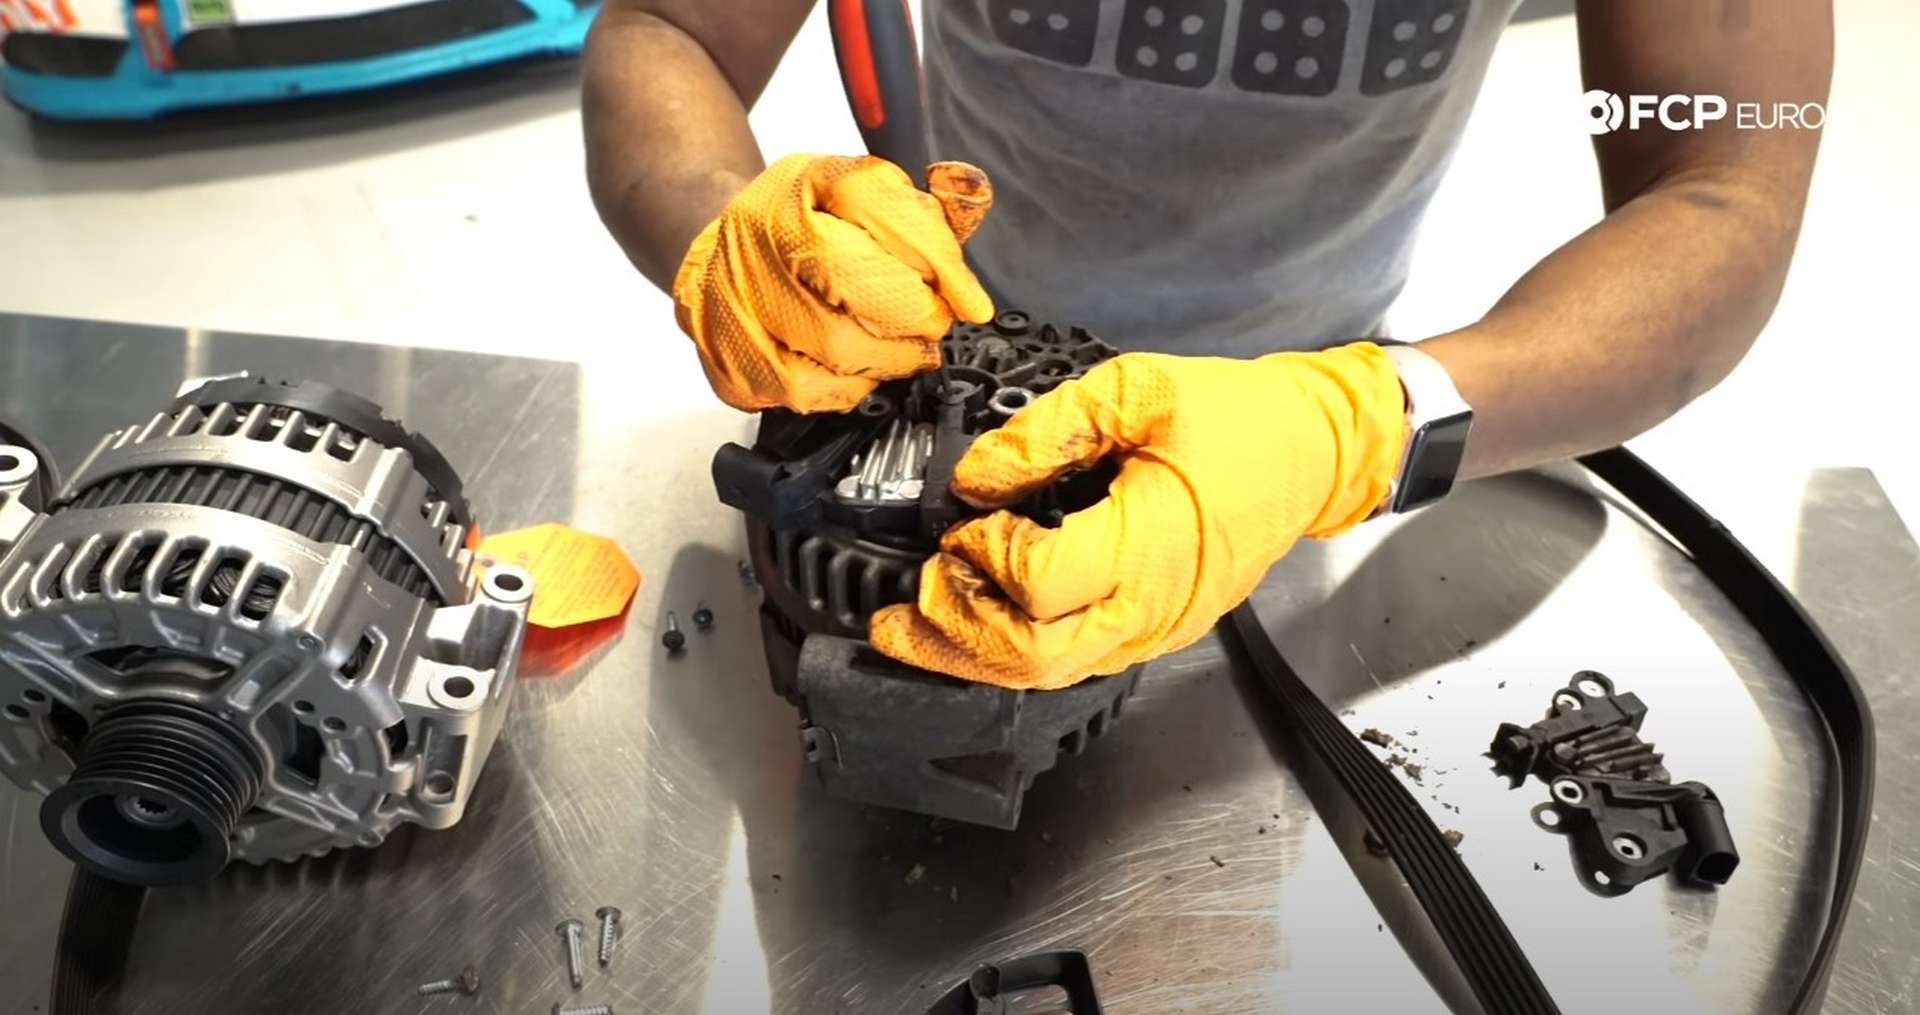
Step 3: Replace the voltage regulator
Follow this step on how to replace the voltage regulator if that was determined to cause the battery light. If you are replacing the entire alternator, skip this step and move down to the reinstallation.
Place the alternator onto a work surface with the pulley facing down. Then, use a T20 socket to remove the rear alternator cover’s four screws.
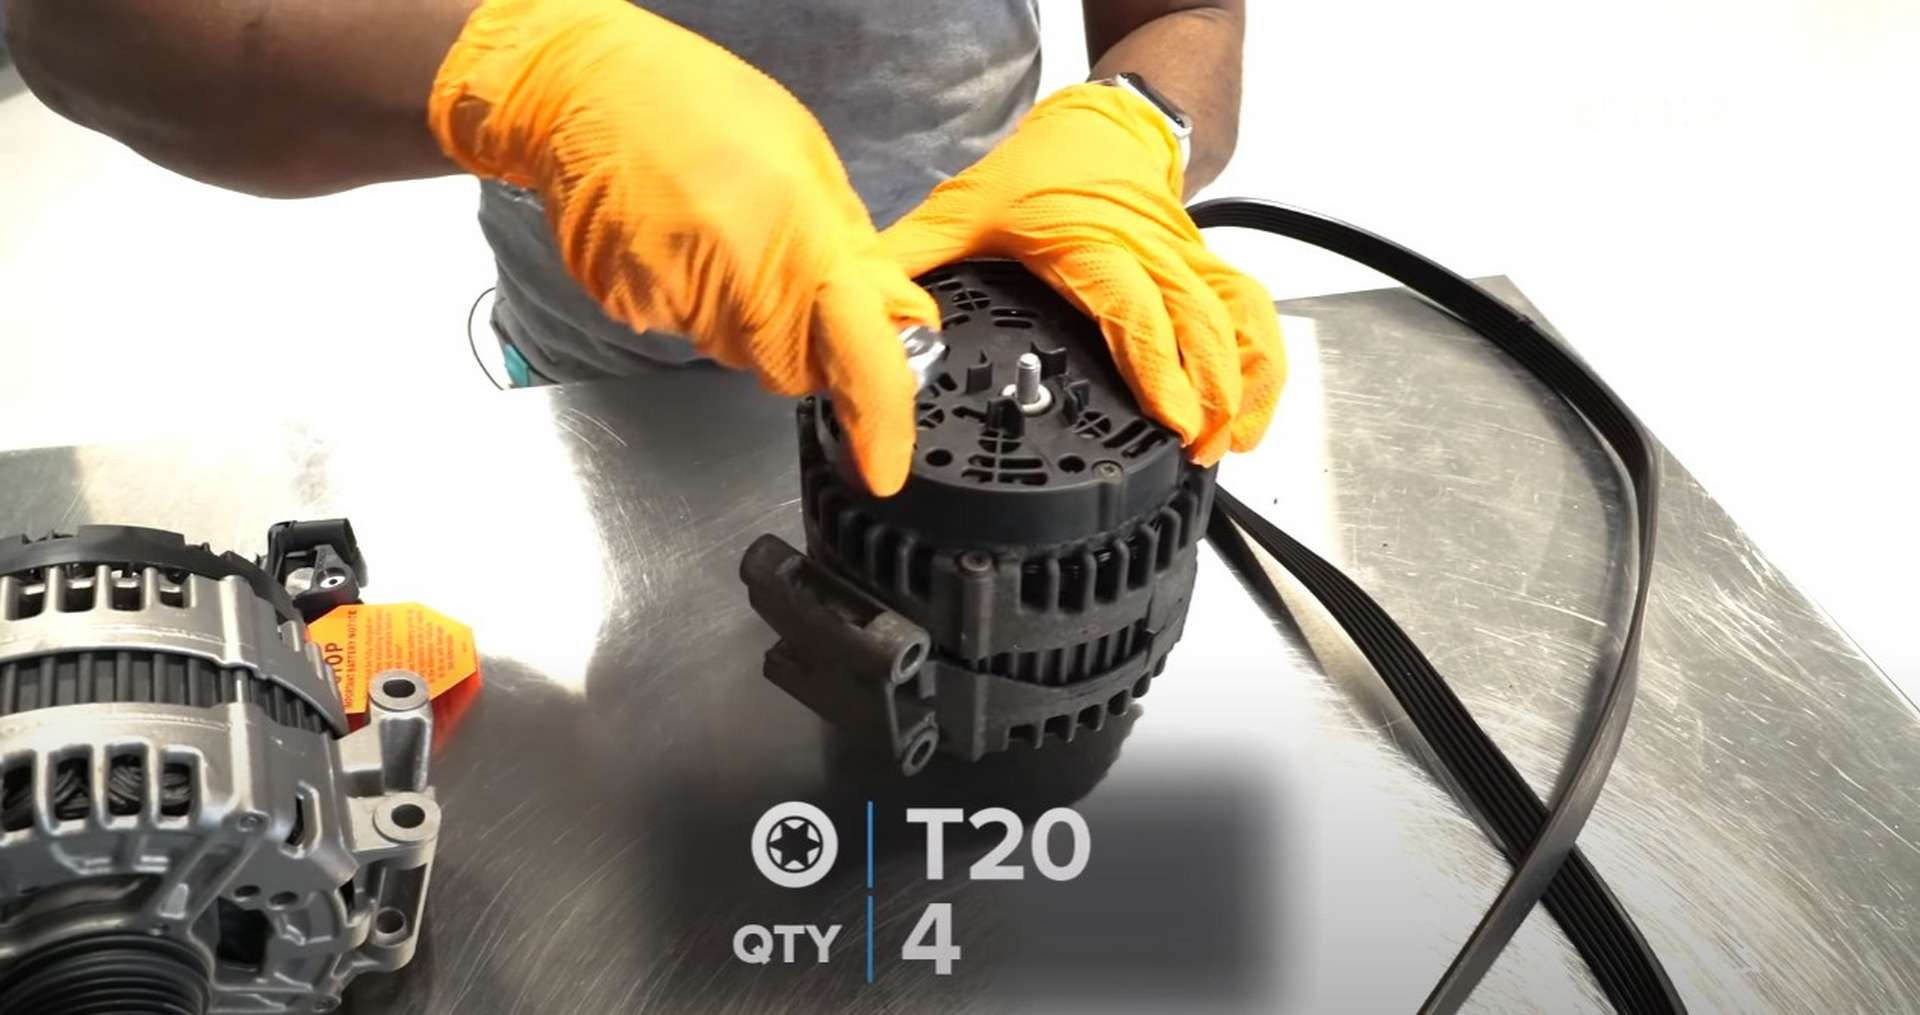
Next, remove the three screws that secure the voltage regulator to the alternator and then lift the old regulator out.
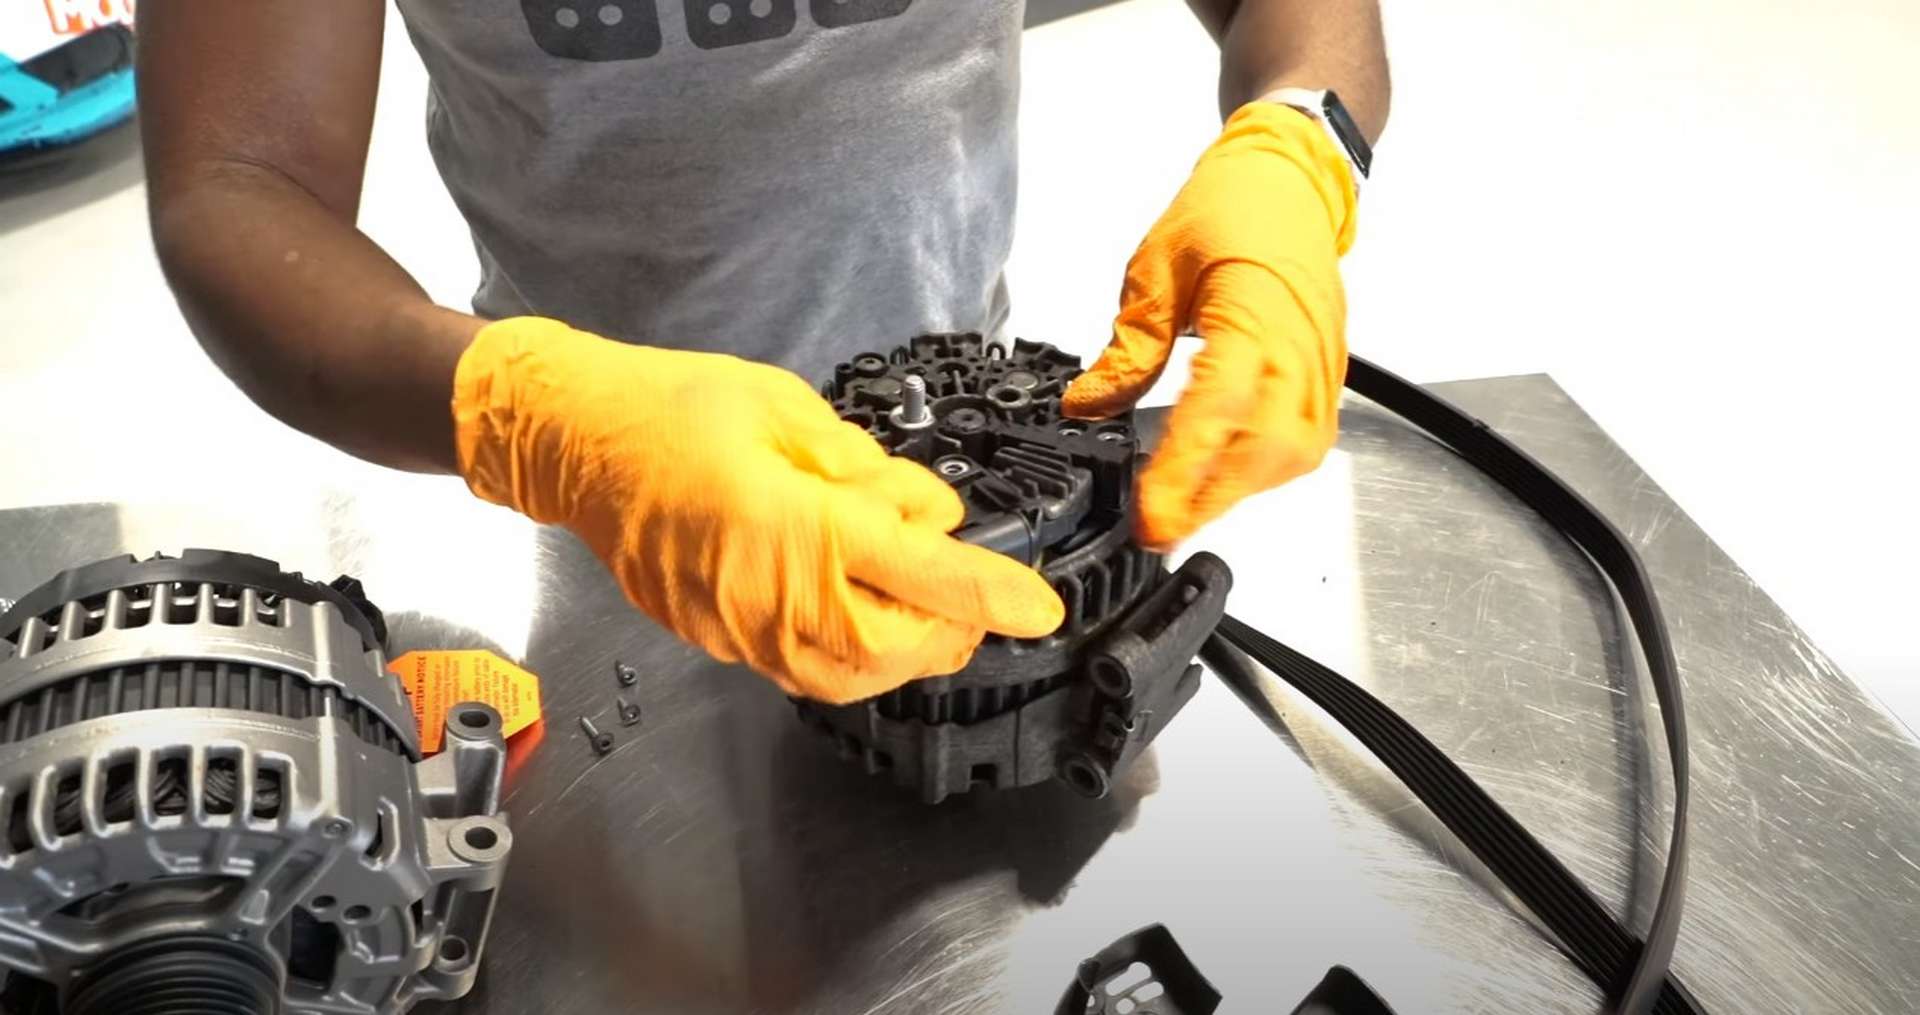
Use a small pick to push the regulator brushes away from the center shaft when you fit the new regulator to the alternator.
Once the new regulator is in, use a T20 socket to install the regulator’s mounting fasteners and then reinstall the cover, using the T20 socket for its mounting fasteners.
Step 4: Install the alternator
Slide the alternator past the engine with the rear-facing up. Remove the nut from the stud and reinstall the battery lead. Thread the nut on and use a 13mm socket to tighten it down. Reuse the original nut if the replacement is another size. Then, put the protective cap onto the nut and reconnect the voltage regulator.
Get the Alternator into position against the timing cover and thread in the four mounting bolts by hand. Once they’re all threaded in, use a 13mm wrench or E12 socket to tighten them. Next, remove the spring clip from the old alternator.

Slide a new zip-tie through the clip and then place them onto the alternator. Use the zip-tie to secure the wiring harness to the alternator.
Before reinstalling the belt drive, refit the combi valve. Line up the valve and prepare the new gasket. Thread all three mounting bolts in by hand to prevent any cross-threading and ensure that the gasket is installed correctly. Then use an E10 socket to drive in the bolts.
After you secure the combi valve to the engine, refit the changeover valve into its bracket.
Step 5: Install the belt drive system
Take the idler pulley that mounts to the water pump and thread it on. Once the threads are engaged, use an E12 socket and a torque wrench to tighten and torque the bolts to 25Nm.
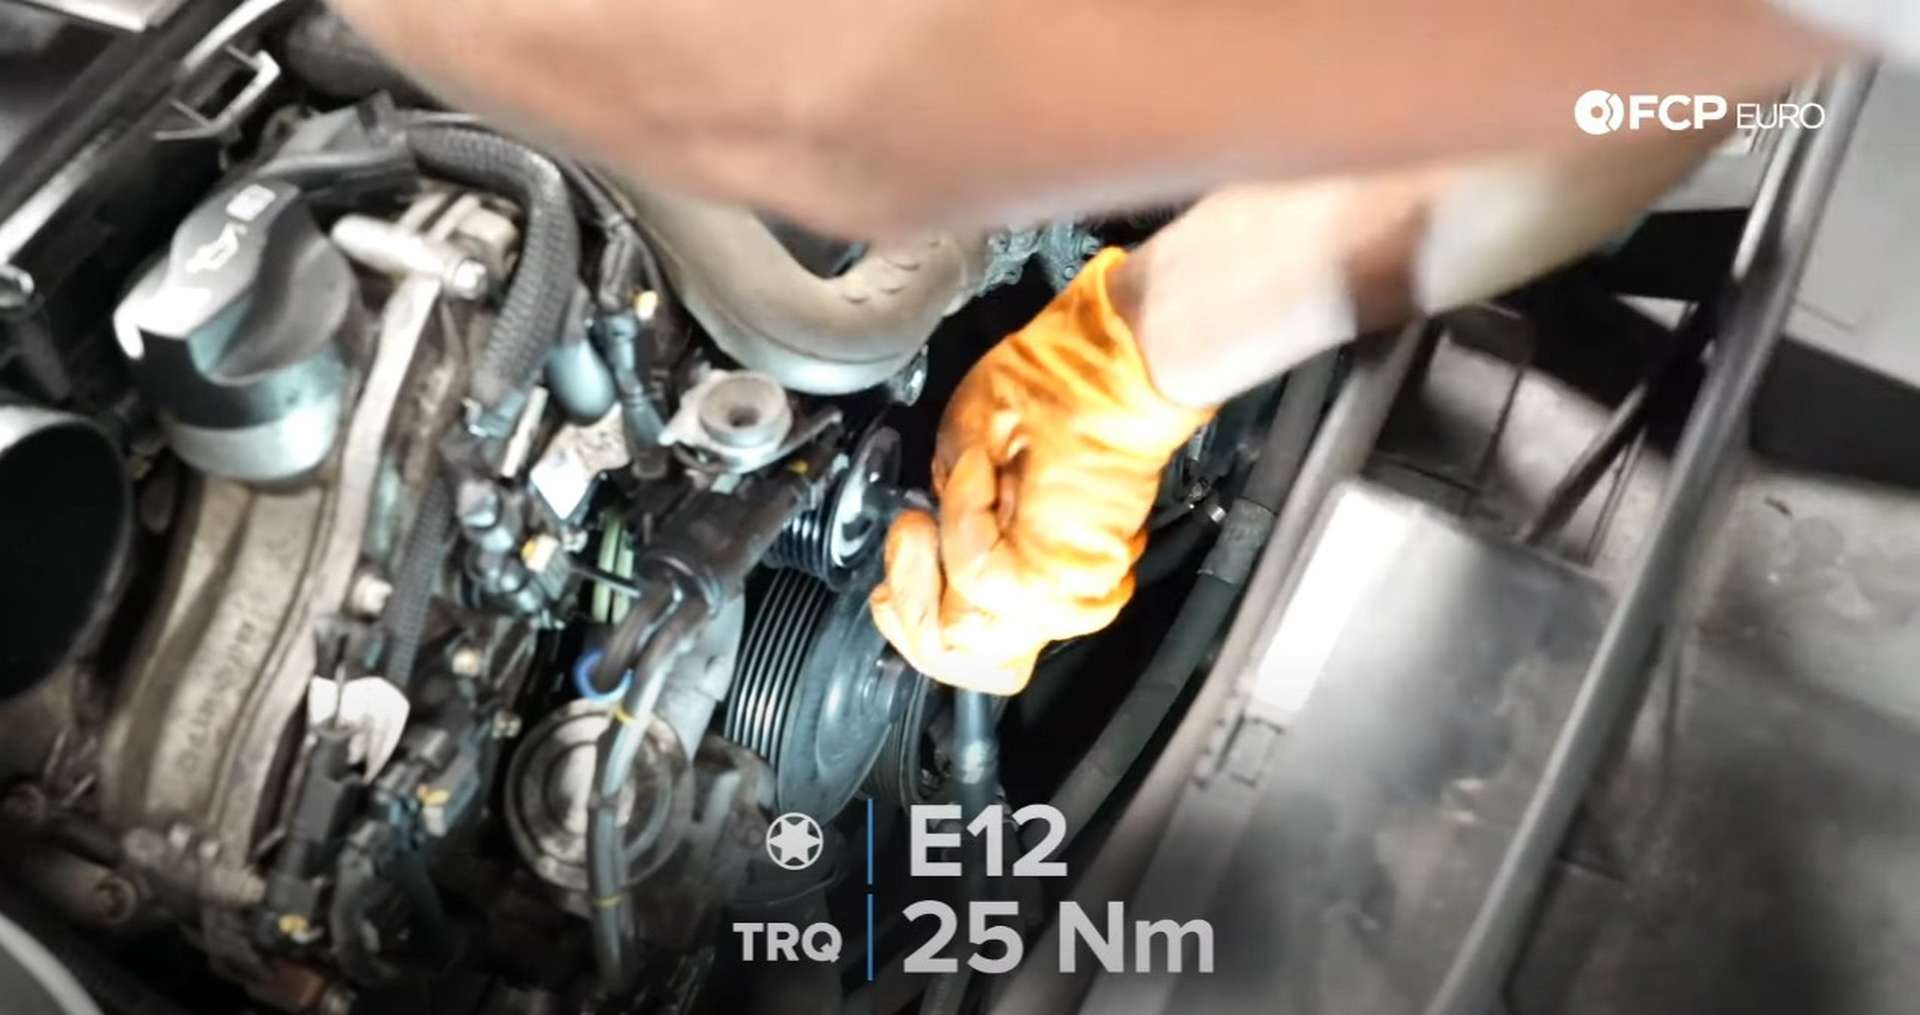
Reuse the bolt from the other idler pulley, if you are replacing it, and thread it onto the engine just below the water pump’s inlet. Use an E14 socket to tighten and torque the bolt to 25Nm.
Then move on to the belt tensioner. Thread in its two mounting bolts by hand to prevent cross-threading before using an E14 socket to tighten the bolts.
![DIY Mercedes W212/204 Alternator and Drive Belt Replacement installing the belt tensioner]](https://images.contentstack.io/v3/assets/blta5fd5c563cb3dbc3/bltc10adc573033e659/65cb4e01059f2cfd95b8753c/25-DIY-Mercedes-W212-Alternator-Belts_Replacing-Belt-Drive.jpg)
Now you’ll need to route the belt on the engine. Follow the diagram below for the proper belt routing.
With the belt routed, you can release the tensioner. Use a 17mm socket to rotate and hold the tensioner to the left. While holding it, remove the hex-wrench from the mounting flange. Then, let the tensioner rotate to the right and apply tension to the belt. Ensure that all of the ribs on the belt are seated properly on the pulleys.
Next, refit the intake snorkel to the engine. Clip the forward section in before connecting the rear of the hose to the rest of the intake system.
After that, reconnect the negative battery cable. Use a 10mm wrench or socket to tighten the cable to the battery post. Then, refit the airbox over the battery.
Step 6: Check the battery’s voltage
Head into the cabin and put the key into position one, or press the start button once without your foot on the brake, if you have keyless go.
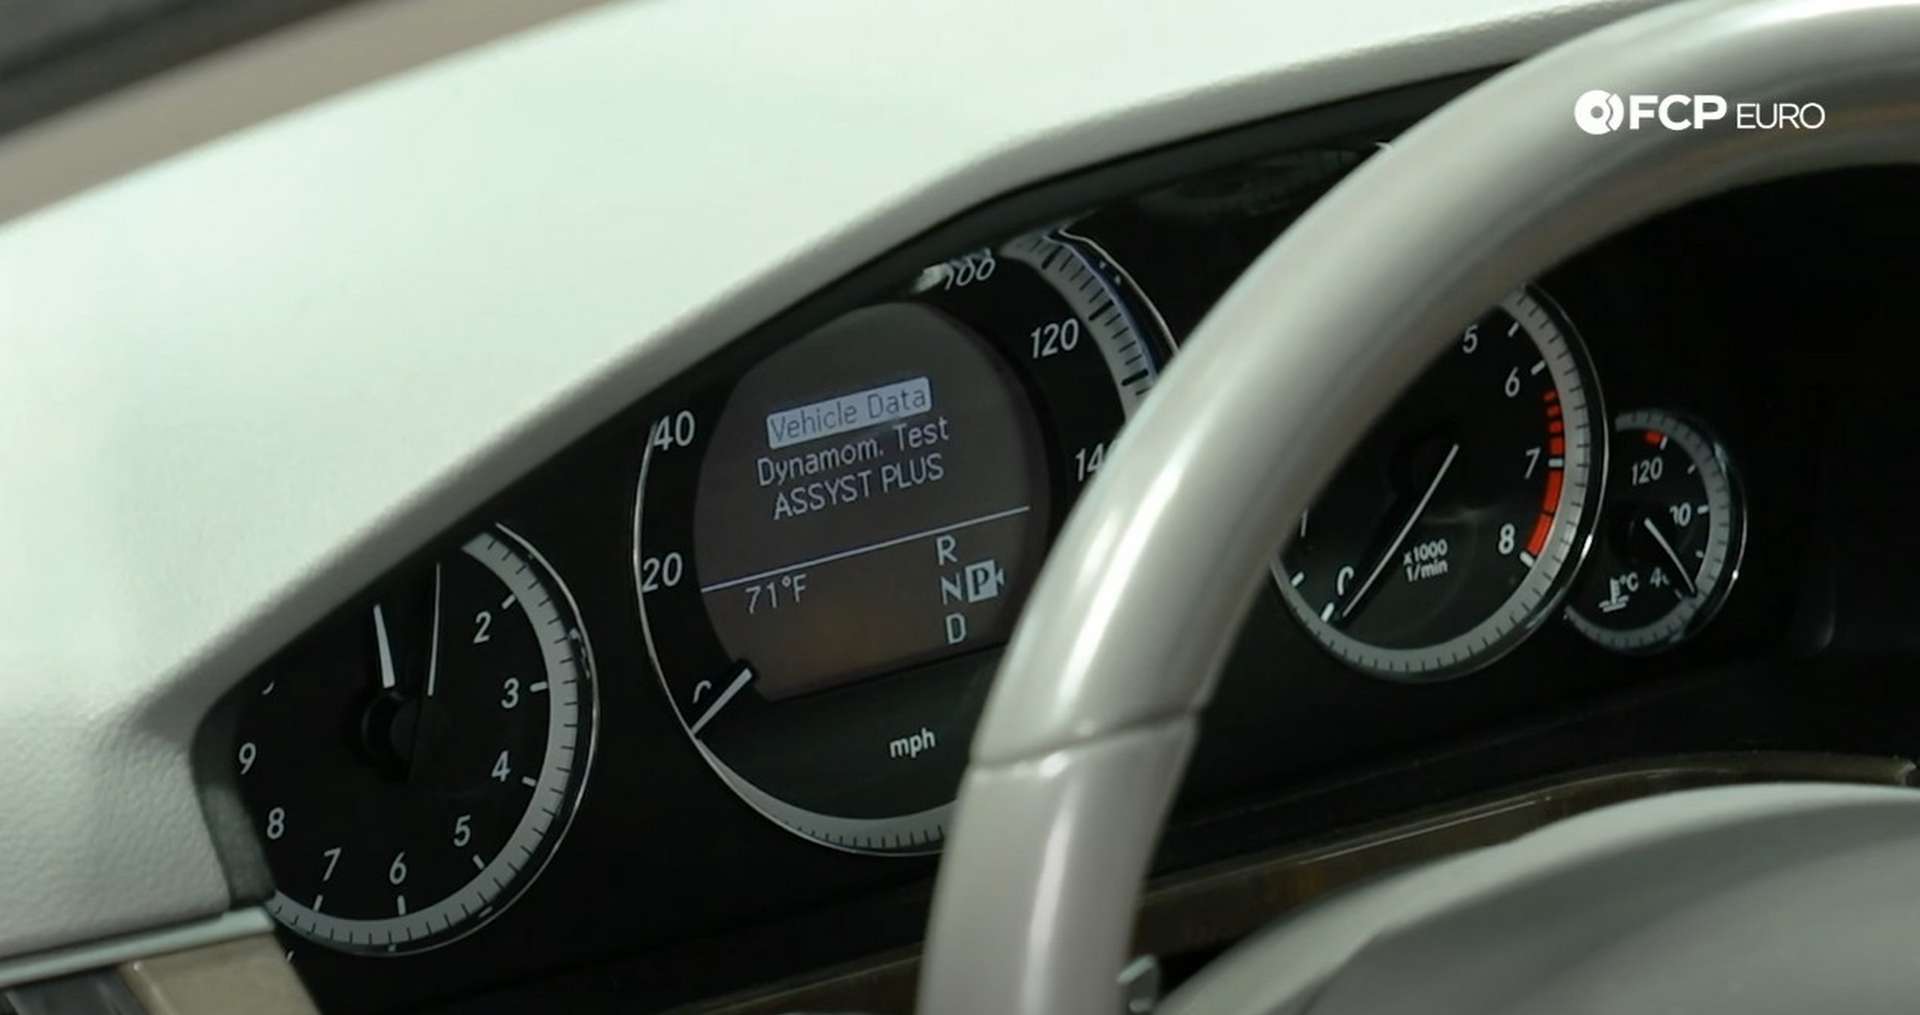
Then, hold the phone and “OK” buttons on the steering wheel until the “Vehicle Data” appears. Select “Vehicle Data” by pressing the “OK” button, and a screen showing the battery’s current-voltage will appear.
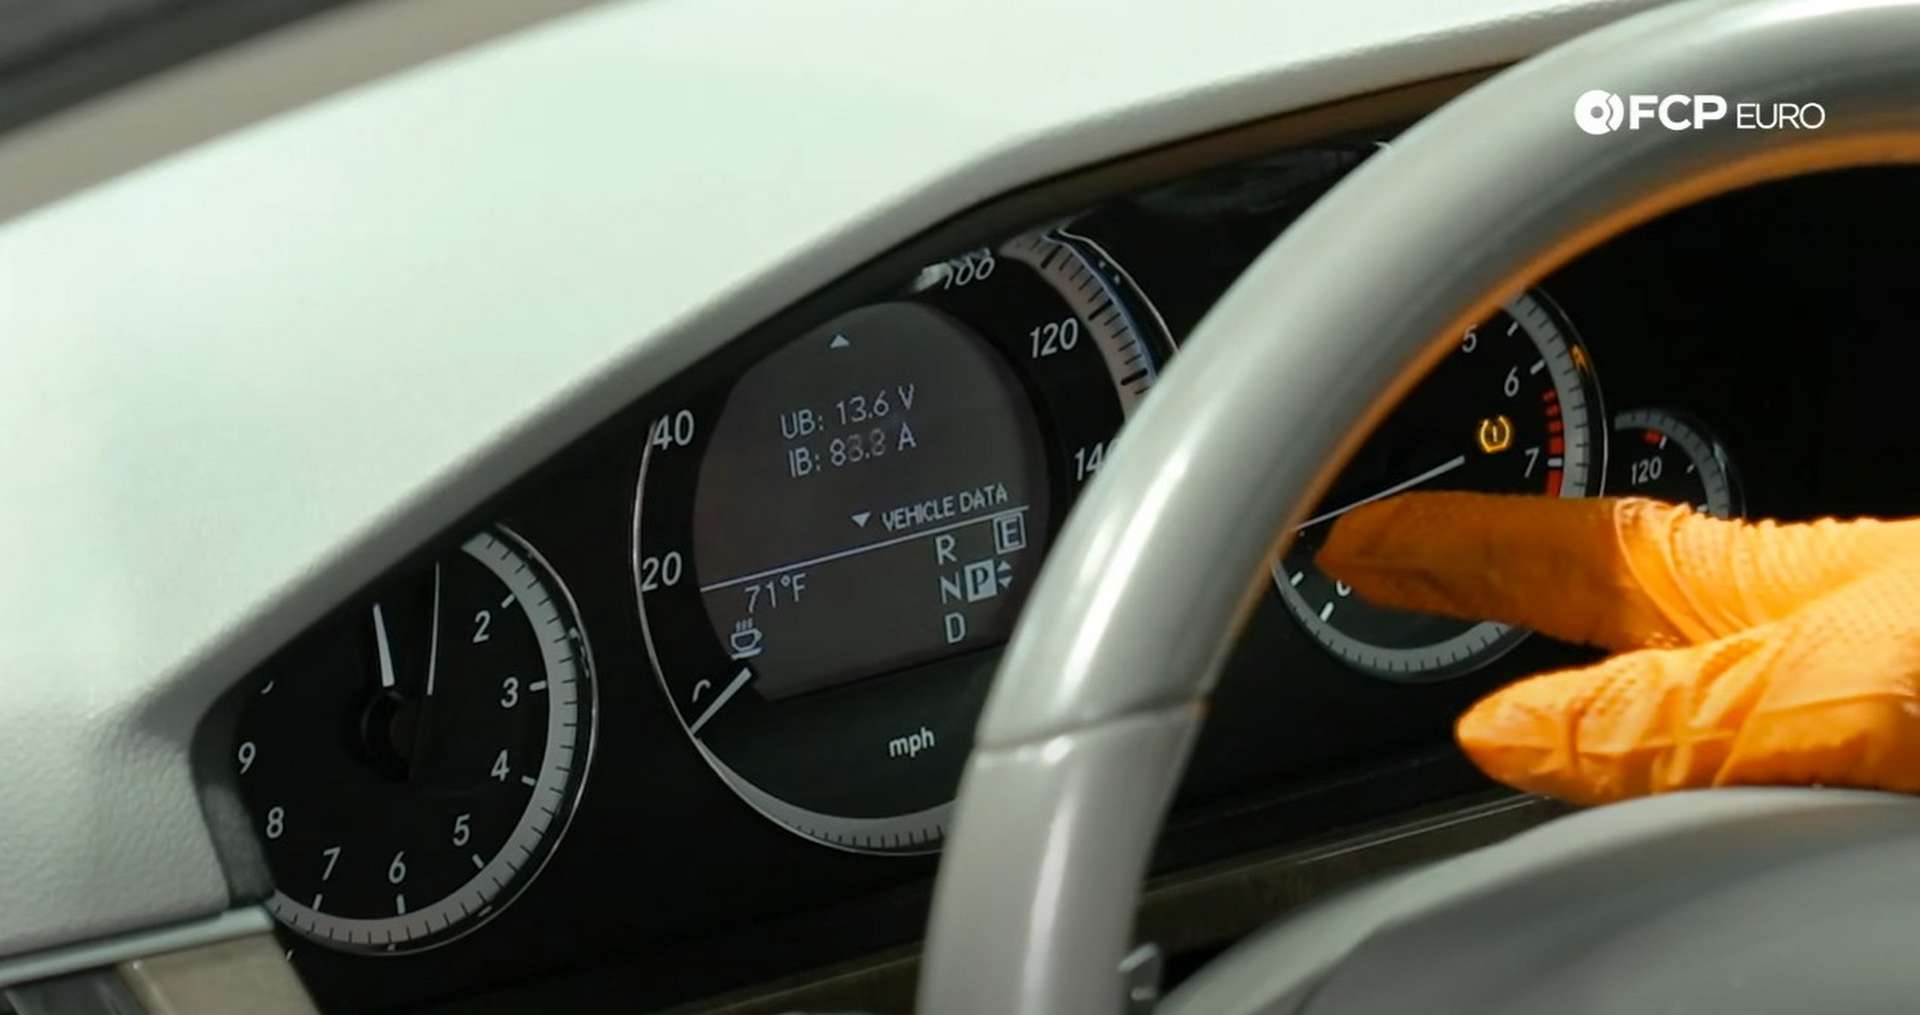
The top number is the battery’s voltage. Start the vehicle and watch the voltage climb to around 13.6V to ensure that the alternator is charging the battery correctly. Next, leave the car running and check the belt to ensure that it was installed correctly. If no adjustments are needed, refit the engine cover and shut the hood.
Mercedes W212 alternator & drive belt torque specs:
- Mercedes Idler Pulley Bolts = 25Nm or 18.4 ft-lbs of torque
Just like that, your Mercedes’ charging system is back at full health. If you’re interested in more DIYs for your Mercedes, you can visit mercedes.fcpeuro.com and subscribe to our YouTube channel.


