- 07/26/2021
- 5 Min Read
- By: Christian Schaefer
How To Replace Mercedes-Benz W203 Front Brakes (Mercedes C230, C320, C350, CLK320)

Mercedes-Benz uses the same style of brake caliper as every other manufacturer on their non-performance models. The sliding caliper is cheap to produce, easy to service, and performs well in everyday driving situations. You will use your front brakes more than the rears in every case; the fronts are larger and do a majority of the stopping, so you’ll often need to replace the front brake components sooner than the rears.
The tires and brakes on your Mercedes are the two most significant factors determining how effective it stops. Checking on the condition of your brakes and tires is as easy as looking at them, but changing worn tires is not a DIY task. Changing the brakes on your Mercedes is a DIY job, however, and can be done with simple hand tools by those with little experience. By following the steps below, you can ensure that your brakes will back to full strength.
Mercedes models and years applicable:
|
|
|
|
|
Symptoms of worn Mercedes W203 front brake pads and rotors:
- A grinding coming from the front, under braking
- Juddering or a vibration coming from the front, under braking
- Deep grooves on the rotor surface
- Dark-colored deposits on the rotor surface
- The vehicle’s steering pulling to one side, under braking
All disc brake systems have a front bias, meaning that the front brakes do most of the braking. Their increased braking responsibility will lead to more frequent replacement intervals when compared to the rears. However, driving with excessively worn rear brakes still creates reduced stopping ability.
Once the brake pad material is completely worn away, the pad’s metal backing plates are forced against the rotor, destroying it. You’ll hear an intense grinding noise under braking when this happens. Additionally, metal shavings will come off of the rotors and cover your wheels. If these shavings get wet, they’ll coat your wheel in rust.
How much will it cost to replace Mercedes W203 front brakes?
You’ll need new rotors, pads, and a new pad wear sensor to service the front brakes on your W203. The pad set used in this DIY is a ceramic set from TRW. These pads are designed with good initial bite and low dust properties and will run you around $40. Additionally, the Zimmermann front rotors go for approximately $55 a piece. Lastly, the replacement pad wear sensor will cost about $5. Altogether, budget $170 for all of the parts required for this DIY.
How long will it take to replace Mercedes W203 front brakes?
The service length will depend on what you choose to do. Replacing the pads and rotors is a straightforward process that doesn’t require removing and reinstalling too many parts. This part of the job should take 30 minutes per corner.
To completely service the brakes, you’ll need to flush the brake fluid as well. Having a pressure bleeder simplifies this process and significantly speeds it up. If you don’t have a pressure bleeder, you’ll need another person to help you out. Either way, bleeding the brakes shouldn’t take longer than 20 minutes.
Parts required to replace Mercedes W203 front brakes:
Tools required to replace Mercedes W203 front brakes:
- 18mm Socket
- 17mm Socket
- 12mm Socket
- T30 Socket
- Ratchets
- Flathead Screwdriver
- Torque Wrench
- Caliper Carrier Hook
- Hammer
- Wire Brush
- Caliper Compressor
Steps required to replace Mercedes W203 front brakes:
Step 1: Remove the caliper
Jack up the front of the car and place it onto jack stands. Then, use a 17mm socket to remove the lug bolts so you can remove the wheel. The passenger’s side caliper uses the pad wear sensor to alert you when it’s time to change the pads. Pull on the wires to remove the old sensor from the connector mounted to the caliper.
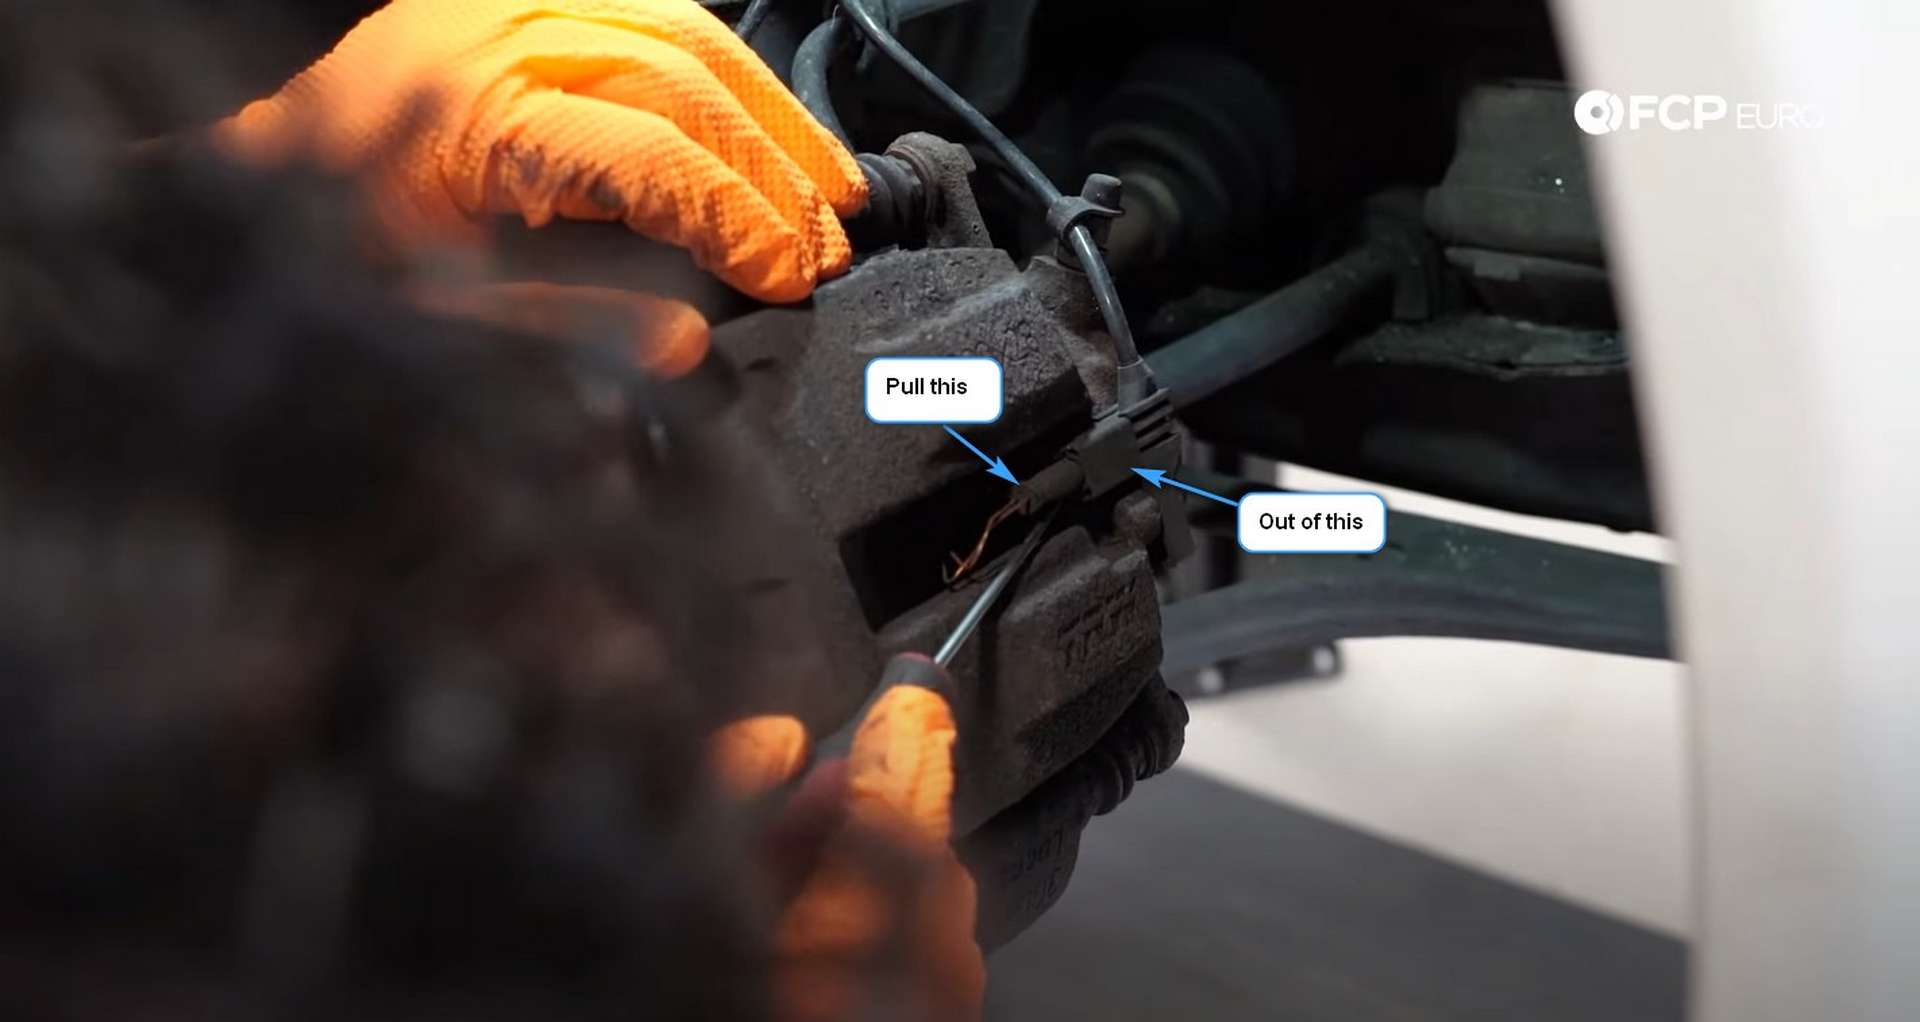
Then, pull the sensor outward from the caliper to remove the old sensor from the inner pad. Next, take the T30 Torx bit socket and use it to remove the set screw from the rotor. Tap the socket into the set screw with a hammer if you live in an area where corrosion is common. That may help free the screw from any corrosion that is present.

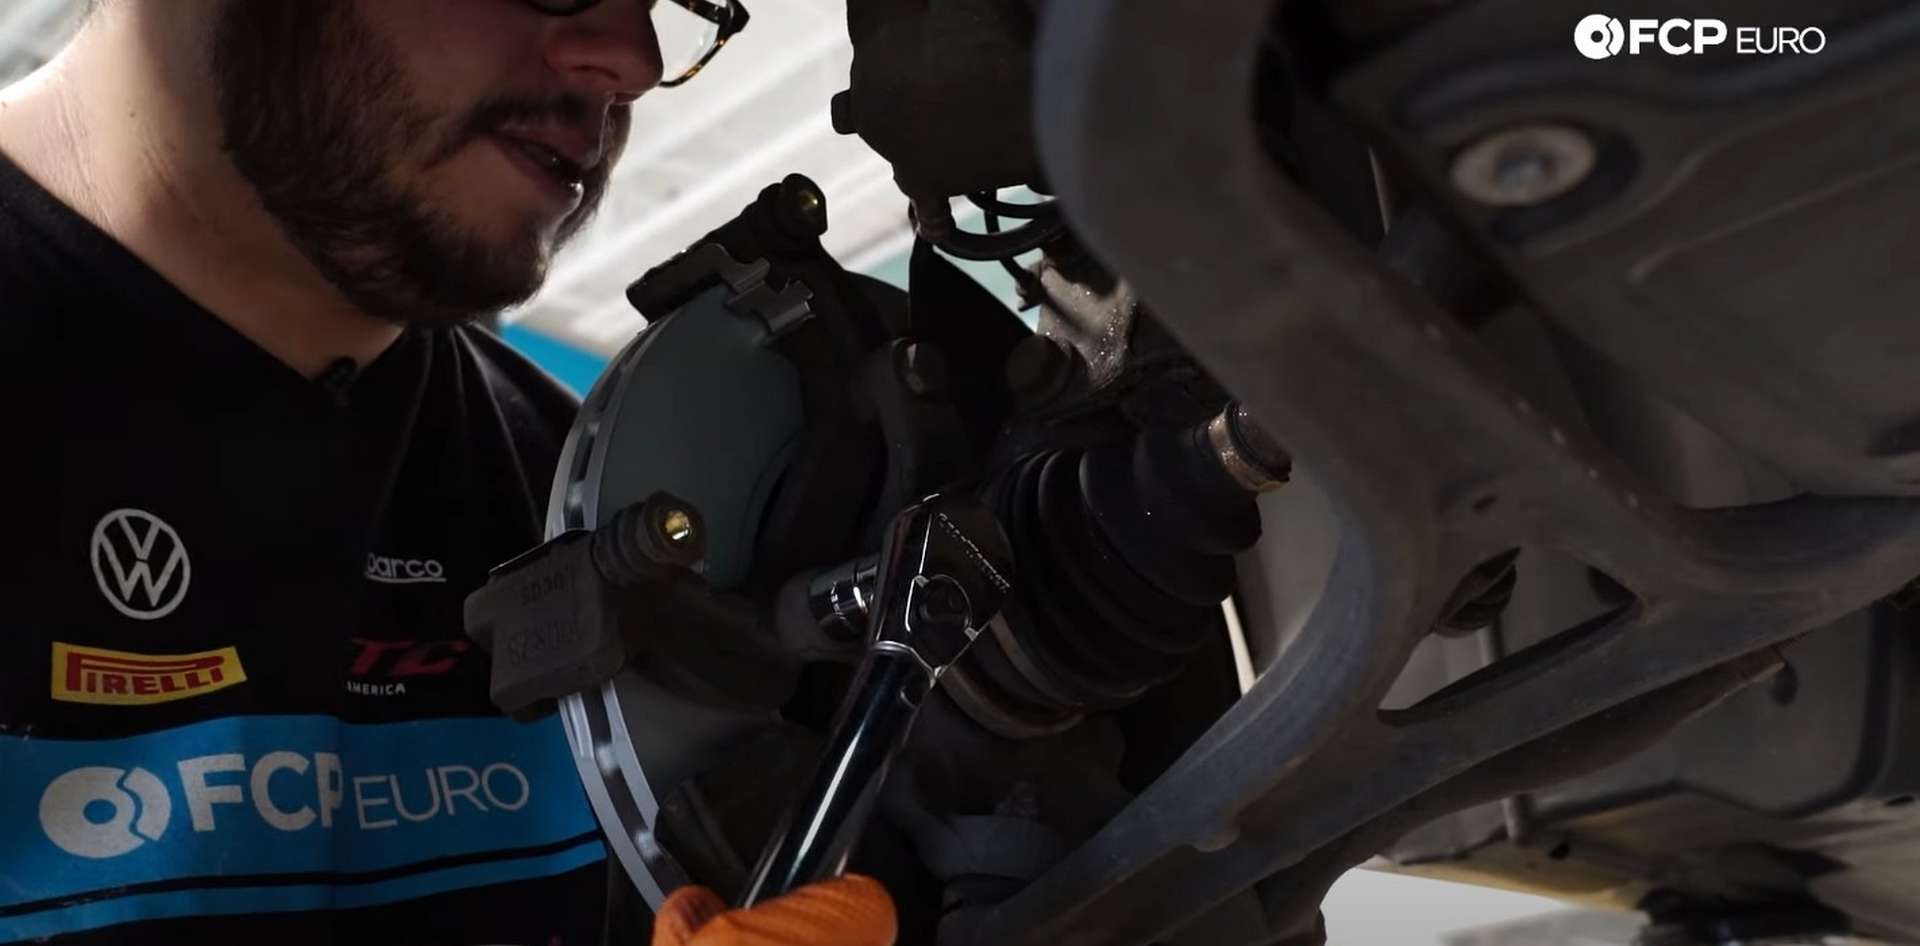
After that, use a 12mm socket to remove the guide pin bolts from the back of the caliper.
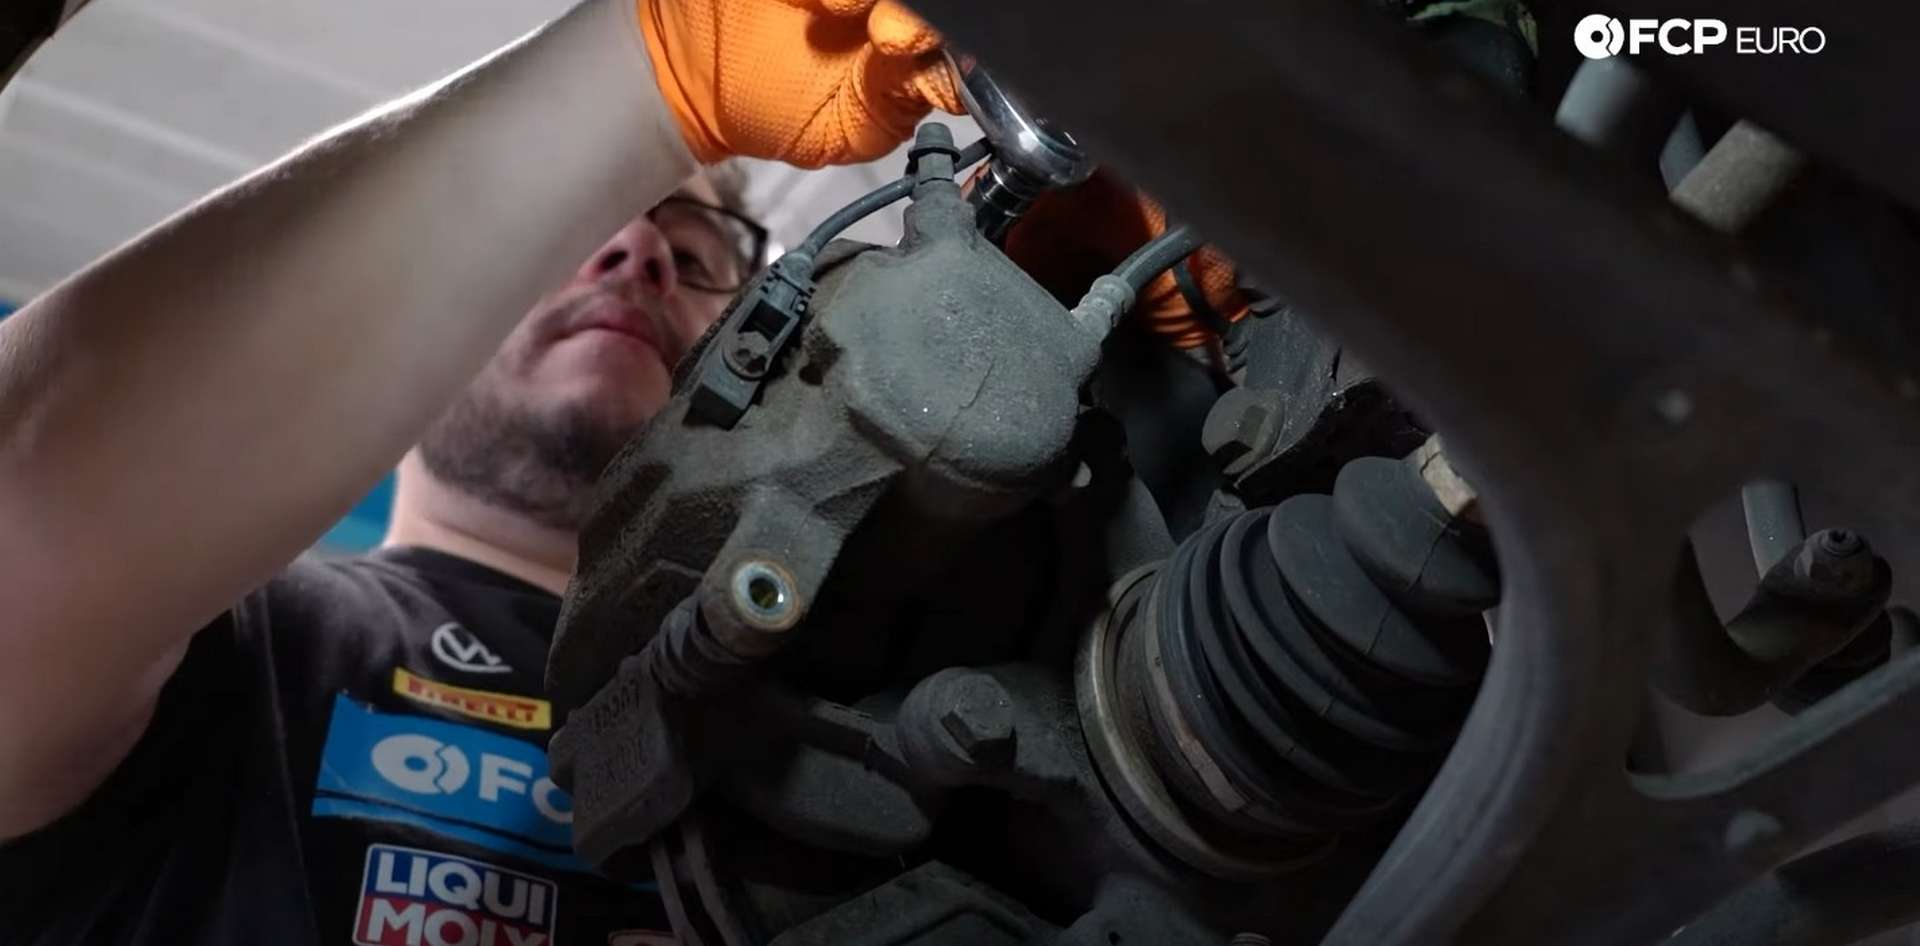
Now, pull the caliper off of the bracket and rotor. Use a flathead screwdriver to pry up on the side of the caliper to expedite the removal process. When you remove the caliper, don’t let it hang by its brake line. The caliper’s weight will put a significant strain on the rubber line and can cause it to tear. You can use zip-tires, wire coat hangers, or the caliper hangers linked above, among other things, to hang the caliper out of the way.
Step 2: Replace the rotor
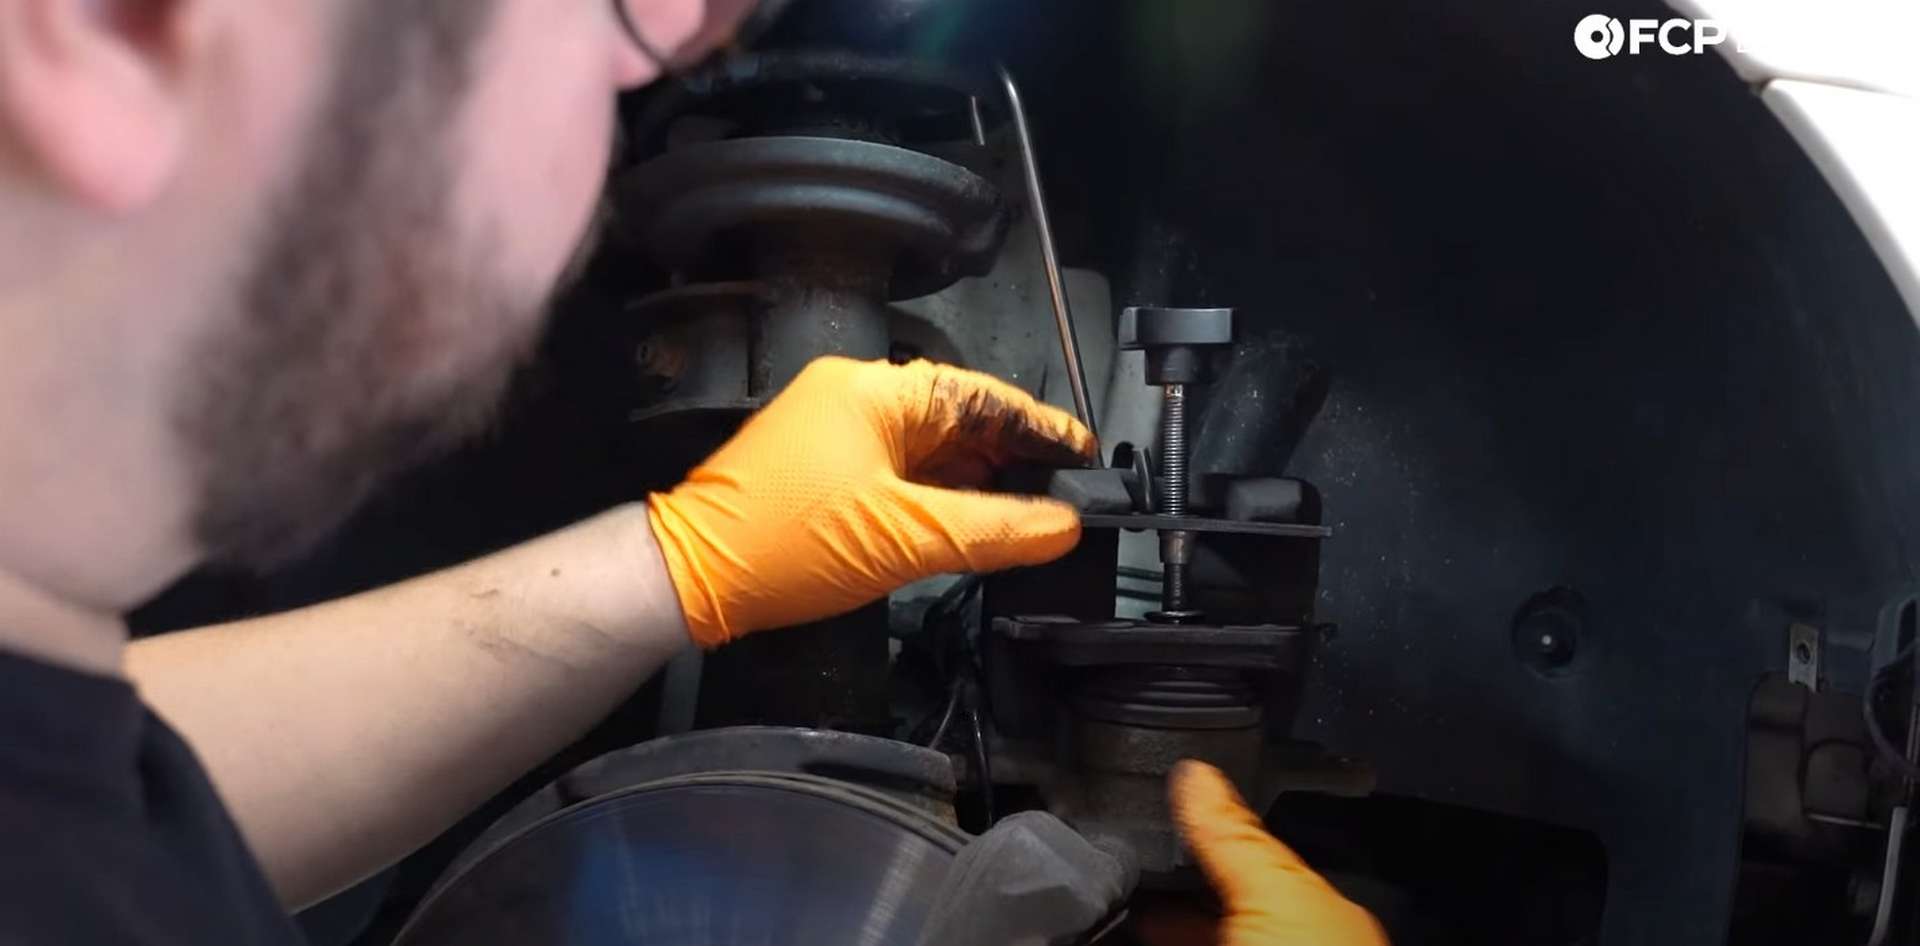
Pull the old inner and outer pad out of the bracket. Then, place the old inner pad onto the caliper’s piston and use it with the caliper compressor to push the caliper’s piston back into the caliper.
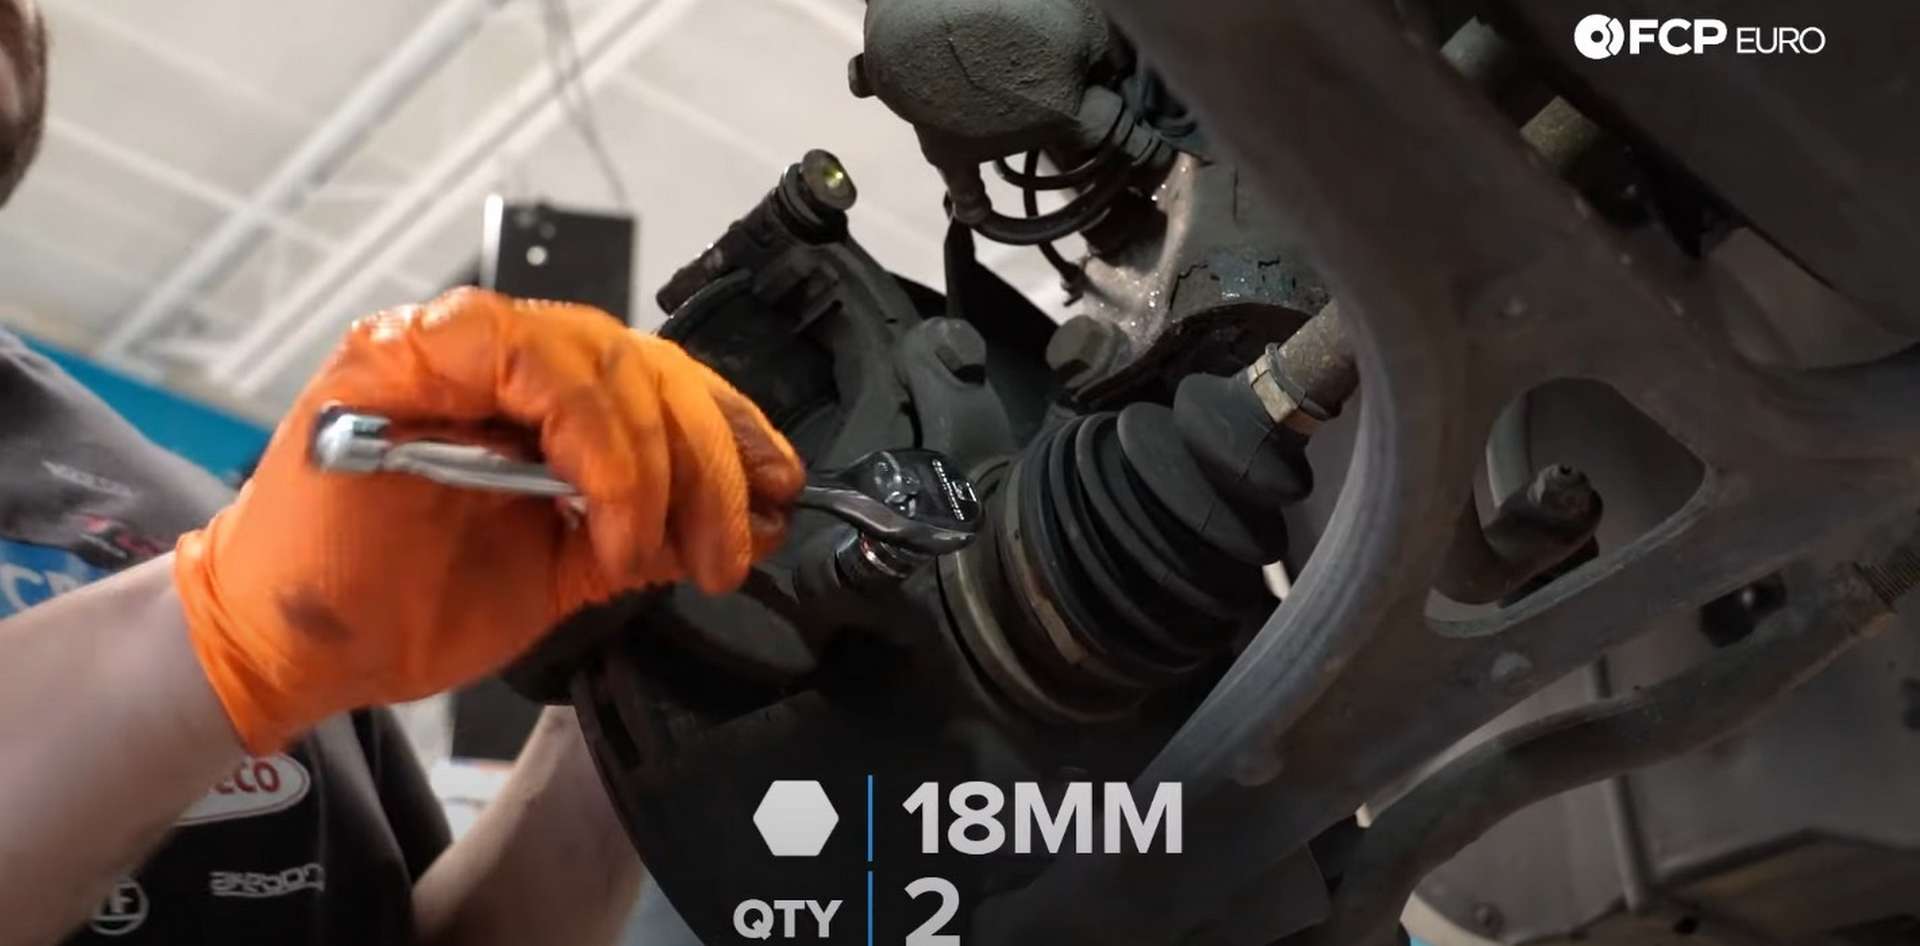
Next, use an 18mm socket to remove the caliper bracket’s bolts.
Remove the bracket from the knuckle, then pull the rotor off of the hub. Tap the rotor’s hat with a hammer if it doesn’t come free from the hub. Corrosion is holding it on, and the hammer will shock it loose.
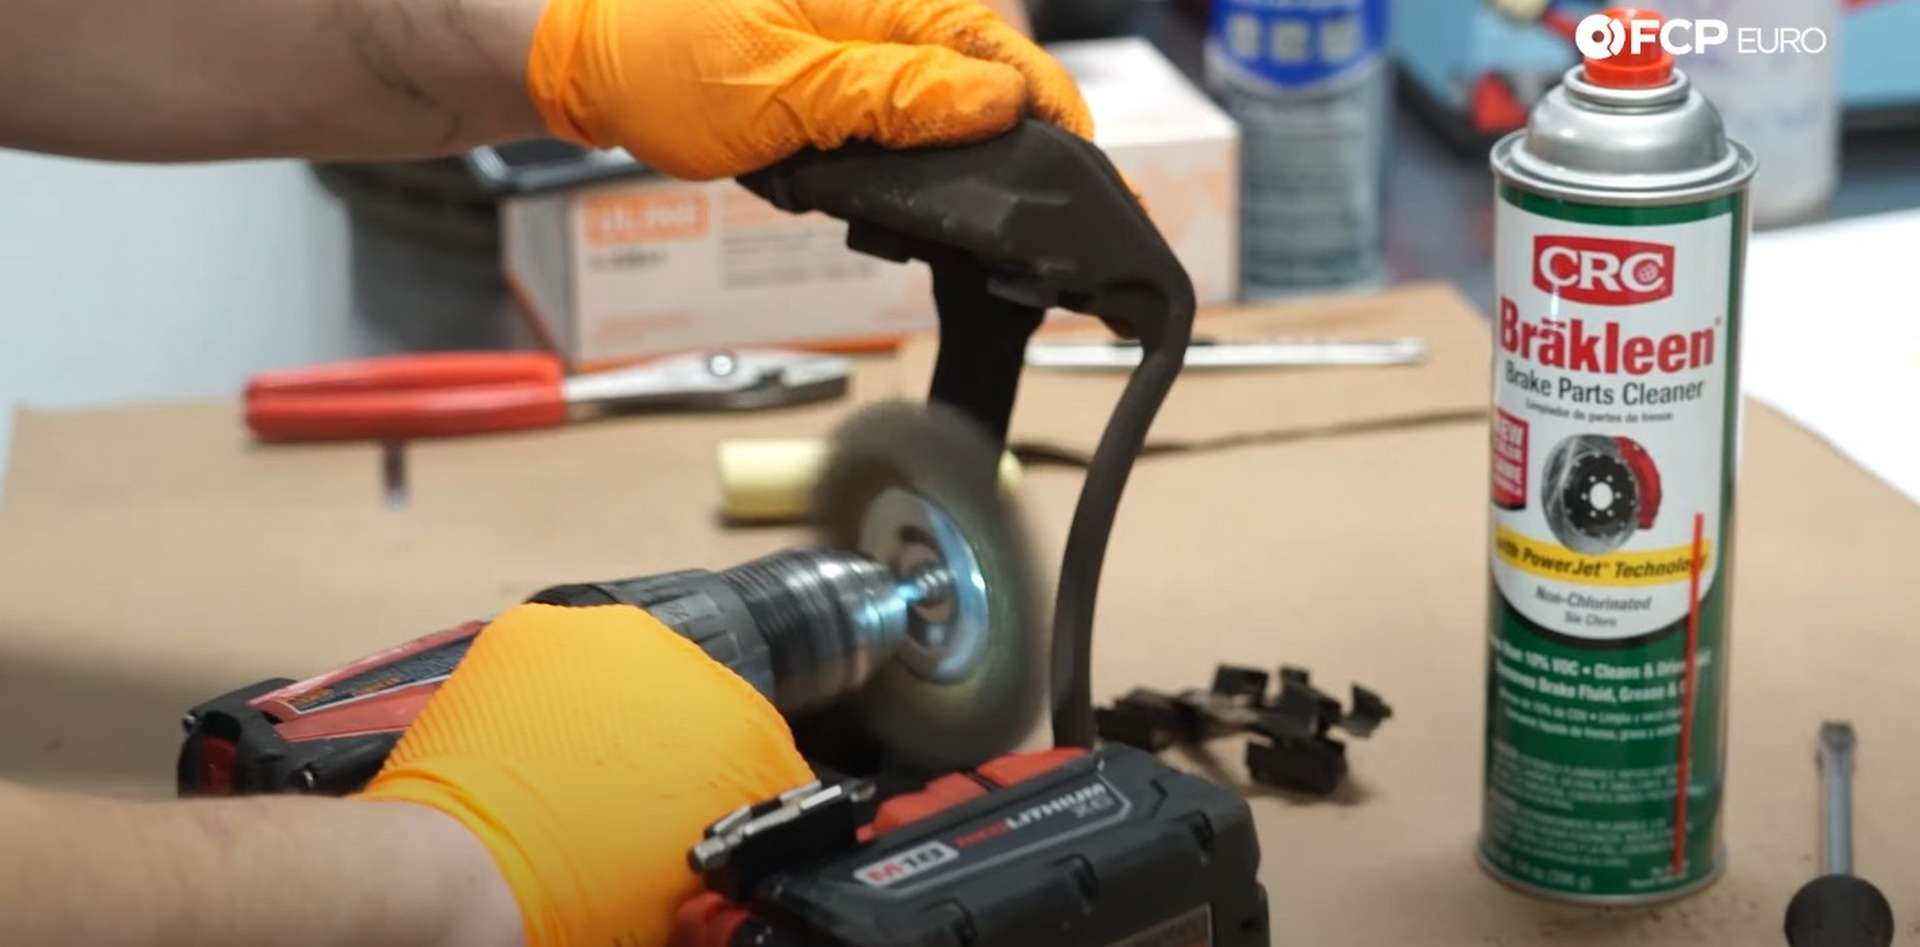
Then, turn your attention to the caliper bracket. Note the orientation of the clips mounted to the bracket, then remove them. Use a wire brush and some brake clean to scrub off as much brake dust as you can. Doing that will ensure you won’t struggle to install the new pads and clips from excess buildup.
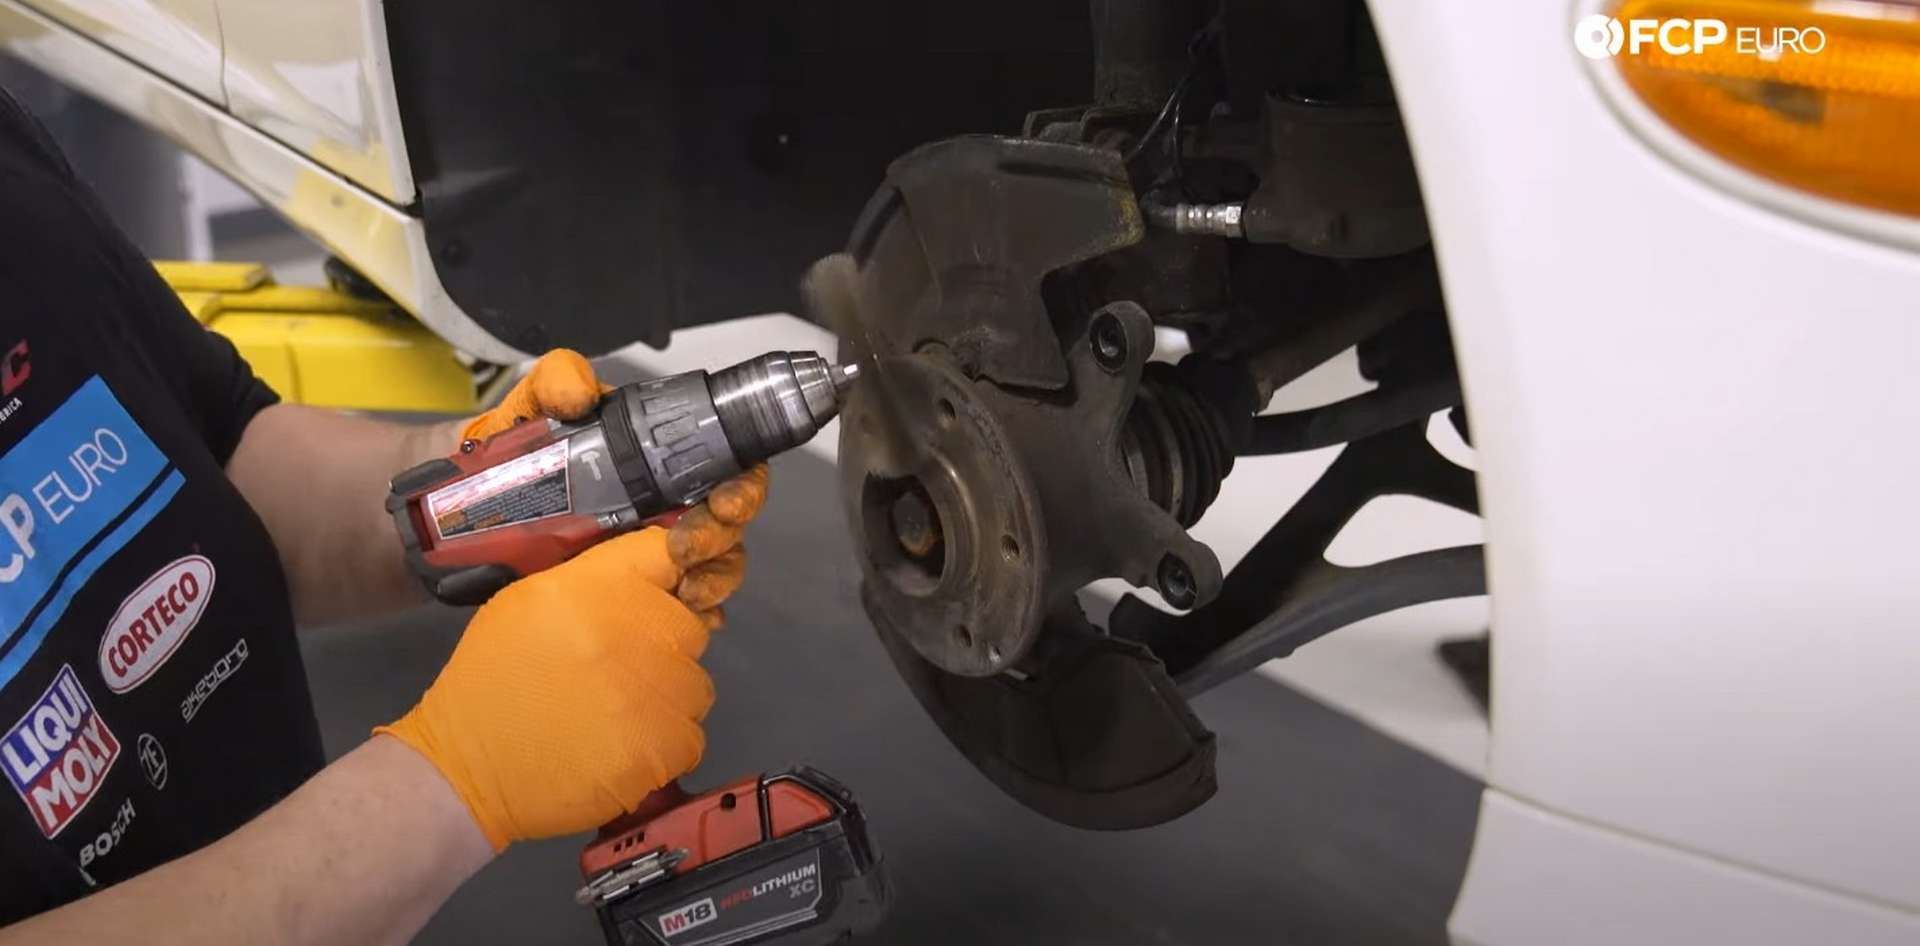
You can use a wire wheel on a drill if you have access to it. Then, fit the new clips to the bracket. Next, use the wire wheel or wire brush to remove as much corrosion as you can from the wheel hub. Once clean, fit the new rotor to the hub.
Thread in the new set screw and tighten it with the T30 Torx bit socket. The torque spec for the screw is 7Nm; however, just get it snug with your ratchet.

After that, refit the caliper bracket to the knuckle. Thread in both bolts by hand before using the 18mm socket to torque them to 115Nm.

Step 3: Refit the caliper and install the new pads
Break out the new pads and examine the tops of them to determine which is the inboard pad. The inboard pad will have the necessary mount for the pad wear sensor. Then, place both pads into the caliper bracket.
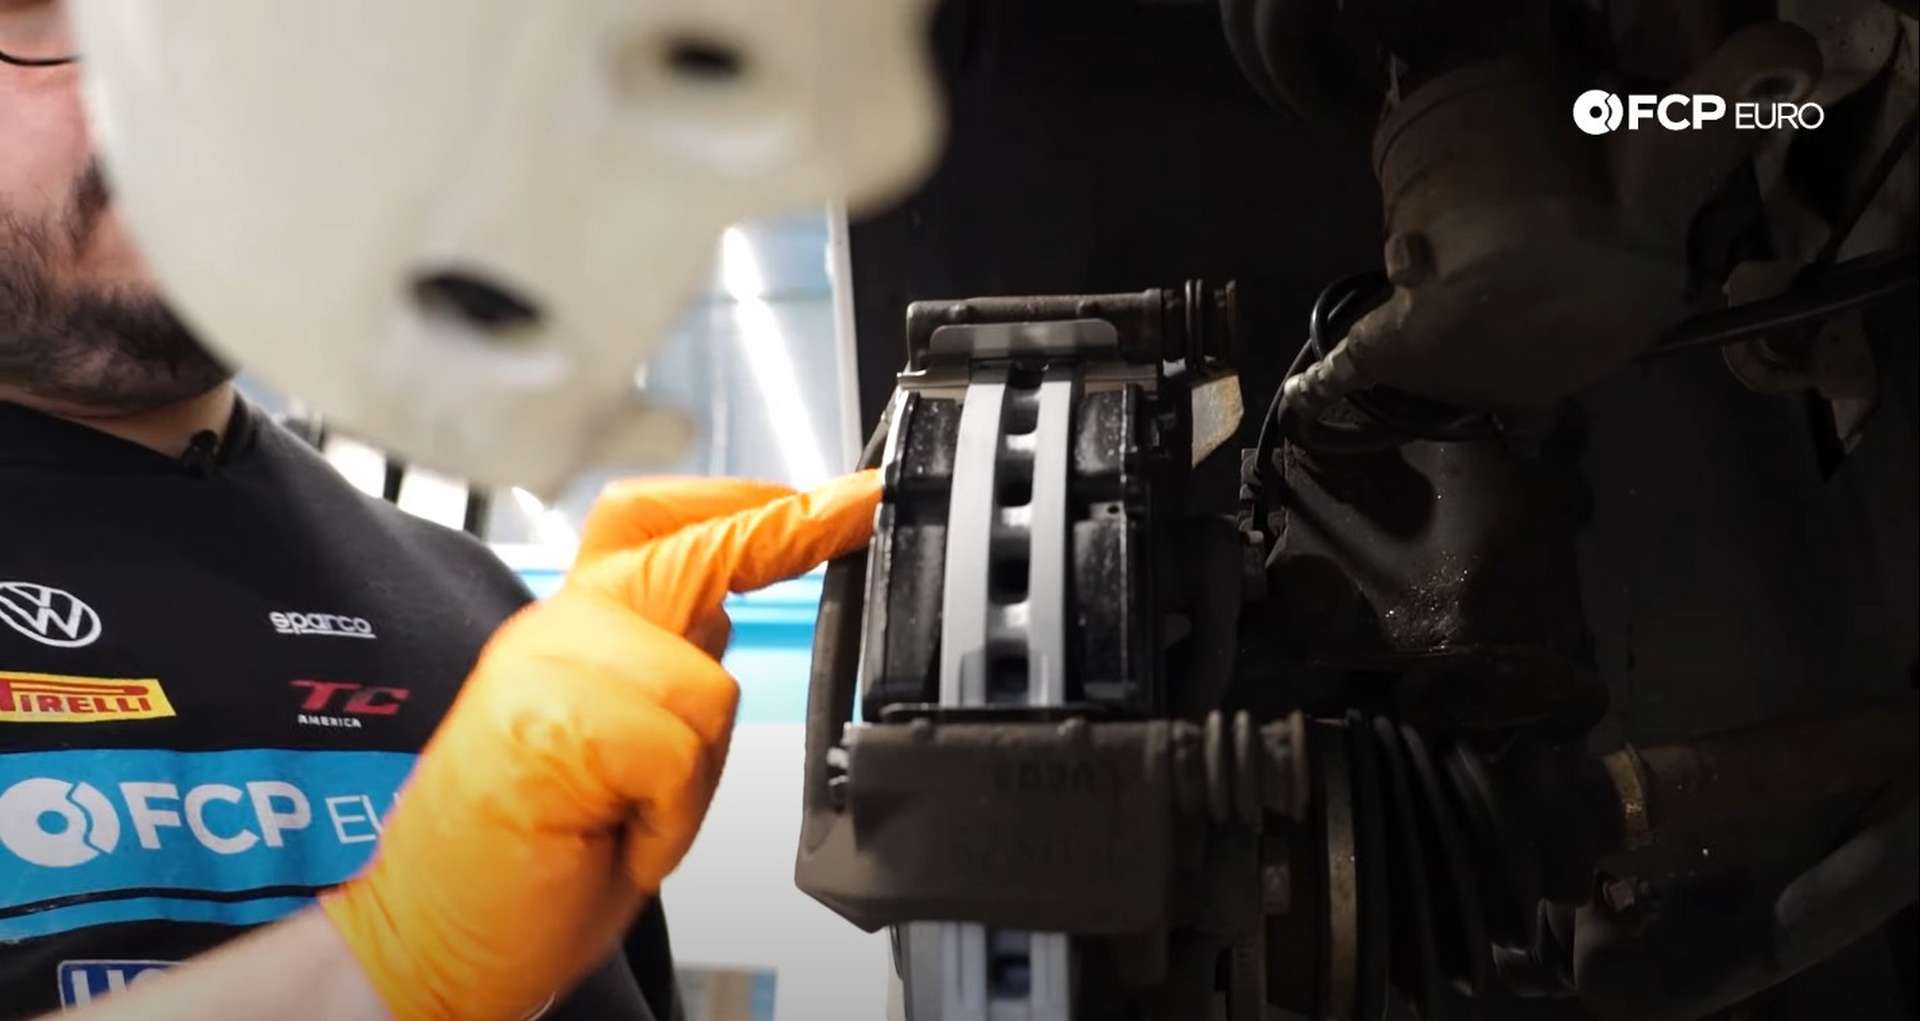
Next, take the caliper off of the hanger and fit it over the pads. Thread in the caliper guide pin bolts by hand before tightening them with a 12mm socket. Then, install the new pad wear sensor. Push the sensor’s tip into the top of the inner pad before connecting the sensor to the connector mounted to the caliper.
Lastly, refit the wheel and move onto the other side if you haven’t done so already. Use a 17mm socket the tighten the lug bolts once you’ve threaded them in.
Mercedes W203 Front Brake Torque Specs:
- Mercedes Rotor Set Screw = 7Nm or 5 ft-lbs, of torque
- Mercedes Caliper Bracket Bolts = 115Nm or 85 ft-lbs, of torque
- Mercedes Guide Pin Bolts = 8Nm or 6 ft-lbs, of torque
Now that your front brake pads and rotors have been replaced, you can get back to safely driving your vehicle on public roads. If you're interested in more DIYs for your Mercedes, you can visit mercedes.fcpeuro.com and subscribe to our YouTube channel.


