- 08/04/2021
- 8 Min Read
- By: Christian Schaefer
How To Replace A Porsche 996 911 Water Pump & Thermostat

Porsche’s M96 engine, found in the 986 Boxster and 996 Carrera, was their first mass-production water-cooled flat-six. It made the right noises and good power but wasn’t without its shortcomings—one of those being the cooling system. The impeller used on the original water pumps on the M96s is plastic. Exposure to consistent and significant thermal changes weakens the impeller blades until they break off and go through the engine, causing extensive issues. The new pumps use metal impellers to improve reliability and prevent plastic from entering your engine block.
Along with the water pump, the other moving part in the cooling system is the thermostat. Regulating the coolant warm-up is the thermostat’s job. When the engine is cold, it prevents coolant from circulating to bring the engine to temperature quickly. When the engine reaches operating temperature, the thermostat opens up and allows the coolant to circulate. A failed thermostat can either be stuck open or stuck shut, leading the engine never to warm up or overheat quickly. Replacing the thermostat with the water pump is a smart and easy way to prevent another repair so soon.
Porsche models and years applicable:
|
|
Symptoms of a failed Porshe 996 911 water pump or thermostat:
- Radiator fans continually running on high
- High coolant temperature error message
- Vehicle taking longer than usual to get to operating temperature
- Engine overheating
Ignoring the signs of a failing water pump can cause costly engine issues. Repeated overheating can cause head gasket failure and the warping of the cylinder heads, leading to costly repairs. If your vehicle is regularly overheating, don’t drive it until you fix the issue.
How much will it cost to replace a Porsche 996 911 water pump & thermostat?
We sell a kit specifically for this application. Included are the new bolts, gaskets, water pump, thermostat, and coolant. Expect the kit to run you right around $225. Additionally, the vacuum coolant filler is a great way to ensure the cooling system is adequately filled the first time around. We sell two different fillers that’ll cost between $85 and $110. Either one will help speed up the job.
Taking your 996 to an independent repair shop will leave you with a bill between $800 and $1400.
How long will it take to replace a Porsche 996 911 water pump & thermostat?
Replacing the pump and thermostat isn’t a quick job. Set aside 2.5 to 3.5 hours to complete the replacement and coolant bleed procedure.
Parts required to replace a Porsche 996 911 water pump & thermostat:
Tools required to replace a Porsche 996 911 water pump & thermostat:
- 24mm Socket
- 15mm Socket
- 15mm Wrench
- 10mm Socket
- 10mm Swivel Socket
- 7mm Nut Driver
- 5mm Hex Bit socket
- Hose Clamping Pliers
- ⅜” Ratchet
- ¼” Ratchet
- Jack
- Jack Stands
- Long Socket Extensions
- Flat Band Hose Clamp Pliers (Any pair of pliers will work)
- Flathead Screwdriver
- Vacuum Coolant Filler
- Drain Pan
- Torque Wrench
Steps required to replace a Porsche 996 911 water pump & thermostat:
Step 1: Remove the intake
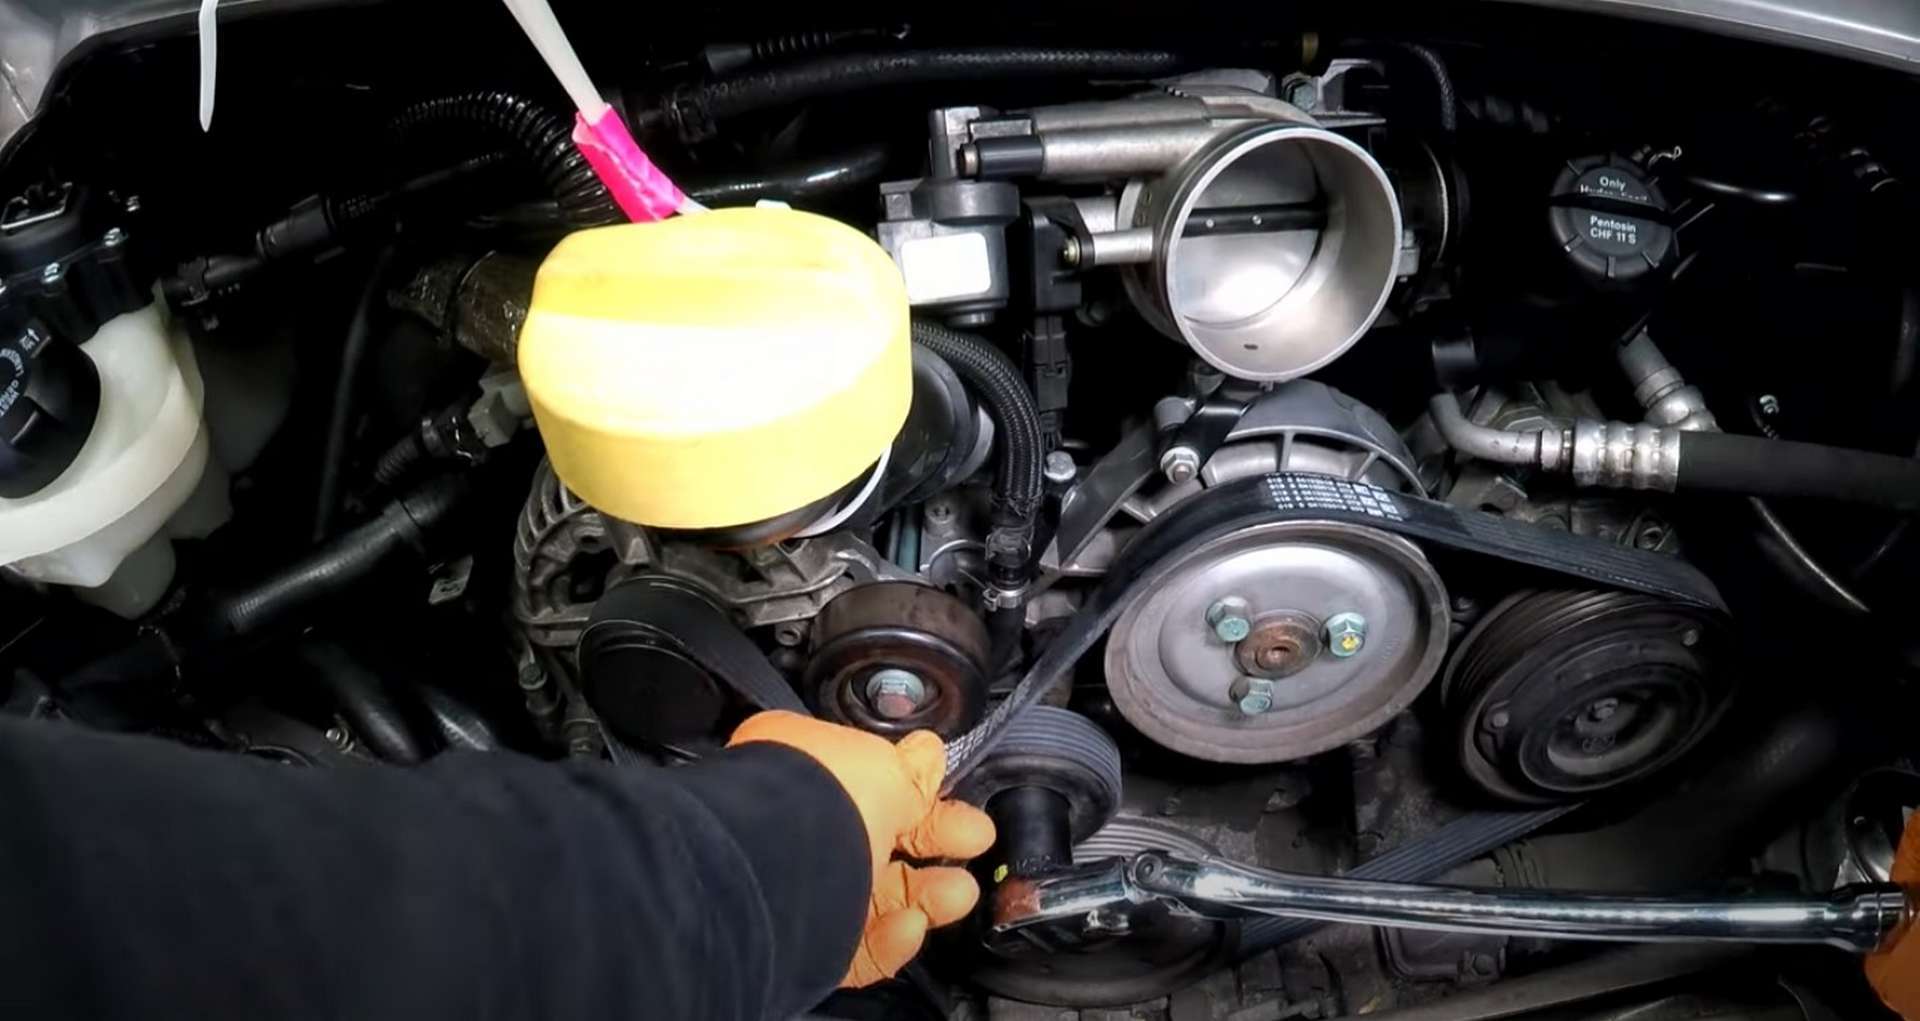
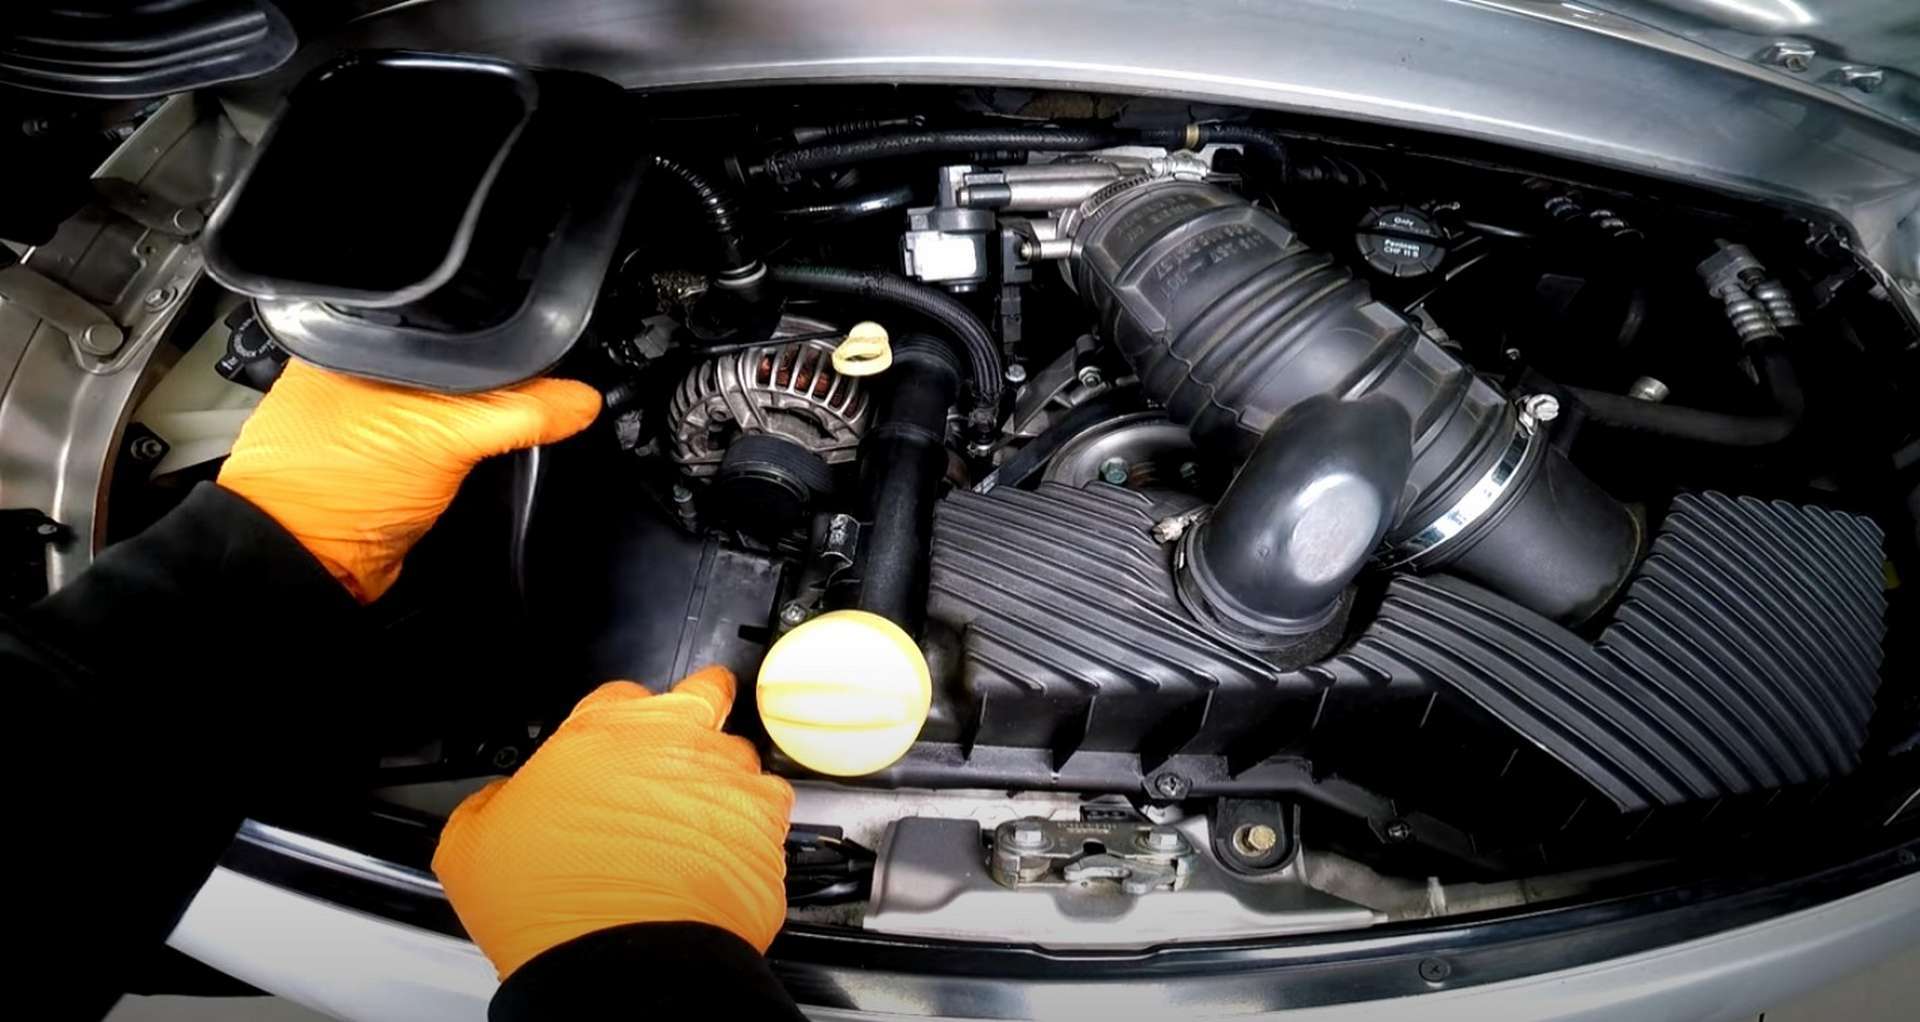
Open the engine lid, and the airbox will be right upfront. First, remove the oil filler tube from the top of the airbox. Then, squeeze the two tabs on either side of the mass airflow sensor plug and pull it off the sensor.
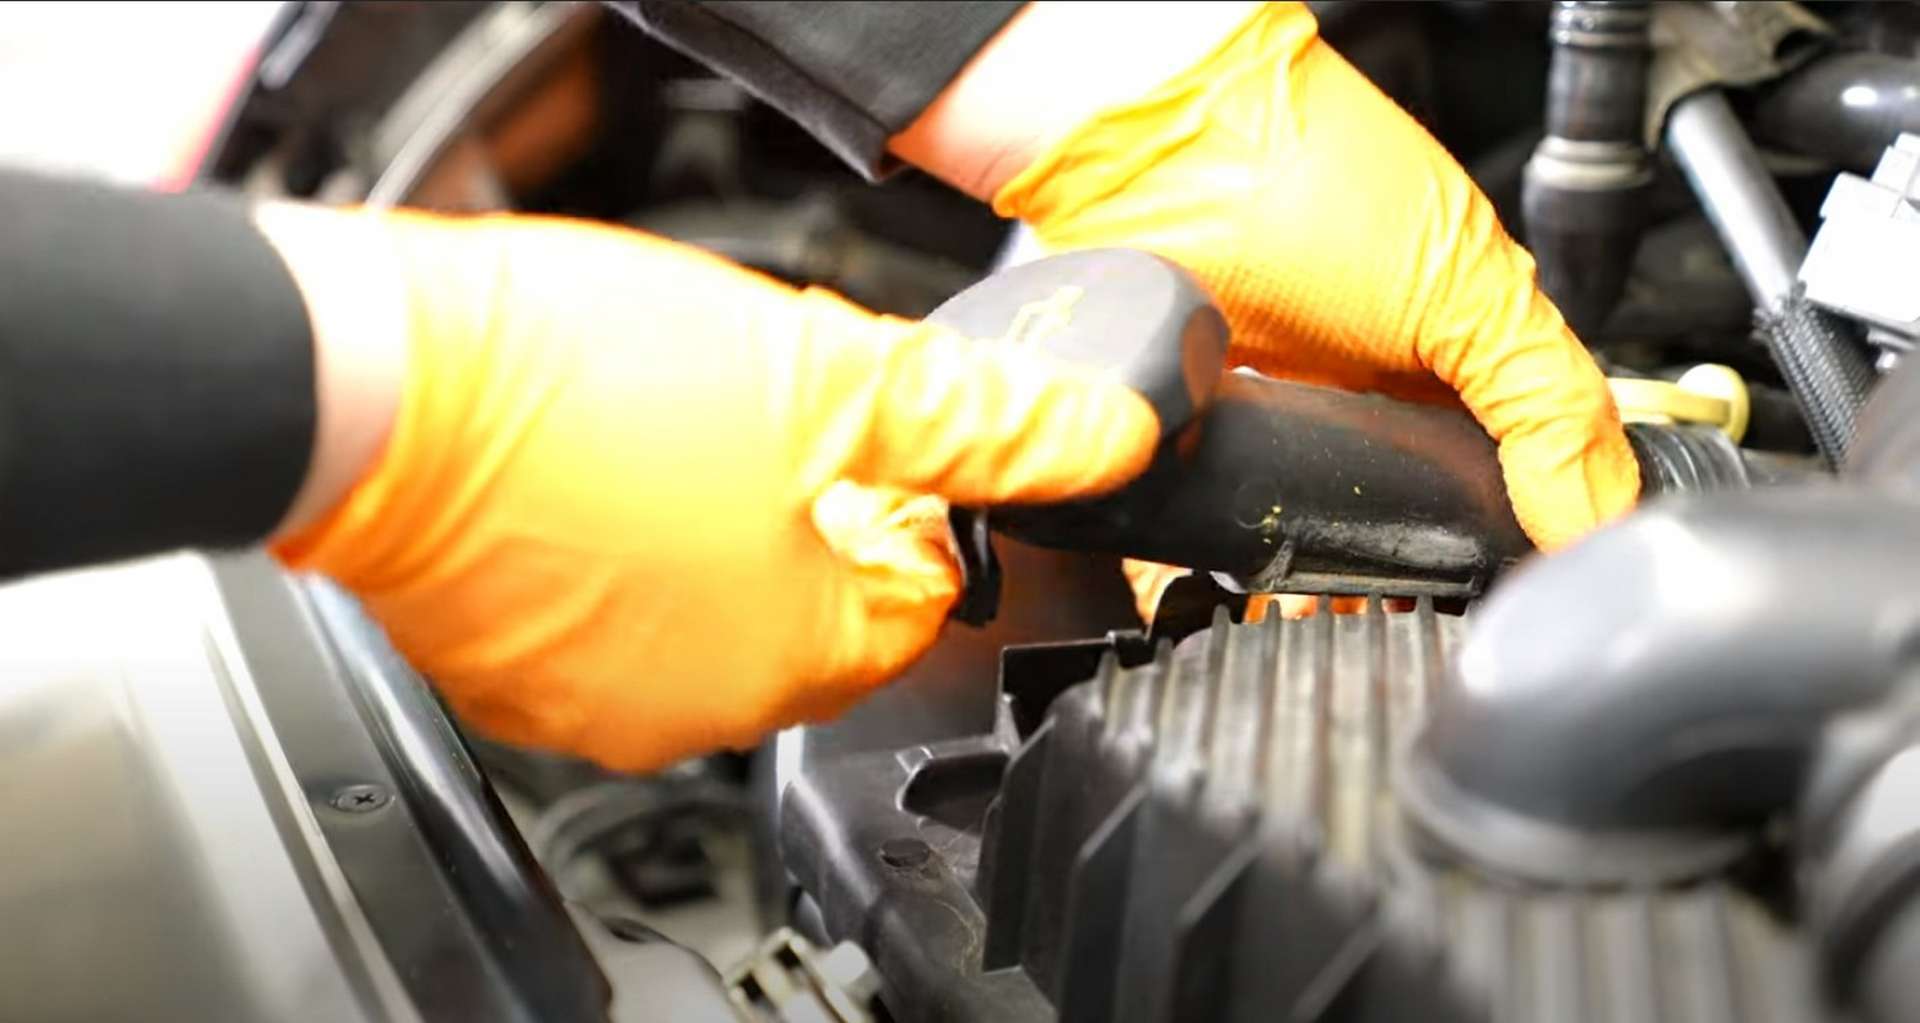
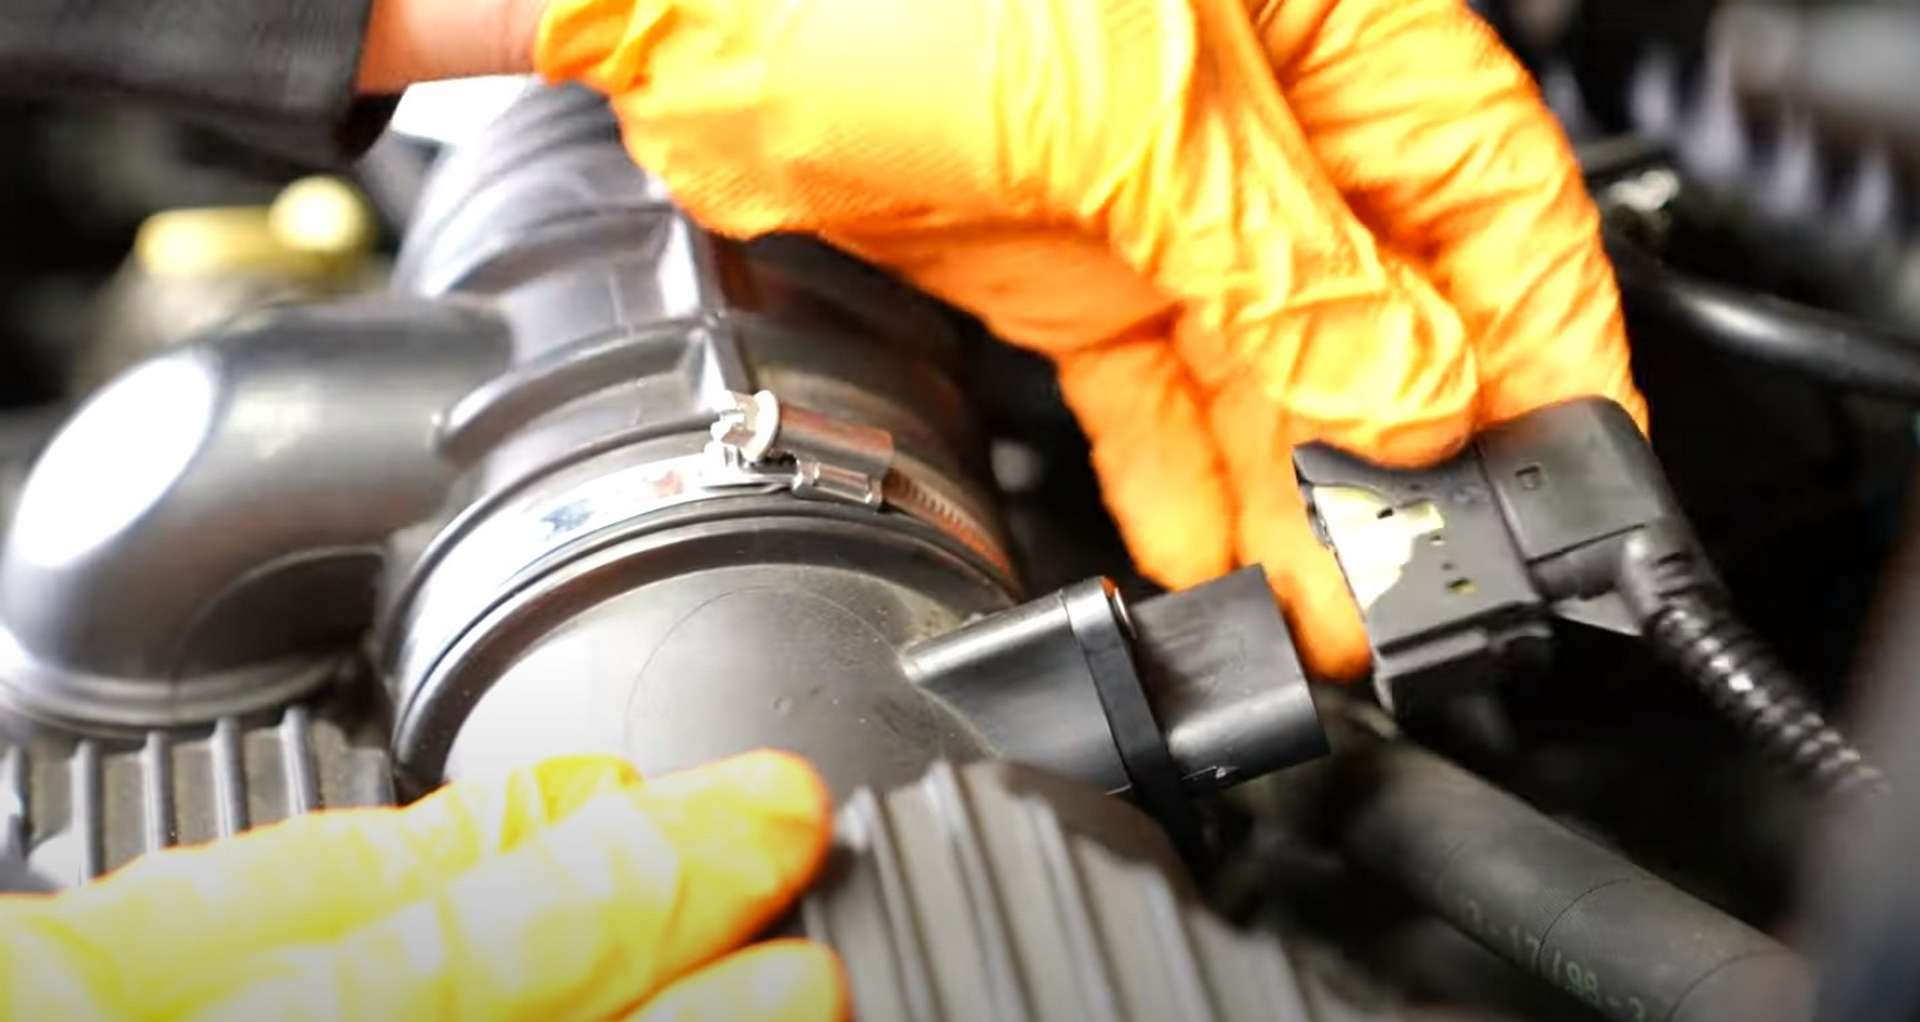
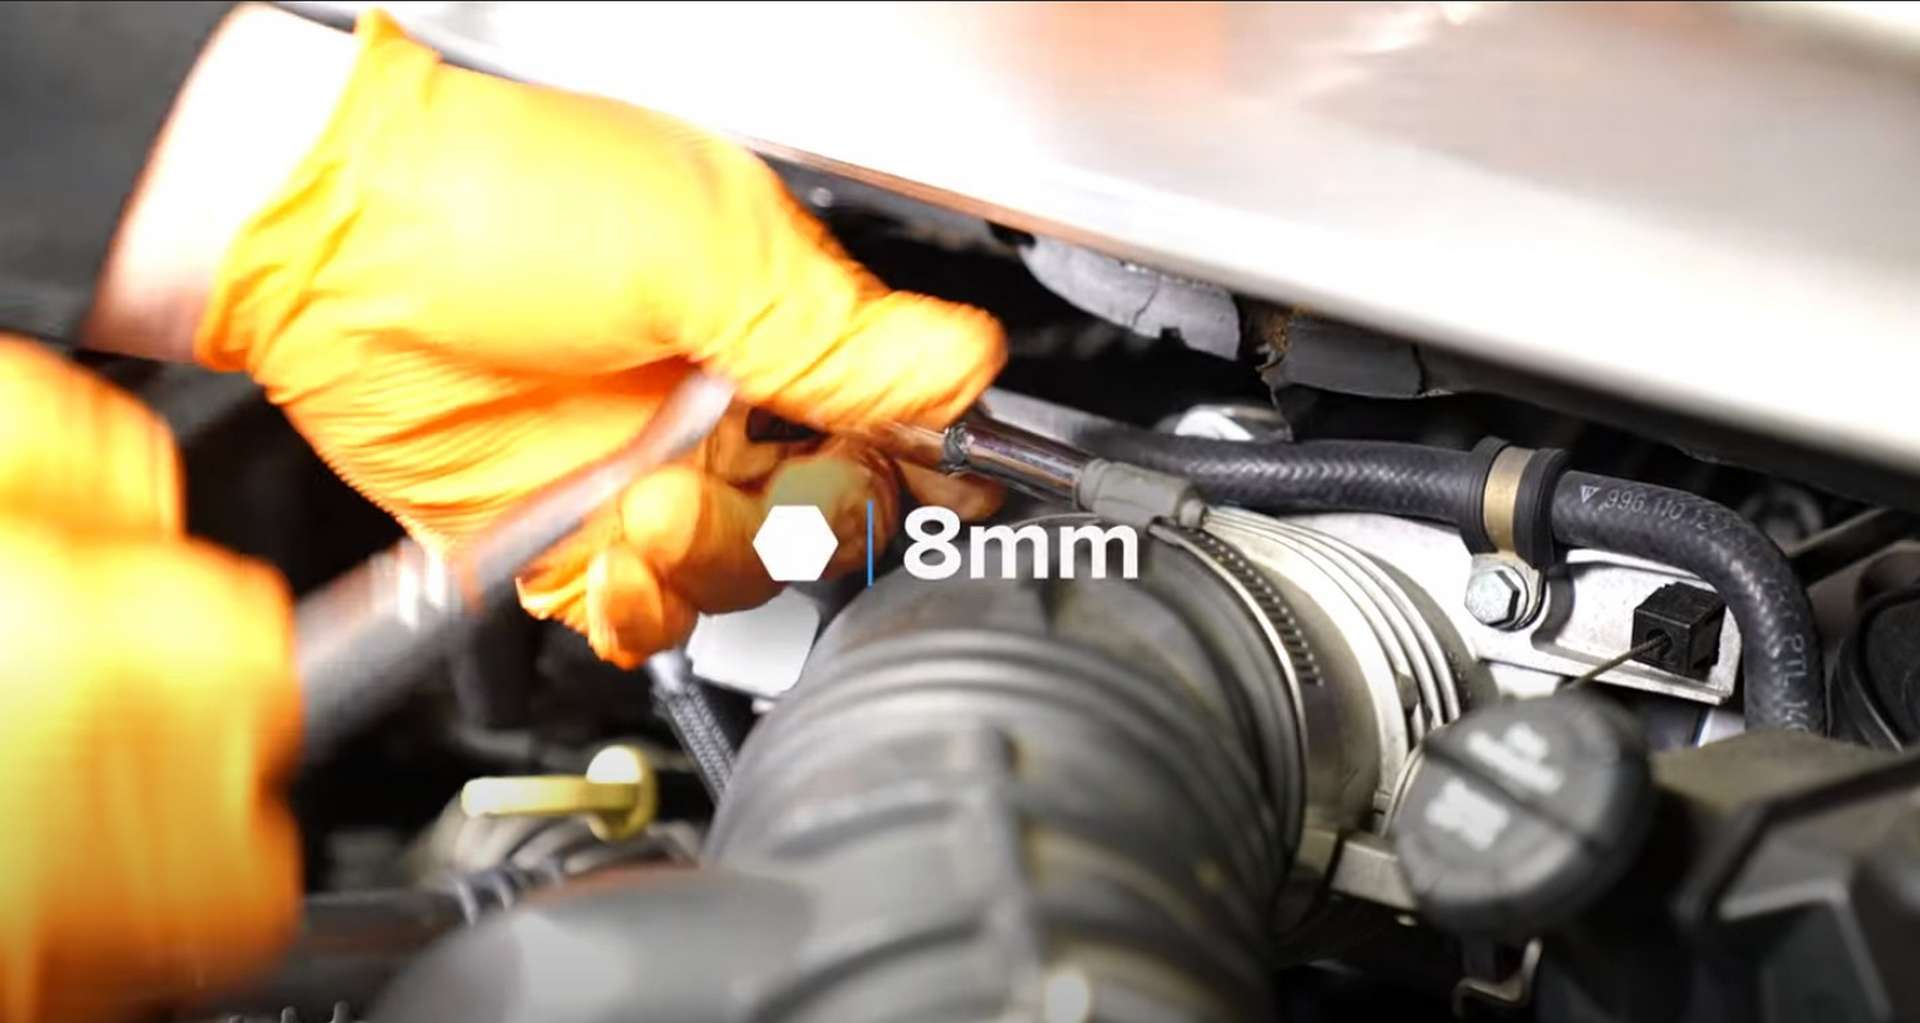
Next, use an 8mm socket to loosen the intake hose clamp on the throttle body. To the left of the oil filler neck is the airbox snorkel for the engine lid. Pull that to the left to remove it from the airbox.
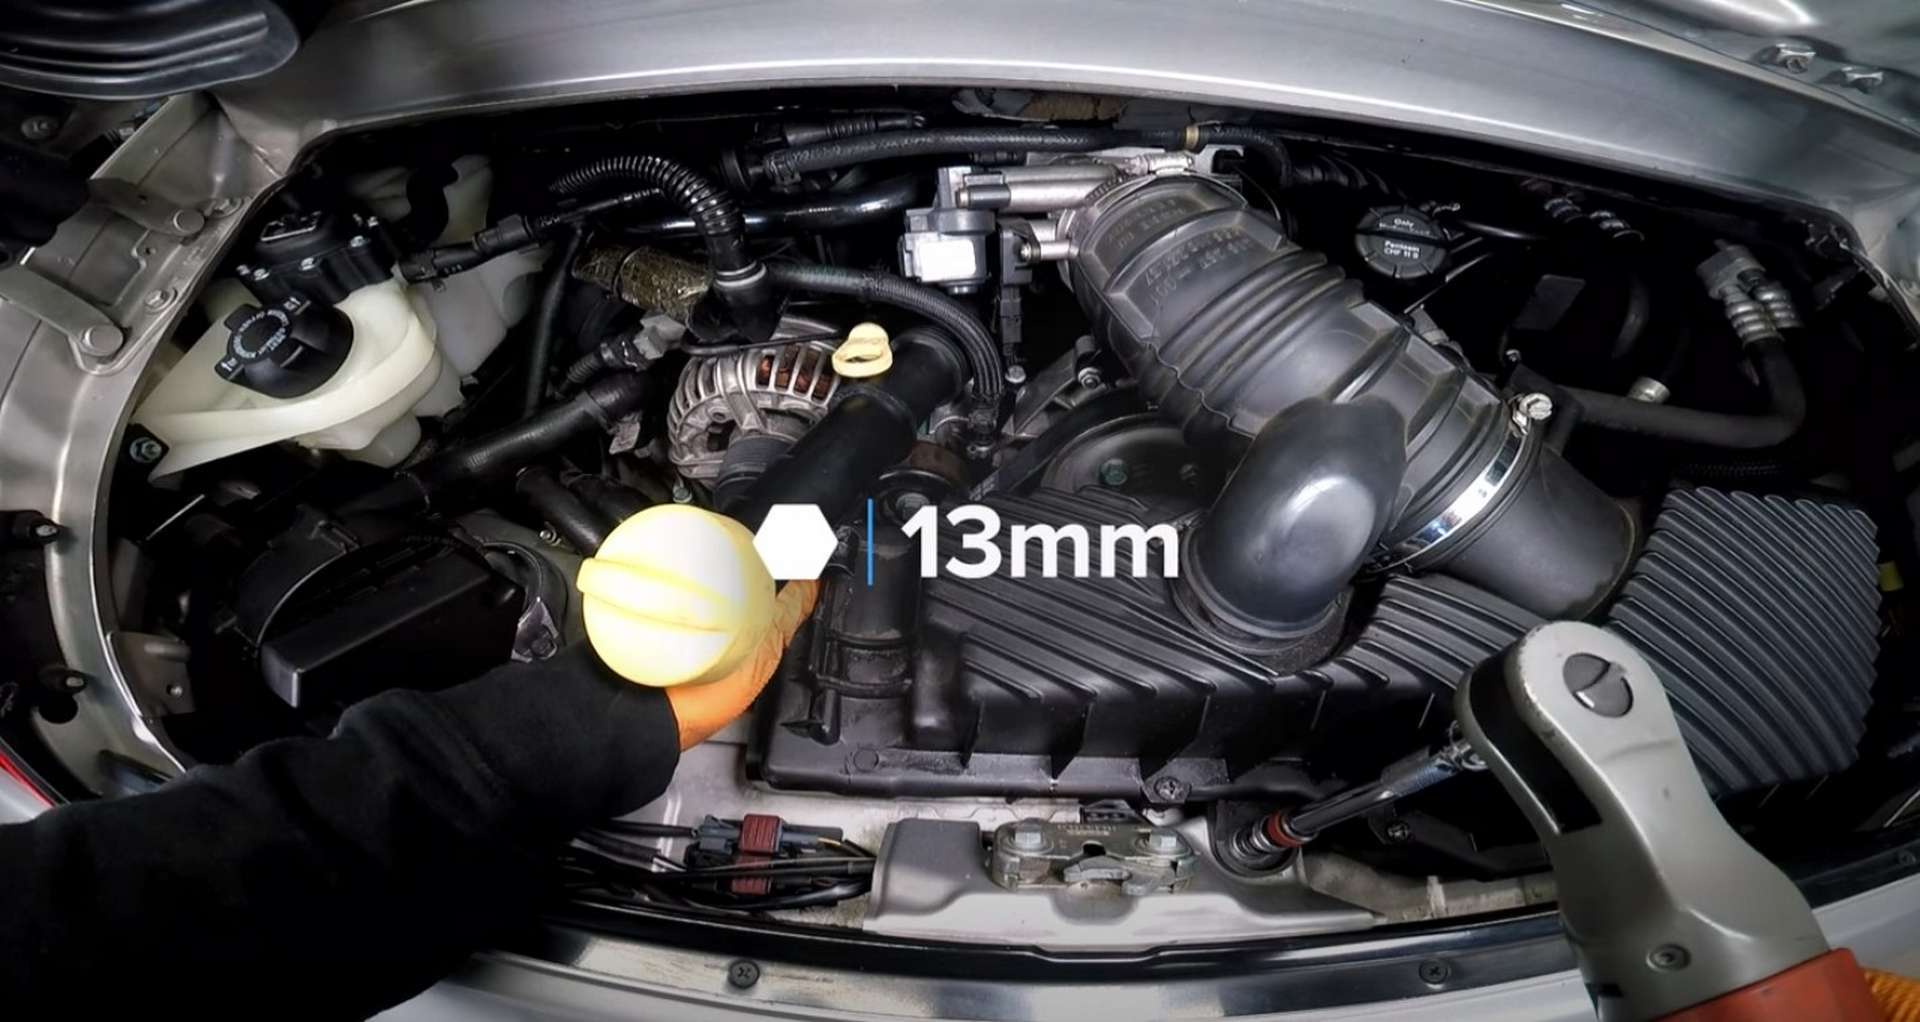
After that, use a 13mm socket to remove the single bolt mounting the airbox into the car. It is located just to the right of the engine lid latch. Then, pull the entire intake assembly up and partially out of the engine bay.
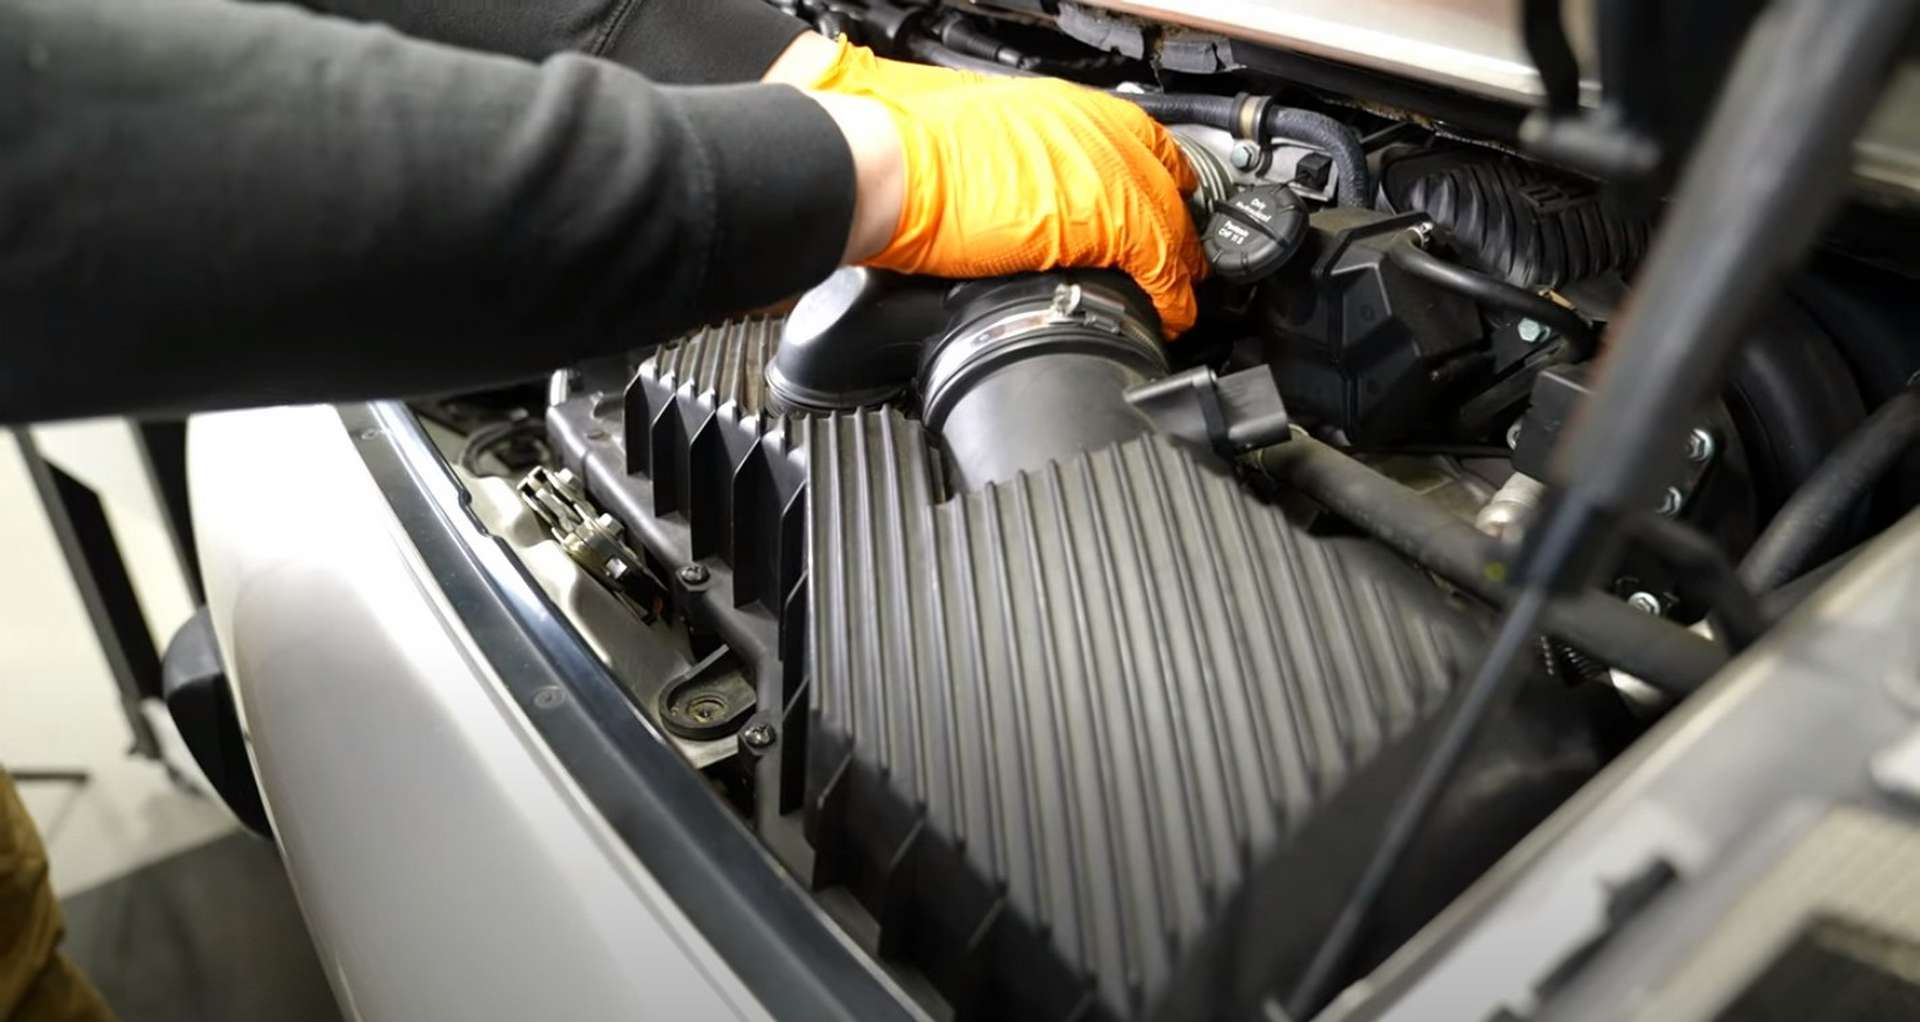
The wiring for the mass airflow sensor runs through a clip on the right rear corner of the airbox. Ensure that you remove the wiring from the clip before removing the intake entirely.
Take a 24mm socket or wrench and place it onto the accessory belt tensioner. Rotate the socket or wrench to the right, and the tensioner will slide the opposite way, removing tension from the belt.
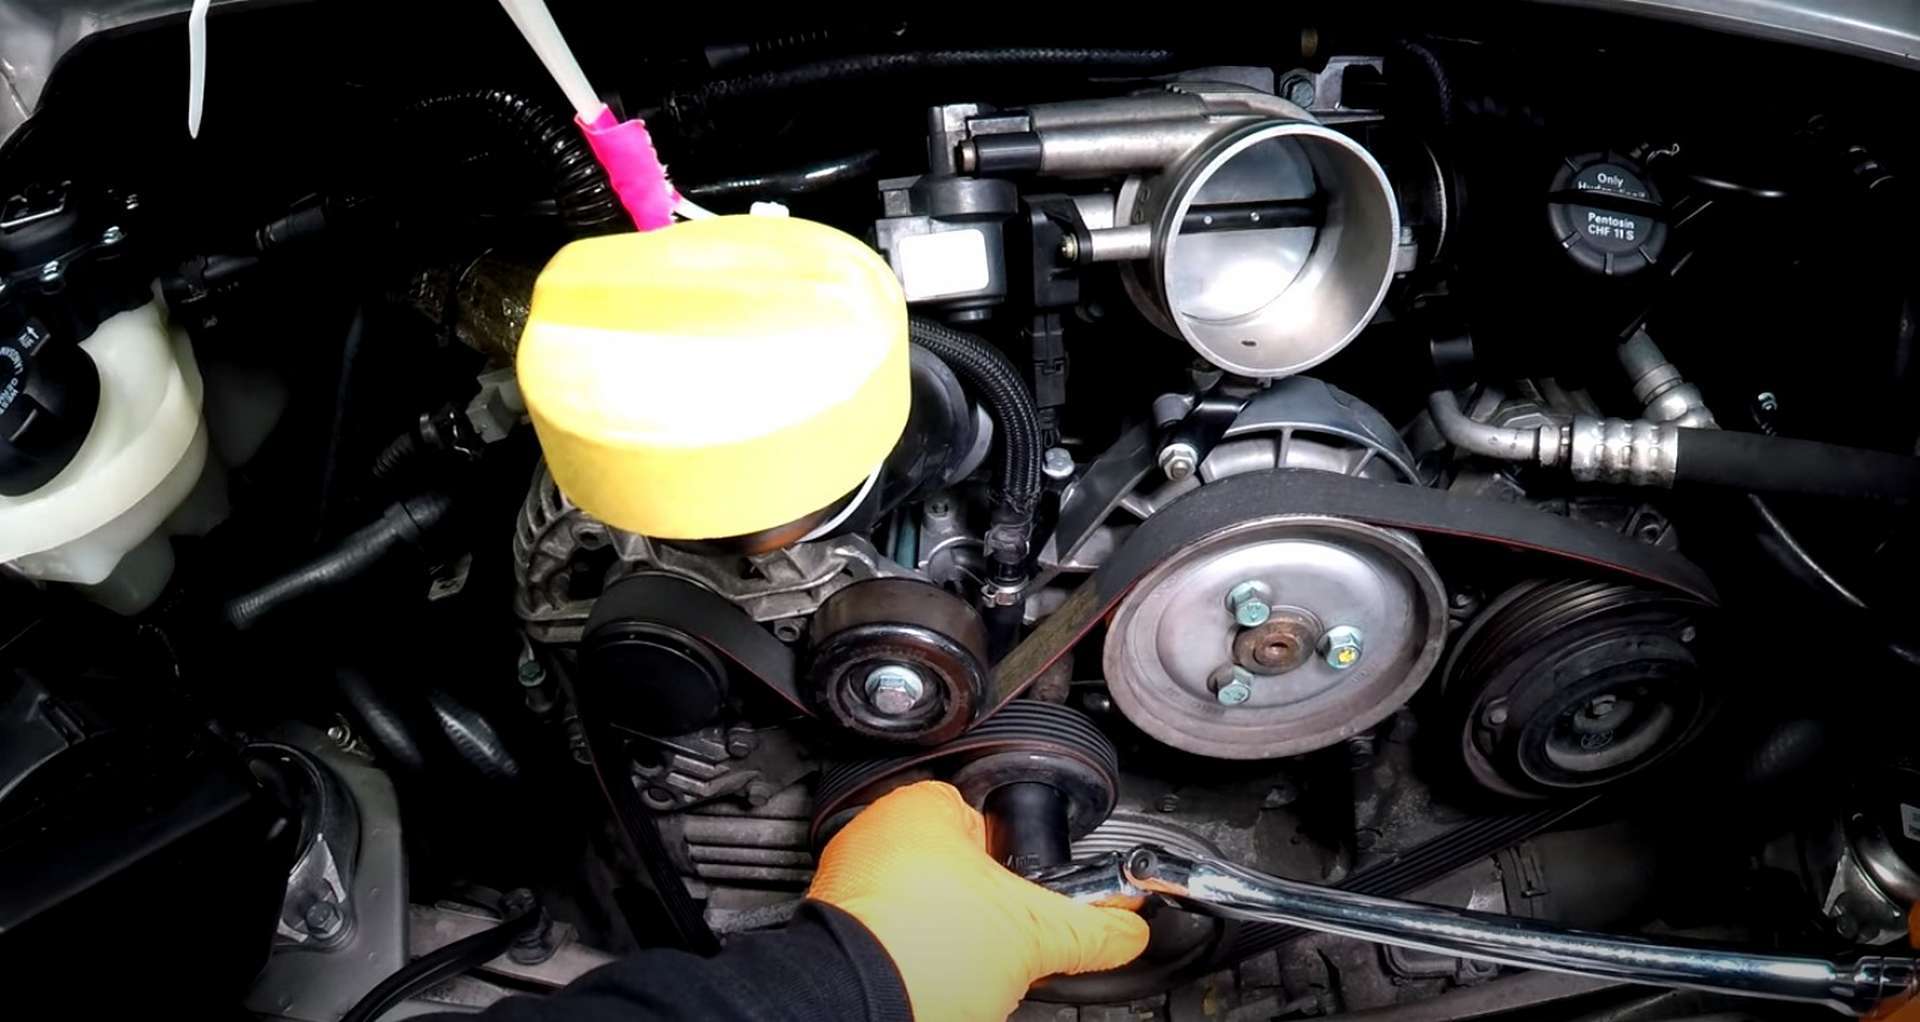
Step 2: Gain access to the water pump bolts
Chock the front wheels and jack up the rear of the car. Raise it about as high as you can get it before setting it onto jack stands. Then, use the jack and a block of wood to support the engine from below. The best spot to place the jack is just in front of the oil pan.
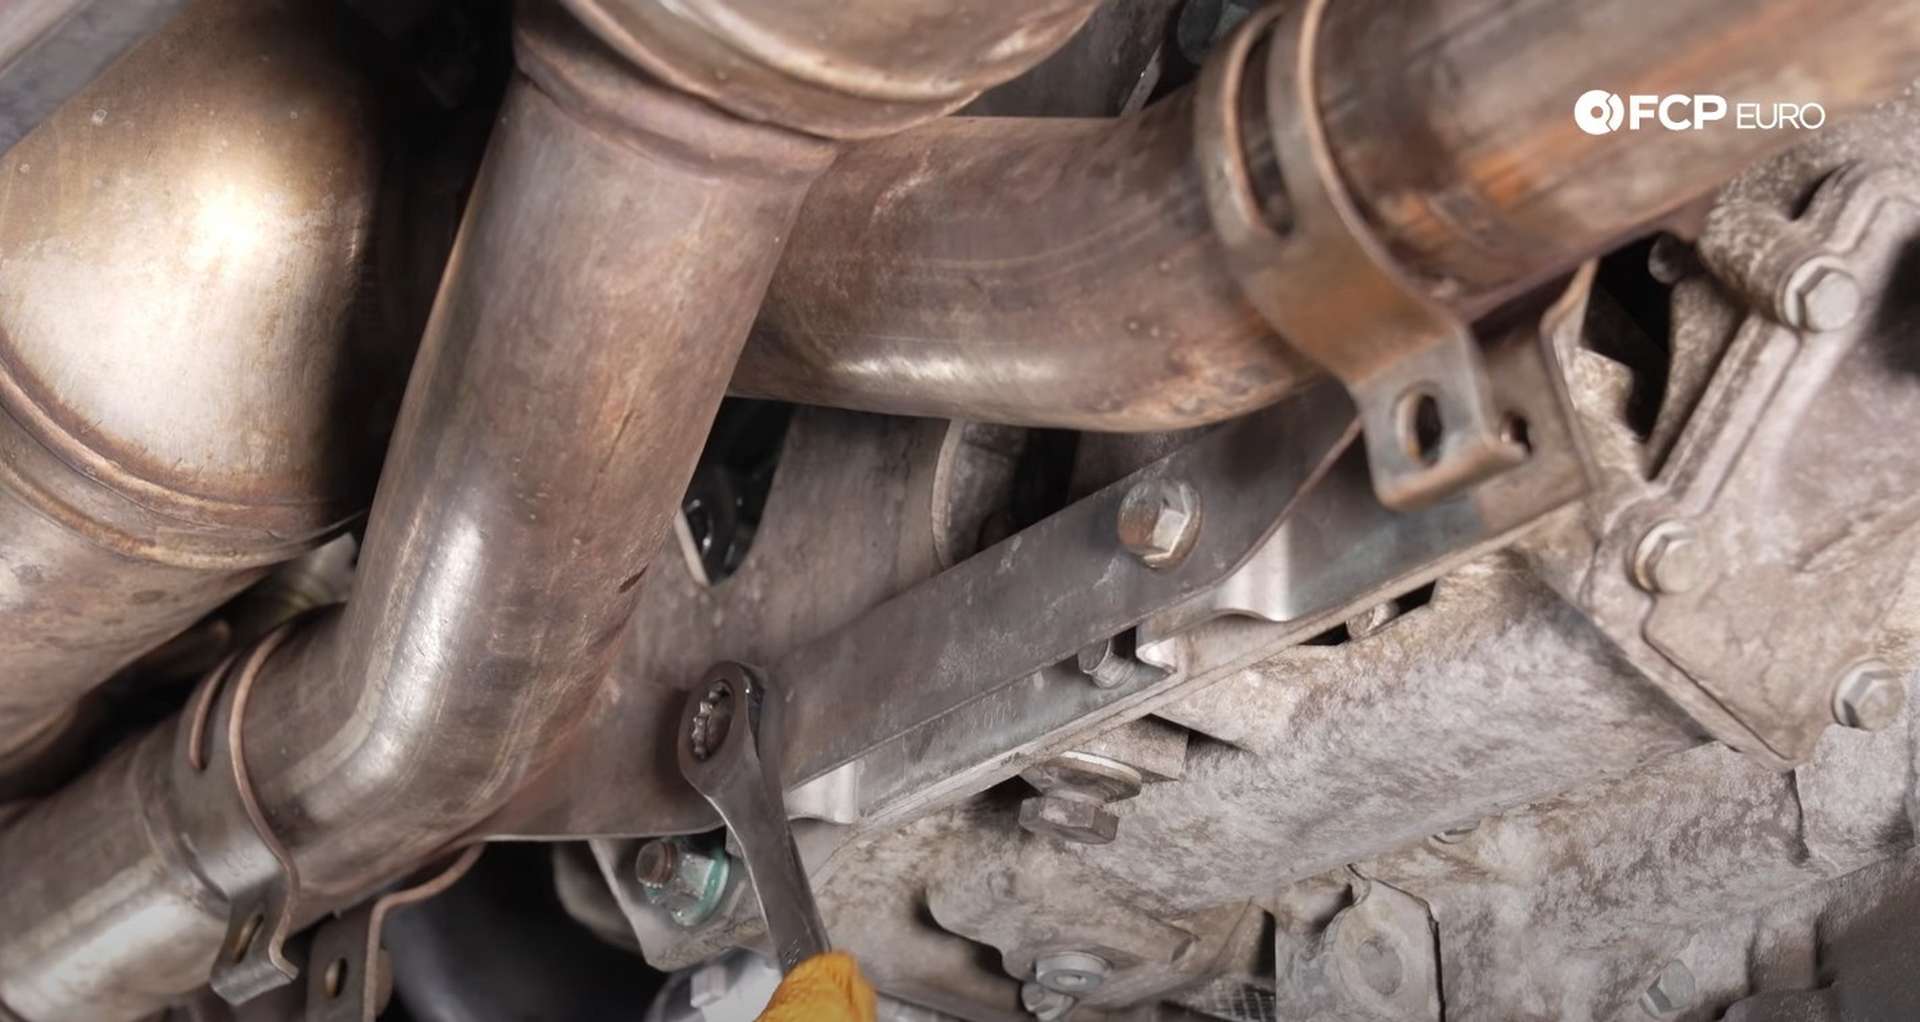
Next, get out the 13mm socket and remove the exhaust from the engine bracket. The mounting bracket is held onto the exhaust by two clamps. Use the 13mm socket to loosen the clamps.
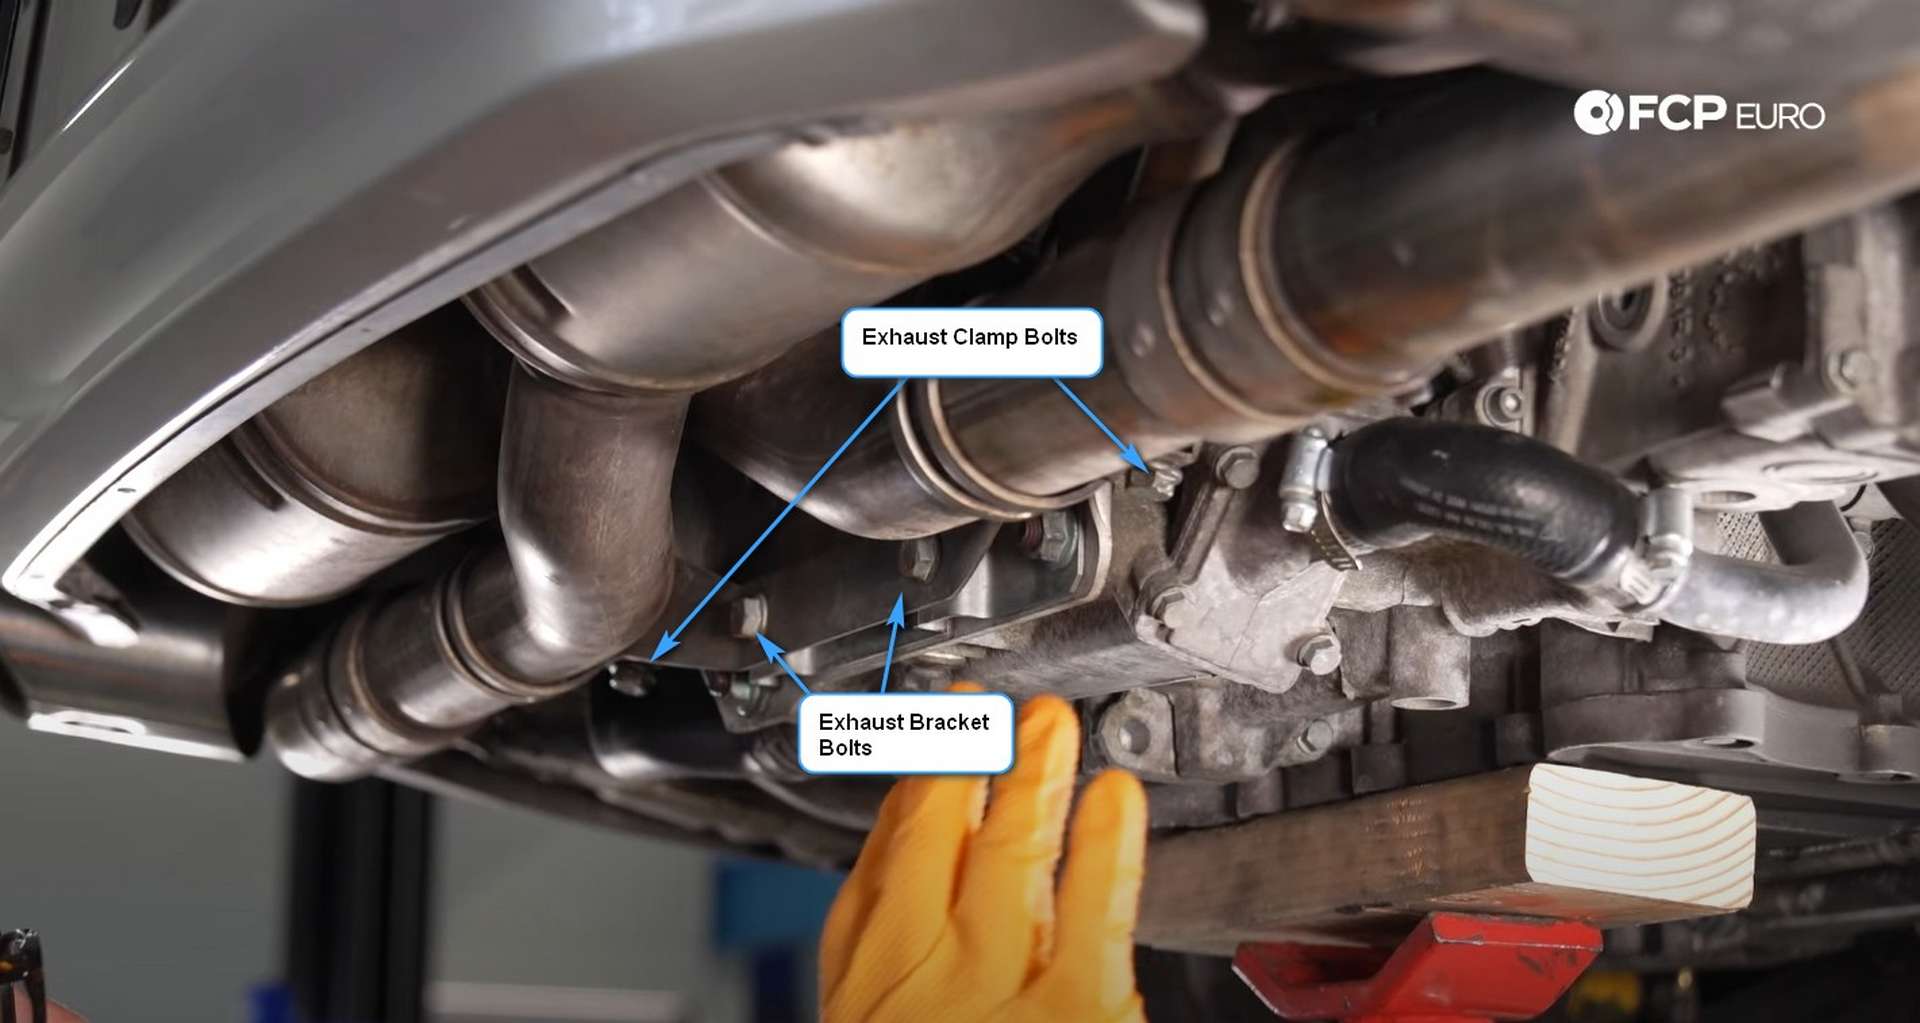
Then, use the same socket to remove the two bolts mounting the exhaust bracket to the engine brace. Pull the bracket off of the brace and let it hang down in the clamps. After that, use a 15mm wrench to remove the two nuts securing the bottom of the brace against the engine.
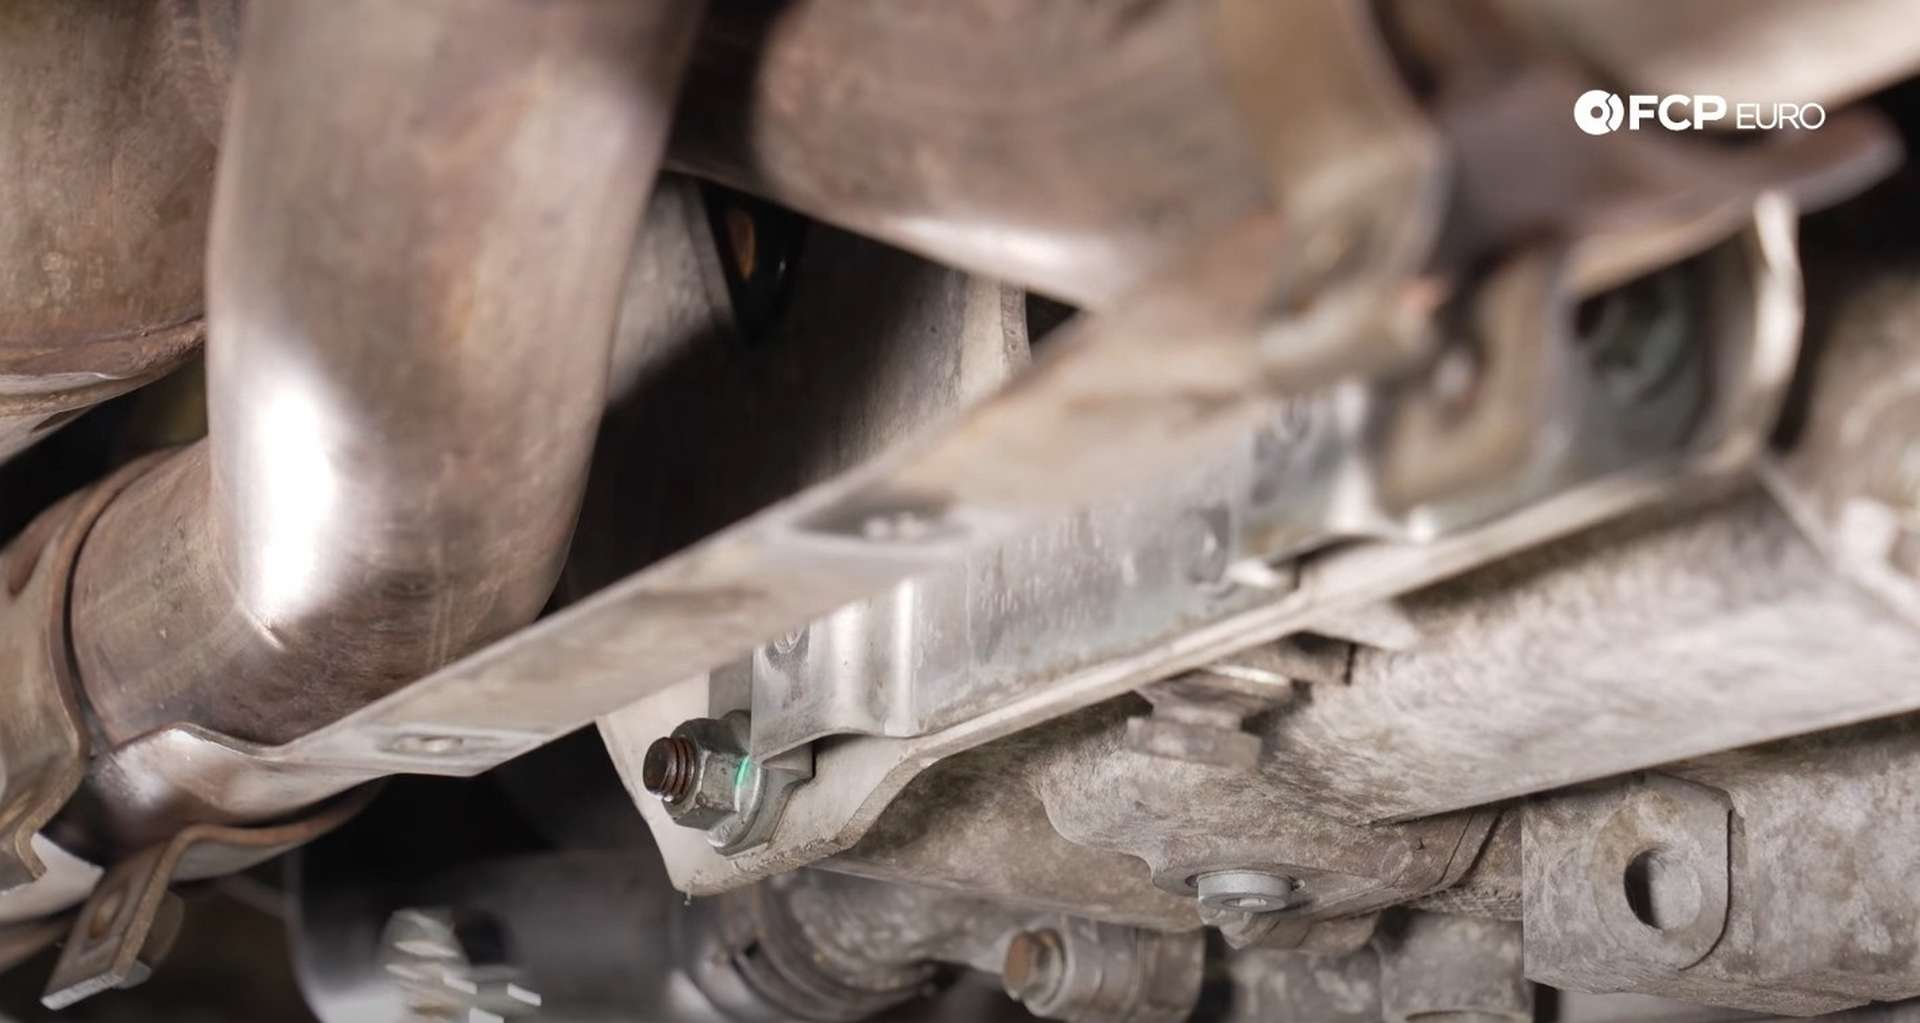
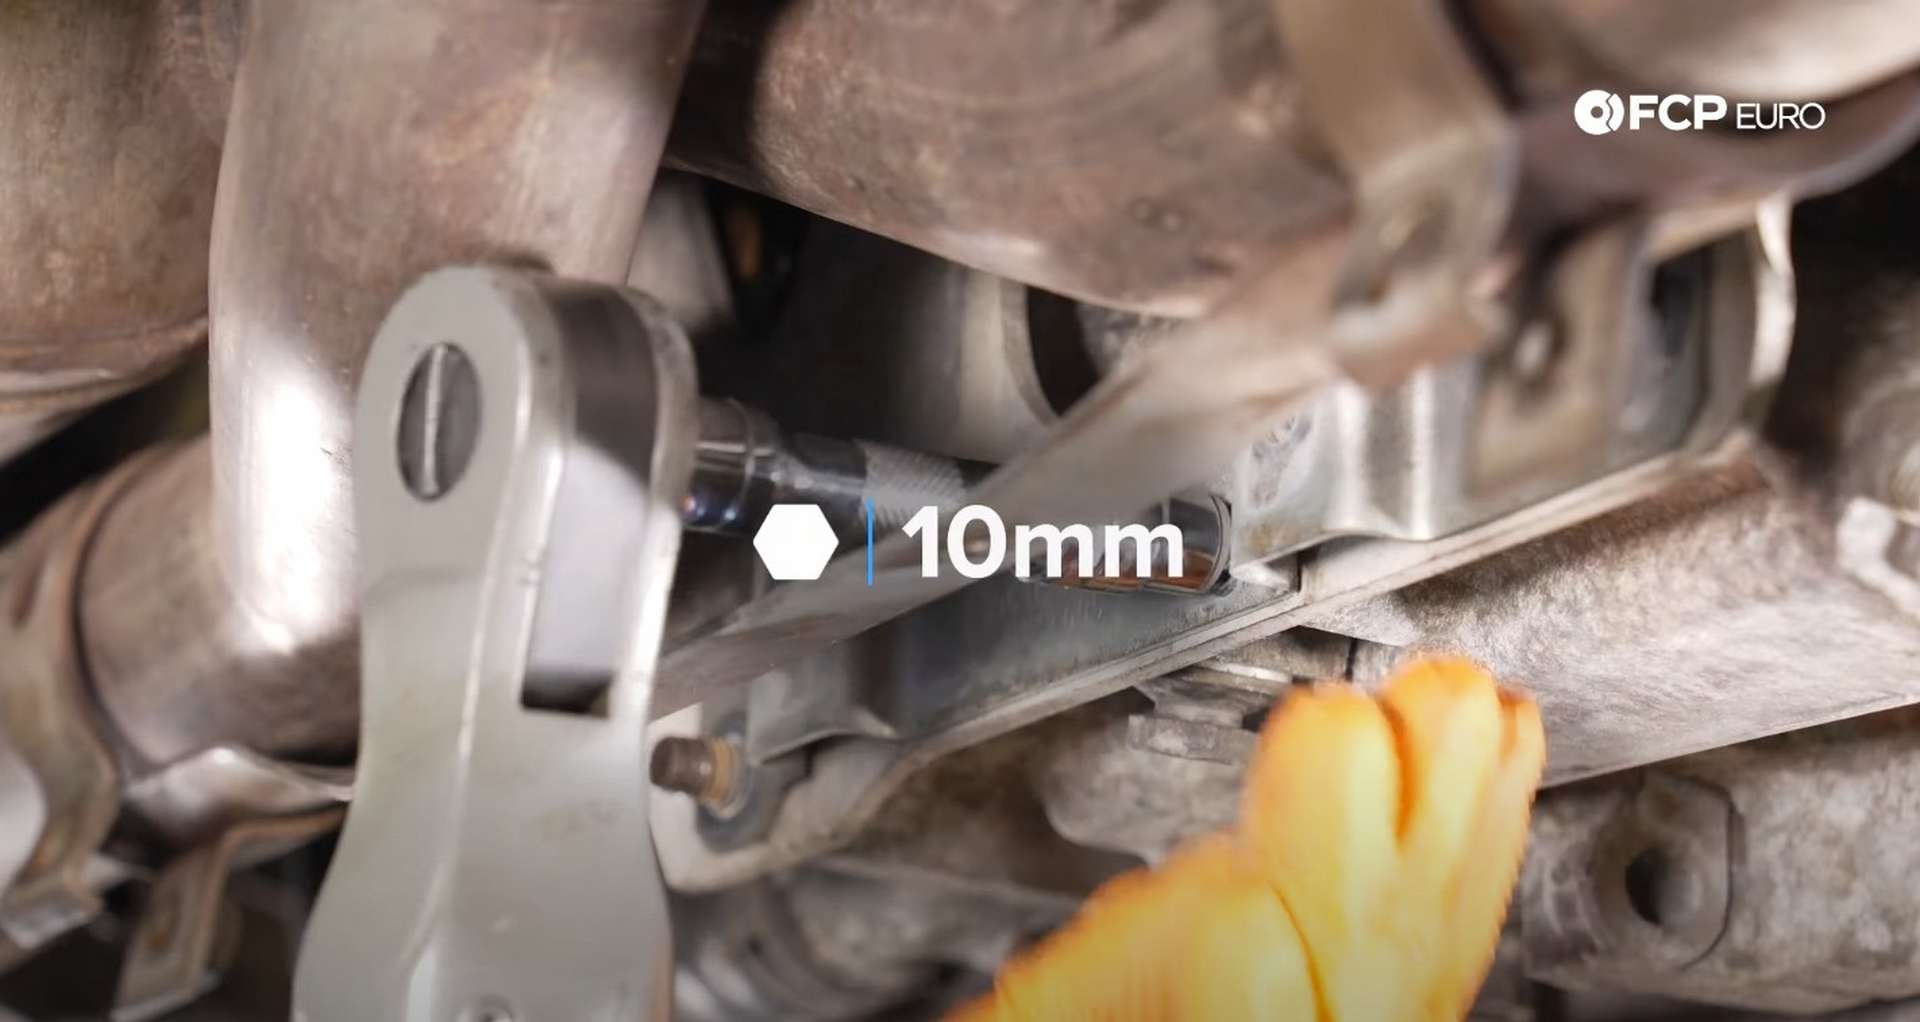
Those two nuts are threaded on over another small bracket. Use a 10mm socket to remove the bolt that mounts the bracket to the engine brace. Pull the bracket off of the engine studs and set it aside.
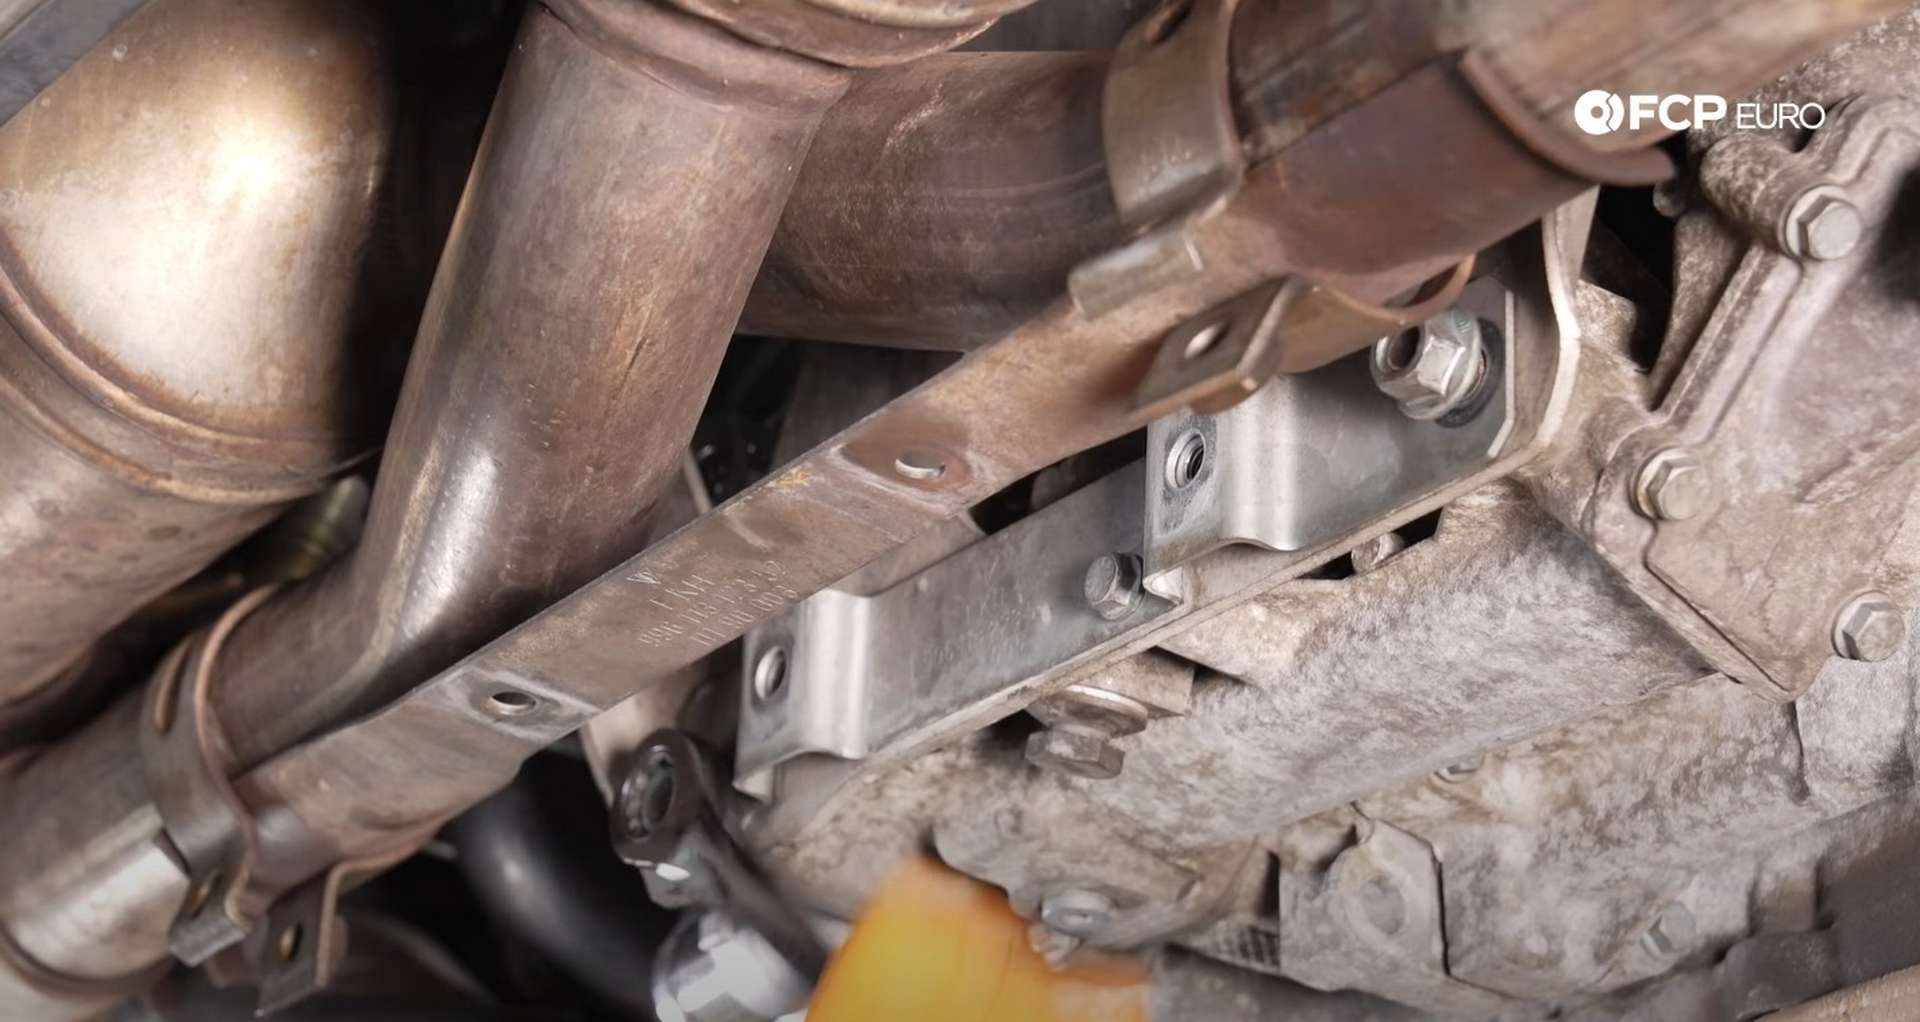
Now the bottom of the brace is free of the engine. Next, take a long 15mm wrench and slide it up on the brace to loosen the two 15mm nuts at the top of it. You don’t have to remove them if you don’t want to. Space is tight, and it can be tricky to thread them back on.
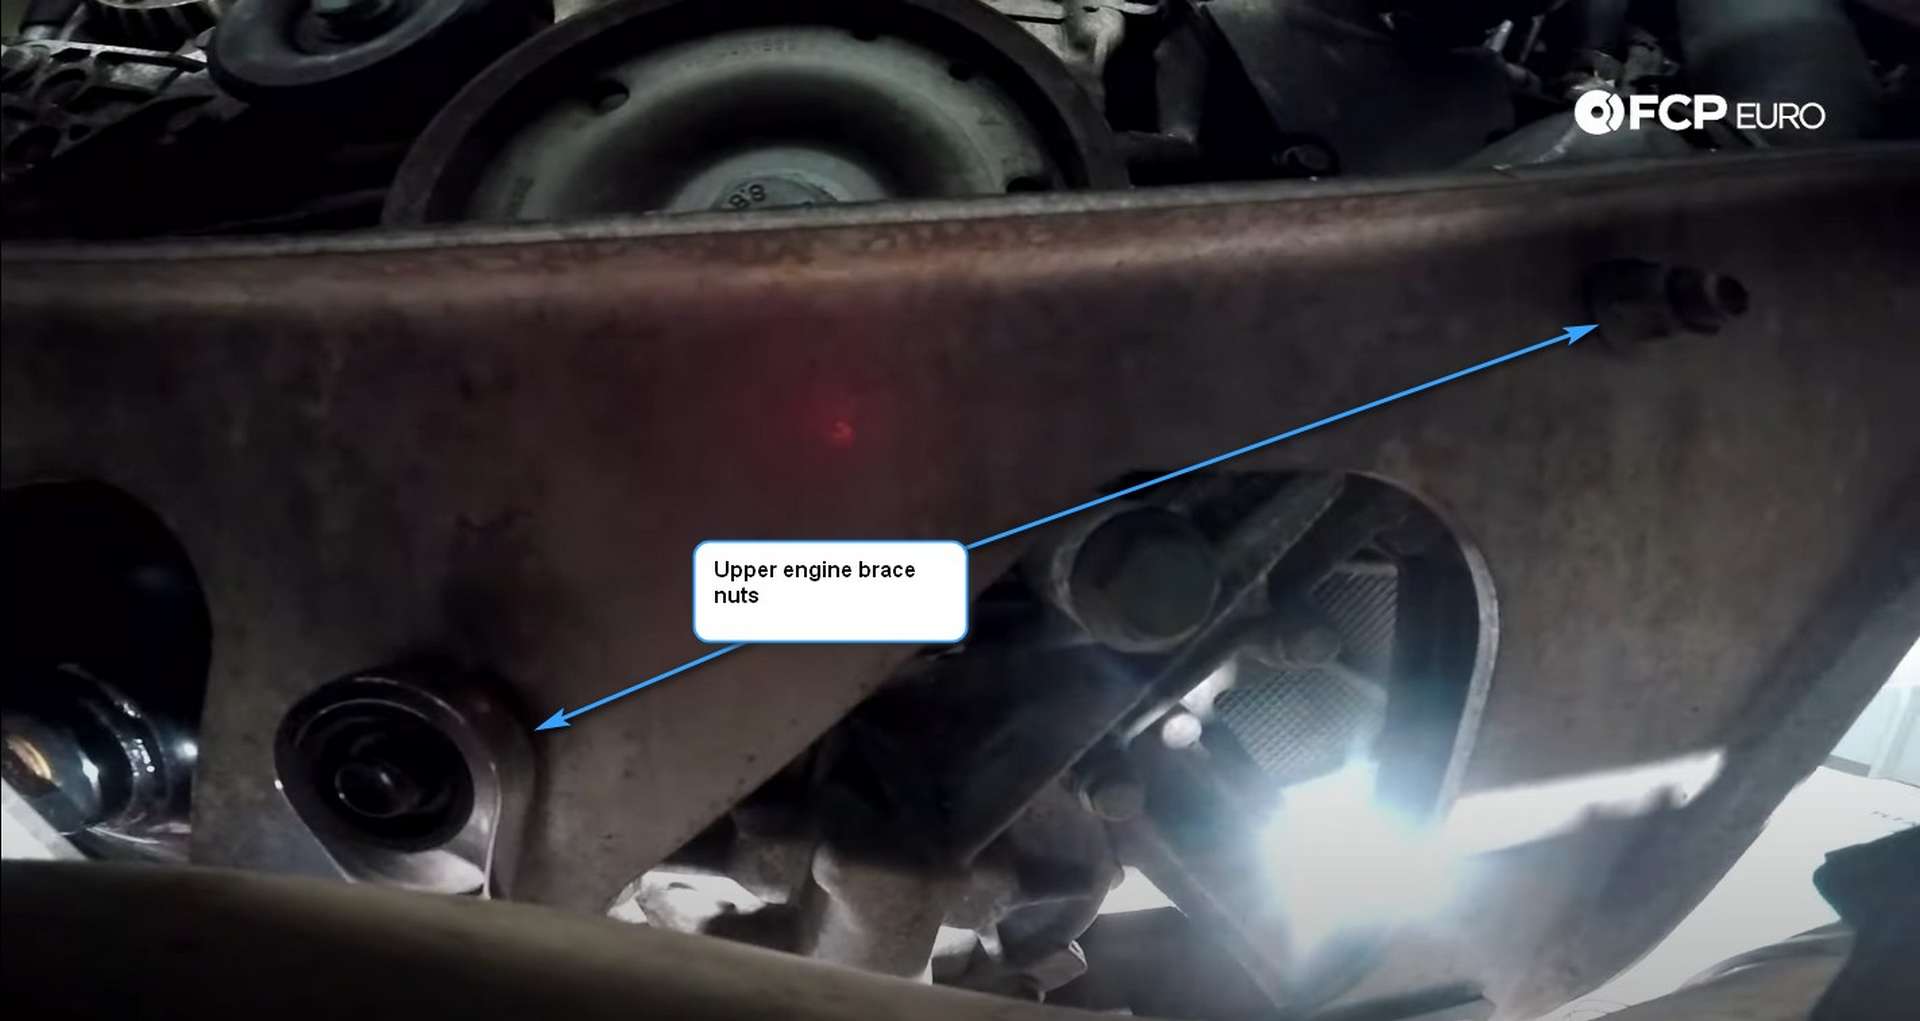
Pry the engine brace away from the engine after you’ve removed and loosened the 15mm nuts. The brace’s lower half should sit at the end of its studs.
Step 3: Drain the coolant
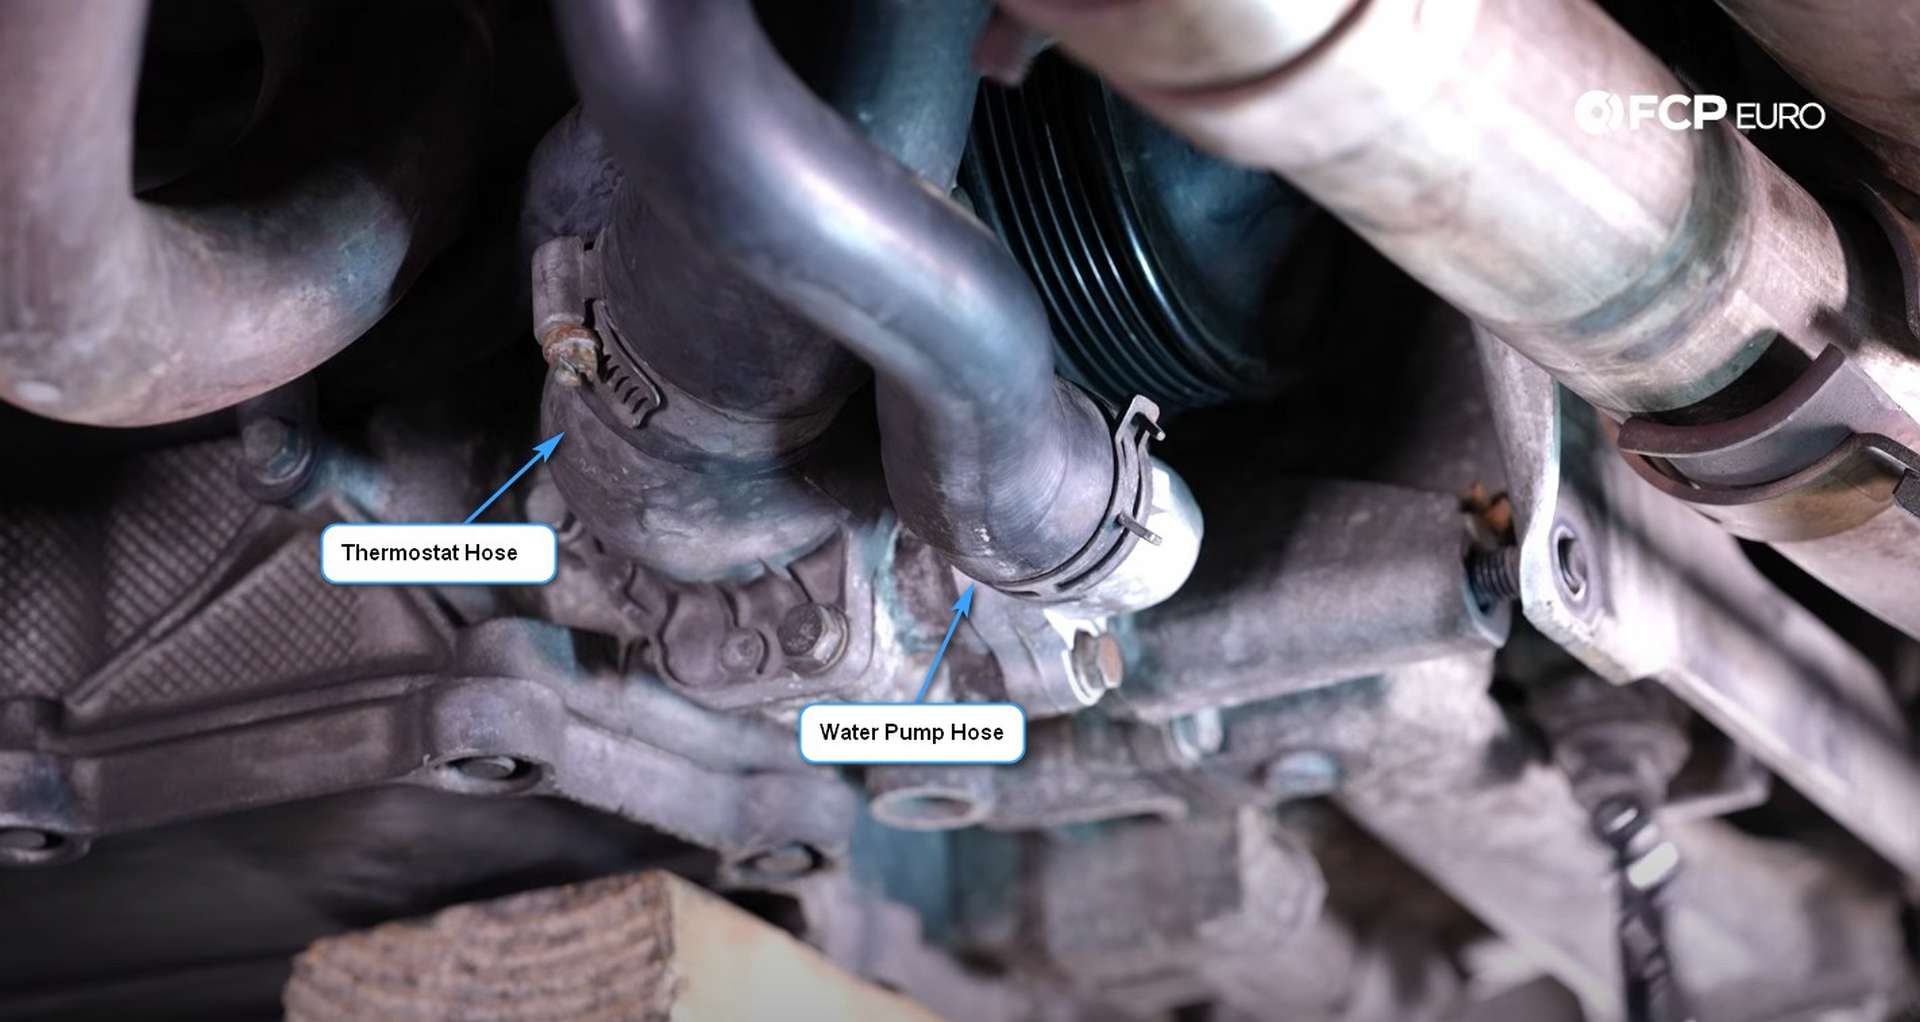
First, grab some hose clamp pliers and remove the clamp from the end of the water pump’s hose. Have a drain pan ready under the hose to catch the coolant. Then, use a flathead screwdriver to loosen the thermostat hose’s clamp and pull both hoses off their respective parts.
The hoses will likely be stuck to the aluminum so use a pick or screwdriver to wiggle them free. Be careful though, ripping the hose will require you to replace it. After that, move to the driver’s side of the engine and locate the plastic coolant pipe that runs along it. Use a 10mm socket to remove the two bolts mounting it to the engine.
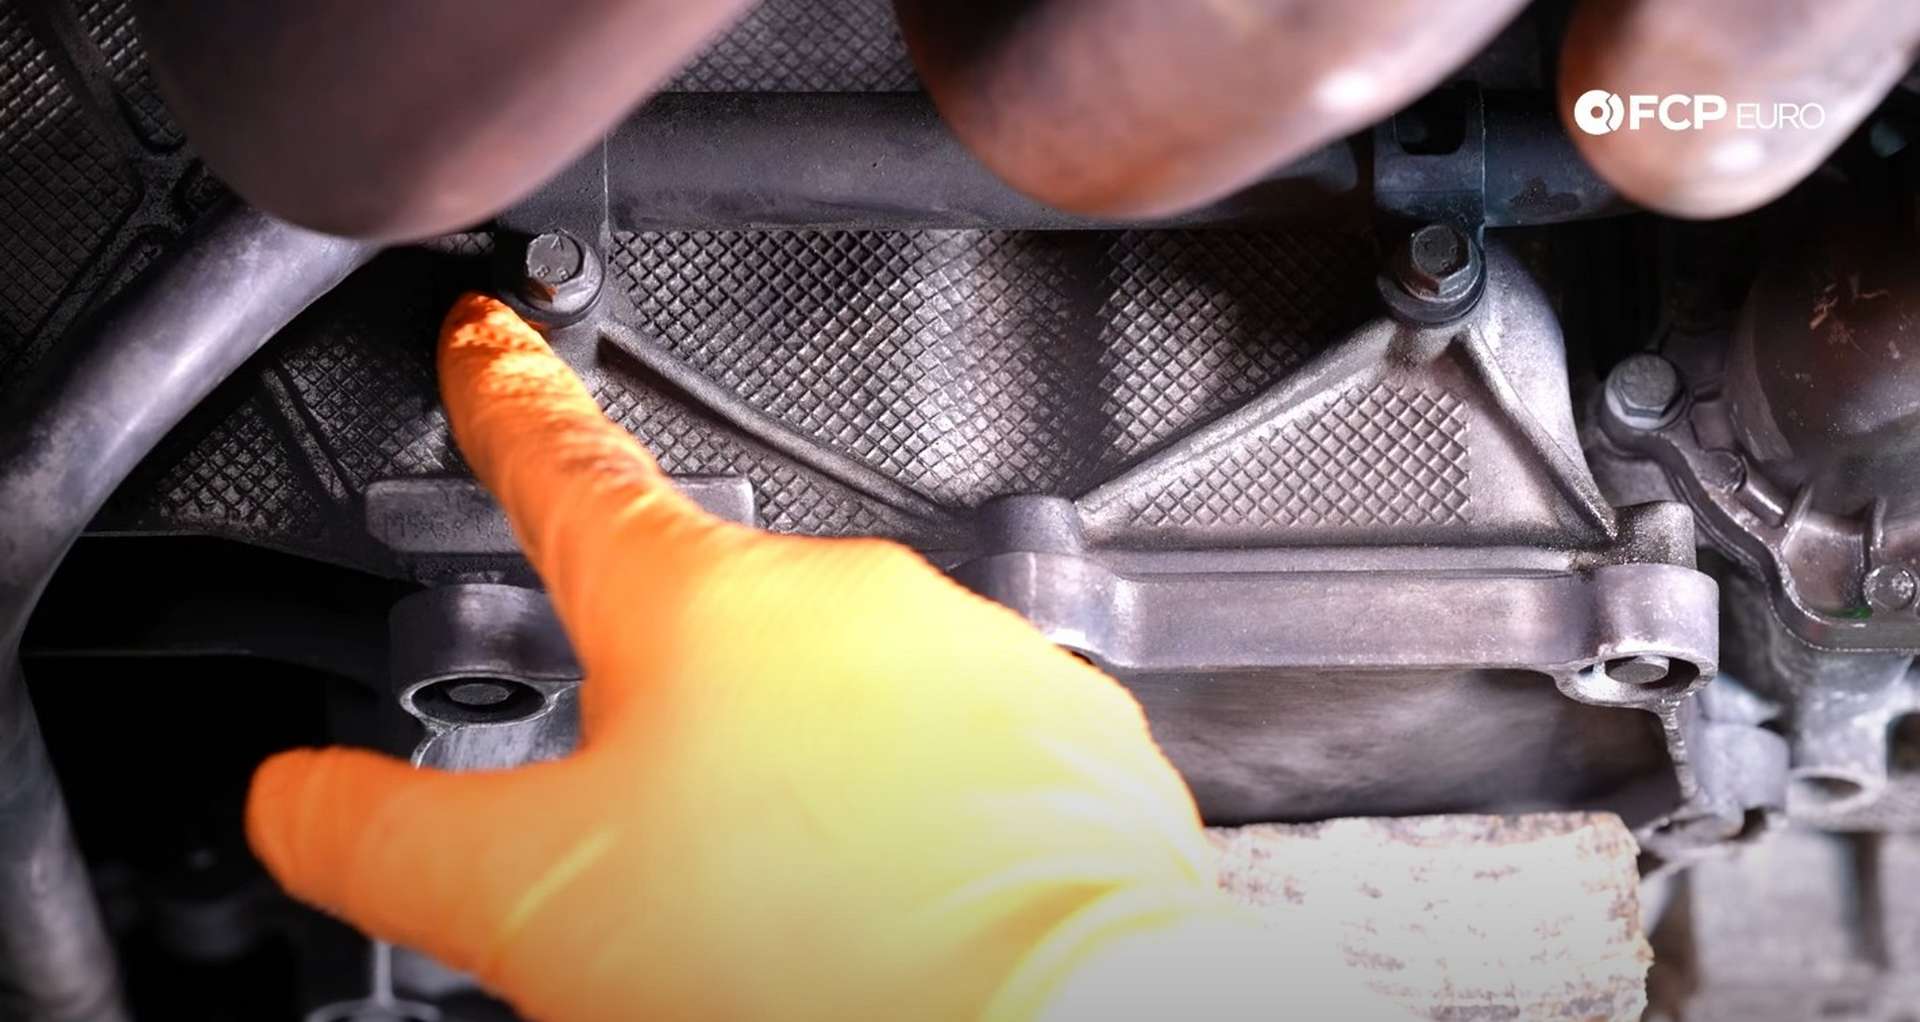
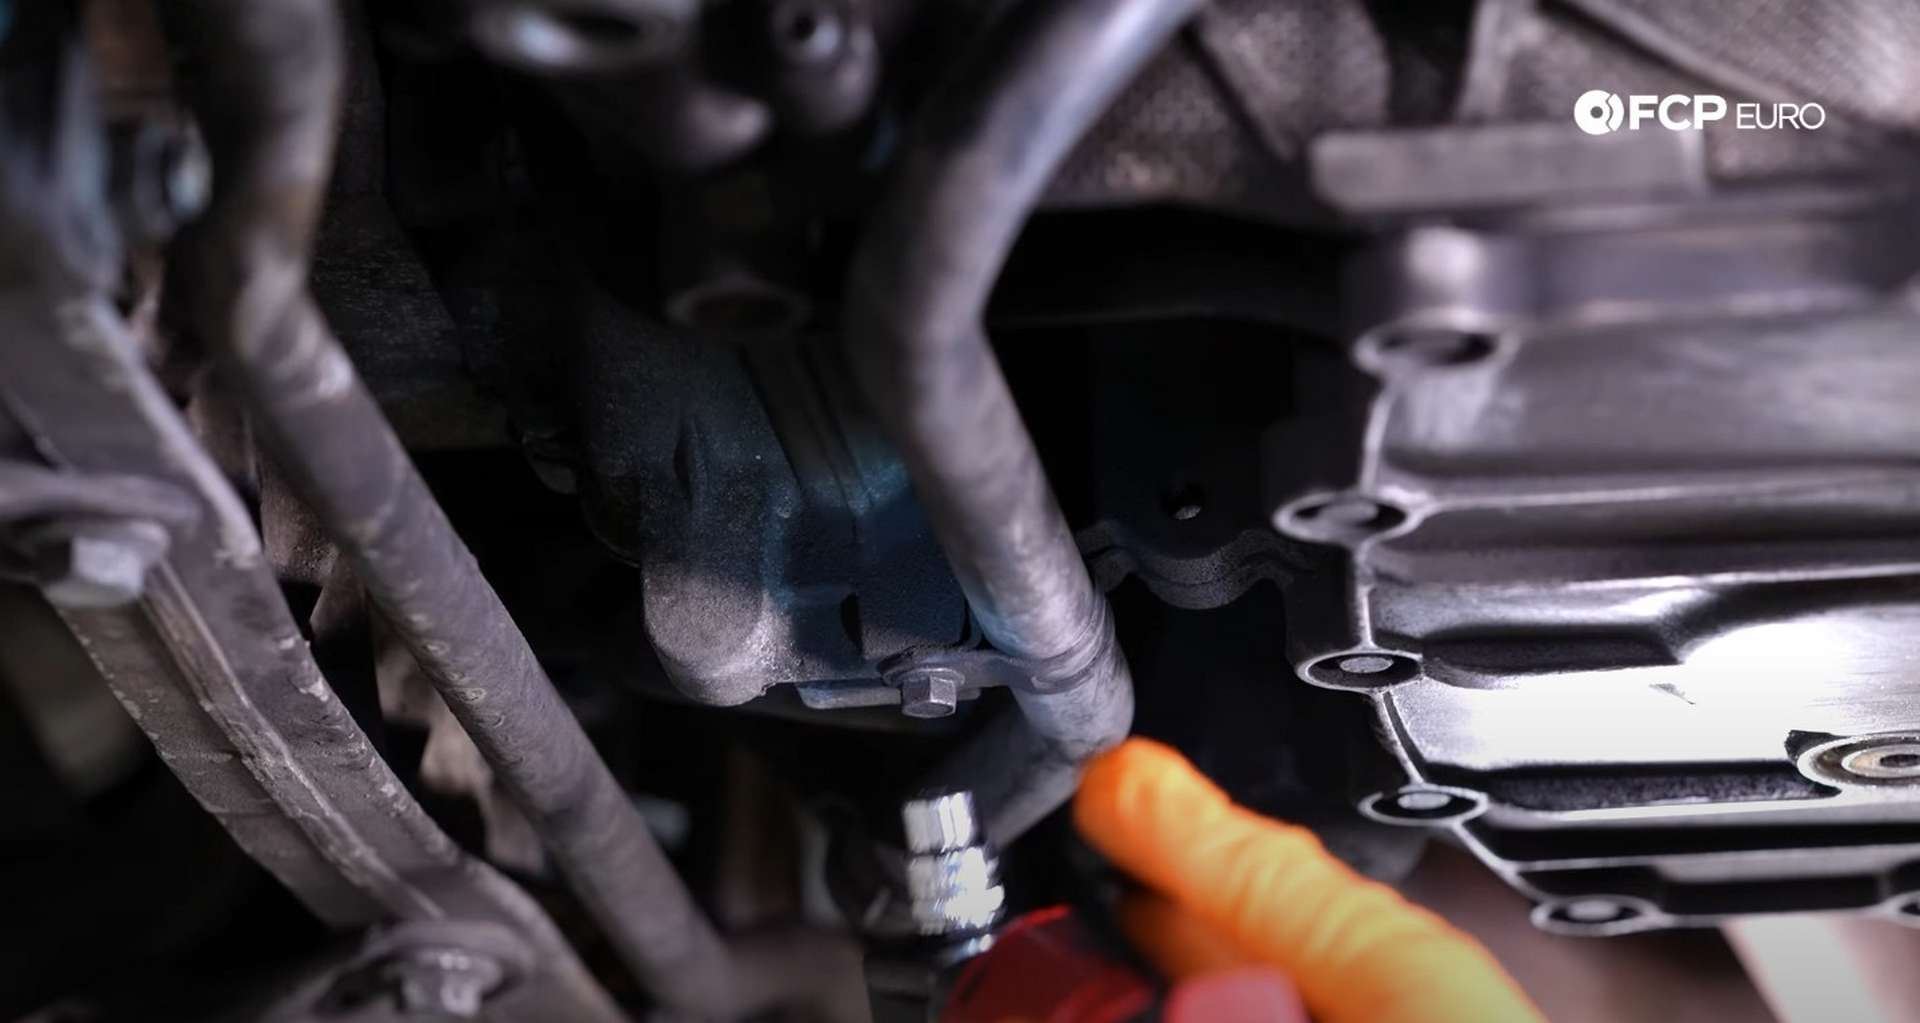
Remove the two bolts and then follow the pipe to the back of the oil pan. Use the 10mm socket to remove the pipe’s last bolt.
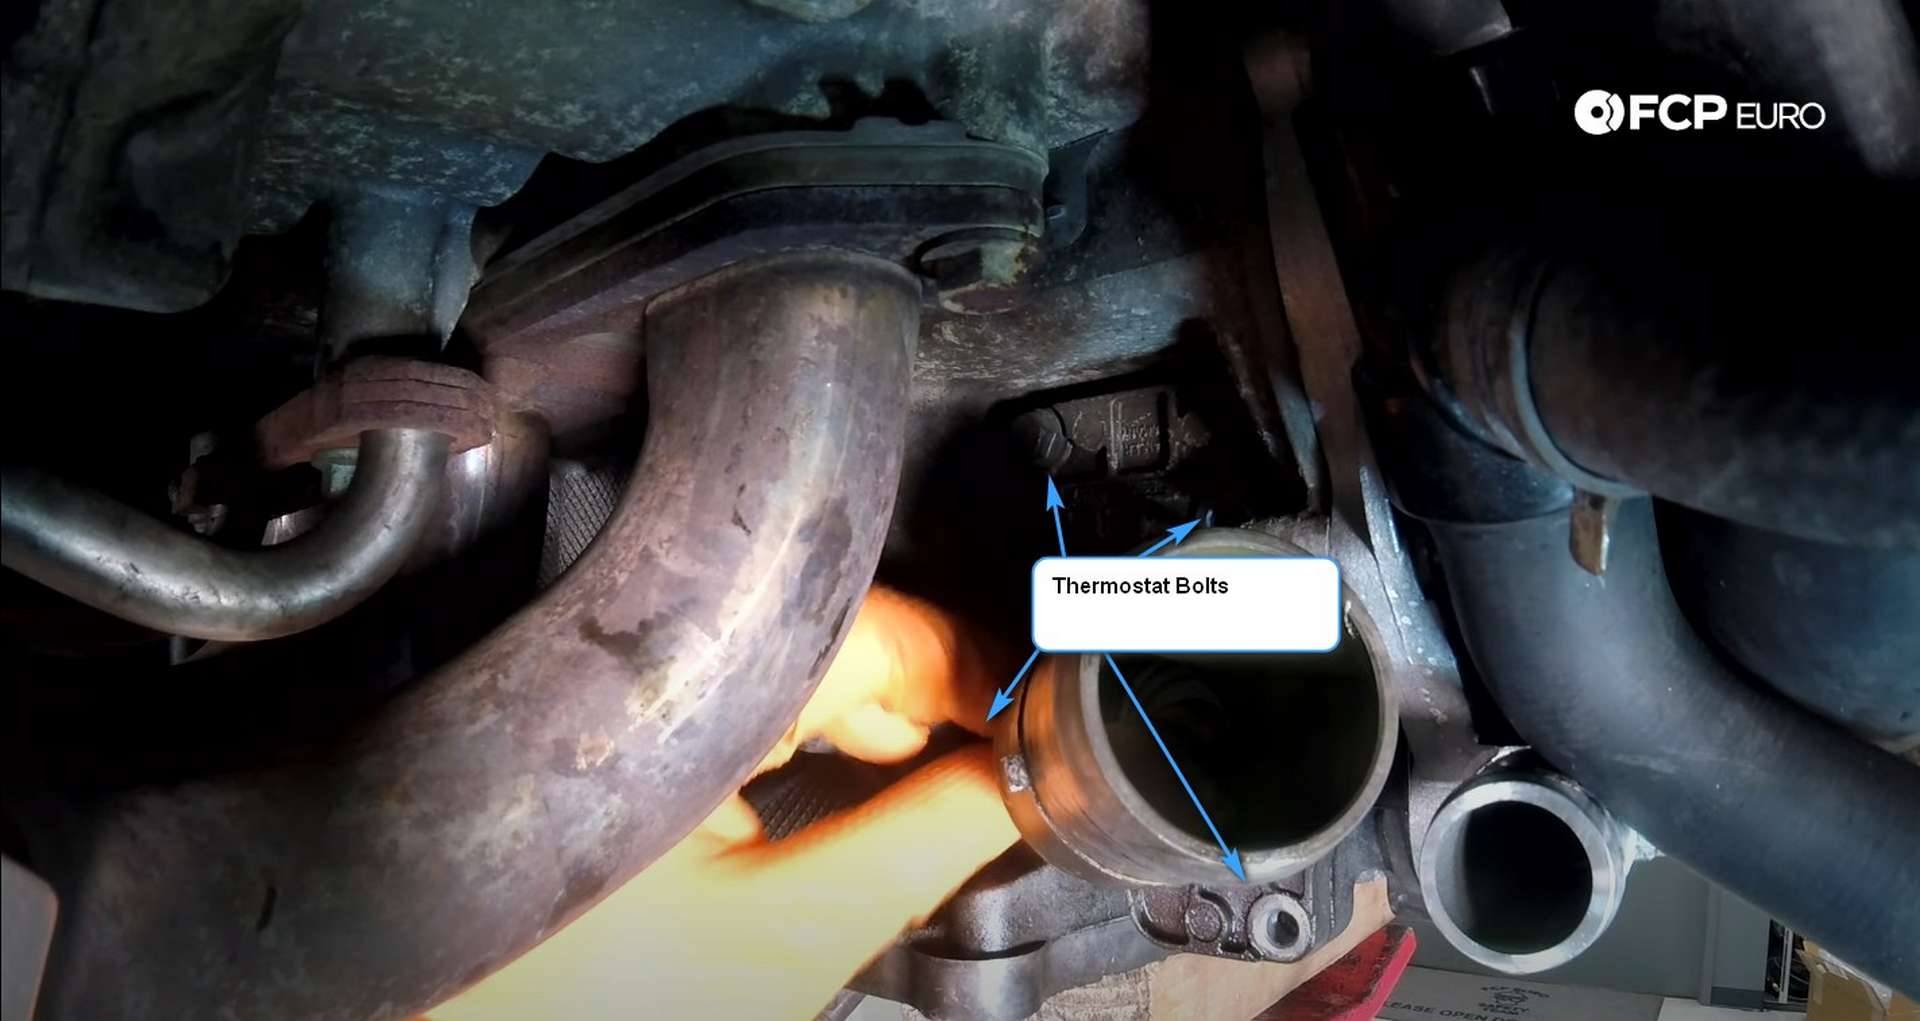
Step 4: Remove the thermostat and water pump
Use a small ratchet and a 10mm socket to remove the four bolts from the thermostat, and have the drain pan ready beneath the thermostat to catch any leftover coolant. Ensure you remove the old gasket from the engine after pulling off the thermostat, too.
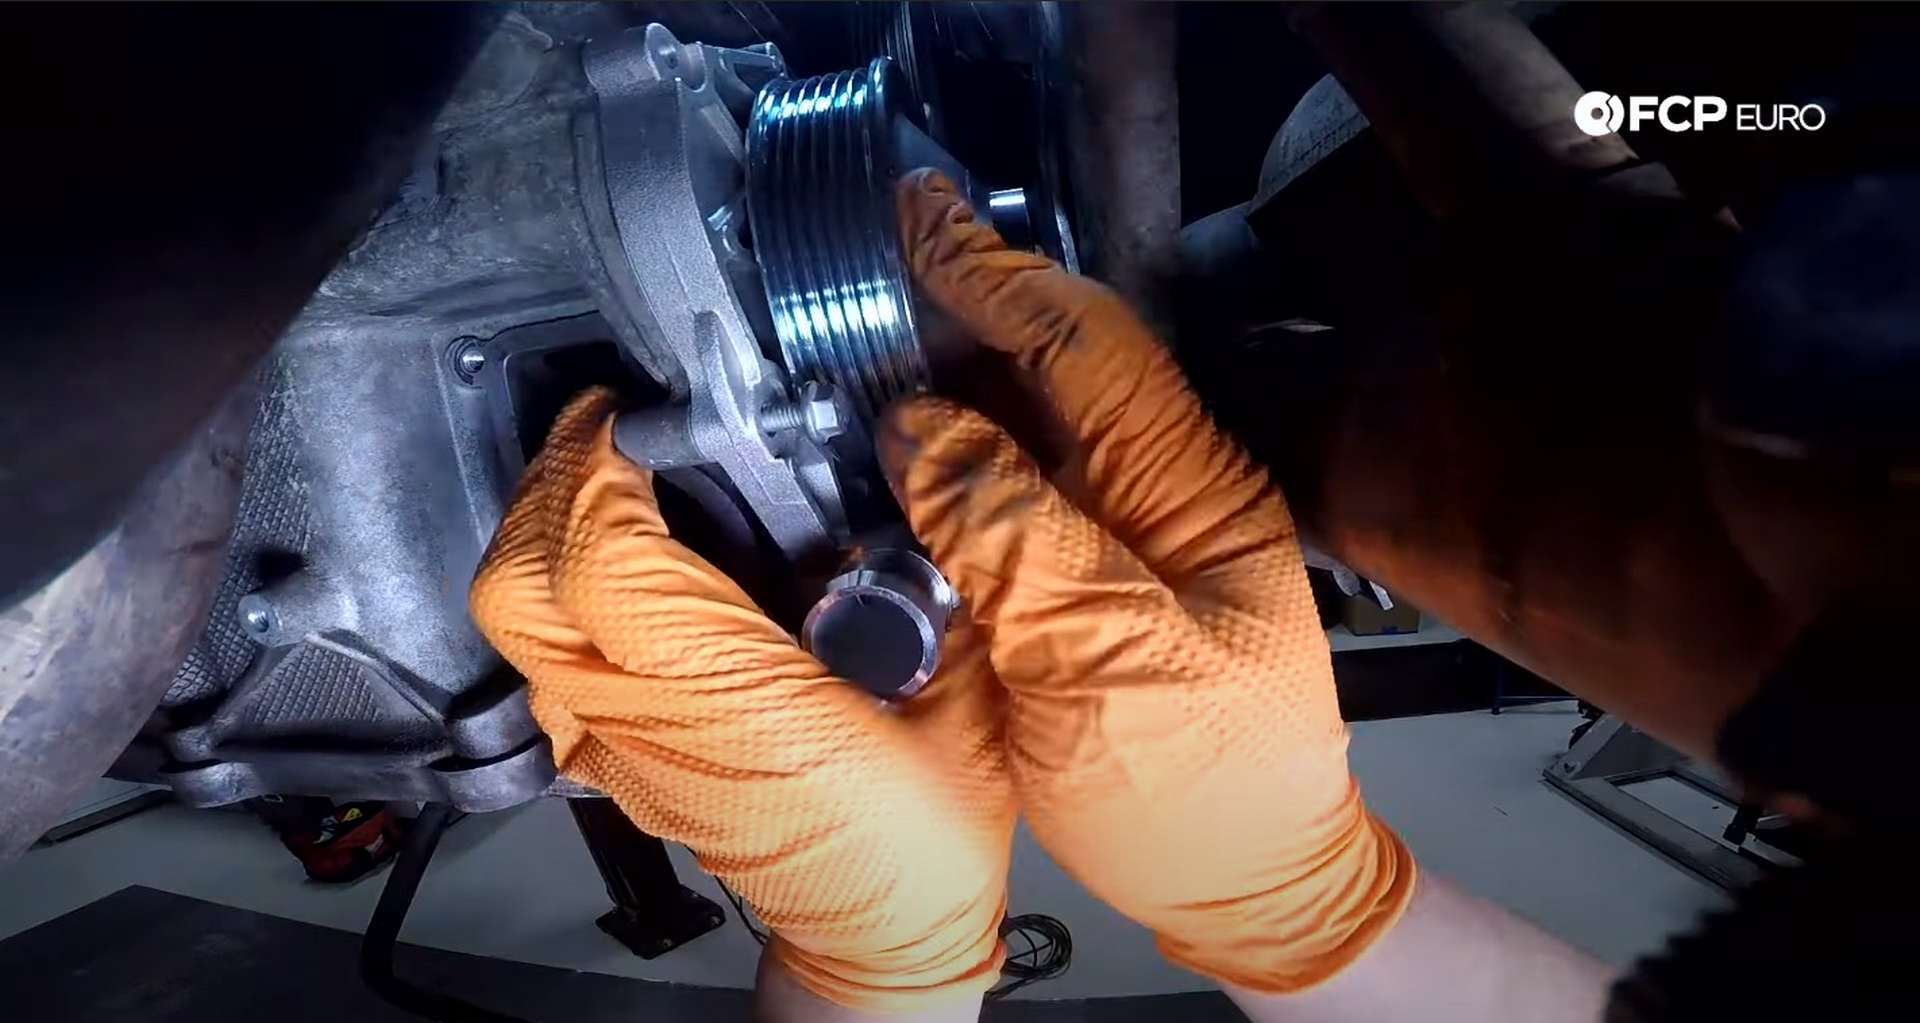
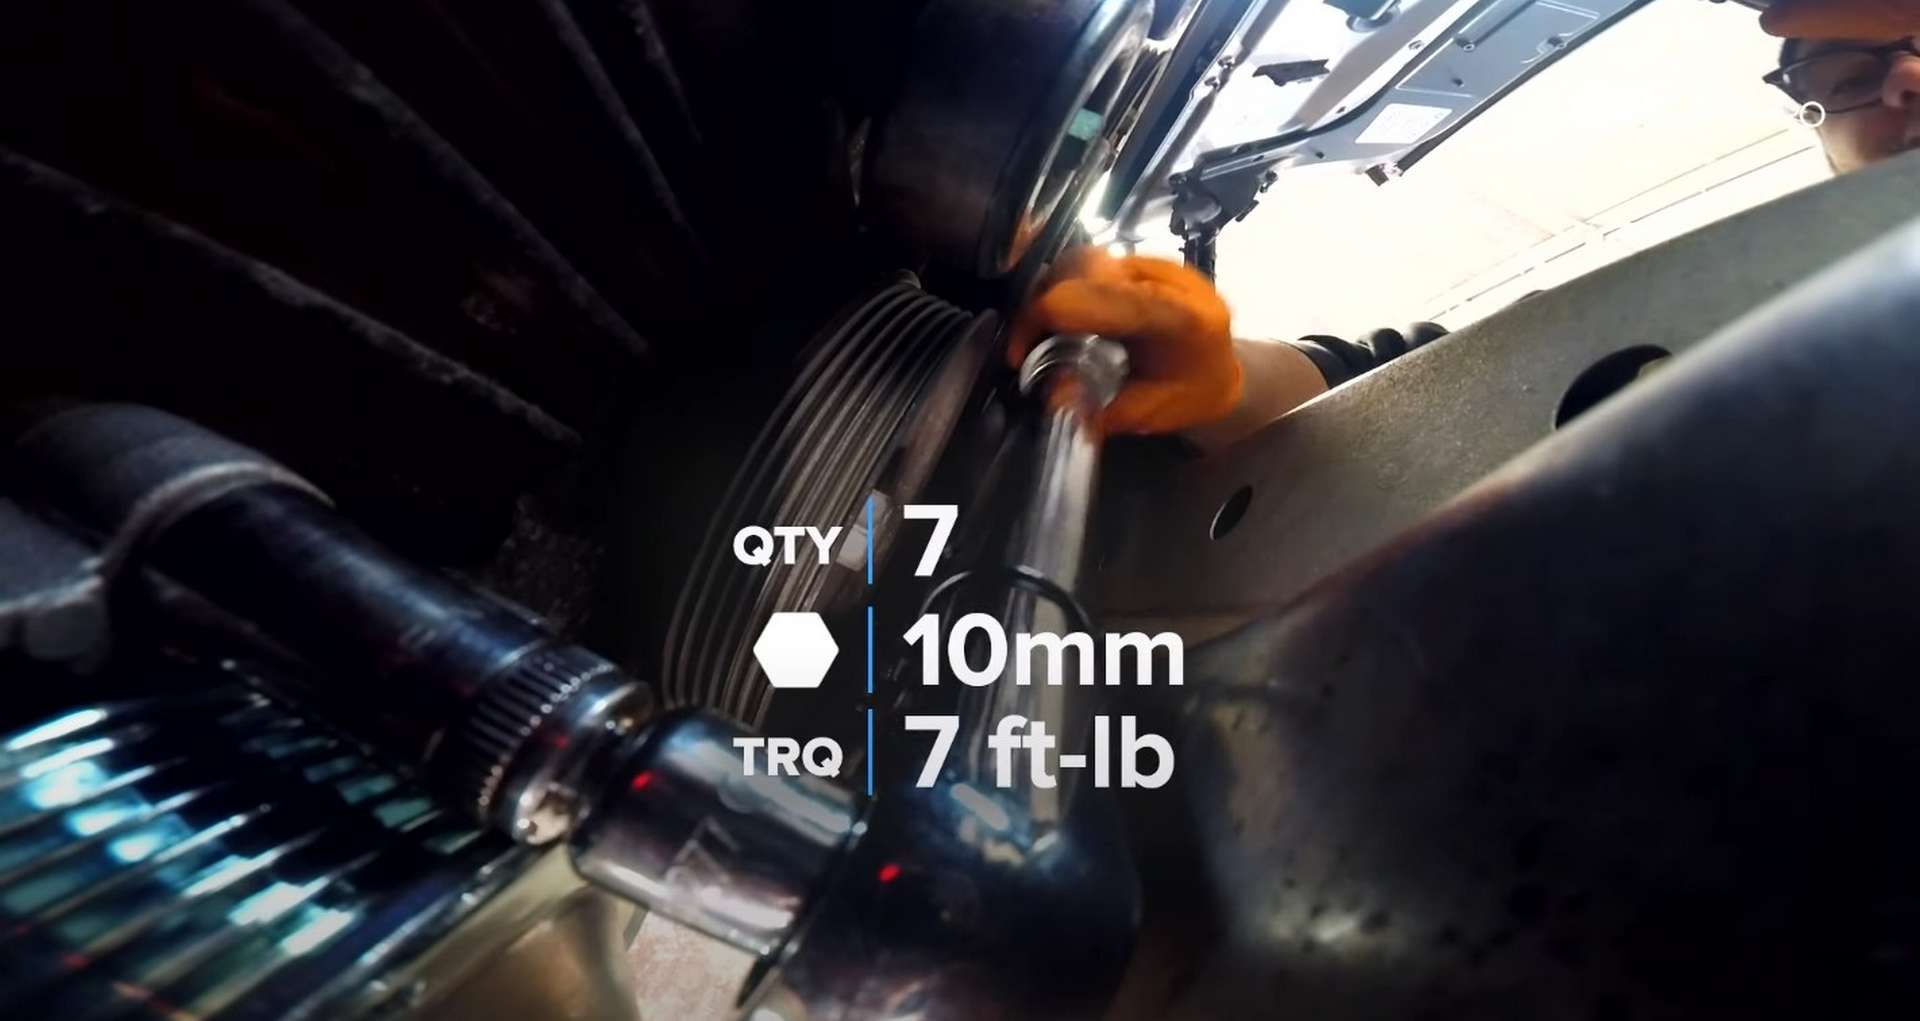
After that, turn your attention towards the water pump. The water pump uses seven bolts, so I recommend taking the new pump out of its box to get an idea of where all of the bolts sit. Then, take your 10mm socket and small ratchet, and remove the water pump’s bolts.
The pump’s upper bolts are very tricky to get to. Be patient. Remove the leftover gasket from the engine block if it doesn’t come off with the water pump.
Step 5: Install the new water pump and thermostat
Inspect the mating surfaces on the engine before installing anything. Use a rag or scotchbrite and brake clean to clean off any corrosion or dirt that may be present. Then, cut out the new gasket.
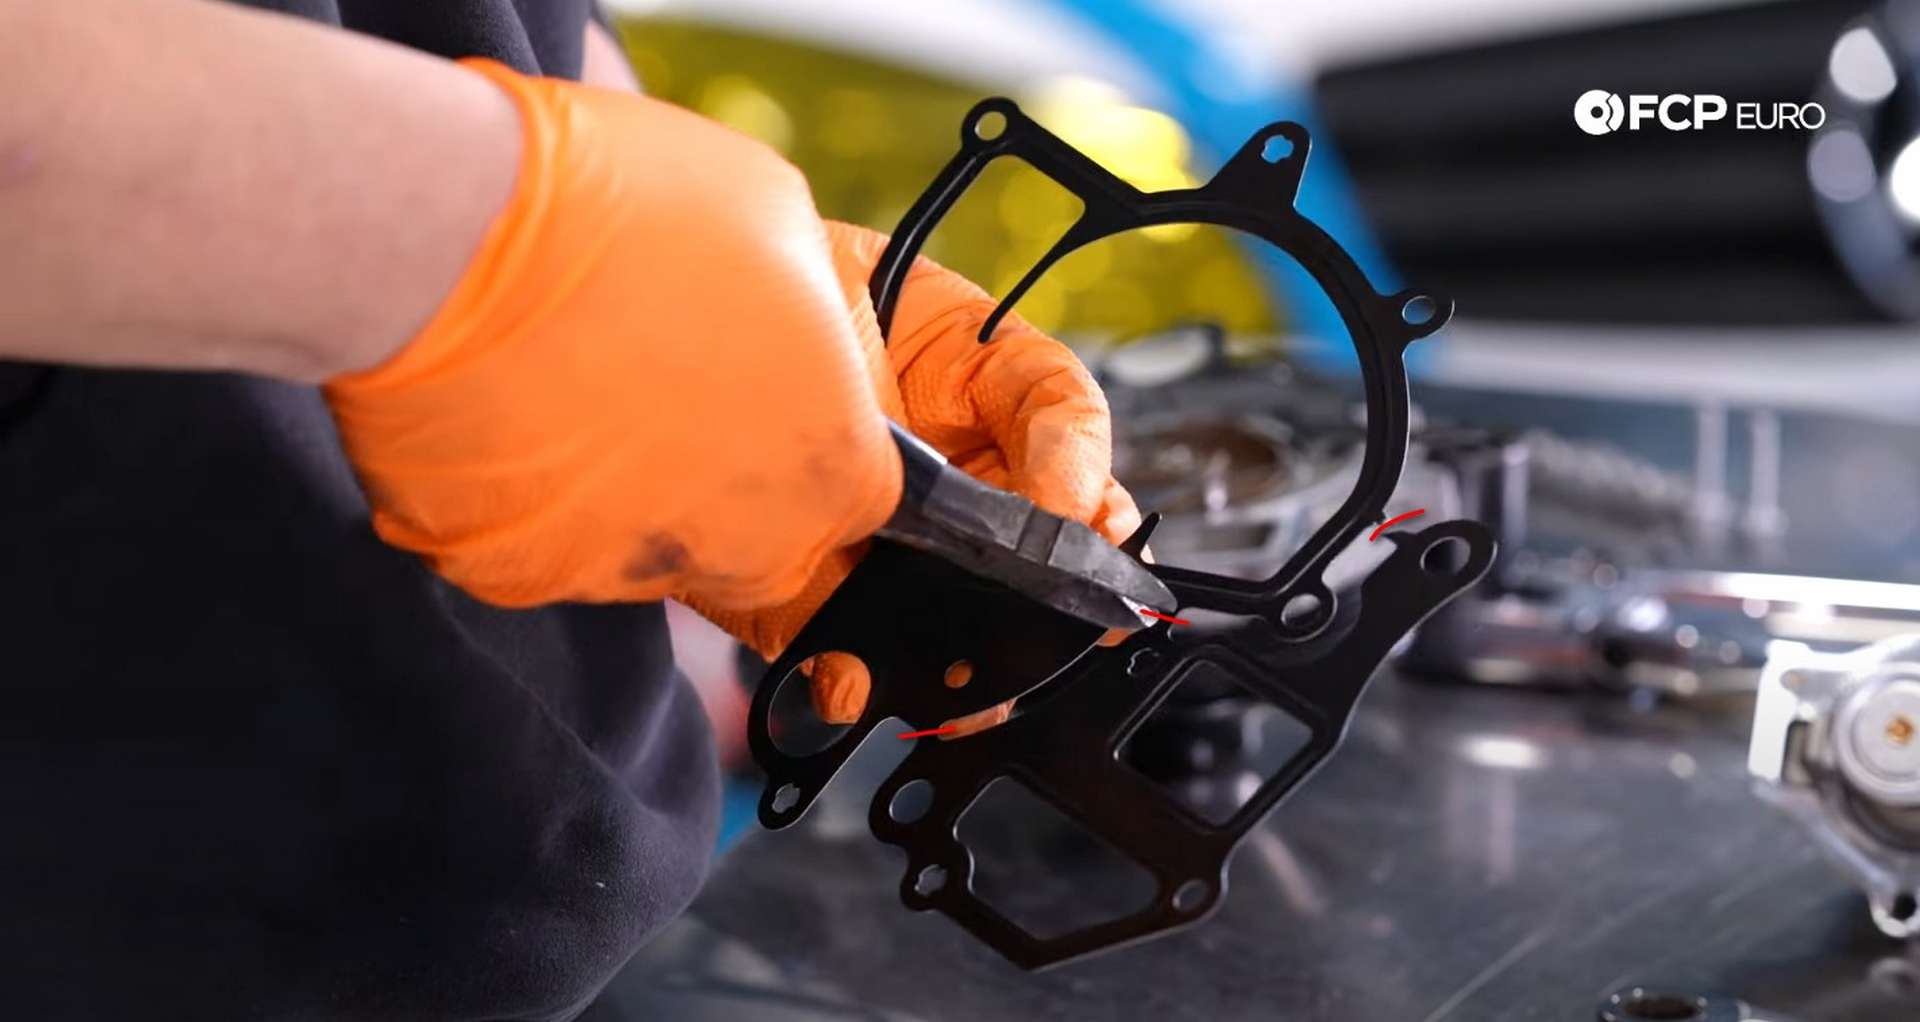
The new gasket comes with another gasket attached to it. The other piece isn’t needed, so you need to cut it off. Cut along the red lines to separate the gaskets. Then, place the new water pump gasket onto the pump and fit it to the engine.
The pump’s bolts aren’t all the same size. The two holes in the pump that use the alignment dowels use the longer bolts included in the kit. Thread those two in first before moving on to the five others. Torque them to 10Nm.
Next, take the thermostat and install it on the engine. Use a couple of bolts to align the gasket as you fit the thermostat into position. Thread the bolts in by hand before using a 10mm socket to torque them to 10Nm
With all of the new parts installed, refit the coolant lines. Start by refitting the callant pipe to the engine. Thread in all three bolts by hand before tightening them with a 10mm socket and torquing them to 10Nm.
After that, slip the water pump and thermostat hoses onto their respective necks. Use a flathead screwdriver to tighten the thermostat hose clamp before using some pliers to refit the hose clamp onto the end of the water pump’s hose.
Step 6: Resecure the engine to its brace
First, push the brace back into position. Then, thread in the alignment bolt at the bottom of the brace.
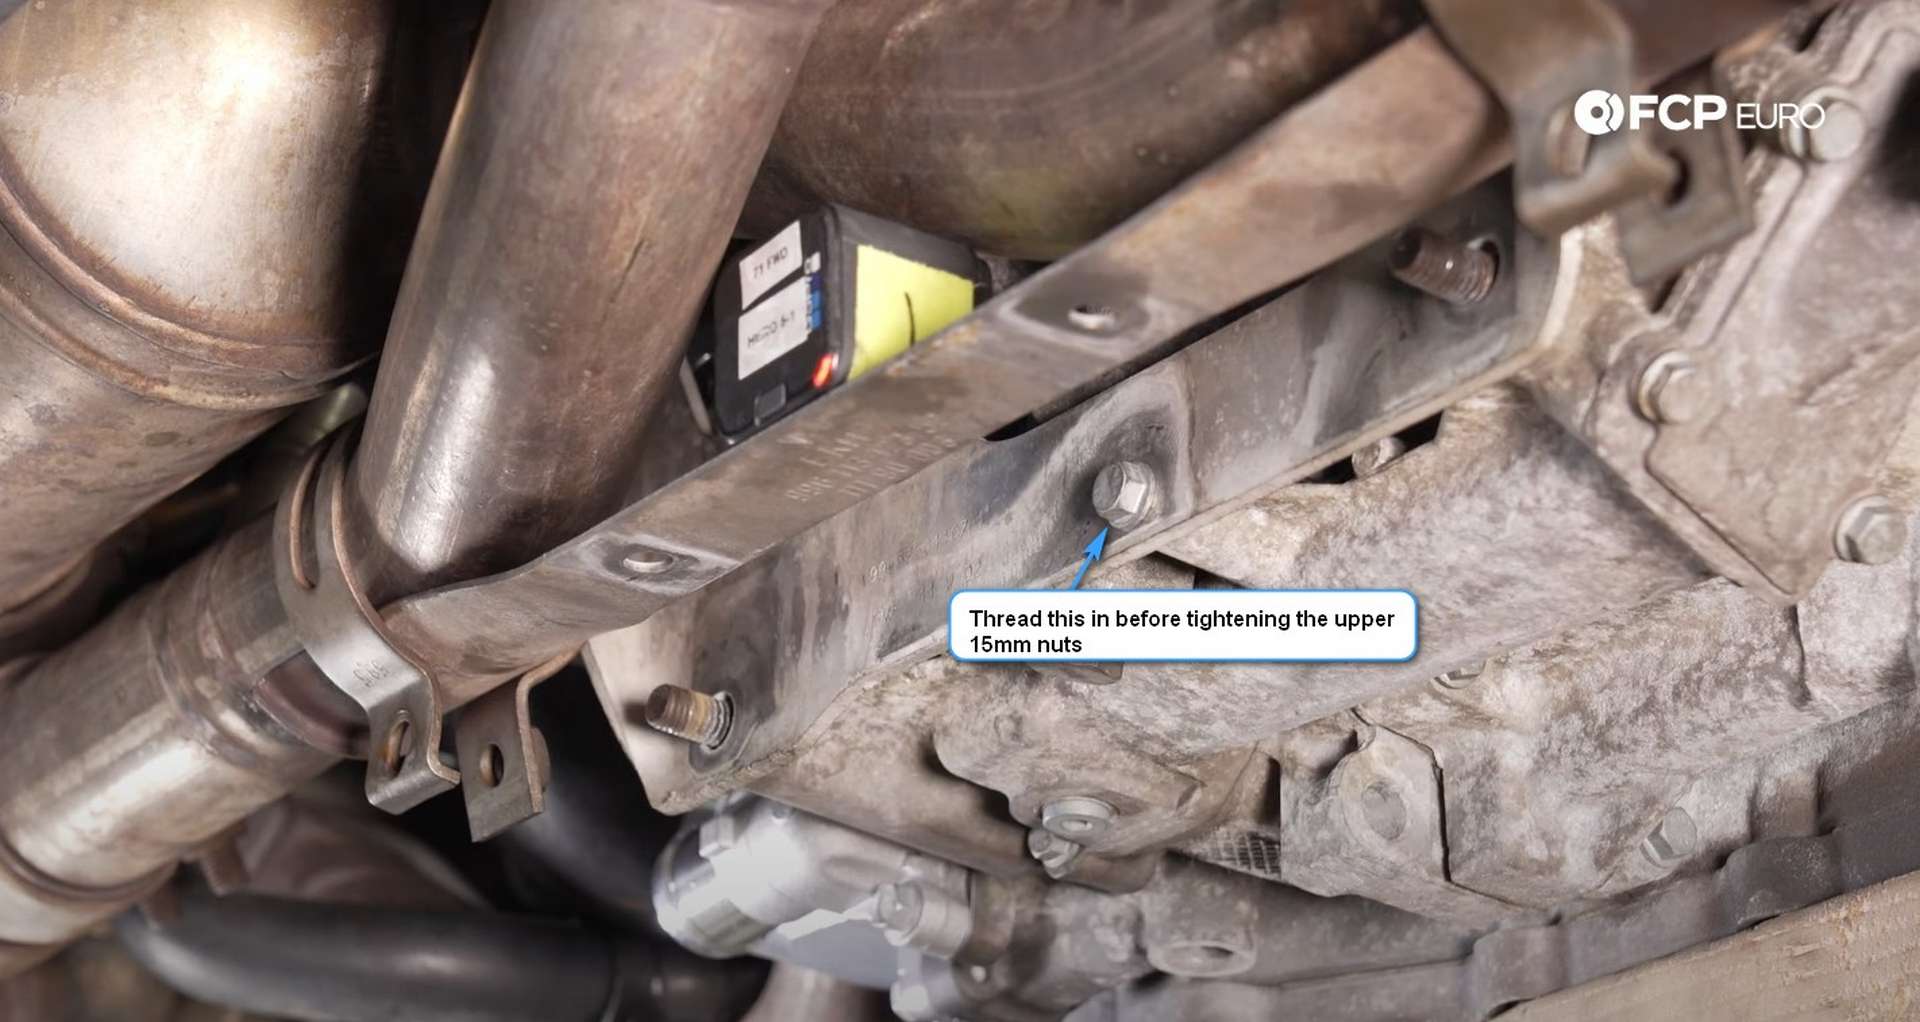
Now that the brace is aligned thread the upper brace nuts back on. Use a 15mm socket or wrench to tighten them. After that, take out the alignment bolt and side on the bracket over the lower studs. Then put the alignment bolt back in.
Use a 15mm wrench or socket to tighten and torque all of the brace’s nuts to 30Nm. Then, use a 10mm socket to torque the alignment bolt to 10Nm. Next, refit the exhaust bracket to the brace. Thread in its two bolts before tightening them with a 15mm socket. Then, thread in the bolt for each exhaust clamp and tighten them with a 13mm socket.
Step 7: Bleed the cooling system
Porsche recommends using a vacuum filler to bleed the cooling system, and so do we. The coolant has to travel from the engine to the radiators at the front, creating many potential spots for air pockets. Using a vacuum filler will be the easiest and quickest way to ensure that no air pockets are present while the coolant is filled to the proper level.
Mix the supplied Porsche coolant with a gallon of water and use that mixture to fill the cooling system.
Step 8: Refit the drive belt and intake
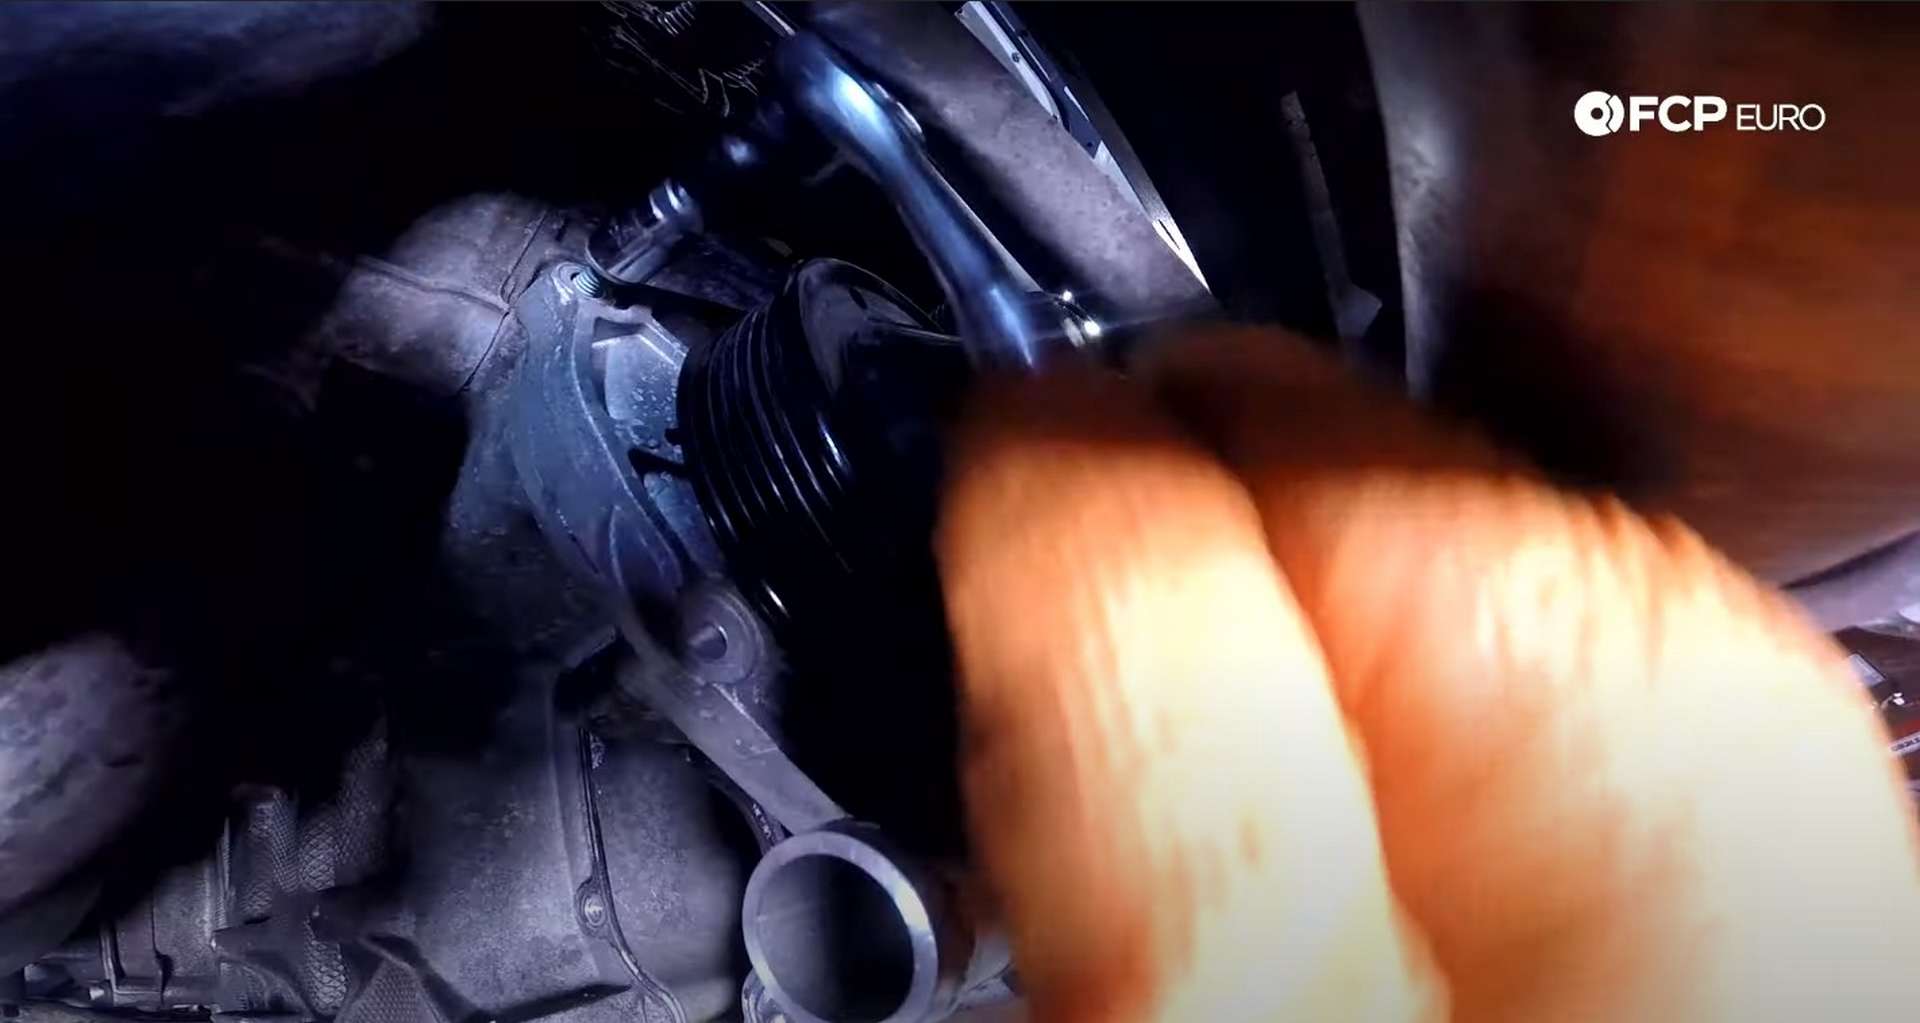
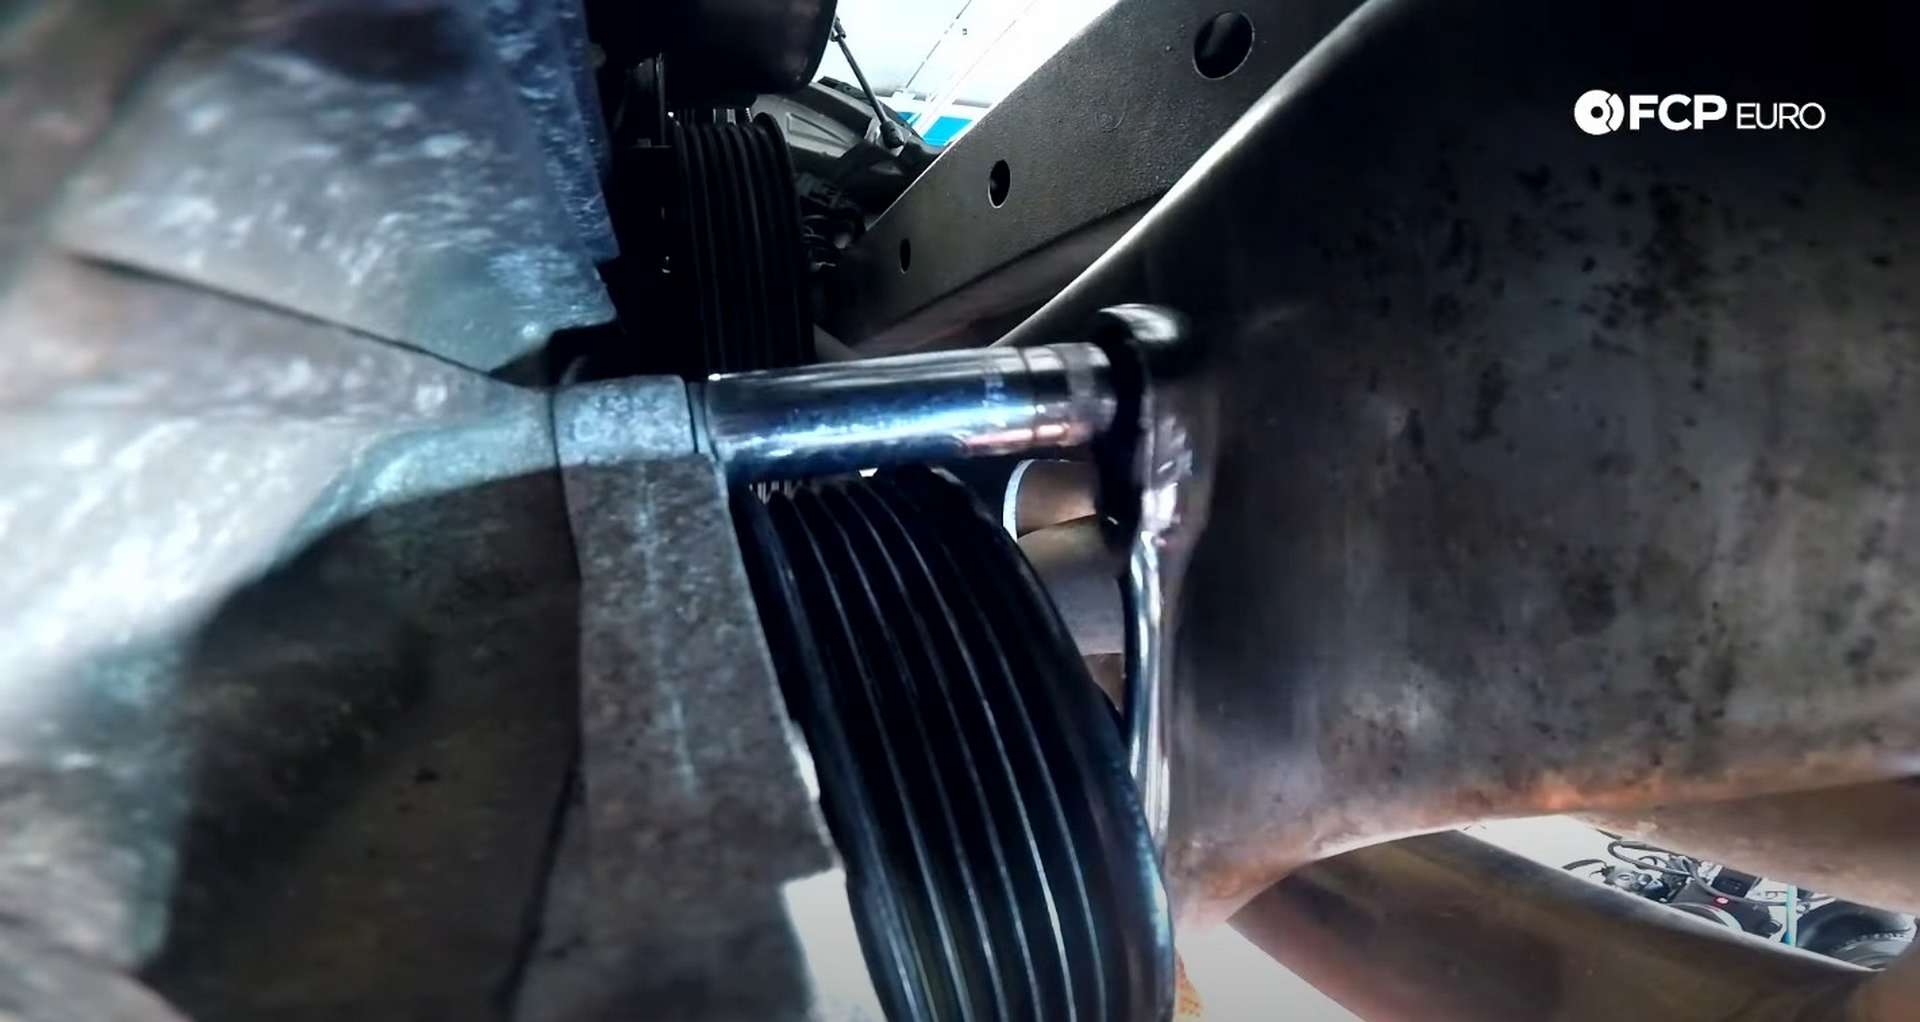
Feed the new belt into the engine bay and wrap the belt around the water pump. Rout the belt around the remaining pulleys before using the 24mm socket or wrench to loosen the tensioner.
While holding the tensioner open, slip the belt under the remaining roller and into place. Then, release the tensioner and check the belt’s alignment. Ensure the belt is sitting in all of the grooves on each of the pulleys. Failing to do so will cause the belt to fray and break or slip off completely.
Grab the intake and refit it into the engine bay. Use the two locating pins on the underside of the airbox to ensure the airbox is in the proper position. Then, run the mass airflow sensor wiring through the clip on the airbox’s corner.
After that, slip the intake boot over the throttle body and thread in the airbox’s mounting bolt. Use a 13mm socket to tighten the bolt. Then, pop the oil filler neck back into the airbox cover and use an 8mm socket or flathead screwdriver to tighten the intake hose clamp on the throttle body.
Finally, refit the airbox snorkel to the airbox and plug in the mass airflow sensor.
Step 9: Test the cooling system
Start the vehicle and let it run for about 15 minutes; you can perform this while the car is still in the air or on the ground. Check for any leaks and allow the engine to get up to operating temperature. Listen for the radiator fans at the front of the vehicle and shut the car off once they stop running. If all is well, your job is done.
Porsche Torque Specs:
- Porsche Water Pump Bolts = 10Nm or 7 ft-lbs, of torque
- Porsche Thermostat Bolts = 10Nm or 7 ft-lbs, of torque
- Porsche Coolant Pipe Bolts = 10Nm or 7 ft-lbs, of torque
- Porsche Engine Carrier Nuts = 30Nm or 22 ft-lbs, of torque
- Porsche Alignment Bolt = 10Nm or 7 ft-lbs, of torque
That’s all there is to it. Replacing the water pump and thermostat on your 996 911 isn’t the easiest job, but it will help your Carrera keep performing at its best. If you're interested in more DIYs for your Porsche, you can visit fcpeuro.com and subscribe to our YouTube channel.


