- 08/25/2021
- 18 Min Read
- By: Christian Schaefer
How To Replace An R56 MINI Timing Chain Assembly (N12 & N14 Engine)

Search any of the MINI forums about a rattle coming from the engine of your R56, and you’ll see some frightening results. Timing chain issues are common on the N12/N14 engines in this generation of MINI and often destroy an engine if not taken care of. Aptly nicknamed the “Death Rattle,” the noise you hear results from a weakened or failed timing chain tensioner allowing the chain to hit the timing chain cover. The lack of tension on the chain will cause it to skip teeth and jump timing, causing the valves to hit the pistons and turning your engine into a very large paperweight.
Of course, with some tools, time, and the right parts, you can prevent the catastrophic failure of your MINI’s engine. Attempting this job should not be done by a novice unless they have someone with serious experience. It is a doable job at home, but the engine’s health and functionality are at immediate risk.
MINI models and years applicable:
|
|
|
Symptoms of a failing MINI R56 timing chain:
- A rattling coming from the engine, loudest on a cold start
A few different scenarios cause death rattle. The timing chain guides used in the N12 and N14 are plastic. As these engines see regular use, the plastic expands, wears, and shrinks, causing the plastic to crack. The broken guides won’t hold the chains in the right place with the correct tension and aid in a timing chain failure. When the guides crack, pieces of the guide can fall into the oil pan, get sucked up by the oil pickup tube, and block the engine from its required oil.
Additionally, like a bike chain, the timing chain will stretch over time. The guides and tensioner are designed to pick up a stretched chain’s slack, but only to a point. The chain eventually can stretch beyond the point that the guides and tensioner can handle, leaving it loose enough to rattle around.
Lastly, there is always the possibility of a tensioner failure. The timing chain system used in the N12/N14 utilizes a large primary tensioner and two smaller tensioners. If anyone fails, they will compound with a lightly cracked guide or stretched chain and significantly shorten the timing components’ life.
How much will it cost to replace an R56 MINI timing chain assembly?
Tackling the timing chain replacement on your own won’t be cheap, but it’ll cost less than taking it to a licensed repair shop. The timing chain replacement kit that we offer includes all of the parts you’ll need for this job and comes in at $292. Additionally, we recommend changing the oil if your timing chain guides have started to break up in the engine. The oil change kit we offer costs $45.11
Along with the parts, you’ll need a few special tools for the job. Most critical to the job is the MINI Timing Tool Kit. It’ll cost you $279, and without it, the job can’t be completed. Additionally, you’ll need the serpentine belt wrenches, the crankshaft counter-hold wrench, and the engine block holding tool. Those three tools together cost $210.44.
Be prepared to spend upwards of $800 for all of the required tools and parts.
How long will it take to replace an R56 MINI timing chain assembly
This is not a quick process. Many of the pieces surrounding the engine need to be removed just to gain access to the engine itself. With a knowledgeable friend and the right tools, expect to spend upwards of eight hours on this job.
Parts required to replace an R56 MINI timing chain assembly:
Tools required to replace an R56 MINI timing chain assembly:
- 7mm Socket
- 8mm Socket
- 10mm Socket
- 13mm Socket
- 16mm Socket
- 18mm Socket
- 27mm Socket
- BMW Spark Plug Socket
- Ratchets
- Ratchet Extensions
- E10 Socket
- E12 Socket
- E14 Socket
- T20 Bit Socket
- T25 Bit Socket
- T30 Bit Socket
- T45 Bit Socket
- Torque Wrench
- BMW MINI Crankshaft Counter Hold Tool
- MINI Serpentine Belt Tool
- MINI Engine Block Holding Tool
- MINI N12 N14 N16 Timing Tool Kit
- Impact Wrench (Recommended)
Steps required to replace an R56 MINI timing chain assembly:
Step 1: Expose the valve cover
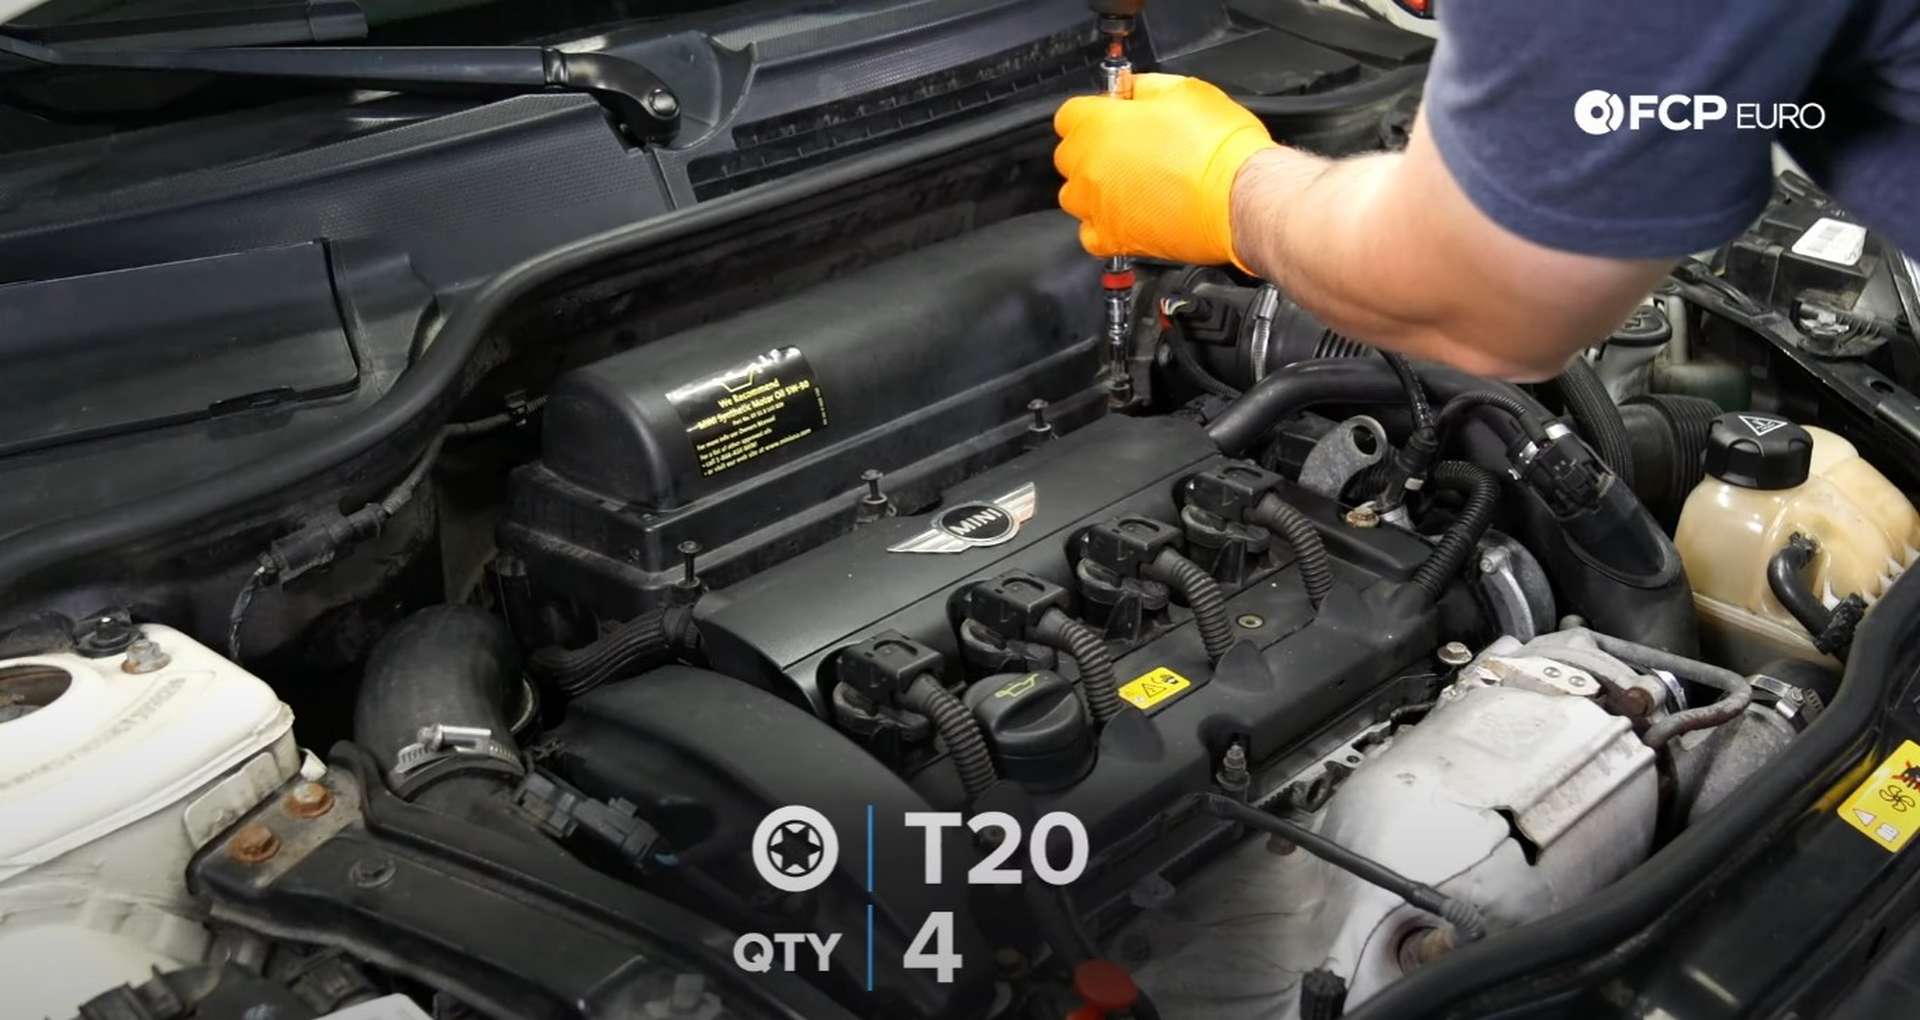
The airbox is the first thing that needs removal. First, use a T20 bit socket to loosen the airbox cover’s four fasteners.
Next, disconnect the PCV hose from the valve cover. Use a flat head screwdriver to remove the hose’s locking clip and then pull the hose out of the valve cover.

Then, use a 7mm socket or nut driver to loosen the intake tube’s hose clamp. Lastly, disconnect the electrical connections on the intake.
Lift the airbox cover and intake tube assembly and remove it from the engine bay.

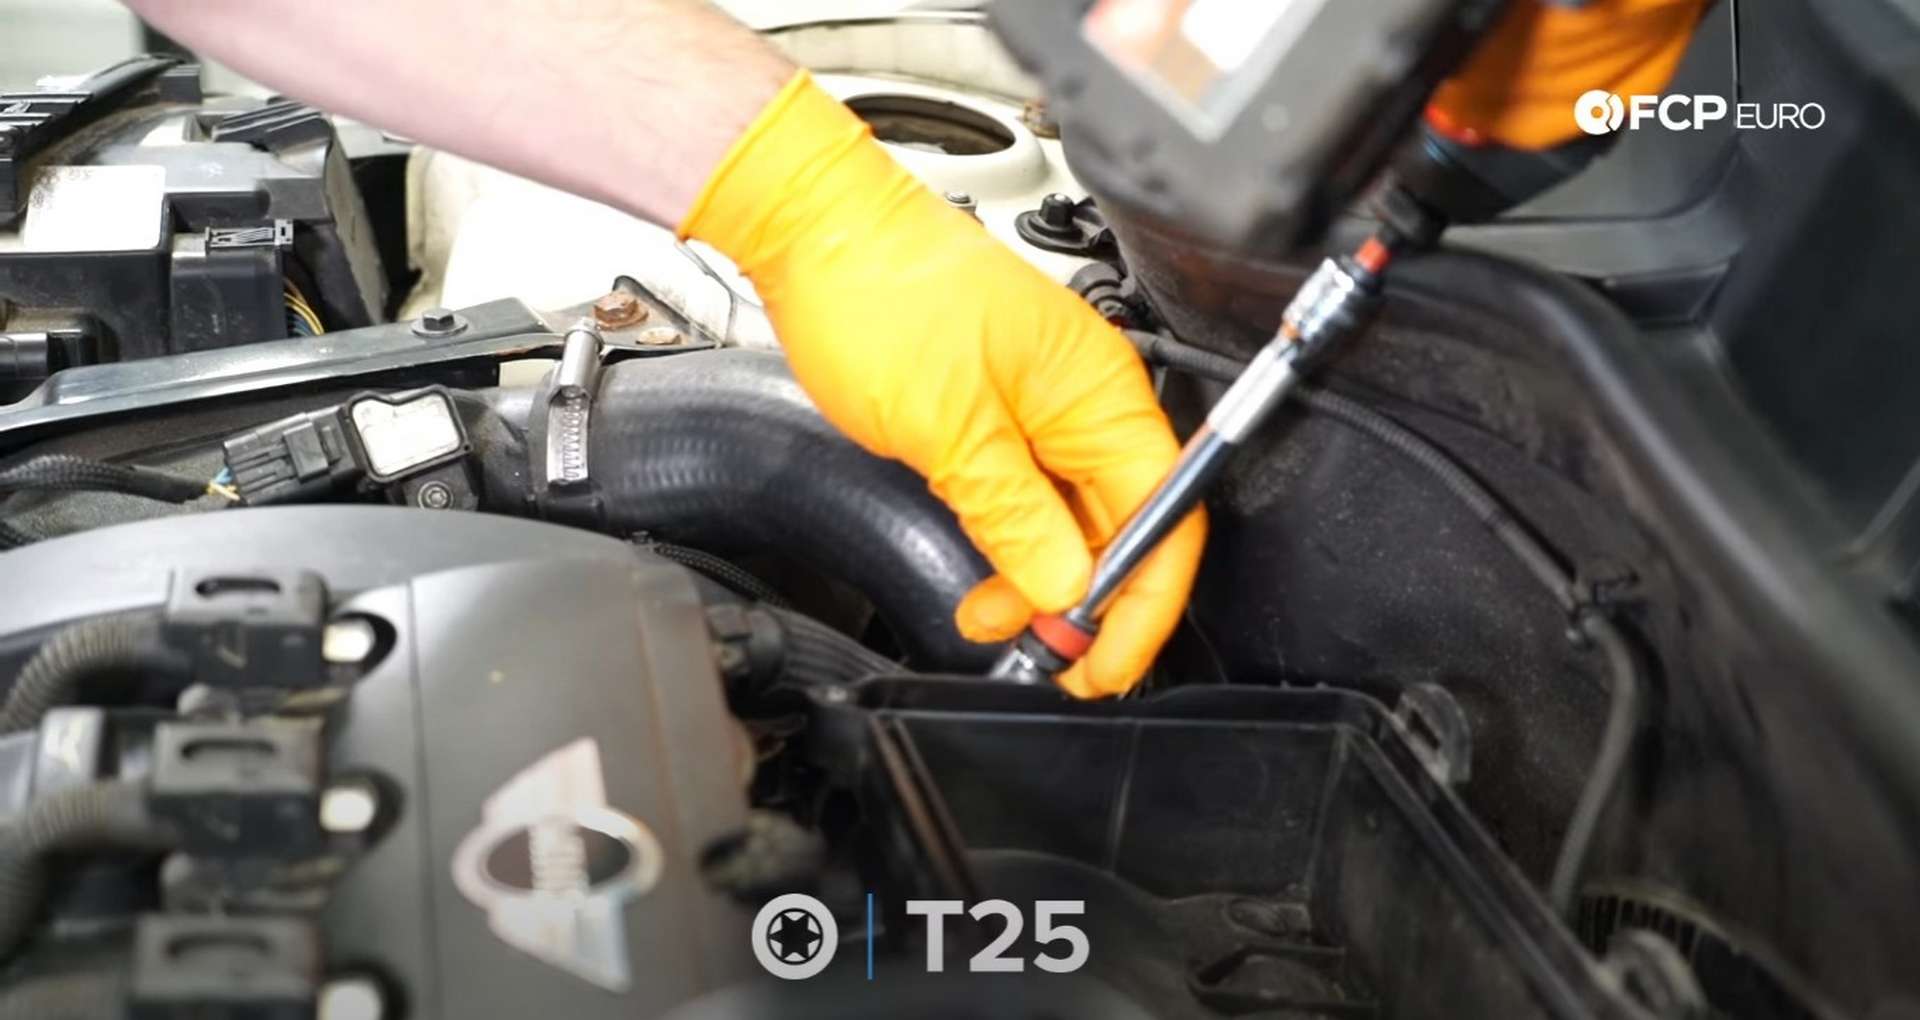
With that out of the way, remove the air filter and then use a T25 bit socket to remove the airbox’s fastener. The fastener is on the passenger’s side of the airbox and mounts it to the engine.
Pull the airbox up and out of its locating grommet. As you pull it up, disconnect the airbox from the intake snorkel on the driver’s side of the box. With the airbox out of the way, pull the intake snorkel out of the engine bay as well.
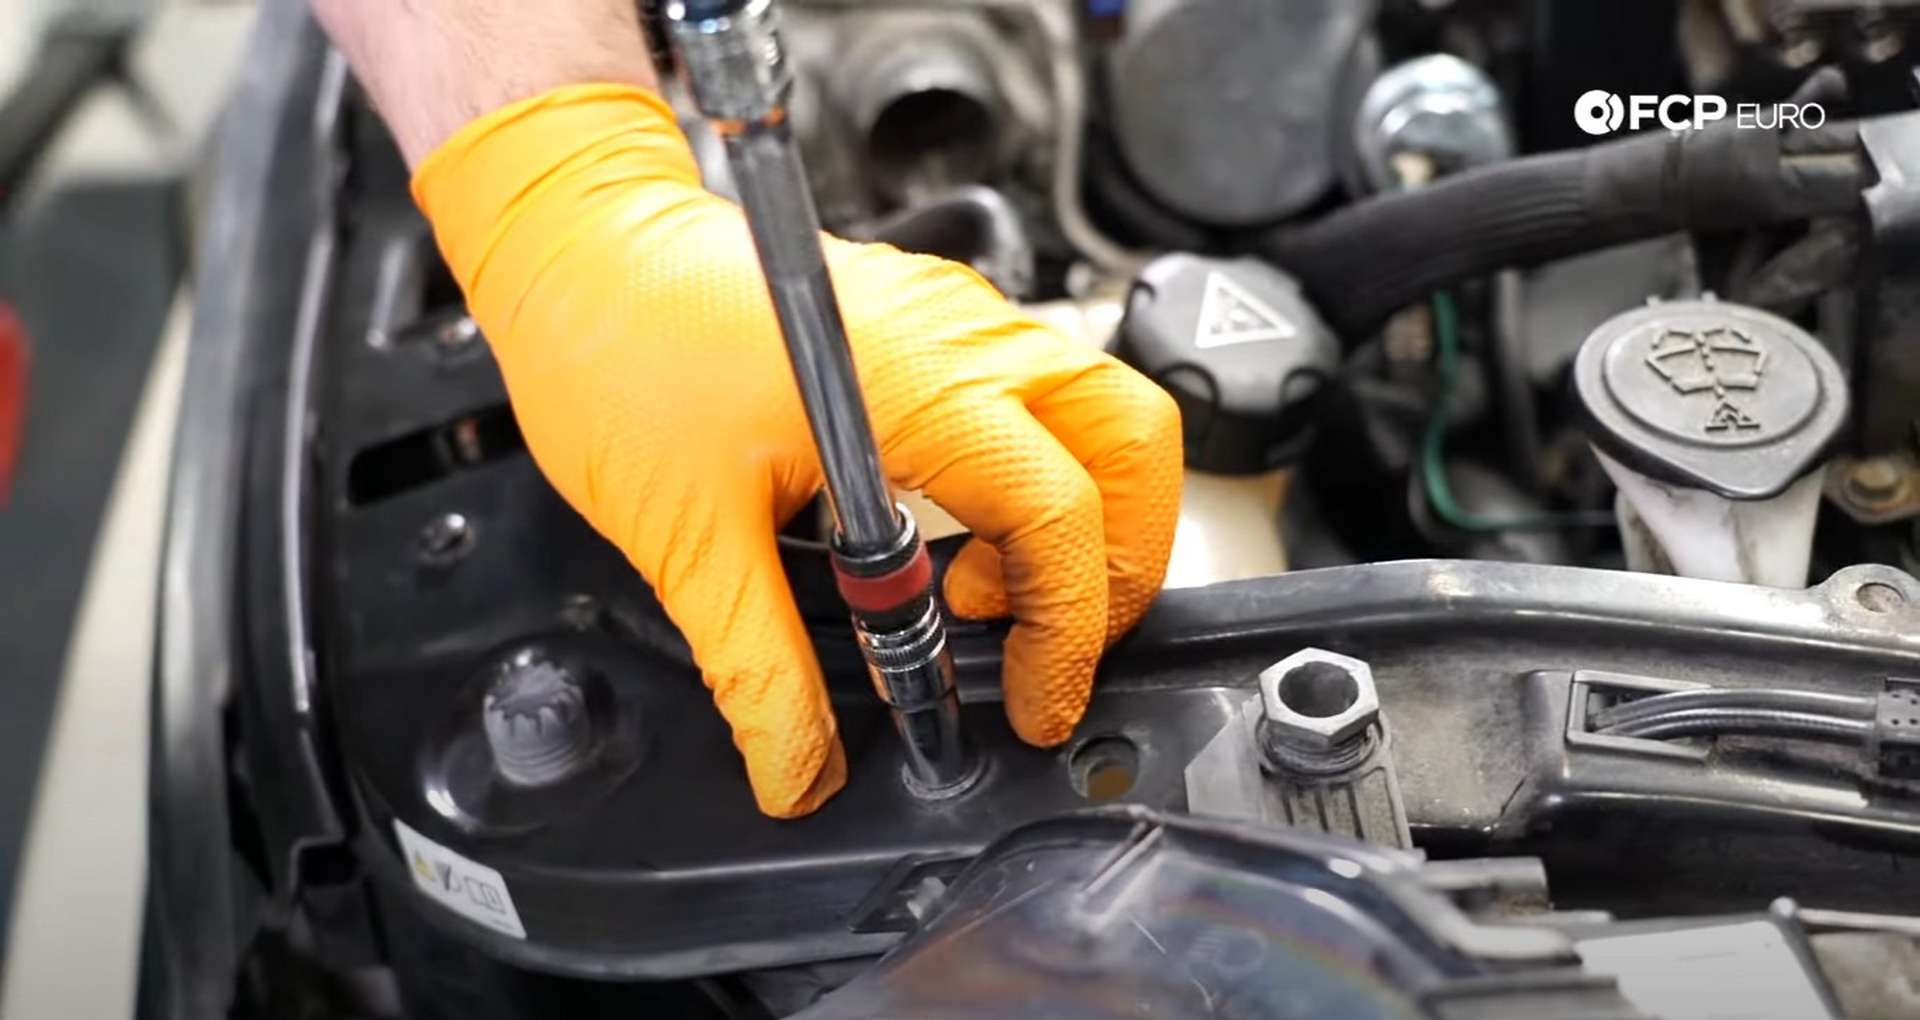
Next, unplug both headlights and remove the four 10mm bolts per light. If all four bolts come out, remove the light. If one of the bottom bolts spins but doesn’t come out, don’t panic as there is still enough room to get around the lights with the other bolts removed.
Adjacent to the driver’s headlight is the connection from the hood release in the interior to the hood latches in the engine bay. Use a pick to pry this box open and separate the cables.

Next, use a flathead screwdriver or a trim clip removal tool to remove the grill’s mounting clips.
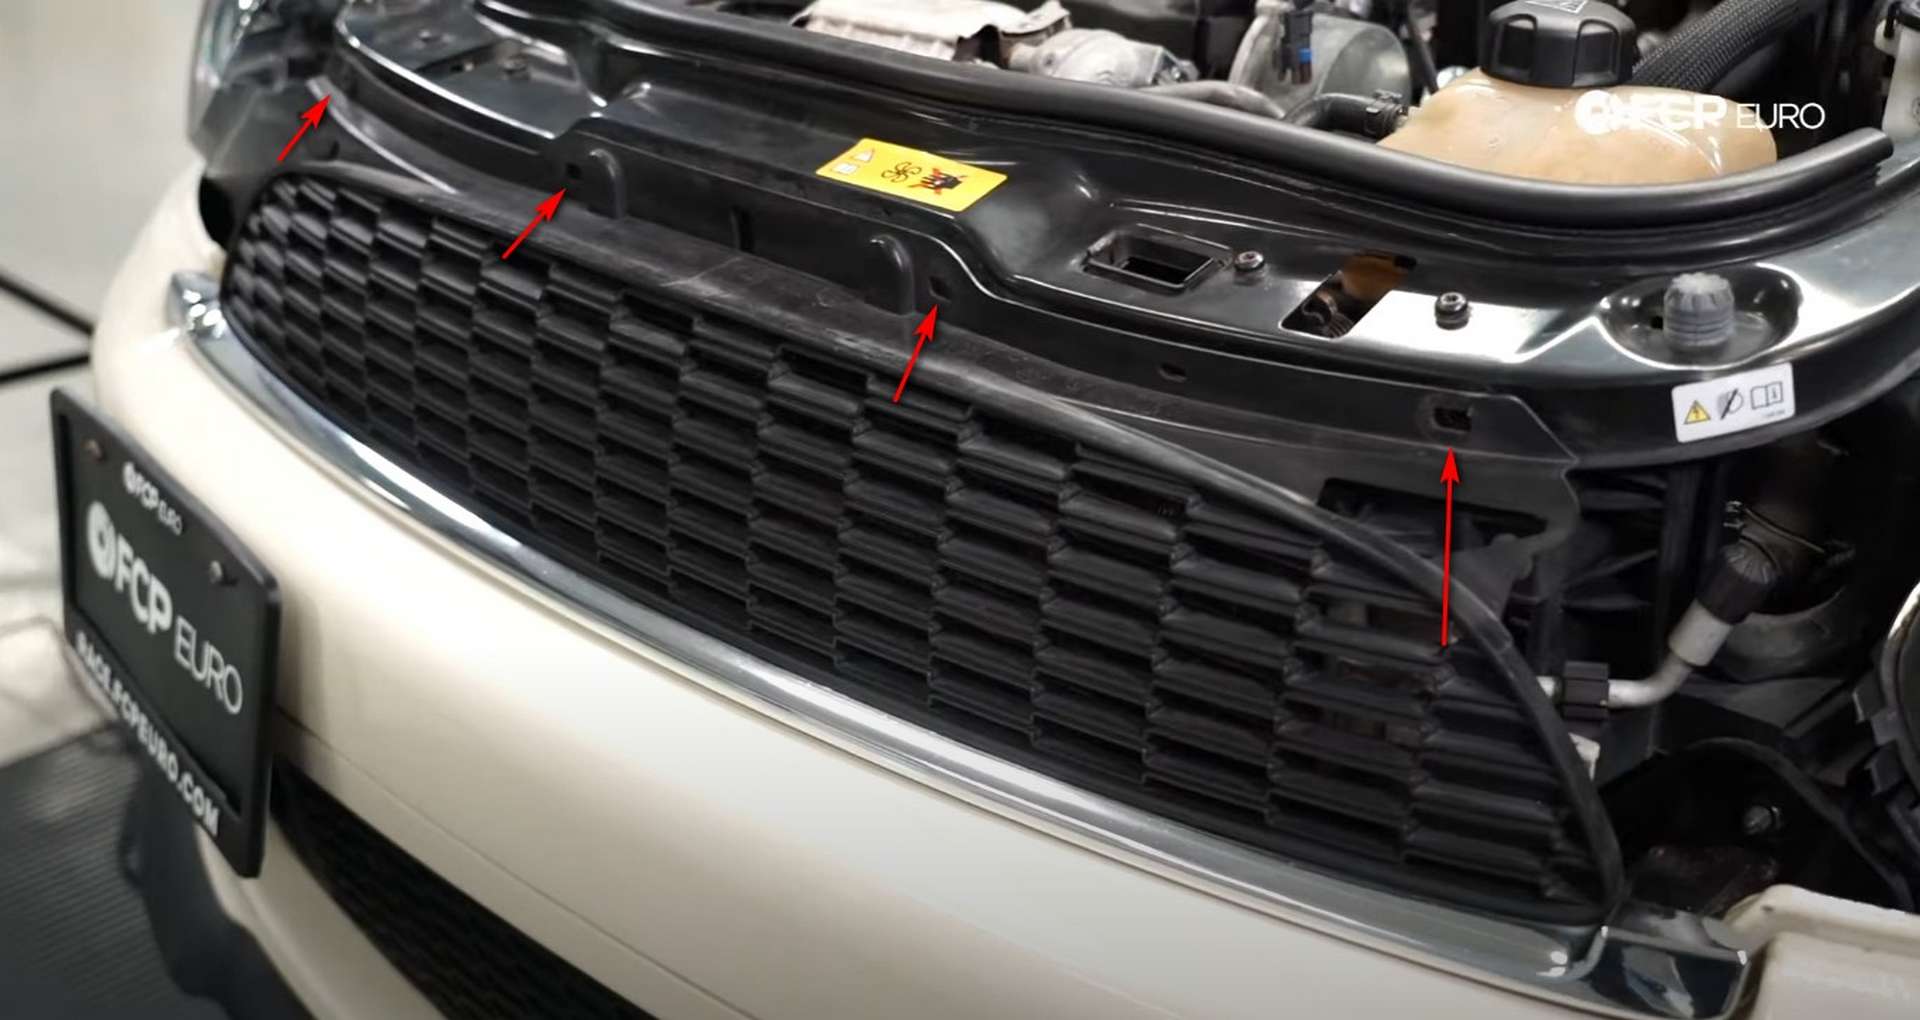
Just behind the hood cable connection is the washer tank filler neck. Remove the mounting clip to disconnect the washer tank from the U-brace.
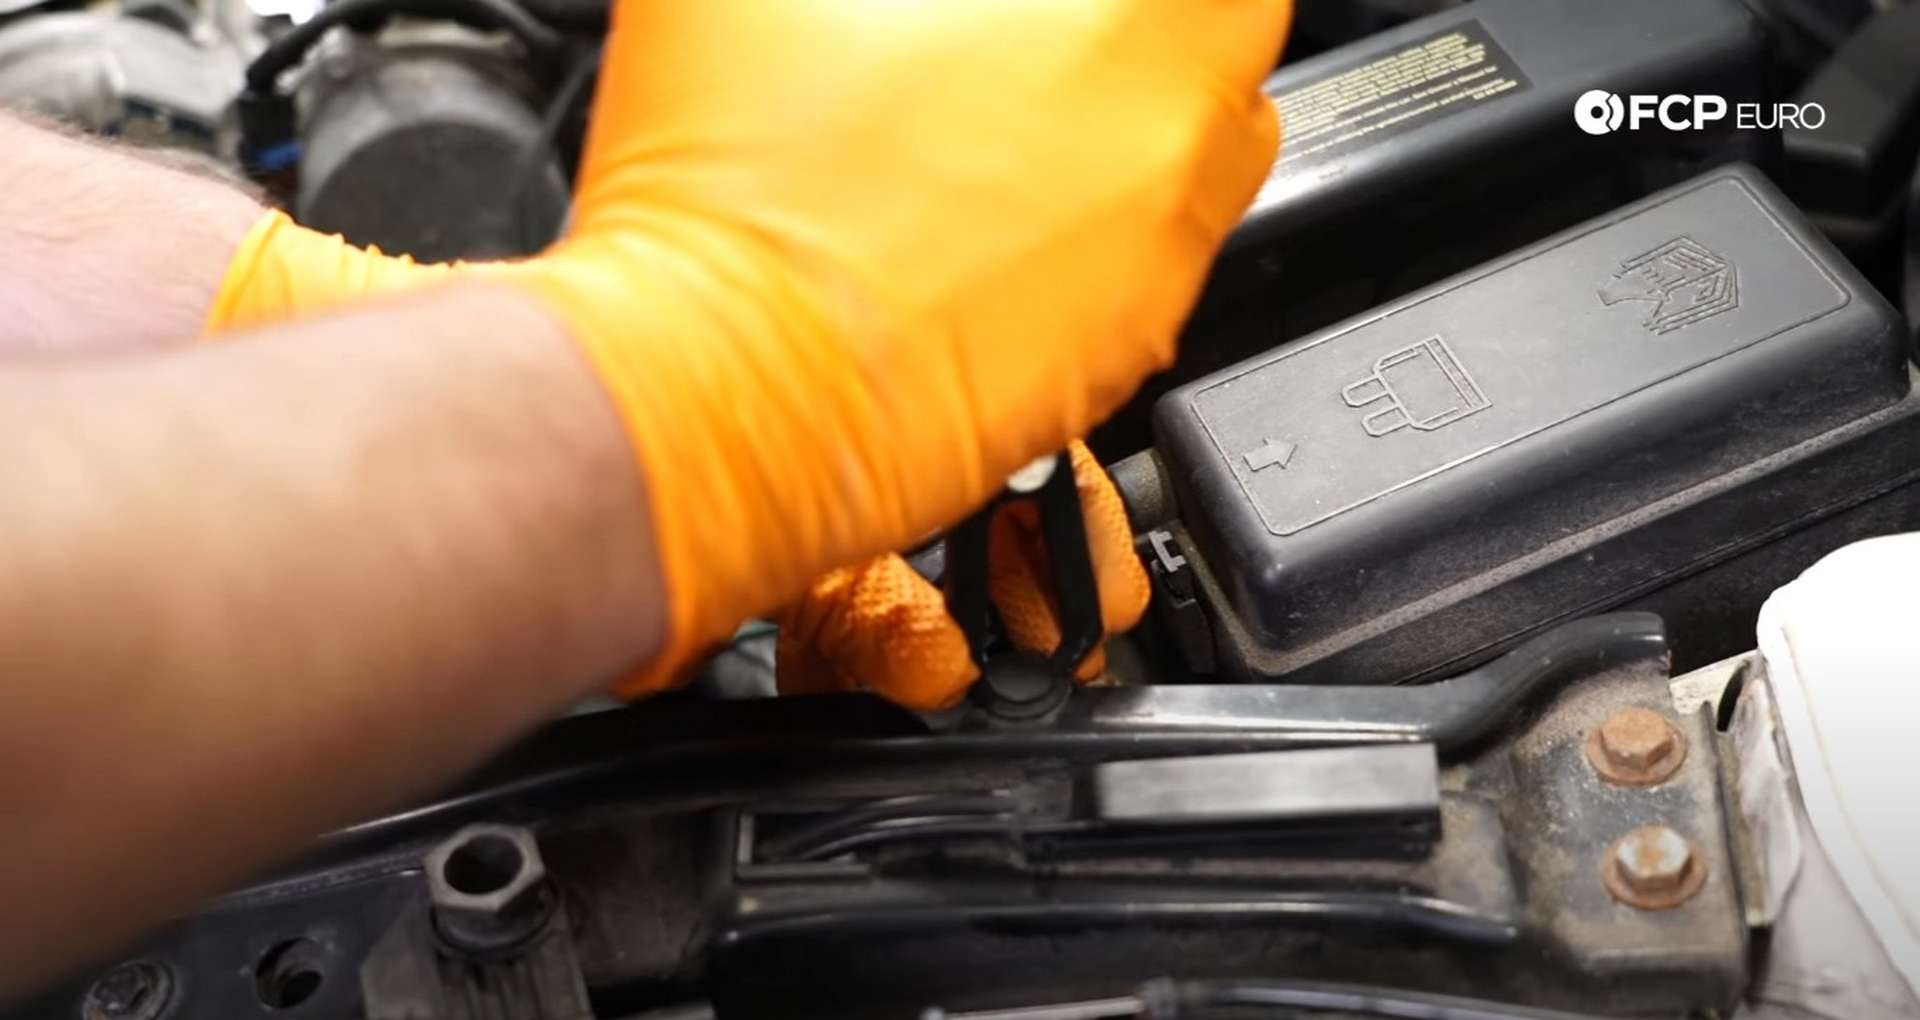
Then use a 10mm socket to remove the bolt mounting the coolant tank to the U-brace.
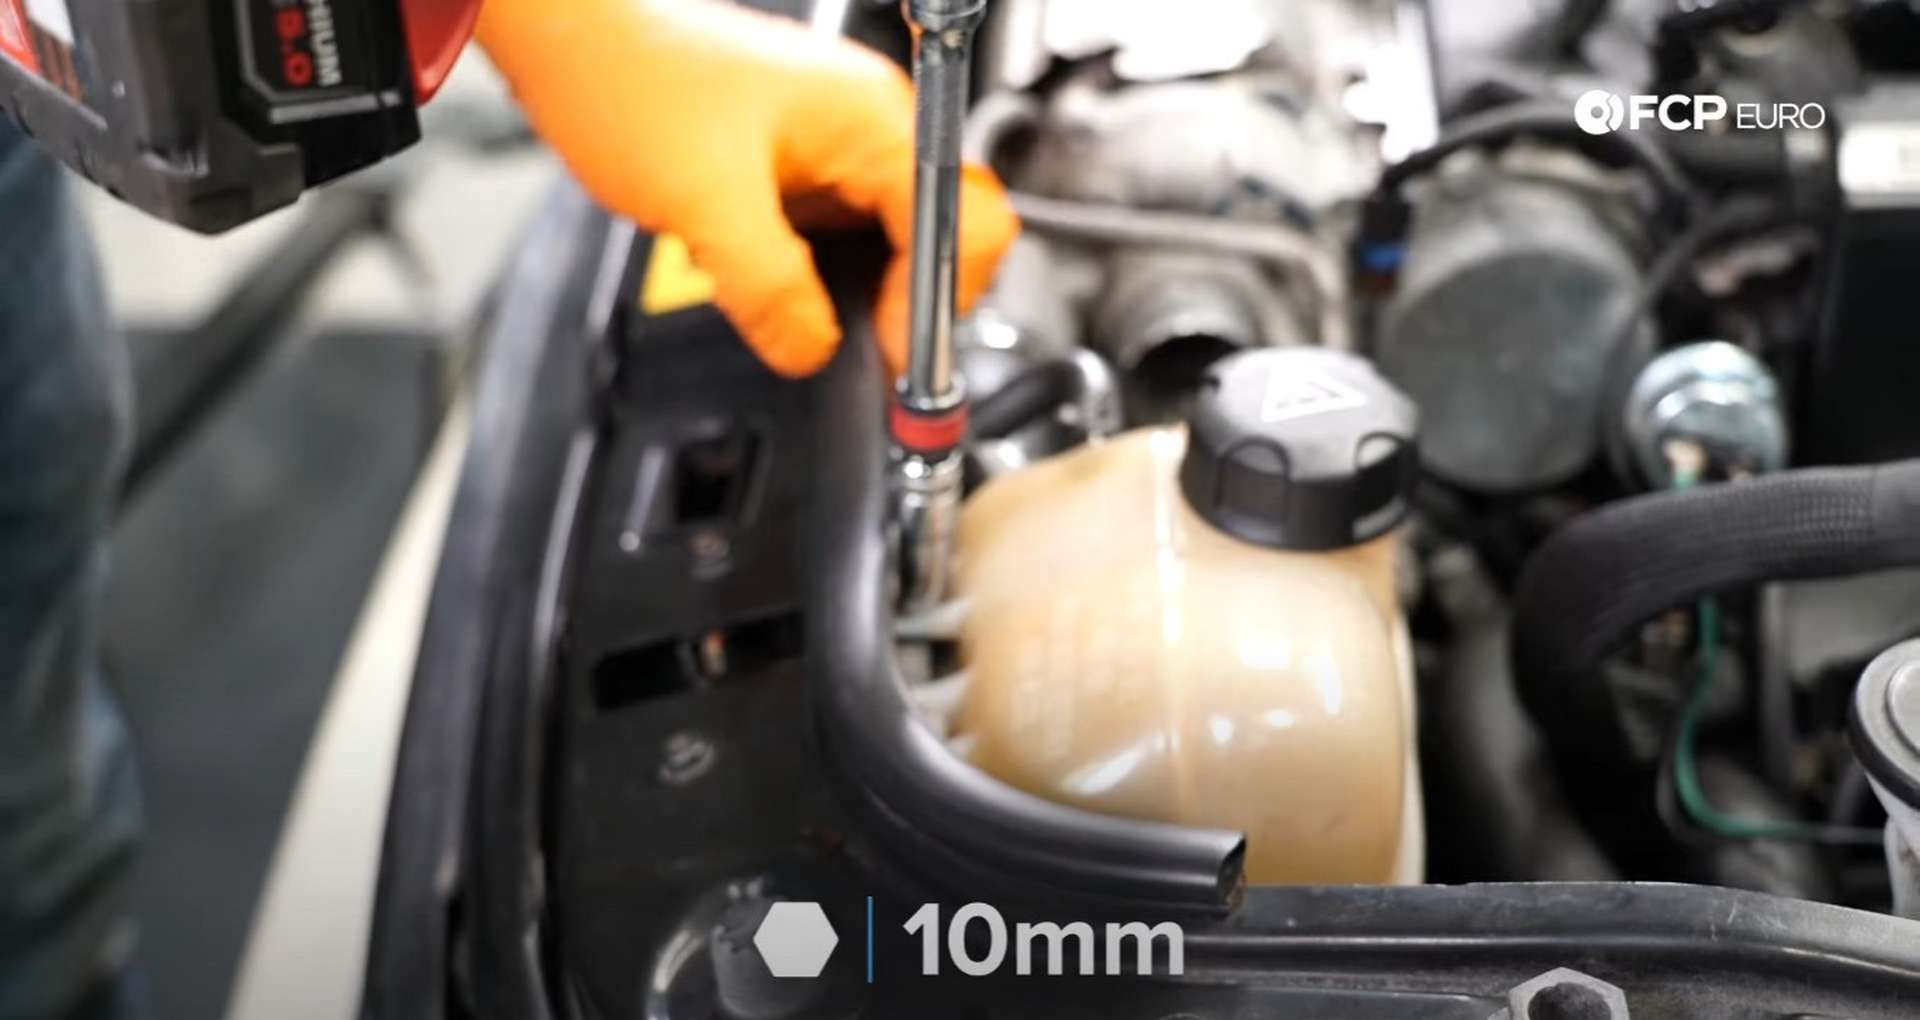
Next, use the 10mm socket to remove the three 10mm bolts mounted through the radiator support/U-brace. One bolt is next to the driver’s headlight, and the other two are by the passenger’s side headlight.

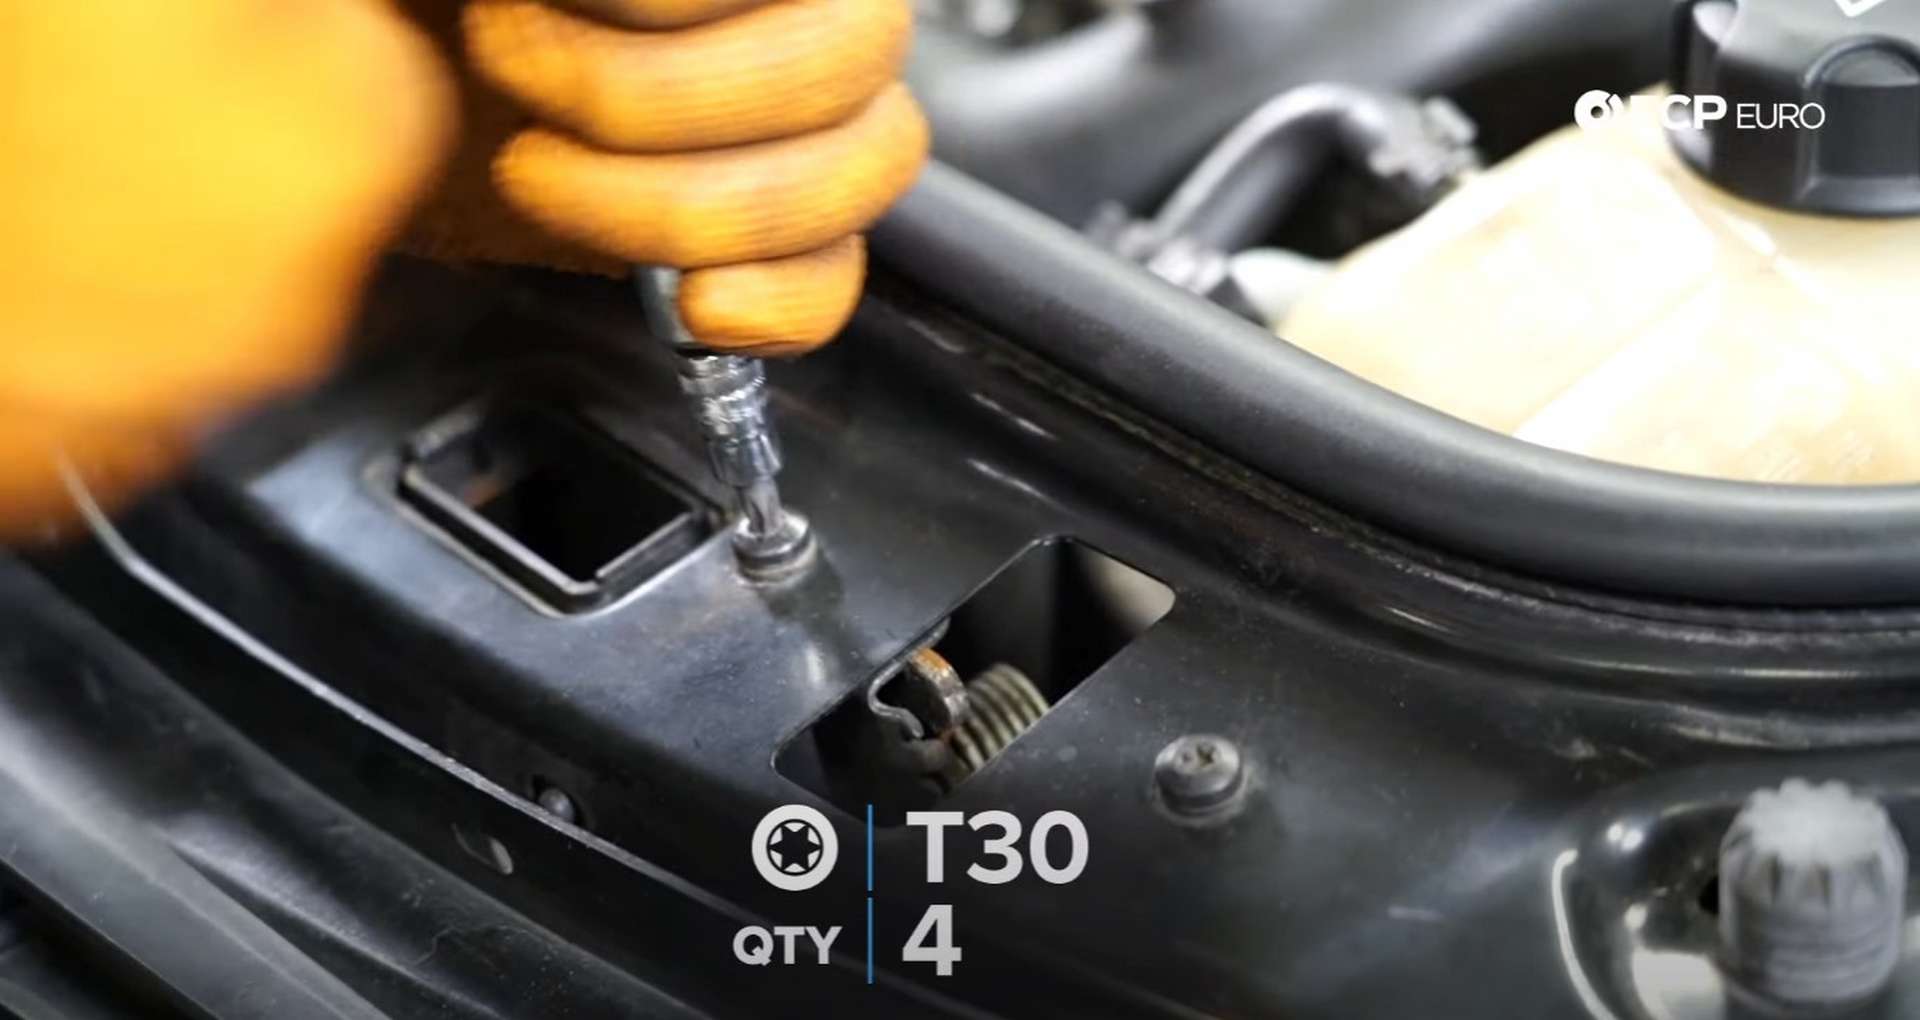
The MINI’s hood uses two latches that are each mounted to the U-brace with two screws. Use a T30 bit socket to remove all four screws.
The last U-brace bolts mount to the chassis just ahead of the strut towers. Use a 13mm socket to remove the bolts. With all of those bolts out, the U-brace is no longer mounted to the car. Use a pick for popping the last of the hood release cable out of the U-brace and then pulling the brace out of the car.
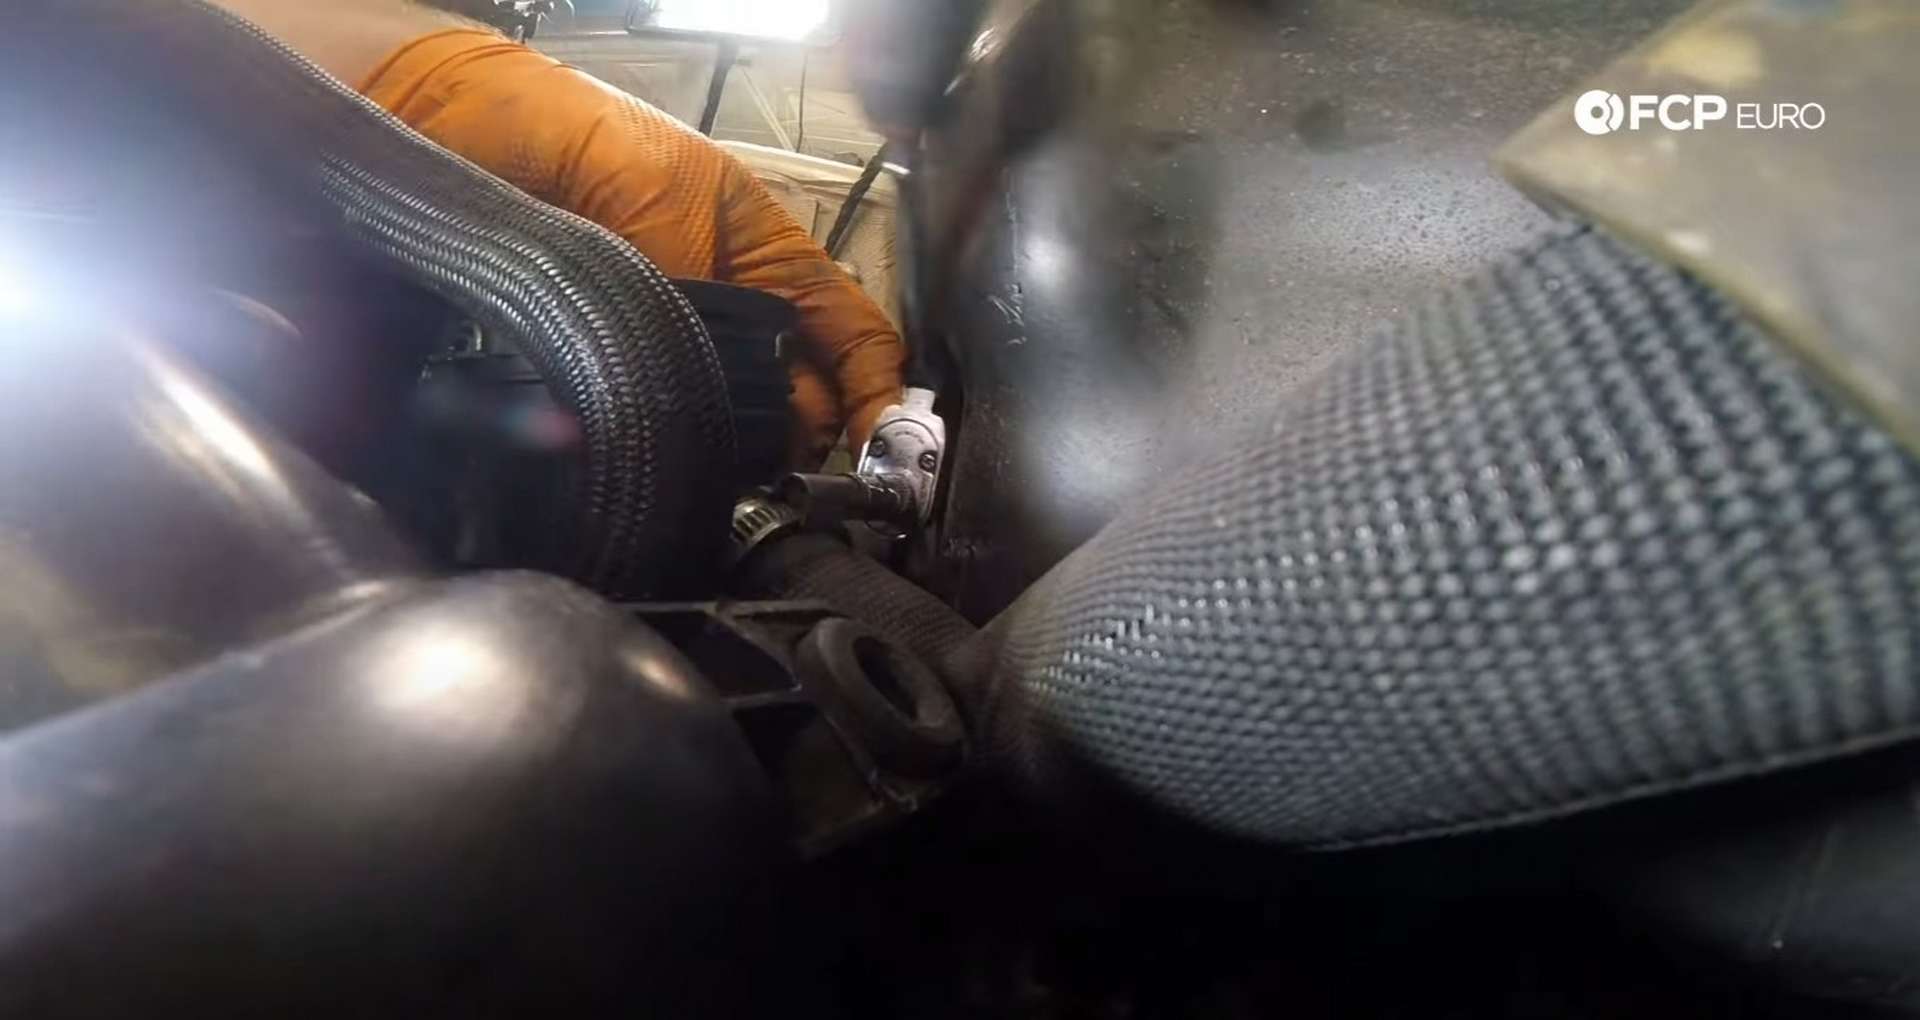
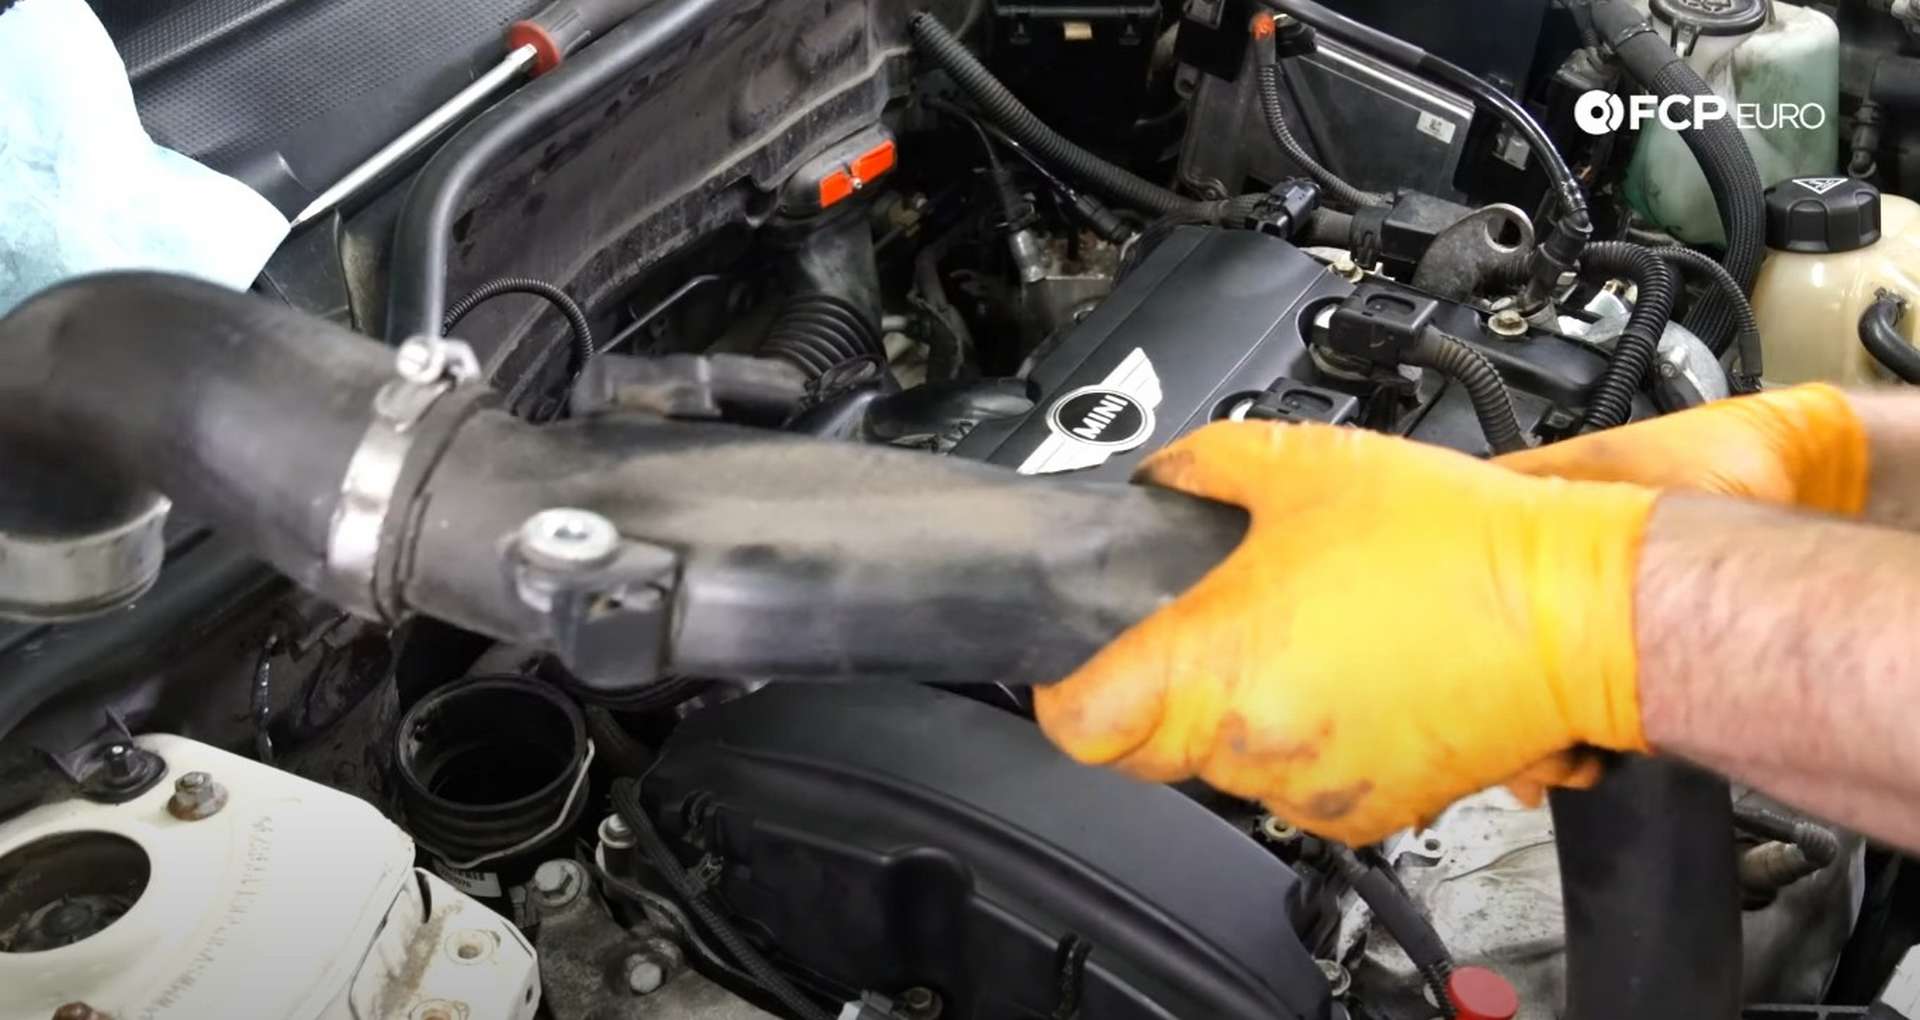
The next piece to go is the charge pipe. Locate the A/C line near the passenger’s side headlight and remove it from its clip. You’ll now have the room to use a T25 socket to remove the charge pipe mounting bolt.
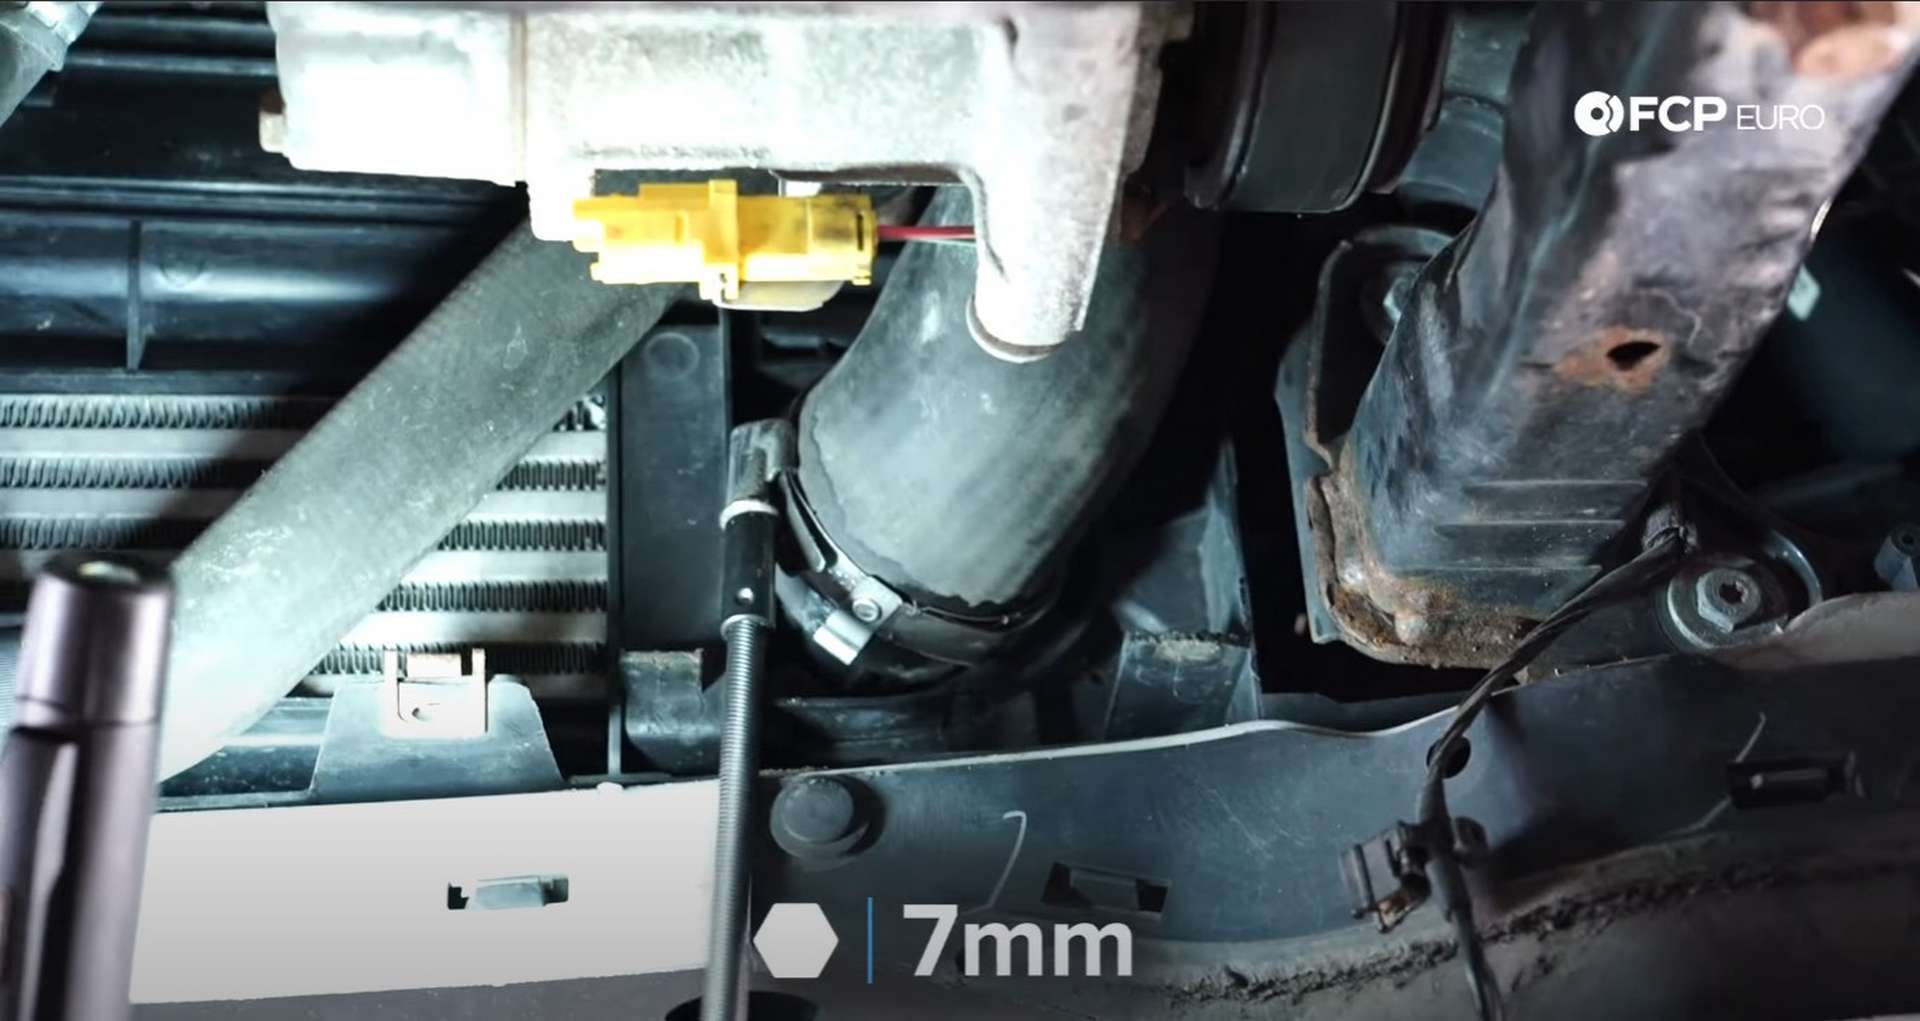
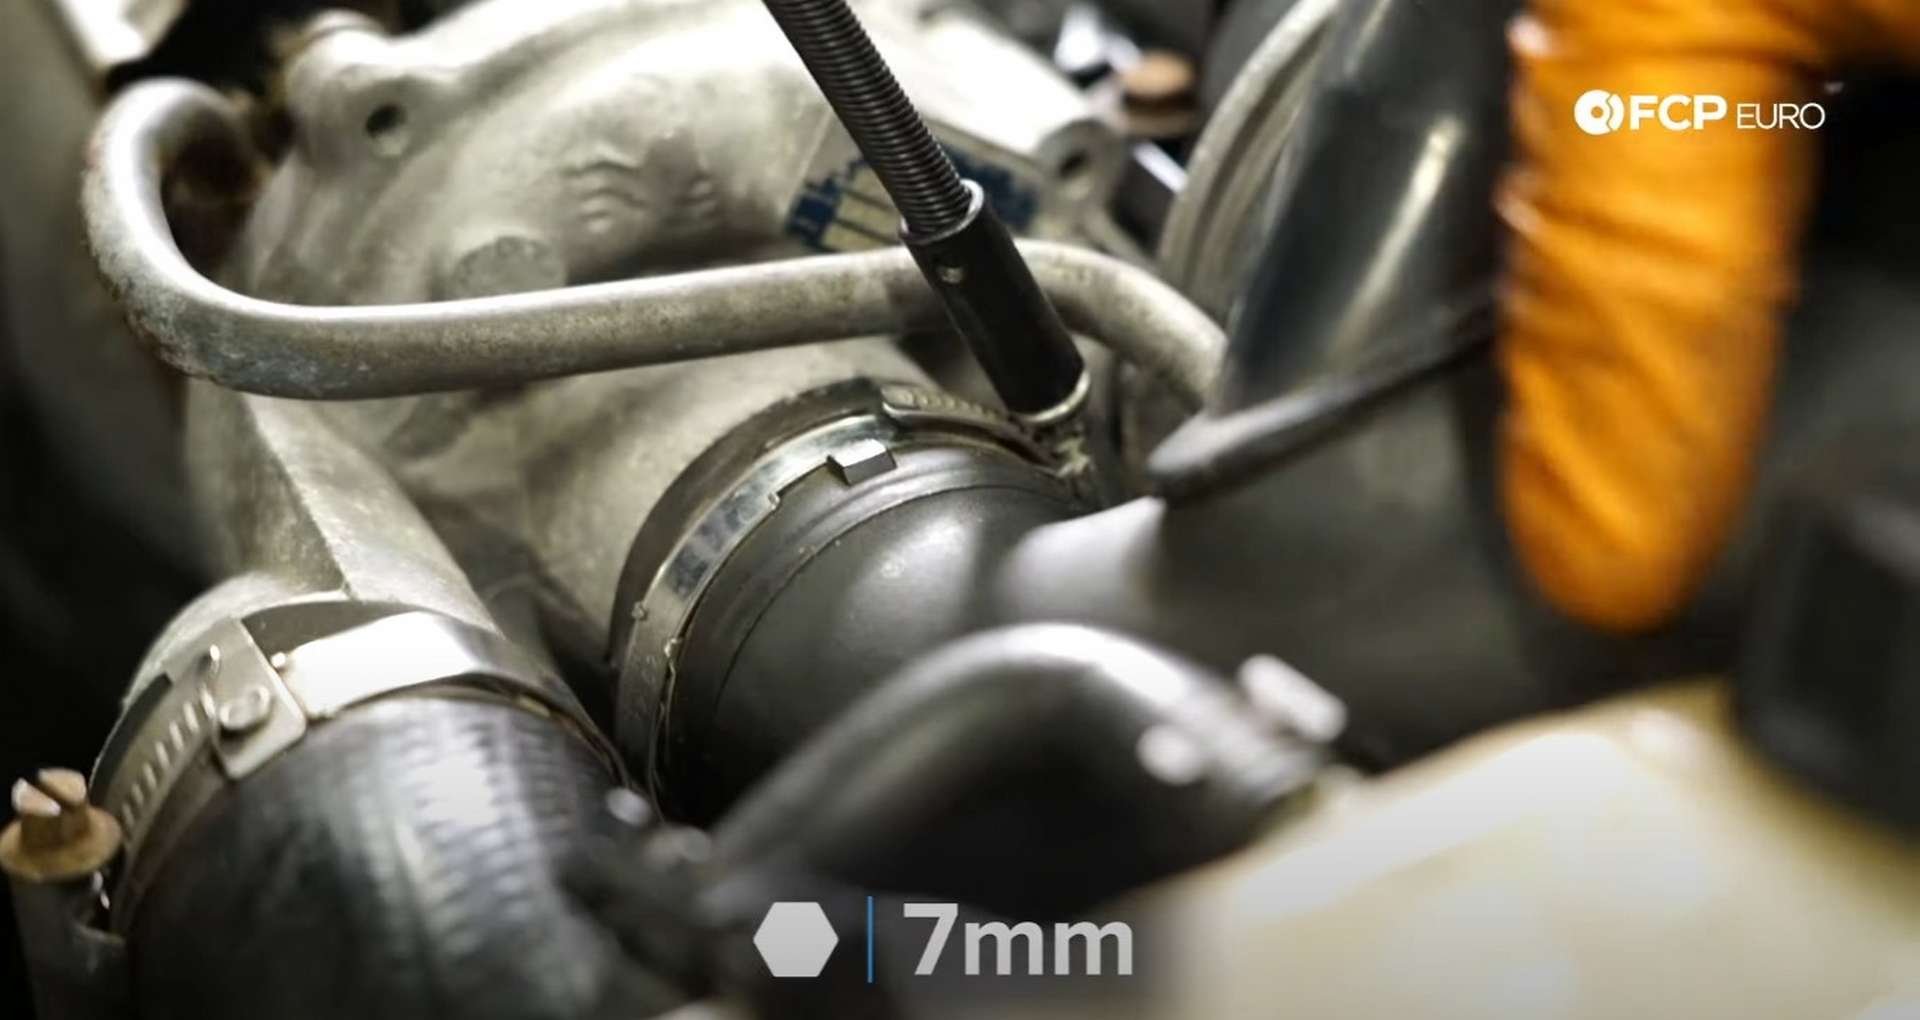
Next, jack the car up to get to the charge pipe clamp on the intercooler. Use a 7mm socket or nut driver to loosen the clamp. Use a Phillips head screwdriver to remove the small plate the screws that secure a plate beneath the intercooler outlet for better access to the charge pipe’s clamp. Lastly, separate the charge pipe from the intercooler.
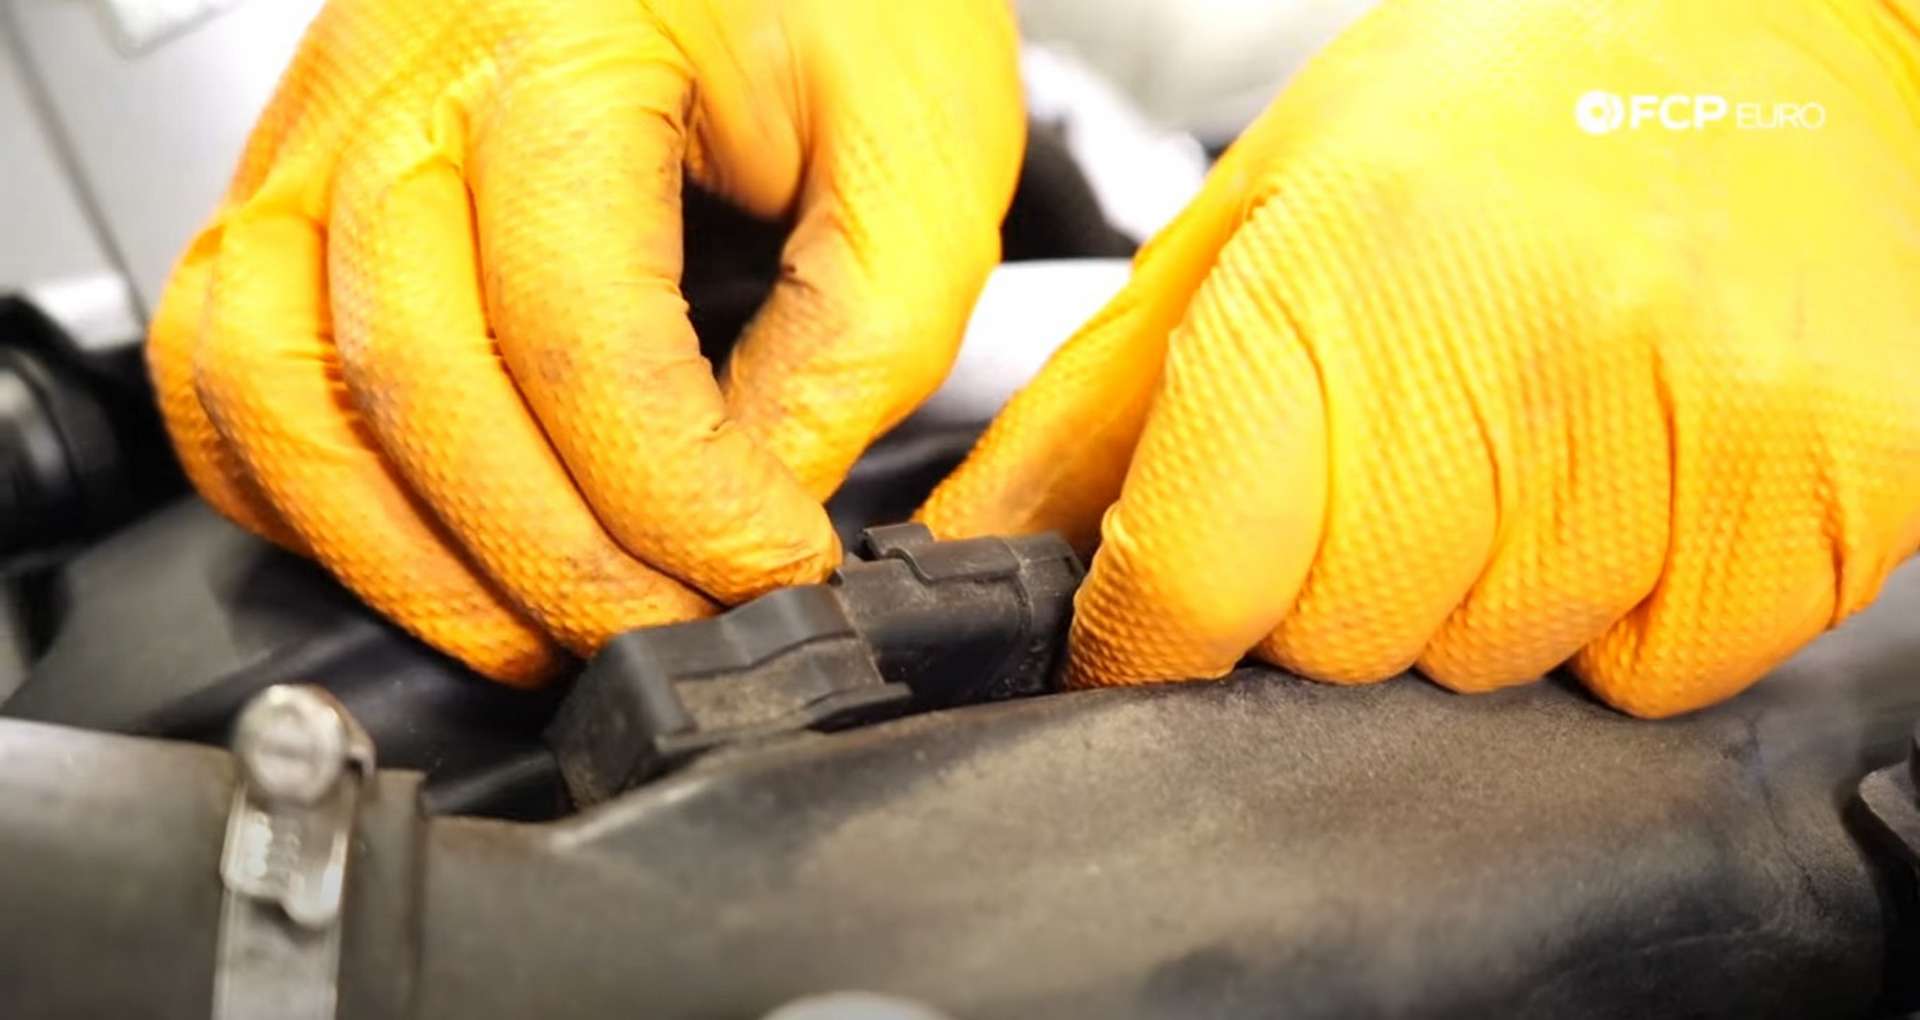
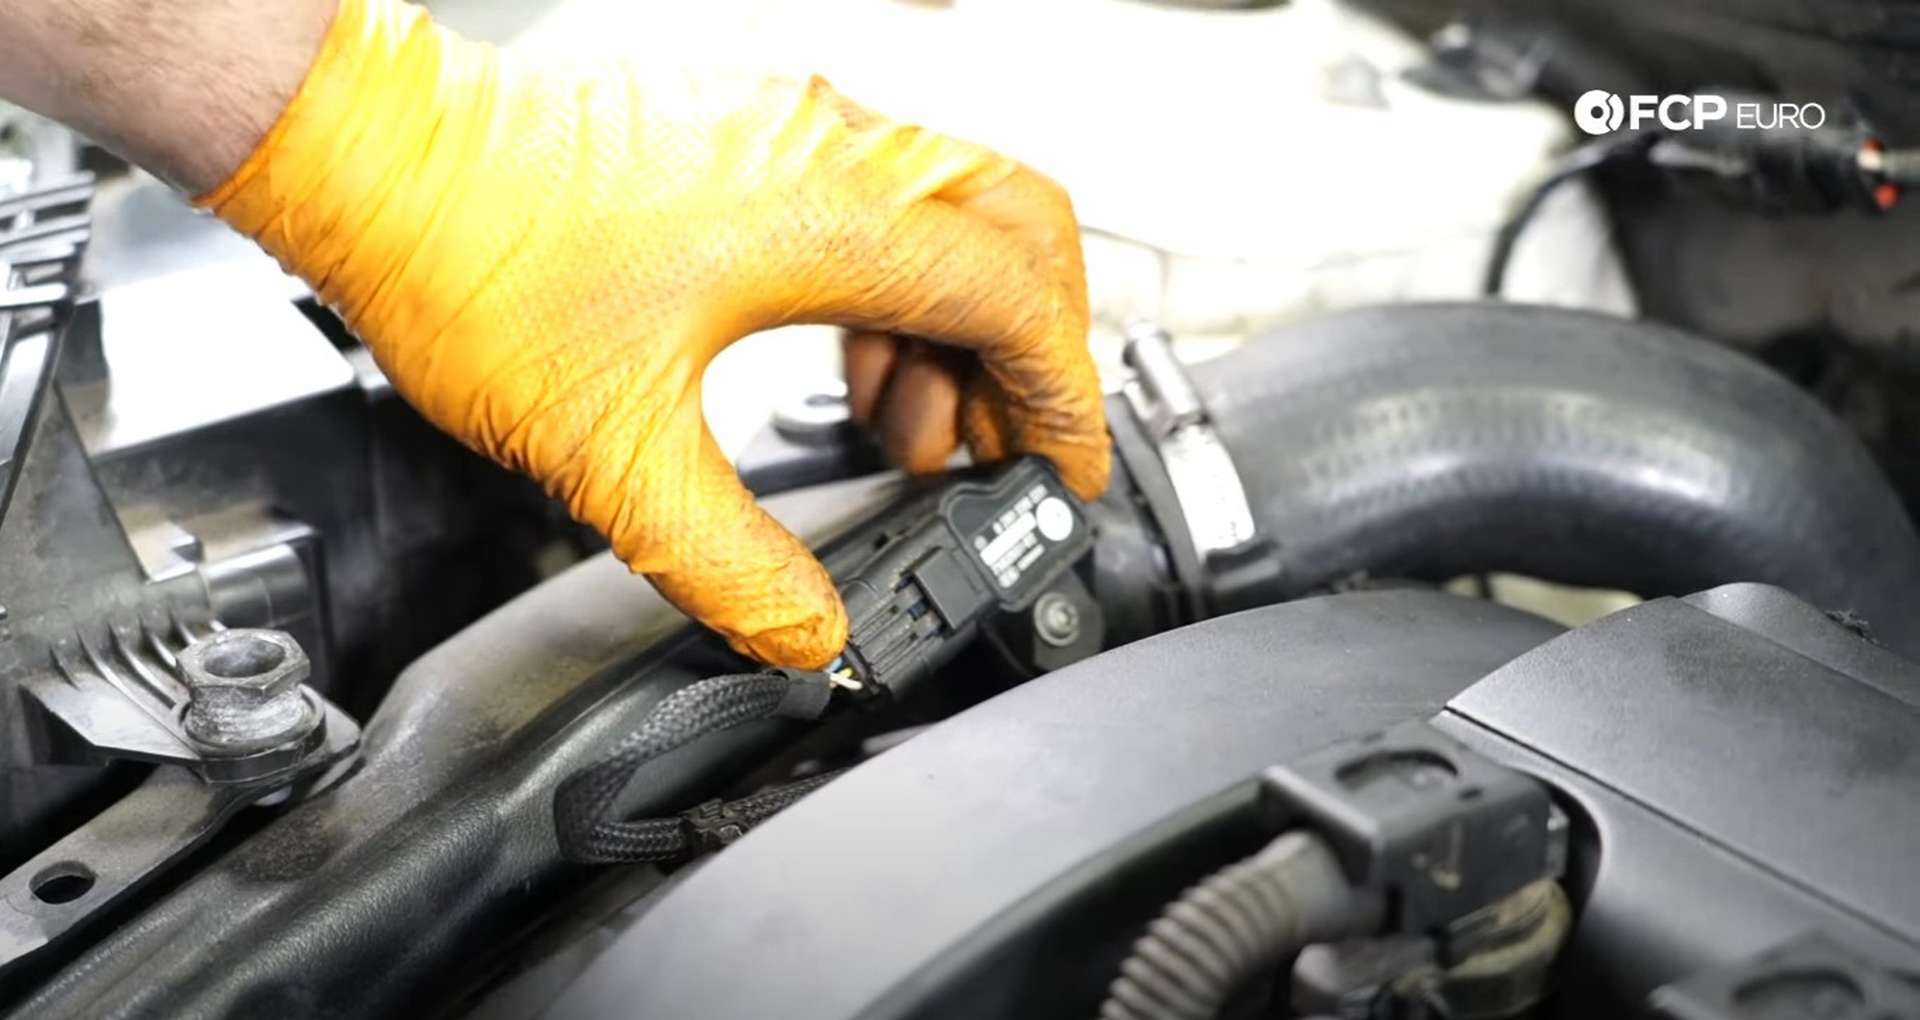
Back in the engine bay, disconnect the electrical connection on the charge pipe near the valve cover, then disconnect the charge pipe from the 90° elbow on the throttle body. Use a flathead screwdriver to pry out the metal tab on the elbow to release the lock, freeing the charge pipe.
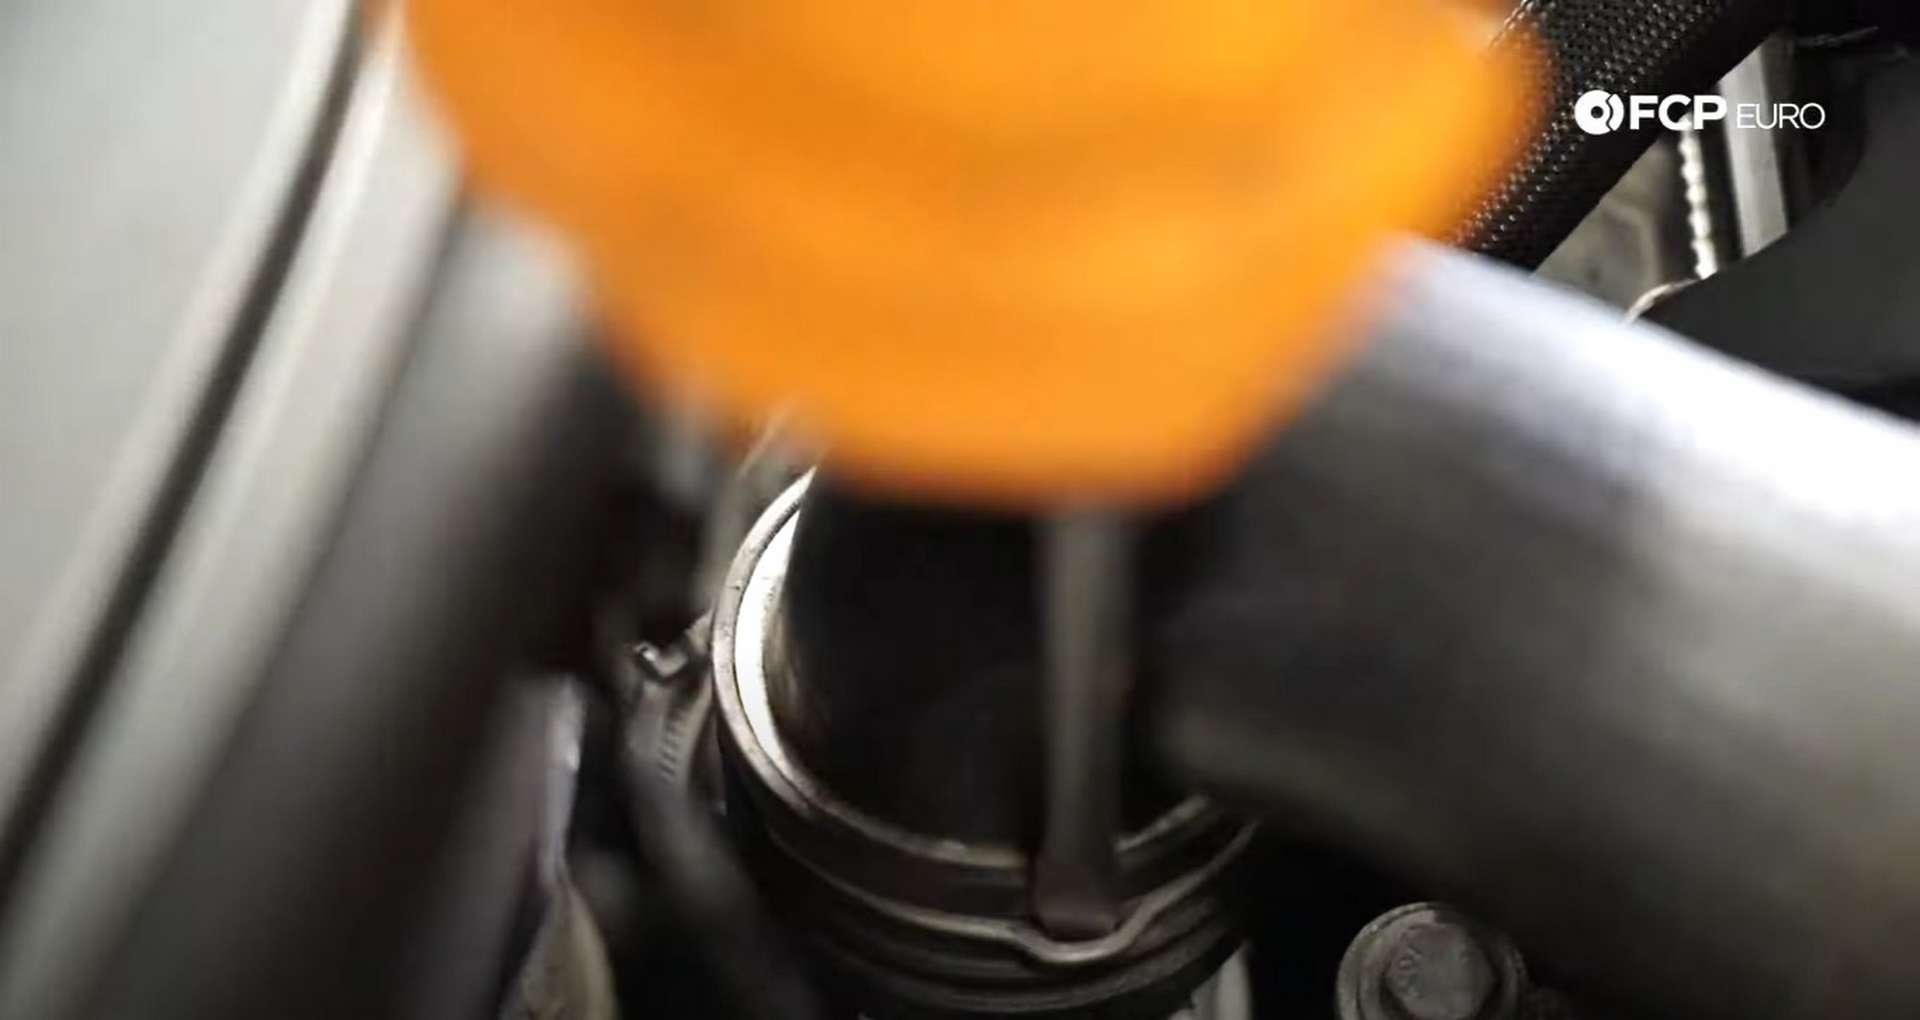
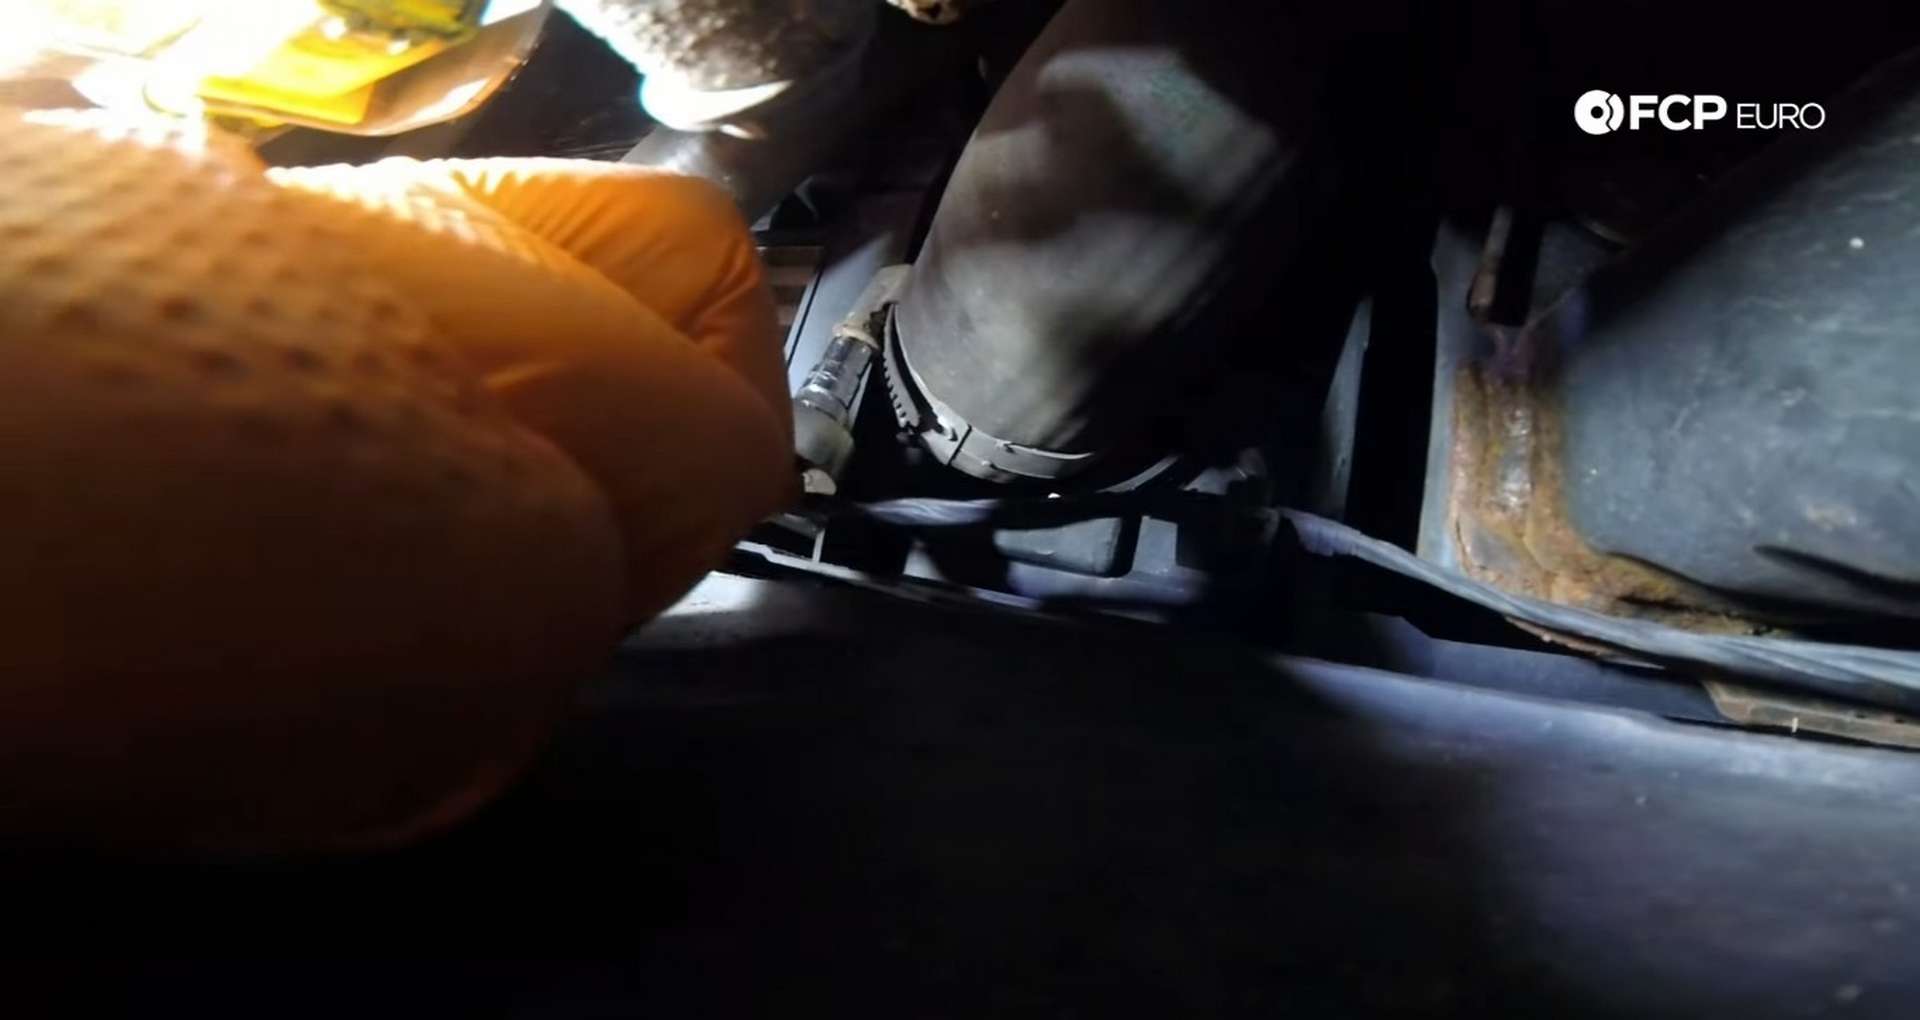
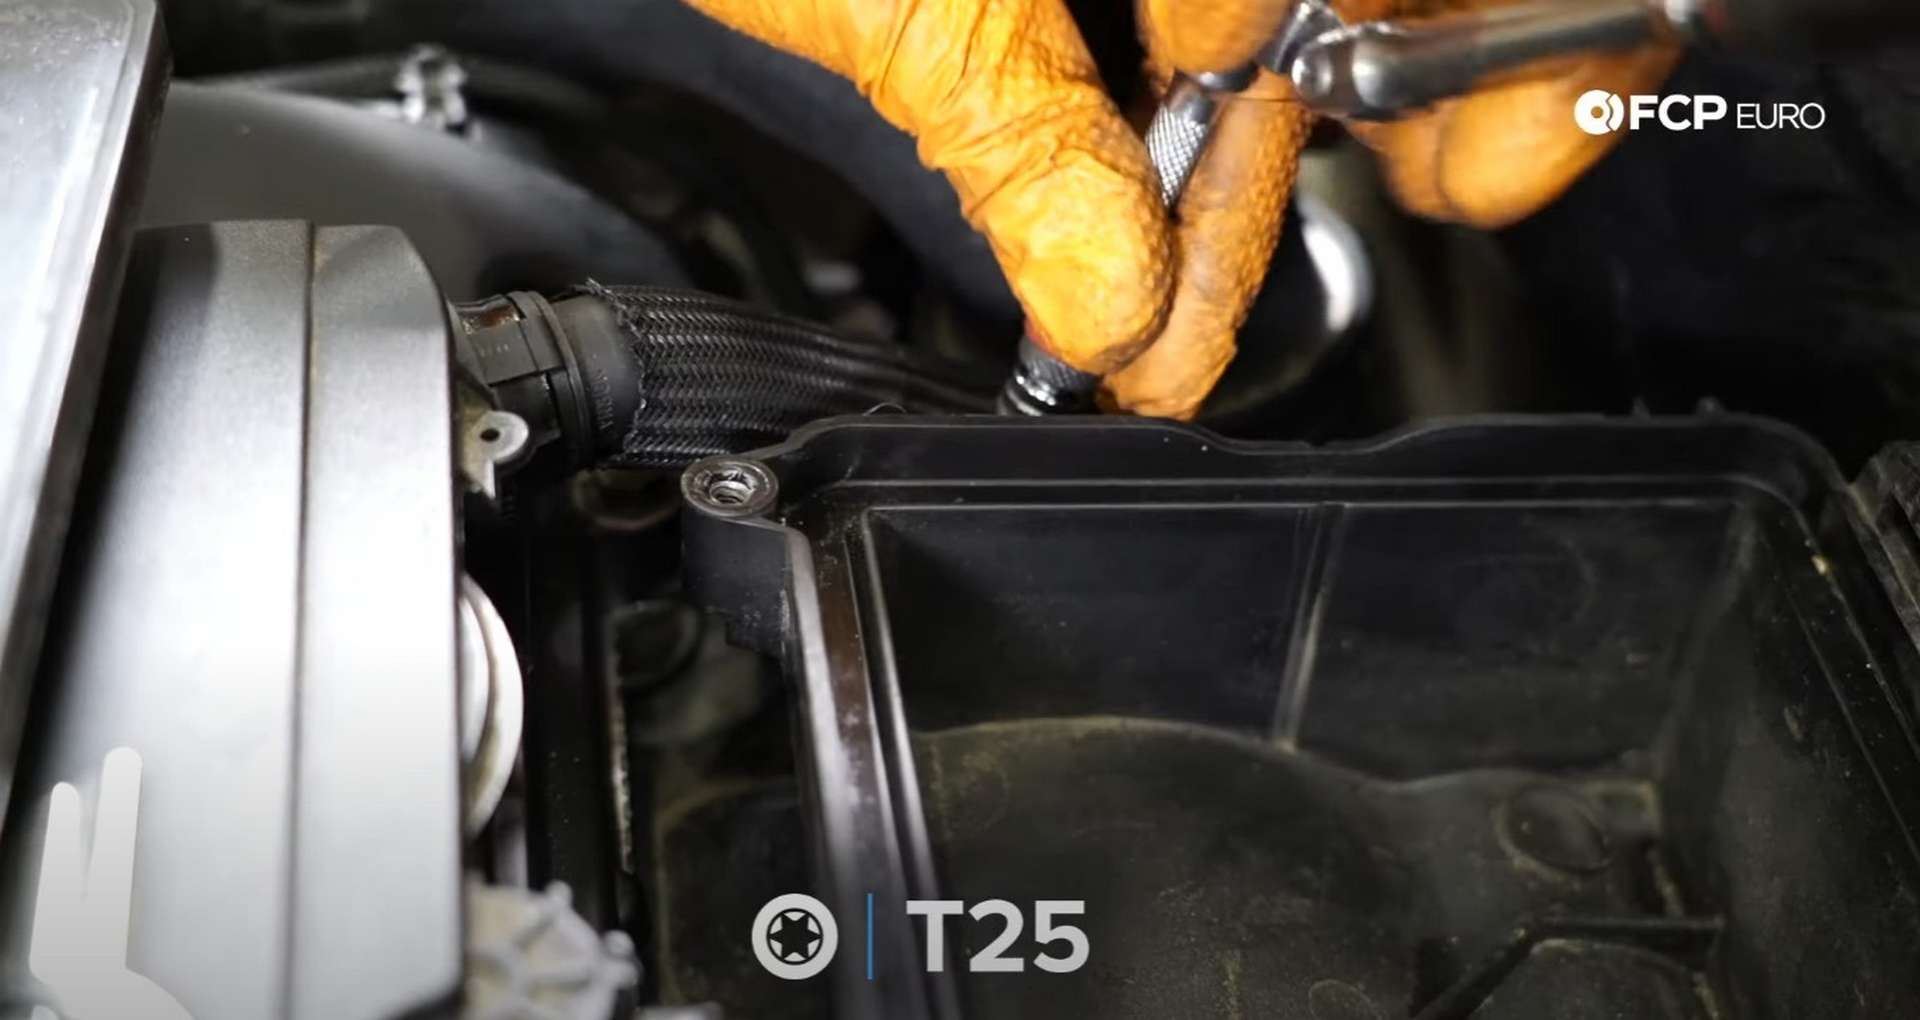
Now pull the charge pipe out of the engine bay. A hose covered in a braided protective cloth runs off the elbow from which you removed the charge pipe. Use a 7mm socket or nut driver to loosen the clamps on both ends of that hose and remove it from the engine bay.
Lastly, follow the elbow down to where it meets the throttle body. Then, use a 7mm socket or nut driver to loosen the elbow’s clamp and remove it from the car.
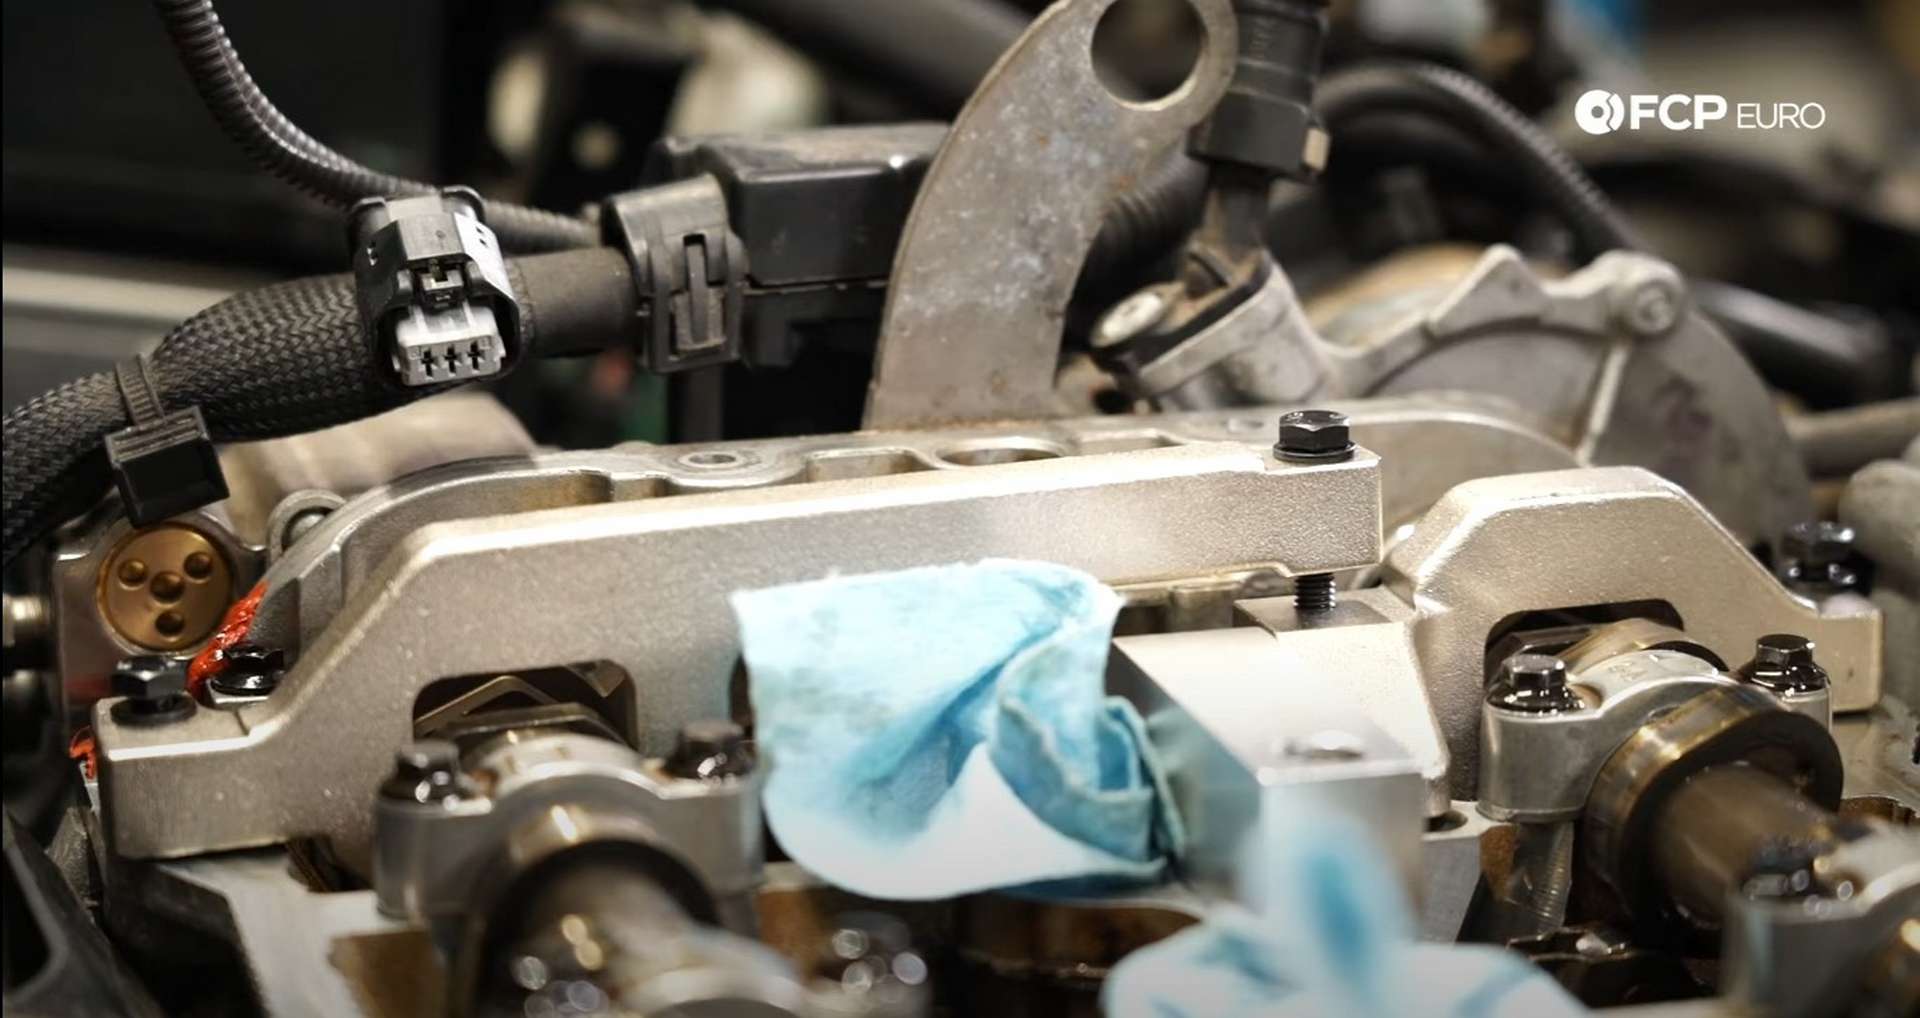
Step 2: Remove the valve cover
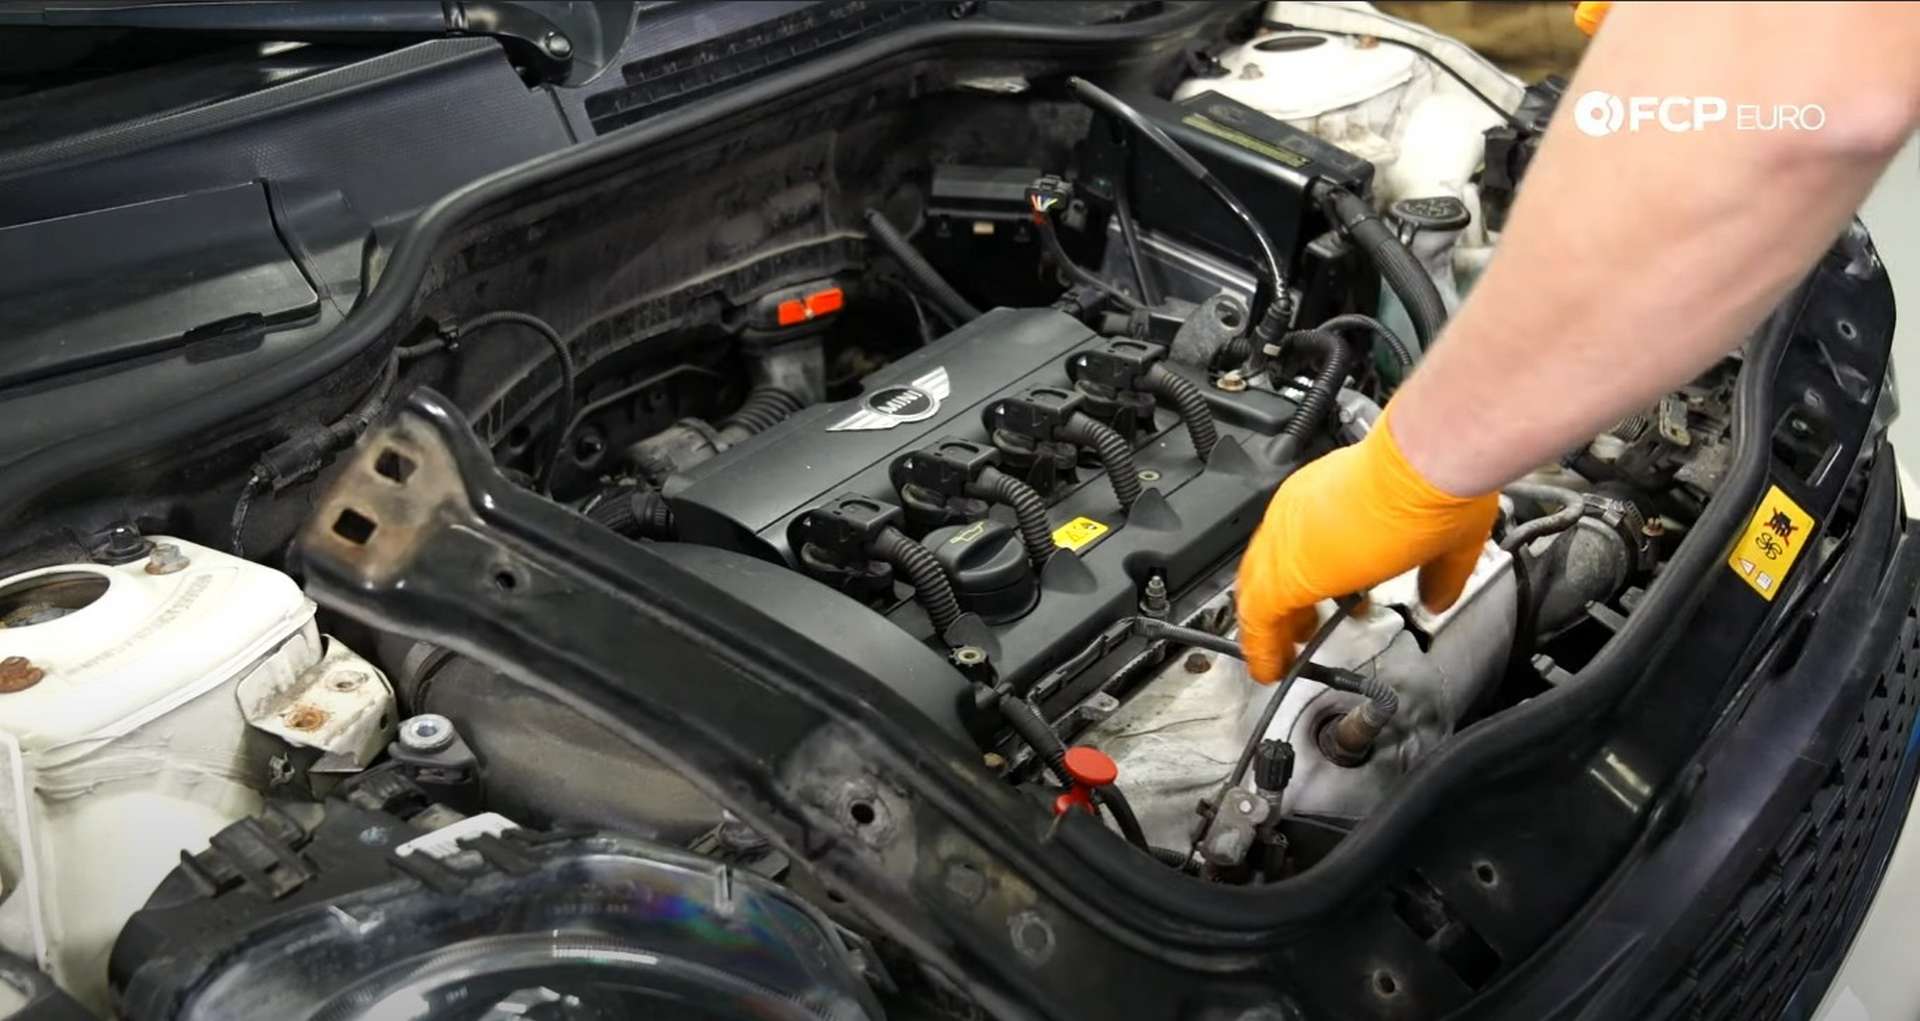
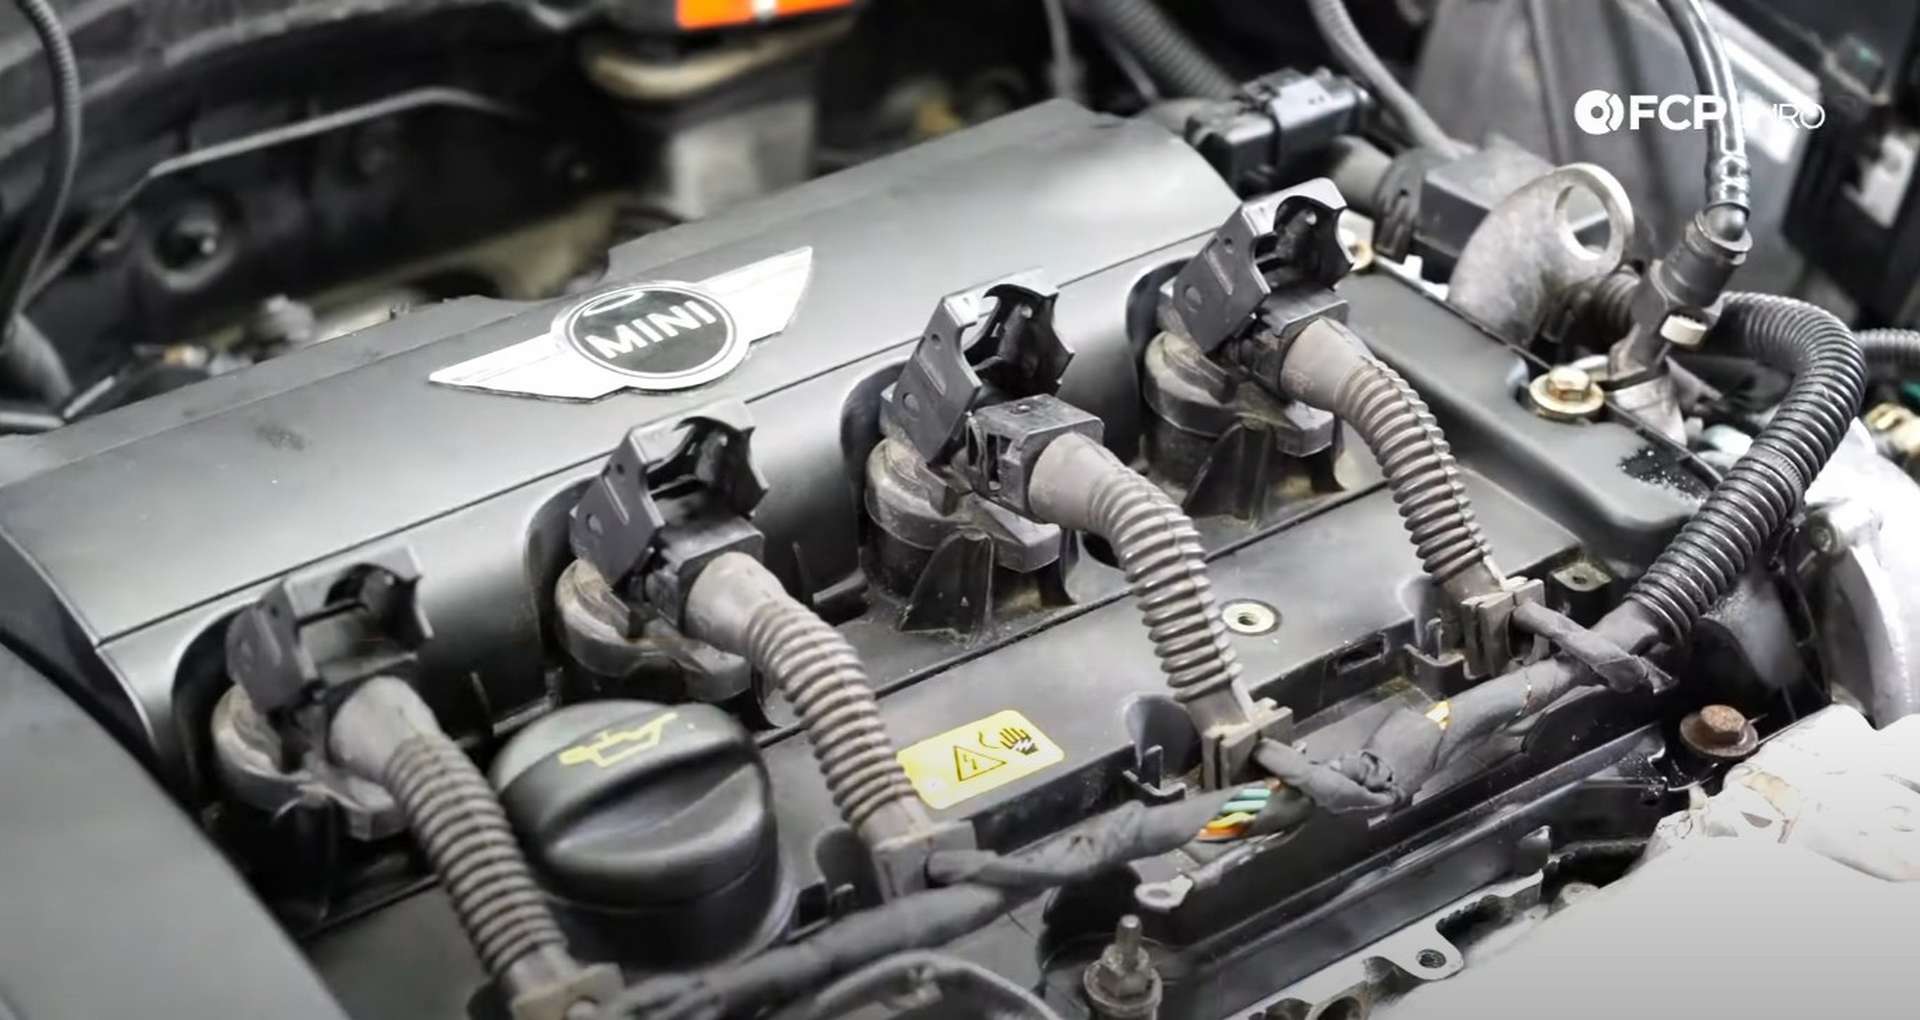
Lift the locks on the ignition coils, unplug the ignition harness from them, and then pull the coil out of the cylinder head.
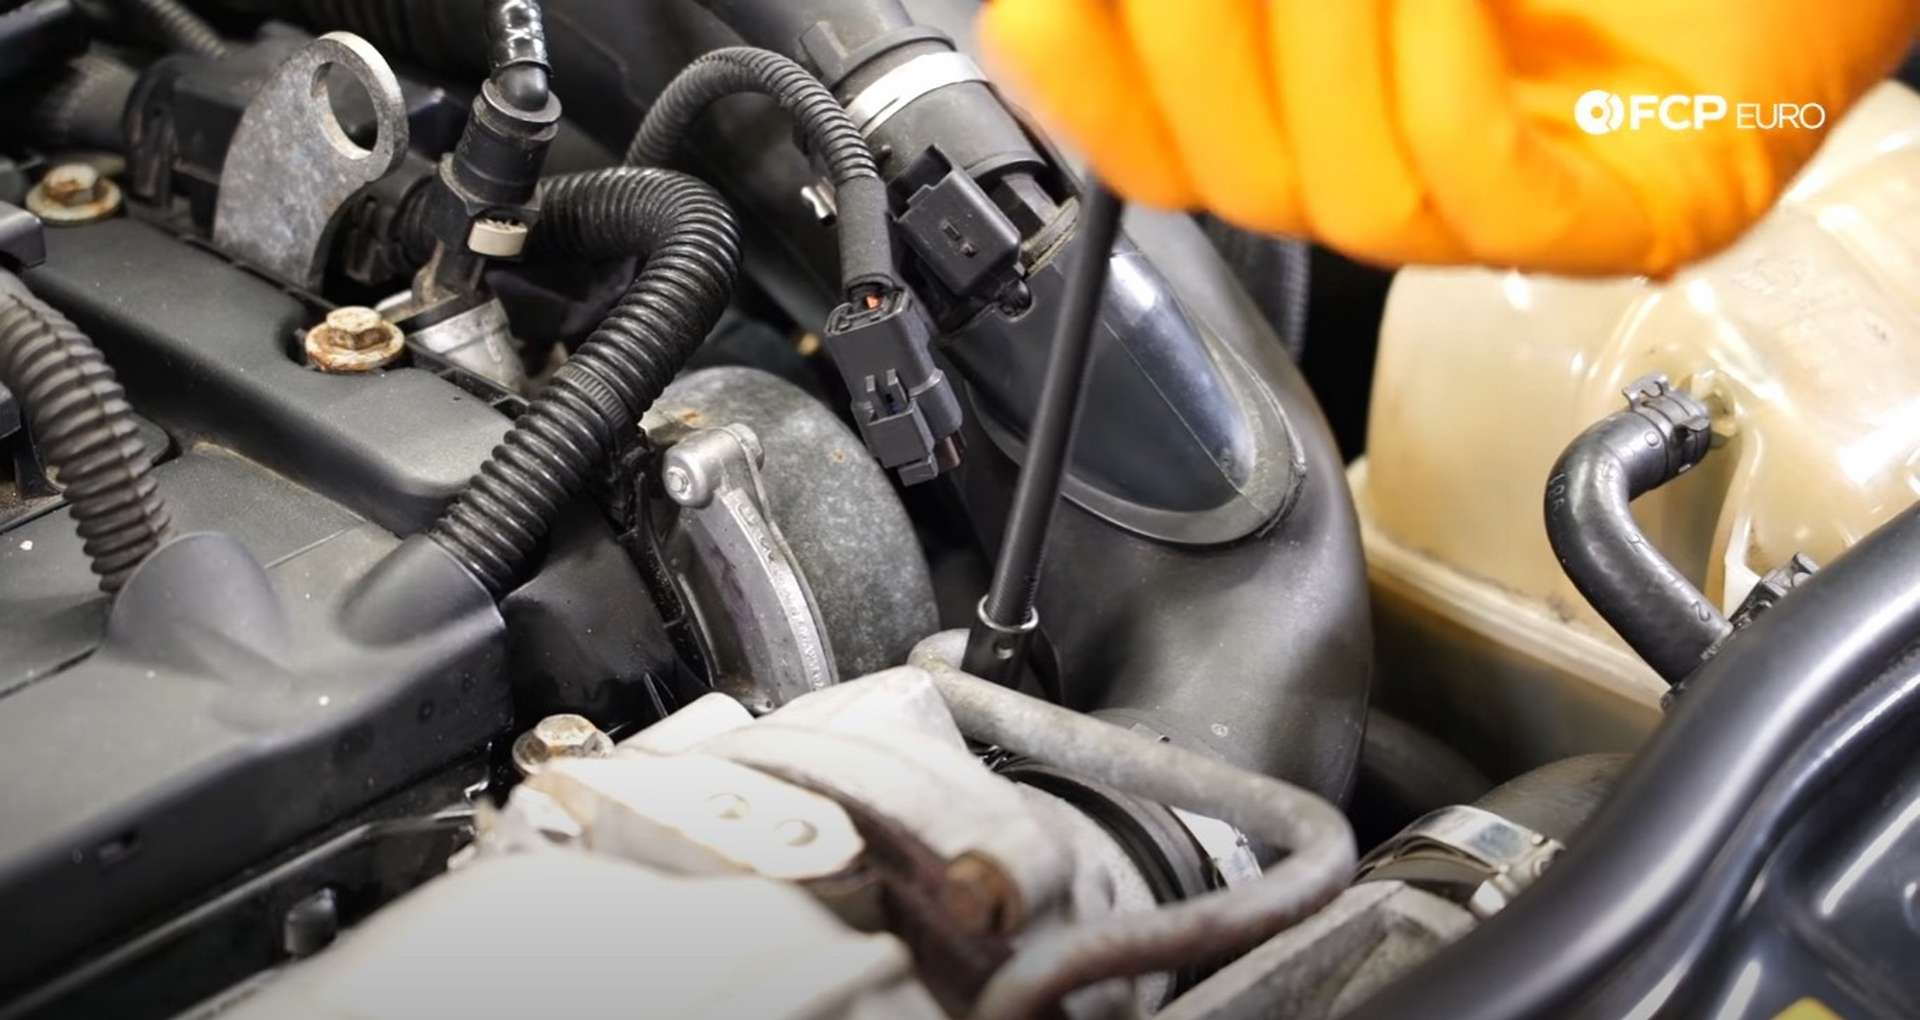
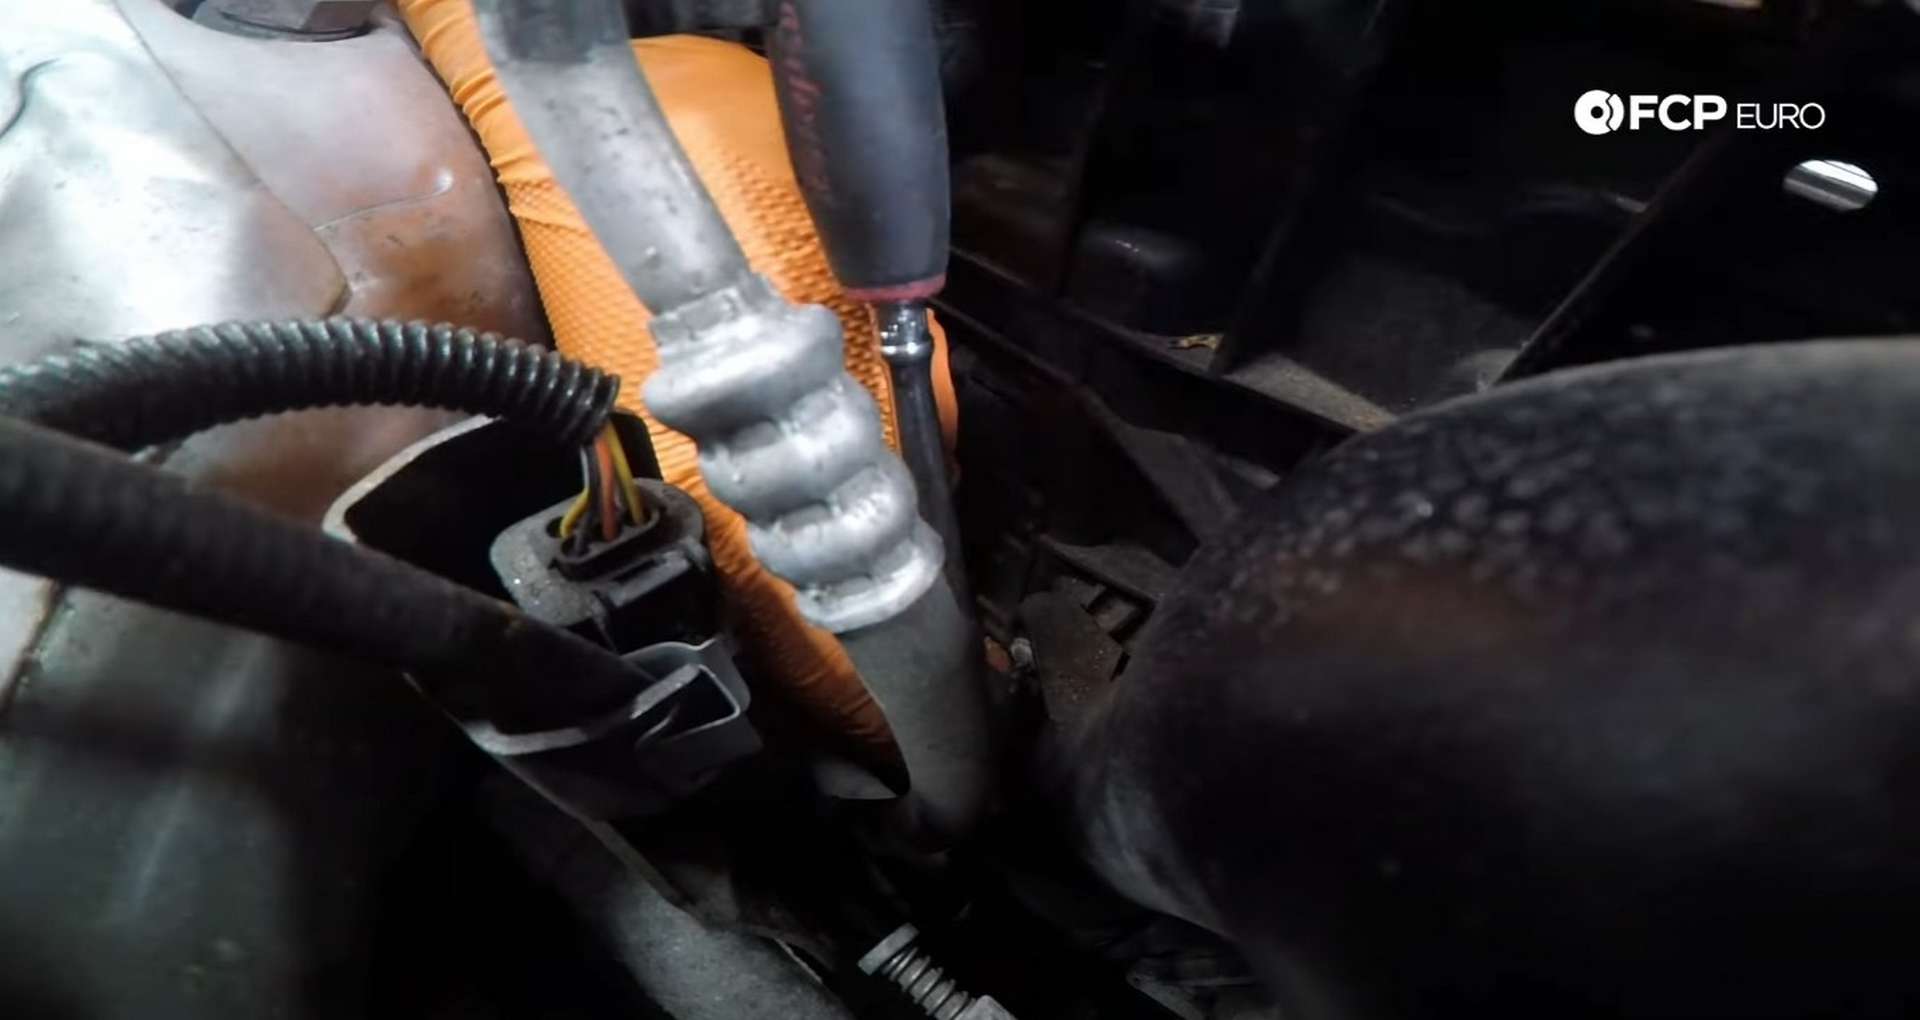
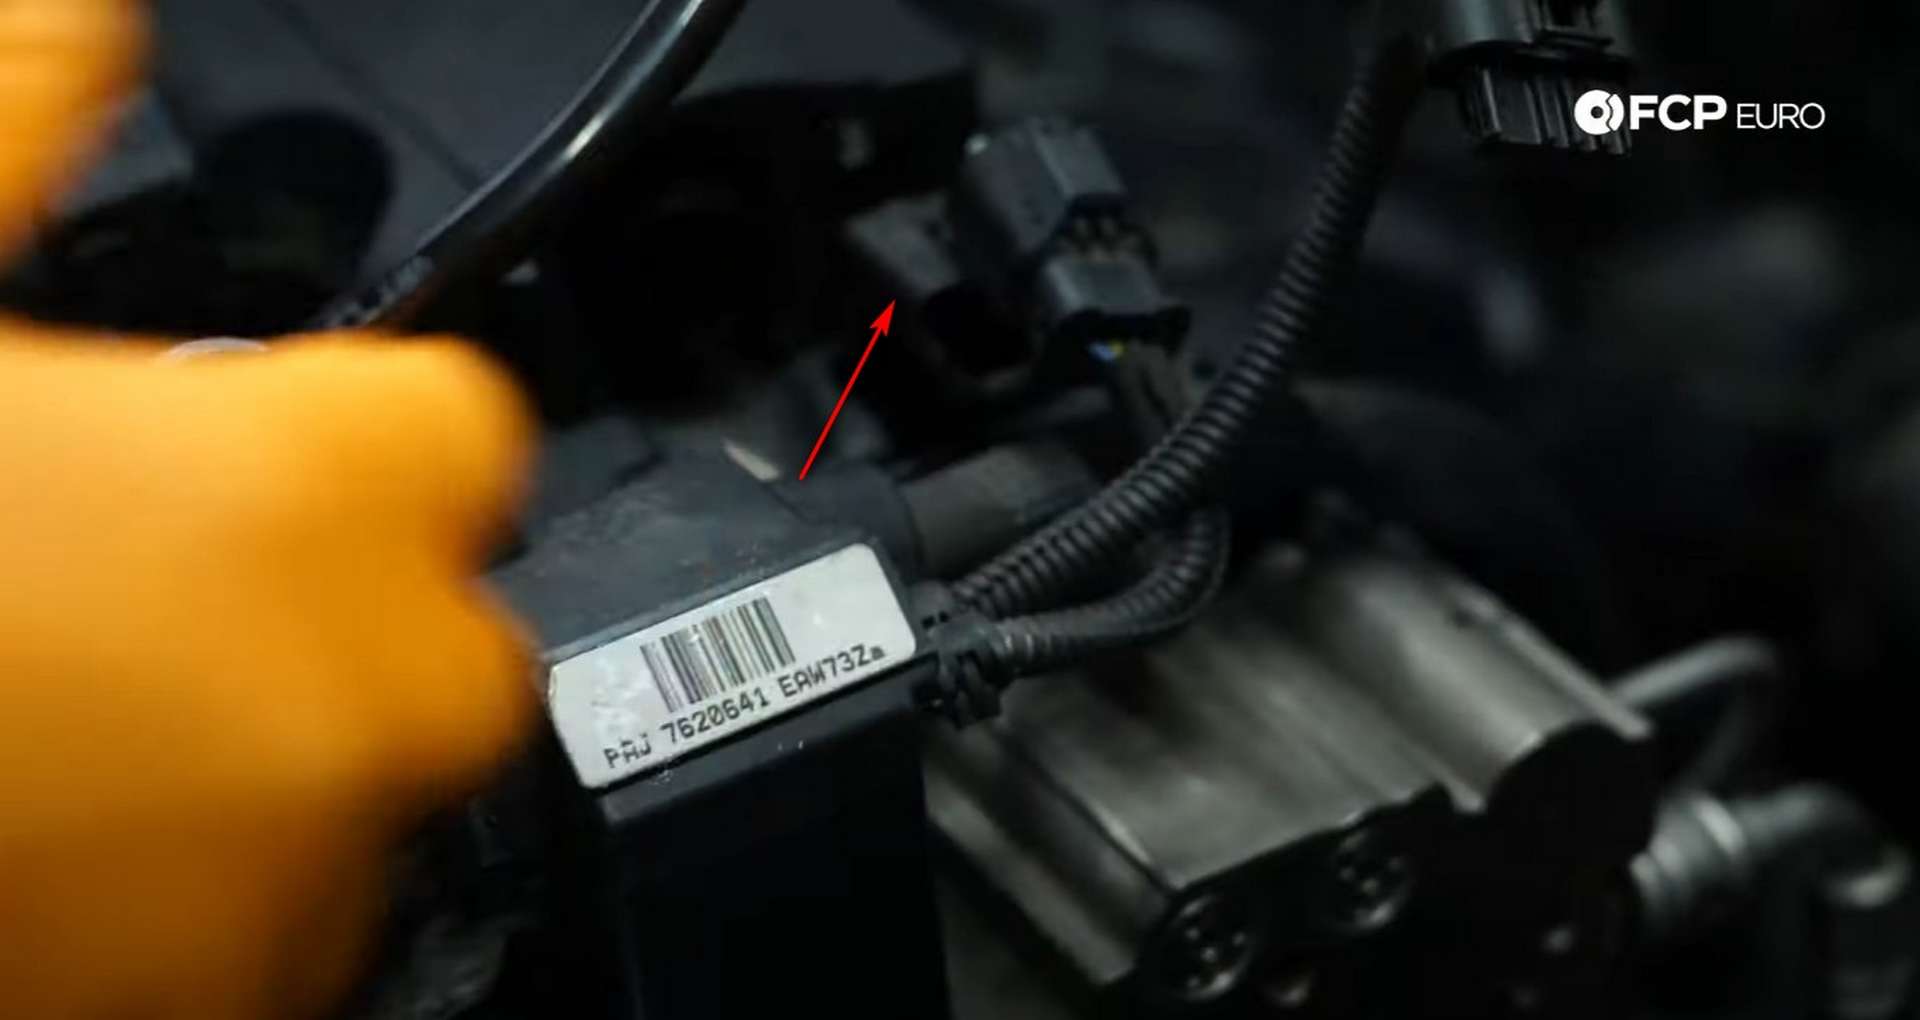
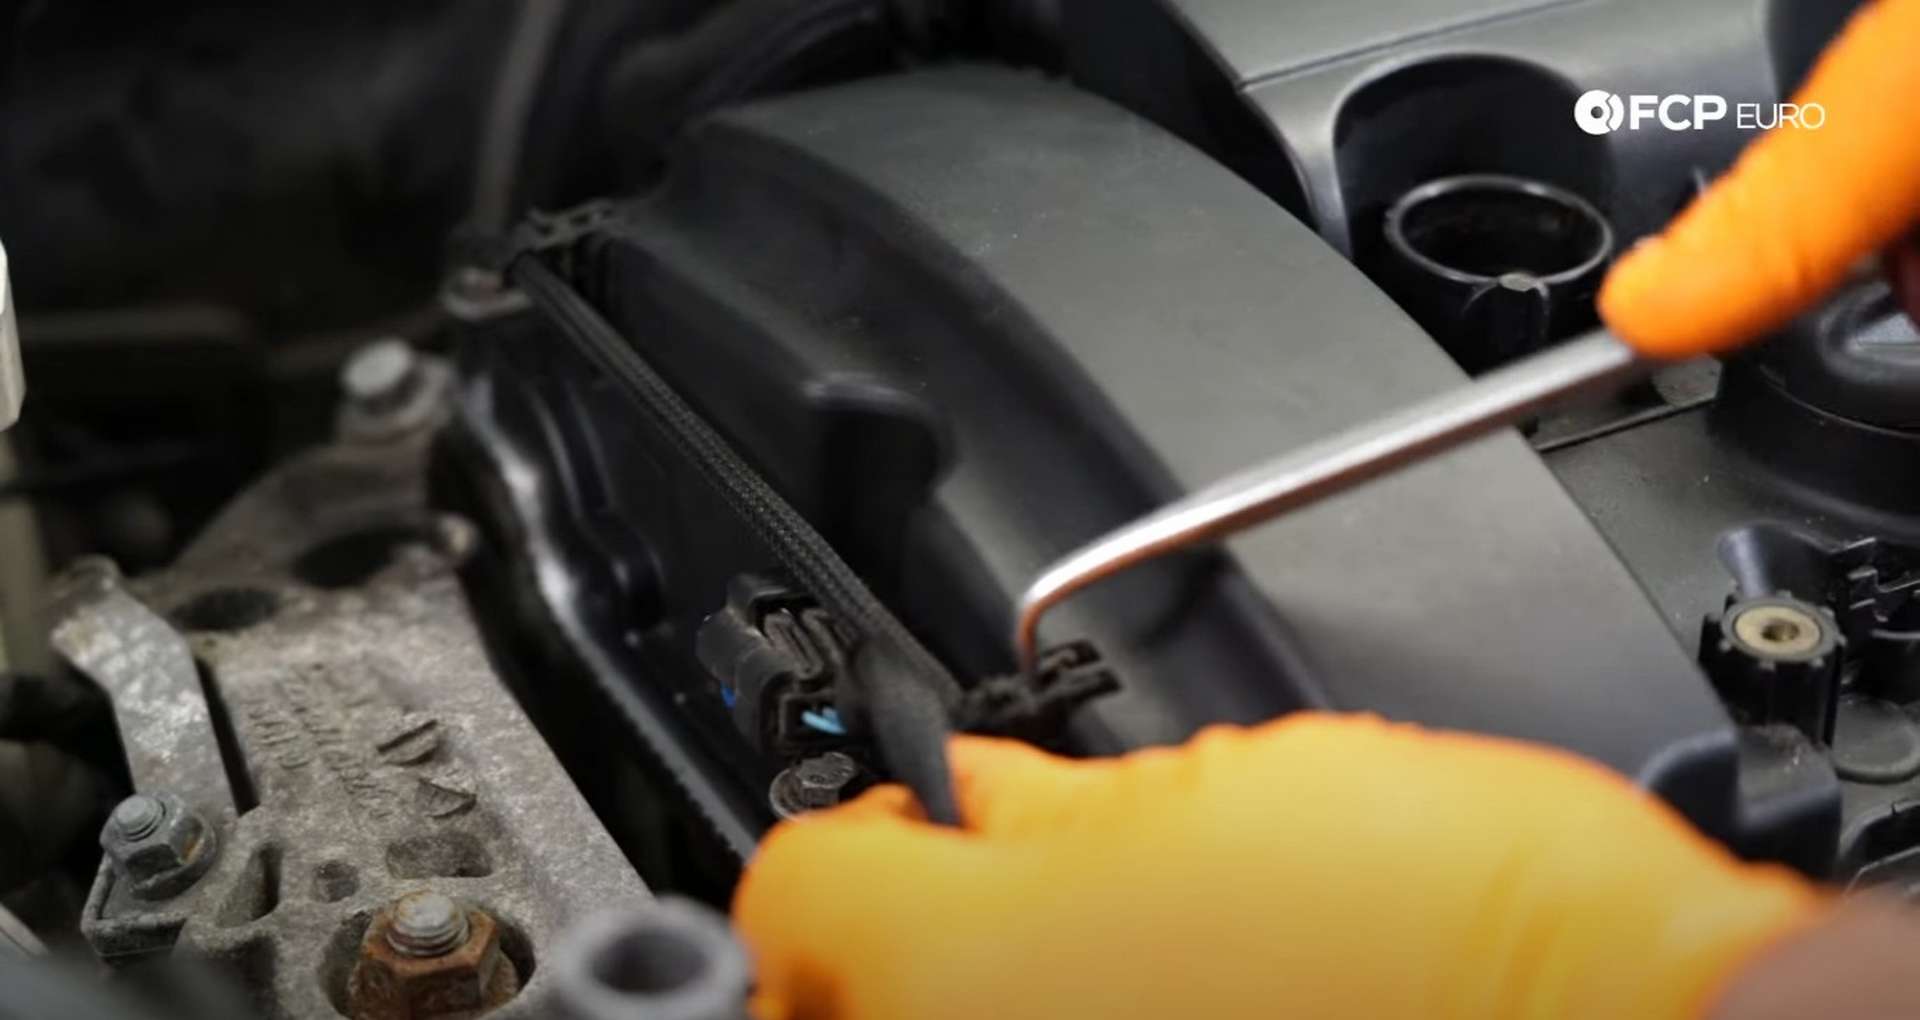
The remaining breather hose attached to the valve cover gets brittle over time. Carefully use a pick to pry up on its locking tabs and disconnect it from the cylinder head. Then, on the opposite side of the valve cover, disconnect the camshaft position sensor.

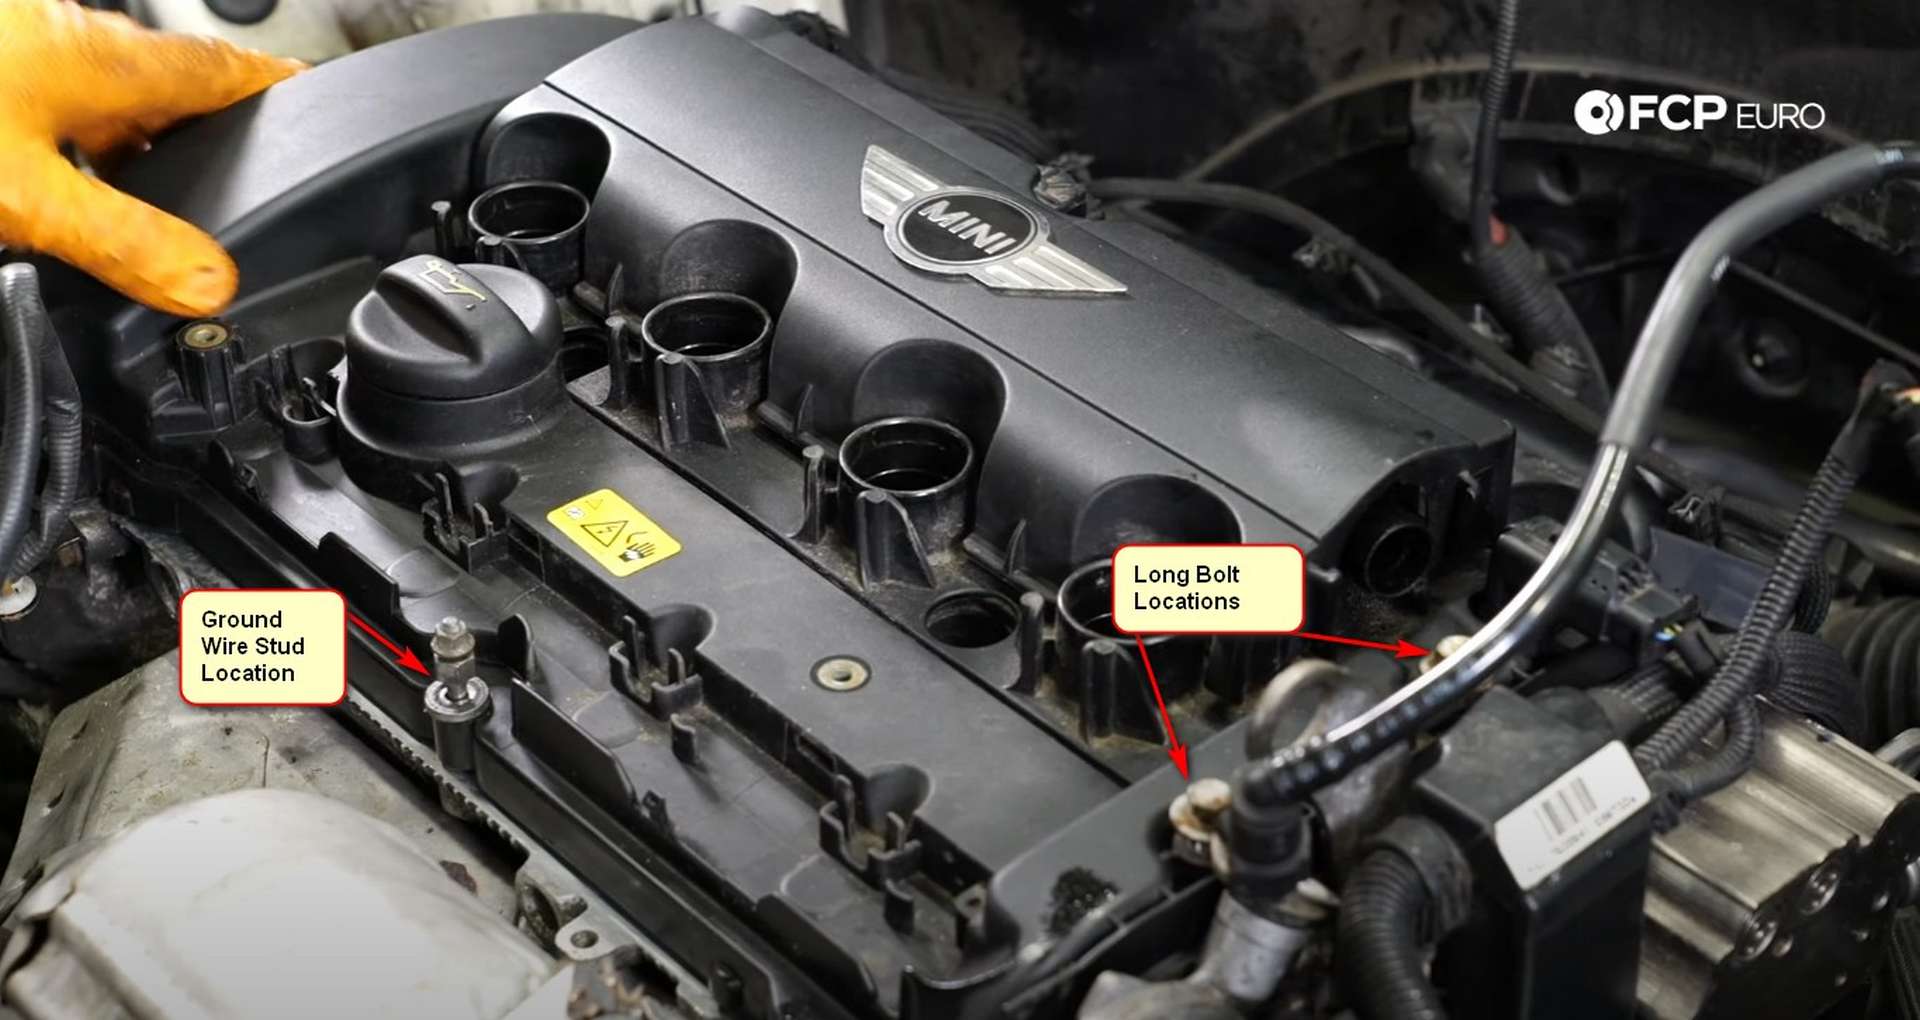
Next up, use a flathead screwdriver to remove the plastic cover from the ignition harness. Follow the ignition harness down the engine on the passenger’s side and disconnect it from the rest of the engine’s wiring harness. Then use an 8mm socket to remove the nut from the harness’s ground wire.
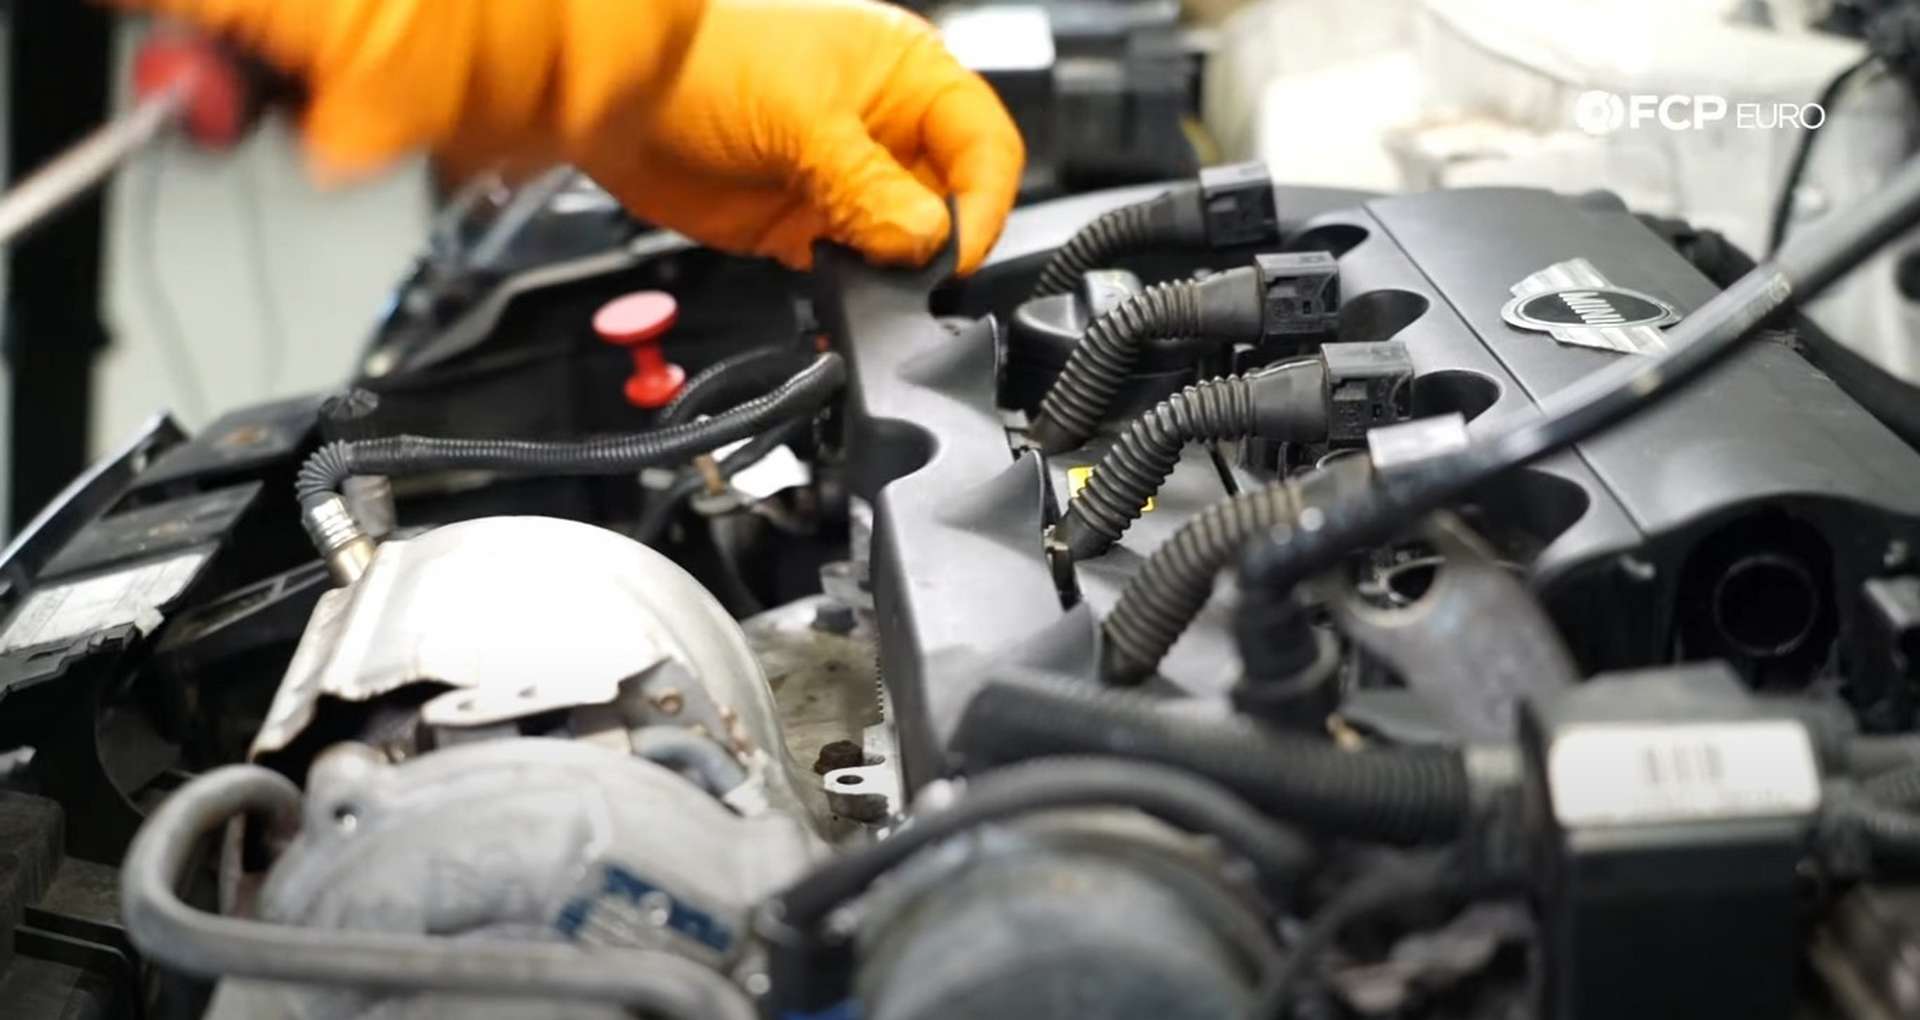
Unclip the harness from any of the remaining clips on the valve cover. Then, pull the harness off of the valve cover, laying it over the right side of the engine bay.
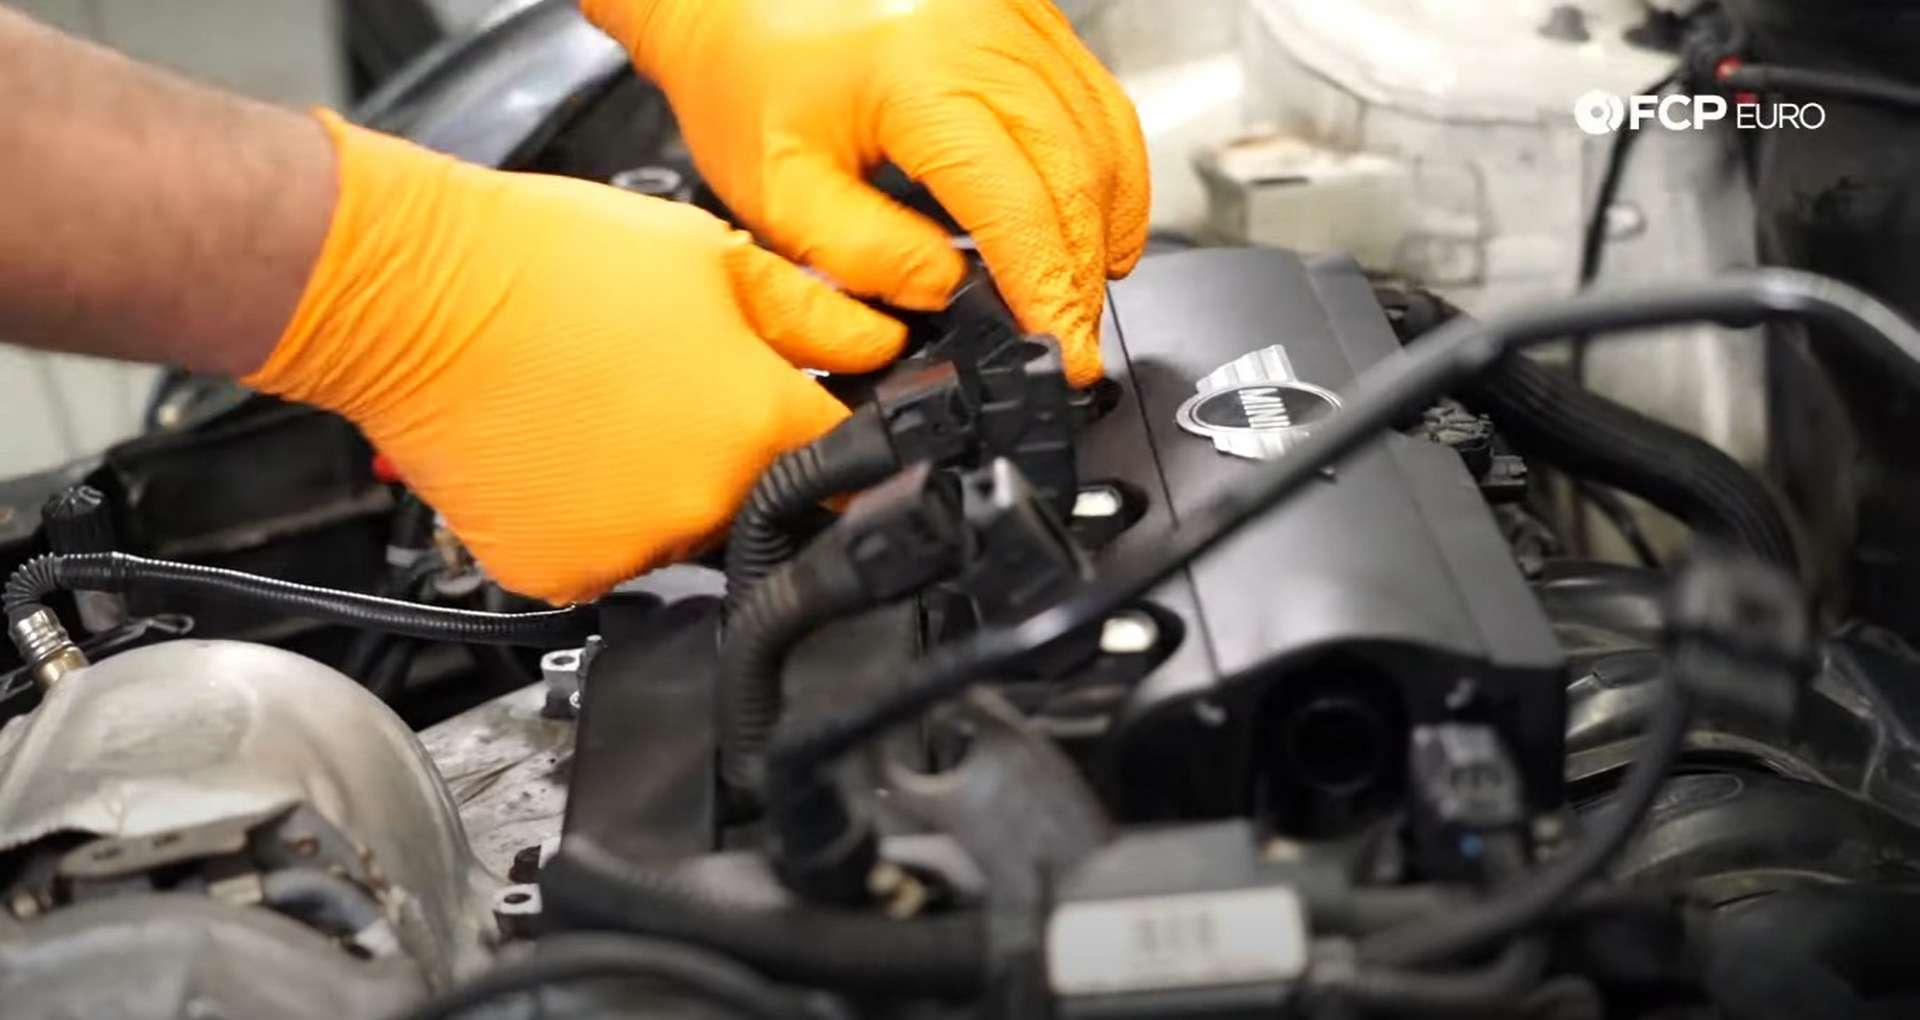
After that, move to the passenger’s side of the valve cover and unclip the electrical plug from it.
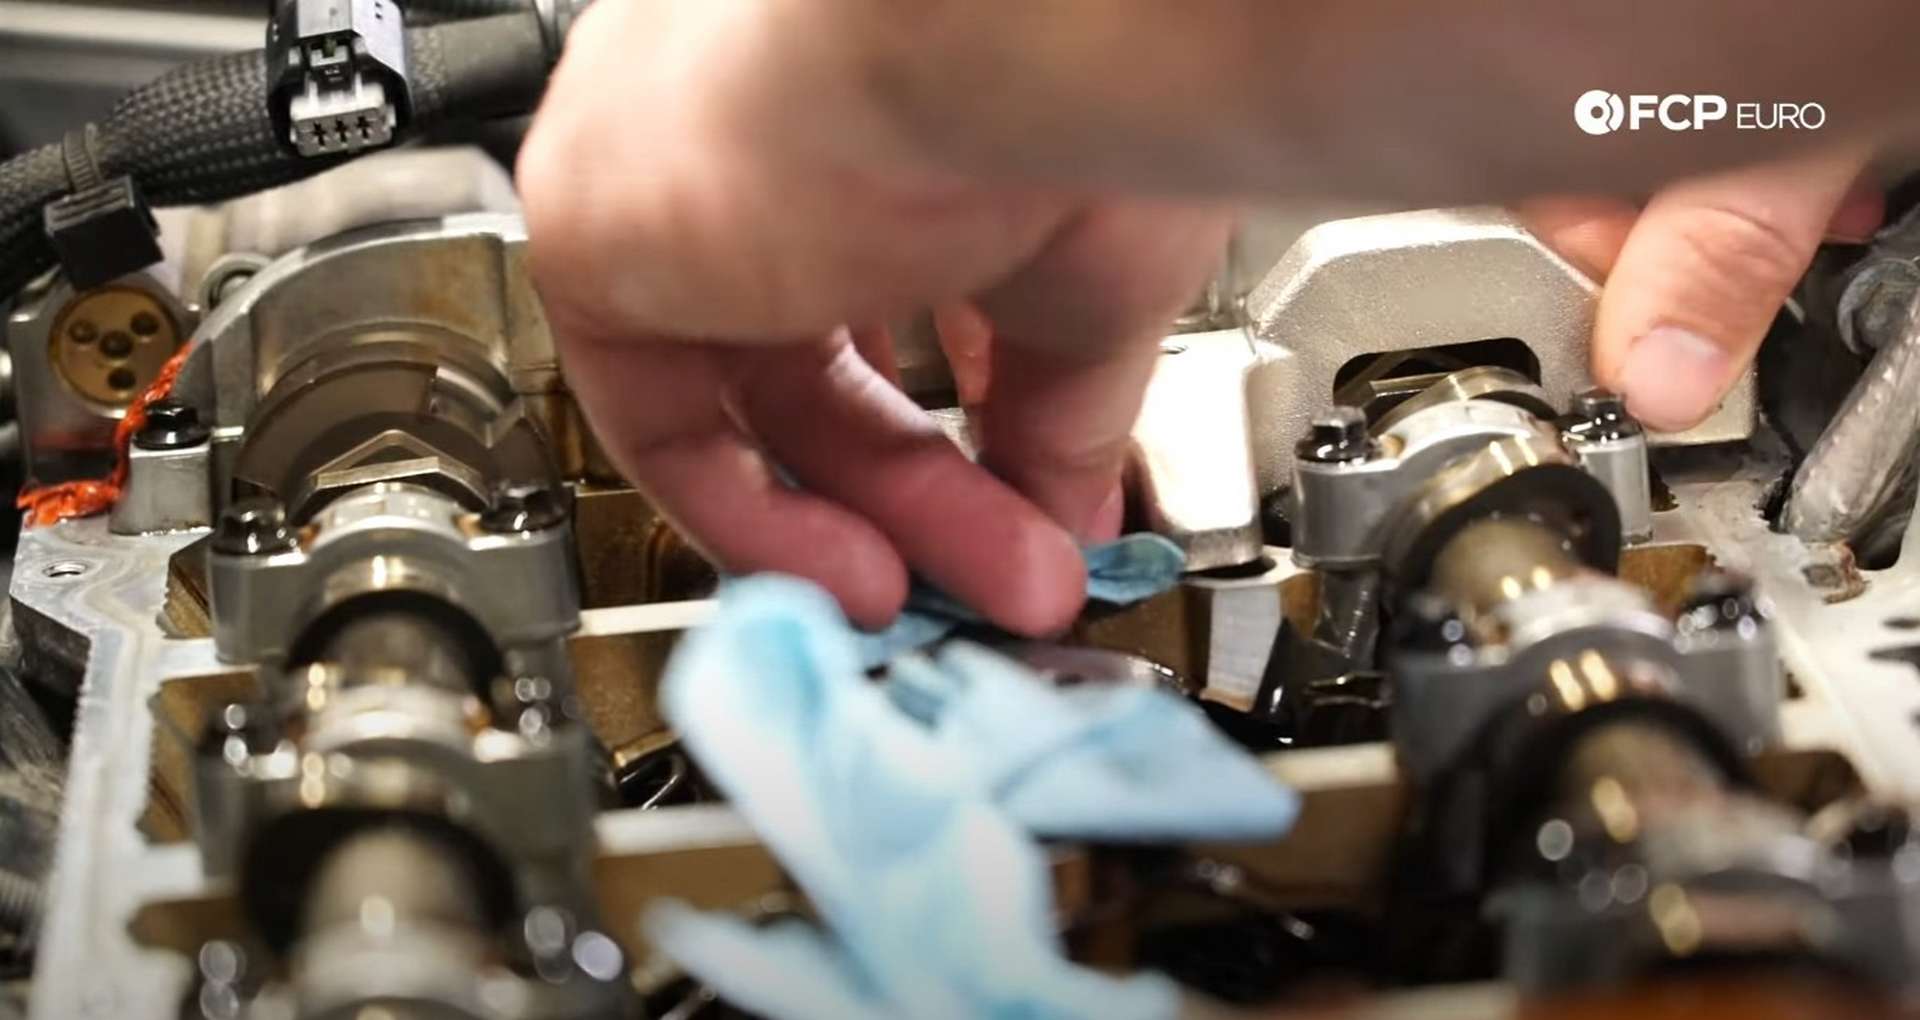
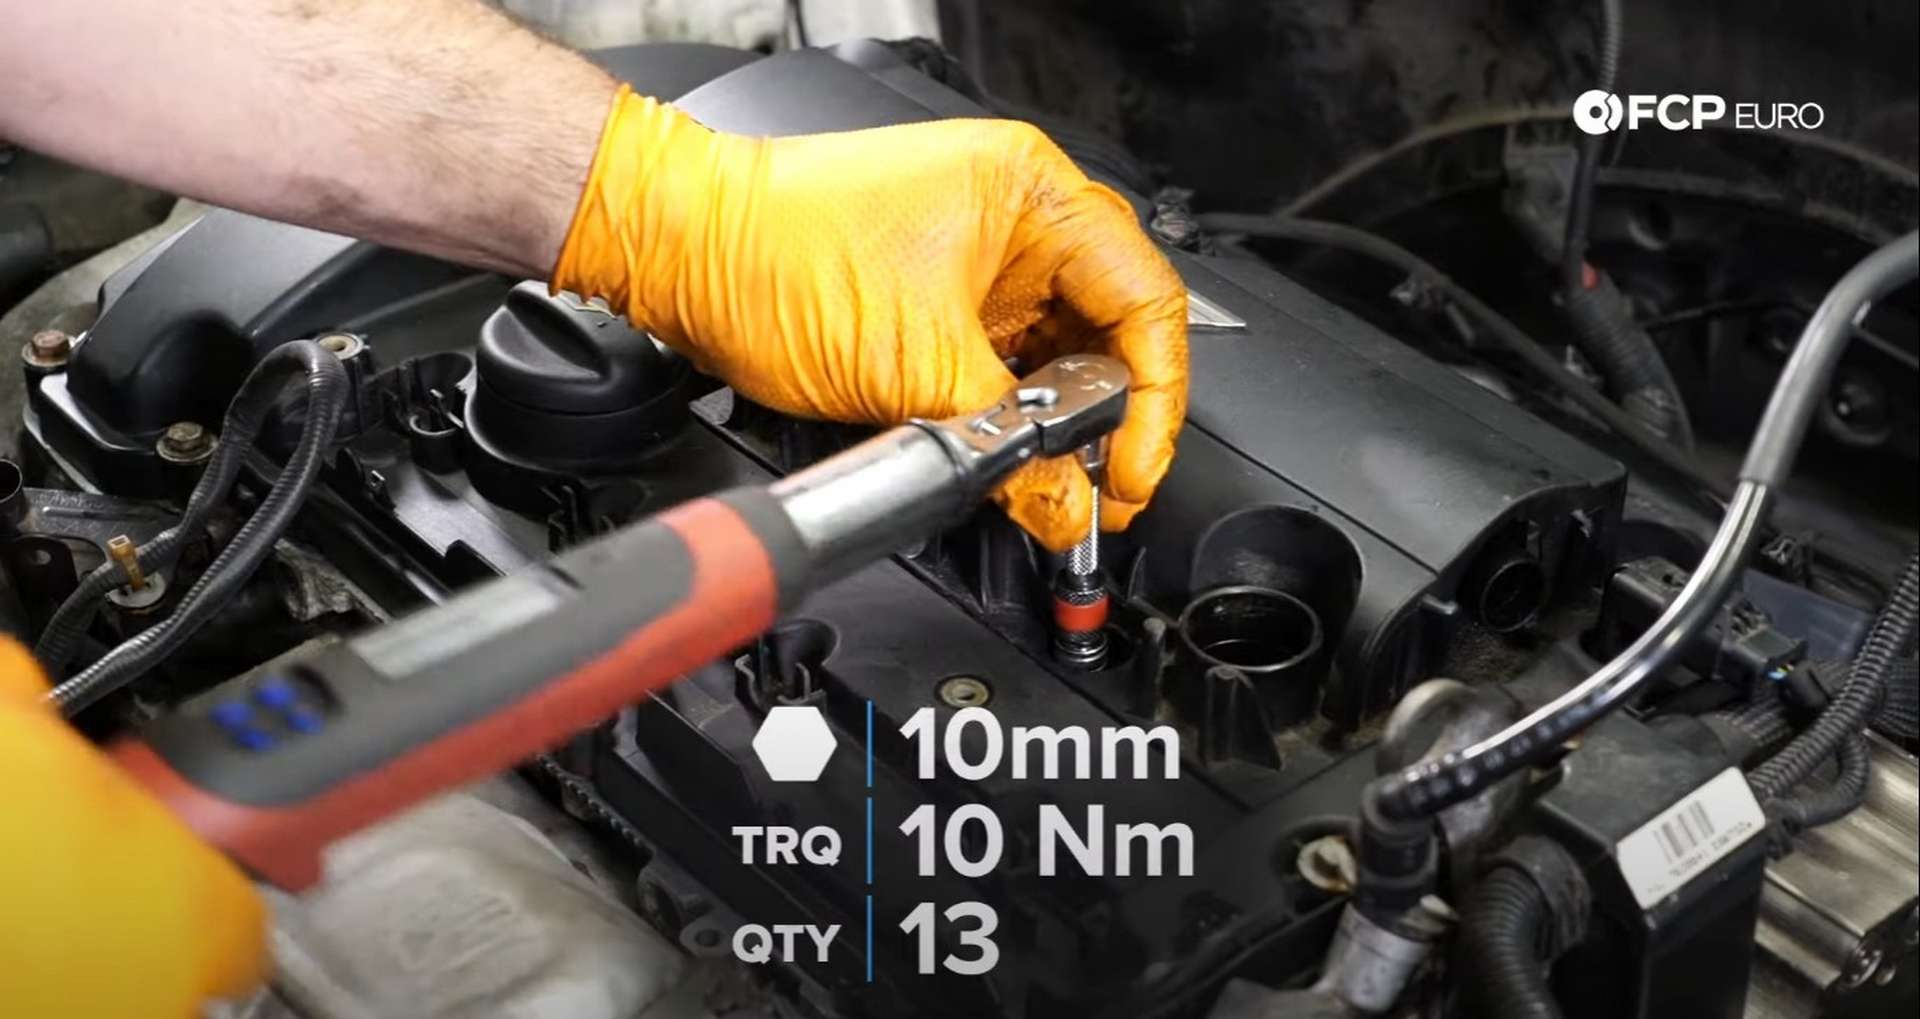
With that out of the way, use a 10mm socket to remove the valve cover bolts. Remove the outermost bolts first, moving inwards until you’ve removed all thirteen bolts. Once all of the bolts are out, pull the valve cover off.
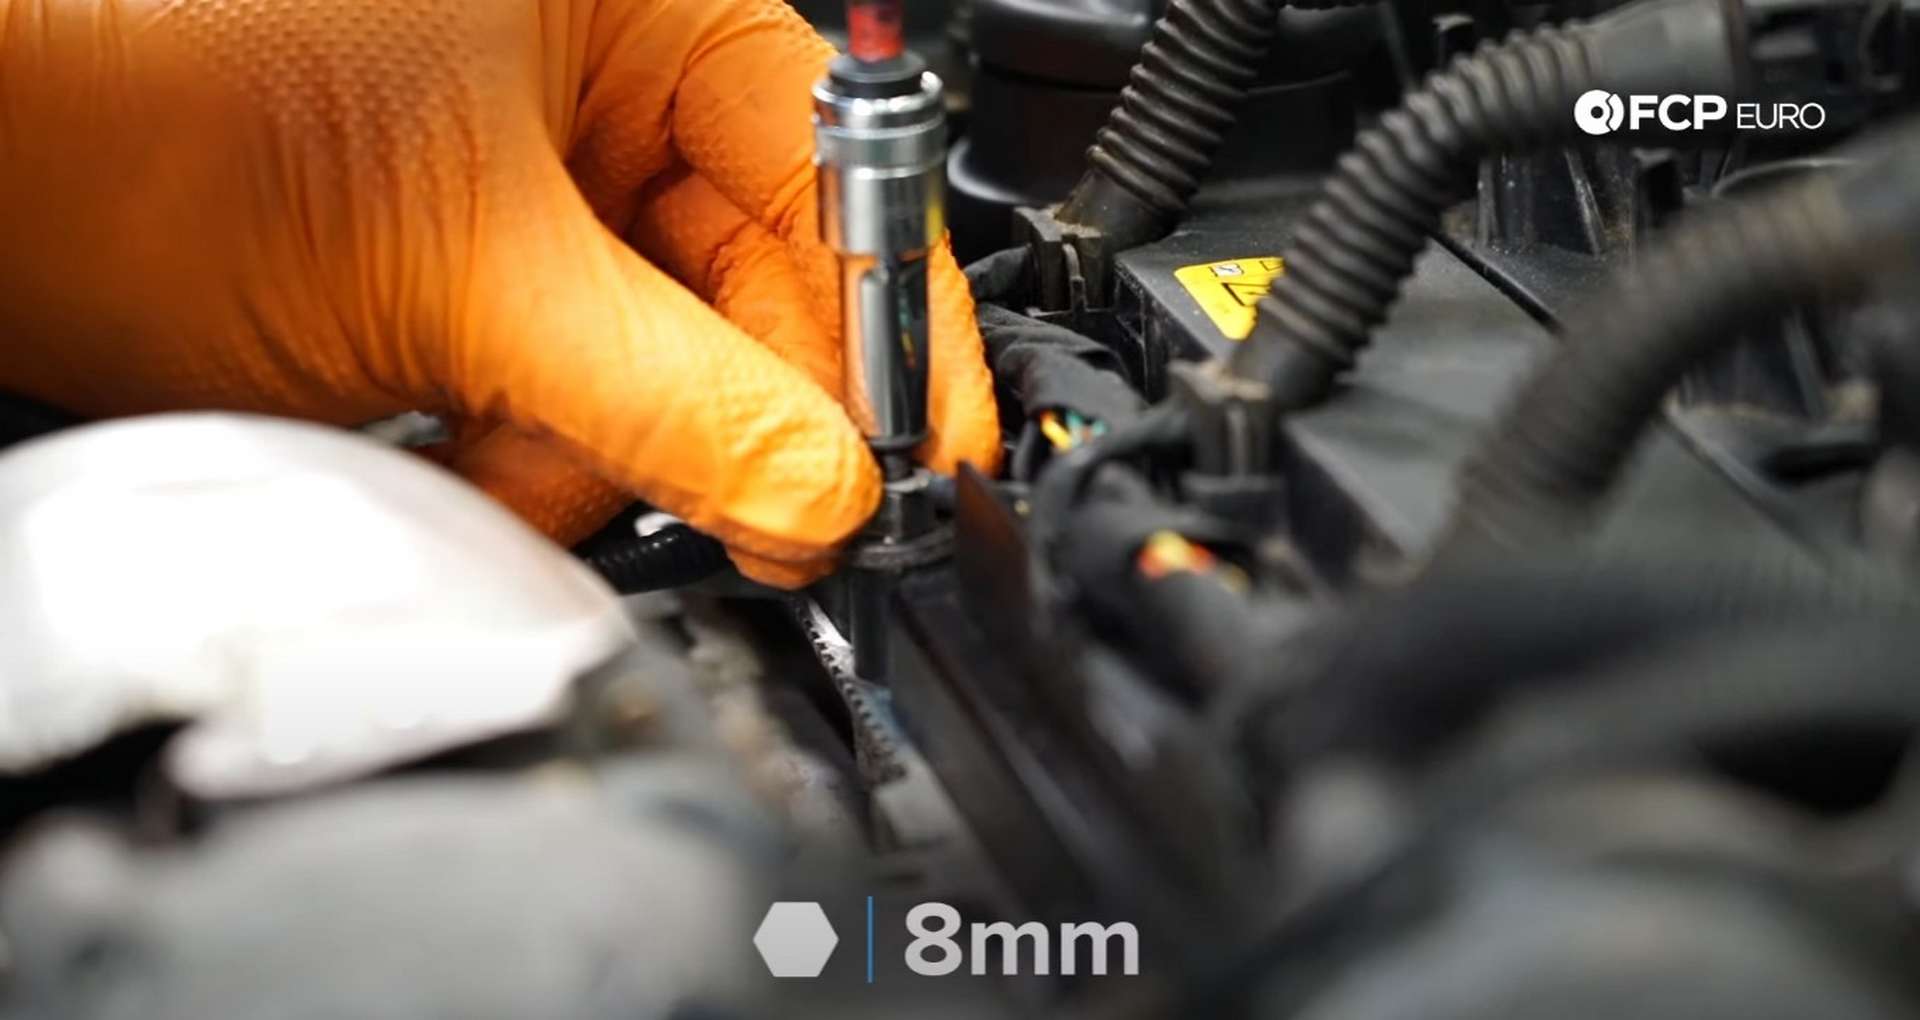
Before moving on, use your spark plug socket to remove all four spark plugs. Removing the plugs will make it easier to rotate the engine to align the timing marks.
Step 3: Align the timing marks
Use the MINI serpentine belt tool to rotate the belt tensioner. Place the tool on the tensioner, rotating the tool’s handle towards the front of the car.
As you rotate it, push in on the pin with the spring. Once the tensioner is rotated to a certain point, the pin will push in and lock the tensioner in place.
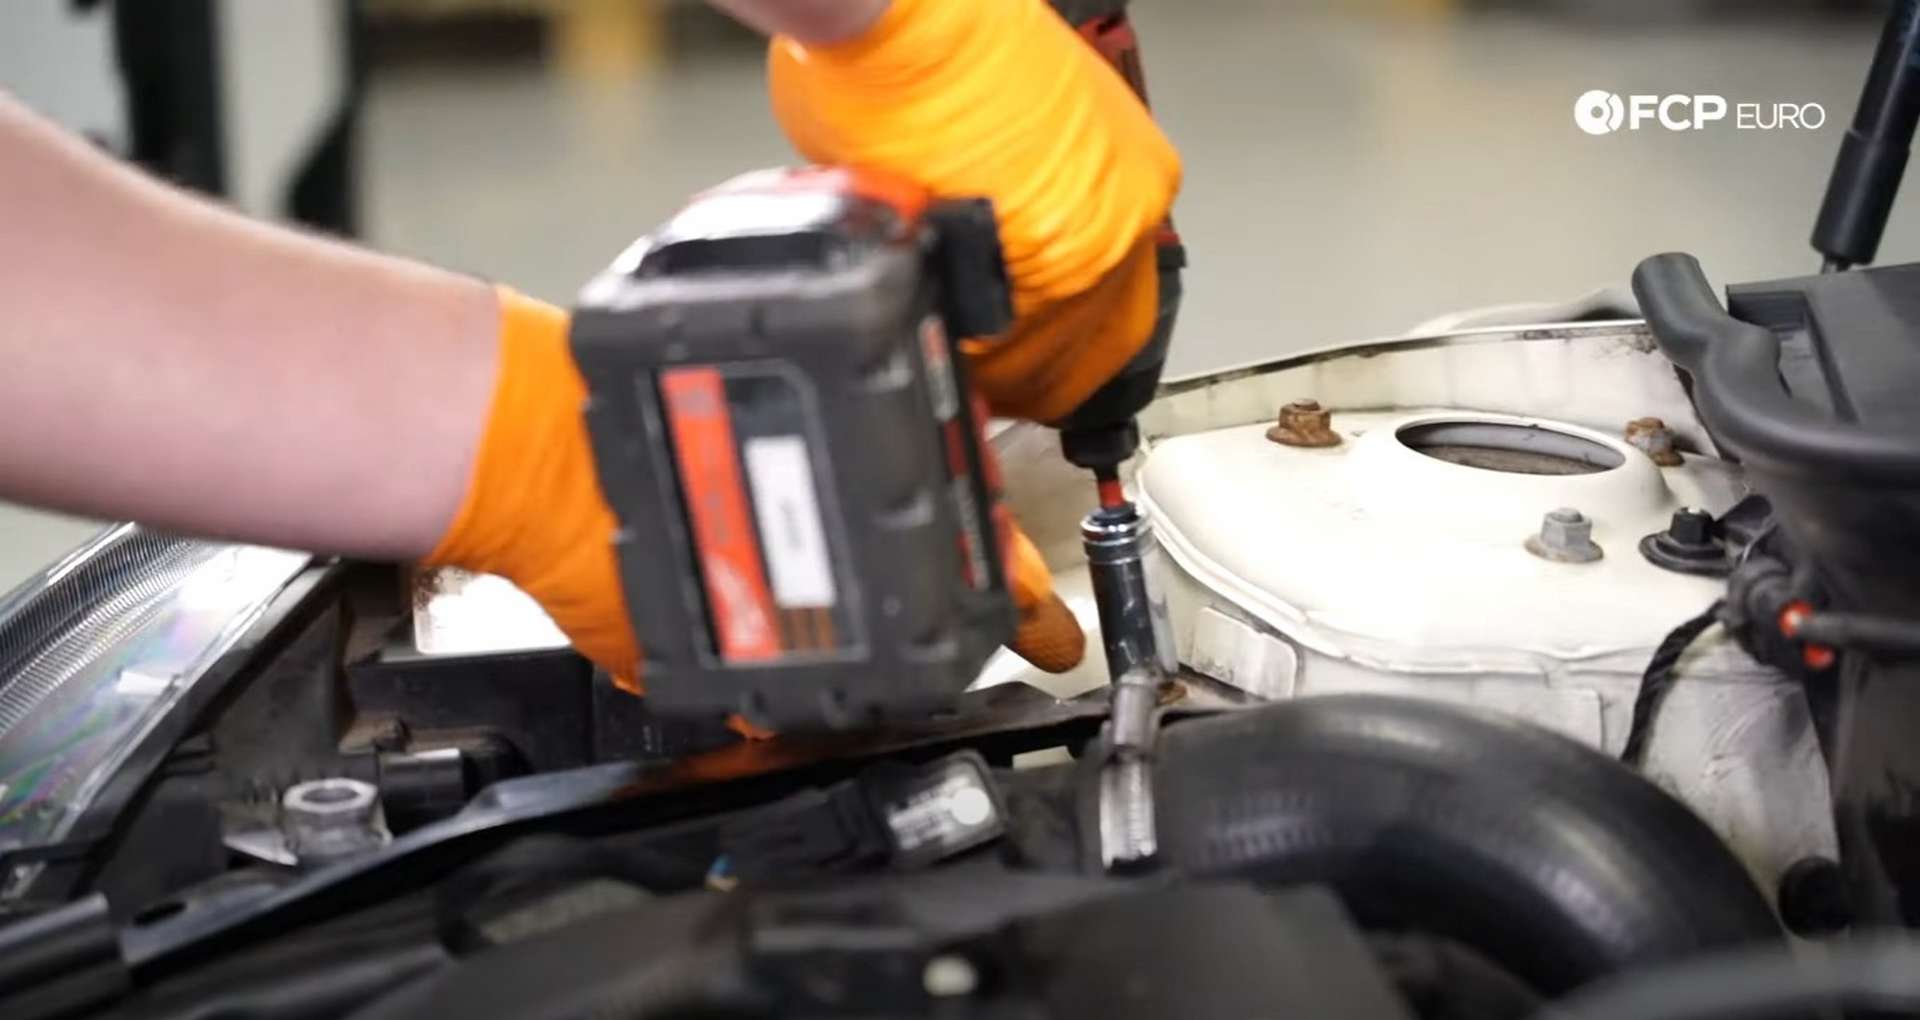
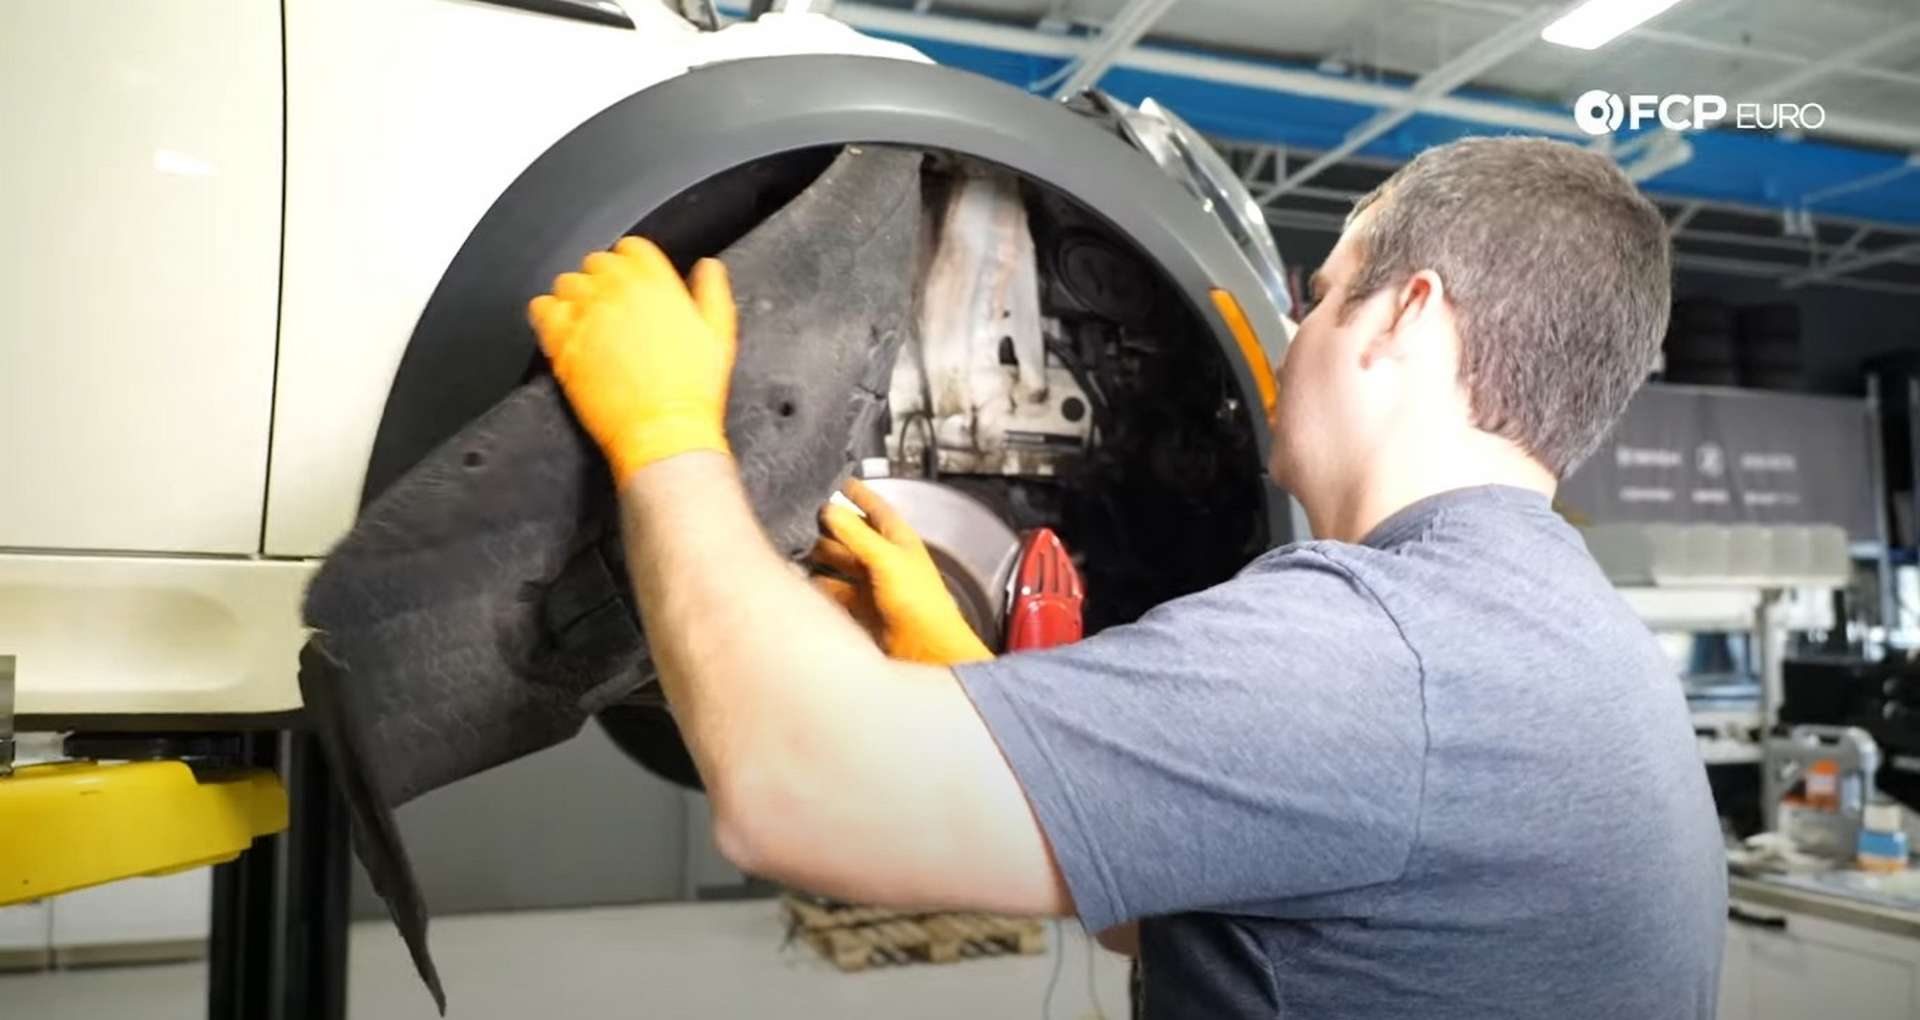
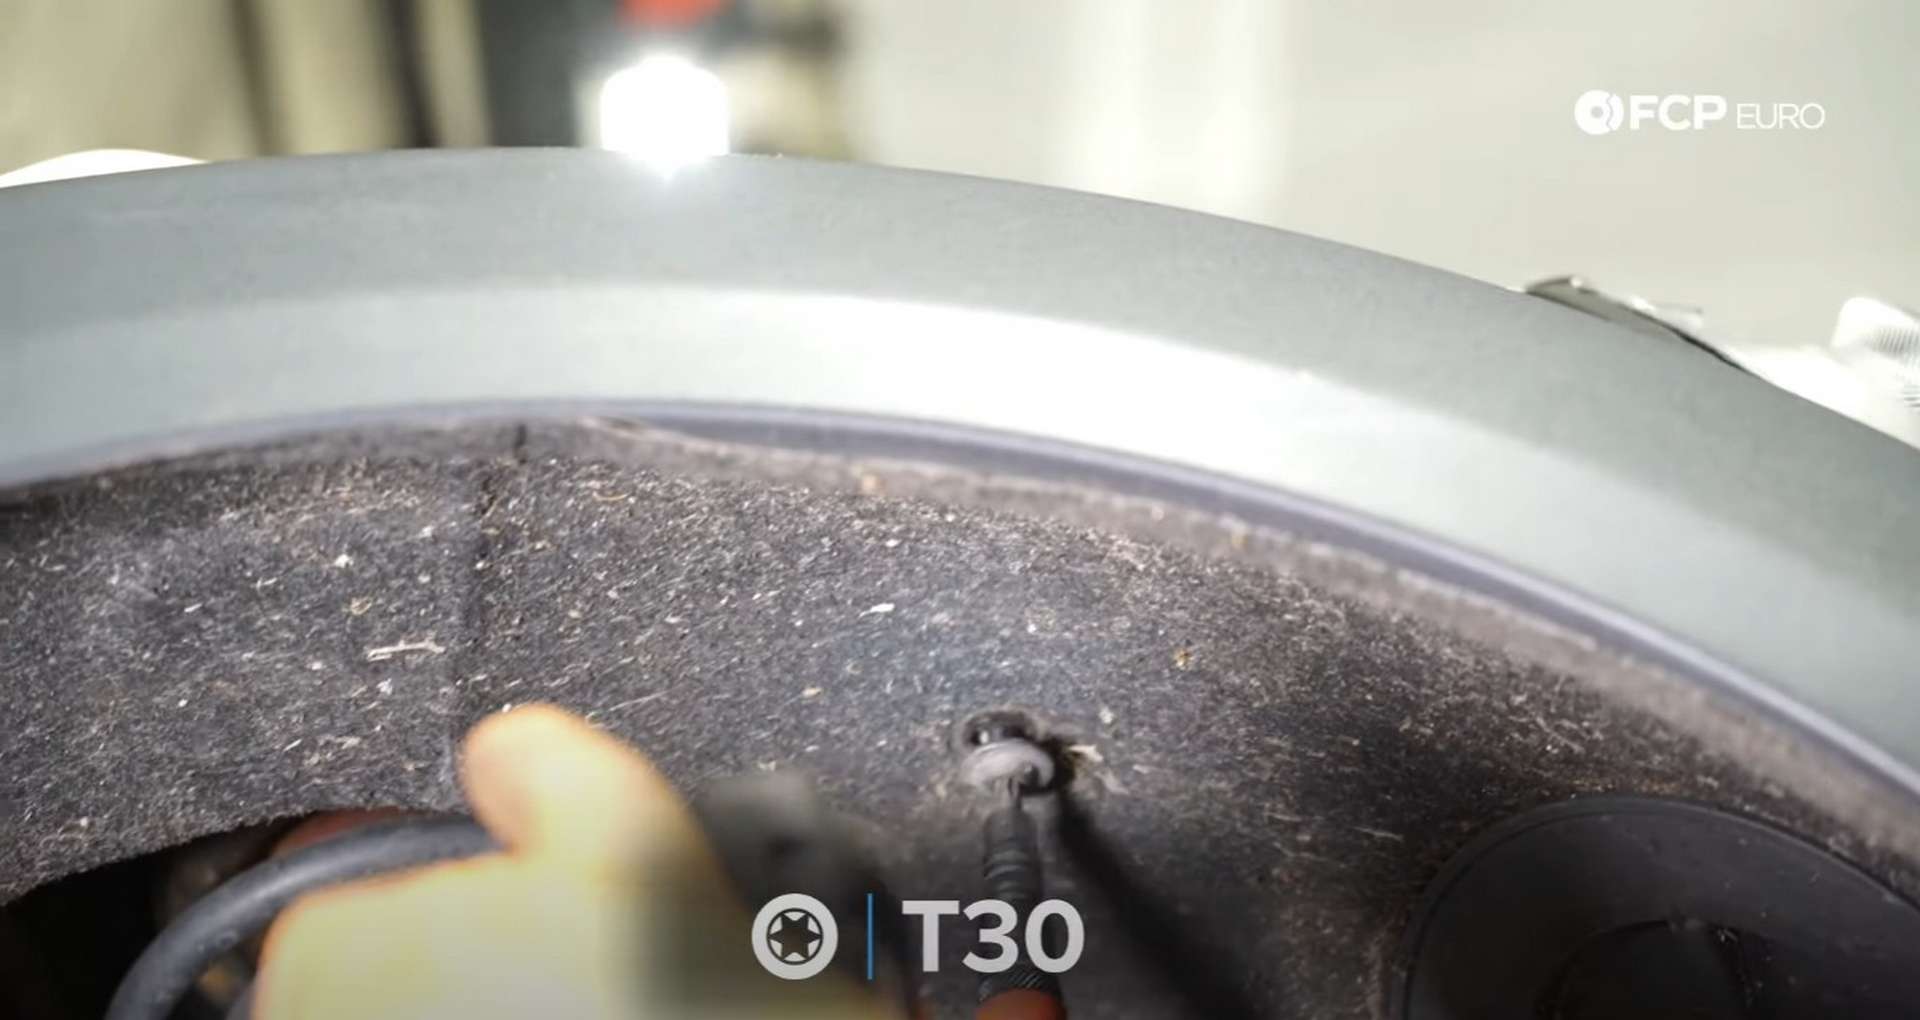
After that, jack the car up and remove the front wheel on the passenger’s side. The front of the engine sits behind the passenger’s side wheel well. To get to it, use a Phillips-head screwdriver and a T30 bit socket to remove the fasteners that secure the front half of the fender liner.
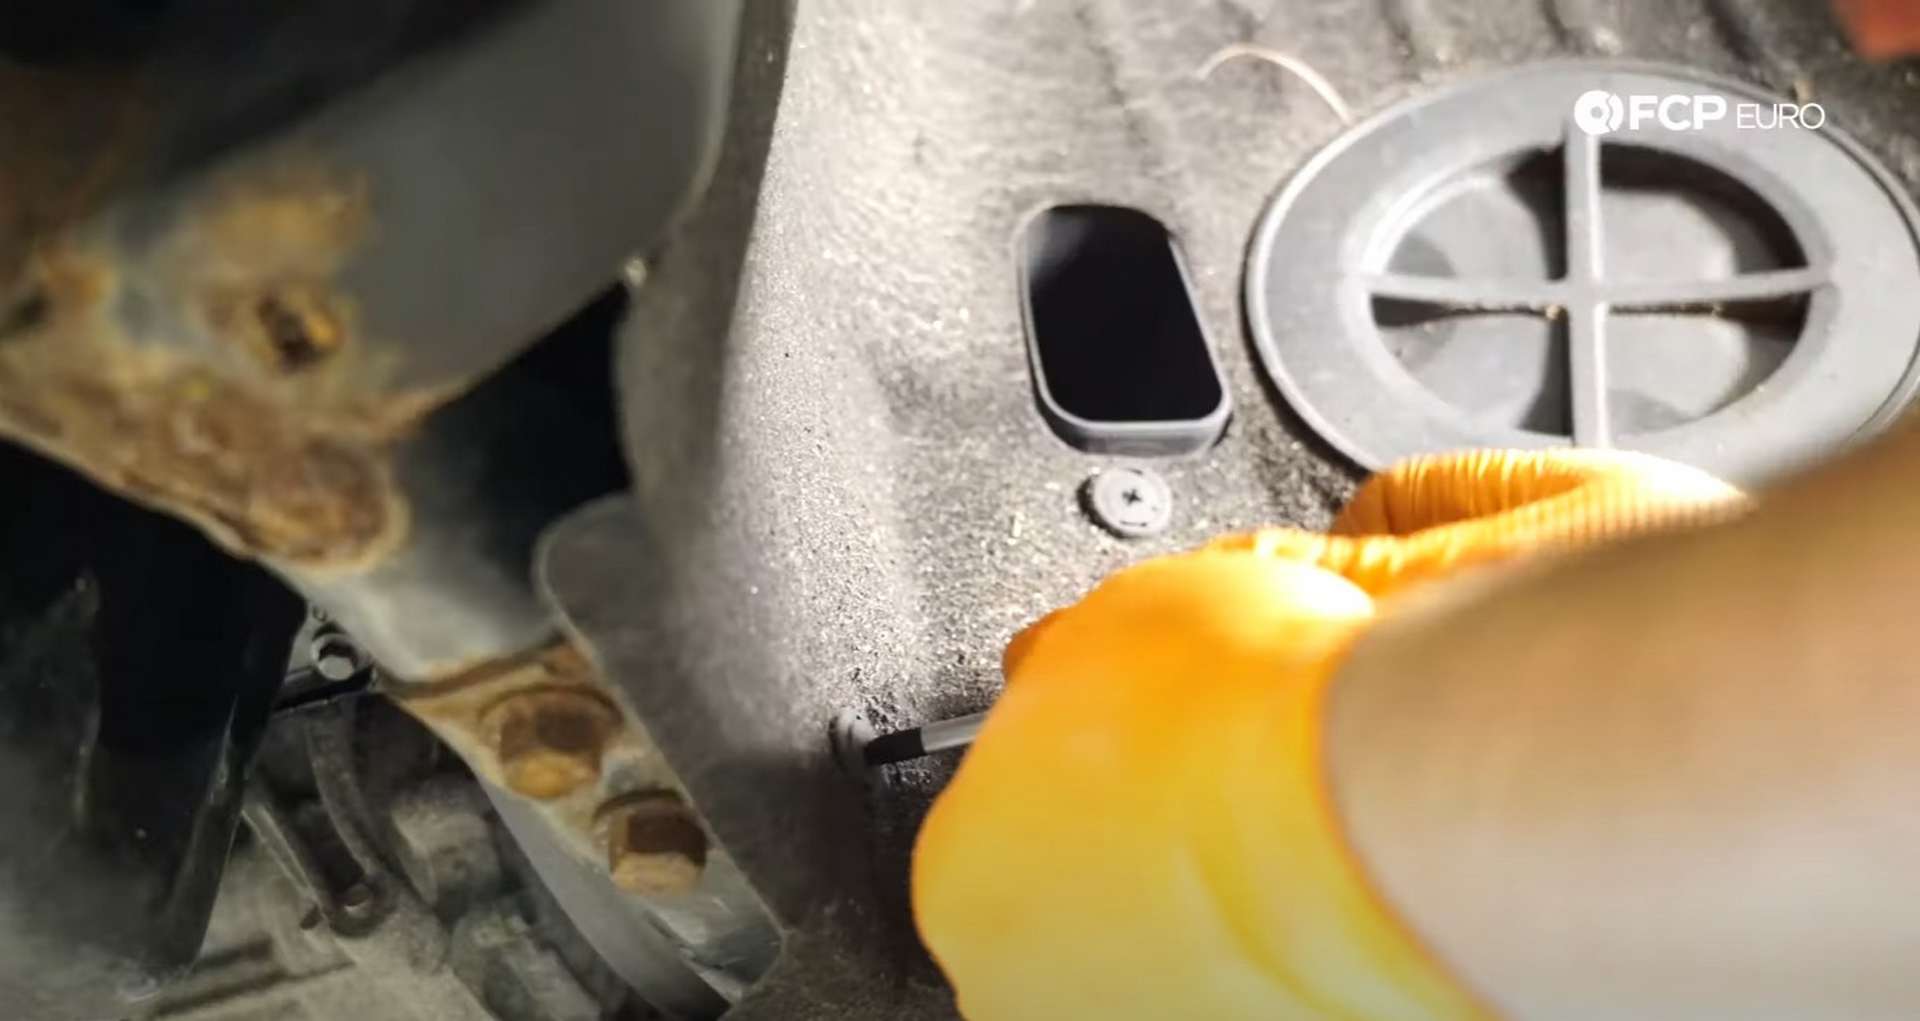
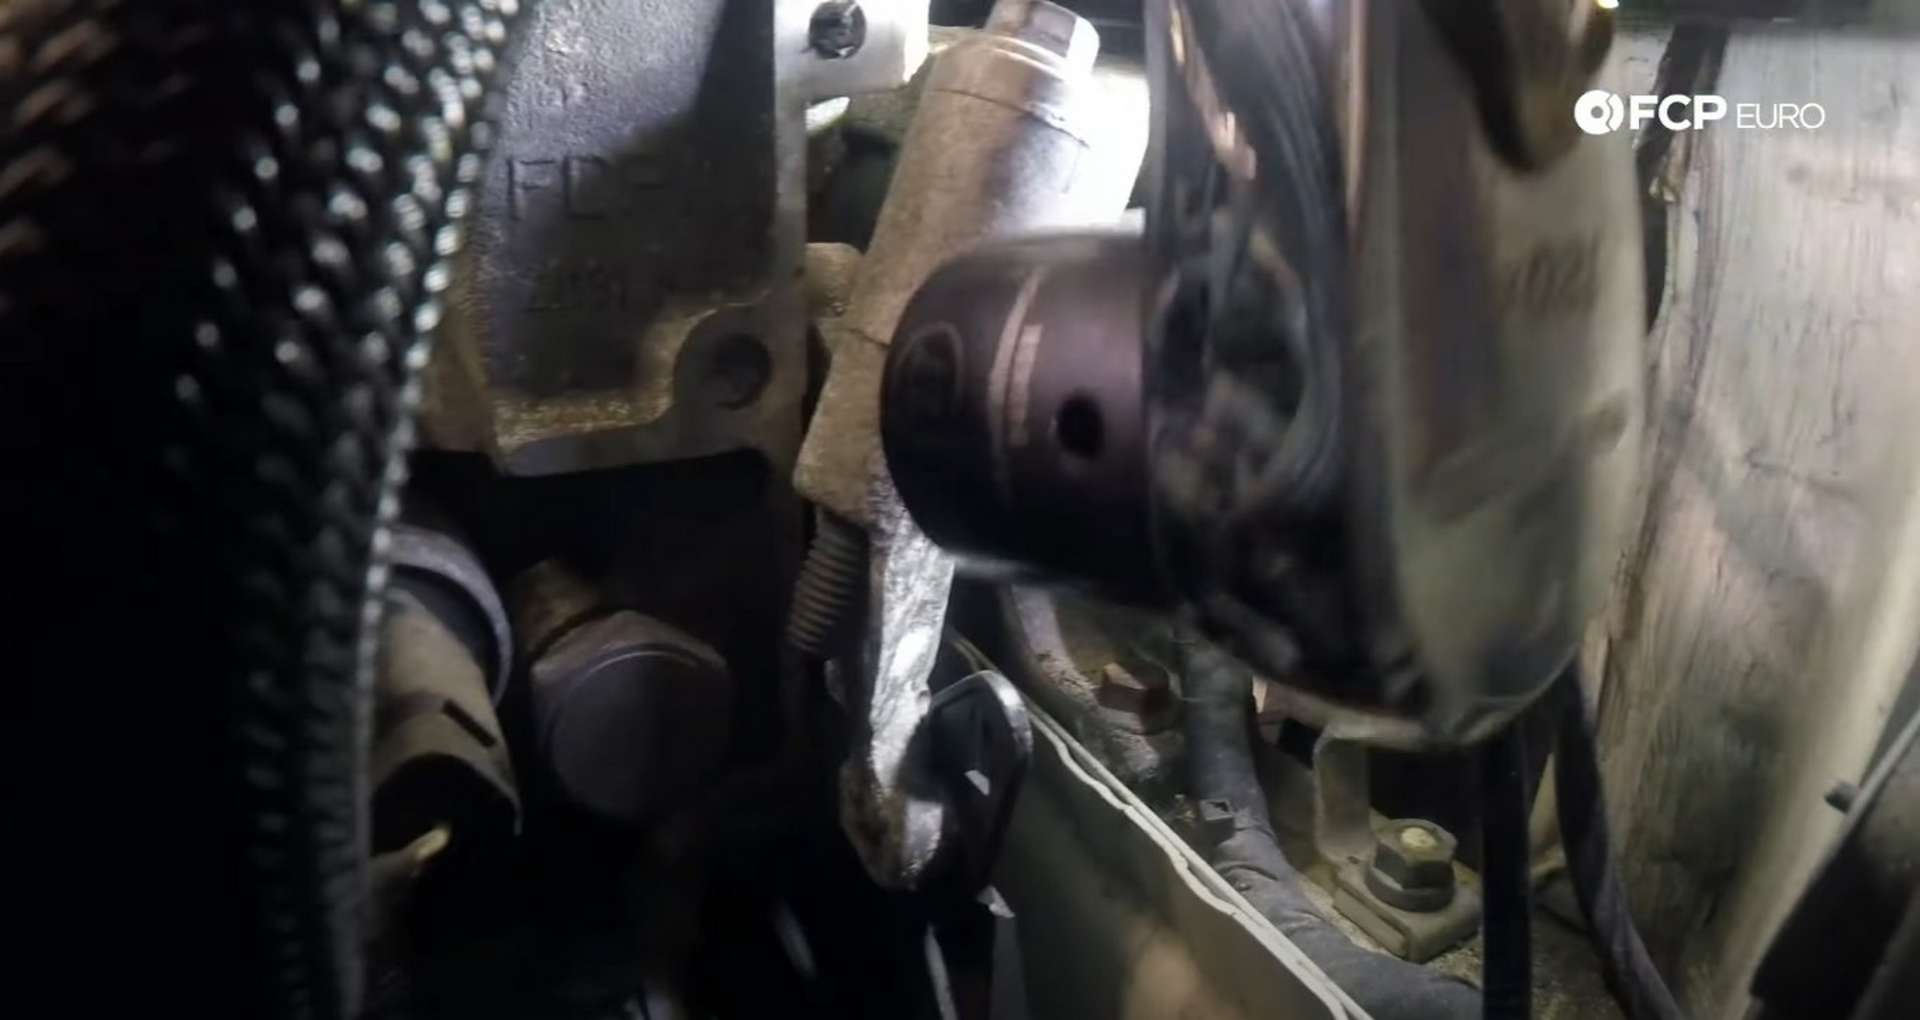
The first thing you need to do on the front of the engine is to release the second belt tensioner’s tension. This tensioner has a tab that you need to pull out to release the tension. Pull the tab out and up to find the spot above it on the tensioner where it’ll lock in place.
Then, pull the belt off. Inspect the belt for any cracking or excess wear. You have easy access to the belt now, so this is the most reasonable time you’ll have to change it.
The writing on both of the camshafts needs to be pointing up to set the engine into the correct timing position. Use an 18mm socket on the crankshaft bolt to rotate the engine clockwise until the camshafts are in position. This may take a few rotations of the engine.
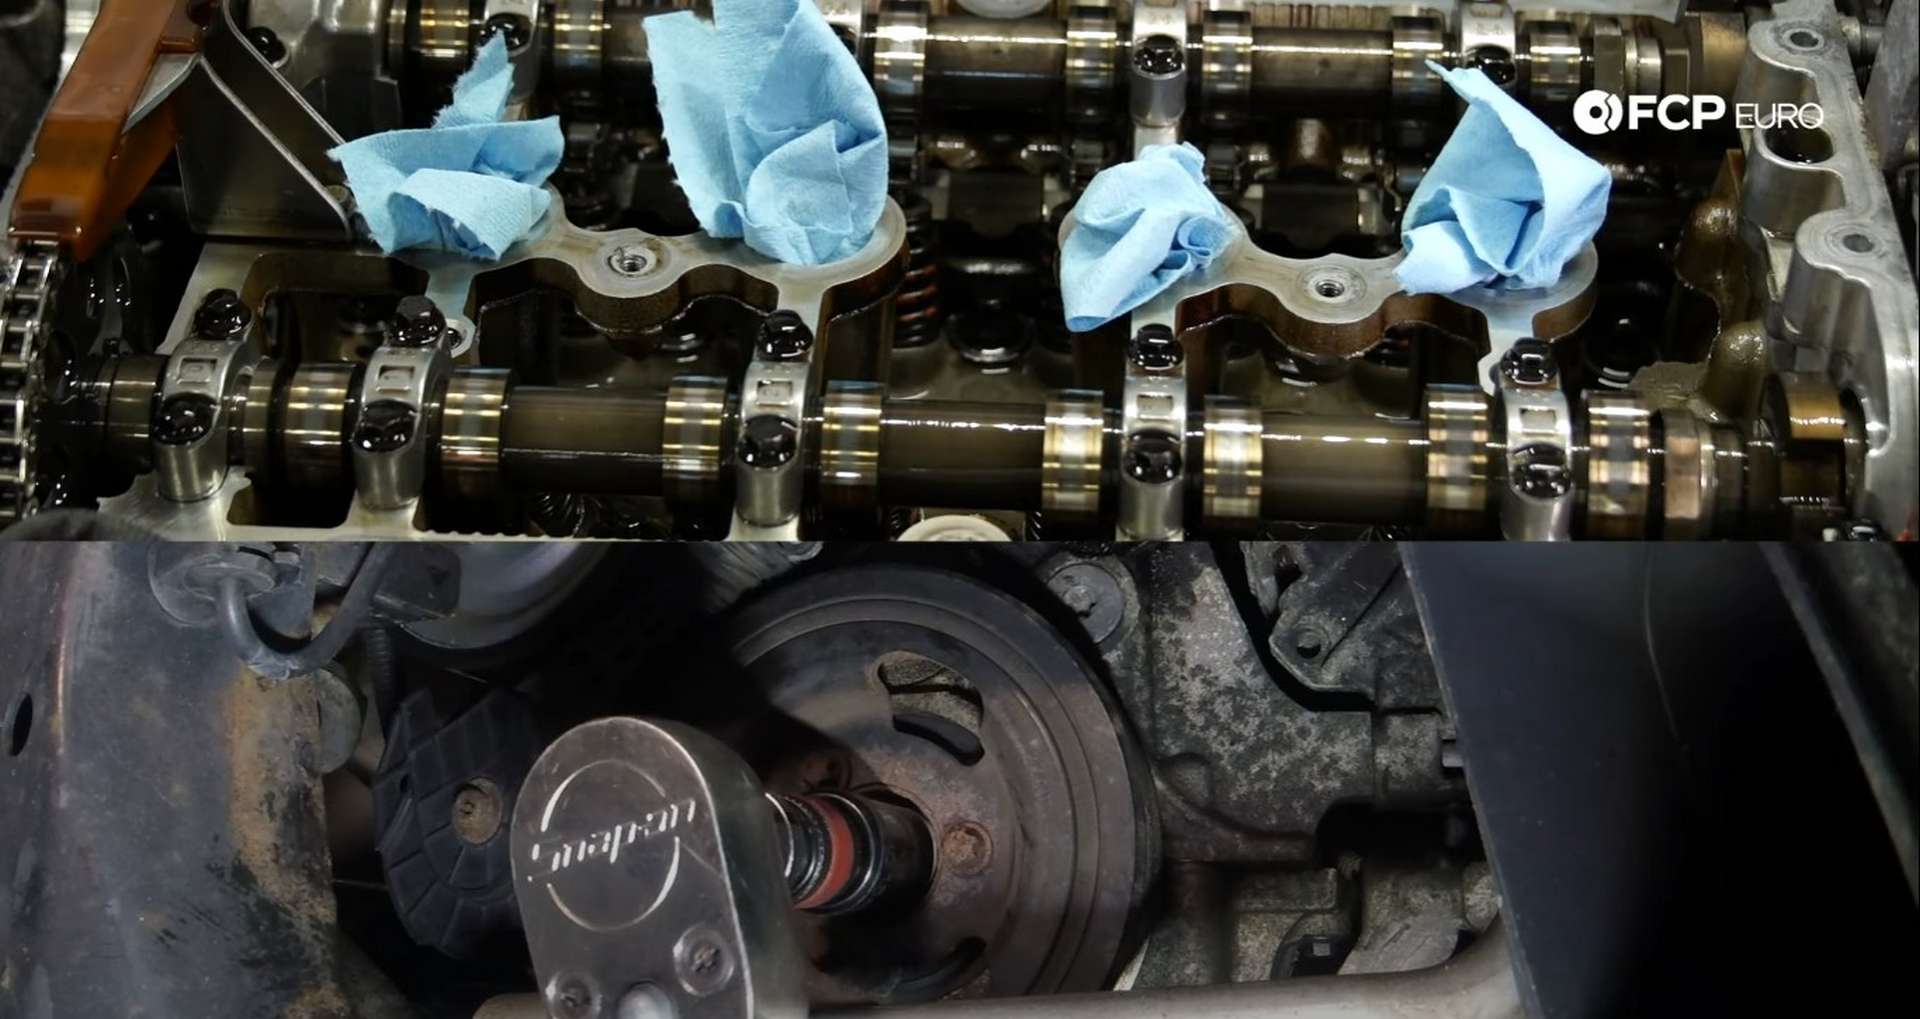
Once you think you have it set to the right position, install the camshaft locks. These sit on flats on the camshaft and prevent them from rotating when the timing chain is removed. If the cam locks don’t fit into place, the engine isn’t in the proper position.
Fit the cam locks into place and tighten their bolts with a 10mm socket.
Step 4: Install the engine block holding tool
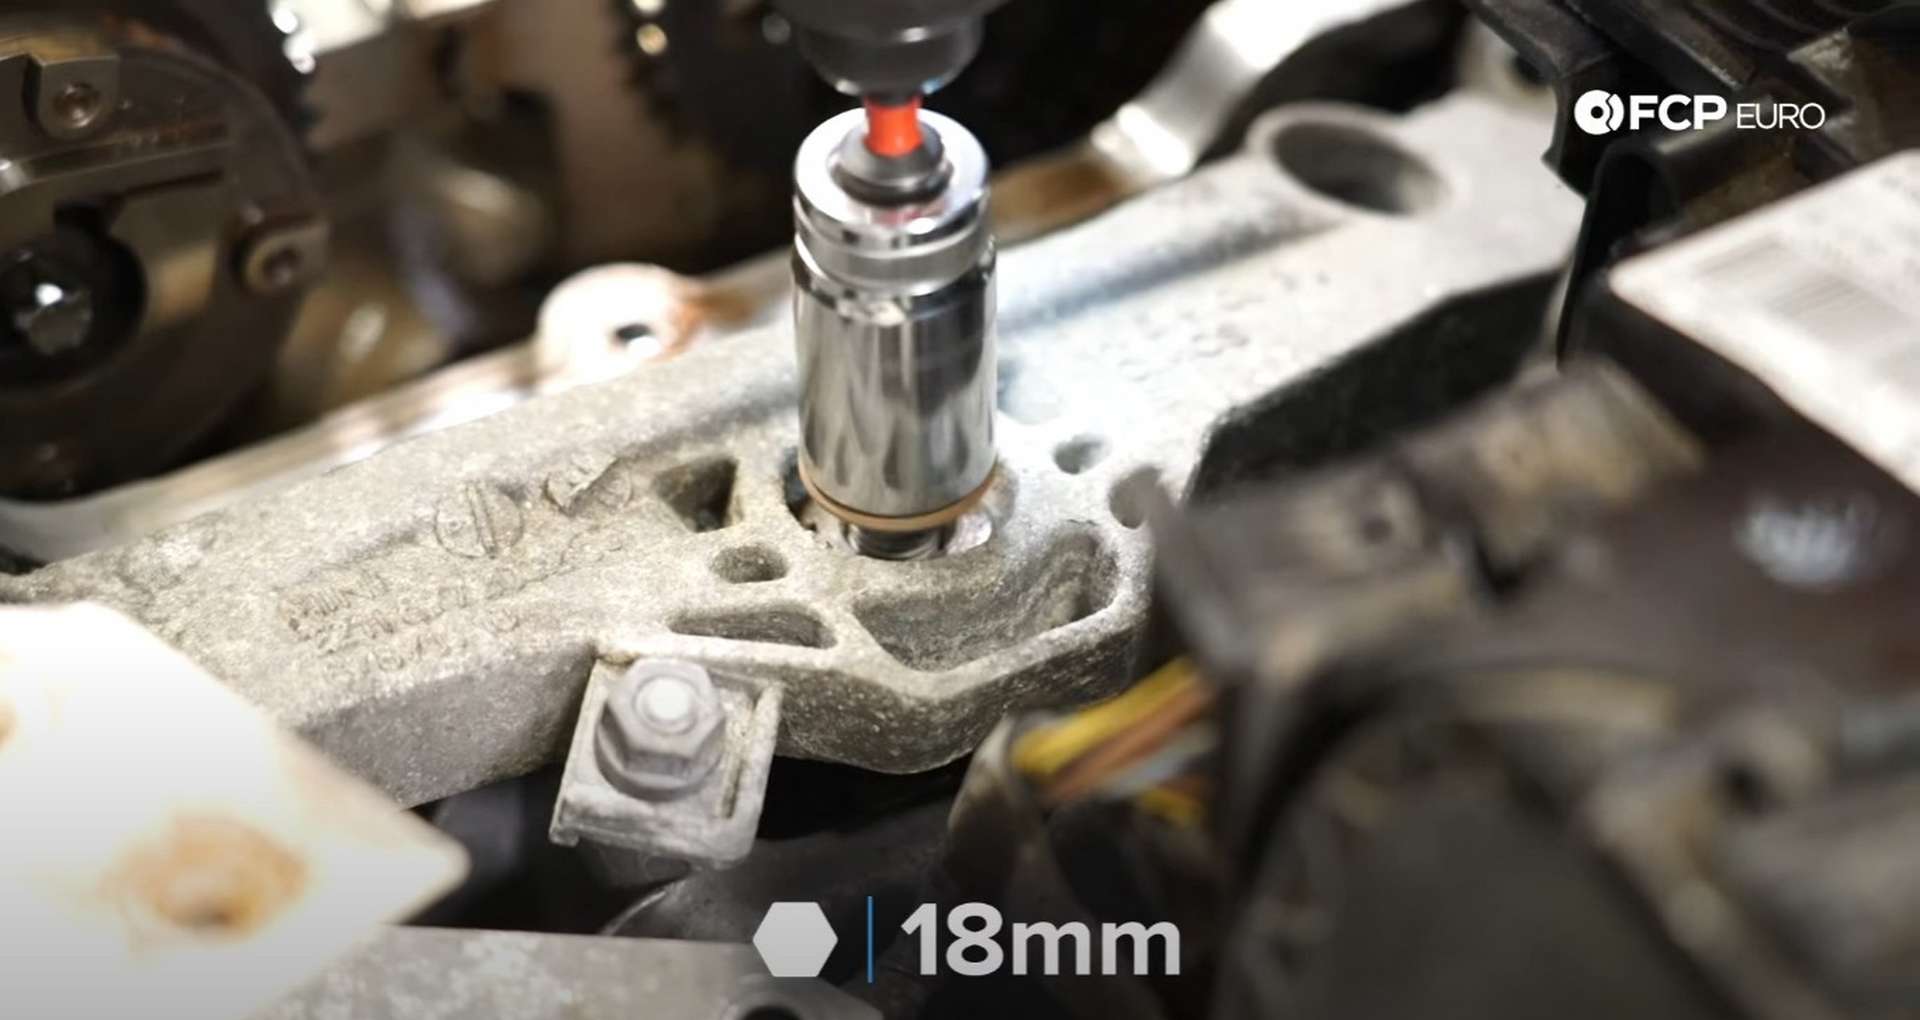
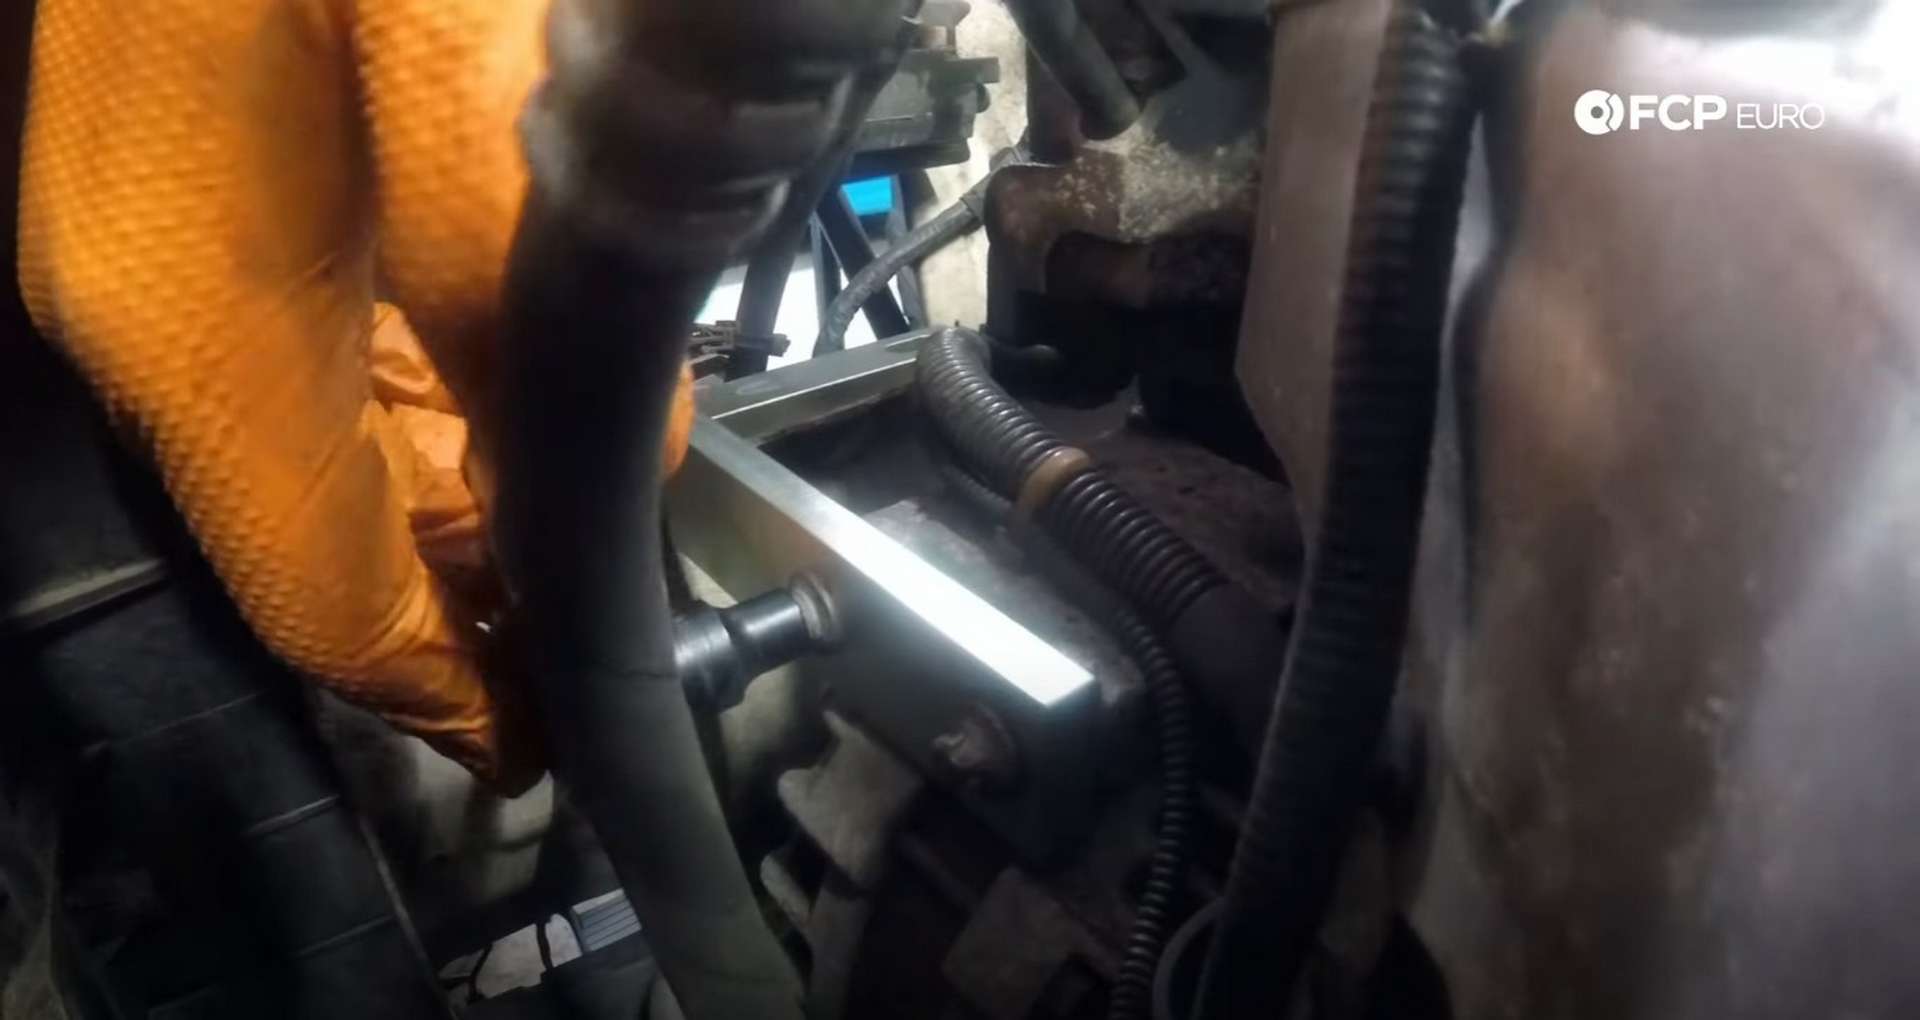
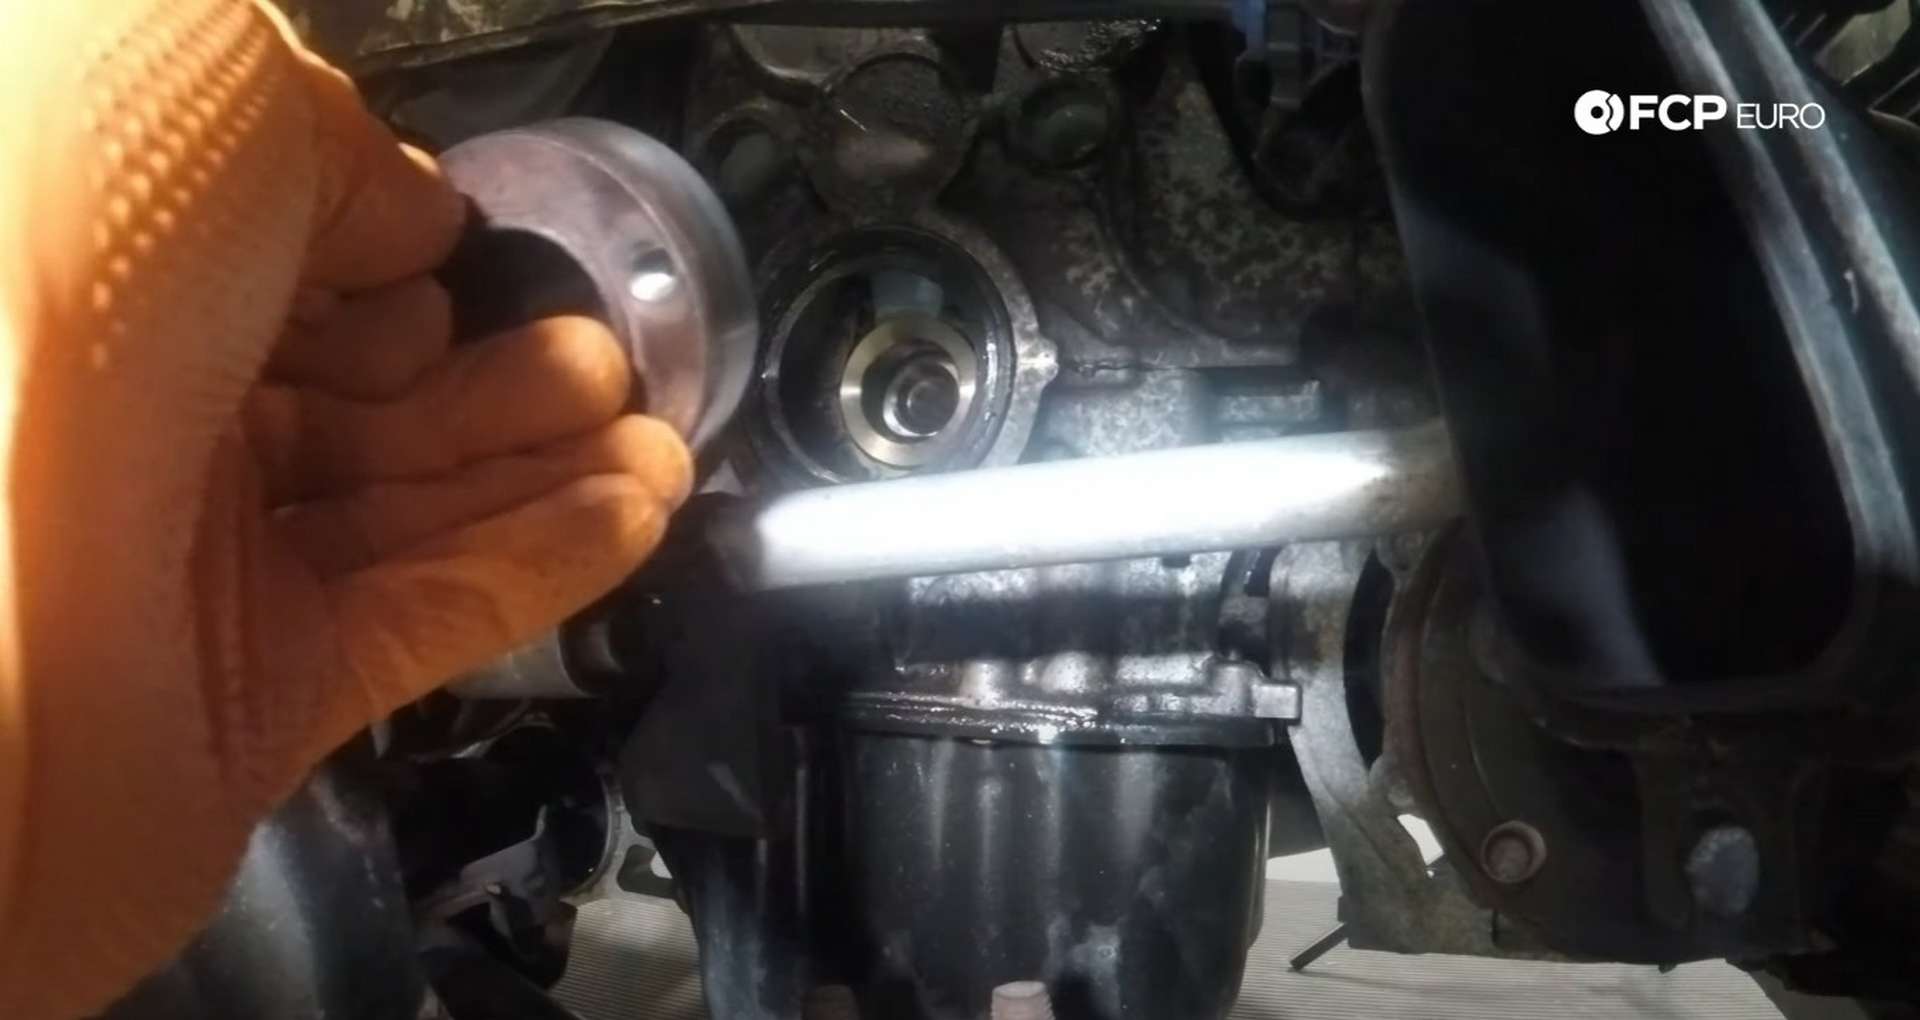
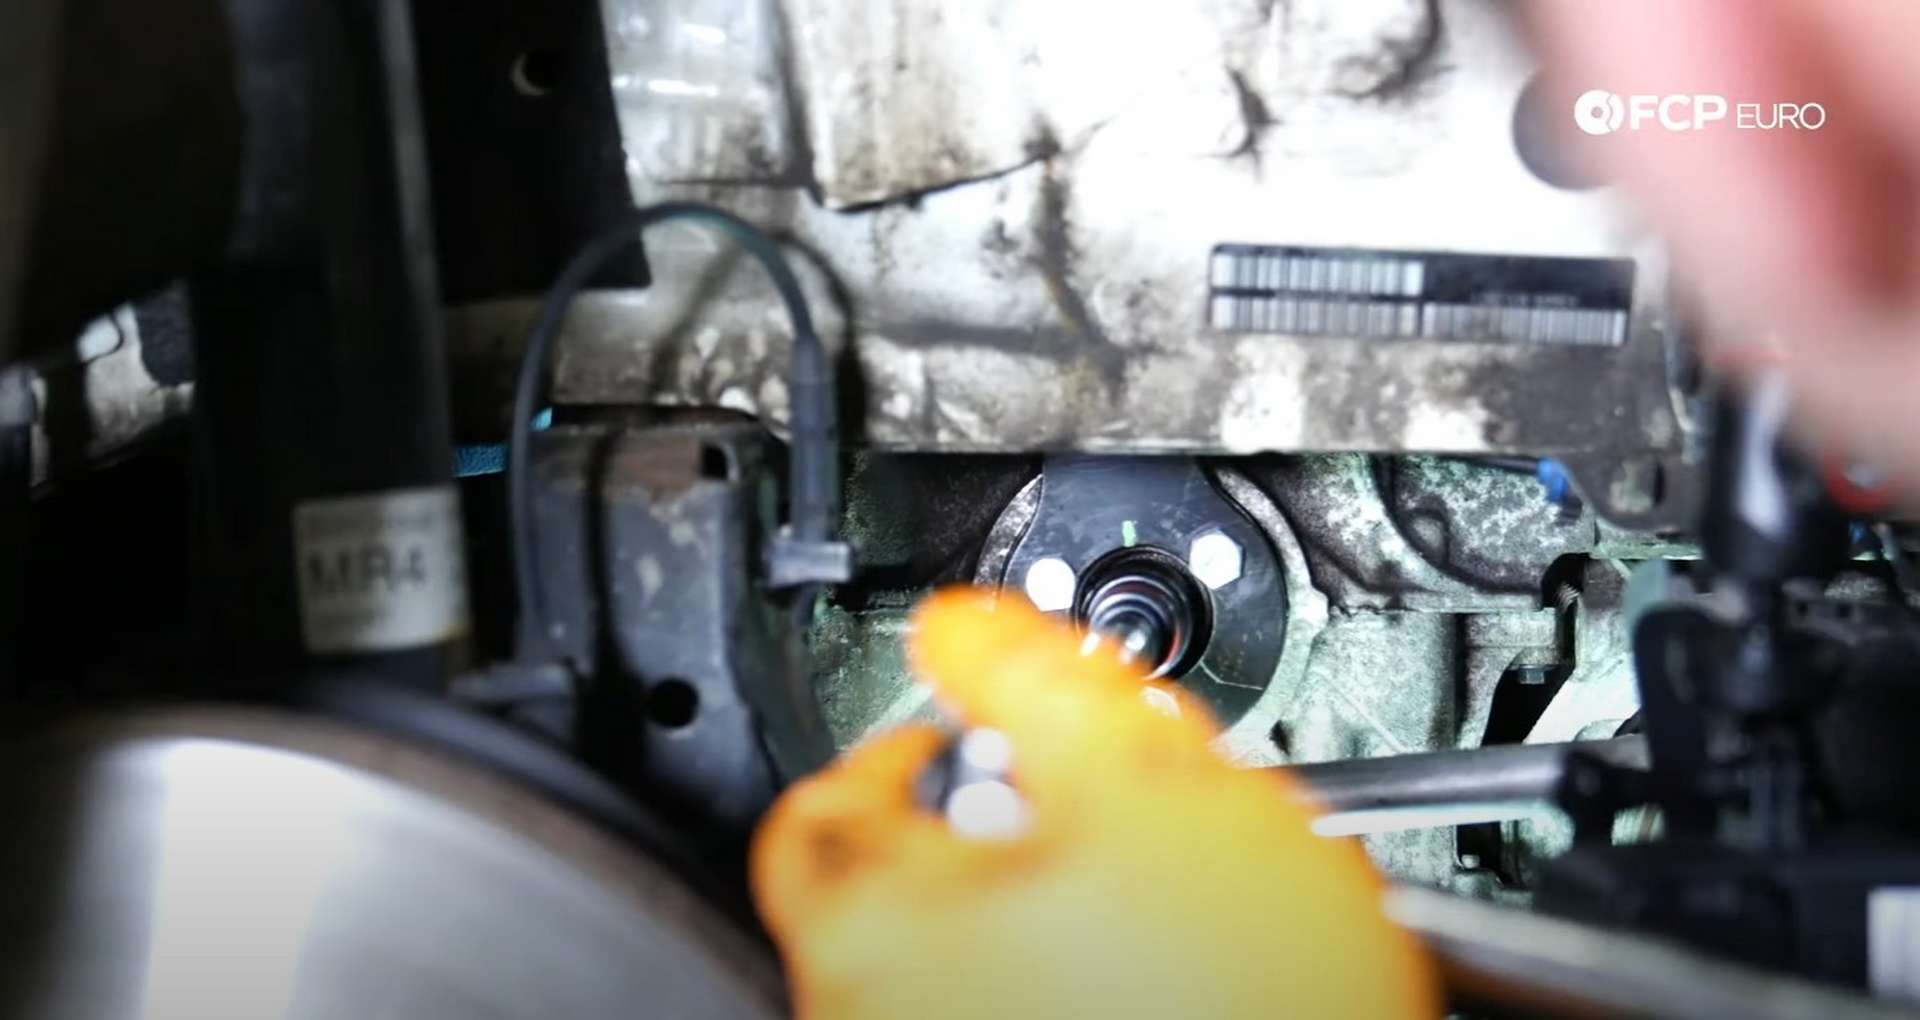
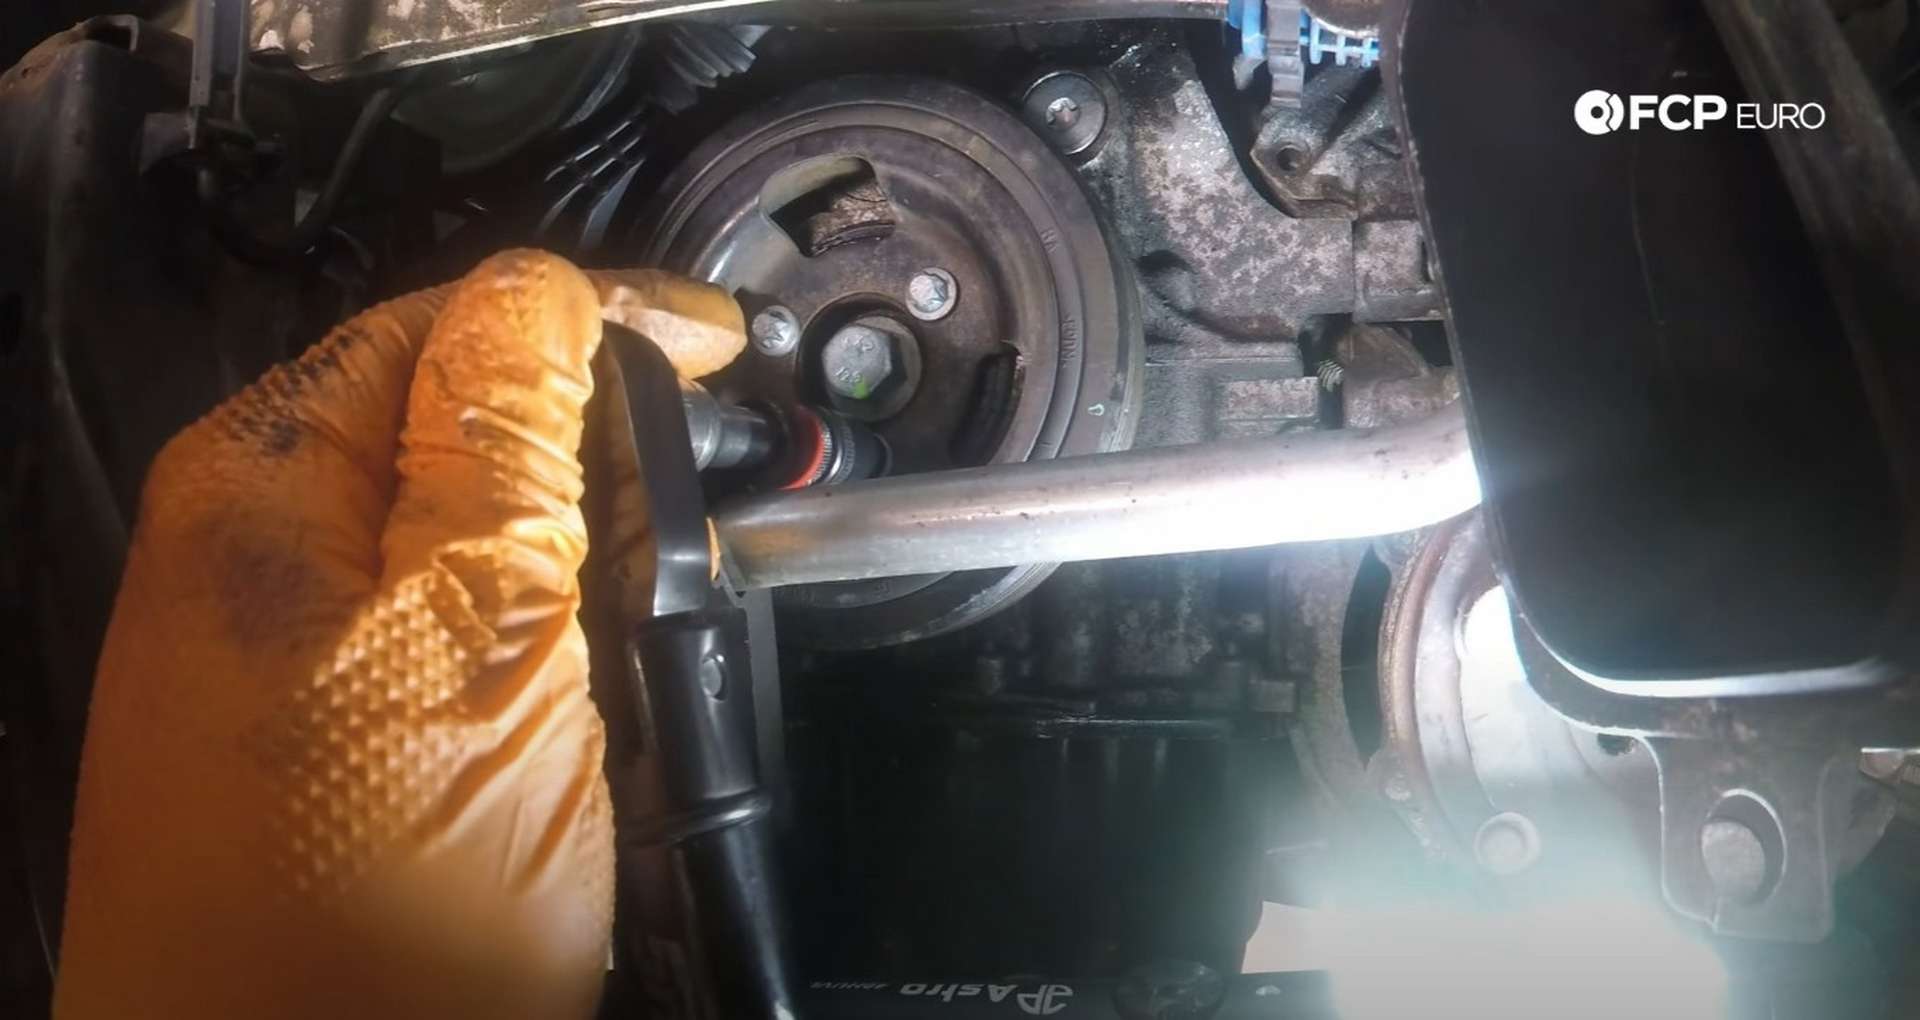
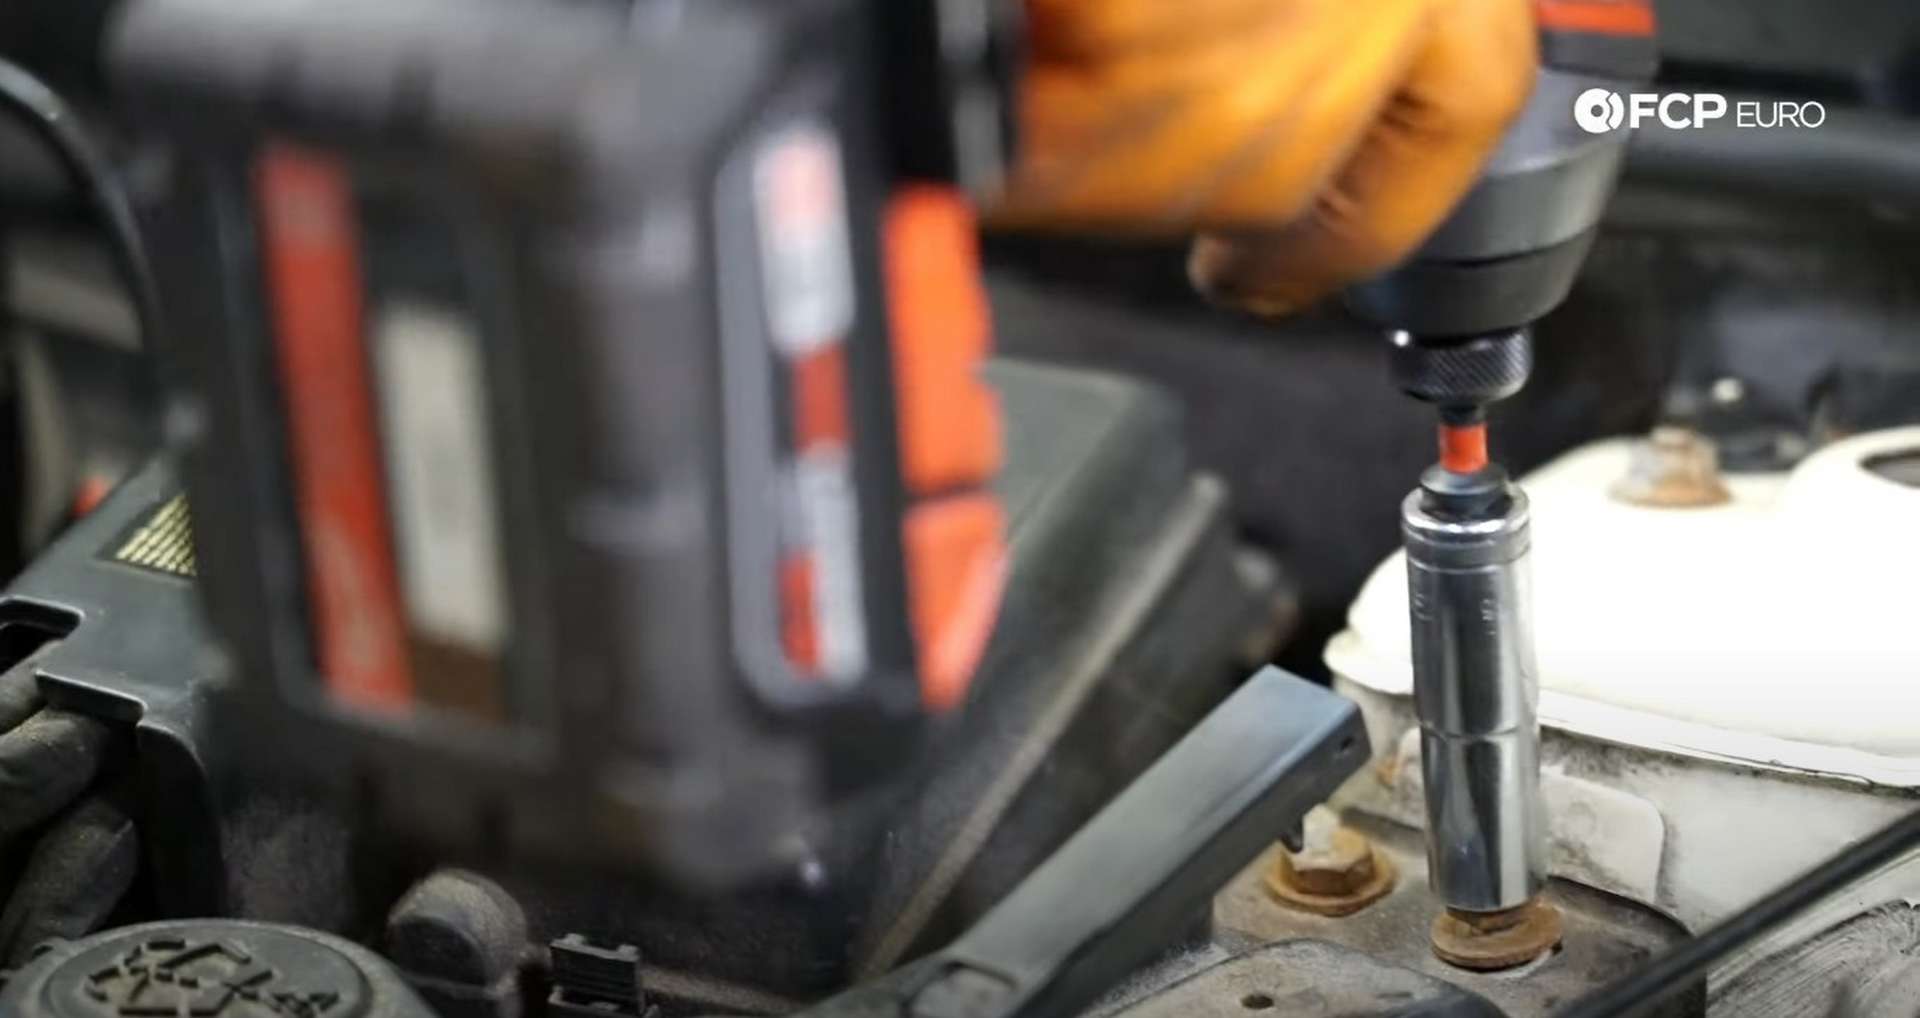
Head back down to the front of the engine and use an E10 socket to remove the three crankshaft pulley mounting bolts. Then, move back into the engine bay and use a 27mm socket to remove the timing chain tensioner. The tensioner threads into the engine’s side around where the throttle body elbow would sit.
Place rags under the tensioner to catch any oil that drips out of it.
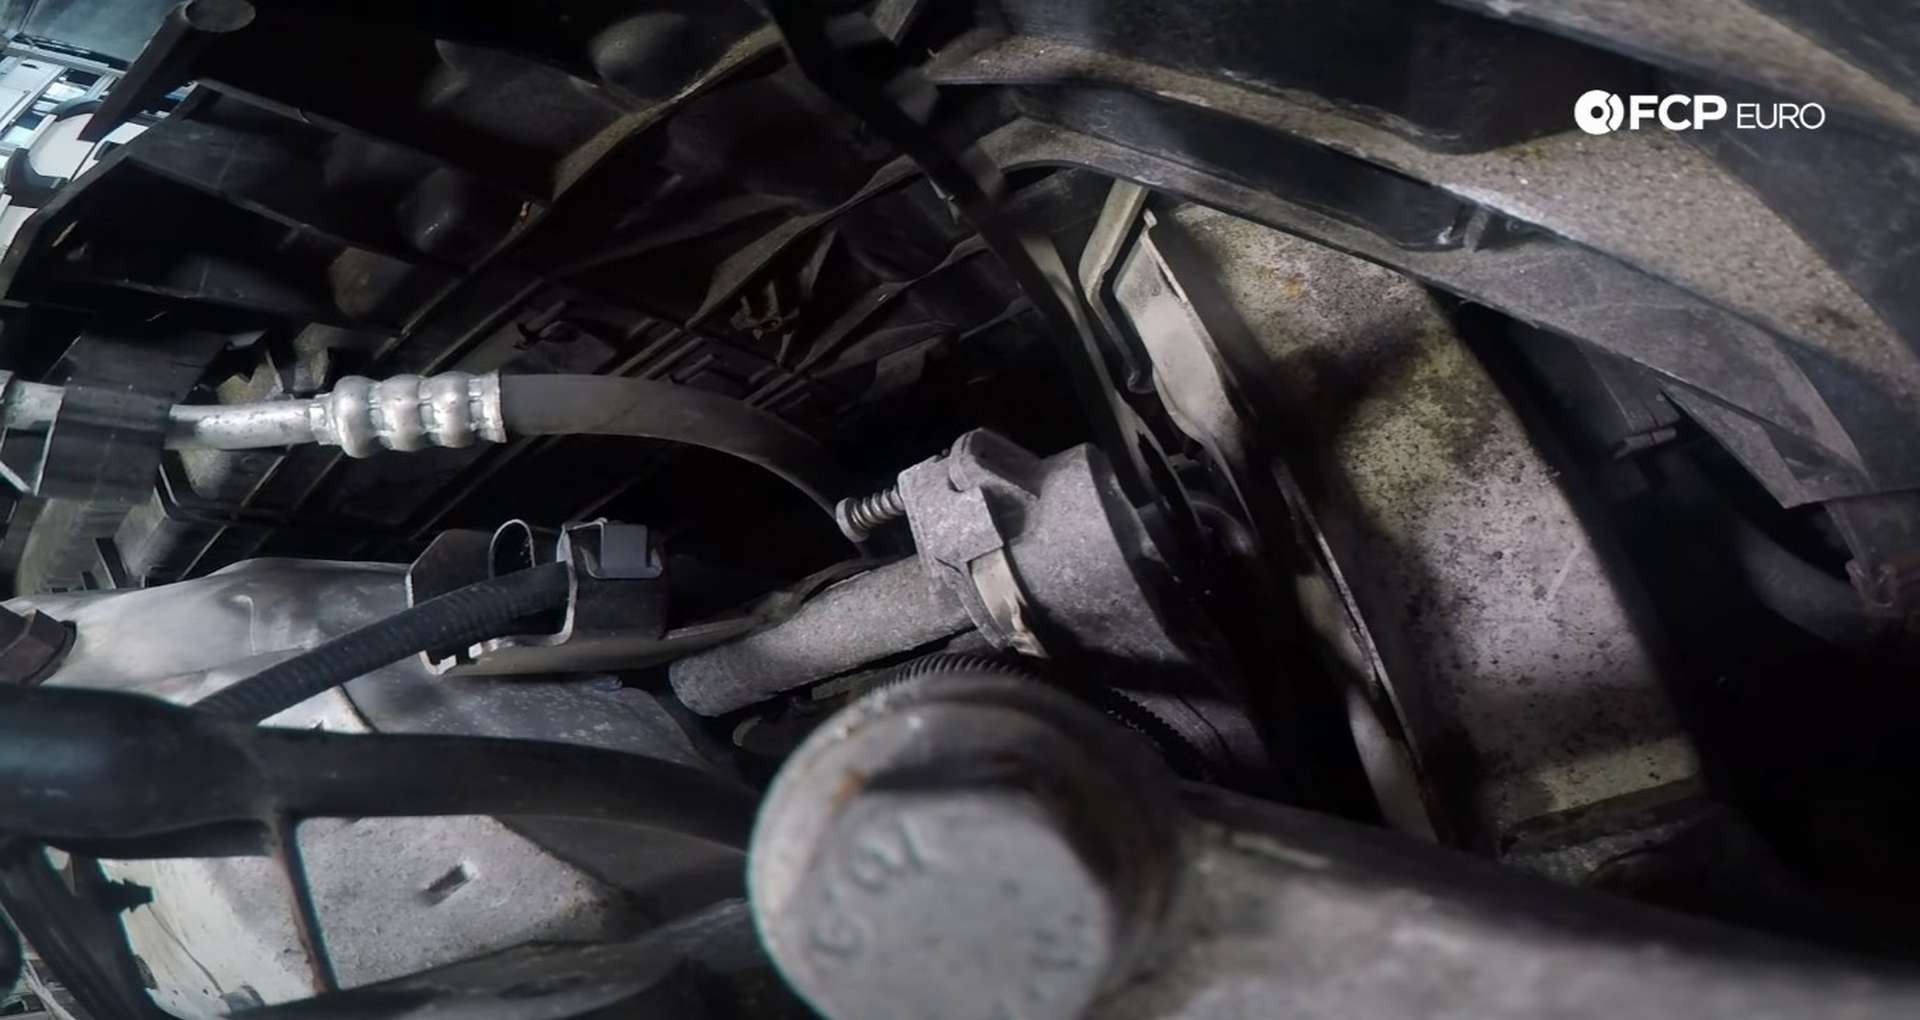
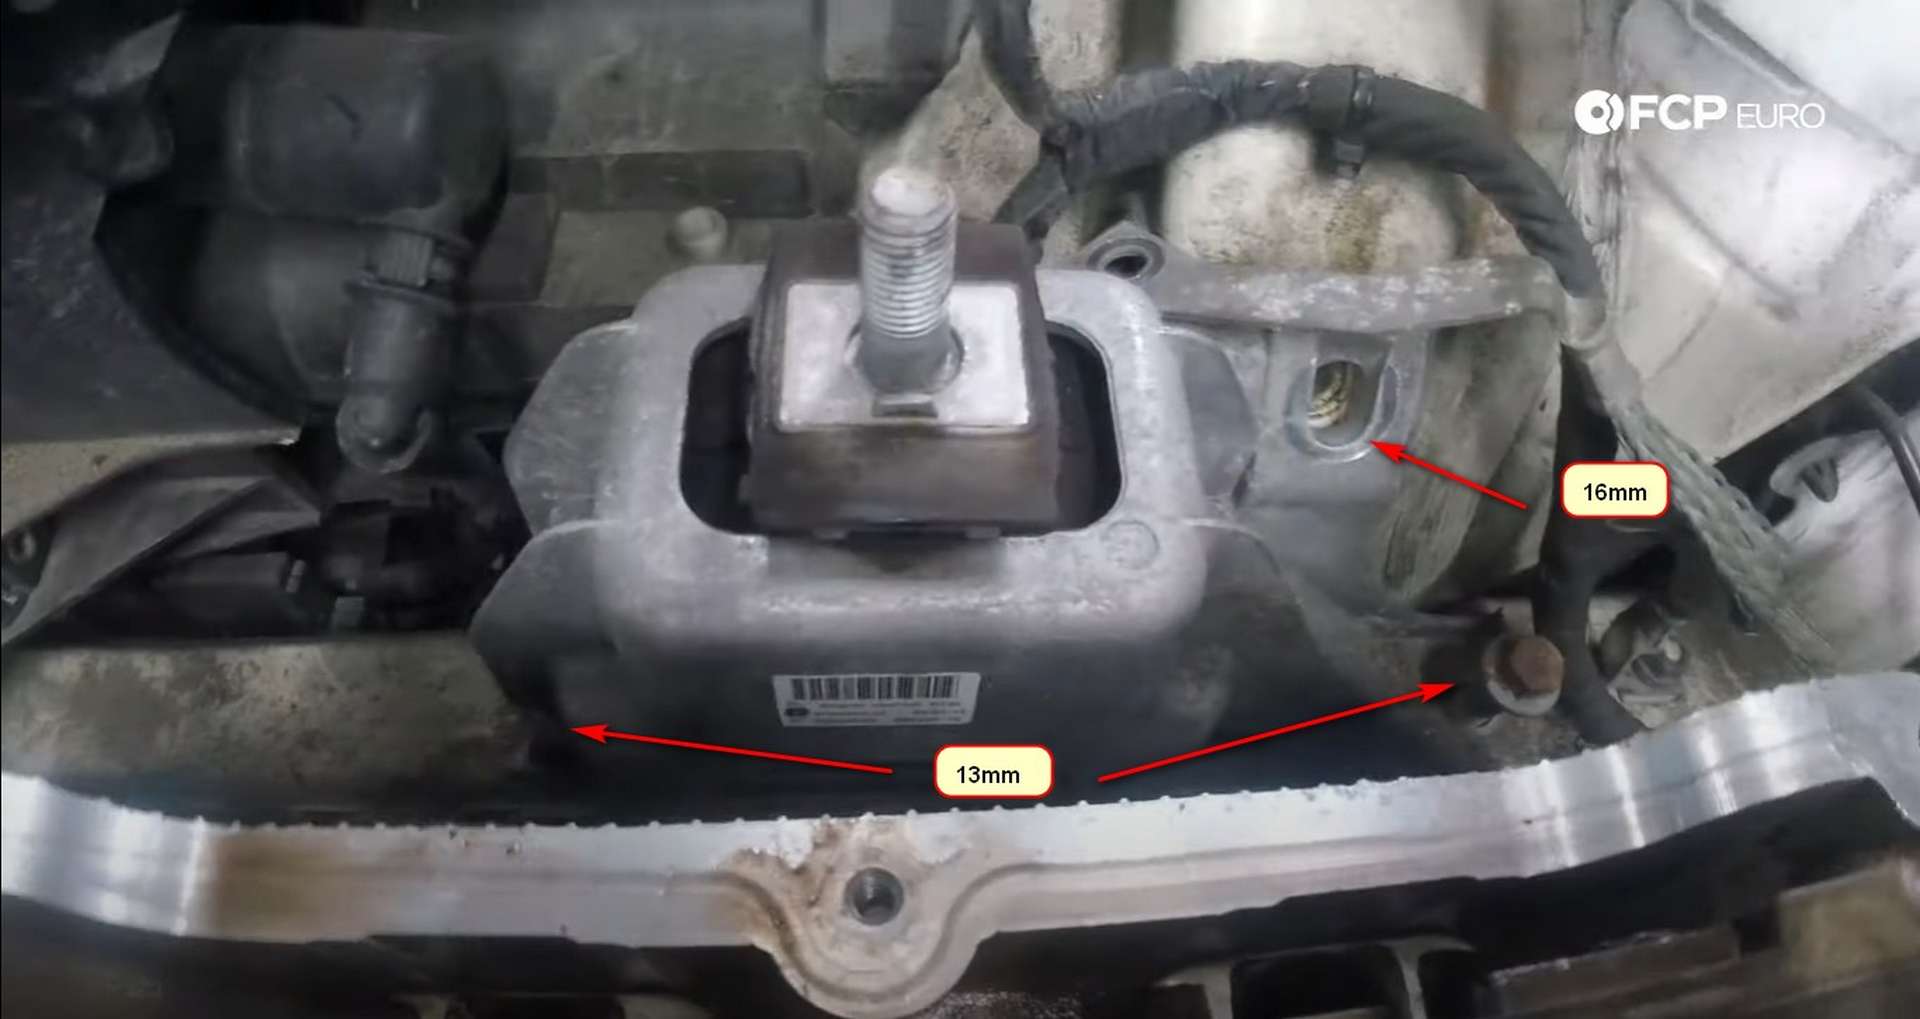
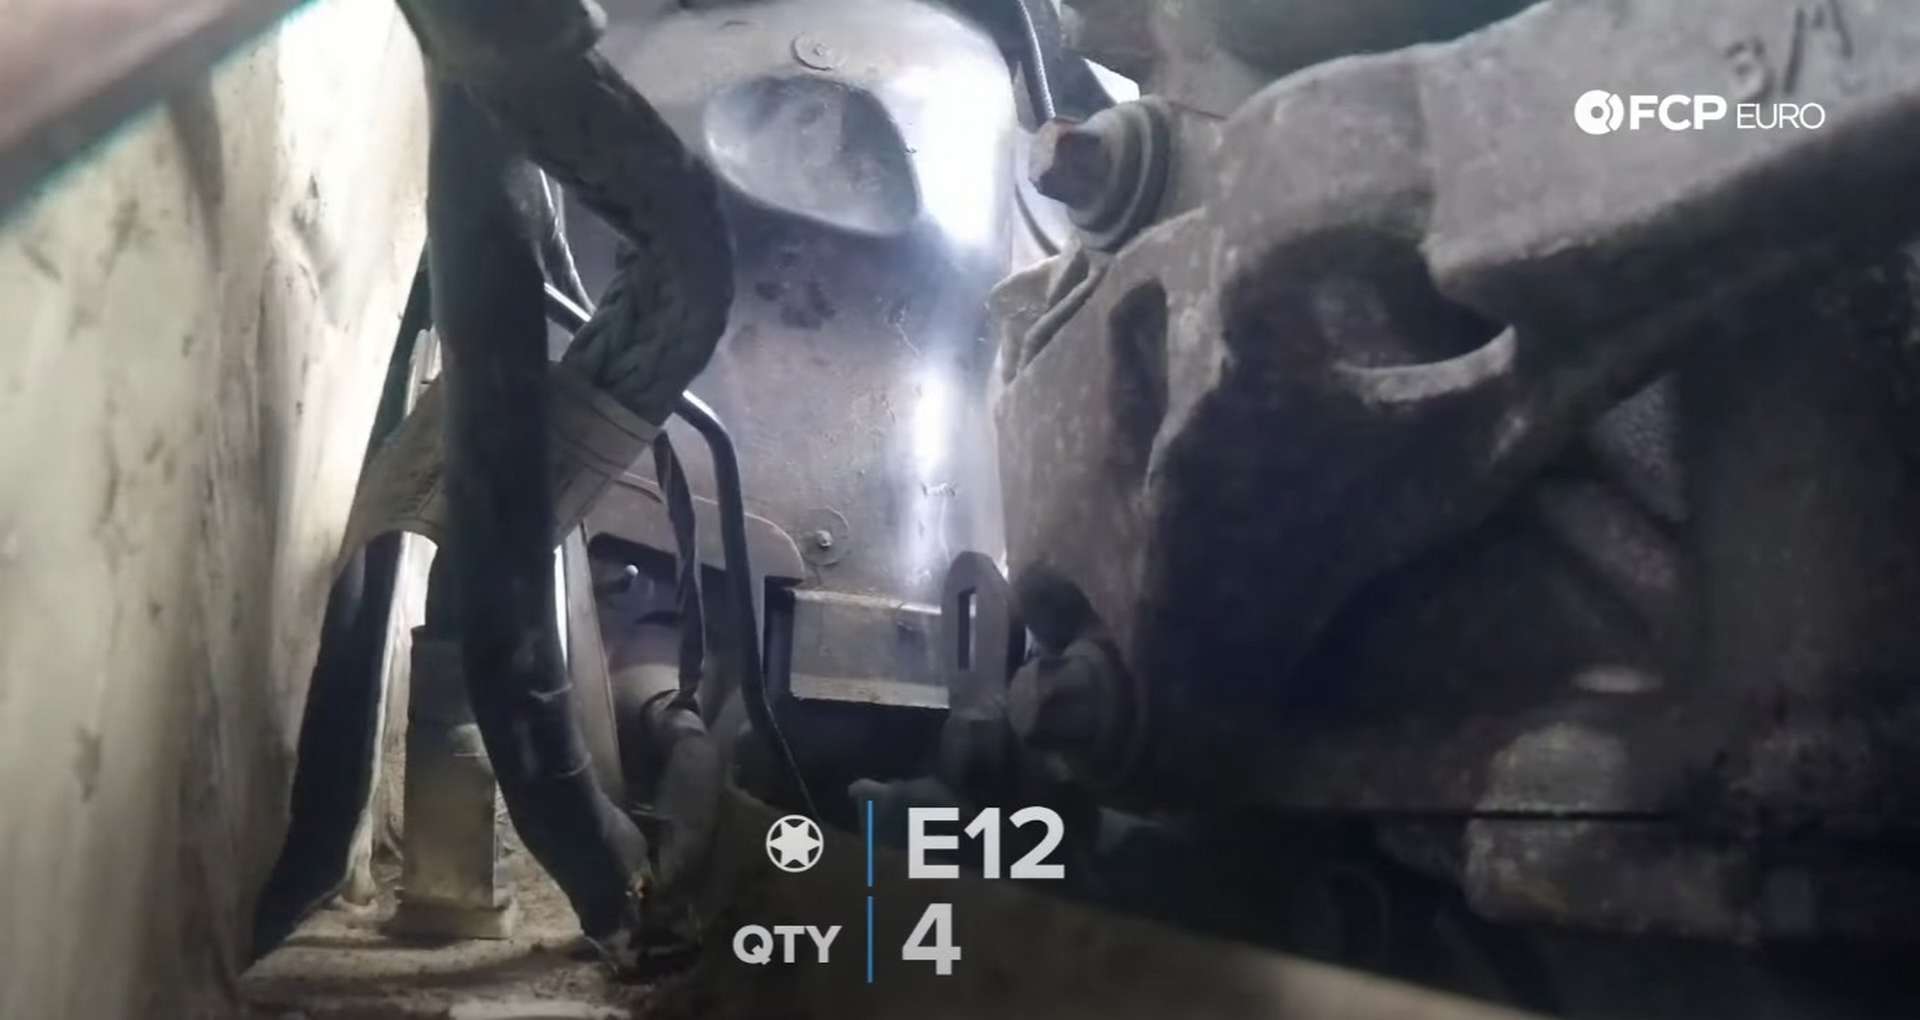
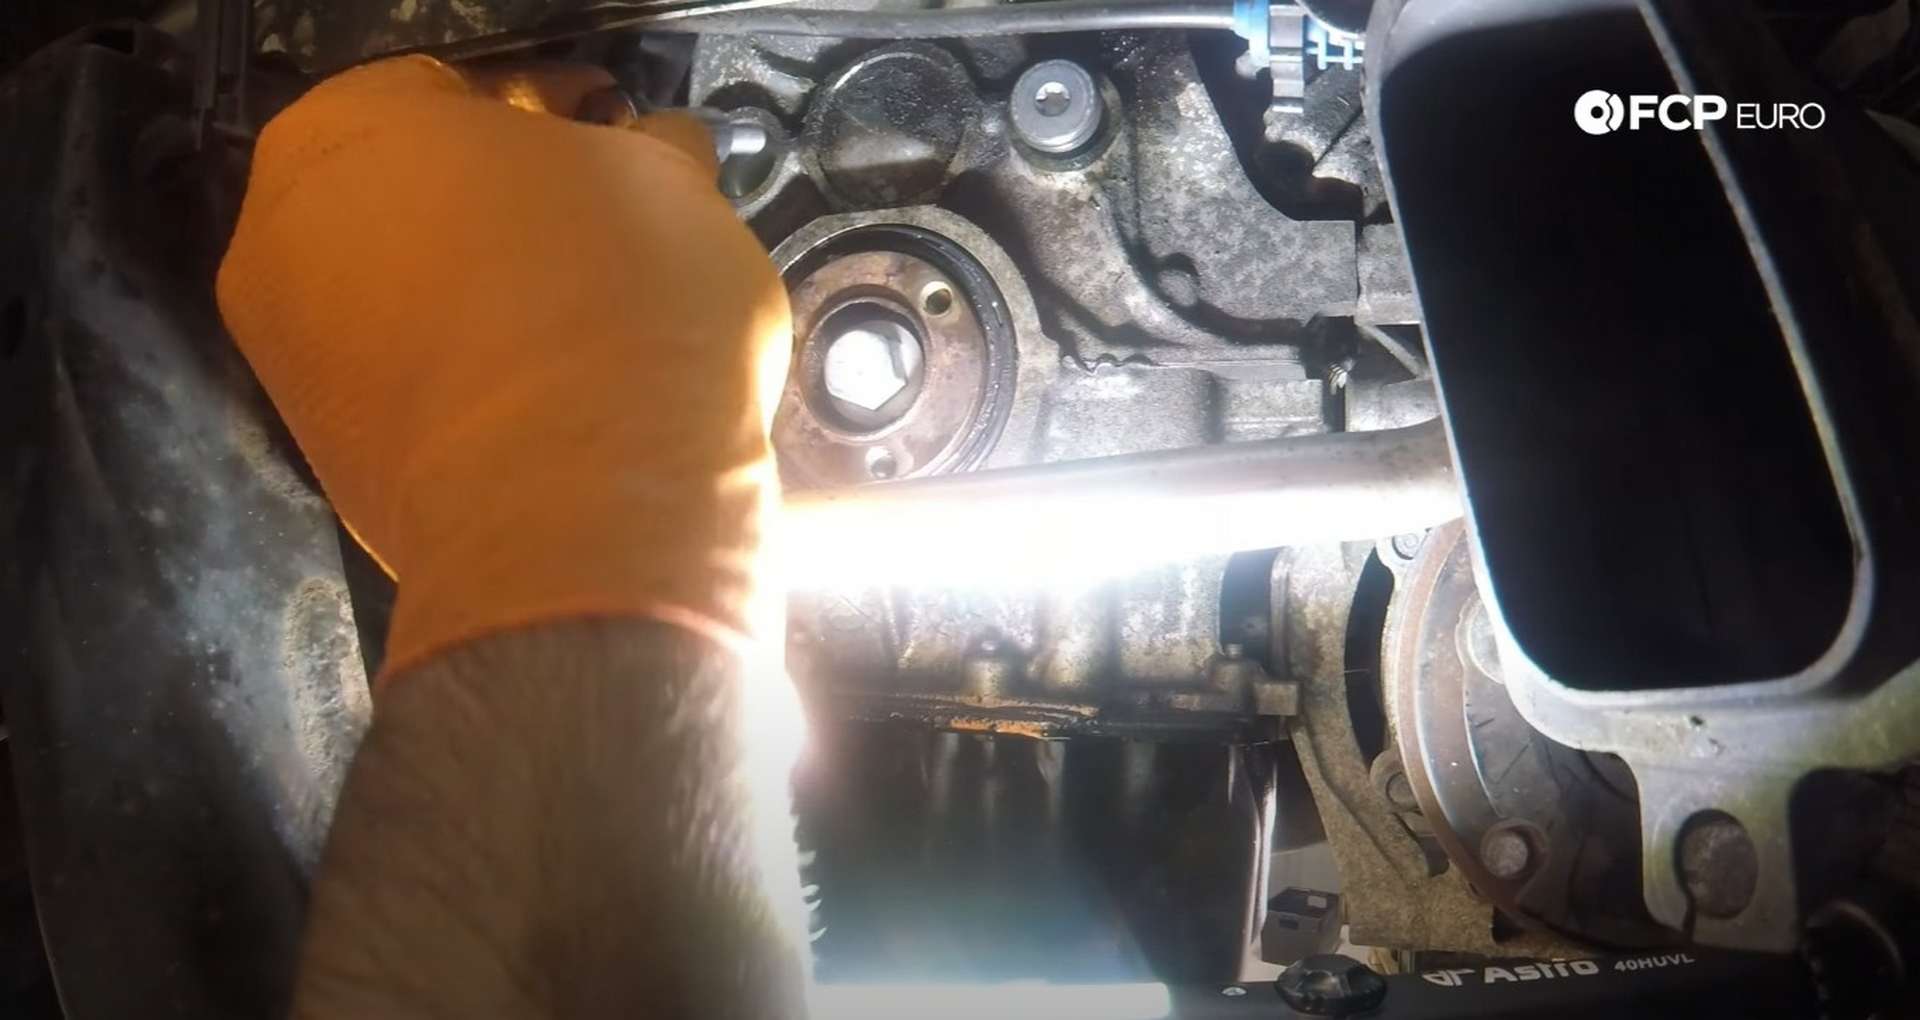
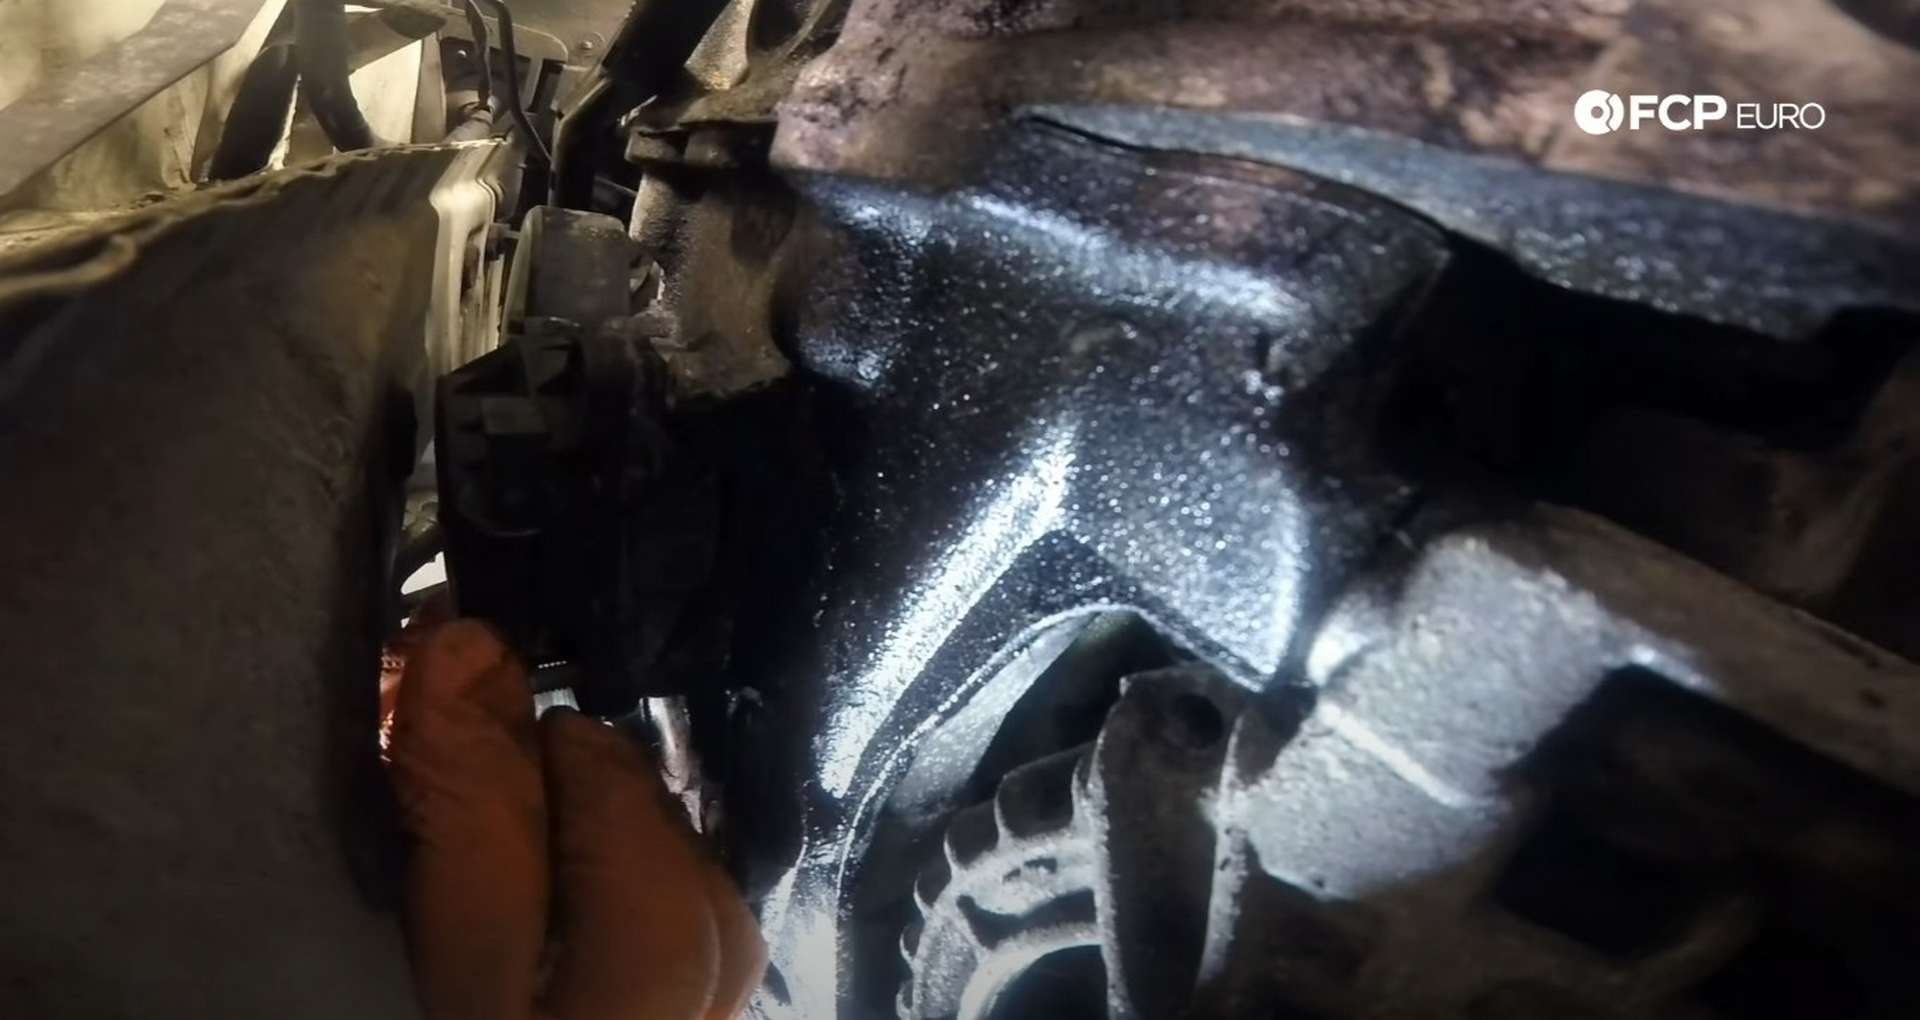
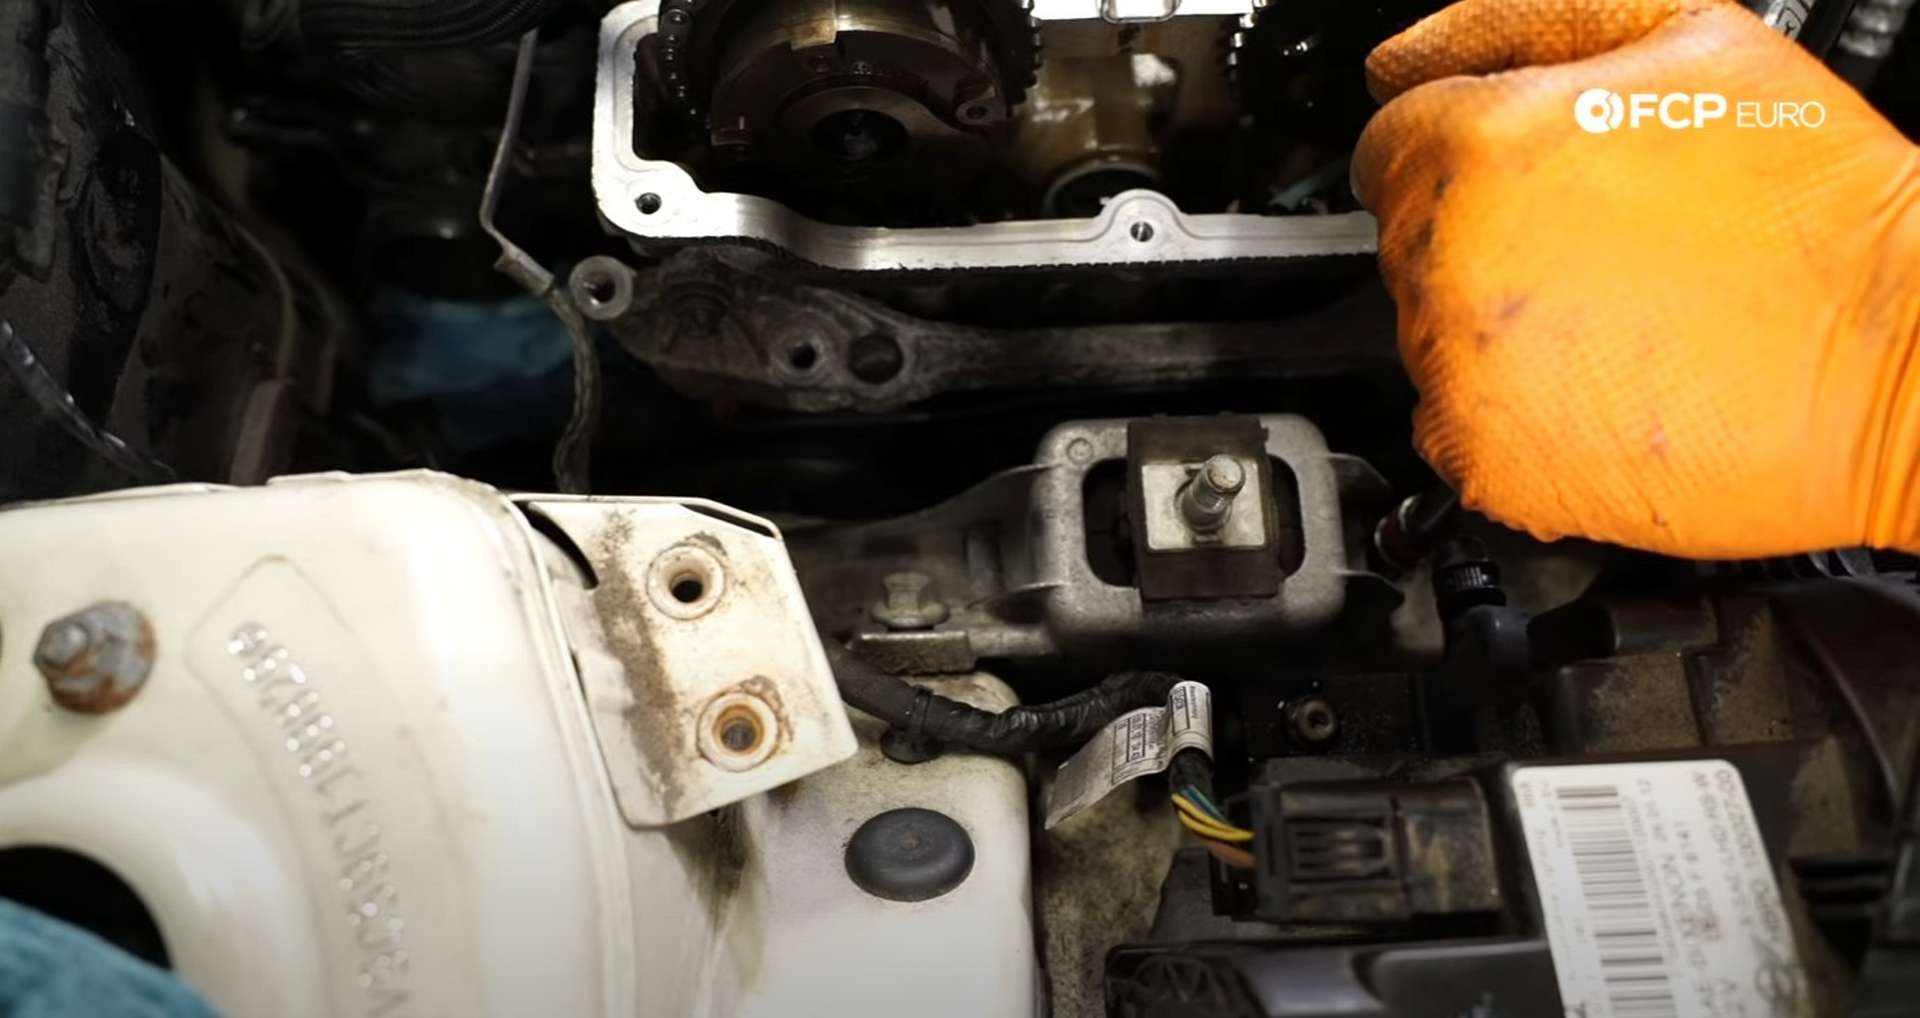
Next, take a floor jack and support the engine from below. Then, use a 13mm socket to remove the four bolts for the main engine mount bracket and an 18mm socket to remove the bracket’s middle nut.
Below the bracket is the forward engine mount. Use a 16mm socket to remove the bolt securing the mount to the chassis and a 13mm socket to remove the two bolts that secure the mount to the timing cover.
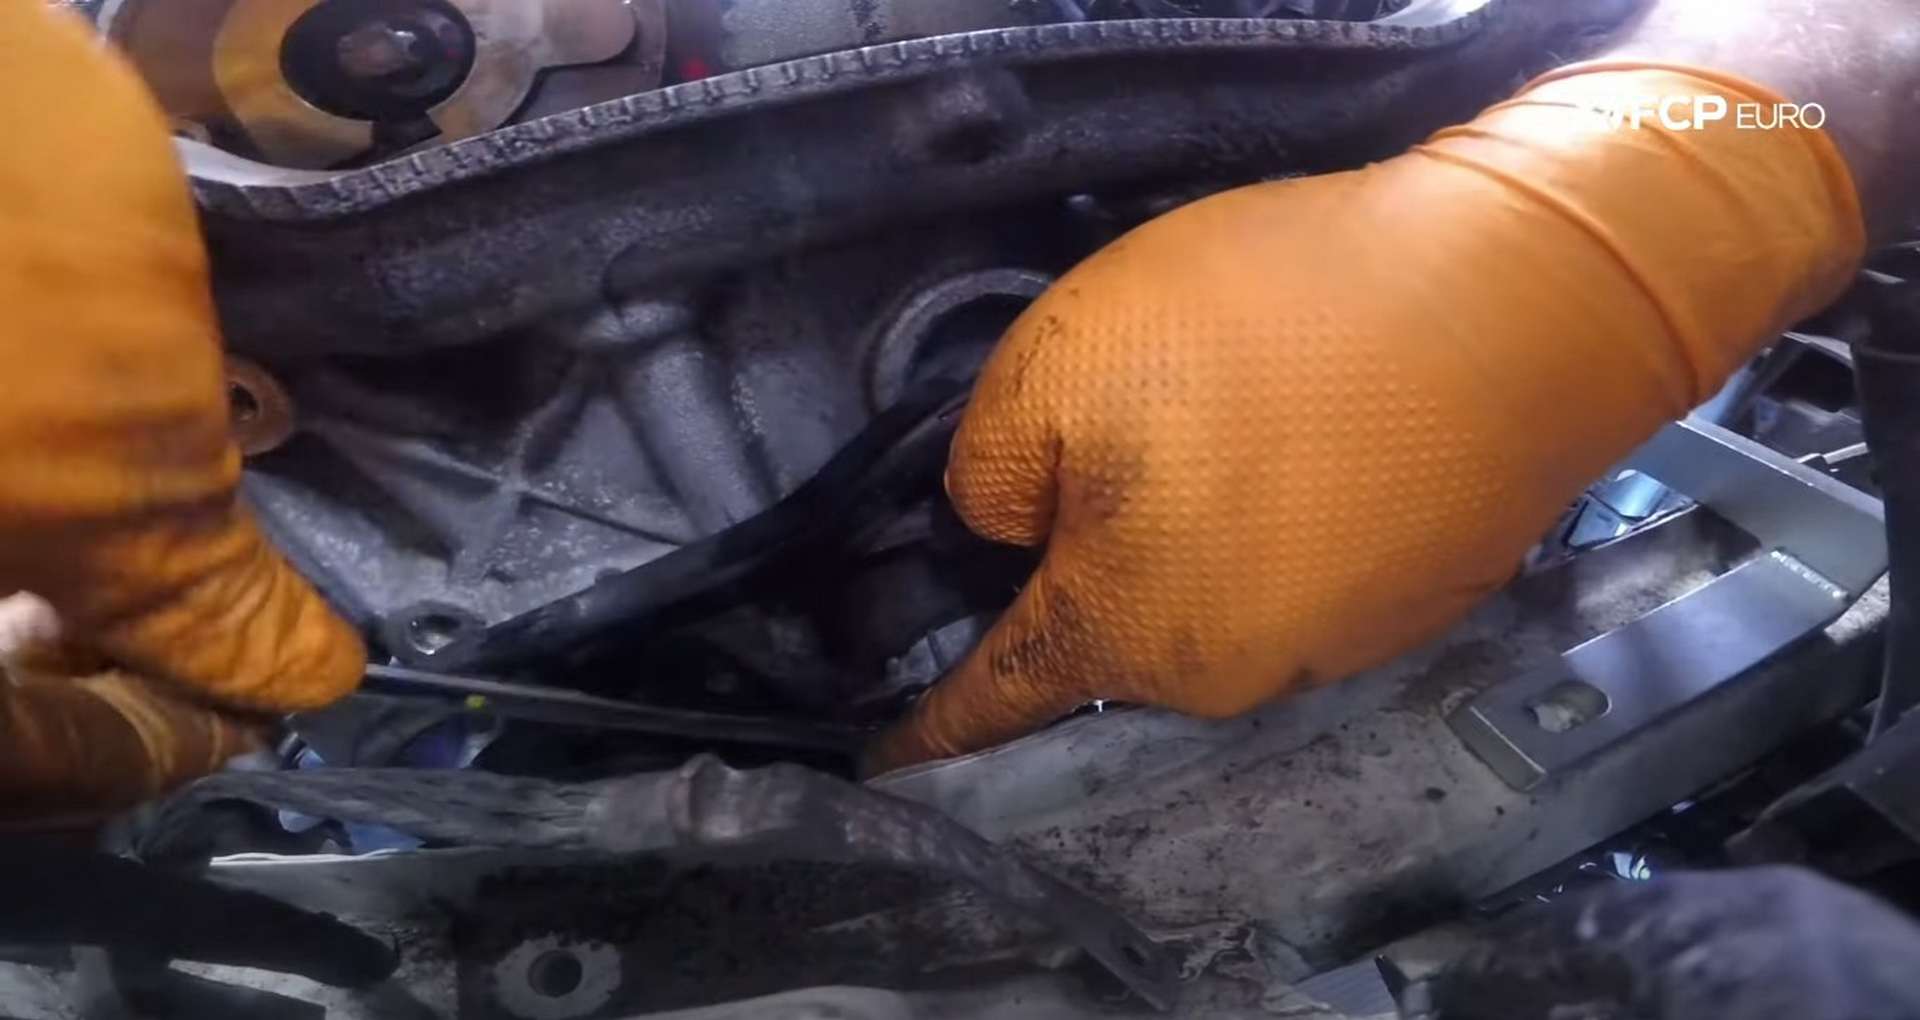
Below the lower engine mount bracket, part of the wiring harness bolts to the front of the engine. Use a 10mm socket to remove the harness’s bolts.
Just above the wiring harness is the engine mount’s lower bracket. Use an E10 socket to remove the four bolts that mount it to the engine.
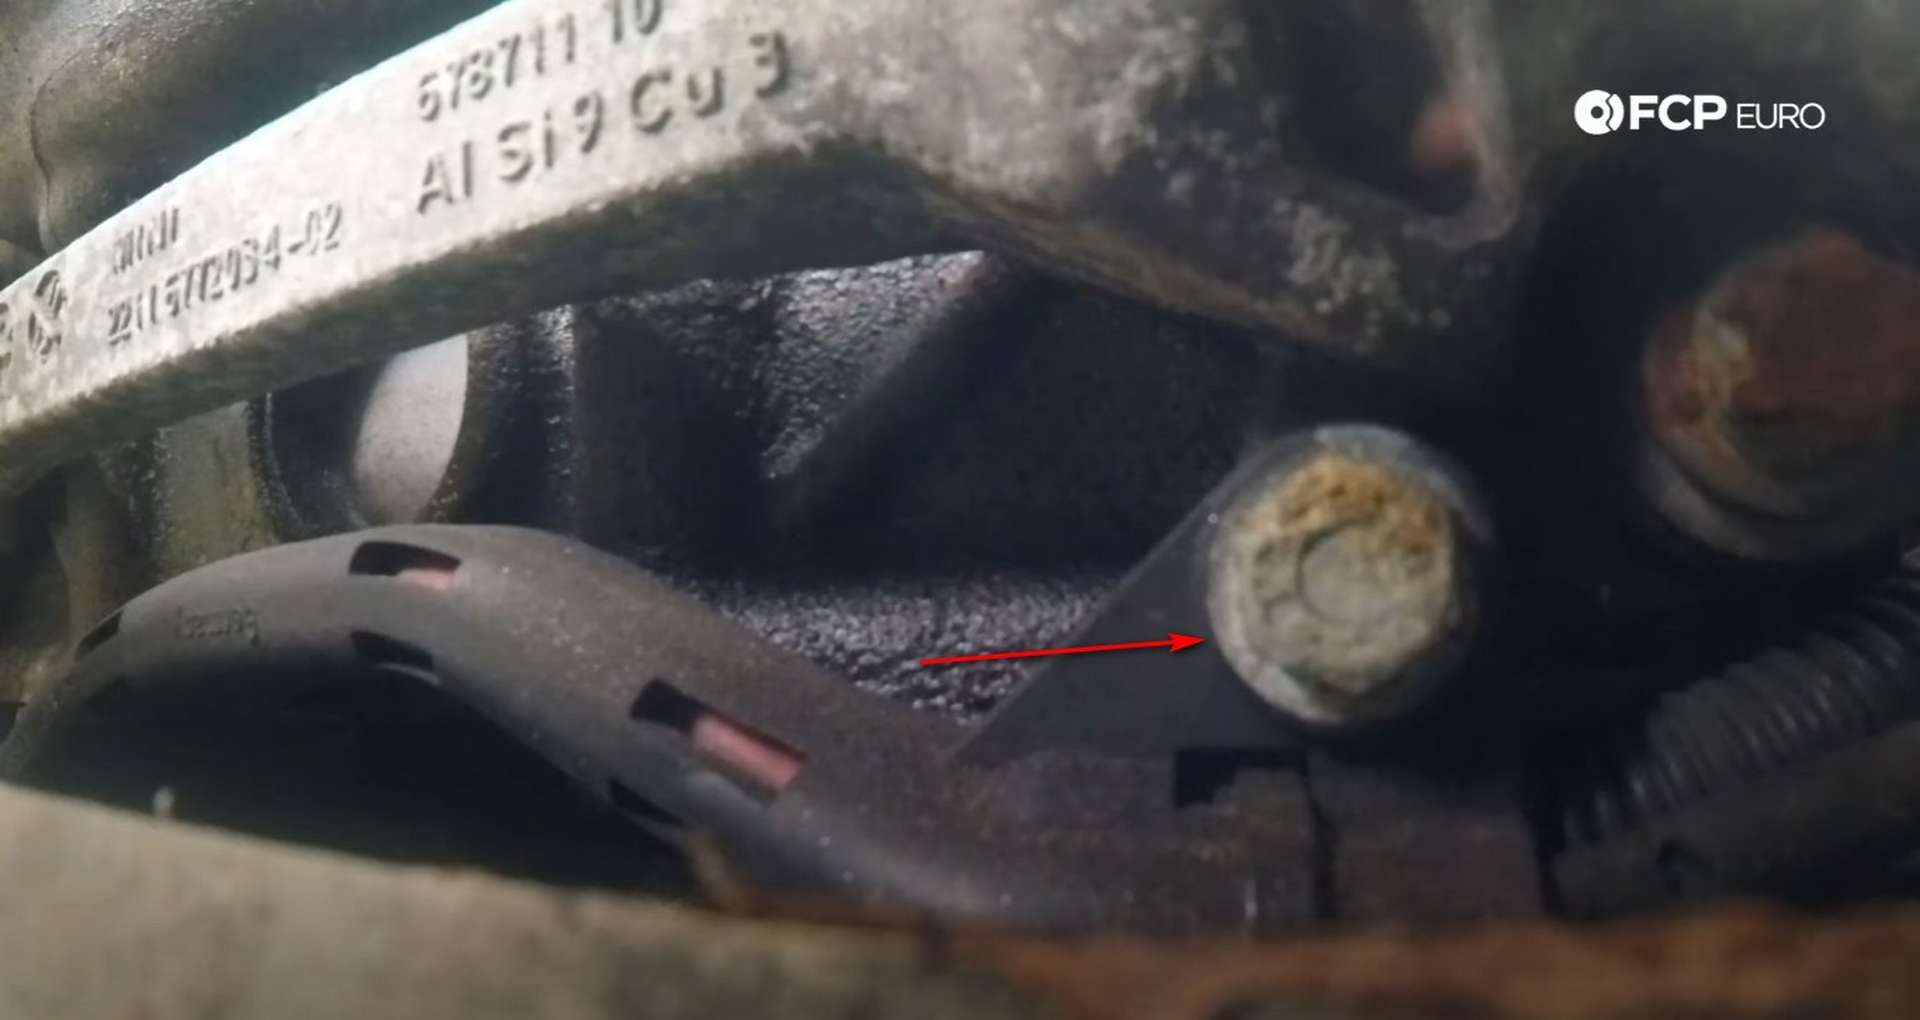
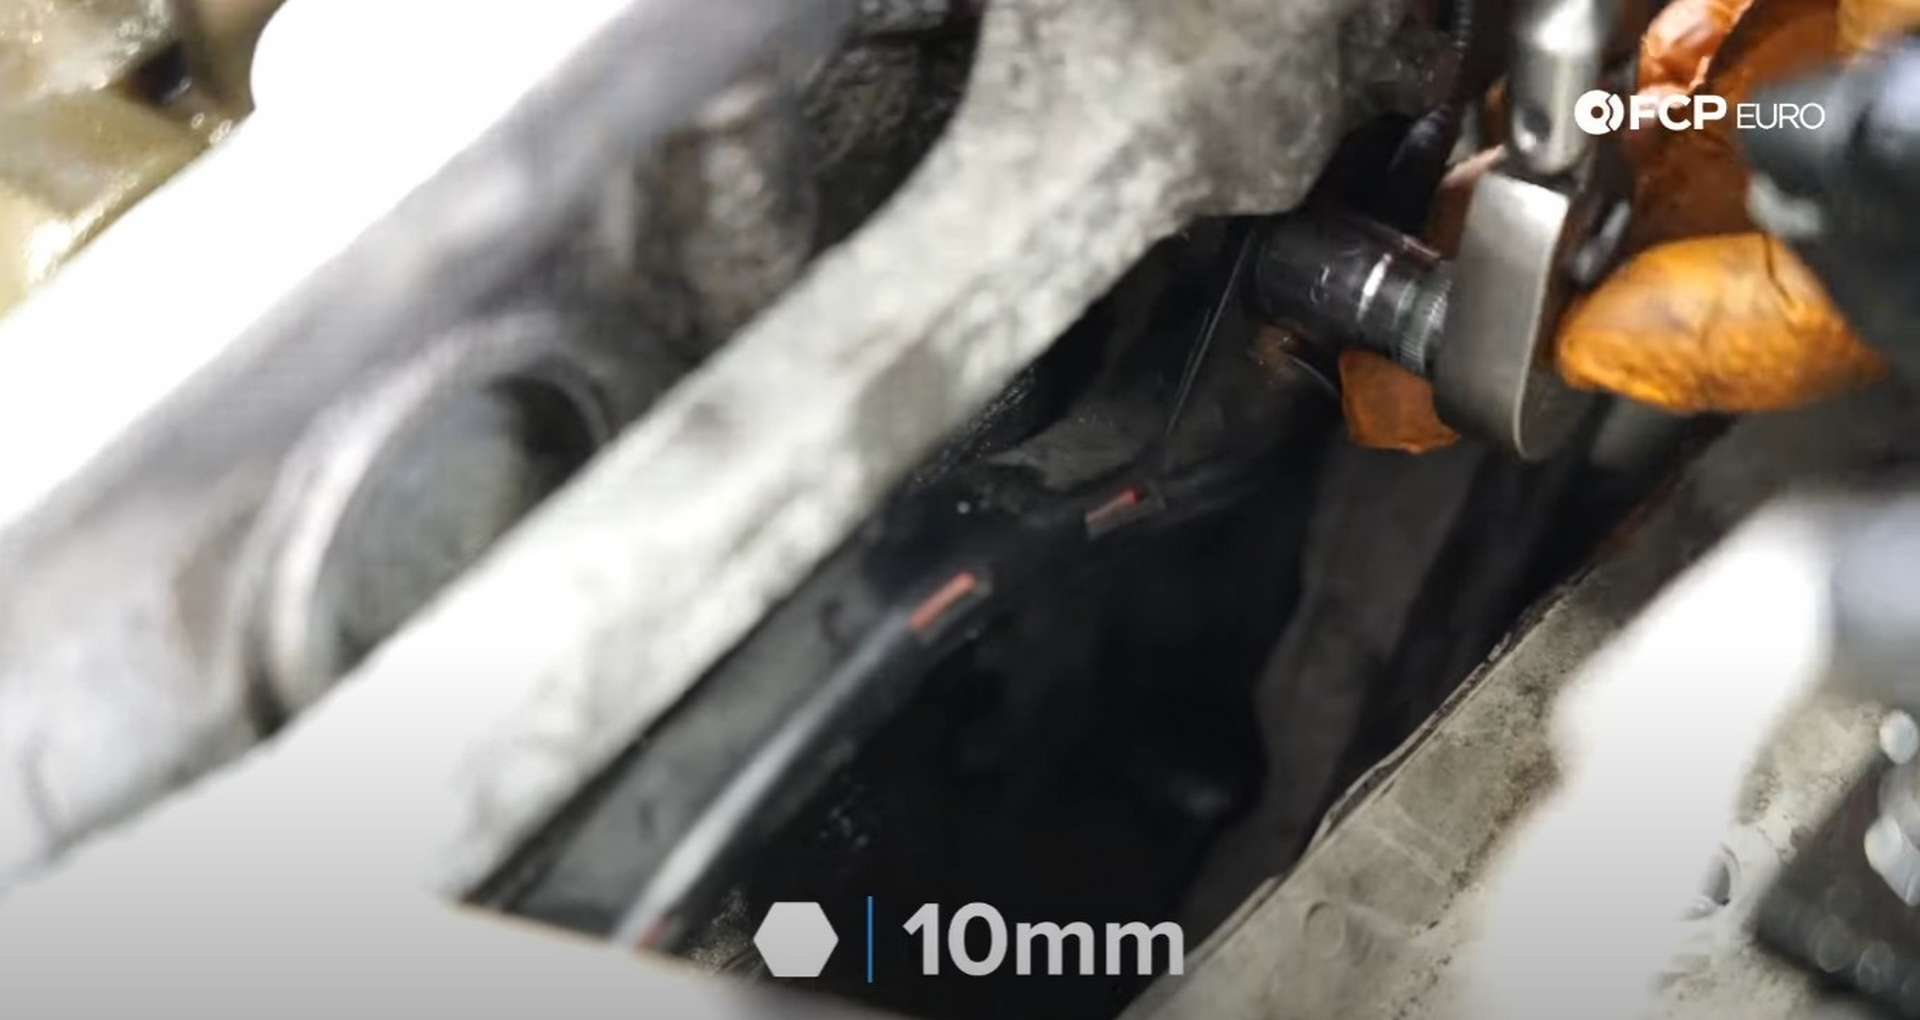
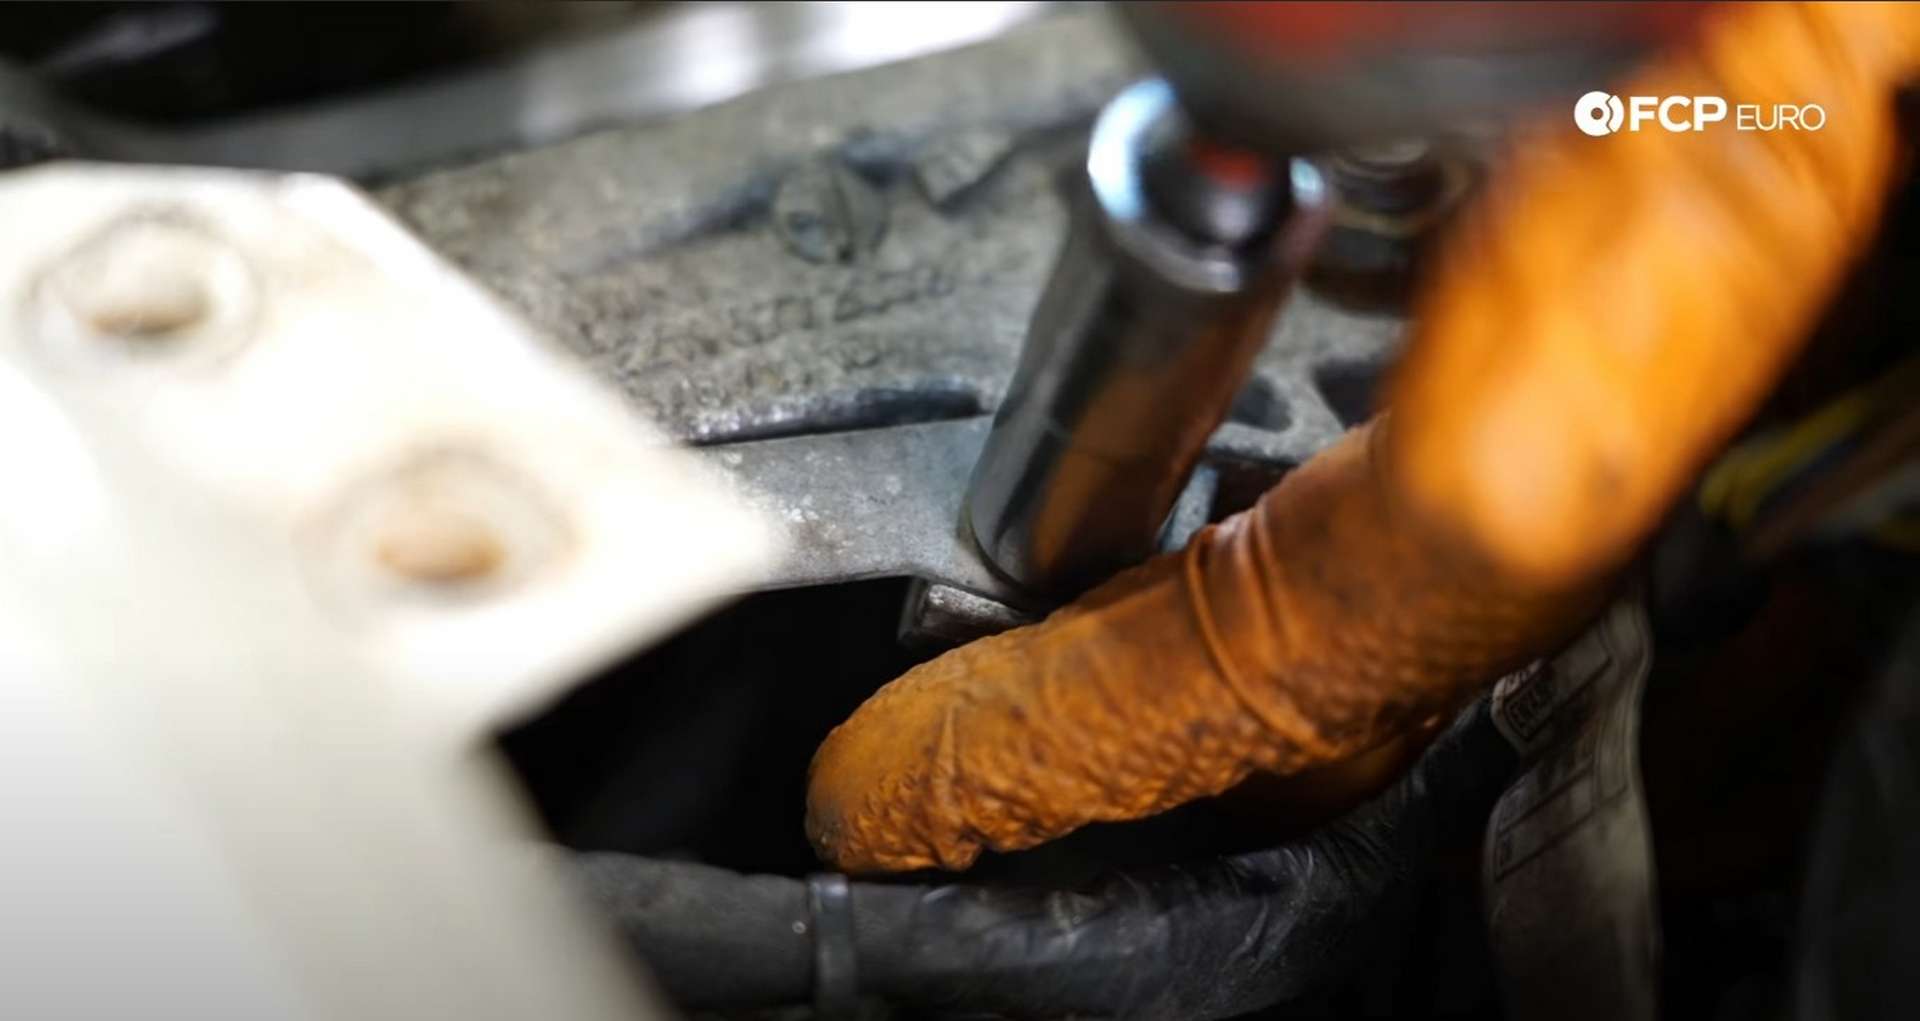
After that, head over to the side of the engine and use a 10mm socket to remove the two bolts for the oxygen sensor harness bracket.
Then, use an E10 socket to remove the two E10 bolts that secure the belt’s tensioner to the engine. They sit at the same orientation as the two oxygen sensor bracket bolts and are located just above them.
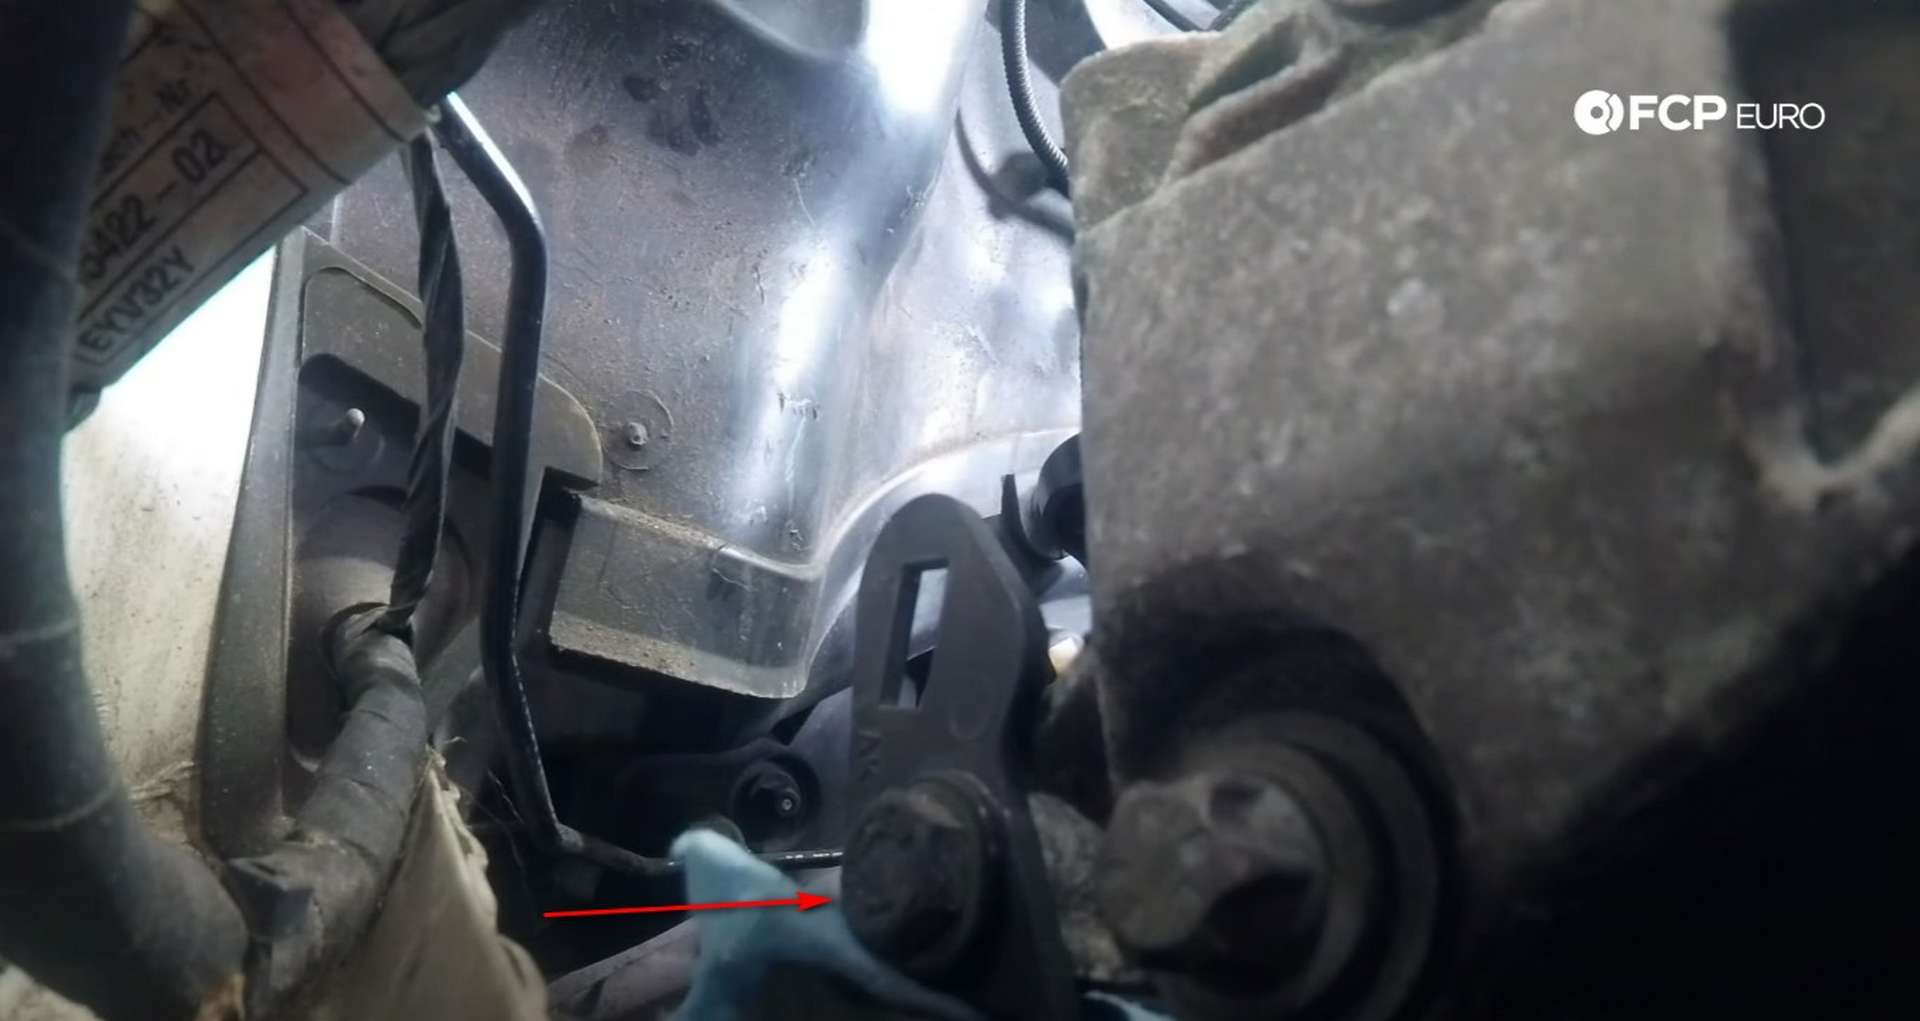
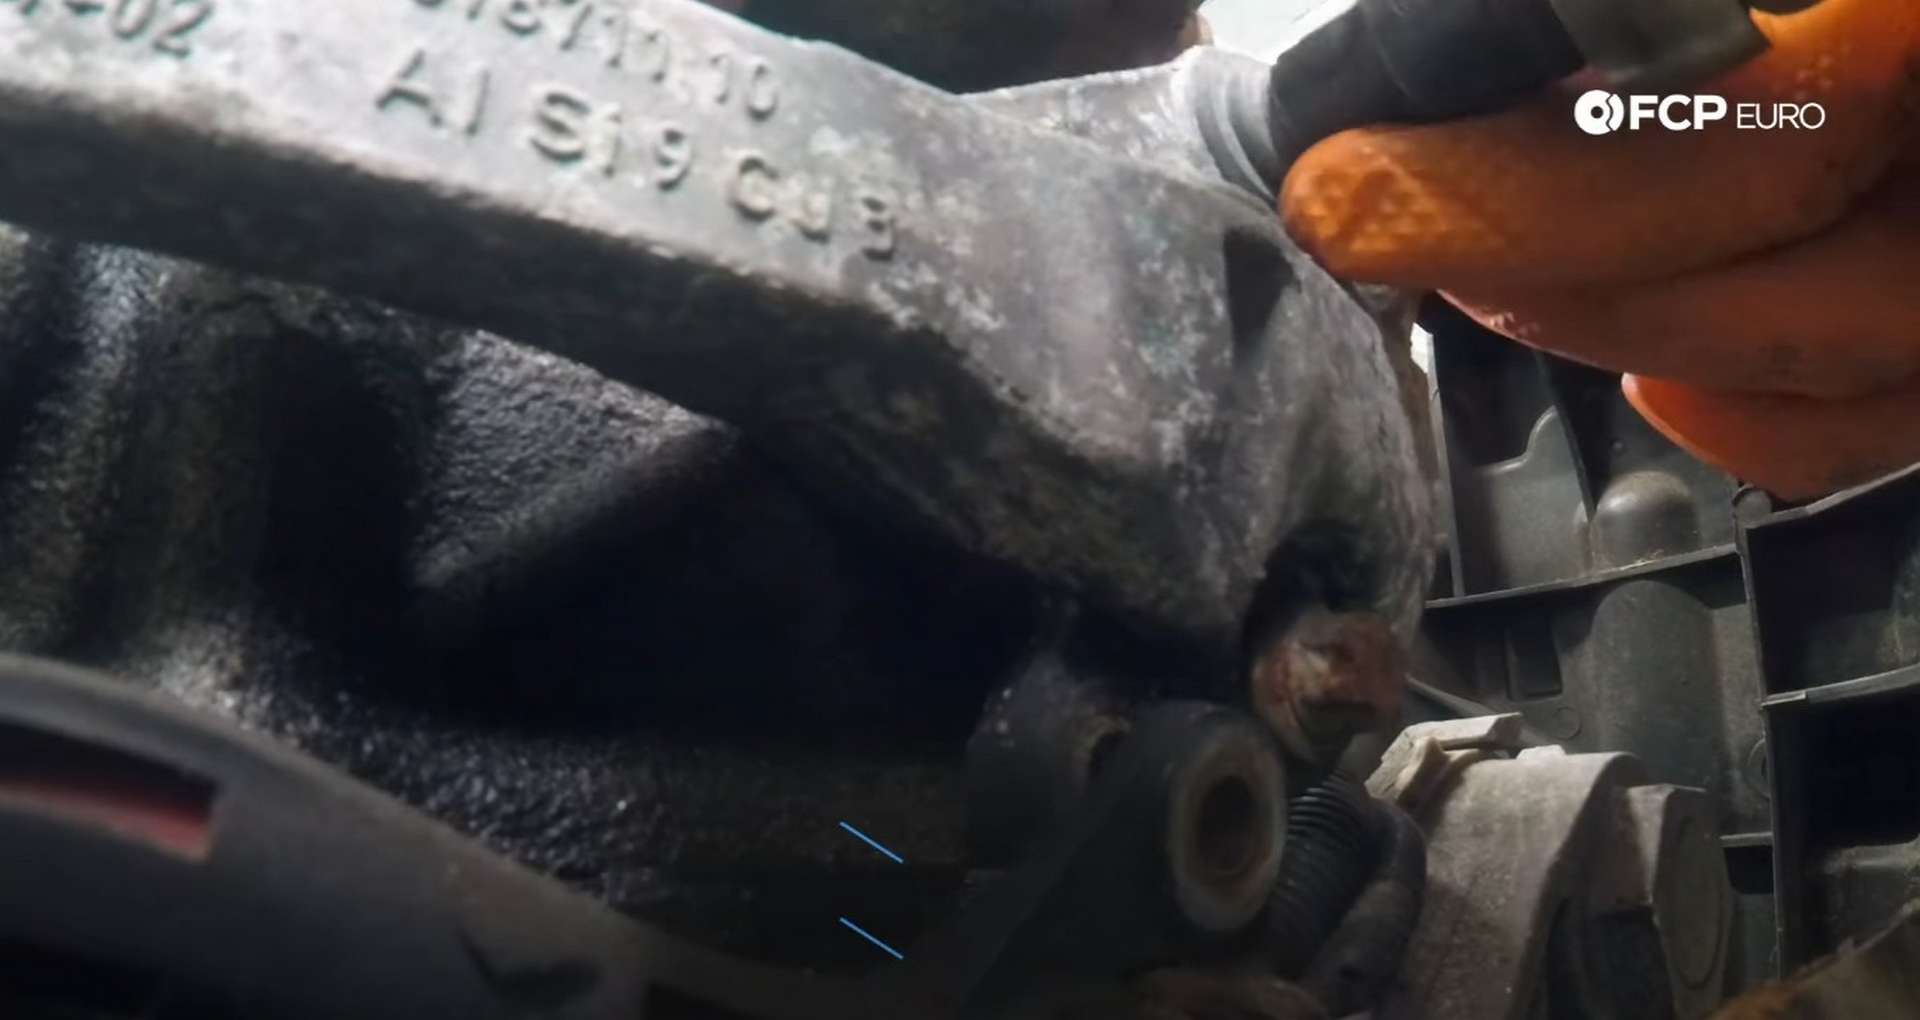
Use a flathead screwdriver to pop the tensioner off of the engine if it resists removal. Then position the engine block holding tool where the tensioner bolts to the engine and use the tensioner’s bolts to secure the tool to the engine.
Next, use a 10mm socket to remove all of the bolts that secure the friction gear to the front of the engine. The top two bolts are accessible from the engine bay, while the third bolt can be removed from the wheel well access.

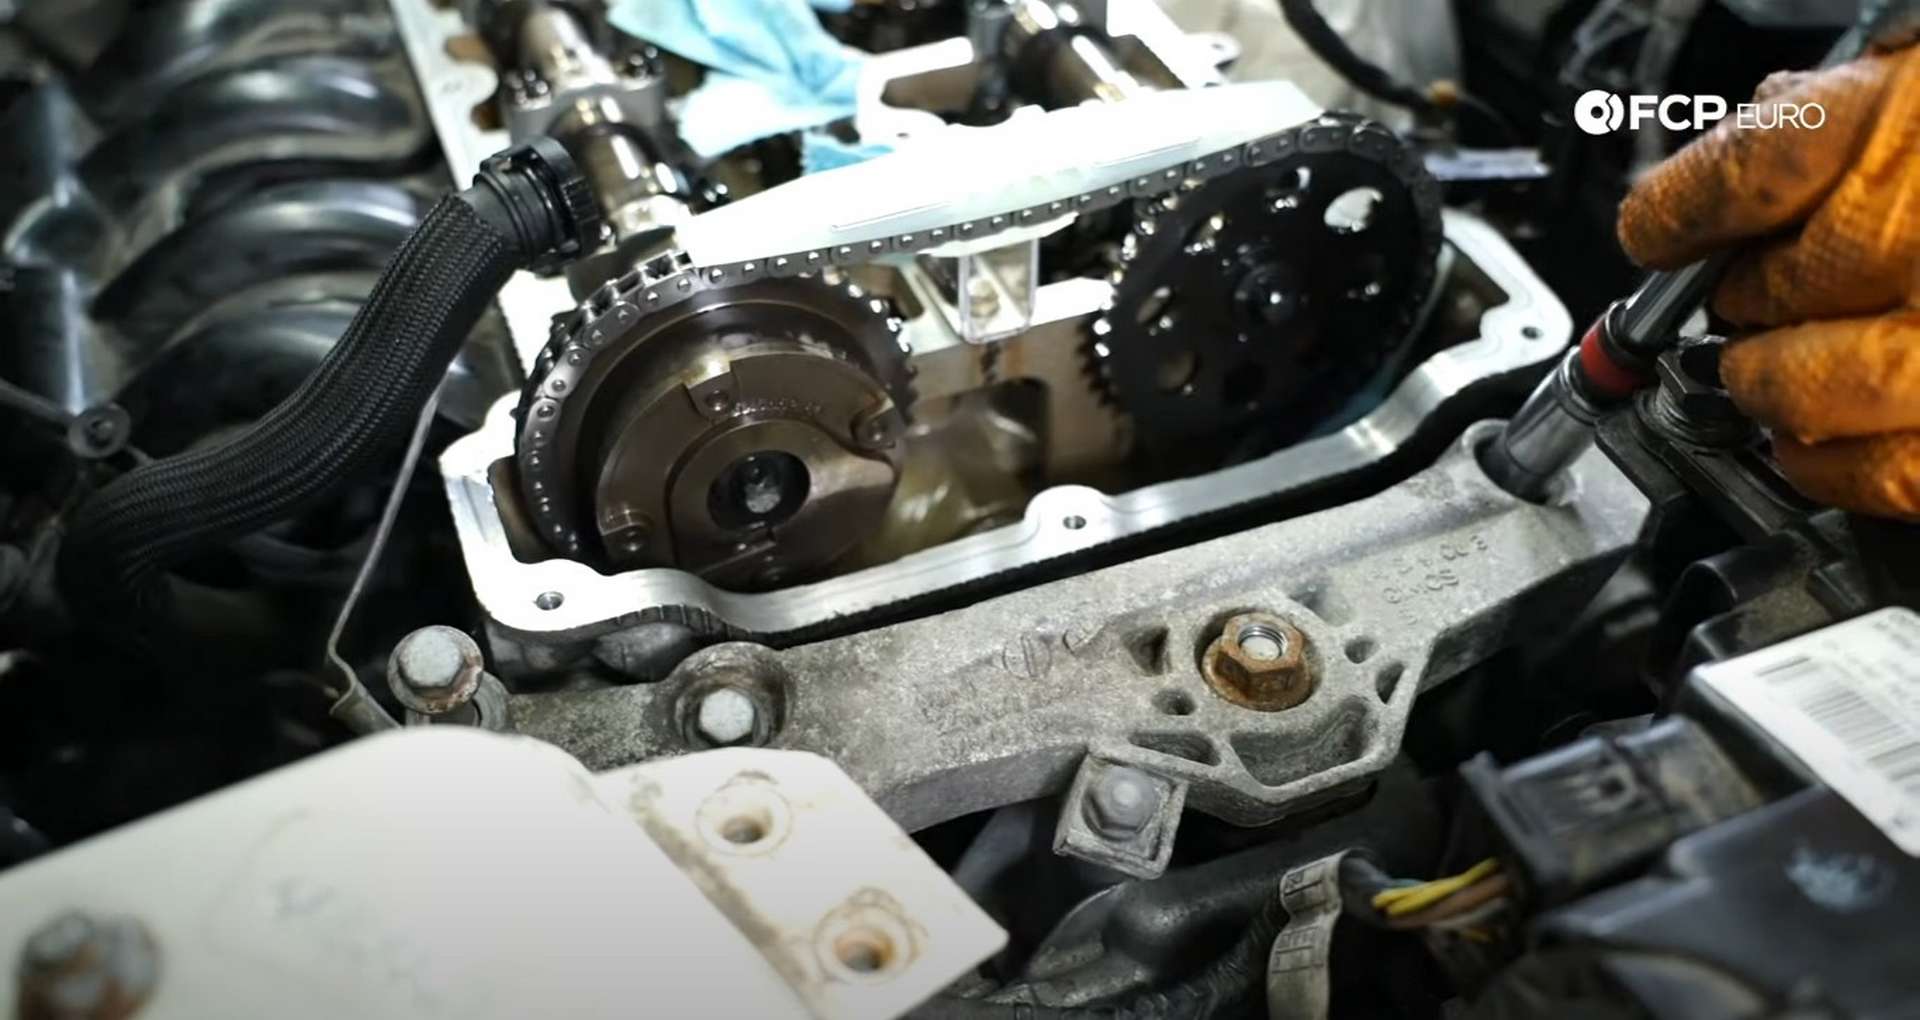
Step 5: Remove the timing chain assembly
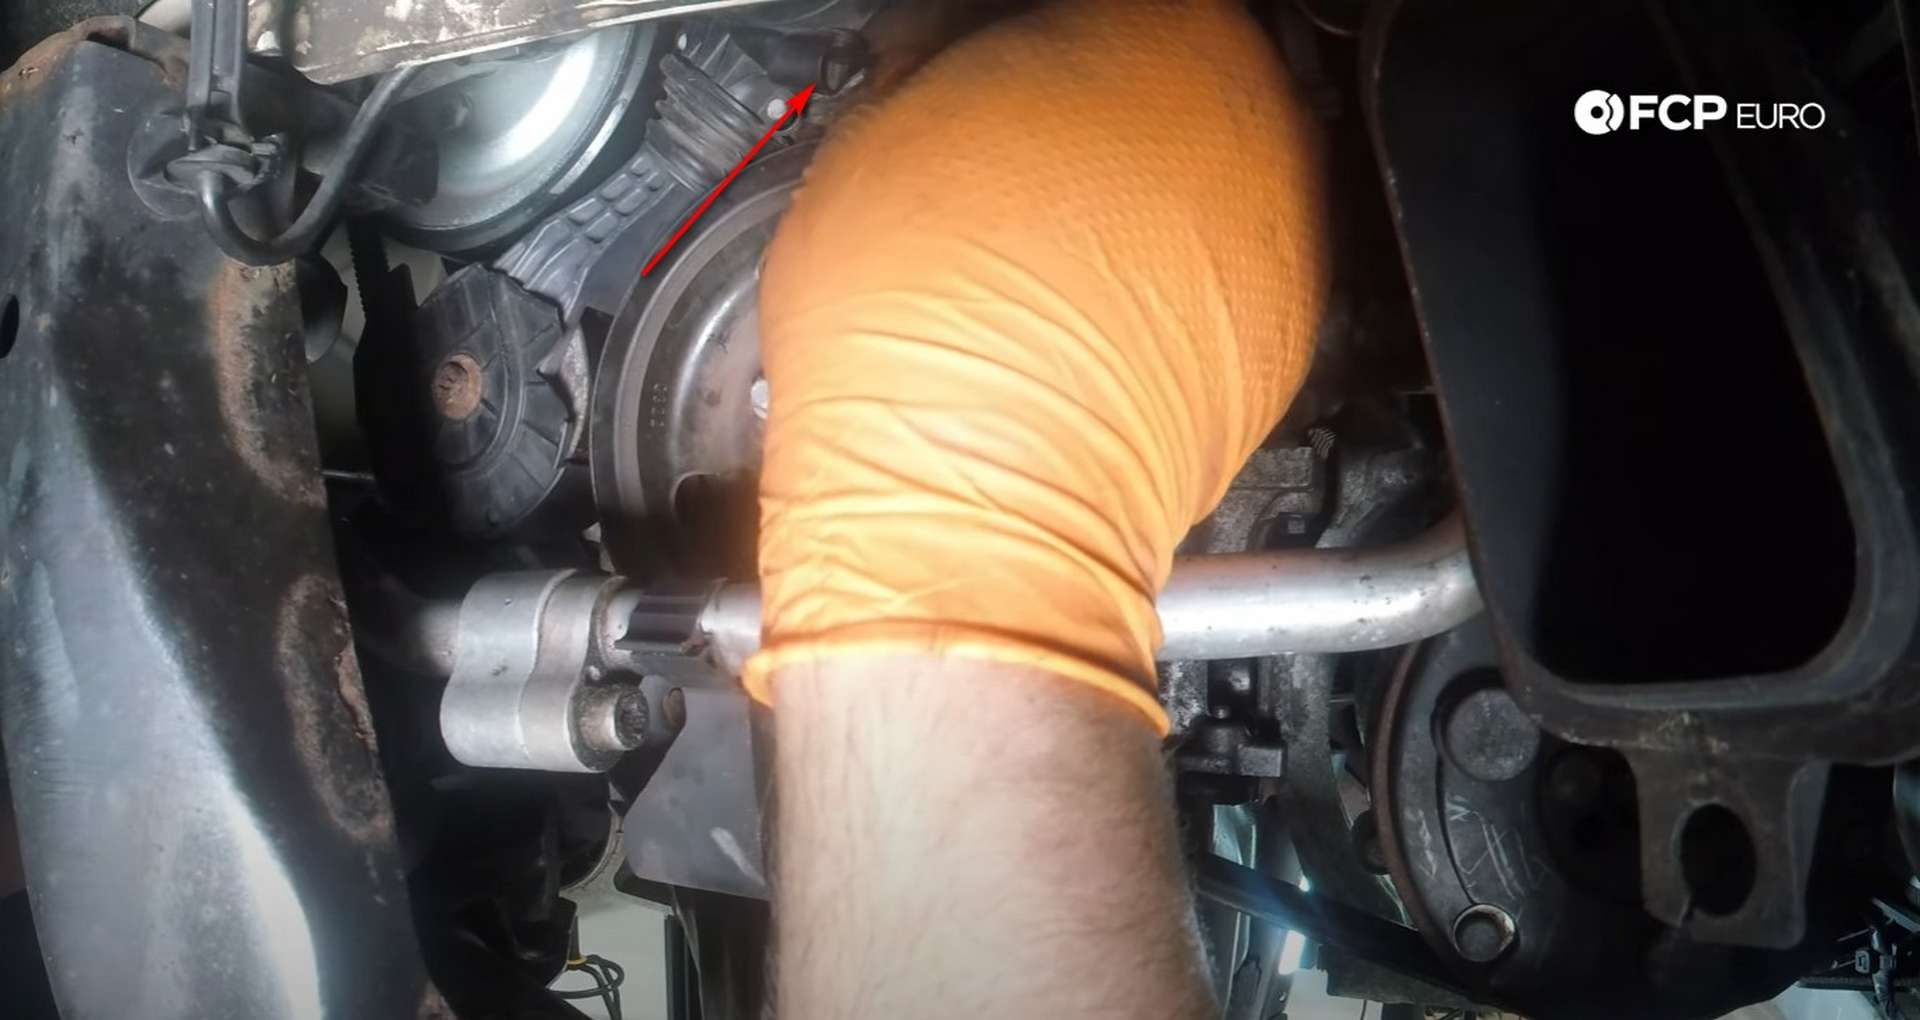
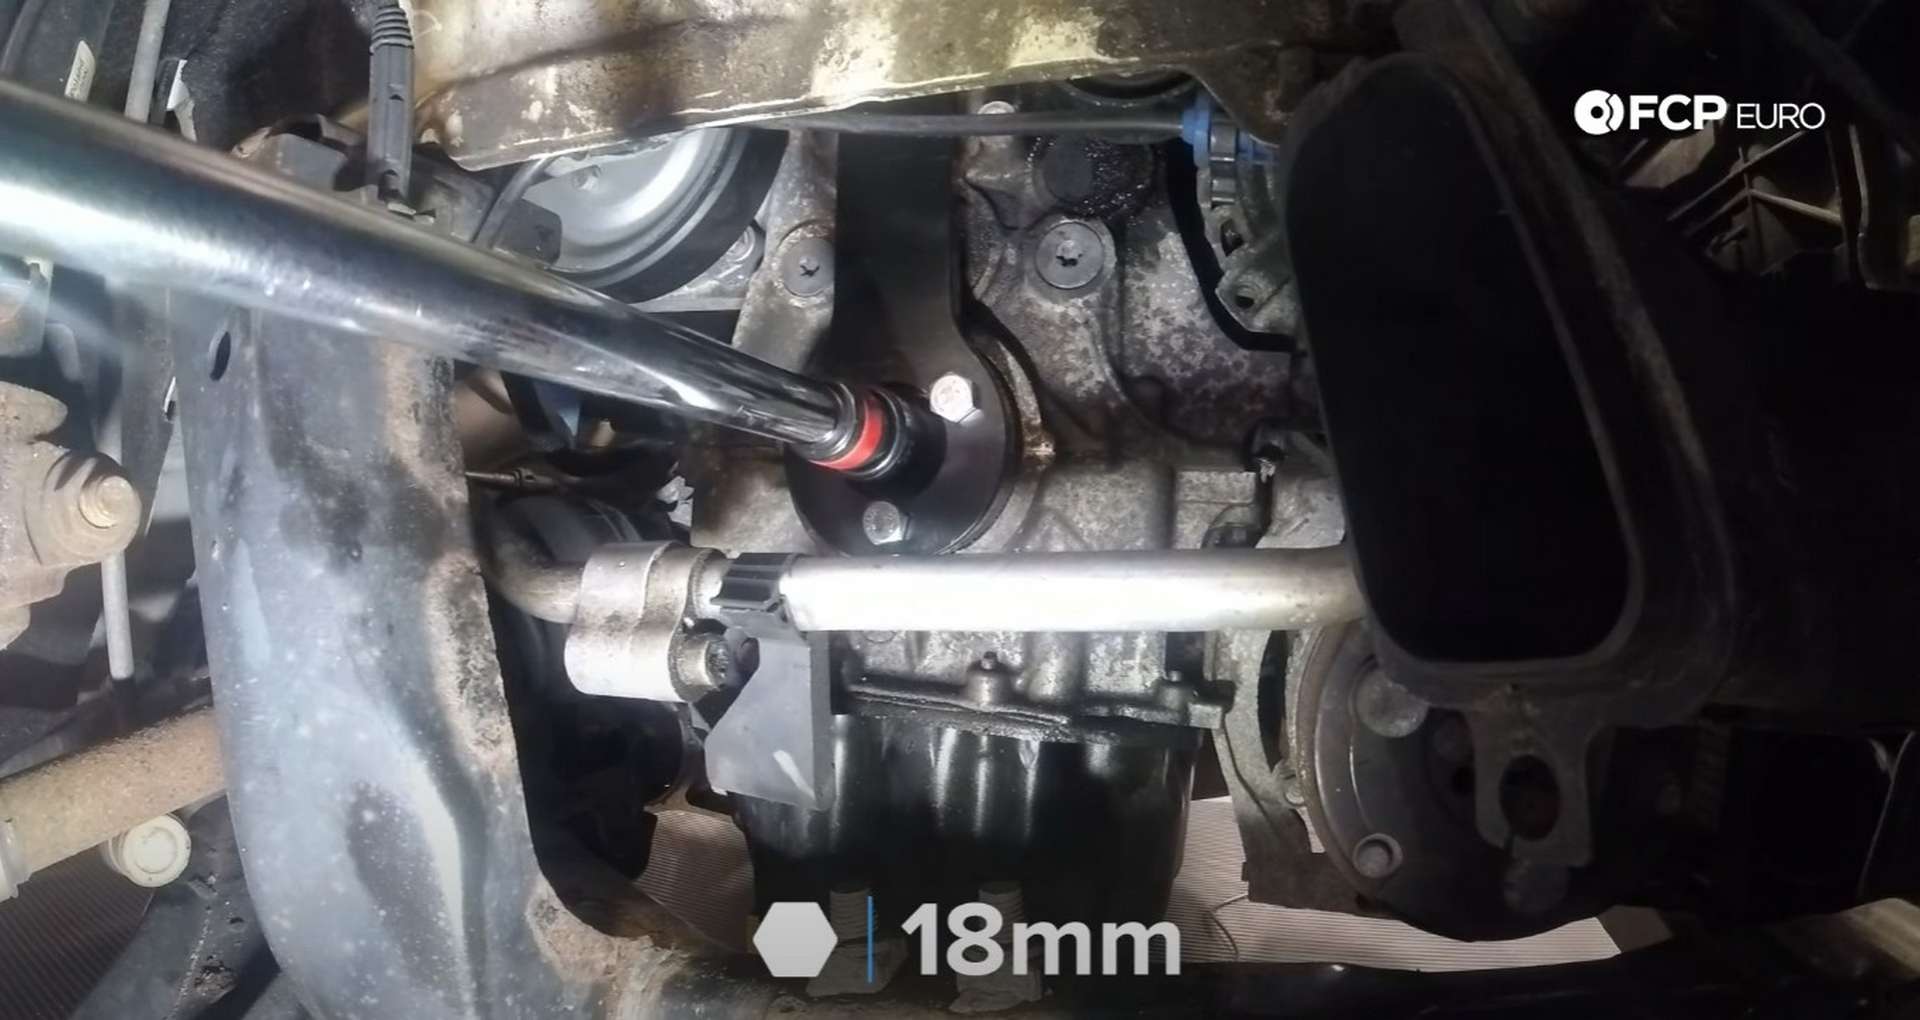
At this point, slide the crankshaft counter-hold tool down the front of the engine and bolt it into place on the crankshaft. Then, use an 18mm socket to break the crankshaft bolt loose.
After you break the bolt loose, remove the counter-hold tool from the crankshaft. Next, head to the top of the engine and use an E14 socket to loosen the camshaft sprocket bolts.

After you loosen but don’t remove the cam sprocket bolts, use an 8mm socket to remove the top timing chain guide.
With the guide removed, remove the sprocket bolts. Be aware that the intake and exhaust bolts are different lengths, so mark them accordingly. Remove the gears but don’t let the chain fall into the engine. You can place a screwdriver through the chain to prevent it from falling.
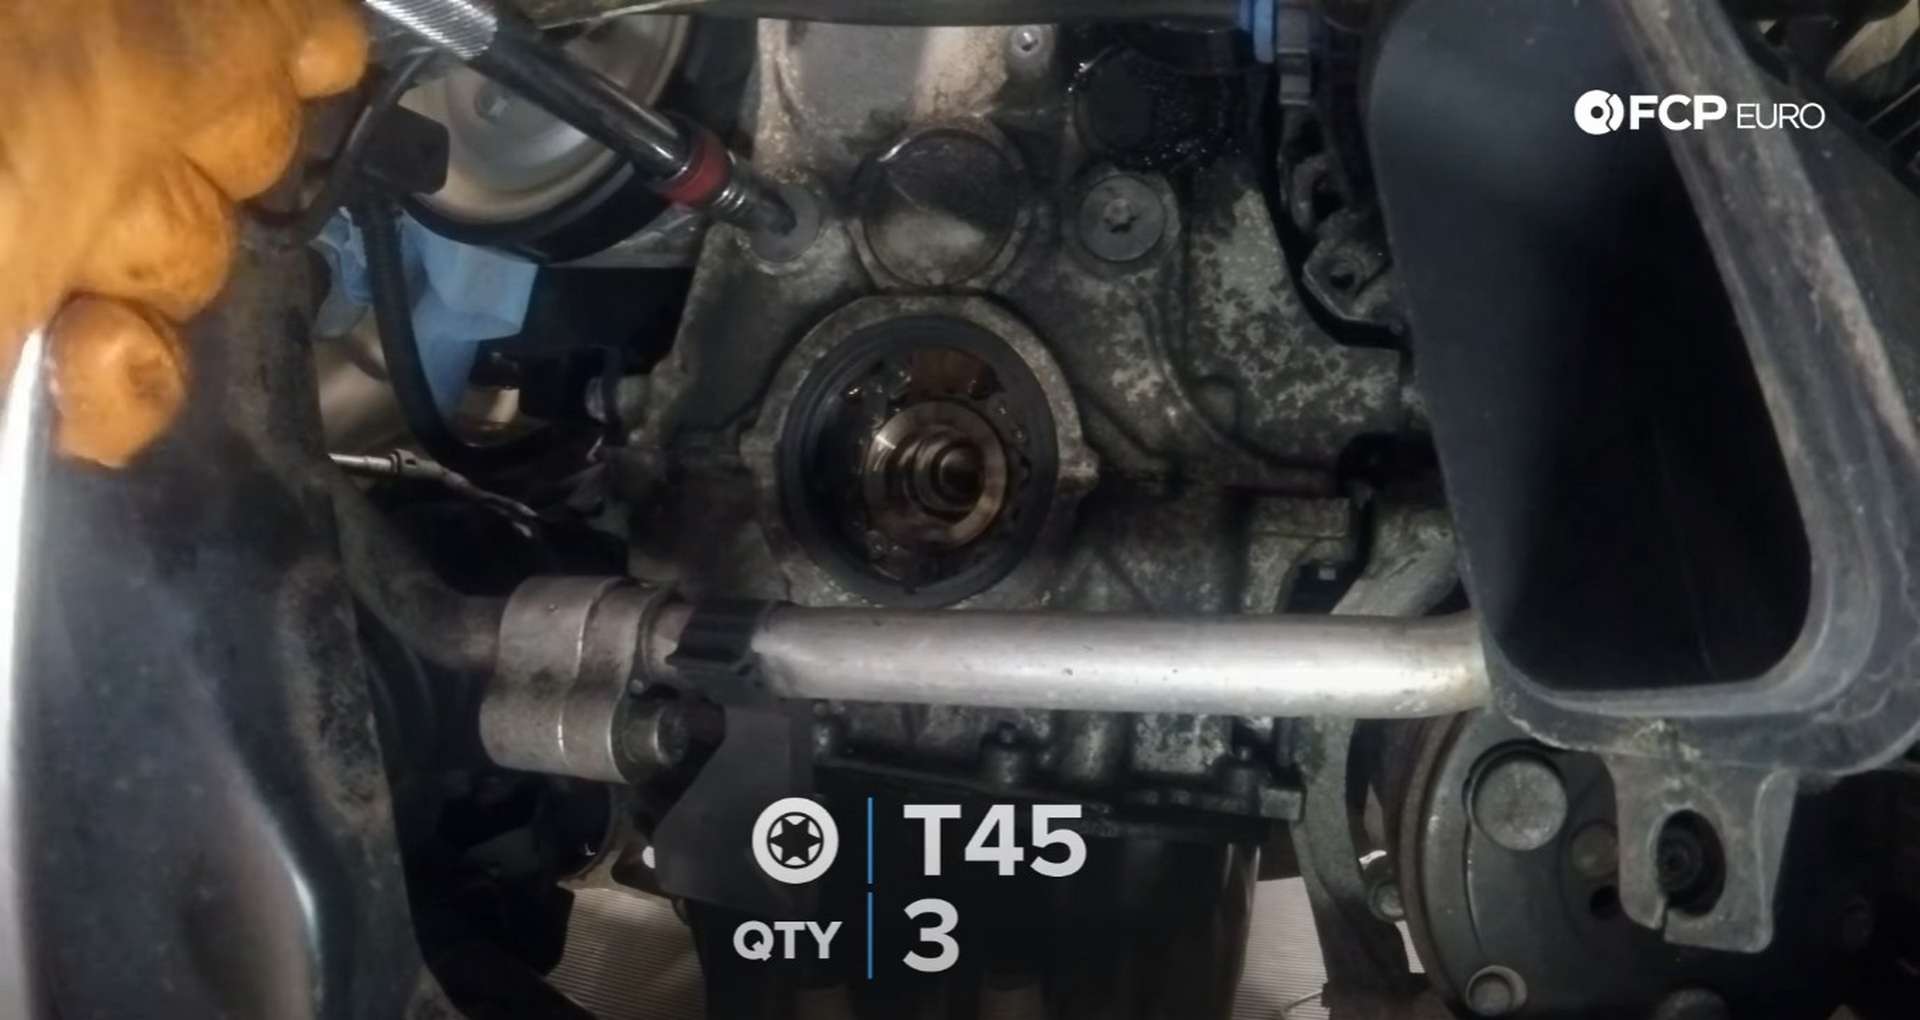
Next, use a T45 bit socket to remove the timing chain guide pins. Two of the pins sit above the crankshaft, while the third is around where the engine mount sits.
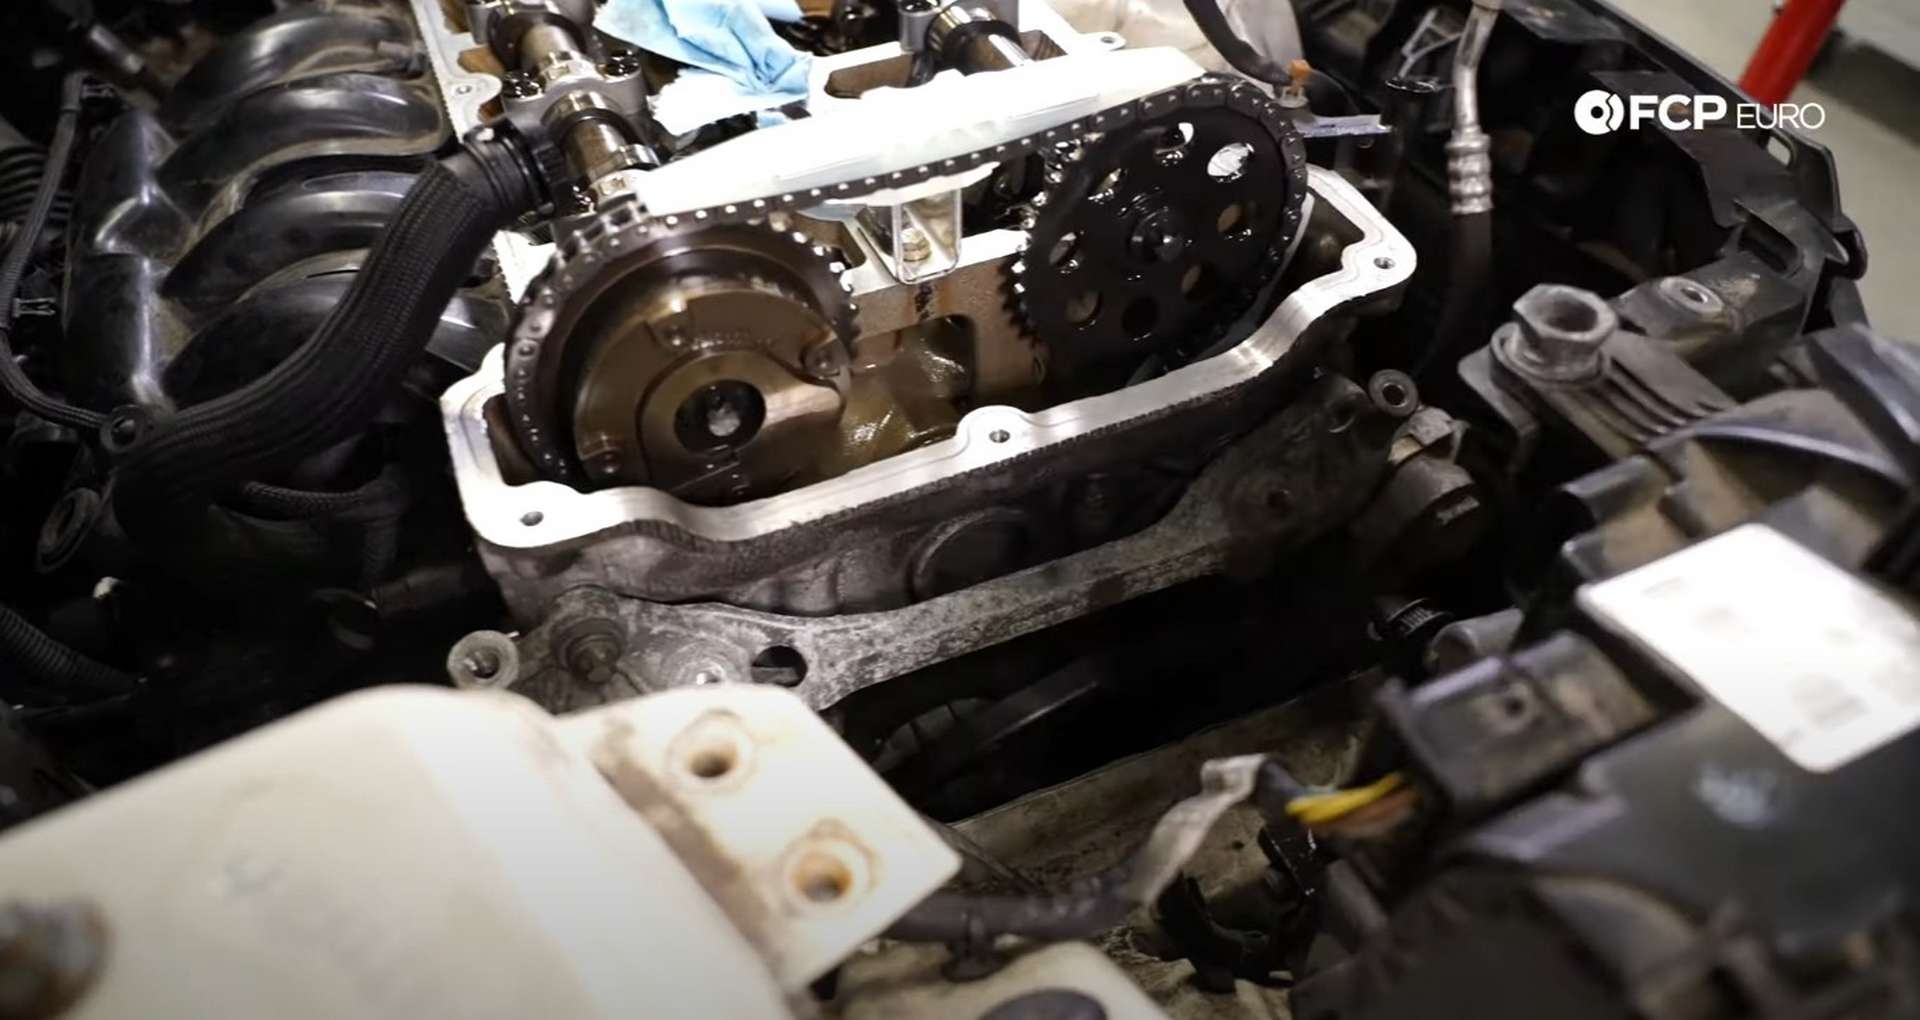
Remove the oil dipstick, grab the chain, and carefully lift the chain assembly out of the engine.

Step 6: Install the new timing chain assembly
Place the old assembly onto a work surface for inspection. If you notice that the guides are cracked with pieces missing, you should drain the oil and remove the oil pan to eliminate any debris.
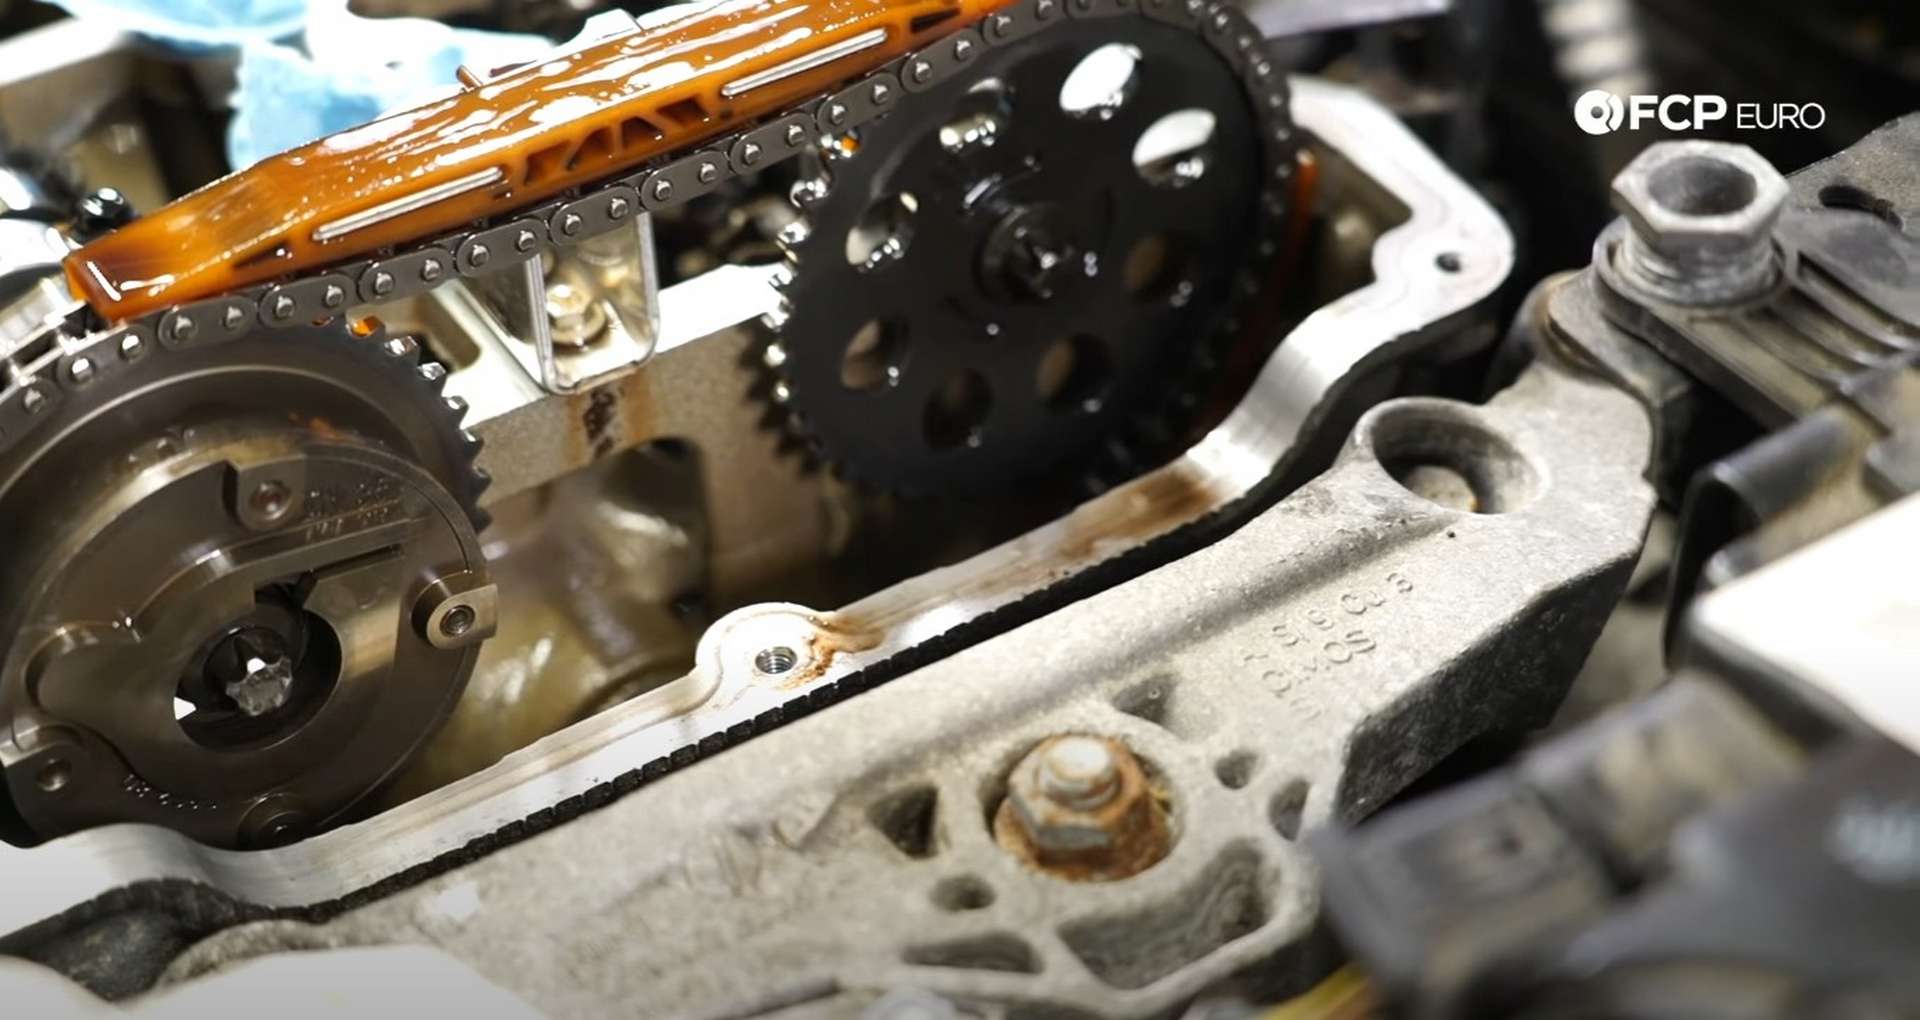
Then, take the new assembly and place it next to the old one. Put the two main guides together and pull the new chain through it. Clean the crankshaft sprocket and place it in the new chain.
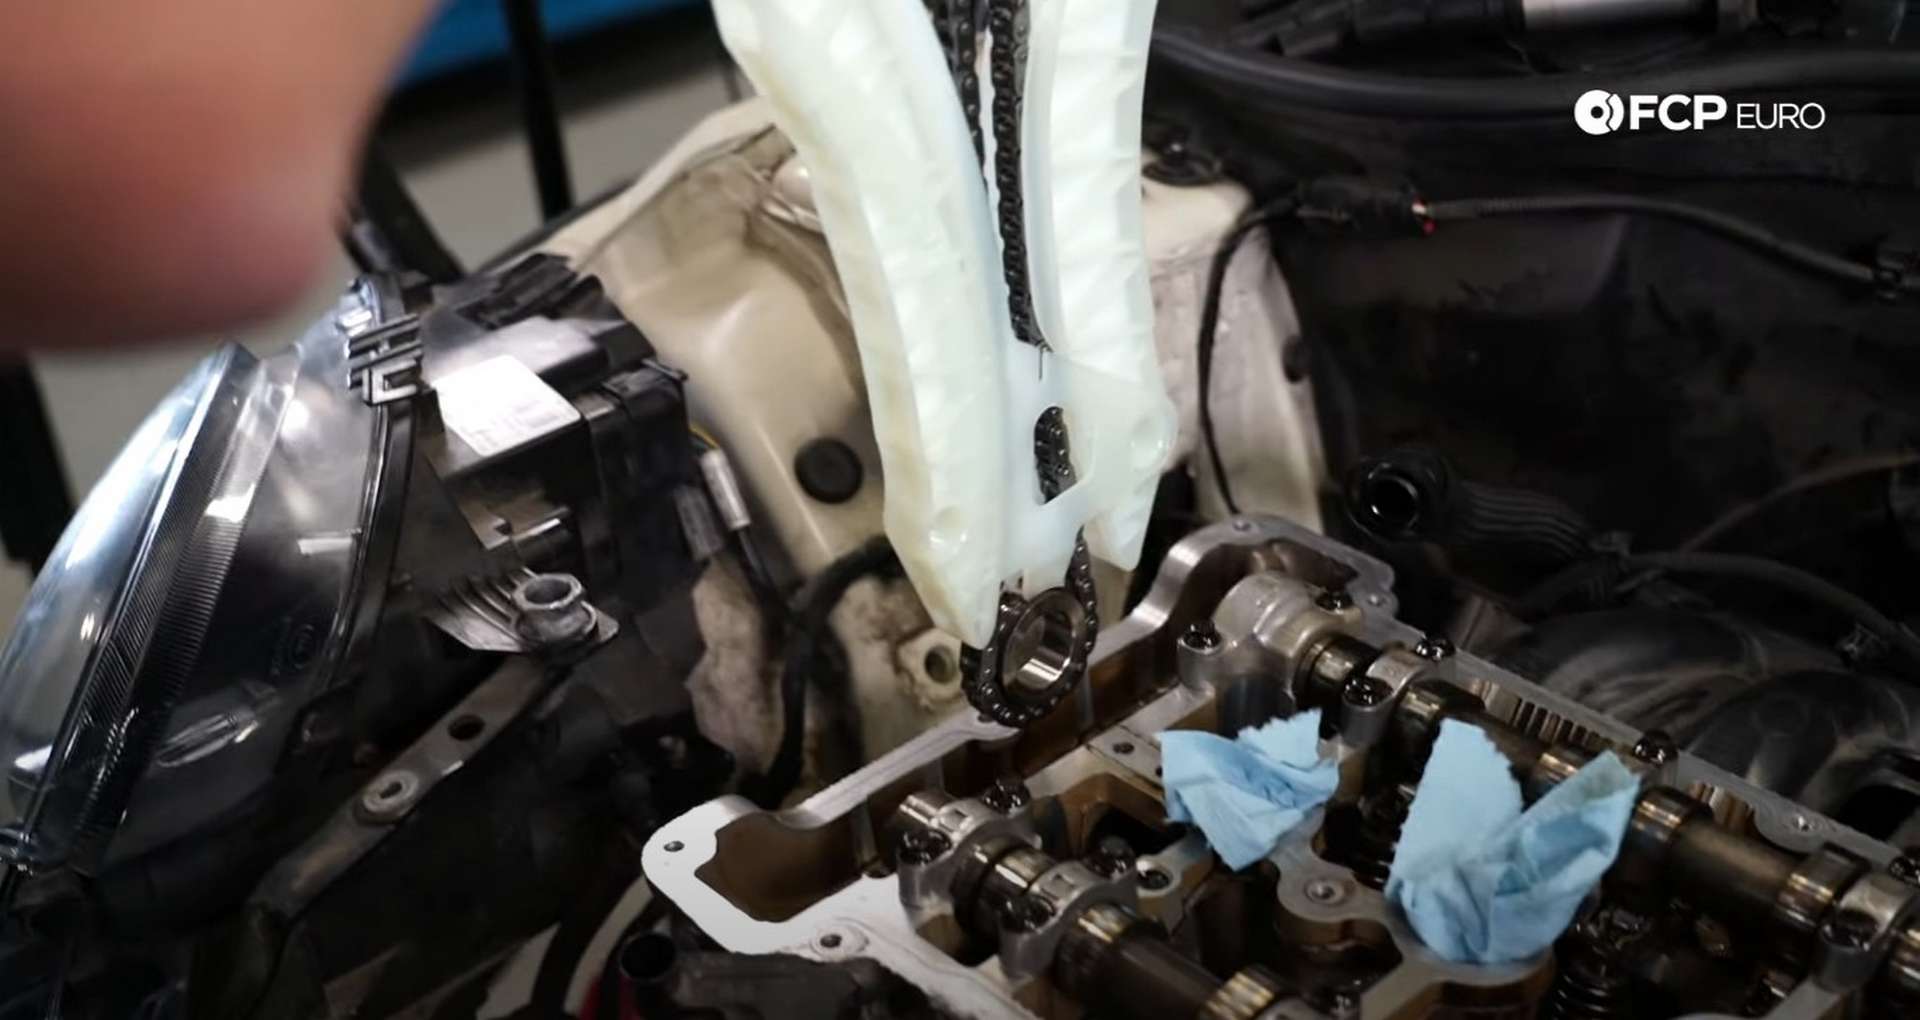
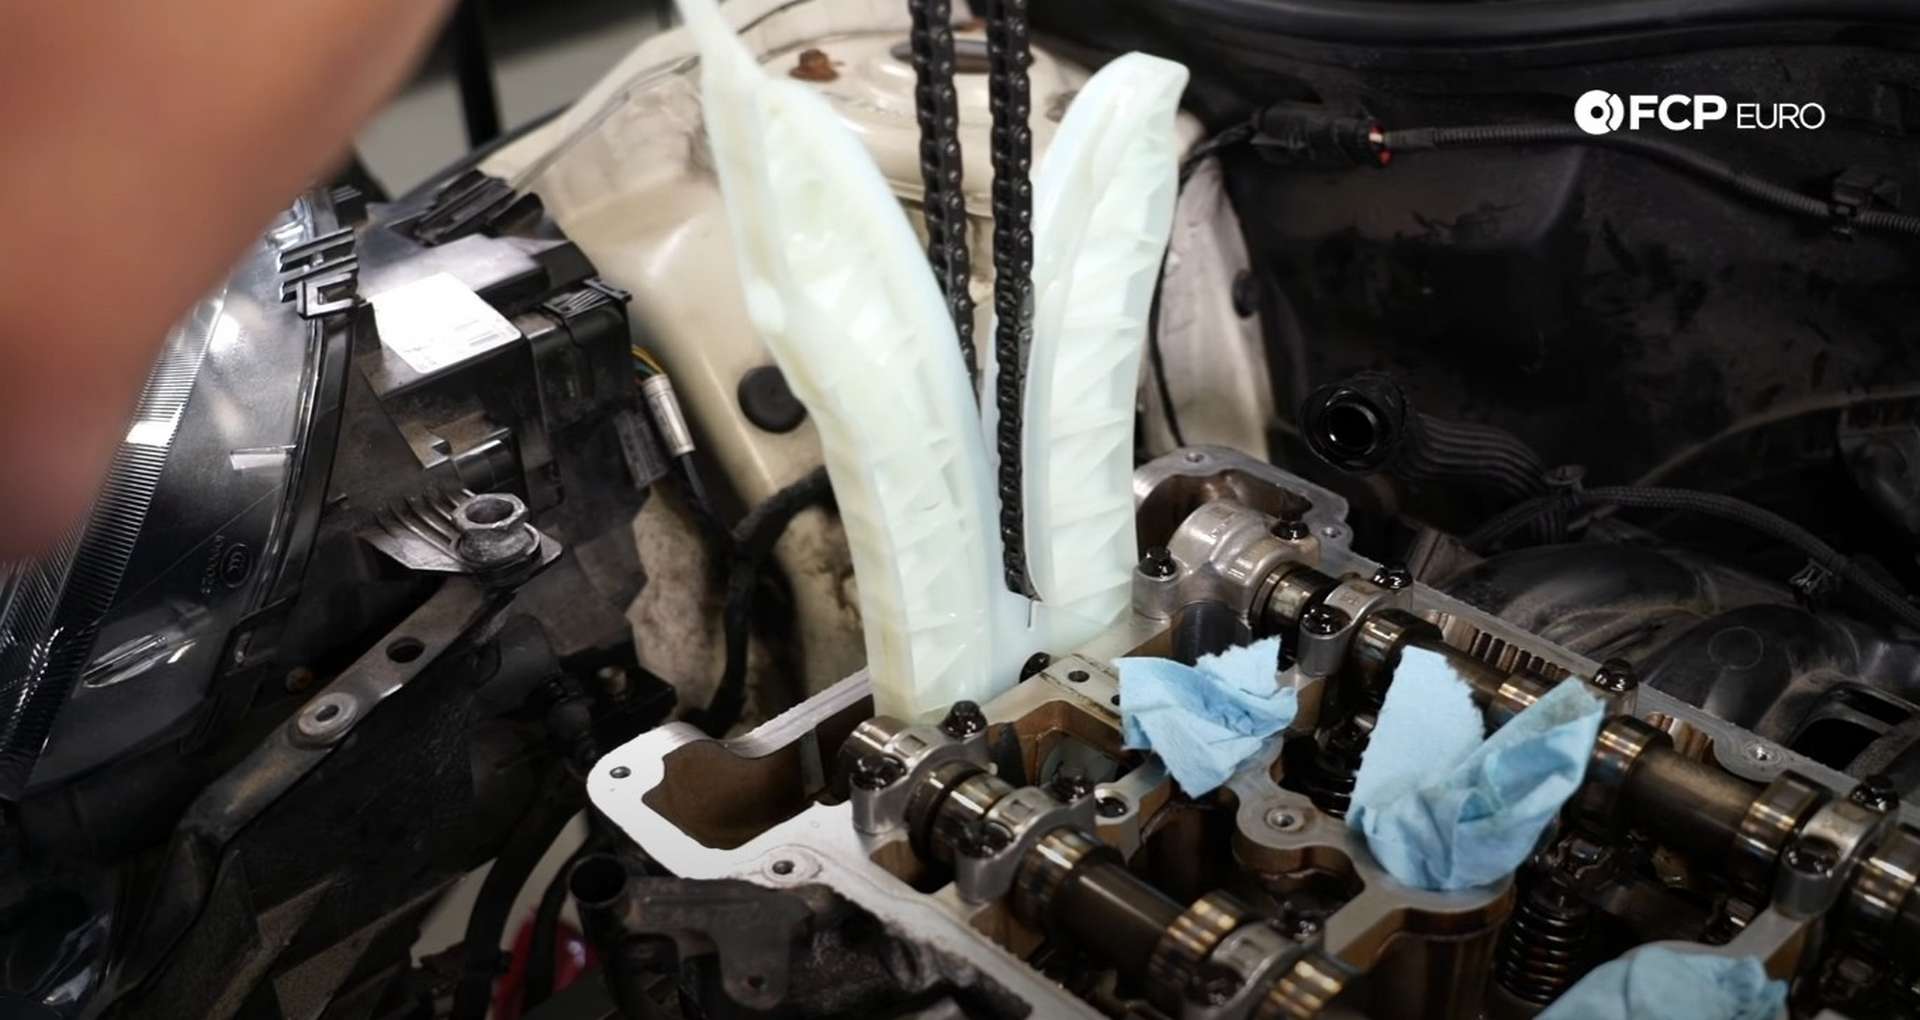
Let the assembly down into the engine. Use the screwdriver again to hold the chain from falling into the engine. Look through the wheel well to see where the timing sprocket is in relation to the crankshaft. Line them up if necessary, and then reinstall the crankshaft hub.
Head back up to the top of the engine and install the camshaft sprockets. The longer bolt and thicker gear sit on the left-side camshaft.

Thread the sprocket bolts in by hand before tightening them with an E14 socket. Then, apply a little oil to the threads of the new crankshaft bolt and thread that in.
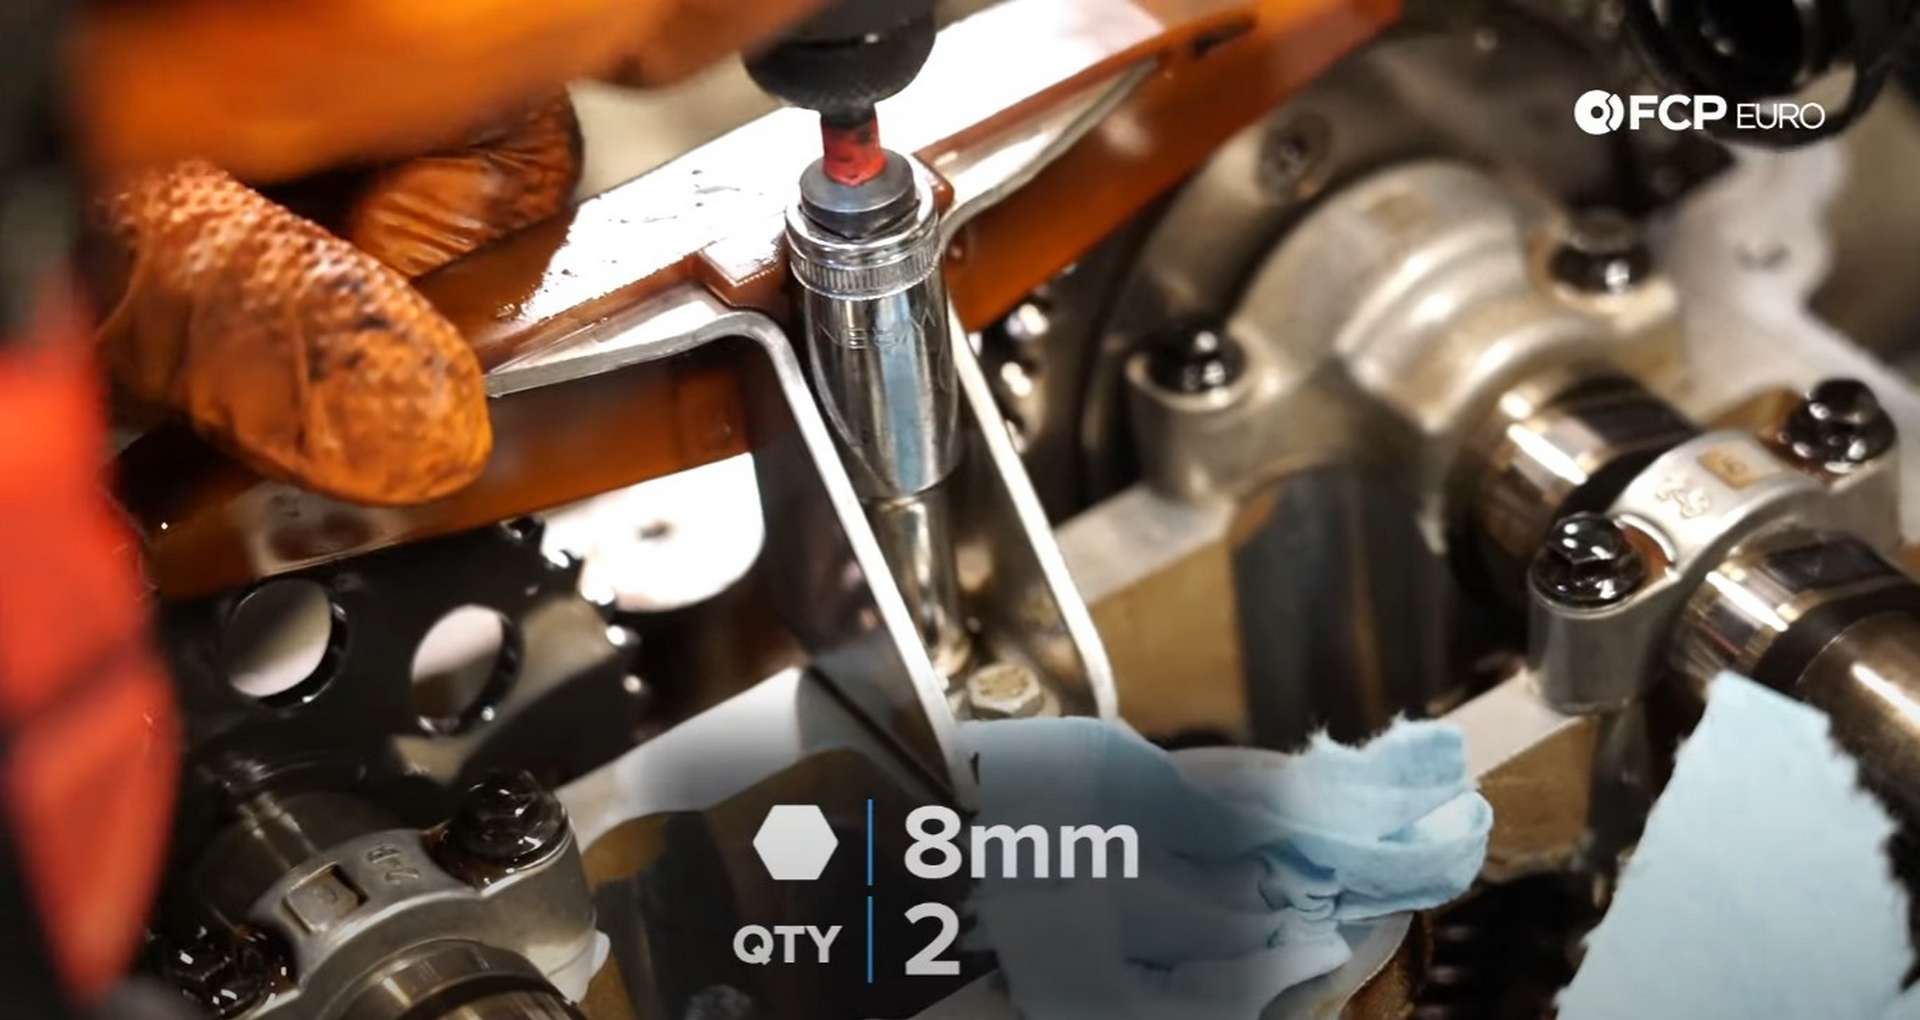
Next, lubricate the o-rings on the lower guide pins and thread them into the engine. Use a T45 bit socket to torque them to 24Nm. The upper guide pin uses an aluminum seal. Remove the old seal and slip on the new one provided in the kit. Then, thread in the upper guide pin and use a T45 bit socket to torque it to 30Nm.
After that, install the new upper timing chain guide. Thread in its two mounting bolts by hand to prevent cross-threading, and then use an 8mm socket to torque them to 8Nm.
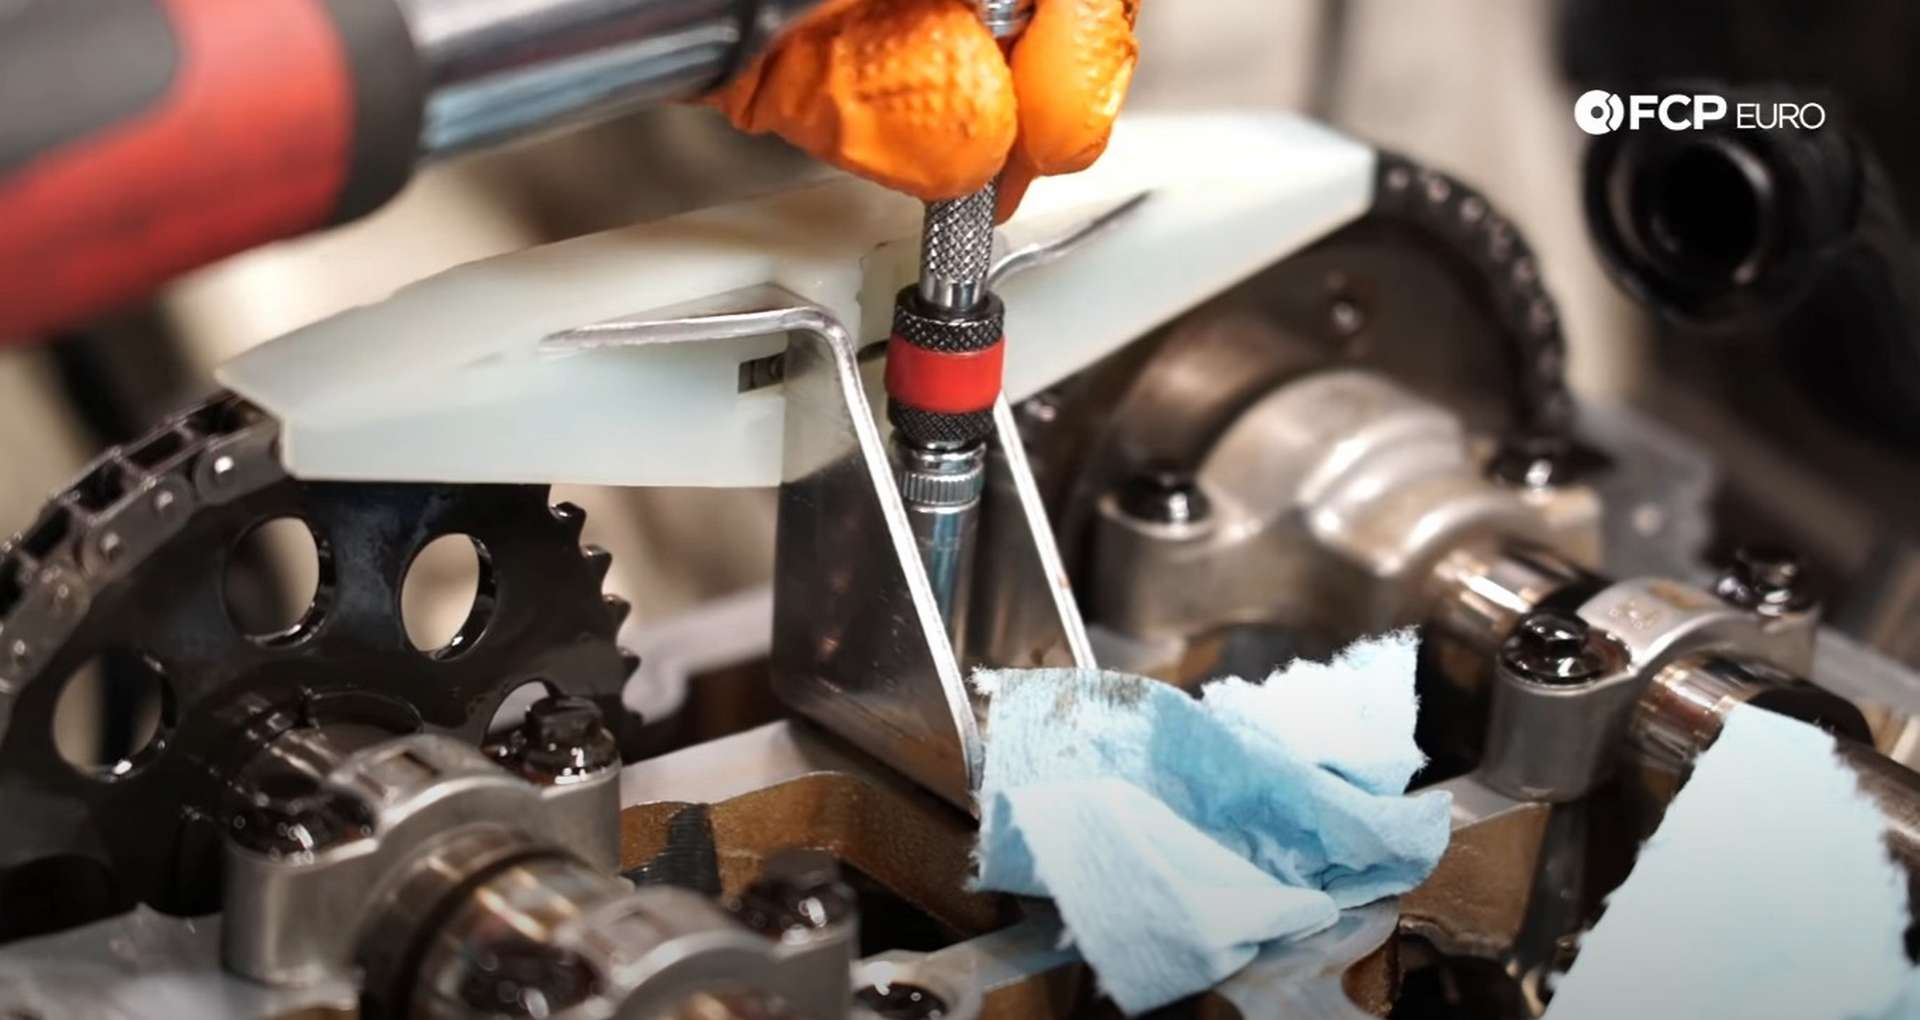
With the guides installed, thread the pre-tensioner tool into the engine where the chain tensioner sits. Thread the knurled portion until its stops, and then use an 8mm socket and a torque wrench to drive in the threaded rod until it reaches 0.4Nm of torque.
Ther is now tension applied to the chain, and the timing assembly’s components can be torqued to the proper spec. First, use an E14 socket to torque the exhaust camshaft sprocket bolt to 20Nm, plus another 90° of rotation. Then, use an E14 socket to torque the intake camshaft sprocket bolt to 20Nm, plus another 180° of rotation.
Next, head into the wheel well with an 18mm socket to torque the crankshaft bolt. Reinstall the crankshaft hub counter-hold tool and then torque the bolt to 50Nm, plus 180°. After that, remove the pre-tensioner tool and install the actual timing chain tensioner. Thread in the tensioner by hand to prevent cross-threading and then use a 27mm socket to torque the tensioner to 80Nm.
Lastly, remove the camshaft locks and turn the engine over to ensure that all of the timing marks line up and that the engine spins freely. Make a mark on the crankshaft hub and rotate the crankshaft, so the mark makes two rotations. After the rotations, the camshafts should be in the same place as when you removed the locks.
Step 7: Redress the front of the engine
Take the alternator belt’s idler pulley and fit it to the timing cover. Slide the pulley up from the bottom of the engine and thread in one of its three bolts. Then, come from the top of the engine and thread in the other two. Use a 10mm socket or wrench to tighten the bolts.
Next, fit the crankshaft pulley to the hub and thread in its three bolts. Use an E10 socket to torque the bolts to 28Nm.
Now you can reinstall the engine mount. Use a jack to lift the engine slightly to take the pressure off of the engine block holding tool. Then, use an E10 socket to remove the bolts mounting the tool to the engine, and install the automatic belt tensioner in its place with the same two bolts. Thread the bolts in by hand and torque them to 20Nm.


After that, refit the serpentine belt to the engine. Use the serpentine belt tool to rotate the tensioner to unlock it and let it apply tension to the belt after you ensure the belt is routed correctly. Refit the oxygen sensor bracket to the tensioner and use a 10mm socket to tighten its bolts.
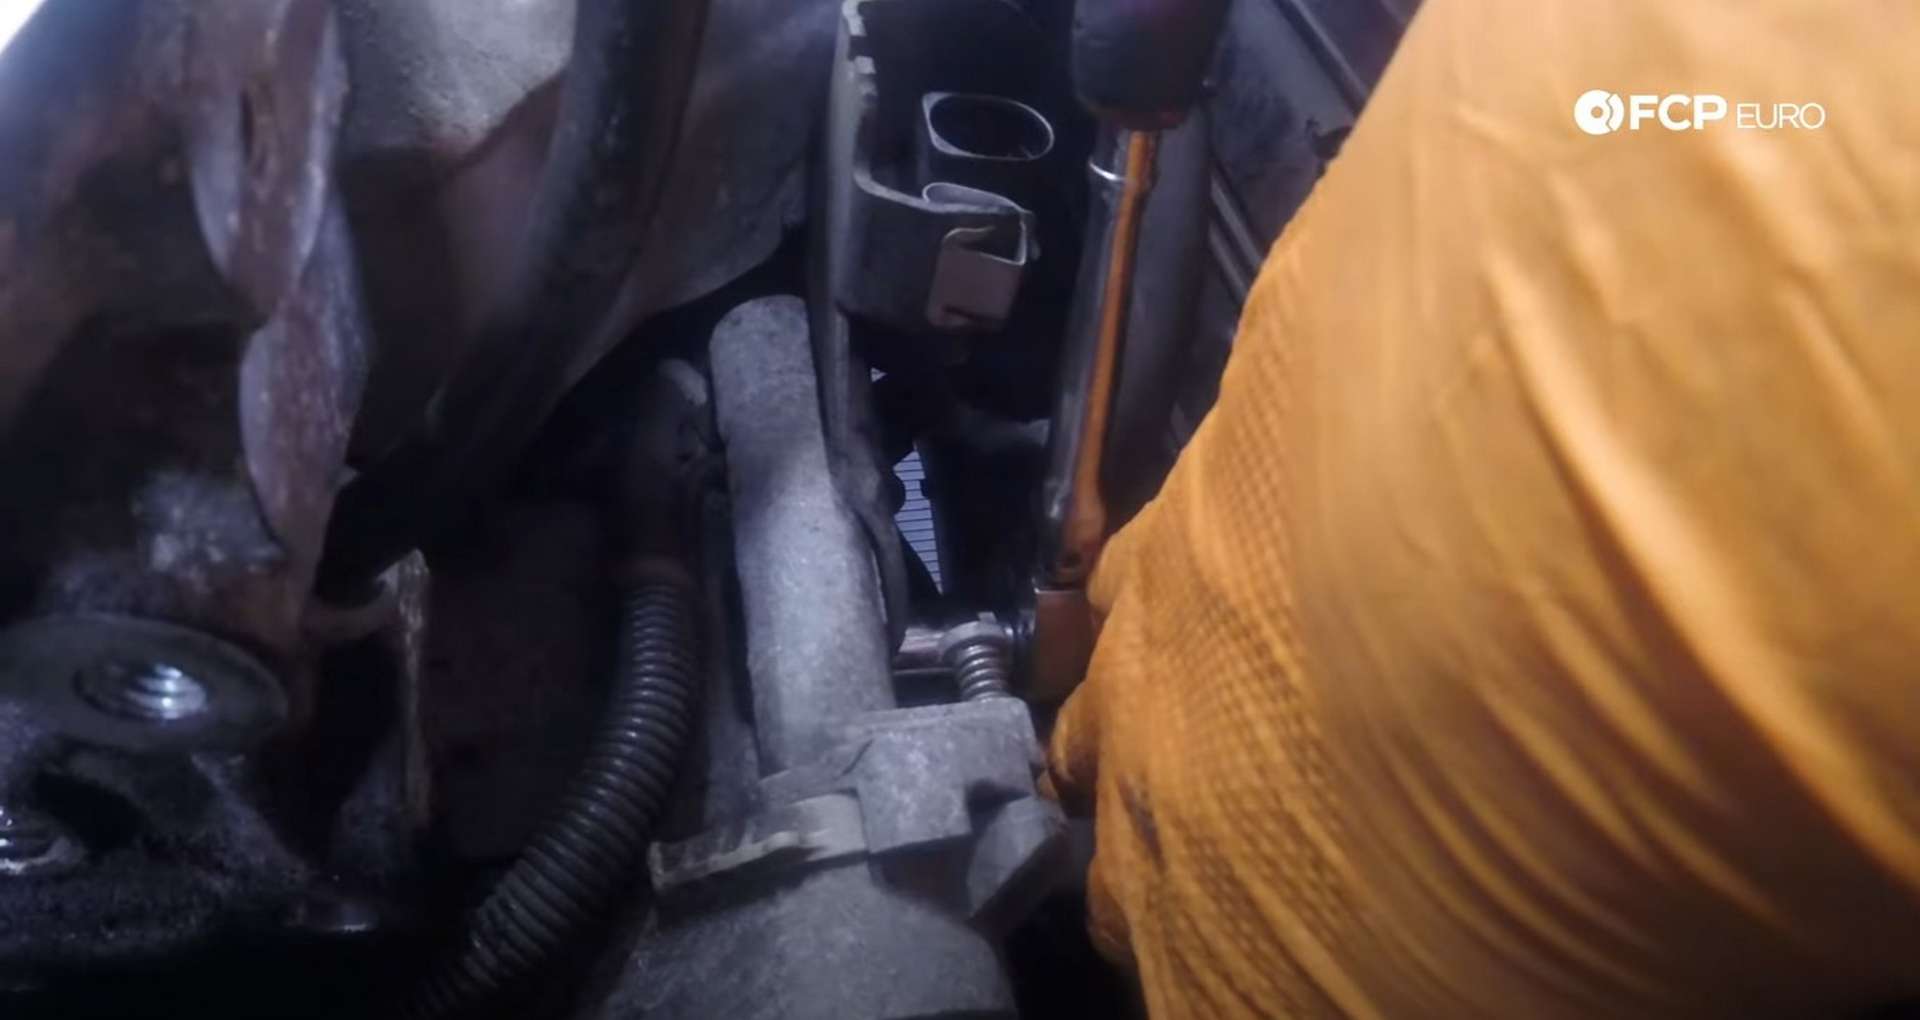
Next, refit the lower engine mount bracket to the timing cover. Thread in the four mounting bolts by hand before using an E12 socket to torque the bolts to 40Nm. After that, resecure the wiring harness to the timing cover below the bracket. Thread in the harness’ bolts by hand and use a 10mm socket or wrench to tighten them.
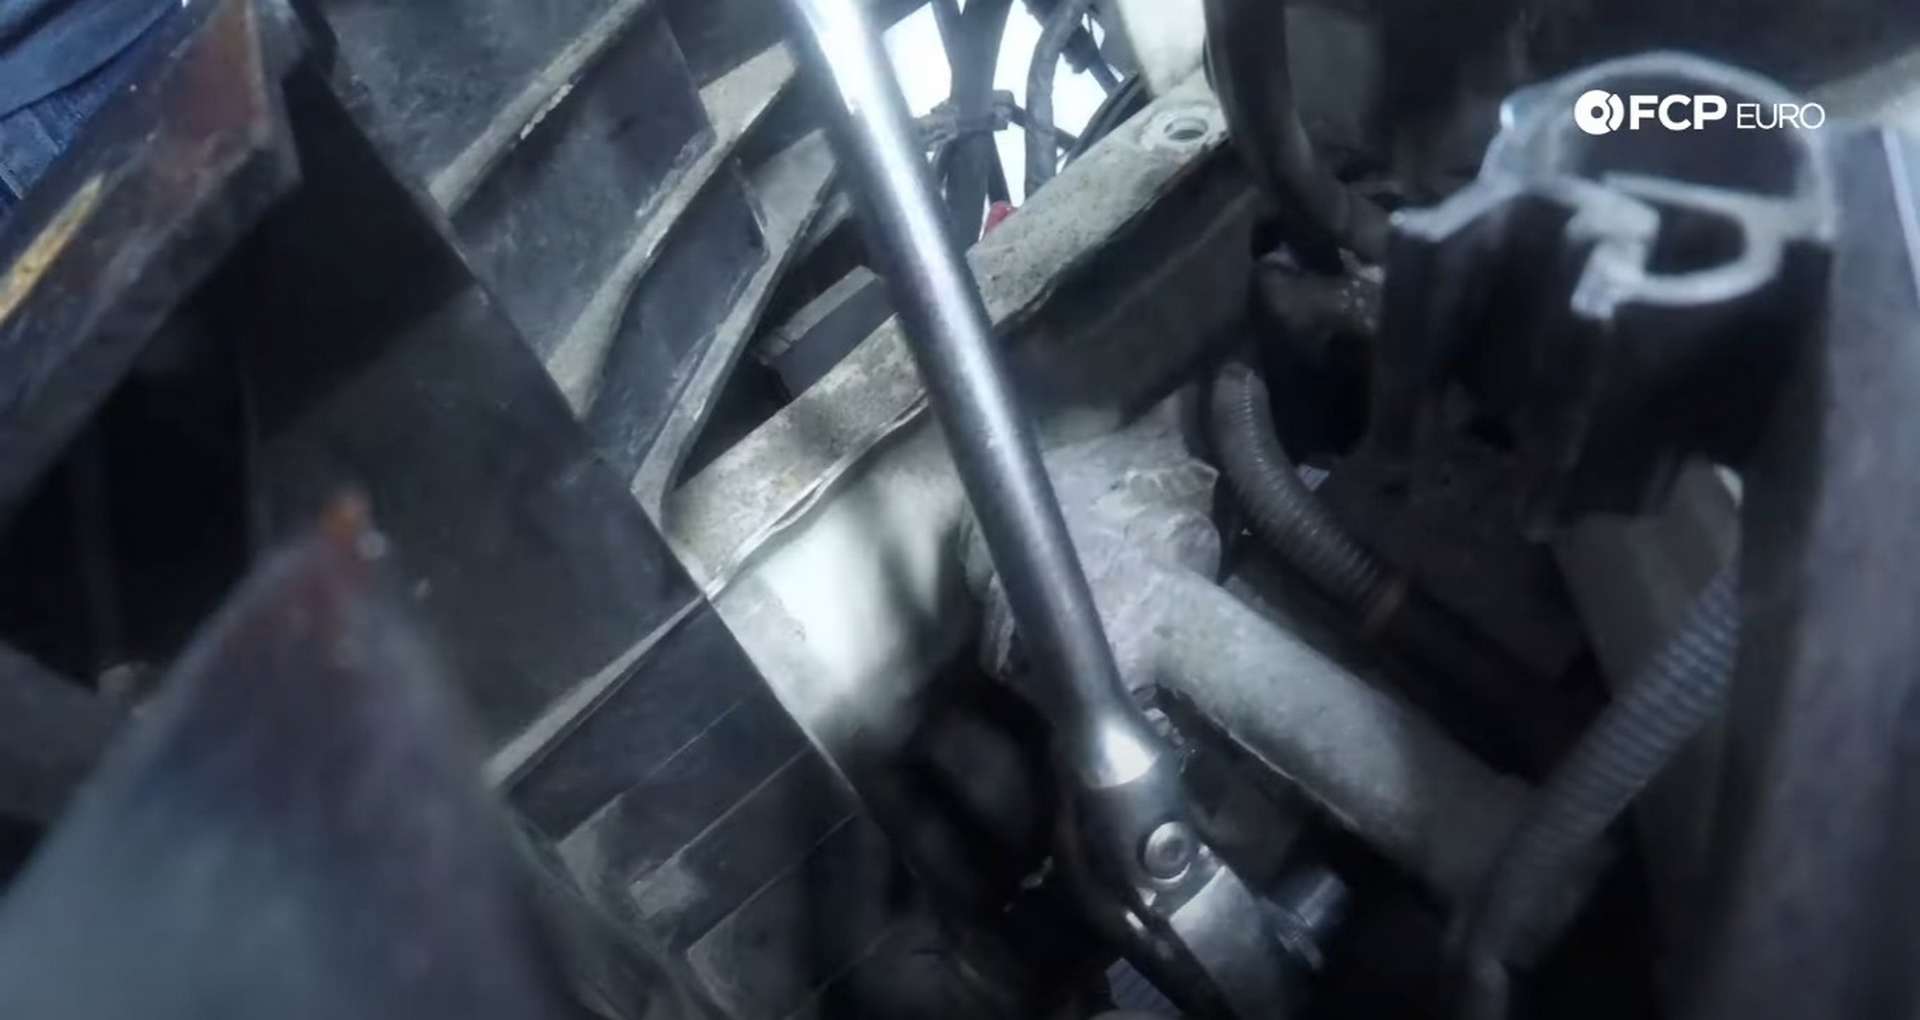
Take the engine mount and seat it into position on the chassis rail. Thread in all three bolts before torquing them down. Use a 13mm socket to torque the two lower bolts to 68Nm, then use a 16mm socket to torque the upper bolt to the same spec.
Fit the upper portion of the bracket over the engine mount and secure it to the engine. Thread in the four bolts by hand along with the singular nut. Use a 13mm socket on the bolts to torque them to 38Nm. Then, use an 18mm socket to torque the nut to 56Nm. Use the 13mm socket to reinstall the ground strap to the engine mount bracket as well.
Step 8: Reinstall the valve cover and its associated components
Remove the old valve cover gaskets and install the new gaskets supplied in the kit. Replace the spark plug tube seals as well.
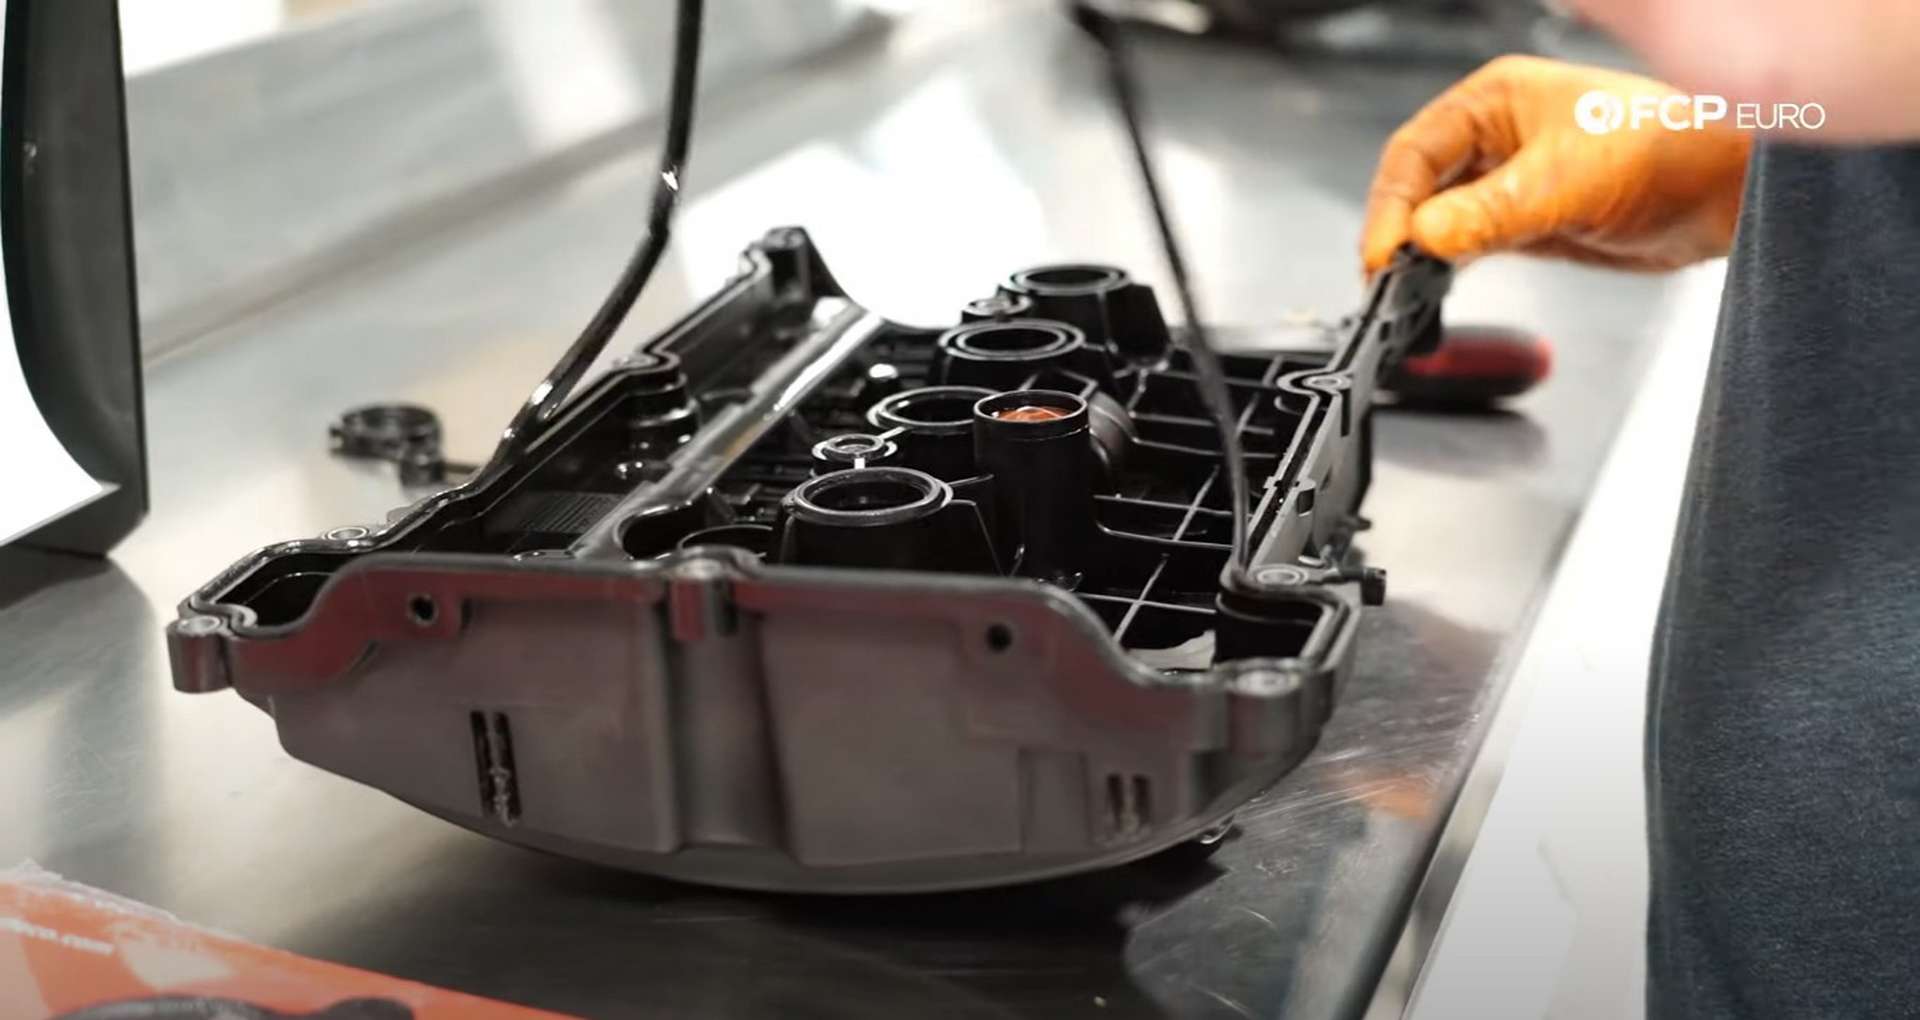
Then fit the valve cover onto the cylinder head. Thread in all of the bolts by hand before using a 10mm socket to run all of them in. Start with the center-most bolts and work your way outward.
Torque all of the bolts to 10Nm. Then, install the spark plugs with the BMW socket and torque them to 27Nm. After that, insert the ignition coils into the cylinder head.
Next, lay the ignition harness back onto the valve cover. Plug in all of the ignition coils, resecure the ground wire, and plug the harness back into the rest of the harness near the front of the engine. Then, plug in the camshaft position sensor.
Lastly, refit the plastic cover over the ignition harness and reconnect the crankcase breather line on the back of the valve cover.
Step 9: Refit the intake components
Start by refitting the elbow piece to the throttle body and tightening the clamp with a 7mm socket or nut driver. Then, refit the braided hose to the elbow and use a 7mm socket or nut driver to tighten its hose clamps.
Slide the charge pipe into place and ensure that it is properly locked into the elbow. Move under the car and fit the charge pipe hose over the intercooler. Secure the hose to the intercooler using a 7mm socket or nut driver to tighten the hose clamp.
Refit the small metal plate beneath the charge pipe hose clamp using a Phillips-head screwdriver for its two fasteners. In the engine bay, thread in the charge pipe mounting bolt by the A/C line and use a T25 bit socket to tighten it down. After that, reclip the A/C line into place, and reconnect the sensor on the charge pipe.
Next, slip the intake snorkel into place, followed by the airbox, before connecting the two. Push the airbox down into its rubber mounting grommet and secure it to the engine with its fastener.
Use a T25 but socket to secure the airbox’s fastener. Then, refit the air filter and top half of the airbox. Plugin the mass airflow sensor and PCV sensor, reconnect the PCV hose to the valve cover and use a T20 bit socket to tighten all four airbox fasteners.
Finally, secure the hose clamp for the turbocharger inlet with a 7mm socket or nut driver.
Step 9: Test your handy work
If you drained the oil from the engine for this job, refill the engine and change the filter before anything else. Once you know that the engine is filled with oil, move on.
With everything, the engine needs to run, reinstalled, start the car. It doesn’t need to run for a long time, just enough to ensure that the job was done properly. Shut the car off before moving on.
Step 10: Reinstall the U-brace
Take the U-brace and fit it into position. Reclip the hood cable and refasten the hood latches into the brace. Use a T30 bit socket to tighten the hood latch fasteners. After that, reconnect the hood latch cables in the little black box next to the driver’s side headlight.
Next, thread in the three 10mm bolts through the brace and into the chassis before threading in the four 13mm bolts.
Thread in all of the headlight bolts and tighten them with a 10mm socket. Then, thread in the coolant tank bolt and tighten it with the same 10mm socket.
Lastly, refit the four clips for the grill and the single clip for the washer fluid tank.
Step 11: Reinstall the fender liner
Take the portion of the fender liner that you moved out of the way, and fit it back into position. Press in all its mounting clips and then use a T30 bit socket to install the single fastener.
MINI R56 Timing Torque Specs:
- MINI Upper Timing Chain Guide Pin = 30Nm or 22.1 ft-lbs, of torque
- MINI Lower Timing Chain Guide Pins = 24Nm or 17.7 ft-lbs, of torque
- MINI Upper Timing Chain Guide Bolts = 8Nm or 6 ft-lbs, of torque
- MINI Timing Chain Tensioner Tool = 0.4Nm or 0.3 ft-lbs of torque
- MINI Exhaust Camshaft Sprocket Bolt = 20Nm or 14.7 ft-lbs, of torque plus 90°
- MINI Intake Camshaft Sprocket Bolt = 20Nm or 14.7 ft-lbs, of torque plus 180°
- MINI Crankshaft Bolt = 50Nm or 37 ft-lbs, of torque plus 180°
- MINI Timing Chain Tensioner = 80Nm or 59 ft-lbs, of torque
- MINI Crankshaft Pulley Bolts = 28Nm or 20.7 ft-lbs, of torque
- MINI Belt Tensioner Bolts = 20Nm or 14.7 ft-lbs, of torque
- MINI Lower Engine Mount Bracket Bolts = 40Nm or 29.4 ft-lbs, of torque
- MINI Engine Mount Lower Bolts = 68Nm or 50.2 ft-lbs, of torque
- MINI Engine Mount Upper Bolt = 68Nm or 50.2 ft-lbs, of torque
- MINI Upper Engine Mount Bracket Bolts = 38Nm or 28 ft-lbs, of torque
- MINI Engine Mount Nut = 56Nm or 41.3 ft-lbs, of torque
- MINI Valve Cover Bolts = 10Nm or 7.4 ft-lbs, of torque
- MINI Spark Plugs = 27Nm or 20 ft-lbs, of torque
And there you have it, a detailed DIY on how to replace the timing chain on your MINI. Piece of cake, right? If you're interested in more DIYs for your MINI, you can visit fcpeuro.com and subscribe to our YouTube channel.


