- 03/17/2016
- 1 Min Read
- By: Alex Fiehl
How to Reinforce a Broken Headlight Retainer on a Saab 9-3


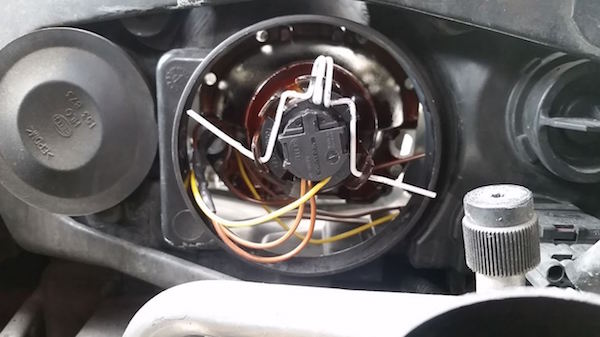
The last time I changed the low beam headlights I was able to secure the headlights with picture hanging wire:

The problem with picture wire is that it’s a pain to route and secure the wire in limited space each time the bulb needs to be replaced. These cars are apparently notorious for going through low beam headlights as they’re also used as daytime running lights. When I recently had to change one out I took the opportunity to devise a better method.
I initially thought to design+fabricate new tabs using duct sheet metal and some snips but thought it might cut me every time I swapped a bulb. Then I had a safer idea to reapply how other cars keep their headlights in, here’s an example:

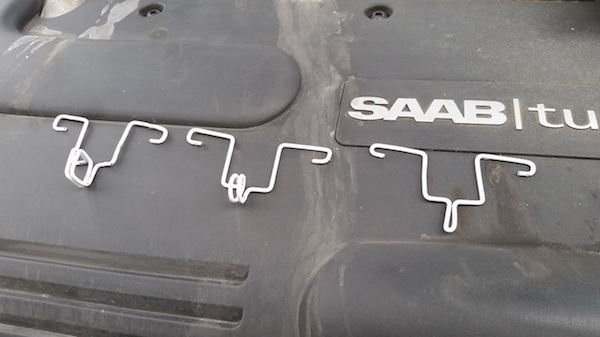
I came up with this design, fabricated+installed the reinforcement and it now works better than flexible picture wire method such that I can more easily remove+reassemble the headlight:

Tools you’ll need:
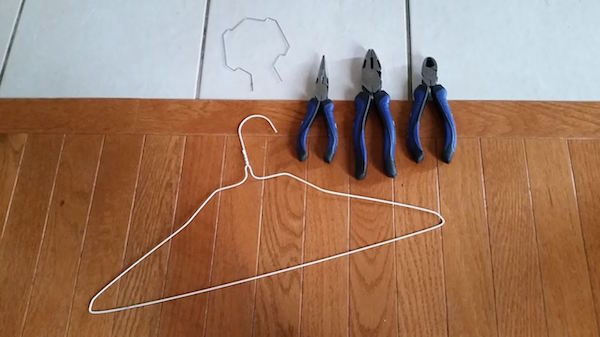
- A metal hanger from the dry cleaners (I had something thinner shown above but I opted to use a popular metal hanger.)
- A set of pliers (needle nose, cutting, etc)
- About 60 minutes of free time
Ready to make your own headlight reinforcements?
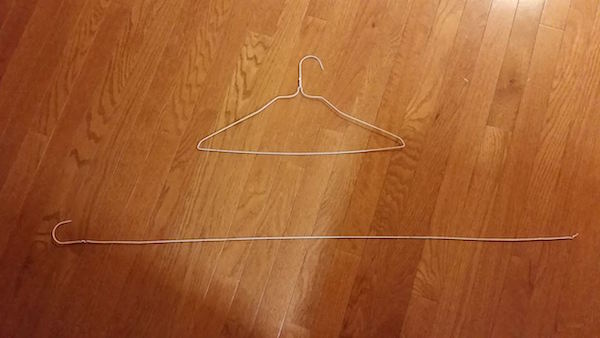
Refer to my DIY to replace low beam headlights to get access to the headlight retainer, avoid touching the bulb to prevent transfer of skin oils which reduces bulb life, then follow along:Take a metal hanger and straighten it out:
Using a pair of pliers, start shaping it so that it has contact points on each of the 3 tab slots on the headlight lens housing:
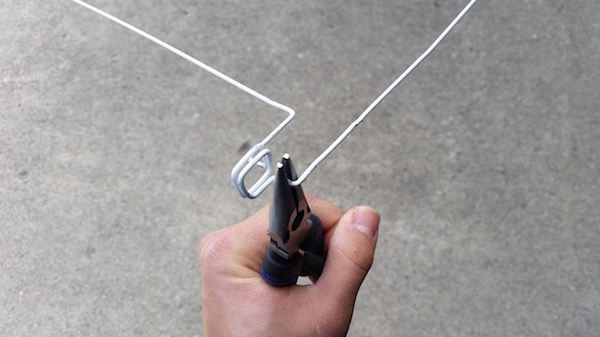
Test fit as you go, trying to keep as close to the bulb connector as possible:
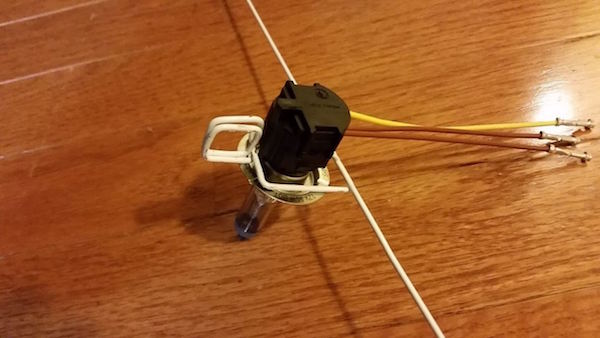
As you get close to the final product, do a test install. A metal hanger is just thin enough to work. If you have something thinner you may want to give it a shot as it should fit better (I had an old metal wire brace from a prior DIY to replace a door mirror glass that I could have used).
I rolled the ends for a better fit and finished up fabrication for one side
I tried different shapes for the middle contact point. Feel free to experiment as they all seemed to work for me. The one on the right worked best for the driver side headlight and I ended up using the middle one for the passenger side.
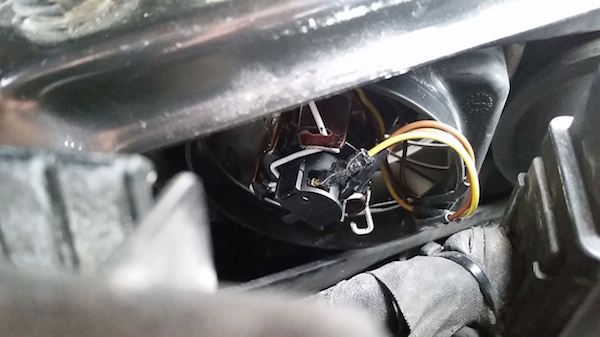
Here’s the driver side installation:
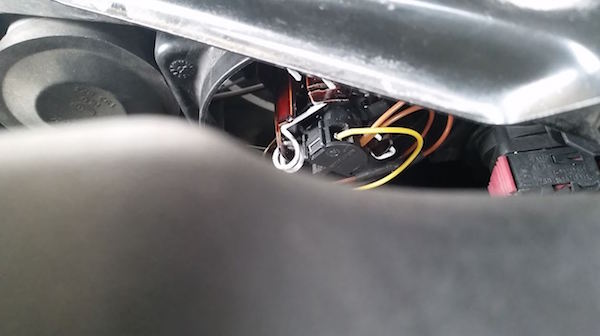
Here’s the passenger side install (sorry, this was the best angle I could get but you get the idea from the pics above):
Do a few cycles of removing and installing these so you feel comfortable that this works for you. Otherwise try changing the shape to find a better design. At the end of the day you want something that not only secures the headlight in place but is also relatively easy to remove and reinstall.


