You don’t think about your brake system until it stops functioning. Unfortunately, by then it might be too late. Performing a basic brake inspection can be done by anyone, nearly anywhere, with minimal special tools.
The car shown below that we're following along with is a 2000 Audi A8, an early build with single-piston vented front disks and solid rears. For reference, this car is only driven during winter months, and when I test drove it, I noticed that I had almost no braking power. The pads felt more like blocks of wood, the car required generous amounts of pedal force to stop, and I couldn’t even lock up the wheels despite not having ABS.
This was when I realized it was time to do a basic, but thorough, brake inspection. And while performing my free brake inspection, what I found was quite alarming.
Brake Inspection Process
Brake Fluid
To start the brake inspection process, start with the hydraulic brake fluid; this is an incompressible fluid that acts as an extension of the force you apply to the brake pedal. The pressure is extended to each wheel and is what provides pressure to the brake calipers to clamp your brake pads against your rotors.
When looking at your brake fluid, you're looking for the fluid level to be within the minimum and maximum of the fluid reservoir's fill lines. It should be a nice amber color. If you didn't know, brake fluid has a service life generally of 1-2 years and should be replaced every two years no matter what. If you would like to learn more about this and what brake fluid you should be using for your car, you can read "How To Pick The Right Brake Fluid For Your Car."
If the fluid level is sufficient and you've replaced it within the last two years, move on to the brake discs.
Brake Discs/Rotors
The next step in your brake inspection is to measure the thickness of the rotors. This will tell you how much wear they've incurred since they were brand new. All brake discs have a minimum thickness specification listed on the manufacturer's website. You will want to make sure that they don't fall below the minimum thickness; they will need to be replaced if they do.
To measure the thickness of your rotors, you will need a few tools. You will need to safely jack one corner of your car in the air at a time and support it while you have the wheel off. We advise using a quality floor jack and jack stands.
The last tool you will need is called a Brake Disc Caliper Gauge. These are essentially analog or digital calipers with extended reach jaws. These jaws help to overcome any lips on the discs themselves that might have developed over time.
Caliper gauges to measure your brake discs don't need to be expensive or brand name, they just need to function. We recommend purchasing a set along the lines of these below:
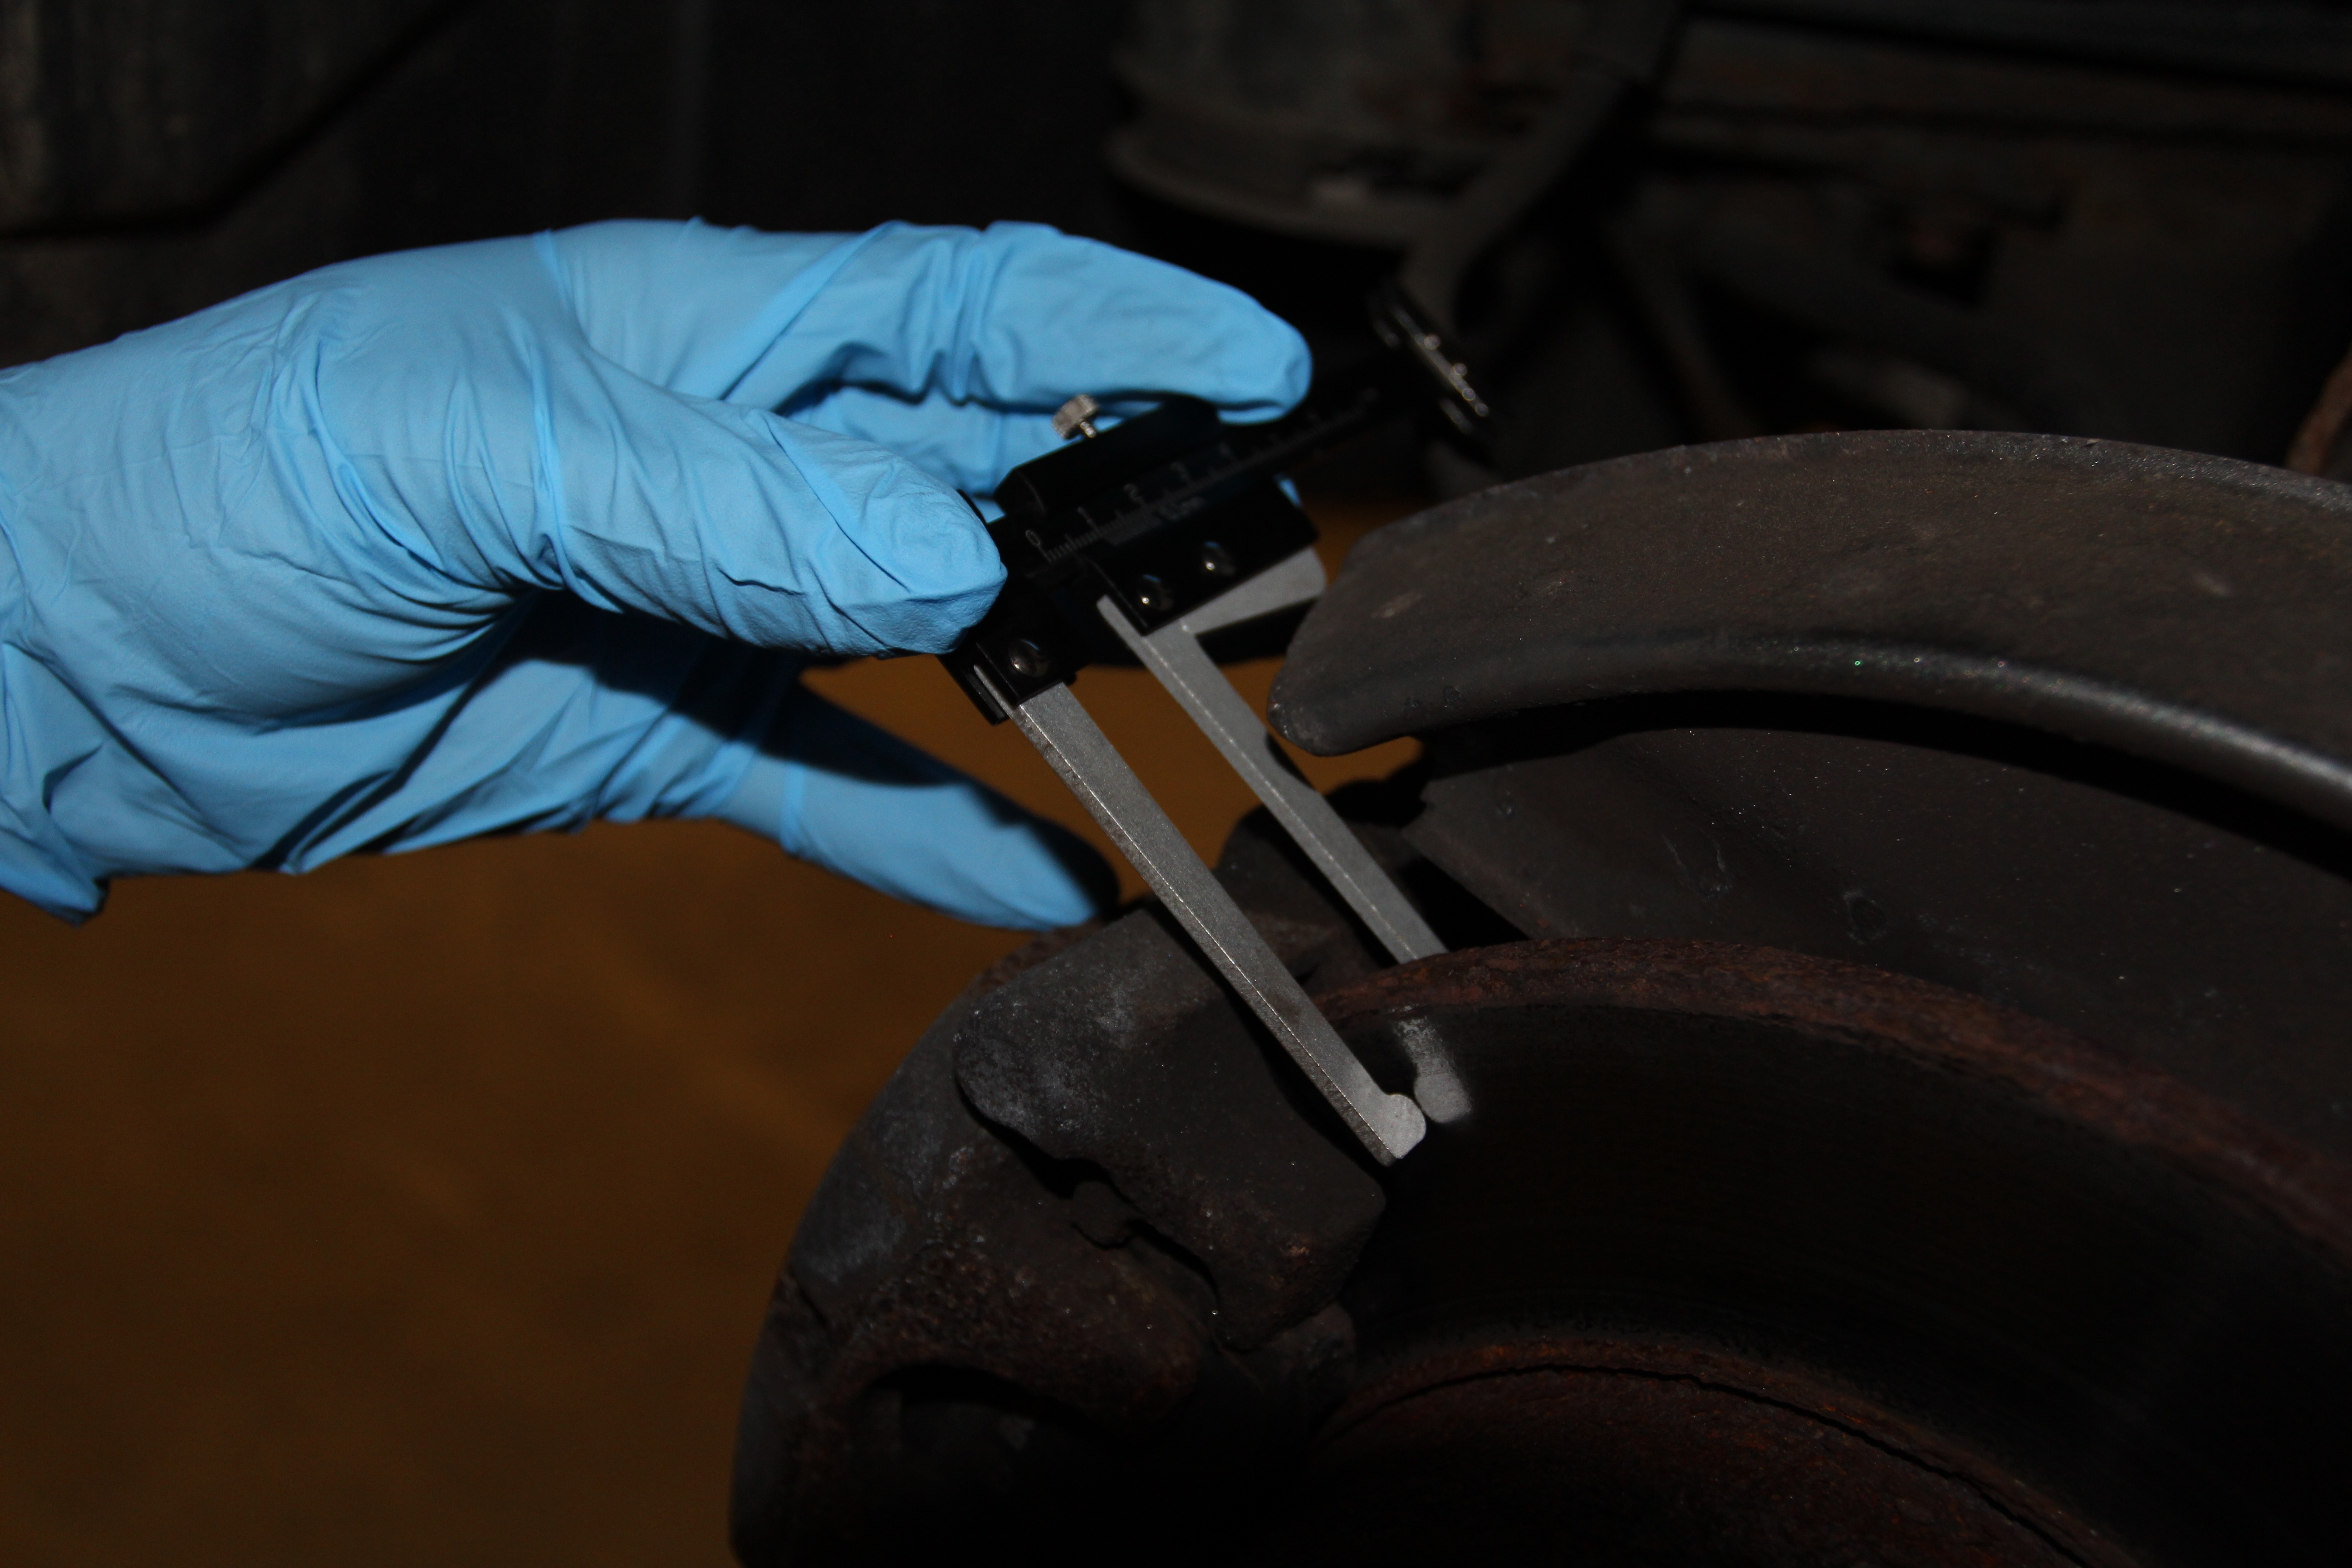
Even if your brake discs are within manufacturer spec for thickness, like mine were, you will want to inspect them for unusual signs of wear. The discs should be solid and free of any missing chunks or slivers of metal. Beyond these glaringly obvious signs, you want to make sure that the rotors are relatively smooth and that they're not grooved.
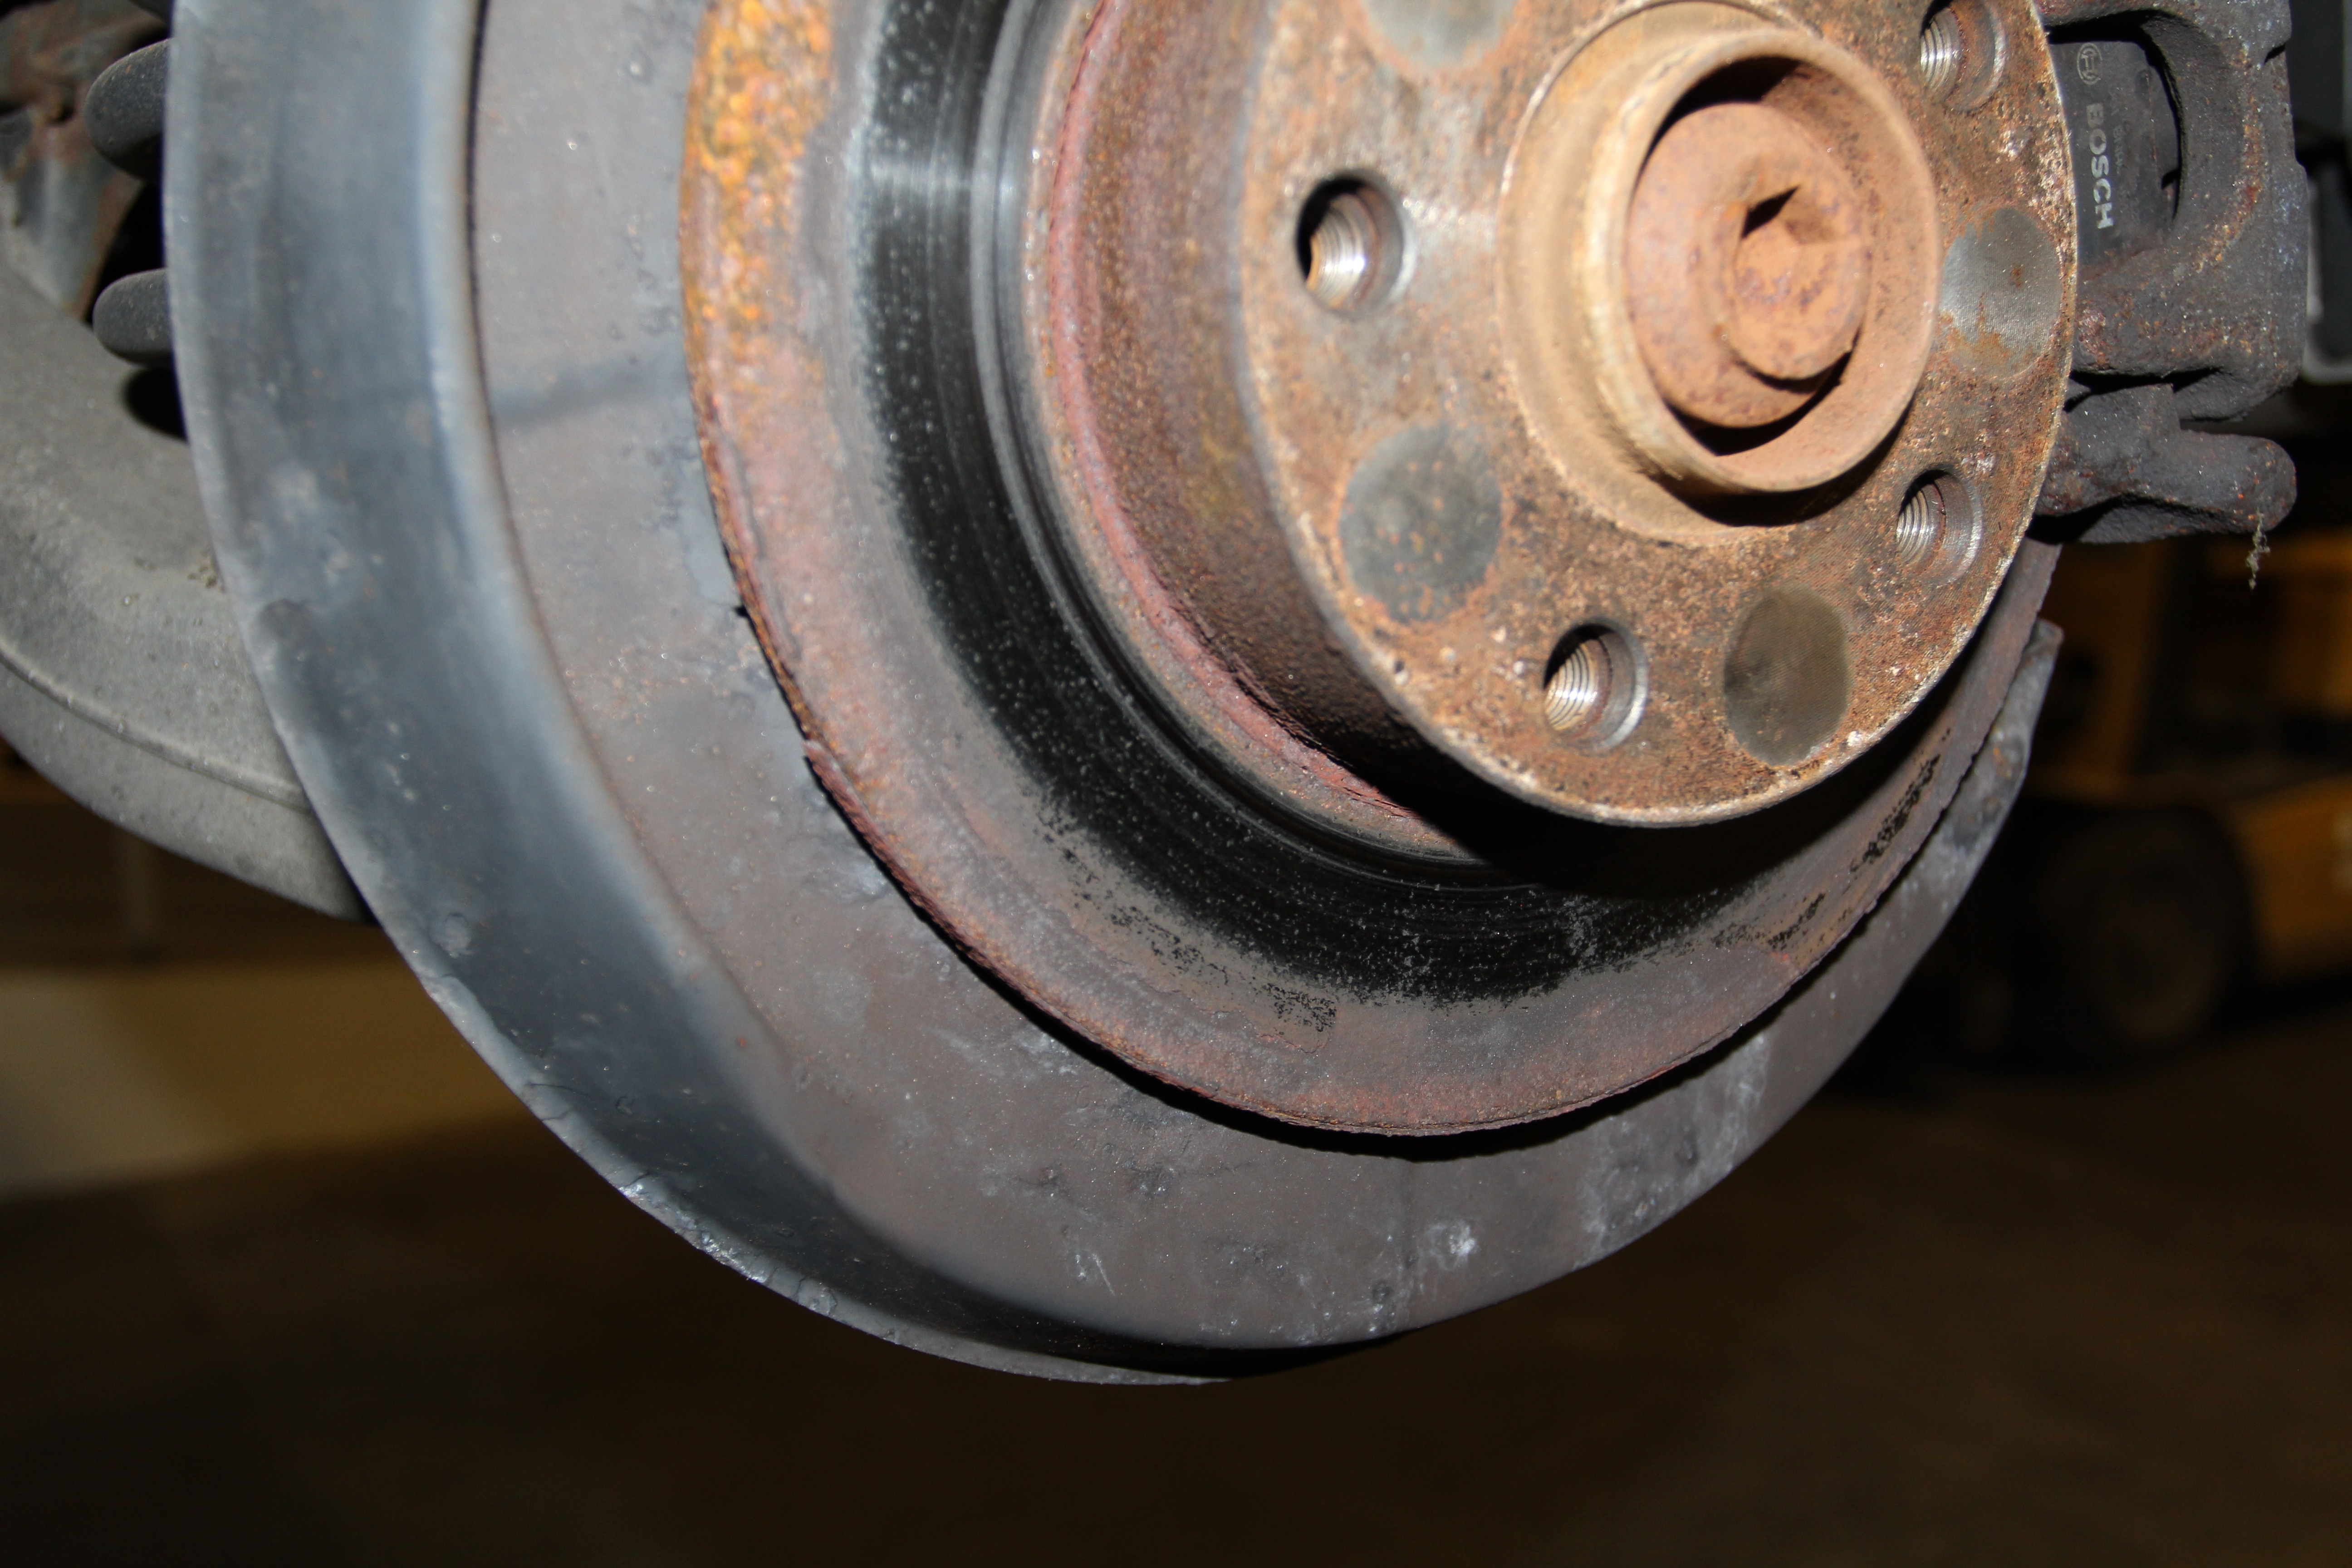
Grooved rotors provide less surface area for your brake pads to make contact with, reducing the overall stopping power. They will also wear your brake pads unevenly, which will result in them needing to be replaced prematurely.
You can see in the photo below that my discs had sections of metal completely missing and grooved pretty heavily. These are both signs that the discs should be replaced. When replacing discs, we advise replacing both sides at once to ensure even stopping power from side to side.
Brake Pads
Brake pads can easily be the source of your braking issues and, most commonly, are the culprit. When doing a brake pad inspection, you are looking for them to meet the manufacturer's minimum thickness specification first and foremost. A brake pad that isn't there can't stop your car.
The next step is to look at how they're wearing. Even if there is plenty of friction material remaining, if they're wearing unevenly or have deep grooves in them from your rotors, they won't work effectively.
As you can see in the photo below, my brake pads wore unevenly. Less than half of the pad is actually making contact with the brake disc surface. You can tell this by the angle of the brake pad friction surface in the two brake pads on the right side of the photo.
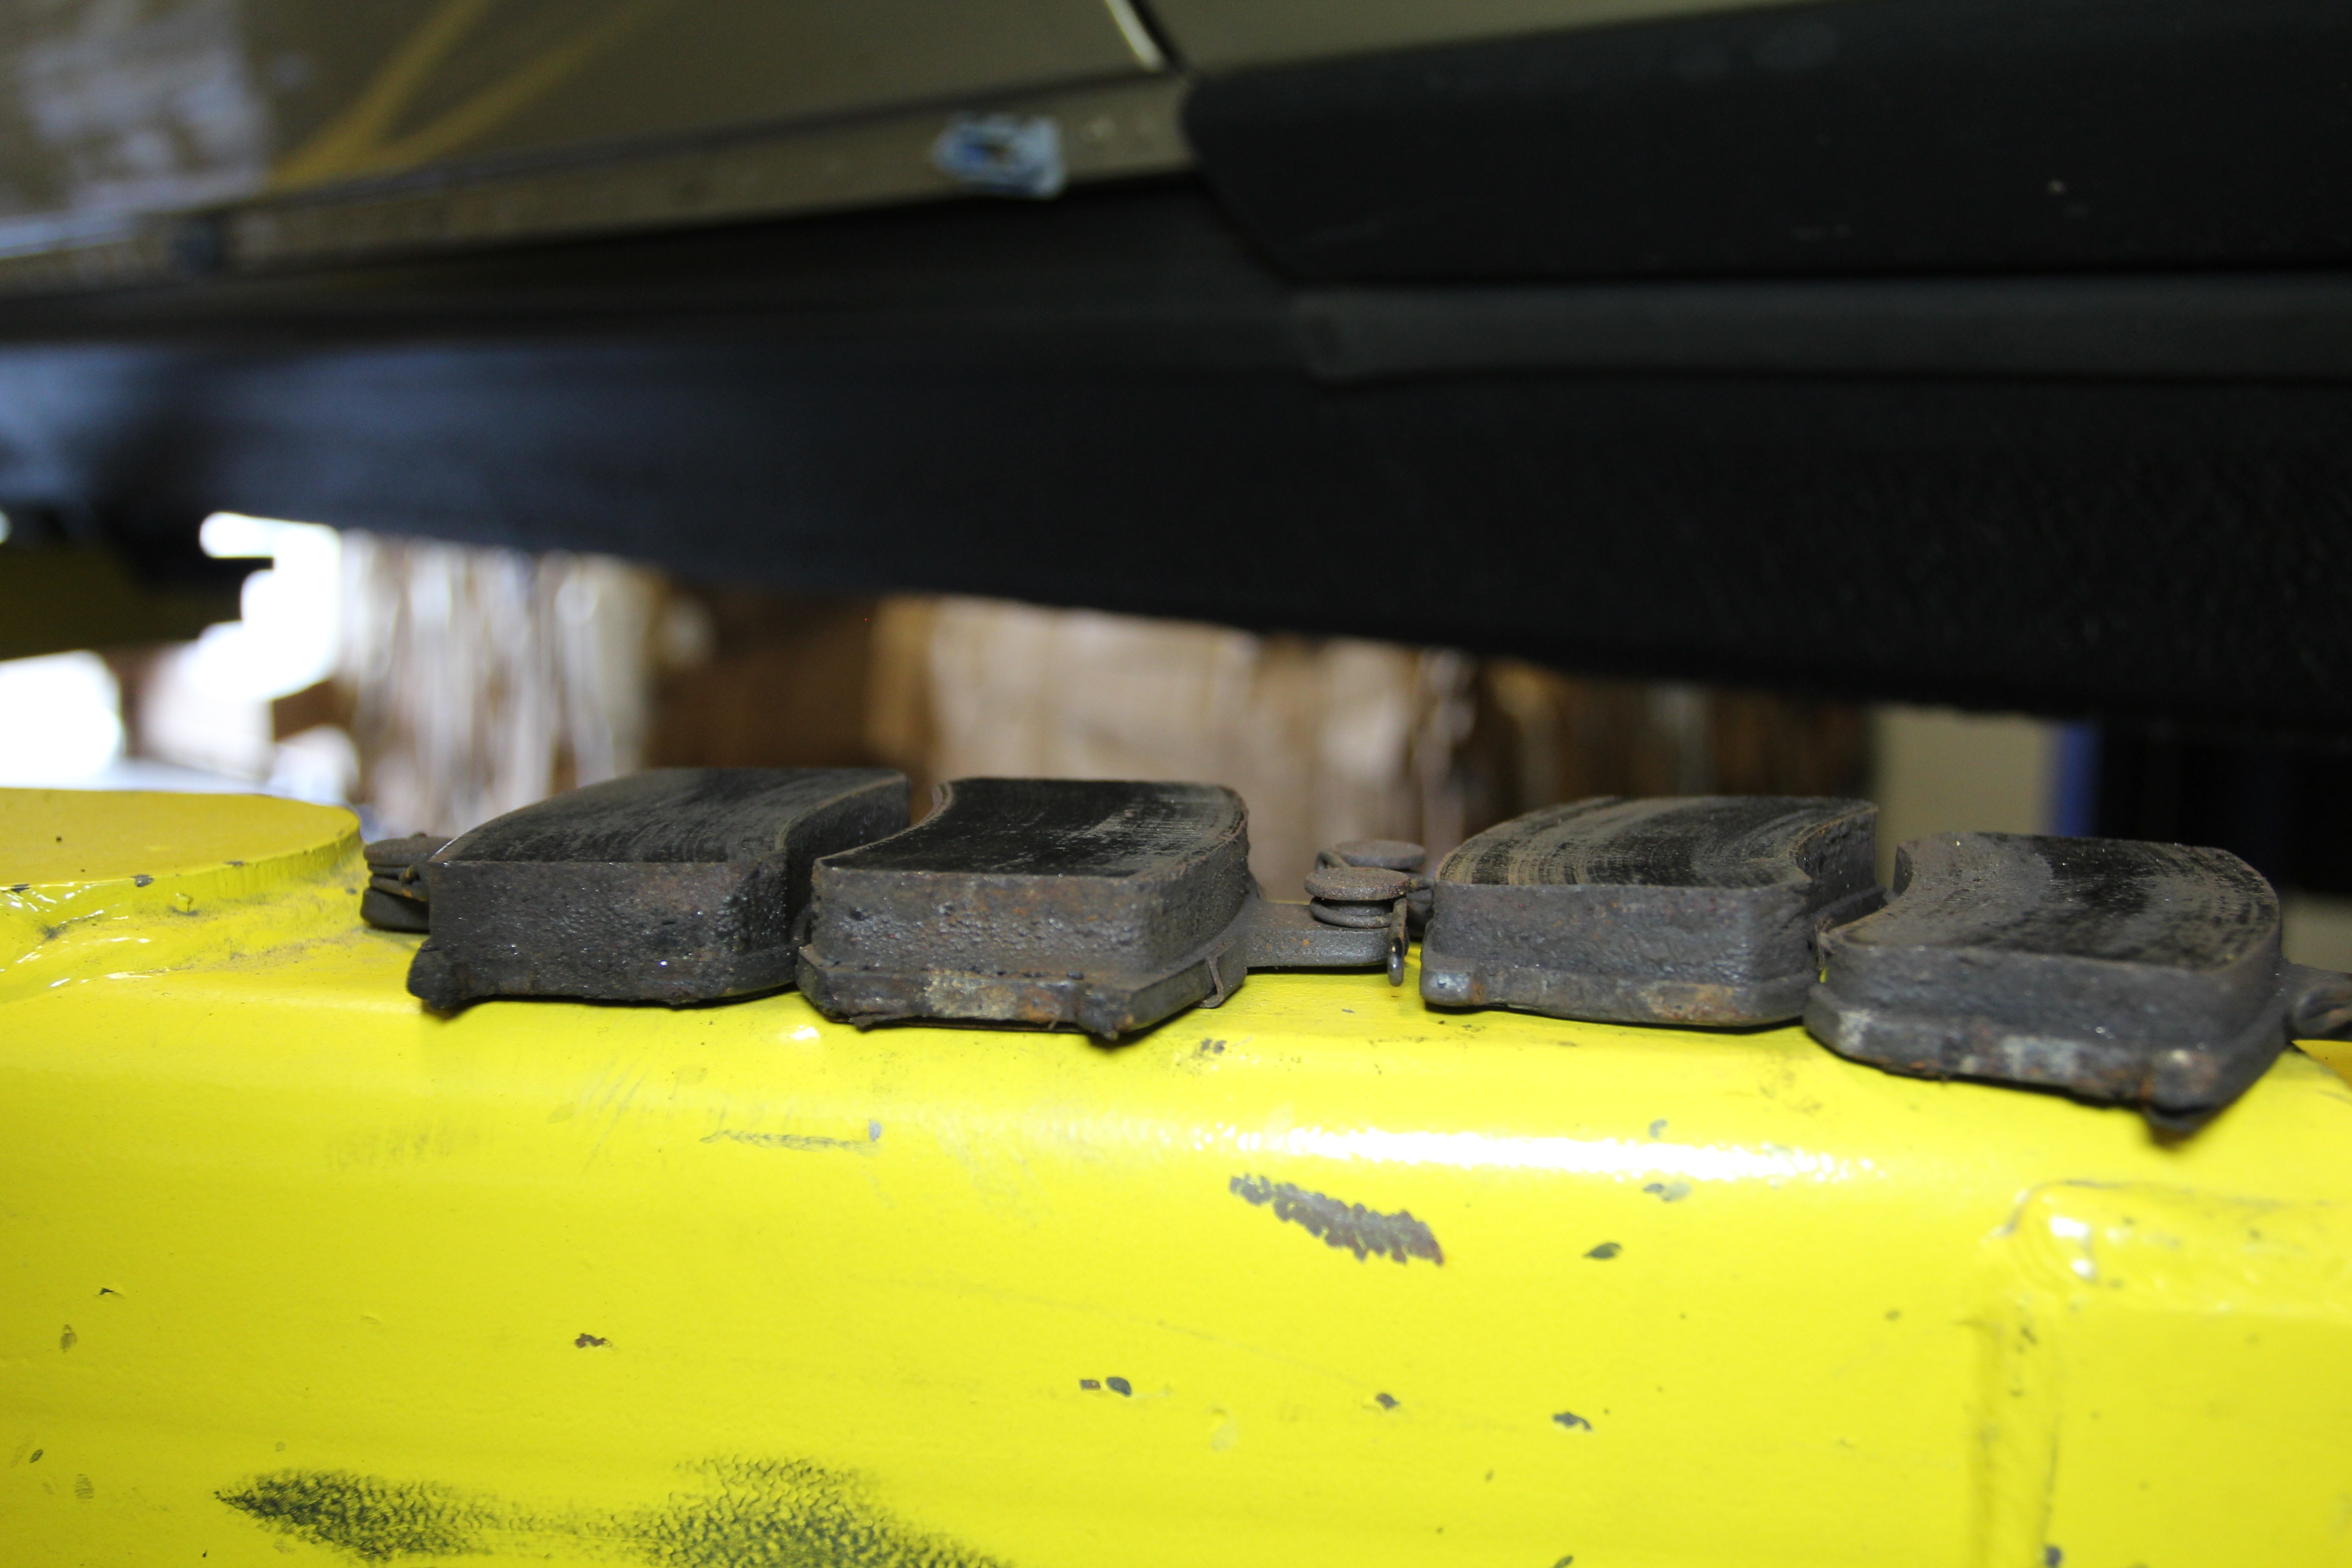
Another issue you can gather from this photo is how much less friction surface is on the pads to the right of the photo compared to the left side. What this tells me is that the brake pads were not moving freely in the brake caliper on the passenger side of the car, causing them to wear more quickly. This could be due to debris getting caught in the caliper or a stuck caliper that needs rebuilding/replacing. In the case of this car that only gets driven in the winter, it's a sign that there is corrosion in my caliper and it needs to be replaced.
Brake Hoses
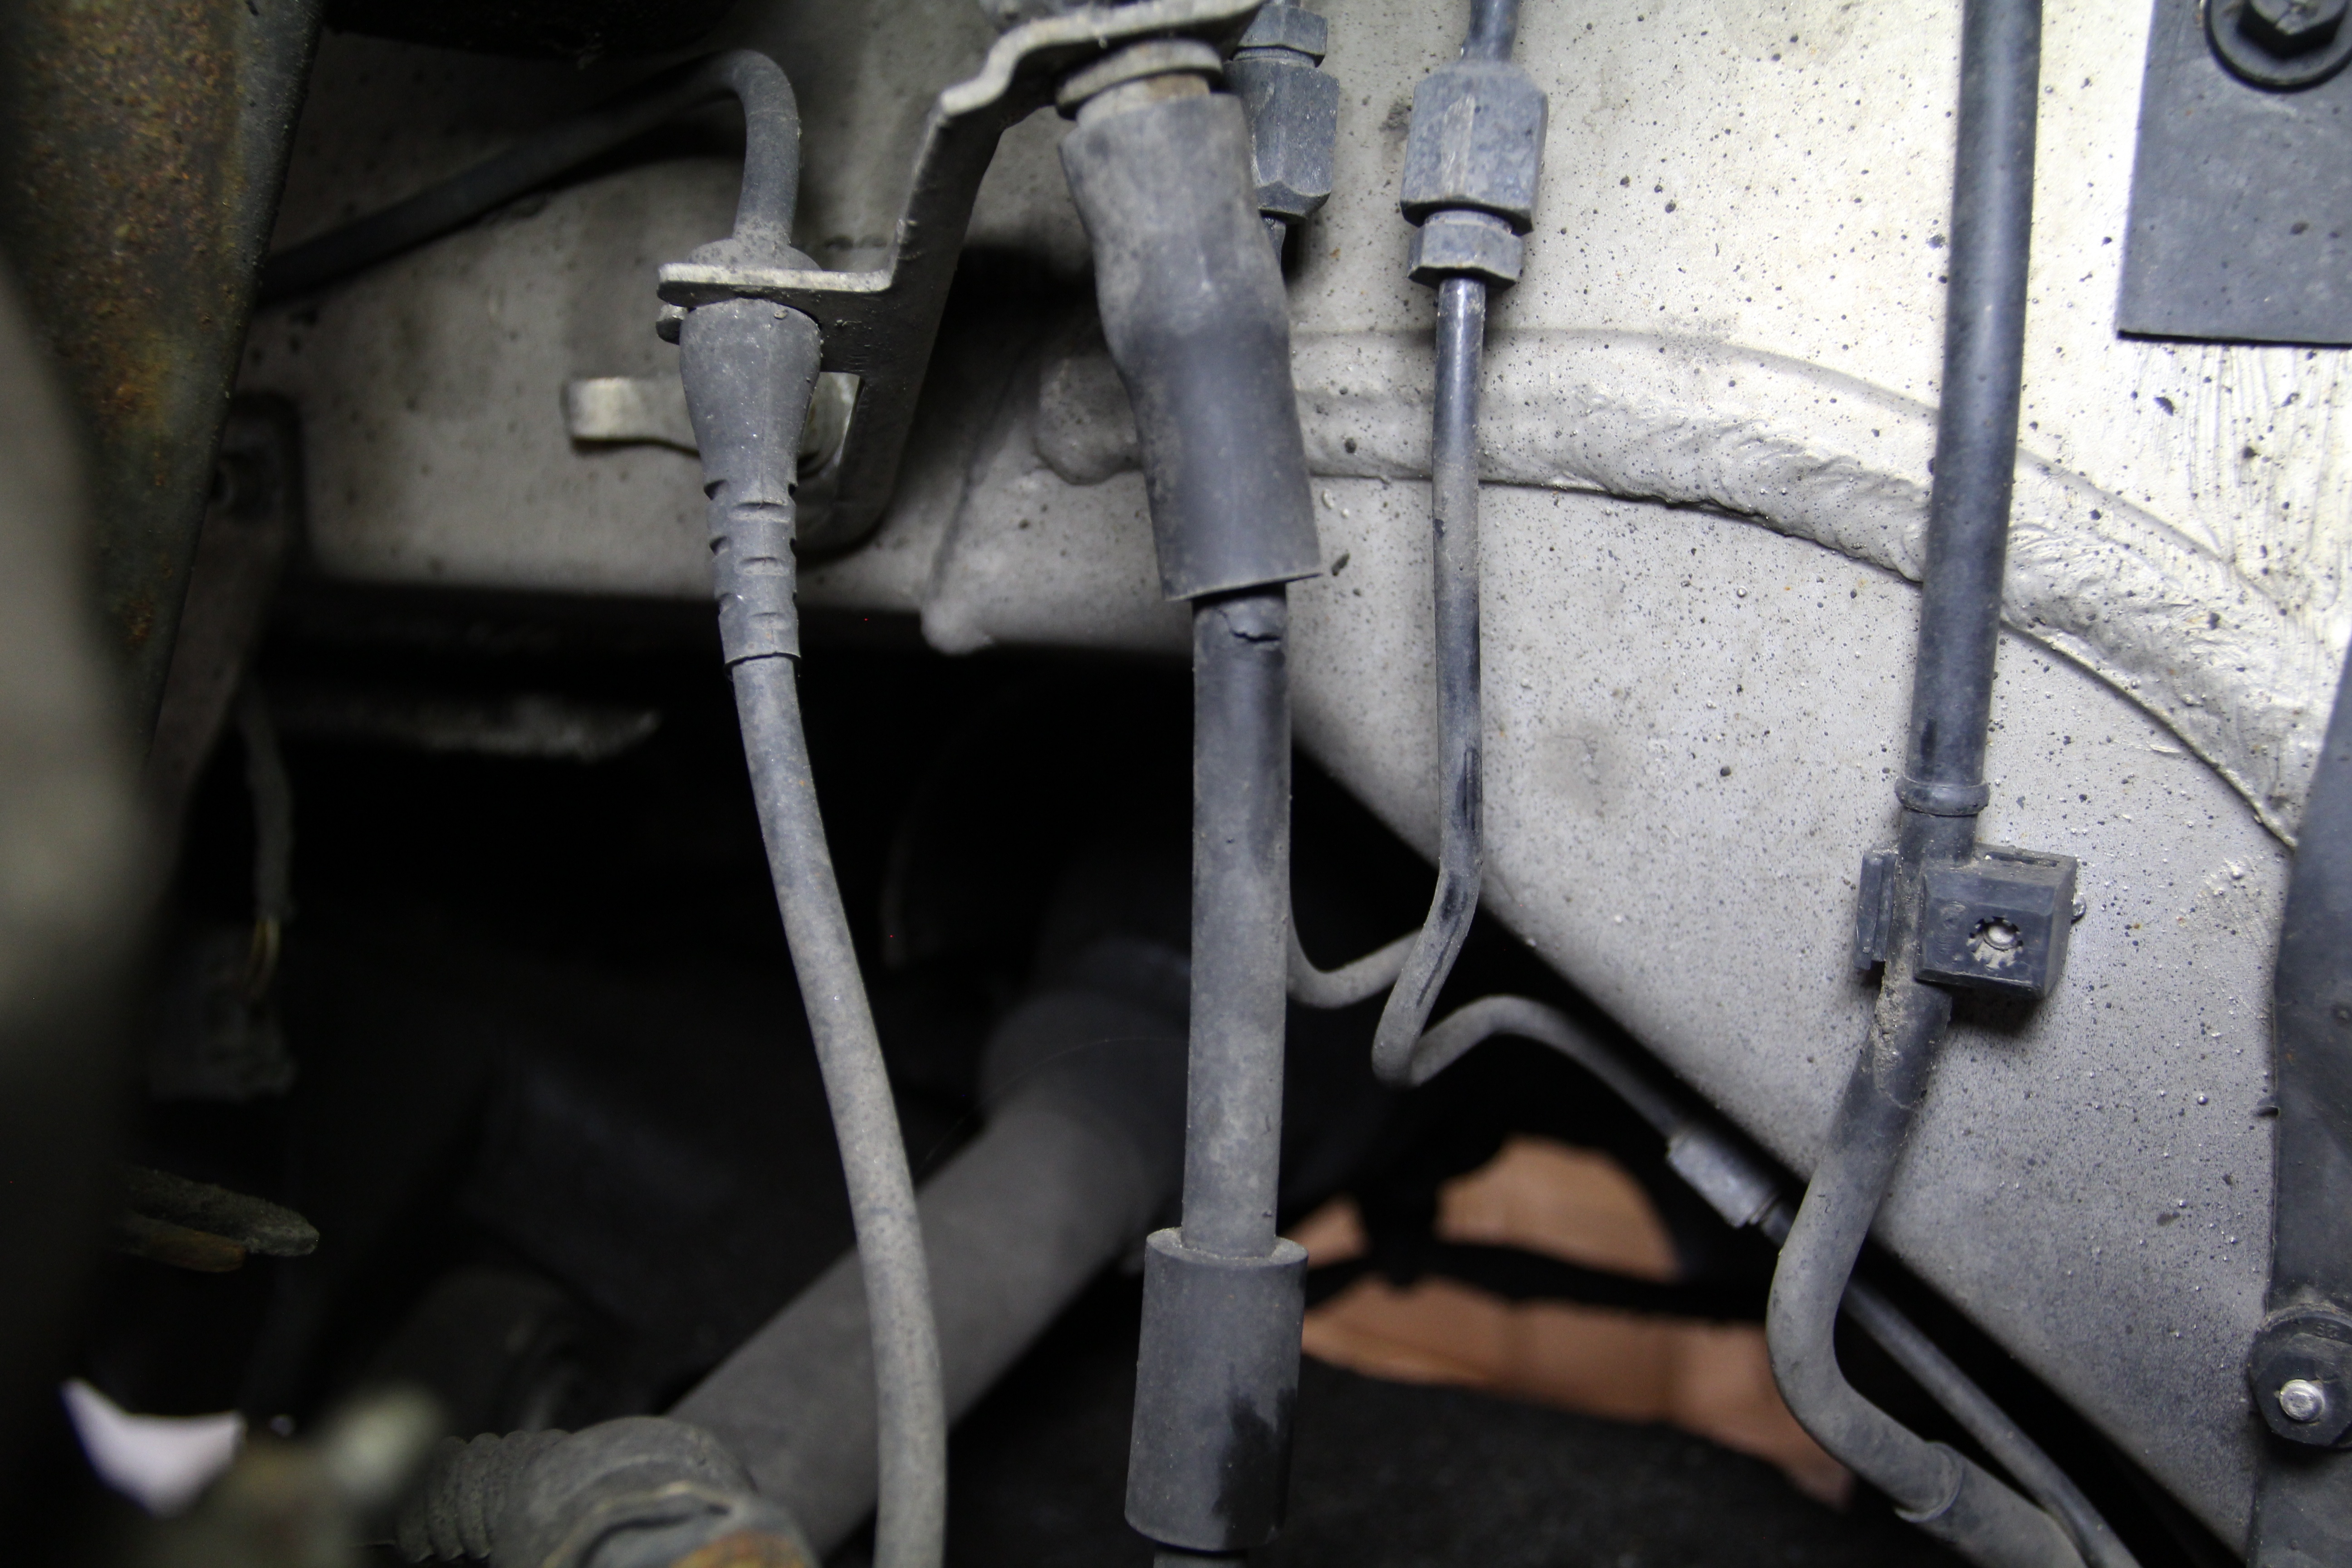
Brake hoses are responsible for transferring the hydraulic brake fluid from the hard brake lines that are stationary to the brake caliper that moves with your car's suspension. These rubber hoses are put through their paces, having to take high-heat from your brake system, they're subjected to extreme pressure, all while having to move freely for tens of thousands of miles.
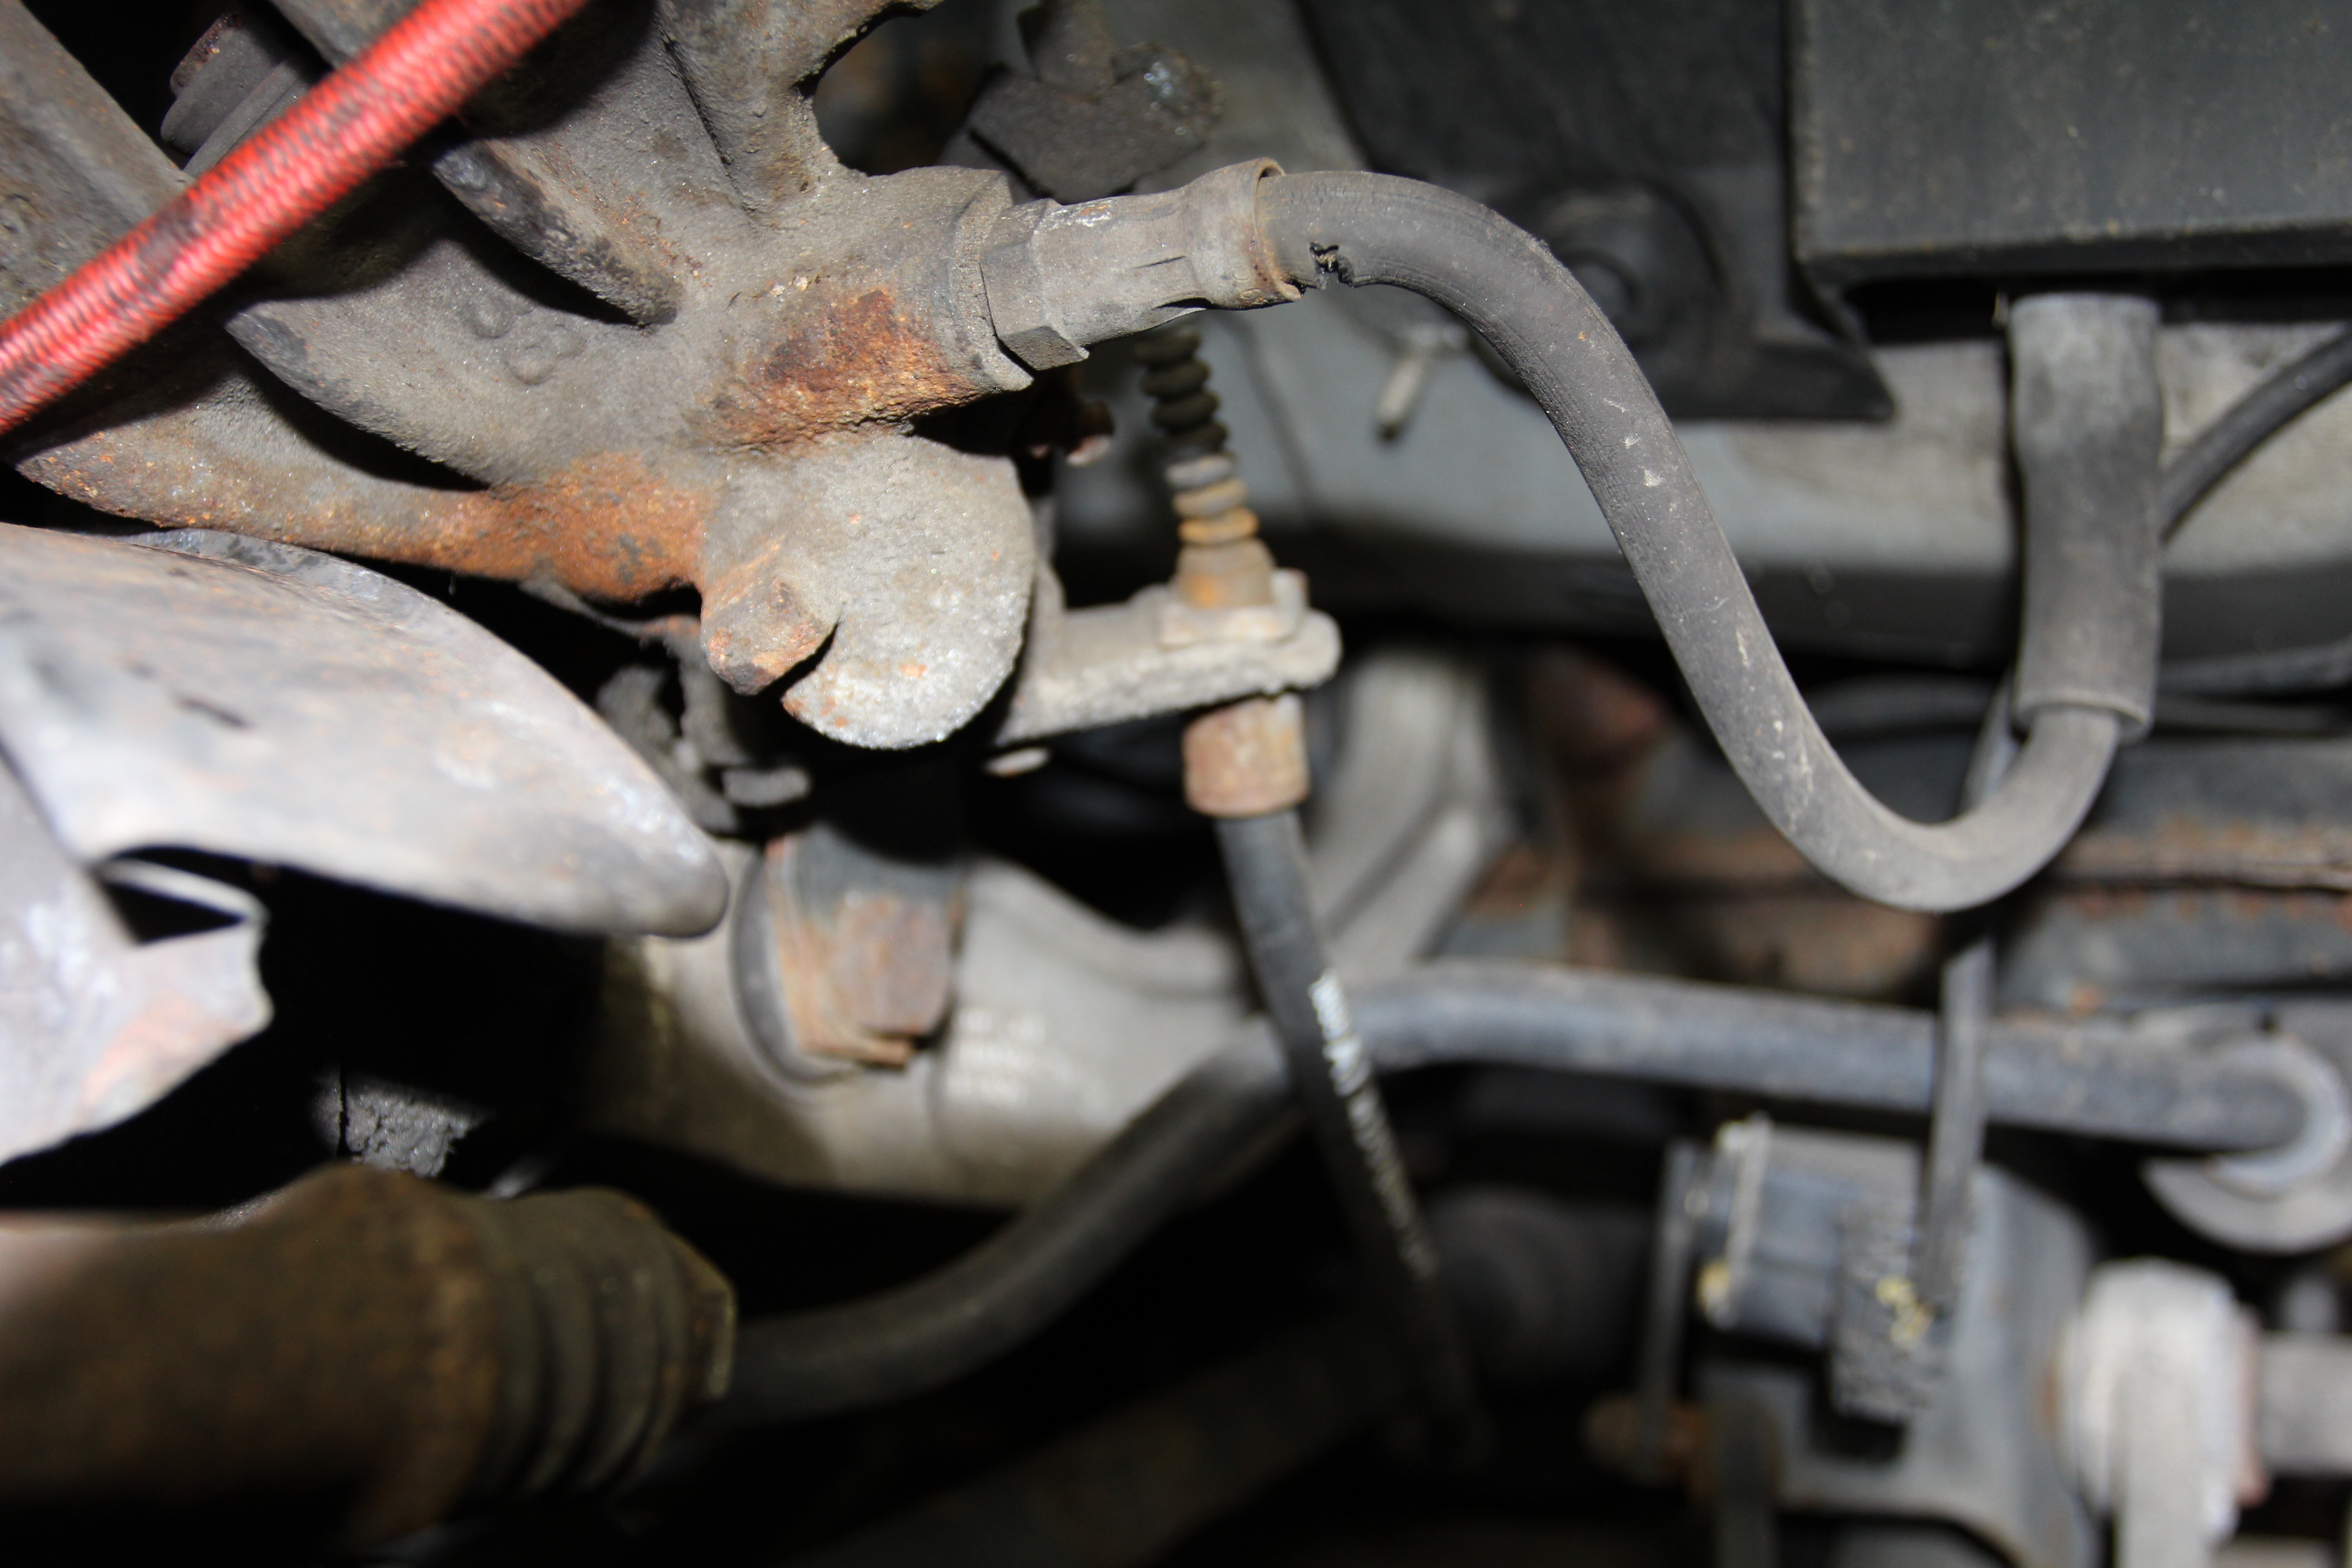
Over time, the rubber of these hoses can break down and crack. Even worse, the connections corrode. If you see heavy corrosion on the end connections, or if you see cracking in the rubber, it's a sign that they need replacement immediately.
You can see from the photo below that my brake hoses were in need of immediate replacement. The rubber was severely cracked in multiple places along the hose. This is to be expected though after 16 years on the car.
Tires
Tires. The most often overlooked, yet most crucial part of the entire system. You could have all new brake system components that are functioning perfectly, but if your tires aren't up to the task, you won't stop. Think about it, out of every part of your car, your tires are the only thing that connects everything to the ground. It's good to inspect your tires more often than your brake system, but at the very least, you should do it during your annual brake inspection.
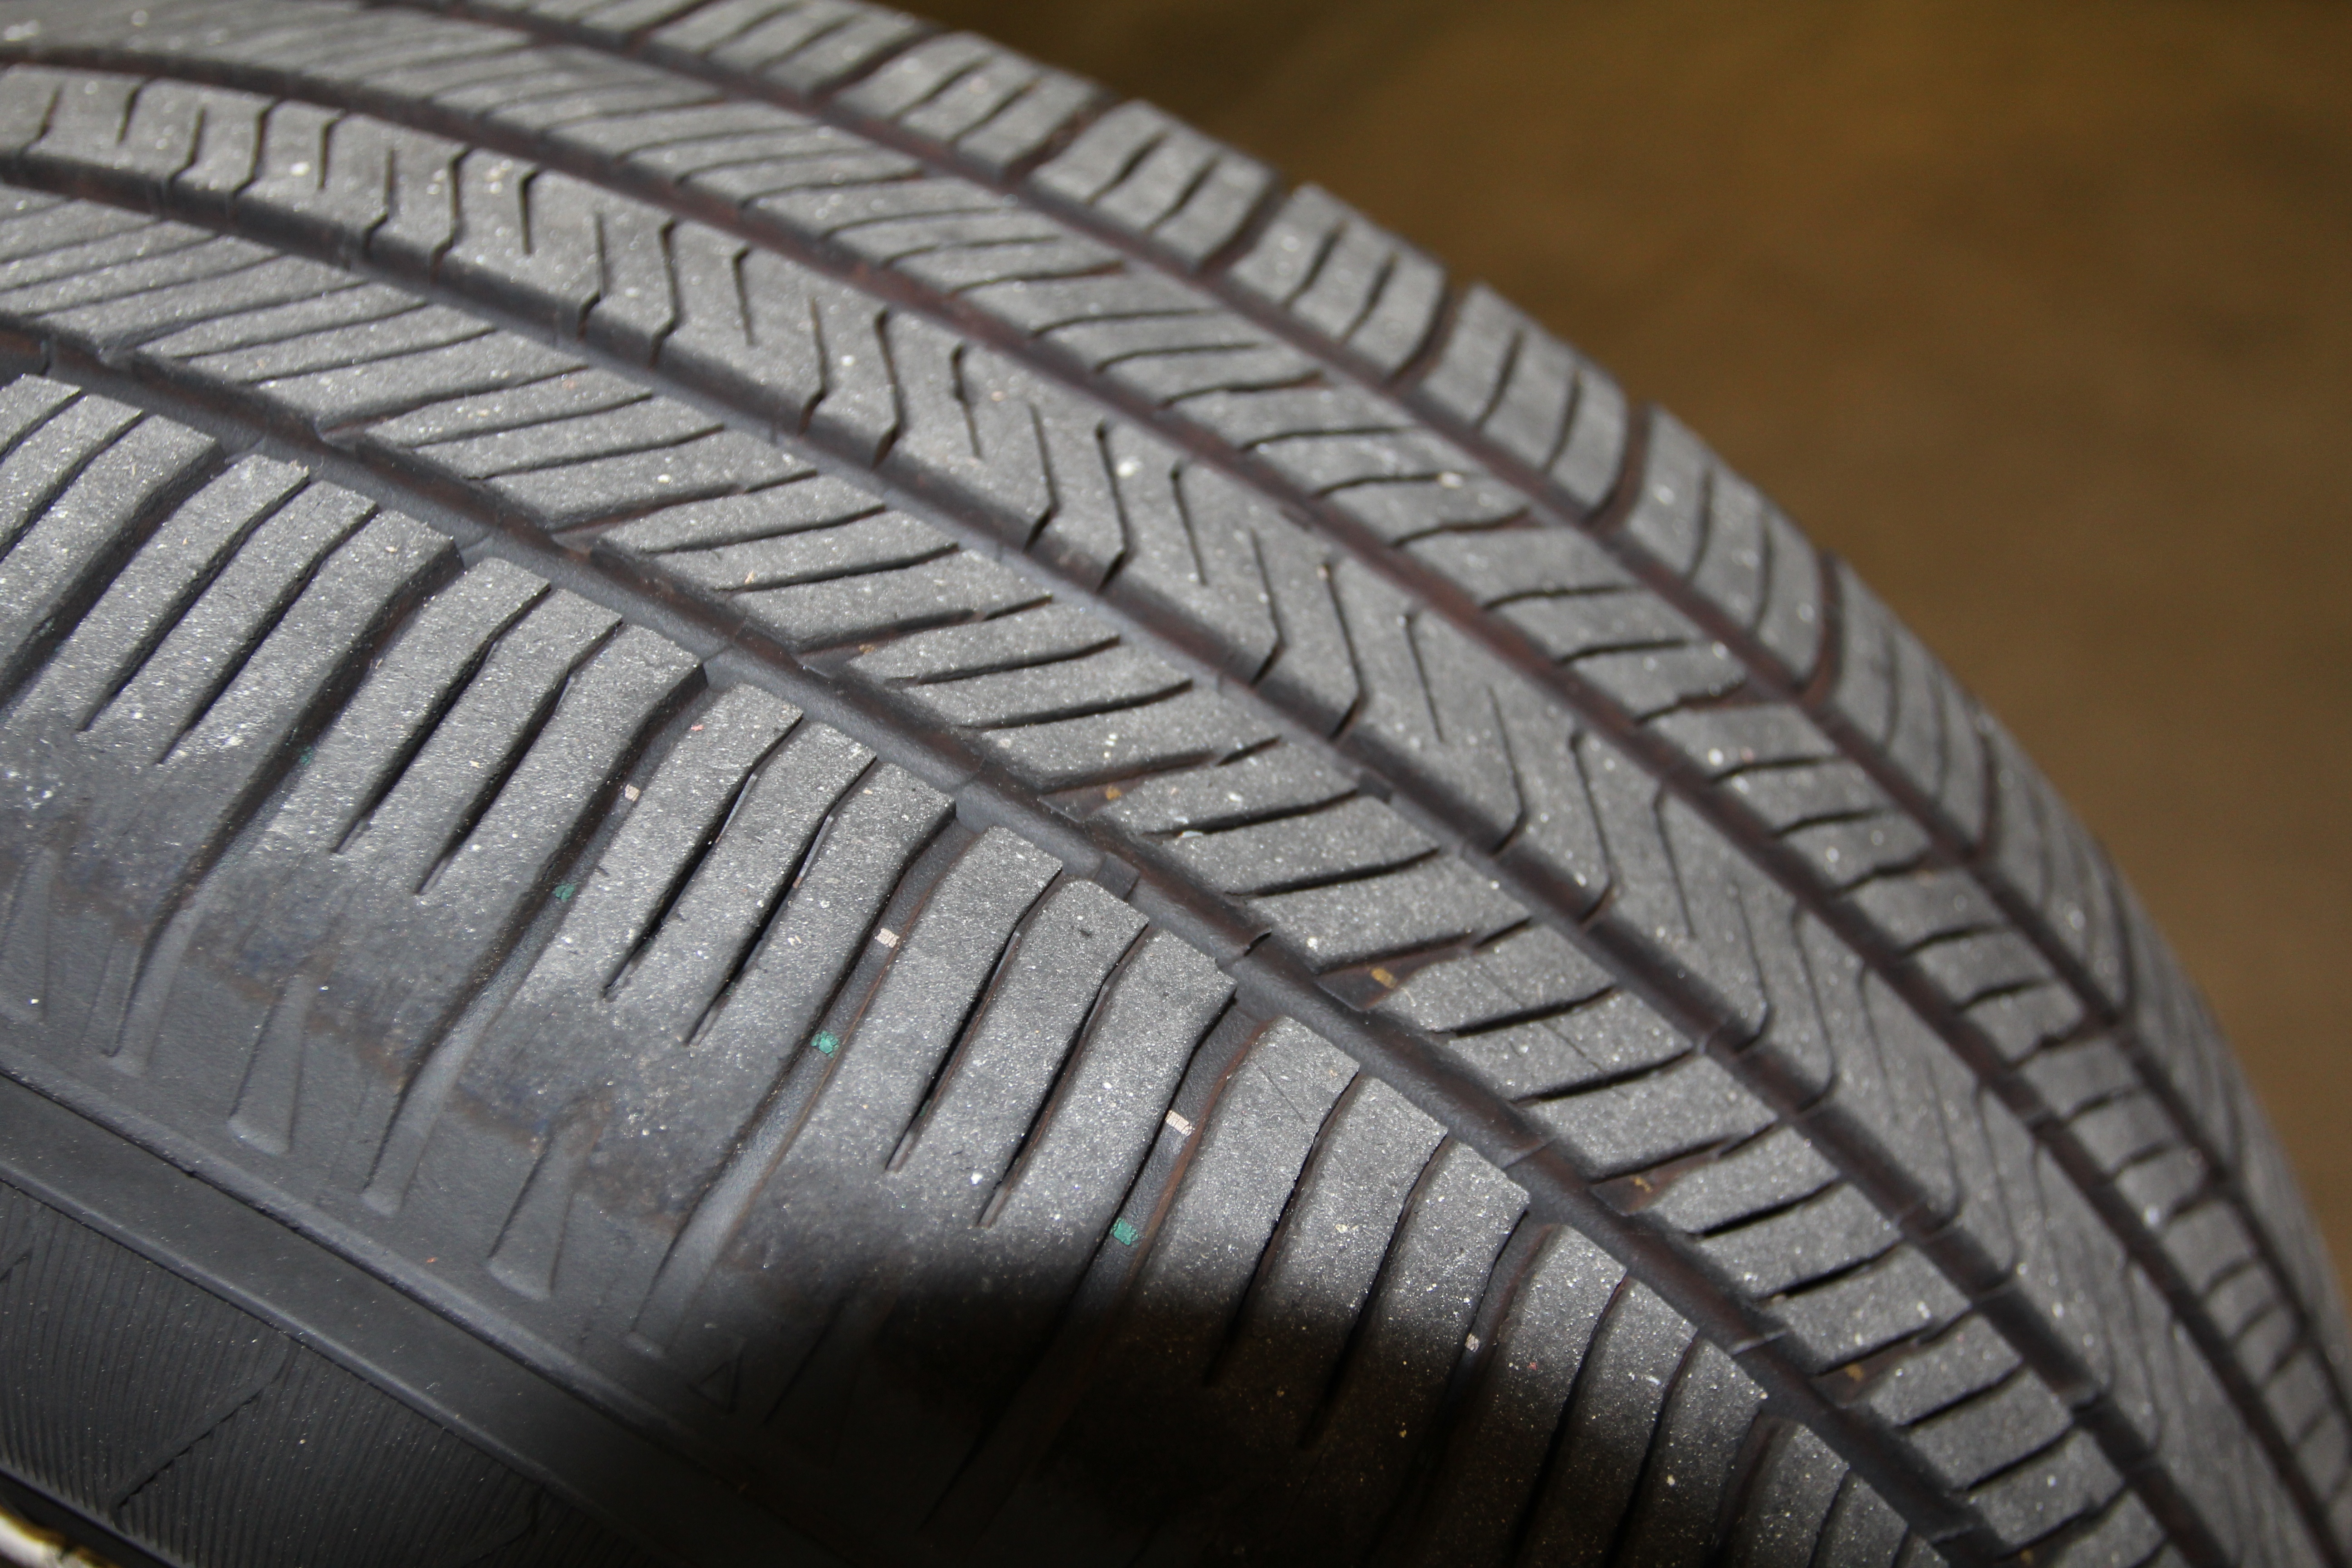
When inspecting your tires during your brake inspection, first start with tread depth. Tread depth is crucial because this is what evacuates the water from underneath your tires and prevents you from hydroplaning over the slightest of puddles.
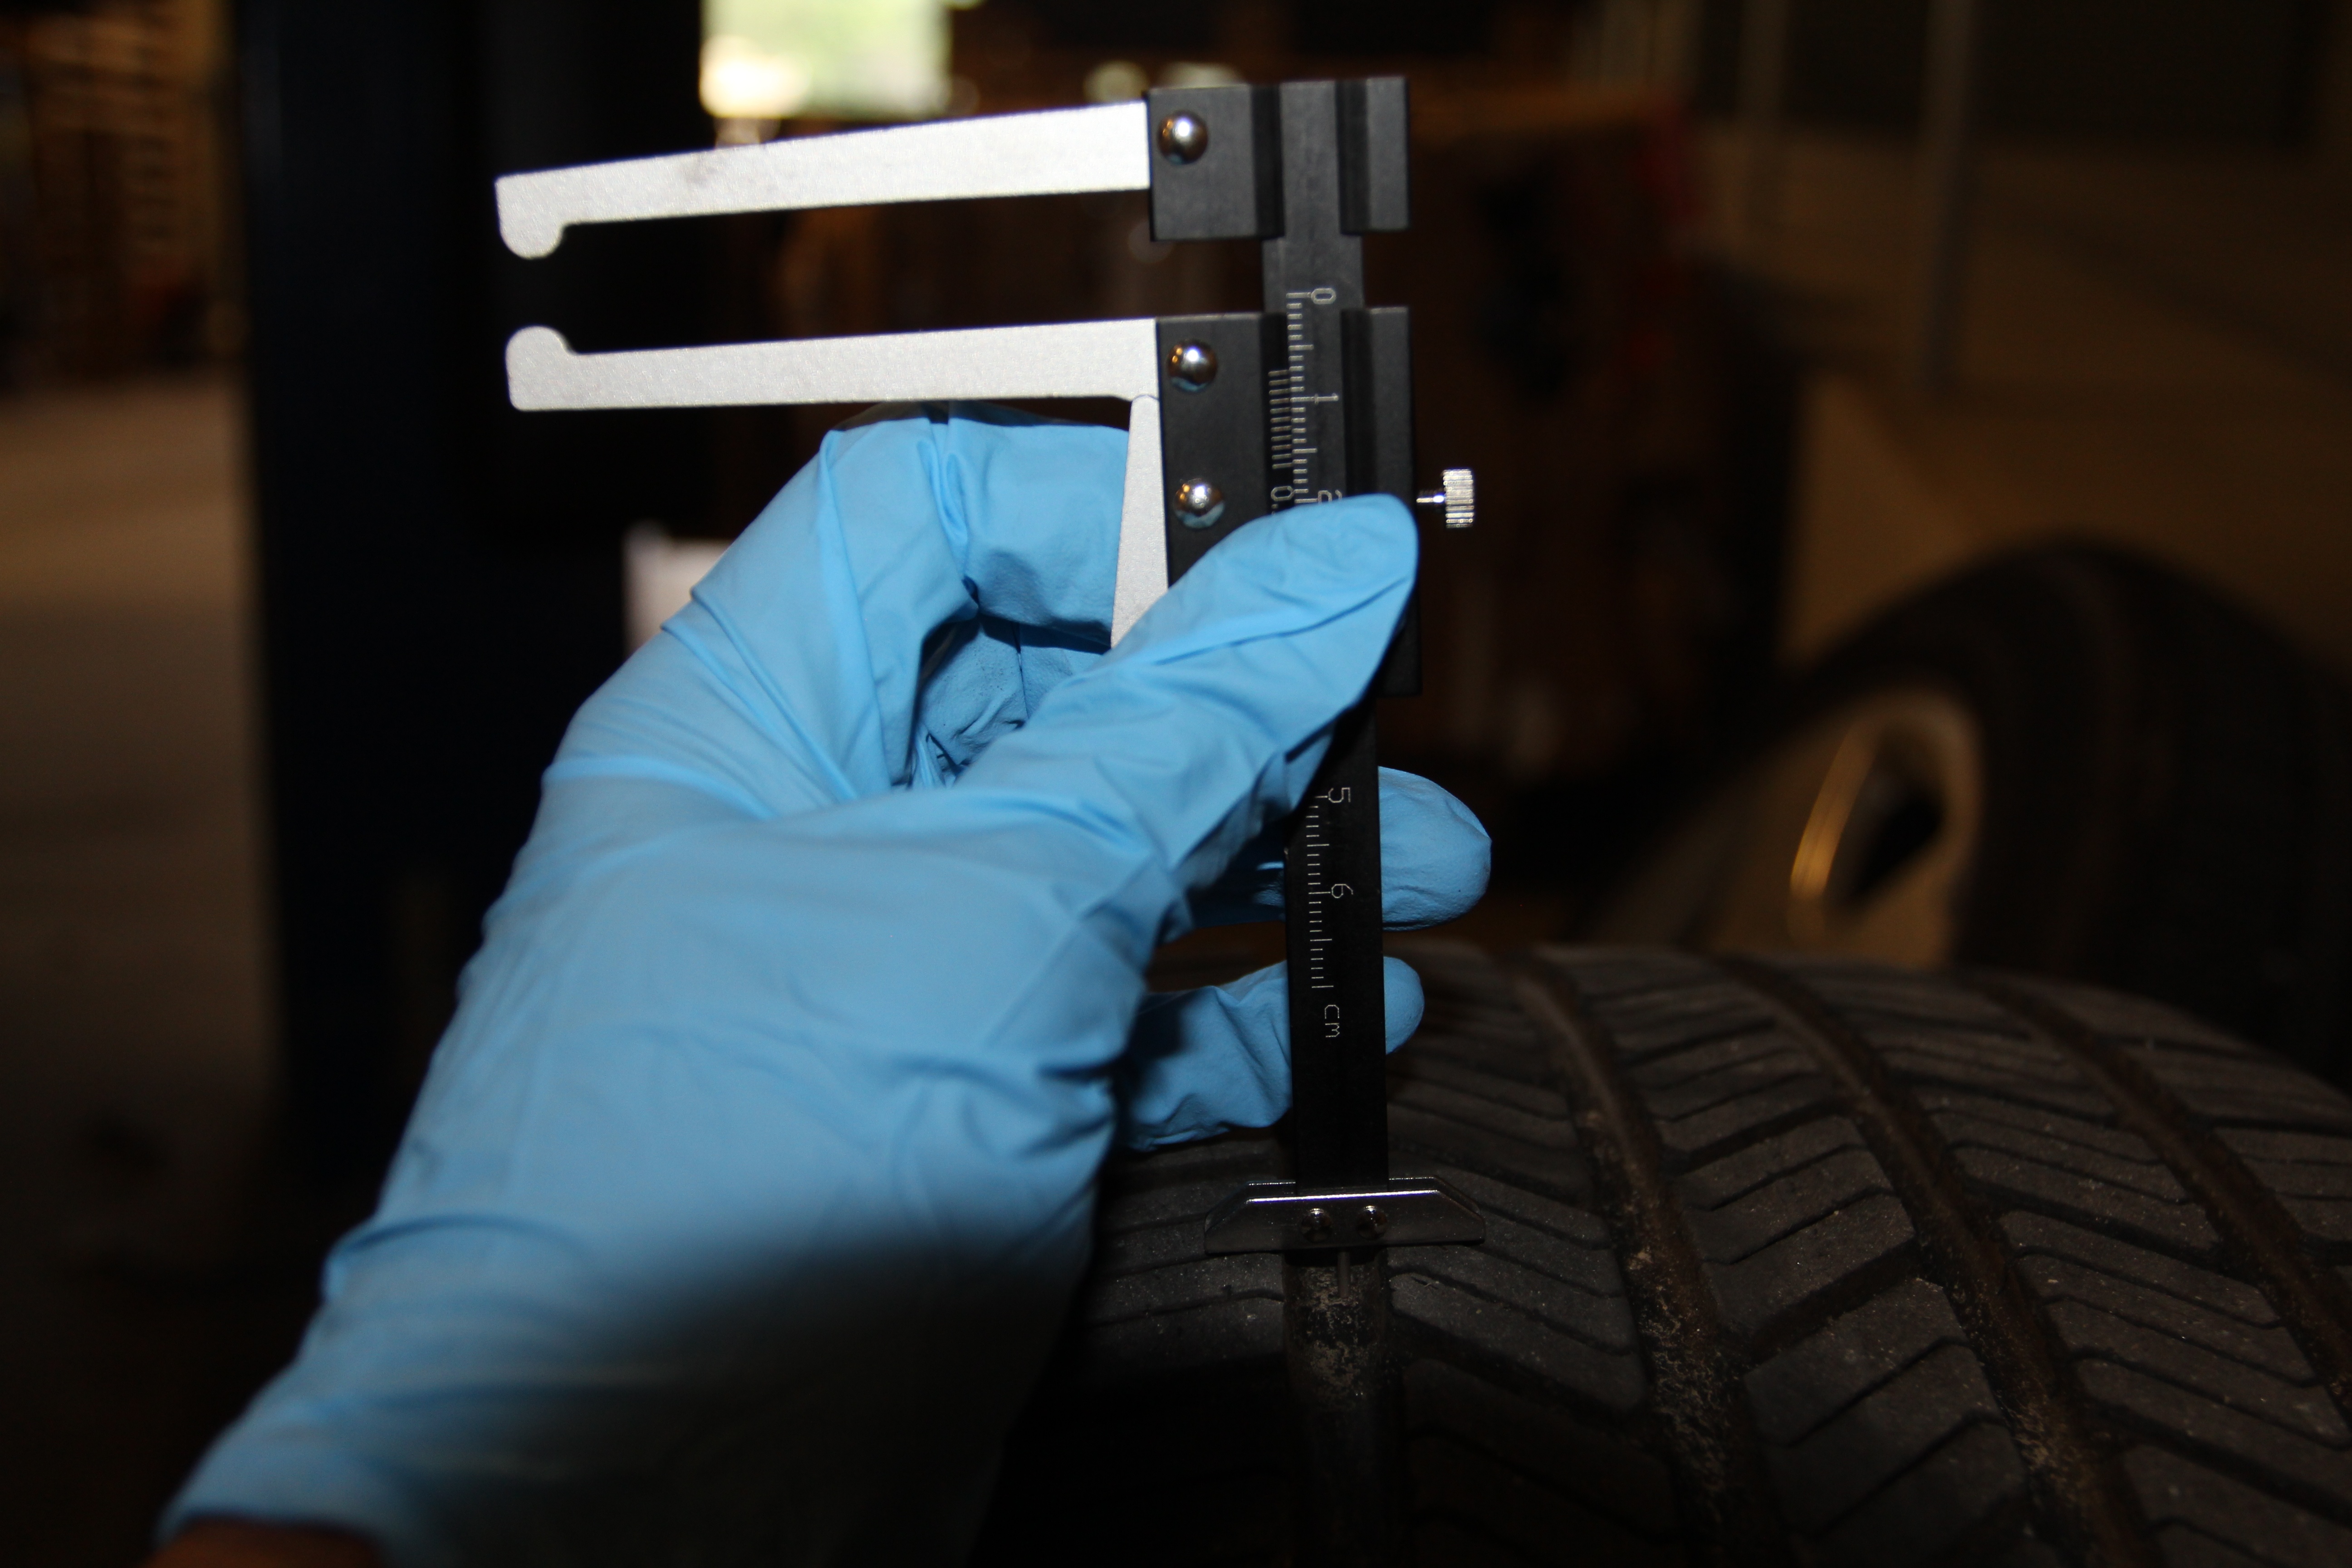
Most states have a minimum tread depth of 2/32" of an inch. However, to remain safe on wet roads, it's advised to replace your tires at around 4/32 of an inch. And for use in the winter, you should have at least 6/32 of an inch. To measure this, you can use the back end of the Brake Disc Caliper Gauge that you used to measure your brake rotors, or you can simply use some coins.
Beyond the tread depth, you should be looking for dry rotting/cracking of the rubber, and uneven tire wear. A tire that wears more on the inside vs. outside or vice versa is a sign that your car is in need of an alignment. This could be due to your car falling out of alignment over time, or a sign that you have wear somewhere in the suspension. Also, tires wear evenly from driver's side to the passenger side. Significant tread depth differences from one side of the axle to the other can wreak havoc on differentials and AWD systems.
If you need to replace any of the brake system components mentioned above, FCP Euro makes it easy. Start by going to our homepage and use the "My Vehicle" selector at the upper left-hand side of the page. By adding your exact make, year, and model, you will only be shown braking components that fit your car, taking all of the guesswork out. To top it off, don't forget to make use of our Lifetime Replacement Guarantee as it applies to wear items such as brake discs and brake pads. Replace them once and never have to pay for new ones for the lifetime of your car!
And if you want to learn how to replace these components on your car, there's a good chance that we have a DIY on our blog or our YouTube channel.
That's it to cover a basic brake inspection at home. Doing this once per year, or when you change from your summer to winter wheels and back, will ensure that your brakes remain functioning and that your car will safely come to a stop. If you have questions about the process, be sure to leave them in the comments section below.