- 09/11/2020
- 5 Min Read
- By: Christian Schaefer
How To Install A Battery Relocation Kit & Battery Kill Switch

Battery relocations are a common idea in the automotive world, though it's often best left undone. Wiring is fussy and easy to screw up, making battery relocation kits the best choice for the inexperienced. Yet even with the kits, you can run the risk of damaging the car. Rather than winging it, follow along as we show you the dos and dont's of a battery relocation.
Why would you perform a battery relocation
The lead-acid automotive battery has been the standard heavy-duty battery for the last 150 years. Since then, very few alternatives have matched it in terms of cost and reliability. They're simple, and they work well enough. Unfortunately, the batteries are cumbersome and can leak acid. From race car to show car, relocating the battery may make sense for you.
You'll need to take advantage of every single rule in whichever racing class you choose to be competitive. Modifying everything you can to make the car as light and powerful as possible gives you the best possible chance to be the top in your class. Beyond the significant modifications, altering the chassis' weight distribution will help you shave off those last few tenths of a second per lap. Look into any race car, and you'll likely see that the battery has been relocated to somewhere inside the cabin or trunk to balance the car's weight.
Moving the battery to the trunk also cleans up the engine bay. Building the engine bay for a show car with tucked wiring and excellent paintwork would be ruined by an ugly battery. A battery in the trunk also means less wiring for a high-performance stereo system.
Upgrading your battery
There are a few options out there in terms of upgrades for race cars. Weight savings and balance are the game's name here, making the offerings from Odyssey a no brainer. Rather than being a lead-acid type, the motorsports batteries are made with absorbed glass-mat, or AGM, technology. The AGM construction removes any lead from the battery, allowing it to shed significant weight and suspend the electrolytic solution in fiberglass mats, preventing any battery acid leaks.
The battery acid suspended by the fiberglass mats allows the AGM battery to be mounted with simple brackets. Conventional lead-acid batteries need to be in a sealed box for safety against any leaks. The AGM batteries don't produce any harmful vapor, either.
These lightweight batteries can be installed into streetcars with some sacrifices. The battery's ability to produce enough amperage when in cold temperatures is reduced by their smaller size, and extreme heat will diminish the battery's ability to hold a charge.
Parts required to relocate your battery
Relocating and upgrading your battery makes the most sense in a motorsport application. To make it simple, we've put together a battery relocation kit. The kit includes the battery, the terminals, and the bracketry needed to mount it to the chassis. Additionally, we recommend picking up a battery kill switch. Nearly all classes of racing require a kill switch as it is a critical safety component. Beyond our kit, you'll need to purchase whatever amount of wiring you'll need and the wires' associated hardware.
Choosing the new battery location
Before ordering any of the battery cable required to move the battery, you need to know where the battery will be. If the goal is to balance the chassis' weight as much as possible, you want to move the battery to its lightest end. Find a flat surface or the floor of the chassis on the passenger's side of the car to secure the mounting bracket and so the battery helps balance out the driver's weight. Think of the battery as moveable ballast. Find the spot that works best to your advantage, within the rules, and use it.
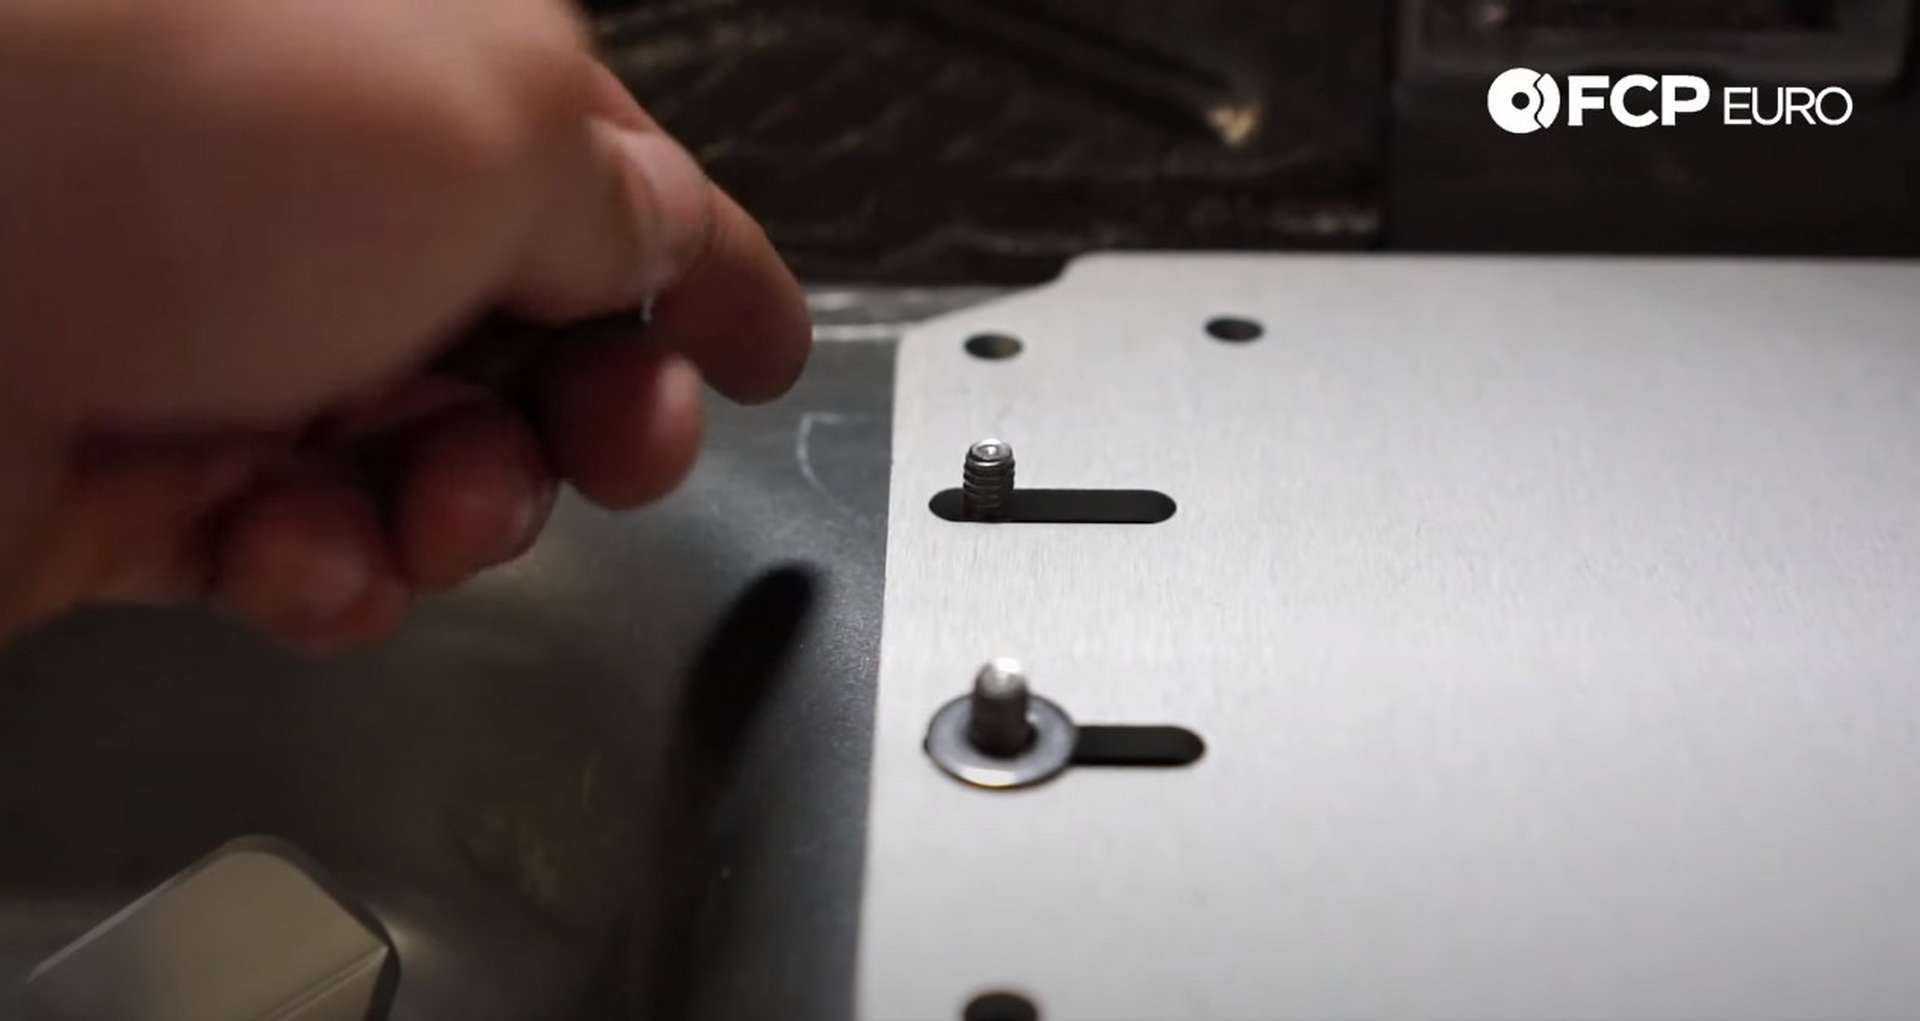
Test fit the possible battery locations for proper clearances before drilling. Use a punch to center the drill bit in the bolt holes. Then push the plate with the threaded studs through the drilled holes from underneath the car. Put the battery mounting plate and the hold down brackets over the studs and secure it all together with the included nuts.
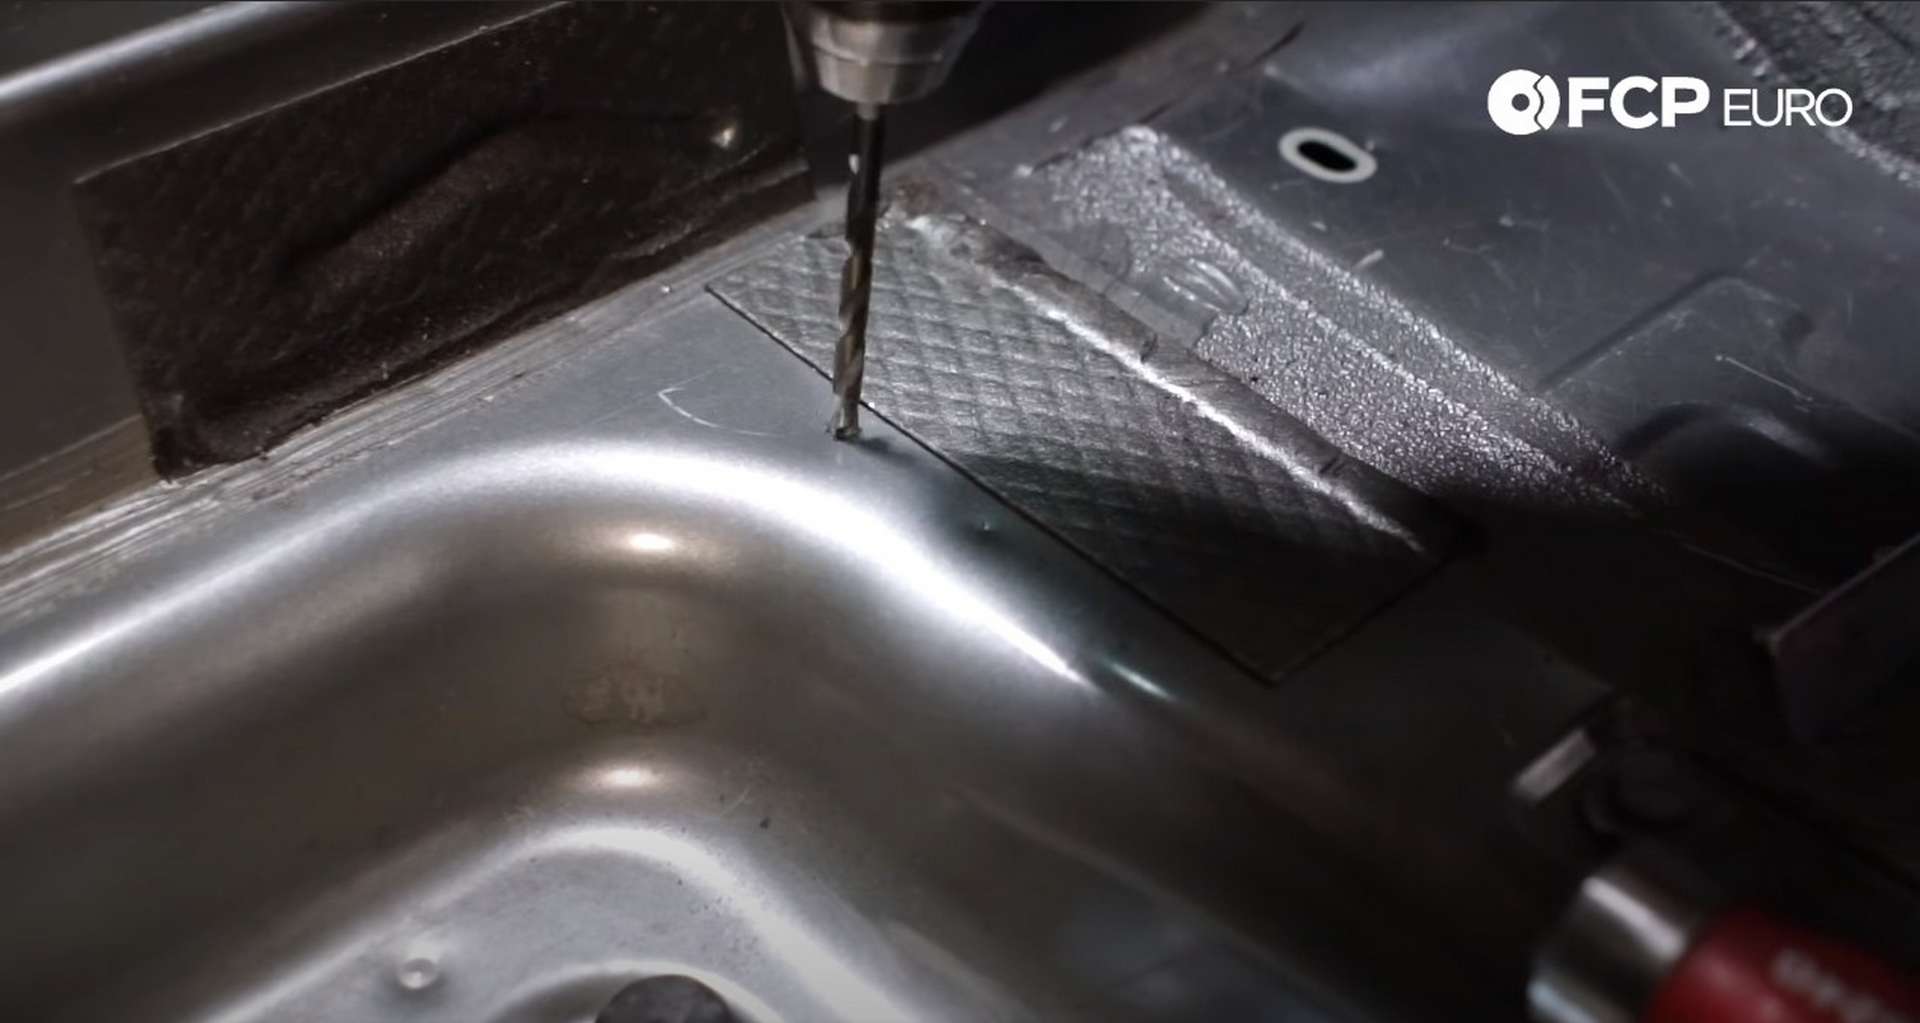
Use rivnuts and bolts instead of the studded plate if getting under the car isn't an option.
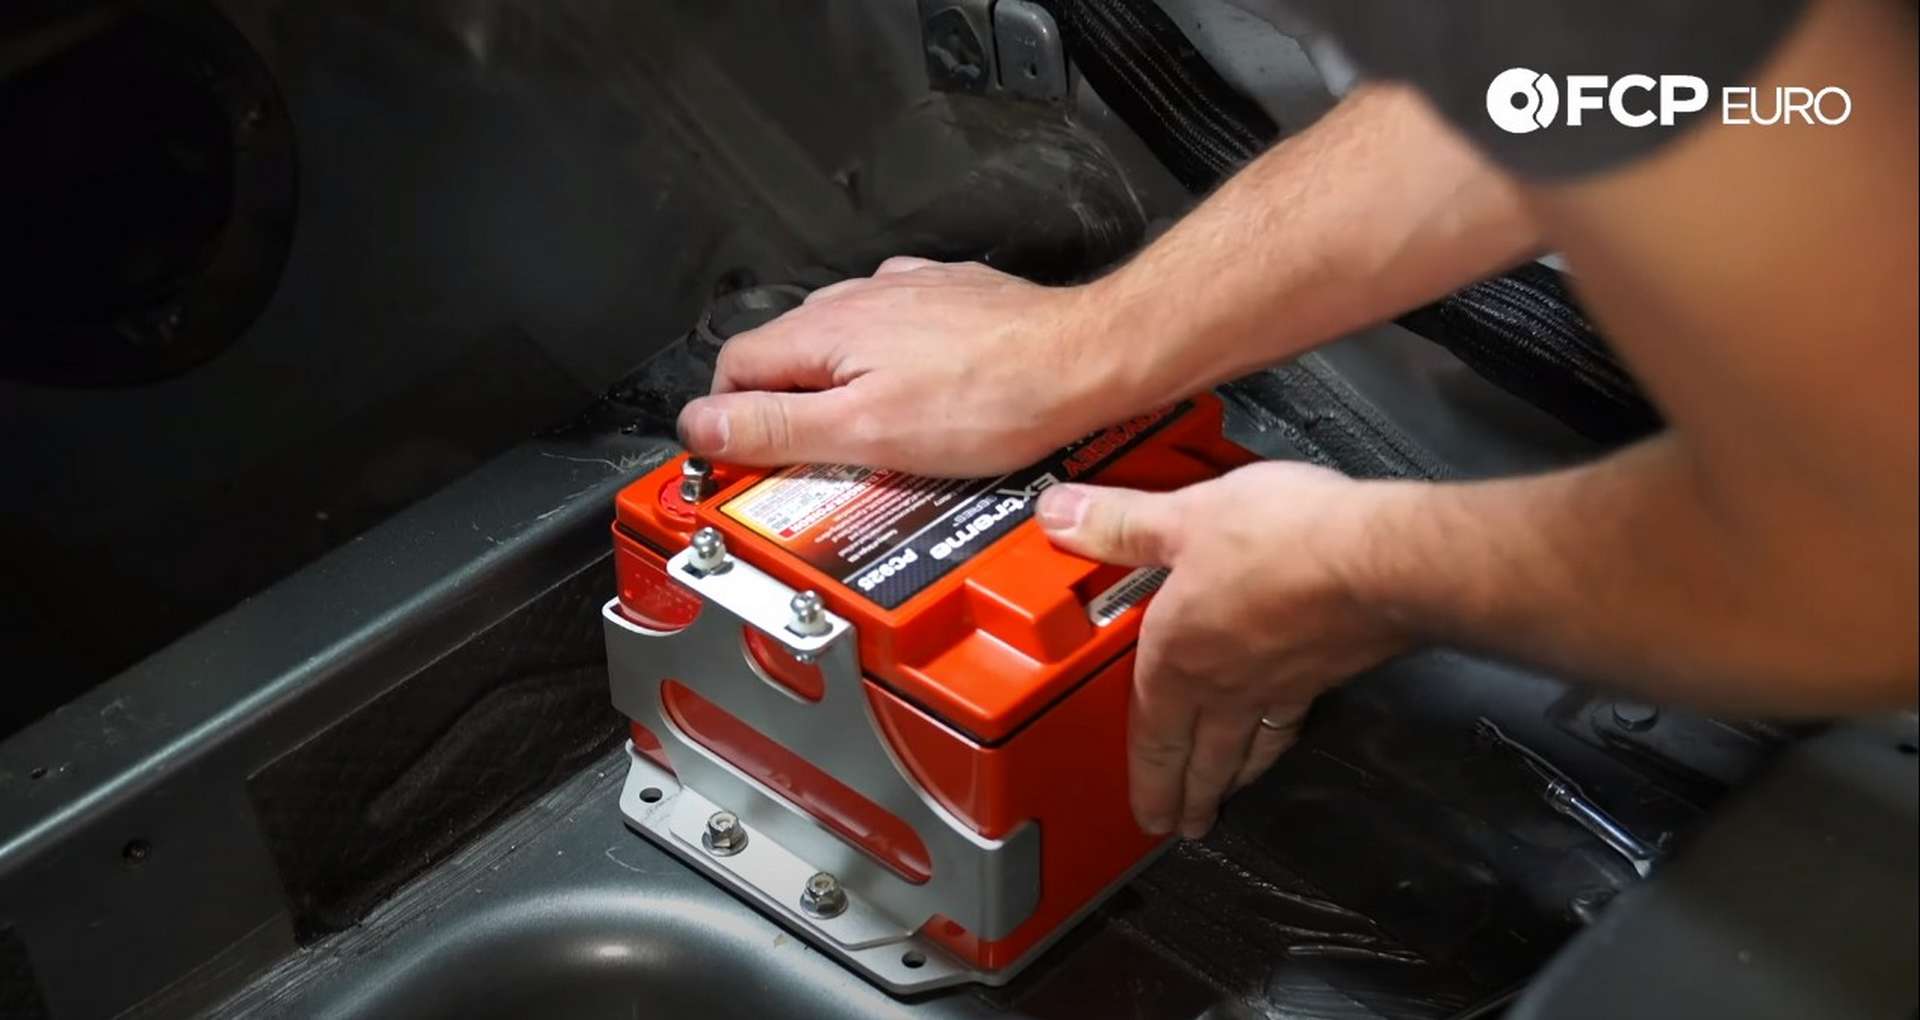
Place the top piece over the battery and secure it to the bracket with the button-head Allen bolts.
Building and Running the Battery Cables
To get the proper length cables for a battery relocation, you'll need to make them yourself, and the first step in that process is to choose what size cable you'll need. The most significant factor in determining cable size is selecting a cable that will give you less than a 3% drop in voltage from the battery to the ECU. Use the chart below to help decide on the thickness you'll need.
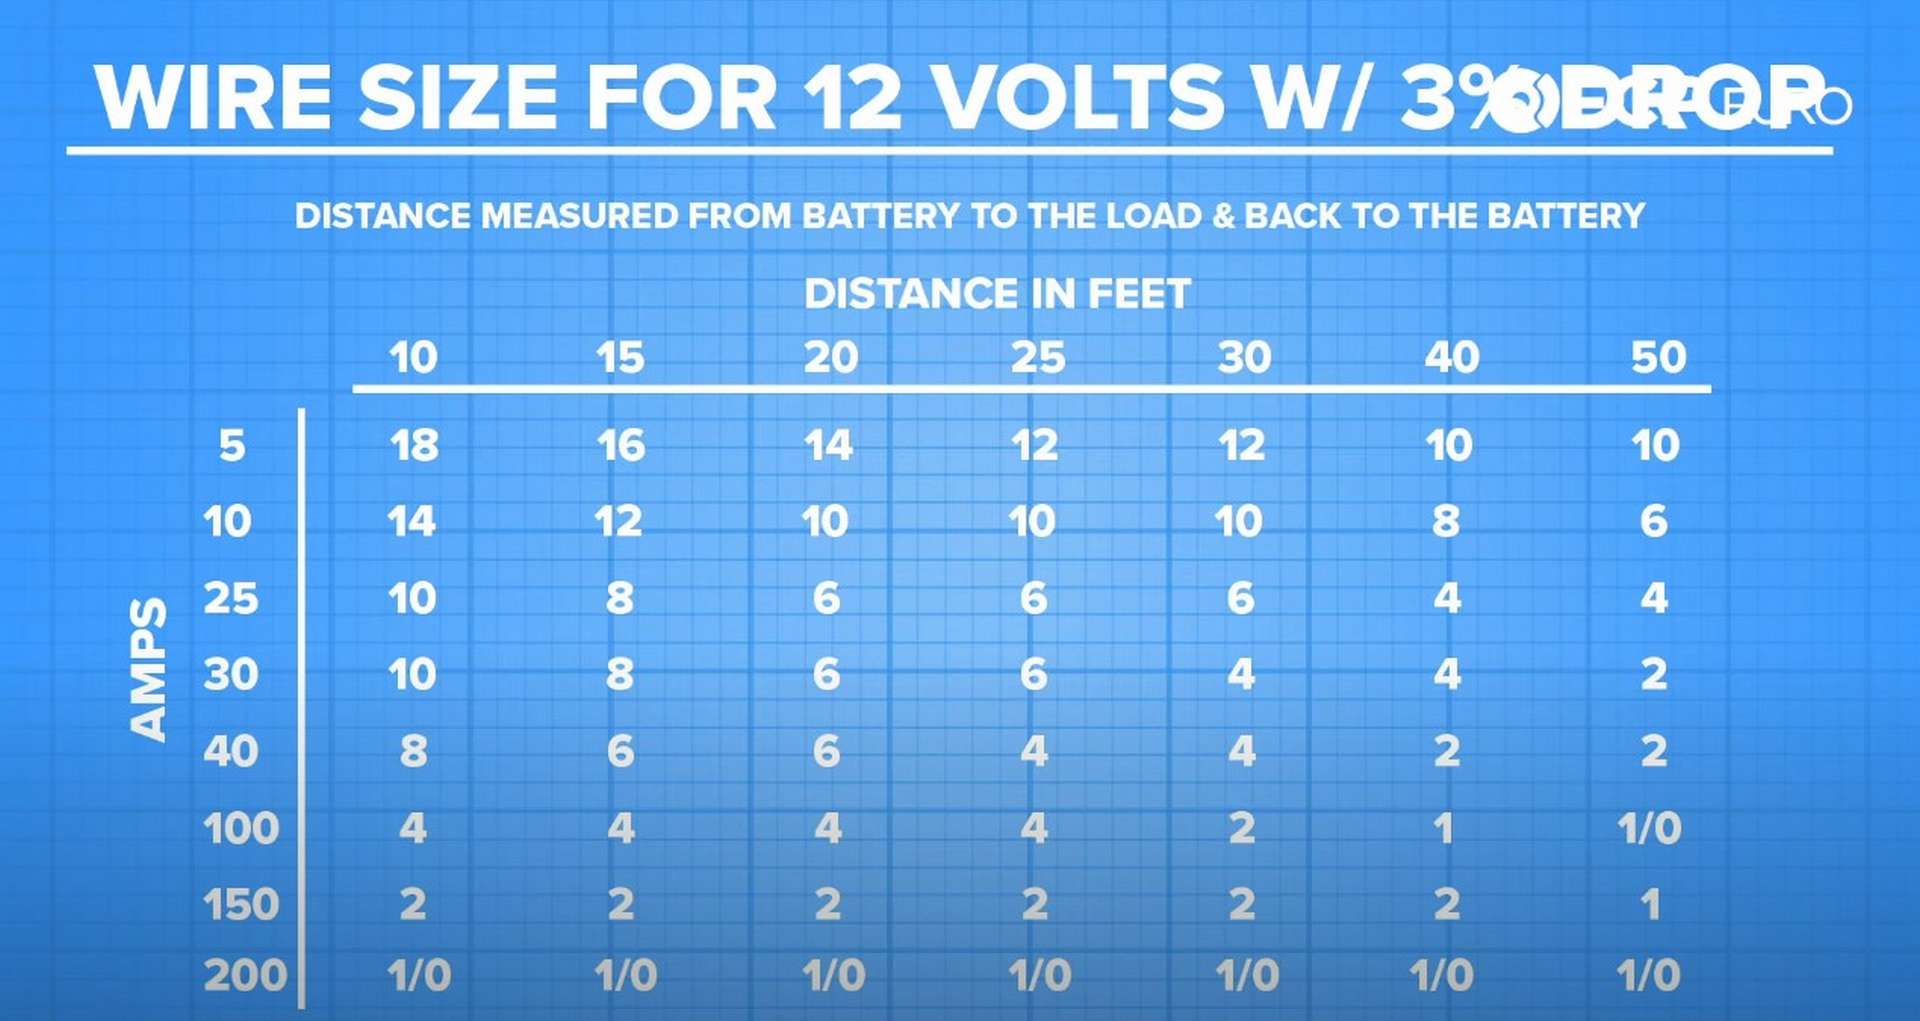
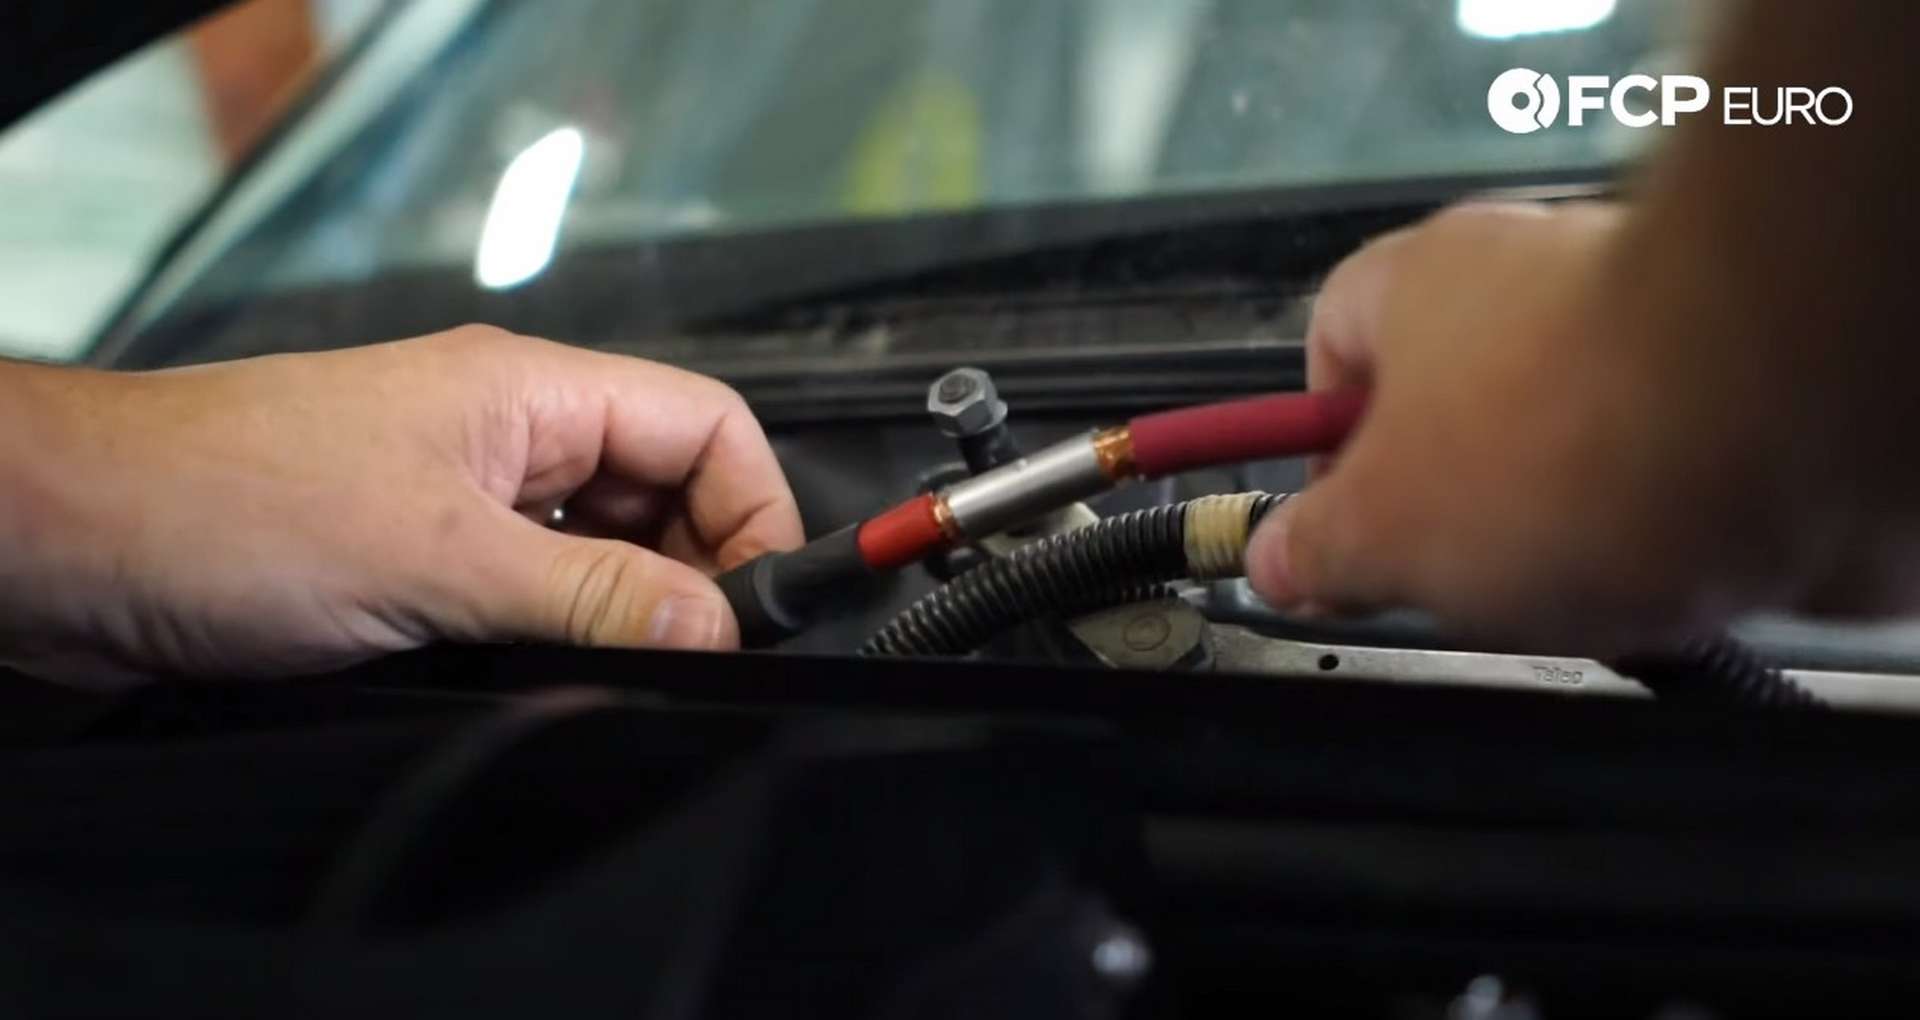
The next step is to determine the length of cable you'll need. This will be from the battery to the kill switch and from the kill switch to a PDM, ECU, or positive battery post in the engine bay. Be sure to get extra cable. Run the cable on the inside of the cage, and tuck it away for safety.
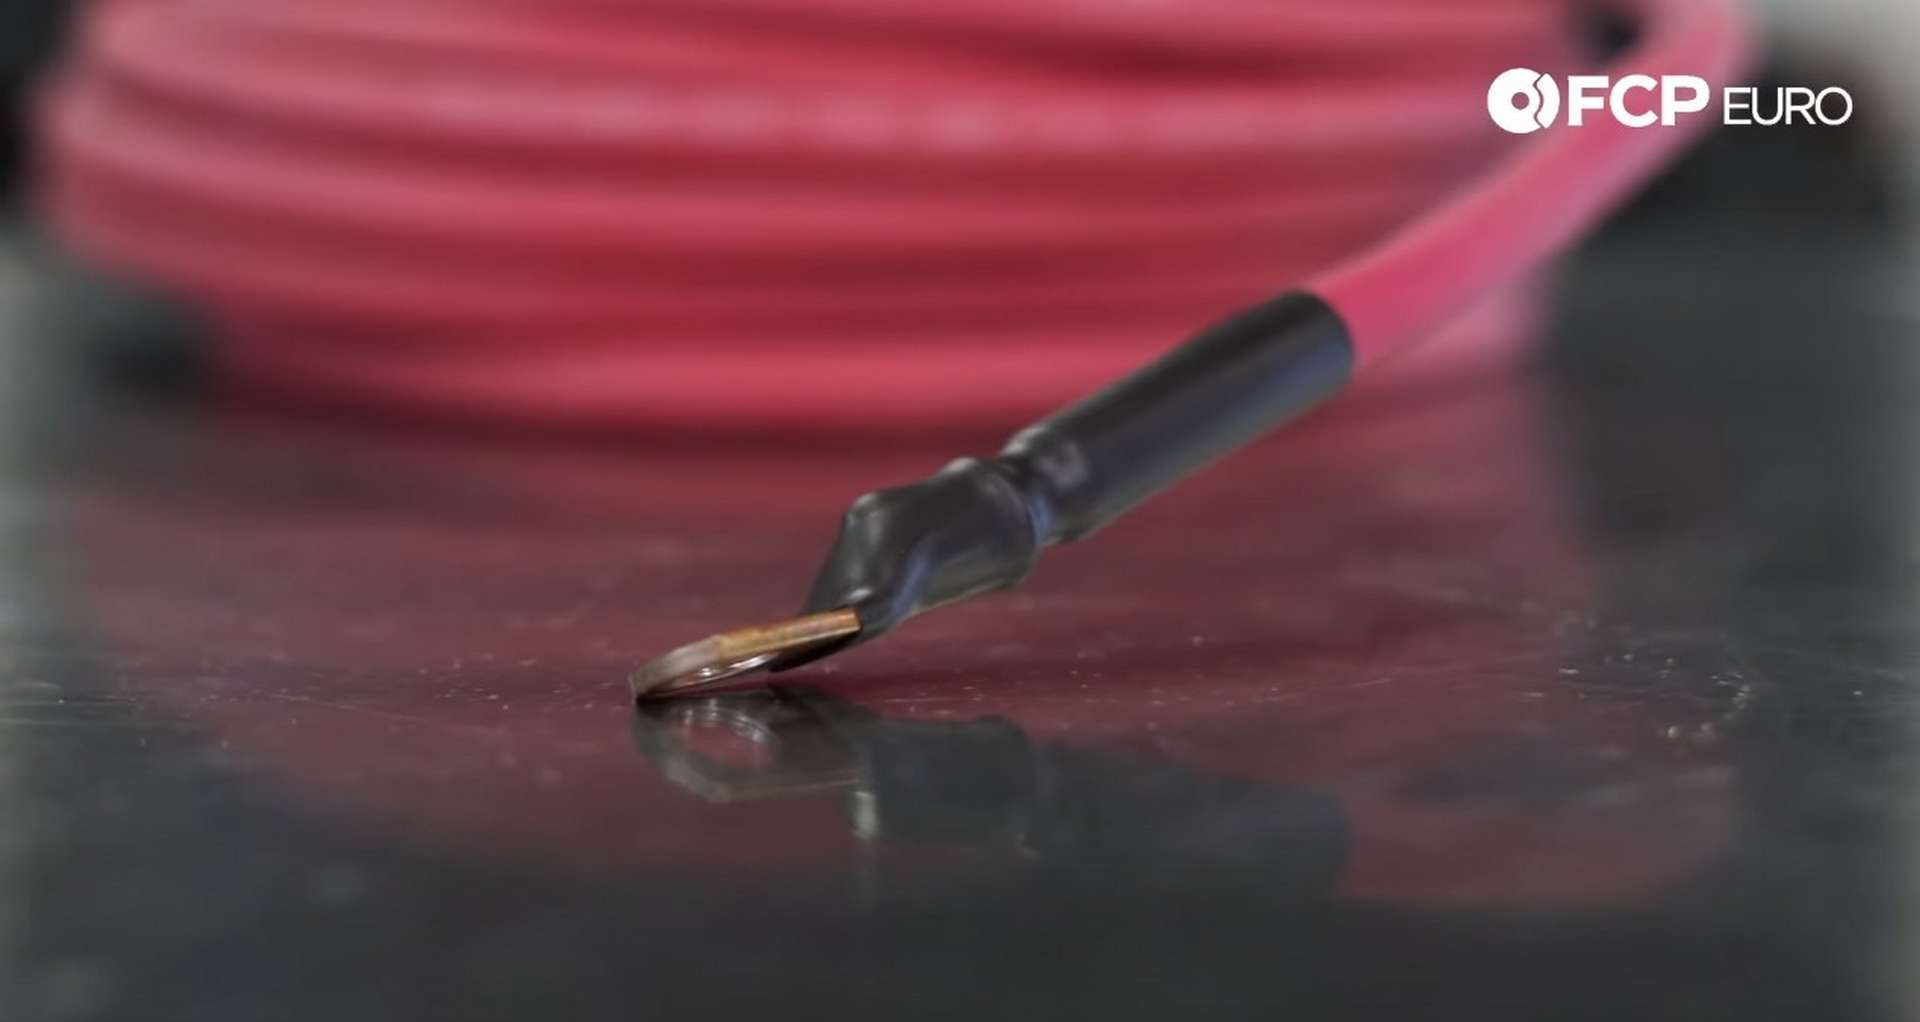
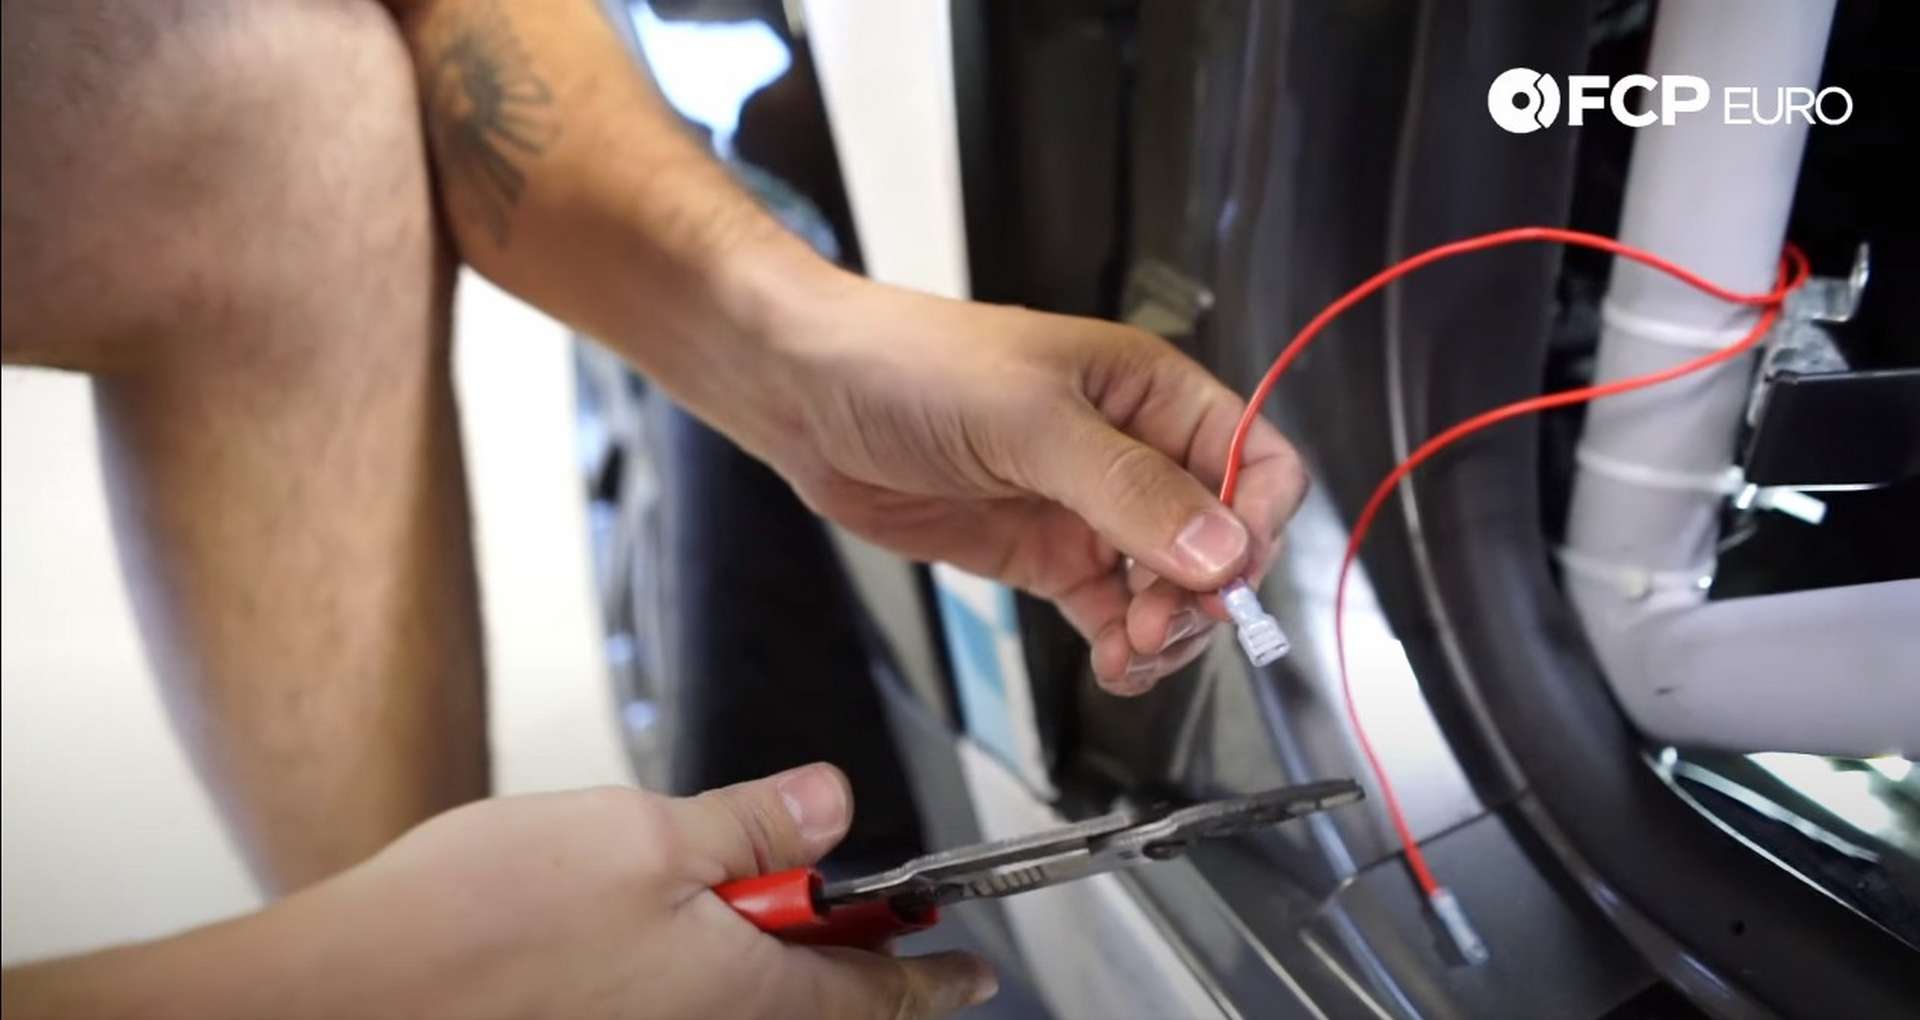
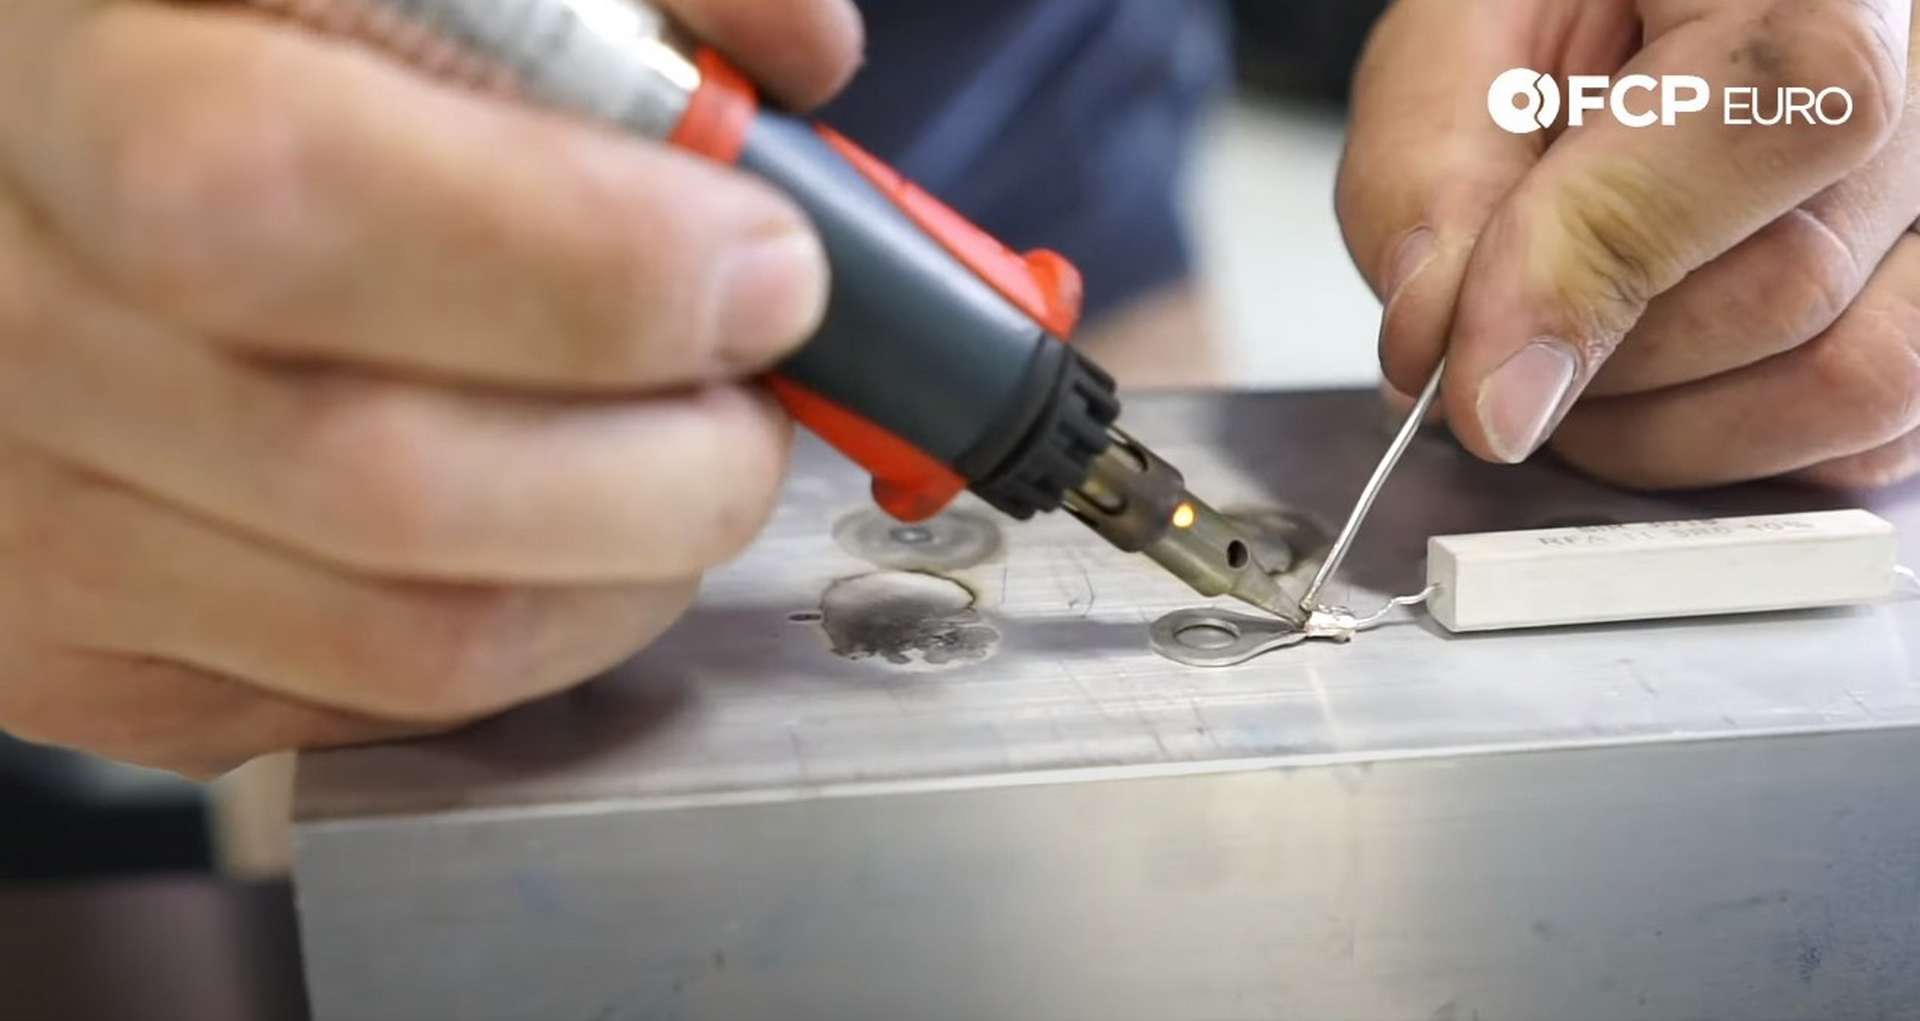
Next, you can prepare one end of the cable for the positive battery post. Slide the shrink tubing away from the end of the cable and then use wire strippers to expose the end. Use the cable end to determine how much wiring needs to be exposed.
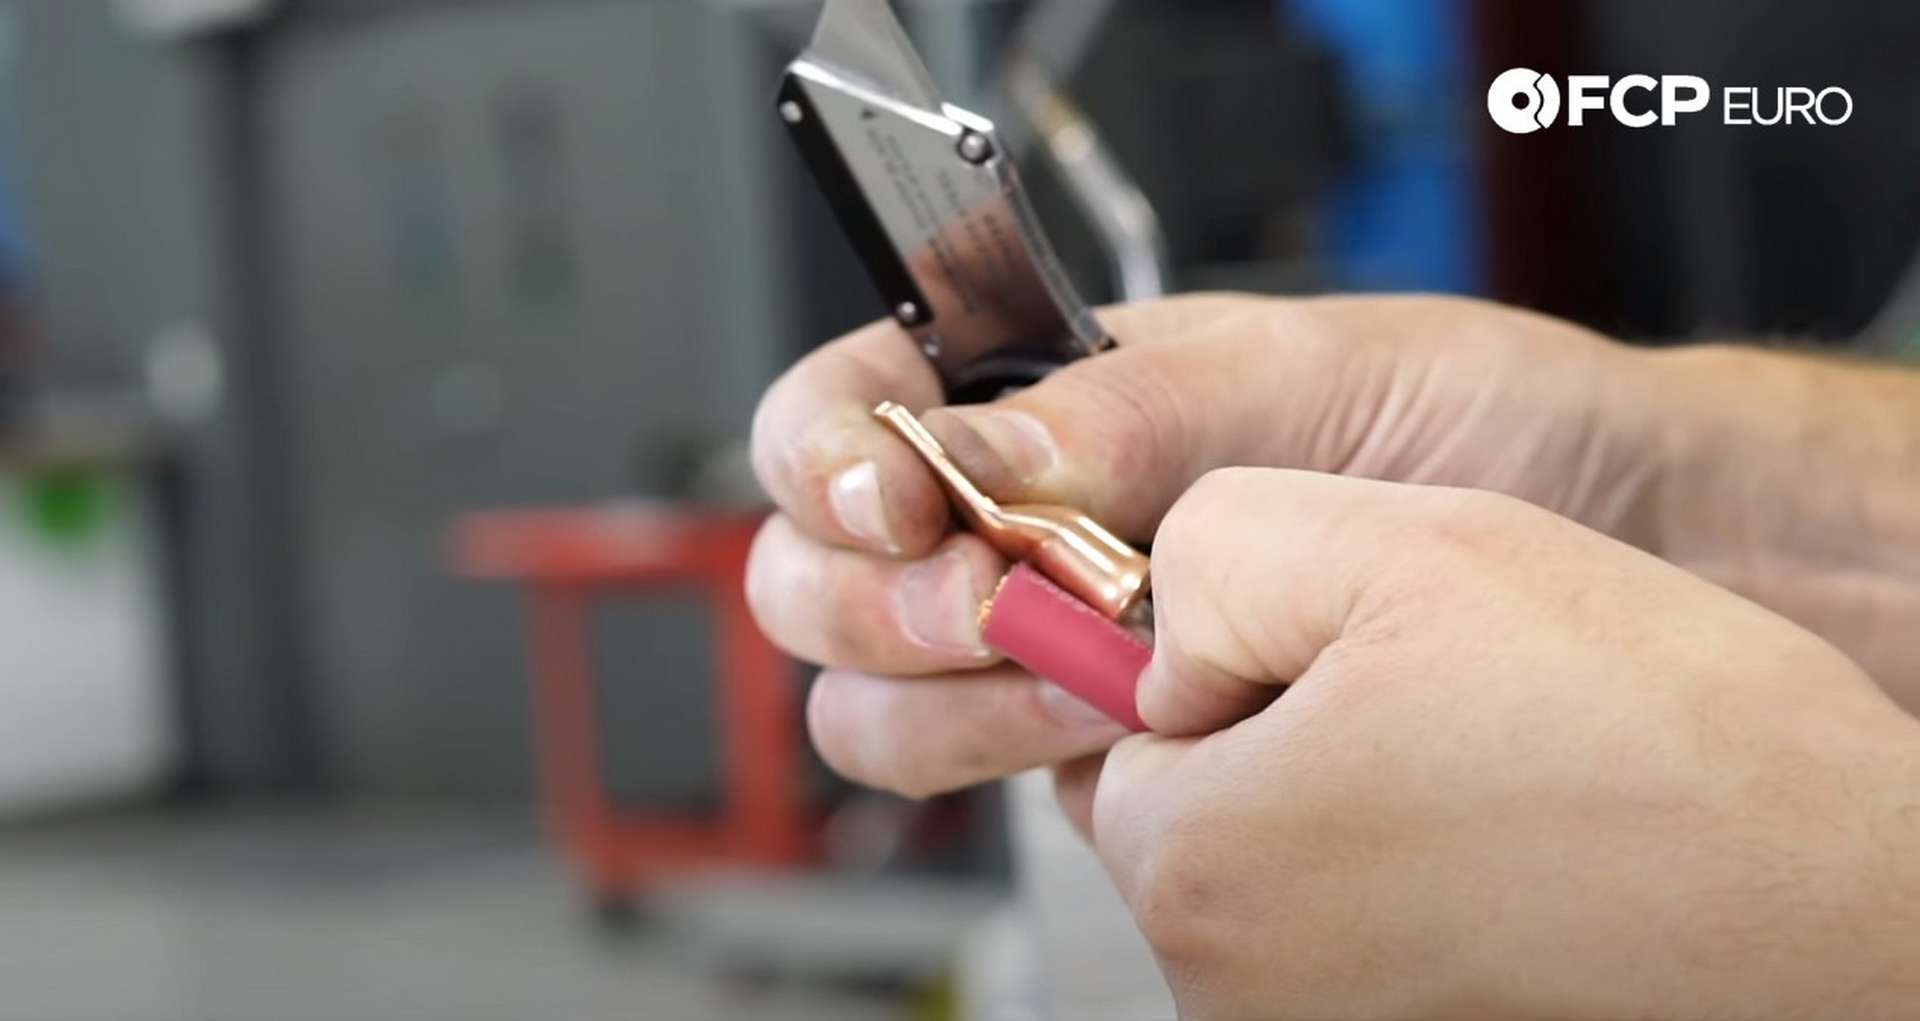
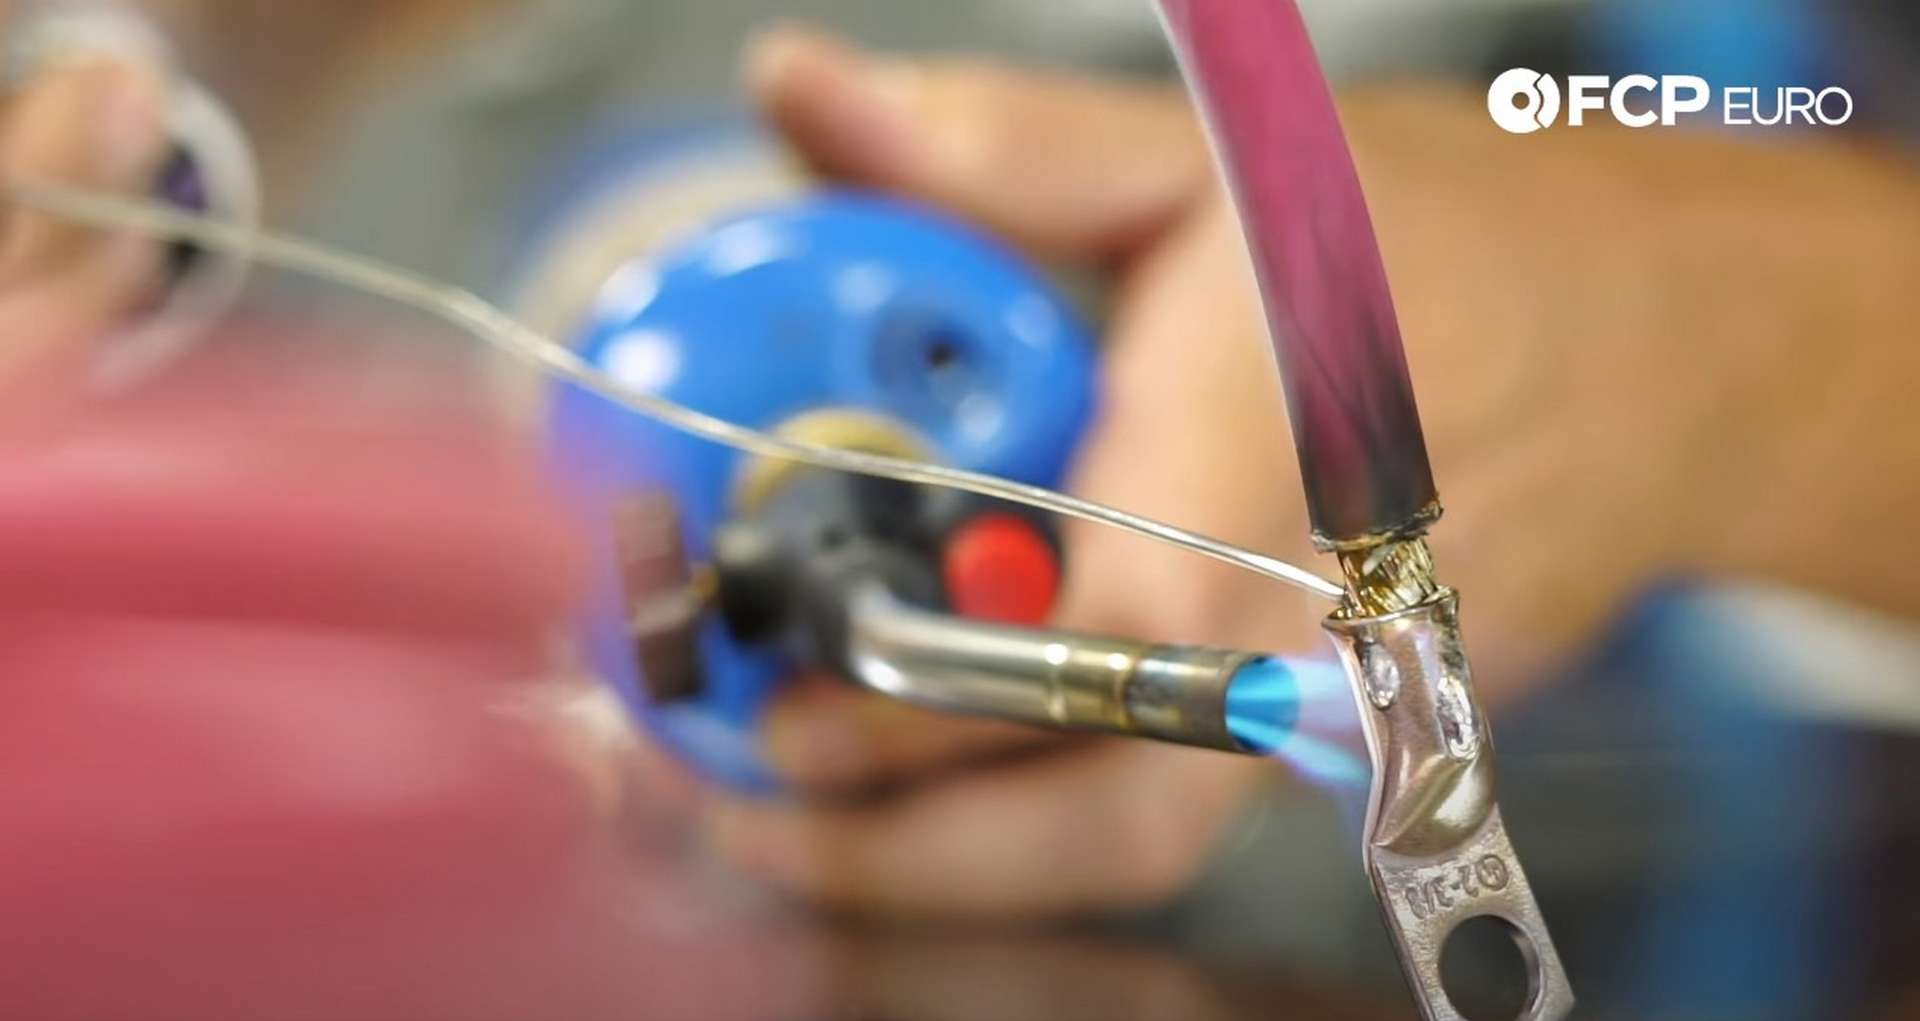
Twist the copper wire strands to corral them and then slide the cable end over them. Use a torch and solder the cable end onto the cable. Seal up the connection with the shrink wrap.
Connect the completed end to the battery and run it to where the kill switch is or will be located. Run the cable to the original location of the battery at the front of the car. For show cars, take this time to route the cable under the carpet. Keep the cable away from any sharp edges to prevent wear on the cable's sheathing.
Cut the other end of the cable at the length you need it to be and give it the same treatment as the other cable end.
Reconnecting the power (No Battery Kill Switch)
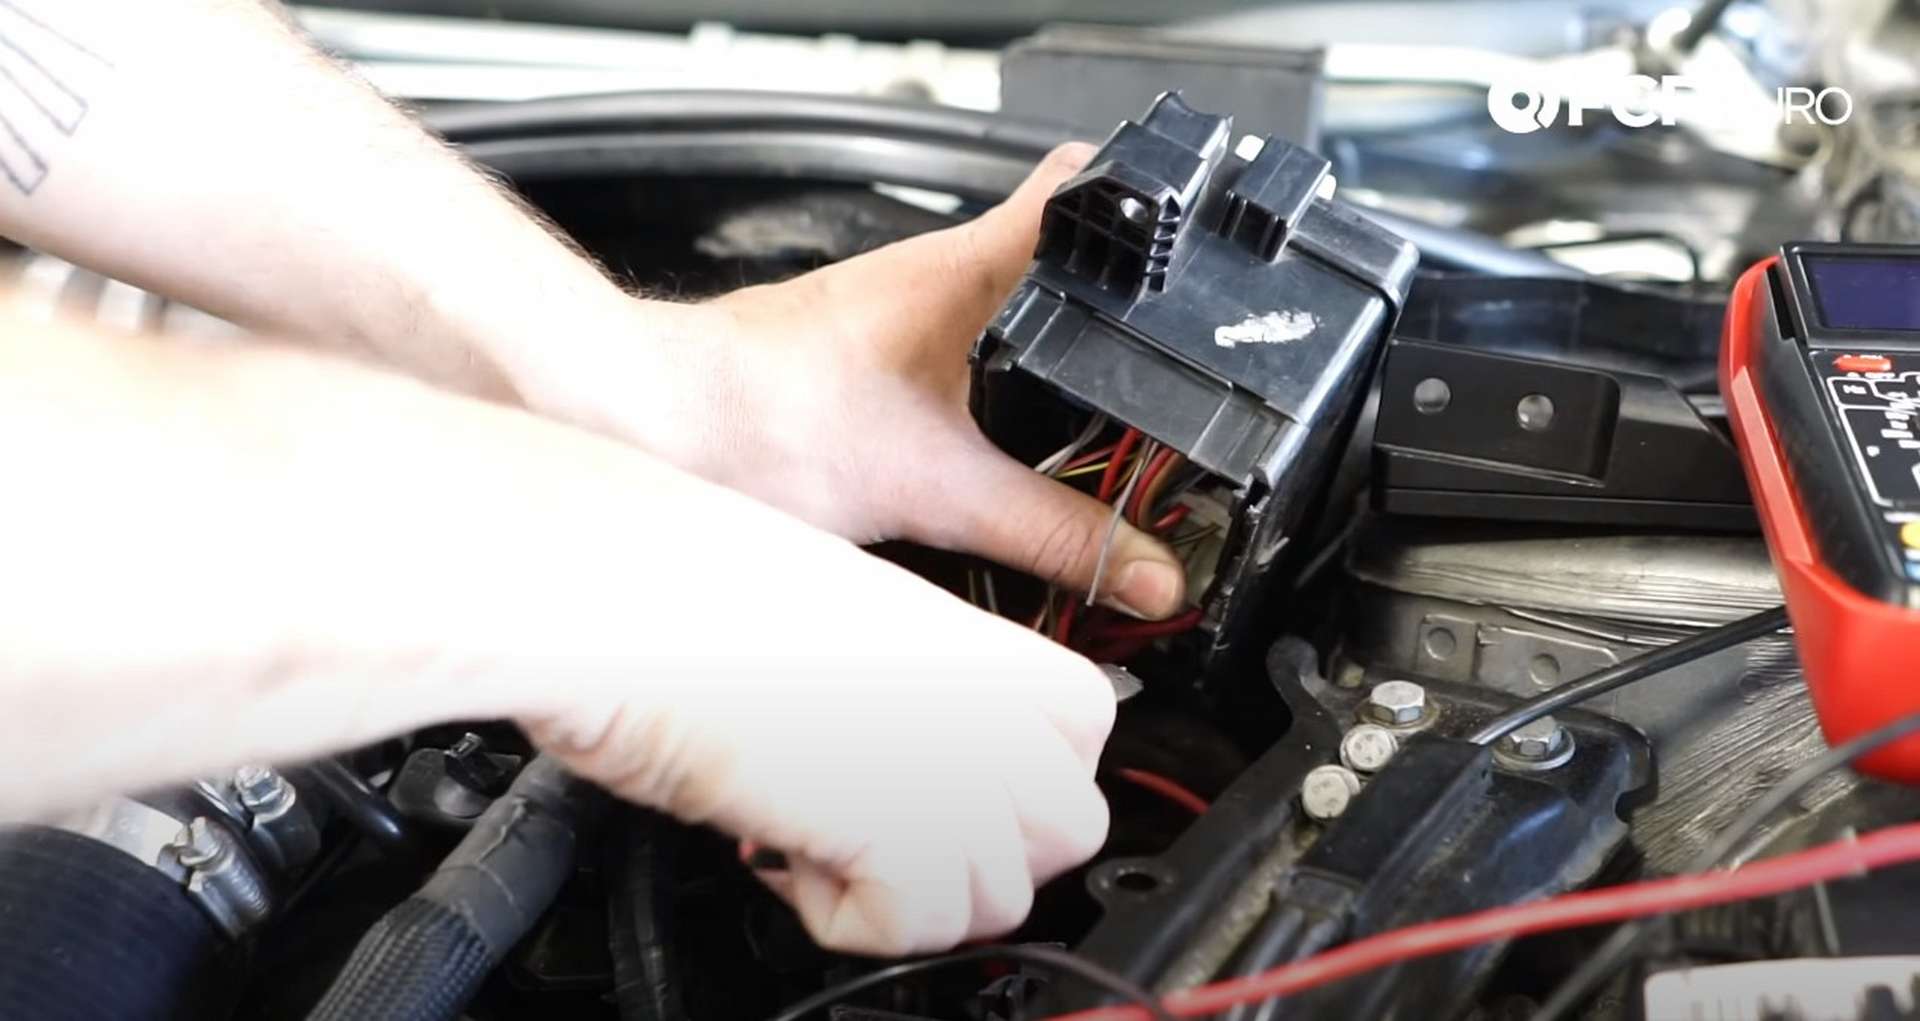
The process for reconnecting the power is much more straightforward without a kill switch. Through either a new post or a bolt, connect the new positive cable to the power lead from the fuse box or PDM.
Using a standalone positive post in the engine bay gives you a place to jump the car from without going into the trunk to connect directly to the battery. It is a clean and simple solution that will allow you to neatly run any cable needing battery power to one engine bay source.
Extend the Engine Bay Cables (Battery Kill Switch)
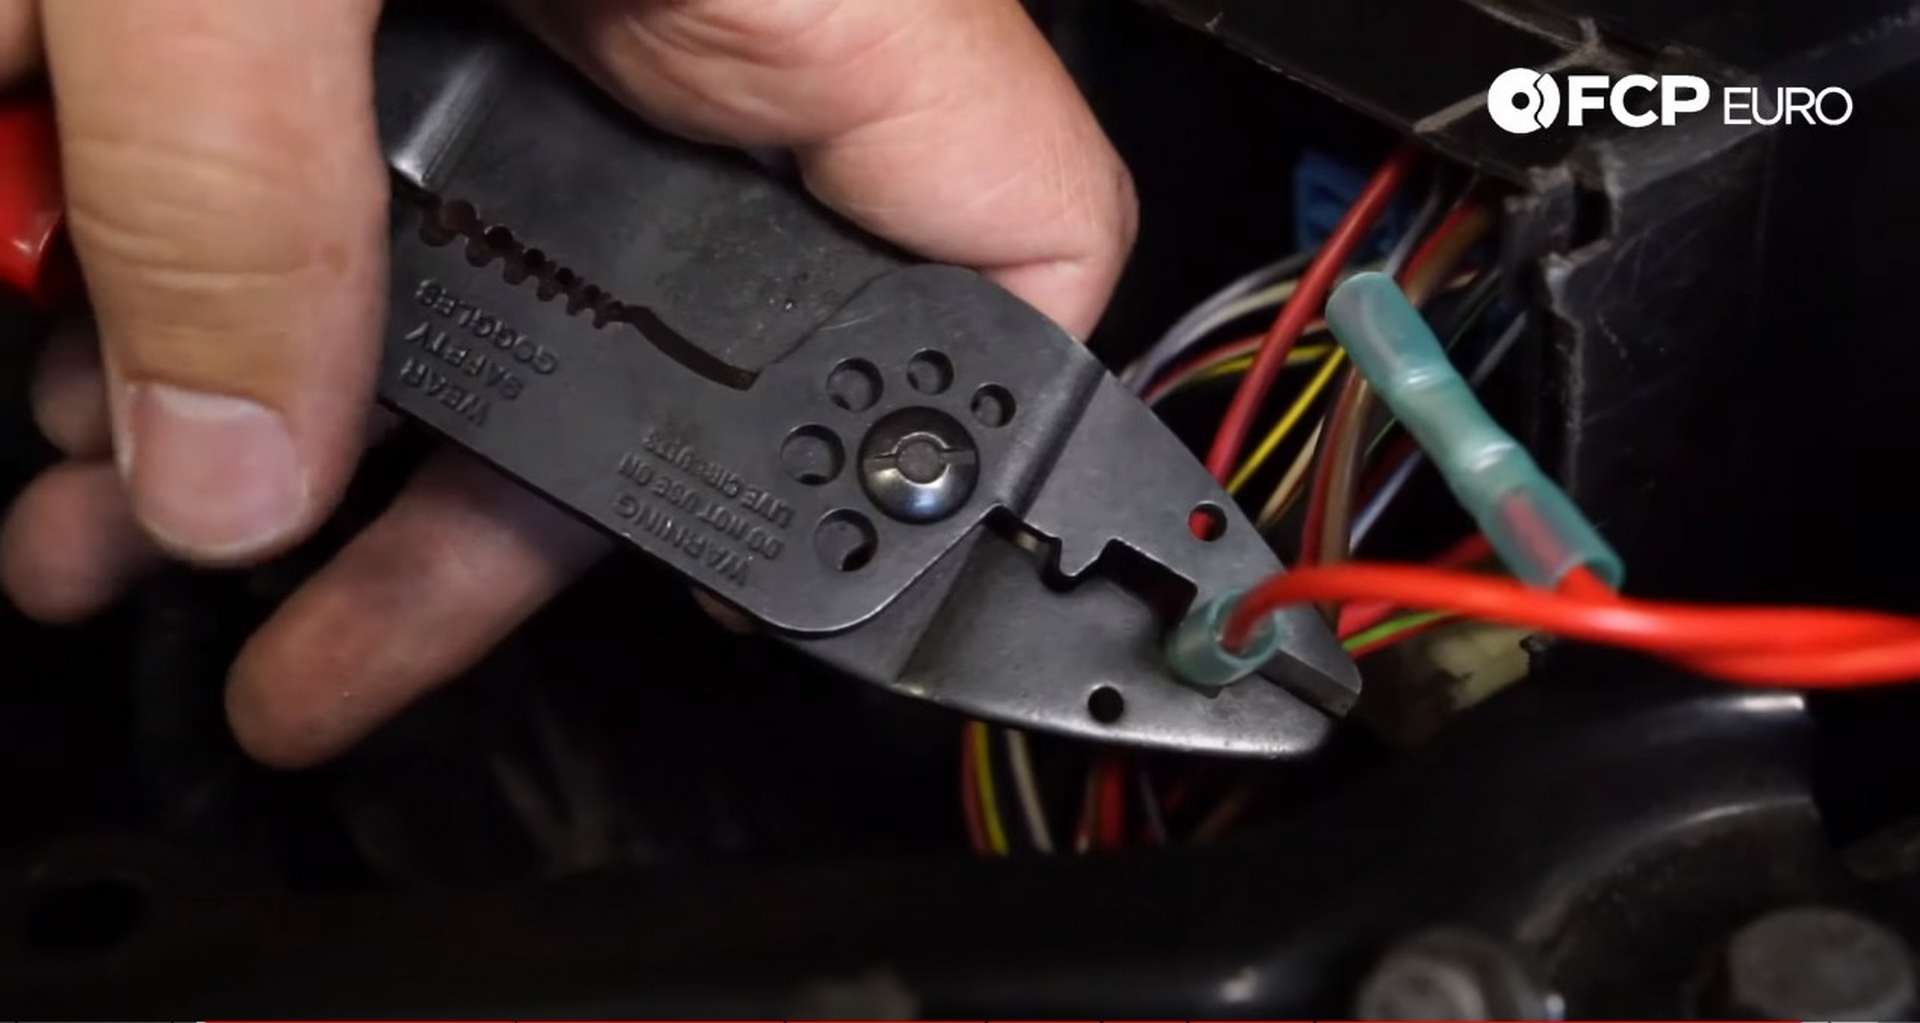
The cables in the engine bay that initially connected directly to the battery now need to be connected to the kill switch. The proper way to do it is by cutting the ends off those cables and extending them using a butt connector and another length of wire to reach into the cabin. Connect the cables with the butt connector, or by soldering them directly together, then cover the exposed wire with heat shrink.
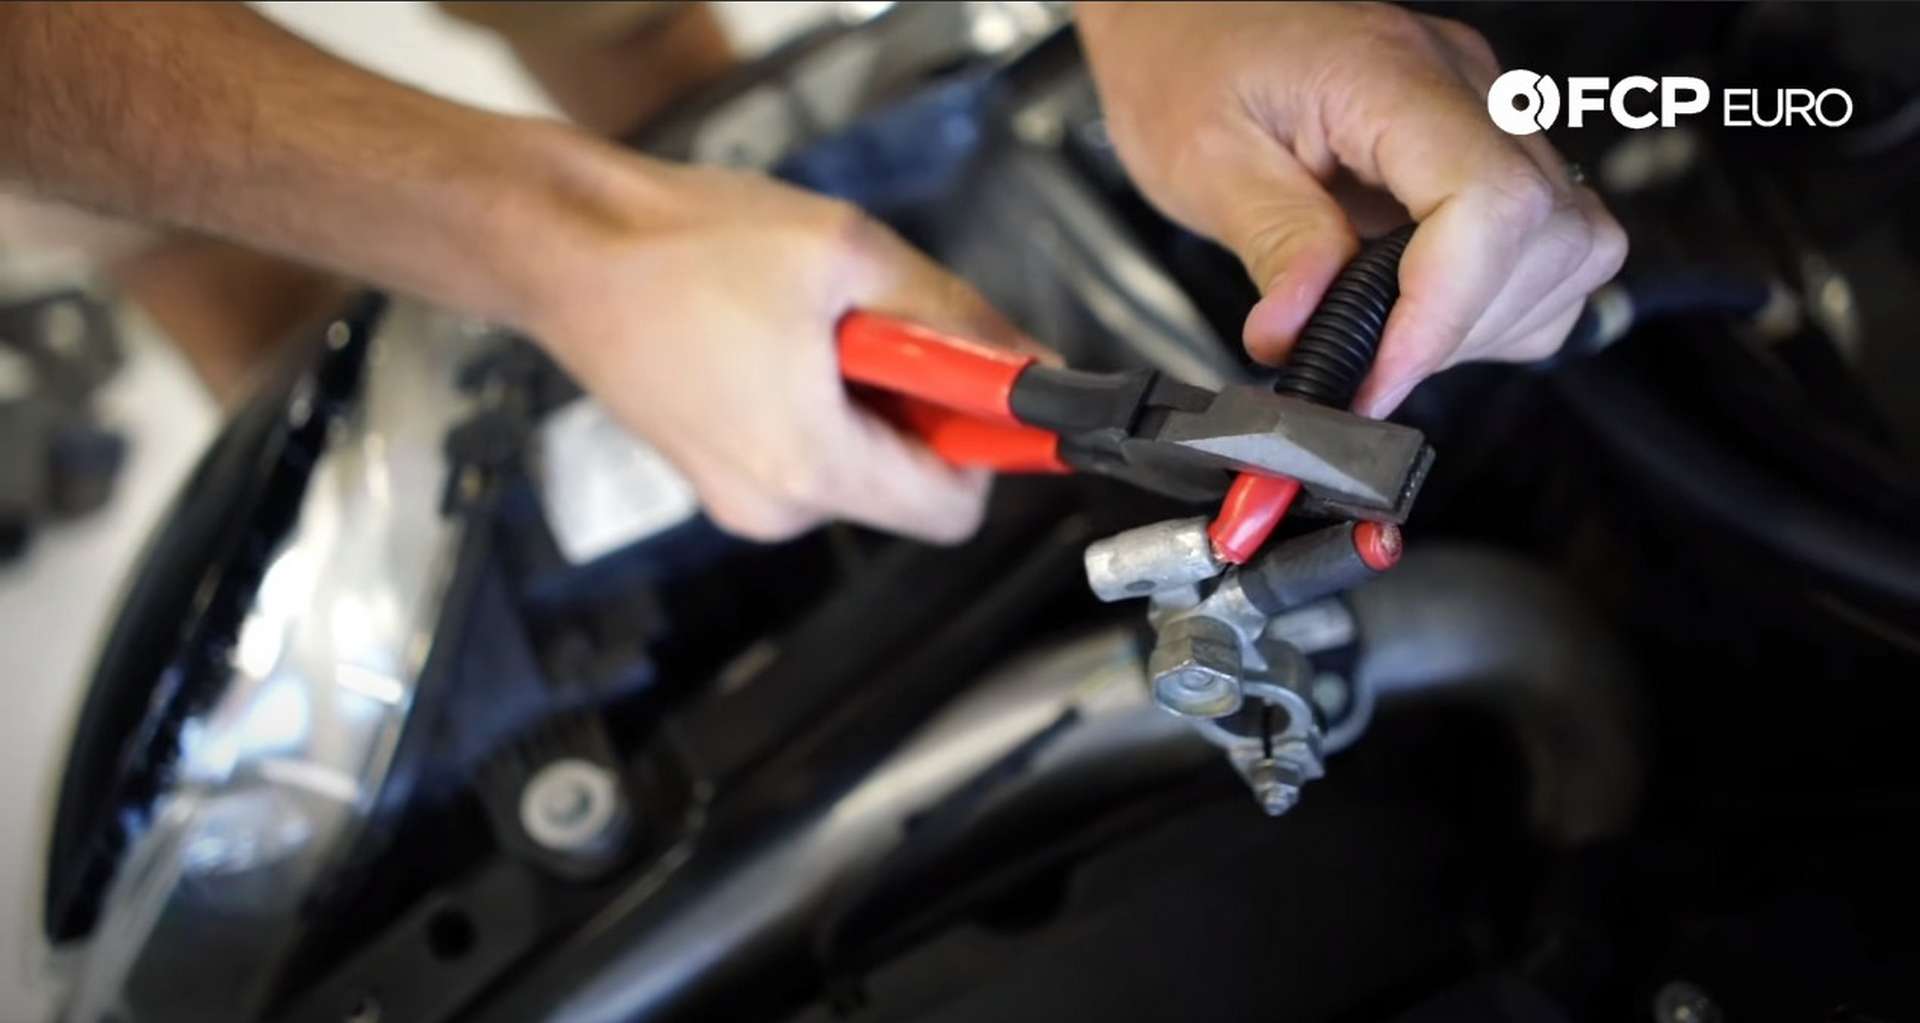
Pass the extended cable through a grommet in the firewall to the kill switch. Once the proper length of cable is determined, trim it to length and solder on a ring terminal.
Attach the Cables to the Battery Kill Switch
The Sparco kill switch that we used in the DIY is available on our website. Using the supplied hardware, attach the engine bay cable to the top post and connect the cable from the battery to the bottom post on the kill switch.
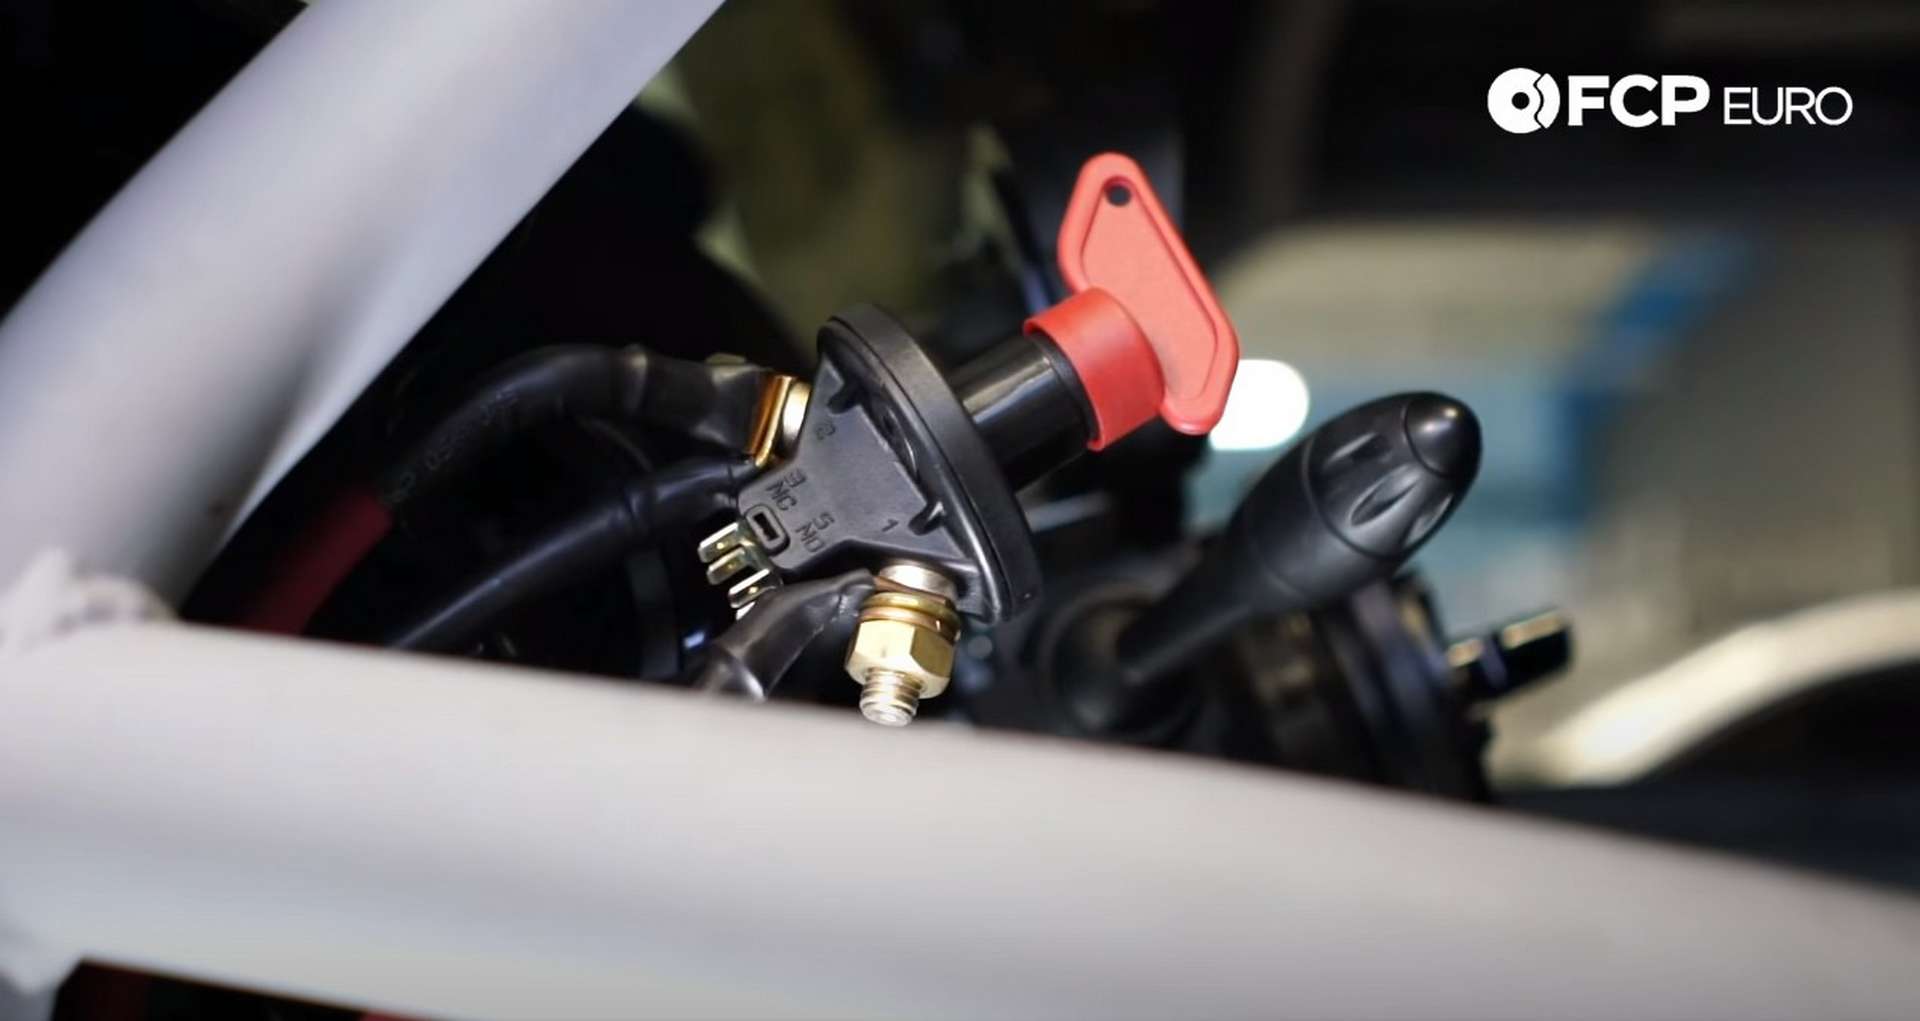
At the back of the kill switch are two pairs of terminals. Clip the switched-power ignition relay wire and run it through the two "NO" pins. Doing so will make sure that the ECU turns off when the kill switch is turned. Use female blade connectors on the wires leading off of the NO pins and then solder those wires to the clipped ignition relay wire.
Use the "NC" pins to prevent an electrical surge from the alternator damaging the ECU. Use a short wire to connect the engine-side battery cable post to one of the NC pins. Use another length of wire to connect the second NC pin to a ground on the chassis. Included with the kill switch is a 3.3-ohm resistor. Solder a ring terminal to one end of the resistor and then solder the other end of the ground wire to the other end of the resistor.

Connect the ground wire to a ground, and the kill switch wiring is complete.
Making a ground wire
The ground used by the battery in the engine bay will not work if you go through with a battery relocation to the trunk. Find a stud or threaded hole around the battery where you could connect a ground strap. Expose the surface around the hole or stud to bare metal. Use the same process for creating the new positive cables to make the new ground cable. Then connect the cable to the battery and chassis.
Testing the circuit
Turn the kill switch, or the ignition if you don't have a kill switch, to the on position. The dash should light up as if no work had been done. If no lights are present, you have an issue with your wiring.
With that, your car is now fully rewired with a relocated battery and maybe even a kill switch. If you're interested in more DIYs, you can visit our blog home page and subscribe to our YouTube channel.


