- 09/05/2018
- 3 Min Read
- By: Jose Martinez
How To Change The Fan Belt On an Air-Cooled Porsche 911

Here's a quick tutorial on how to change the fan belt on your classic air-cooled Porsche 911.
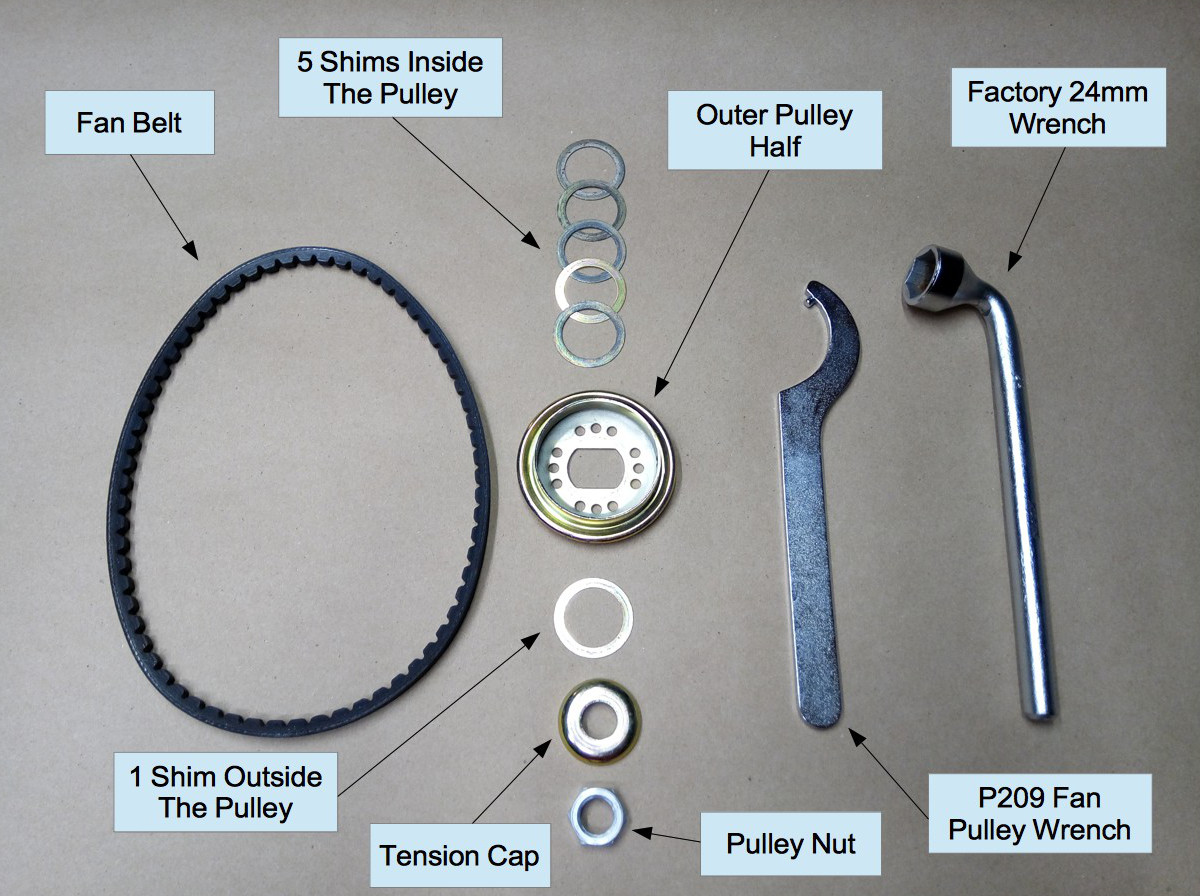
Your Porsche 911's fan belt is the only link between the rotating engine and the cooling fan. It uses two separate pulley halves and a set of six shims to control the tension in the belt. It's a simple, yet effective system similar to the old Porsche 356 and old air-cooled Volkswagens.
However, big problems can develop should that belt break. Preventative maintenance, aka replacing the belt, can make sure you avoid what could potentially be a catastrophic disaster. It's also a good idea to keep one of these inside your car as a spare just in case one fails mid-journey, wherever you might be.
Model Years Applicable:
All Porsche 911 models up to 1989.
Tools Needed To Complete This Repair:
-
Fan pulley wrench
-
1975 and earlier 8-hole pulley: use P208 fan pulley wrench
-
1976-1989 12-hole pulley: use P209 fan pulley wrench
-
-
24mm socket and ratchet (or 24mm wrench from factory tool kit)
-
Torque wrench (if using the 24mm socket)
Parts Needed:
-
-
1975 and earlier 911: use 10x710 fan belt
-
1976-1979 911, use 10x725 fan belt
-
1976-1979 Turbo, use 10x710 fan belt
-
1980-1989 911 and Turbo use 10x710 fan belt
-
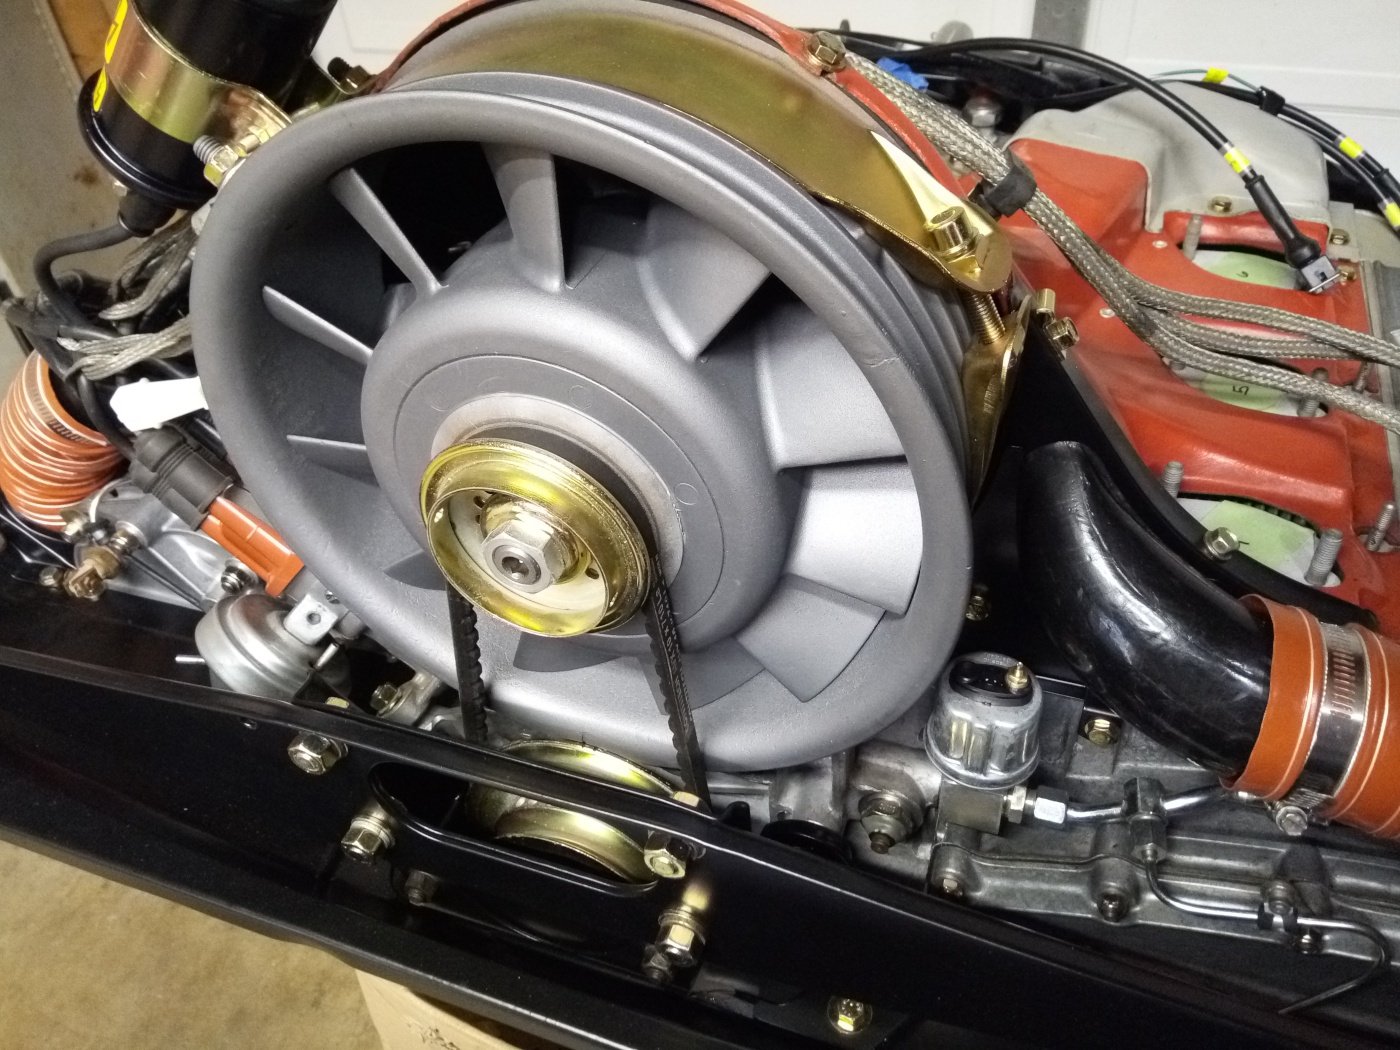
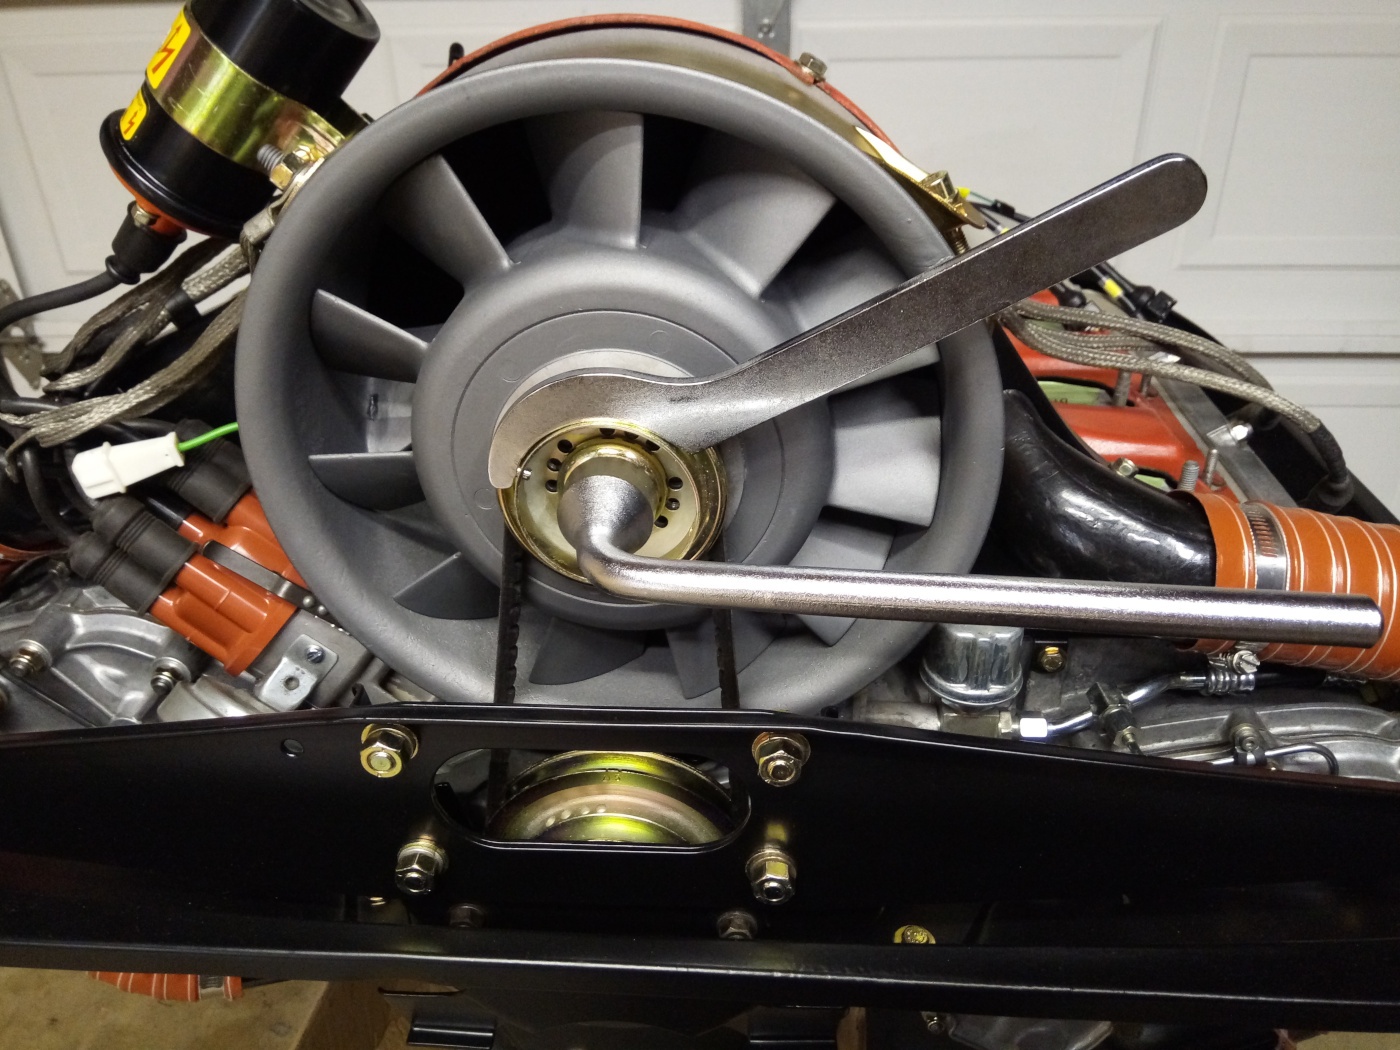
Step 1: Loosen Fan Pulley
Attach the fan pulley wrench to the holes in the outer pulley half to hold it stationary. Use the 24mm socket or wrench to turn the pulley nut counterclockwise to loosen it.
Once the nut is broken loose, carefully spin the pulley nut from the threaded alternator shaft. Remove the tension cap next. Take note of the number of shims (if any) that are located between the tension cap and the outer pulley half. Pull off the shims, the outer pulley half, as well as the shims underneath the outer pulley half. The fan belt should now be loose.
Note: You must have six shims total in order for the belt and pulley nut to tighten correctly. If you are missing any, order replacement ones.
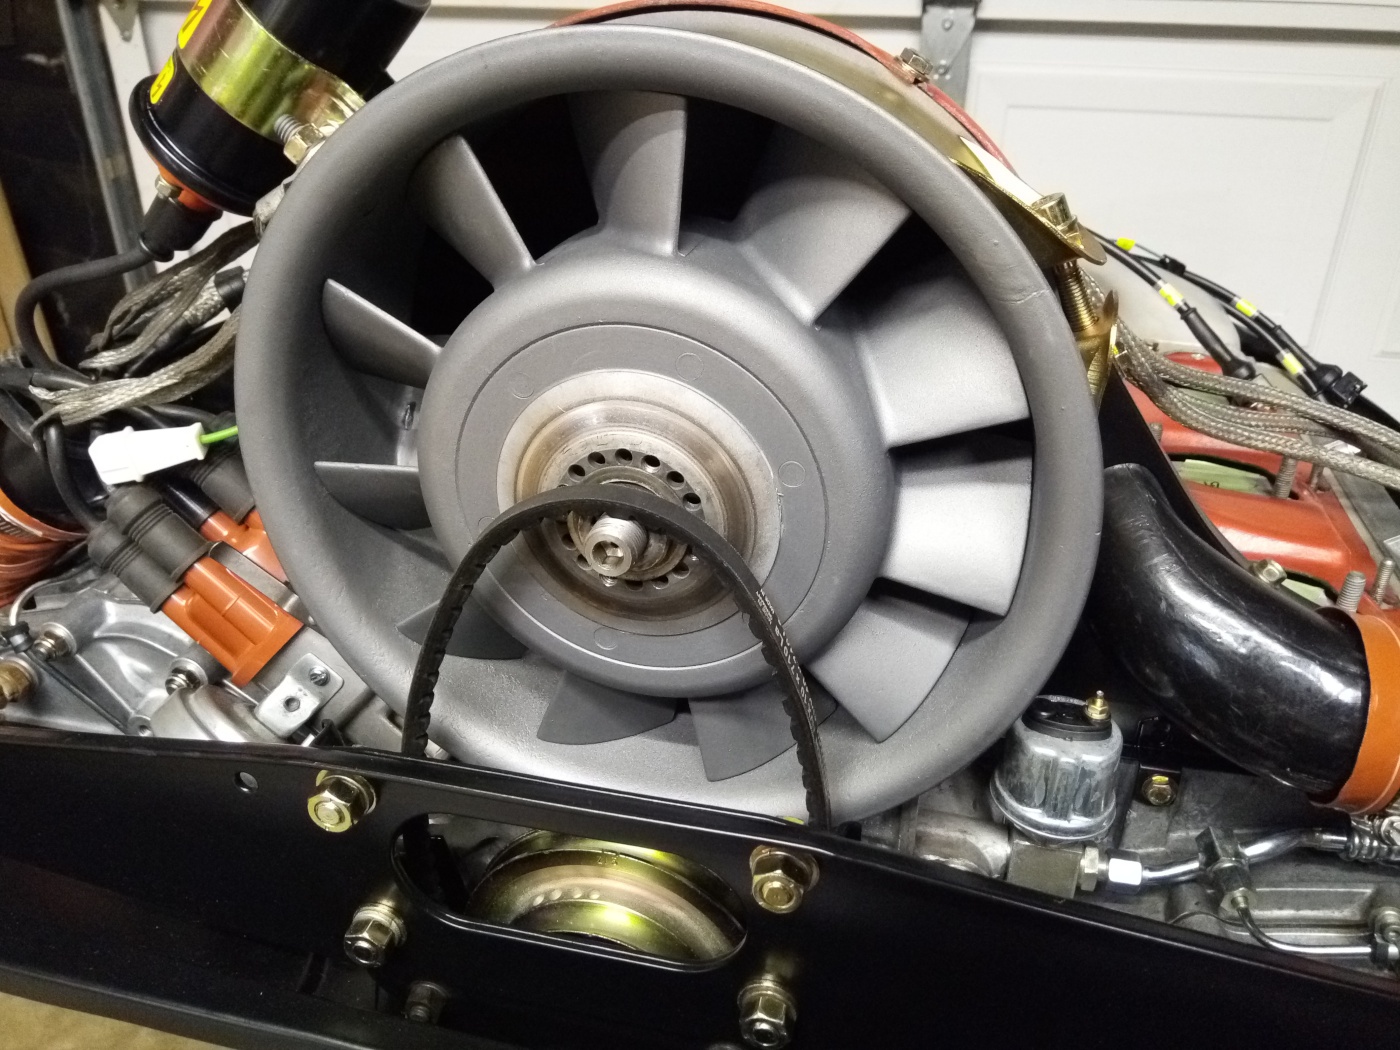
Step 2: Replace Fan Belt
Remove the old fan belt by unhooking it from the groove in the crank pulley, located below the fan pulley. Hook a new belt into the crank pulley groove and loop the top around the alternator shaft and hub of the cooling fan, which doubles as the inner fan belt pulley.
Step 3: Tighten Fan Belt
Regardless of the old position of the shims, when installing a new belt, start with 5 shims inside the outer pulley and 1 outside the pulley.
Reassemble the shims, outer pulley, tension cap, and pulley nut so that the top of the fan belt is captured between the pulley halves. Tighten the nut until snug, adjusting the belt by hand to keep it from pinching between the pulleys and to keep it in the crank pulley groove. Tighten the fan pulley nut clockwise with the 24mm socket or wrench slowly until the fan belt gets tight. The fan and engine may turn over as you are tightening. Once the belt and nut do not get any tighter use the fan pulley wrench to hold the pulley stationary once again and give the nut a final torque of 40 N-m (29.5 ft-lb). If you are using the pulley wrench from the factory tool kit, tighten the nut as hard as you can. The factory wrench should allow you to easily meet this torque requirement.
Step 4: Check Belt Tension and Adjust if Needed
Verify that the belt tension is correct by starting and running the engine for a minute or two to let the belt adjust into its final position. Then with the engine shut off, place a finger on the belt, halfway between both pulleys, and push by hand to deflect the belt. Belt tension is correct when the belt deflects between ¼ to ½ inches. If the belt deflects too much, transfer a shim from inside to the outside of the pulley. This reduces the clearance between the pulley halves and causes the belt to ride further up on the pulley, taking up some belt slack. If it deflects too little, move a shim from outside to inside the pulley to do the opposite. While adjusting belt tension move one shim at a time and fully torque the nut before checking tension. New belts stretch after the first few miles of use so re-check the tension after the first drive and adjust if needed.
Note: Inspect your belt condition and tension often and replace it if it looks worn or cracked. Keep an extra belt, shims, and the tools listed above in the car so you never get stranded by a broken belt.
Your new belt is now ready to run!


