No matter what vehicle you drive, it’s inevitable that—in time—your brakes will need bleeding. That means flushing old, contaminated brake fluid and air out of your brake lines and refilling them with the good stuff. It might sound intimidating, but it’s a simple measure of maintenance that can do away with a spongy brake pedal and provide a firmer, more immediate response when you need to stop in a hurry.
Here, we’ve broken down a few simple methods that should help, each using different tools you or someone you know might have handy. Whether you’re by yourself or have a friend to pump the brakes for you, at least one of these techniques should do the trick.
Setup to bleed your brakes

Regardless of which tools you’ll be using, make sure your car is jacked up and resting on a sturdy set of jack stands rated for the vehicle’s weight. Ideally, all four wheels should be lifted off the ground and removed.
Then it’s time to locate your vehicle’s master cylinder, otherwise known as a brake booster. You’ll find it fixed to the car’s firewall, underneath the hood, and typically on the driver’s side. It’s important to drain or siphon all of the old brake fluid out of the nearby reservoir before going forward. Replace it with new brake fluid, and be sure to check which fluid is recommended for your car’s specific make or model. You may need to add fresh fluid to the reservoir several times throughout the procedure.
You’ll also need to spot the bleeder valve, which is fixed on the back of each brake caliper. A properly-sized box wrench will make it easy to loosen and tighten the valve throughout the repair.
Always start with the wheel that’s farthest away from your master cylinder. In most cases, that’s the right-rear. You’ll want to bleed all four brakes, working toward the master cylinder as you go. Remember, the engine is turned off for this repair.
The following methods should work normally on vehicles with anti-lock brakes (ABS), though a scan tool may be necessary to complete the job in some cases.
Bleeding brakes with a kit
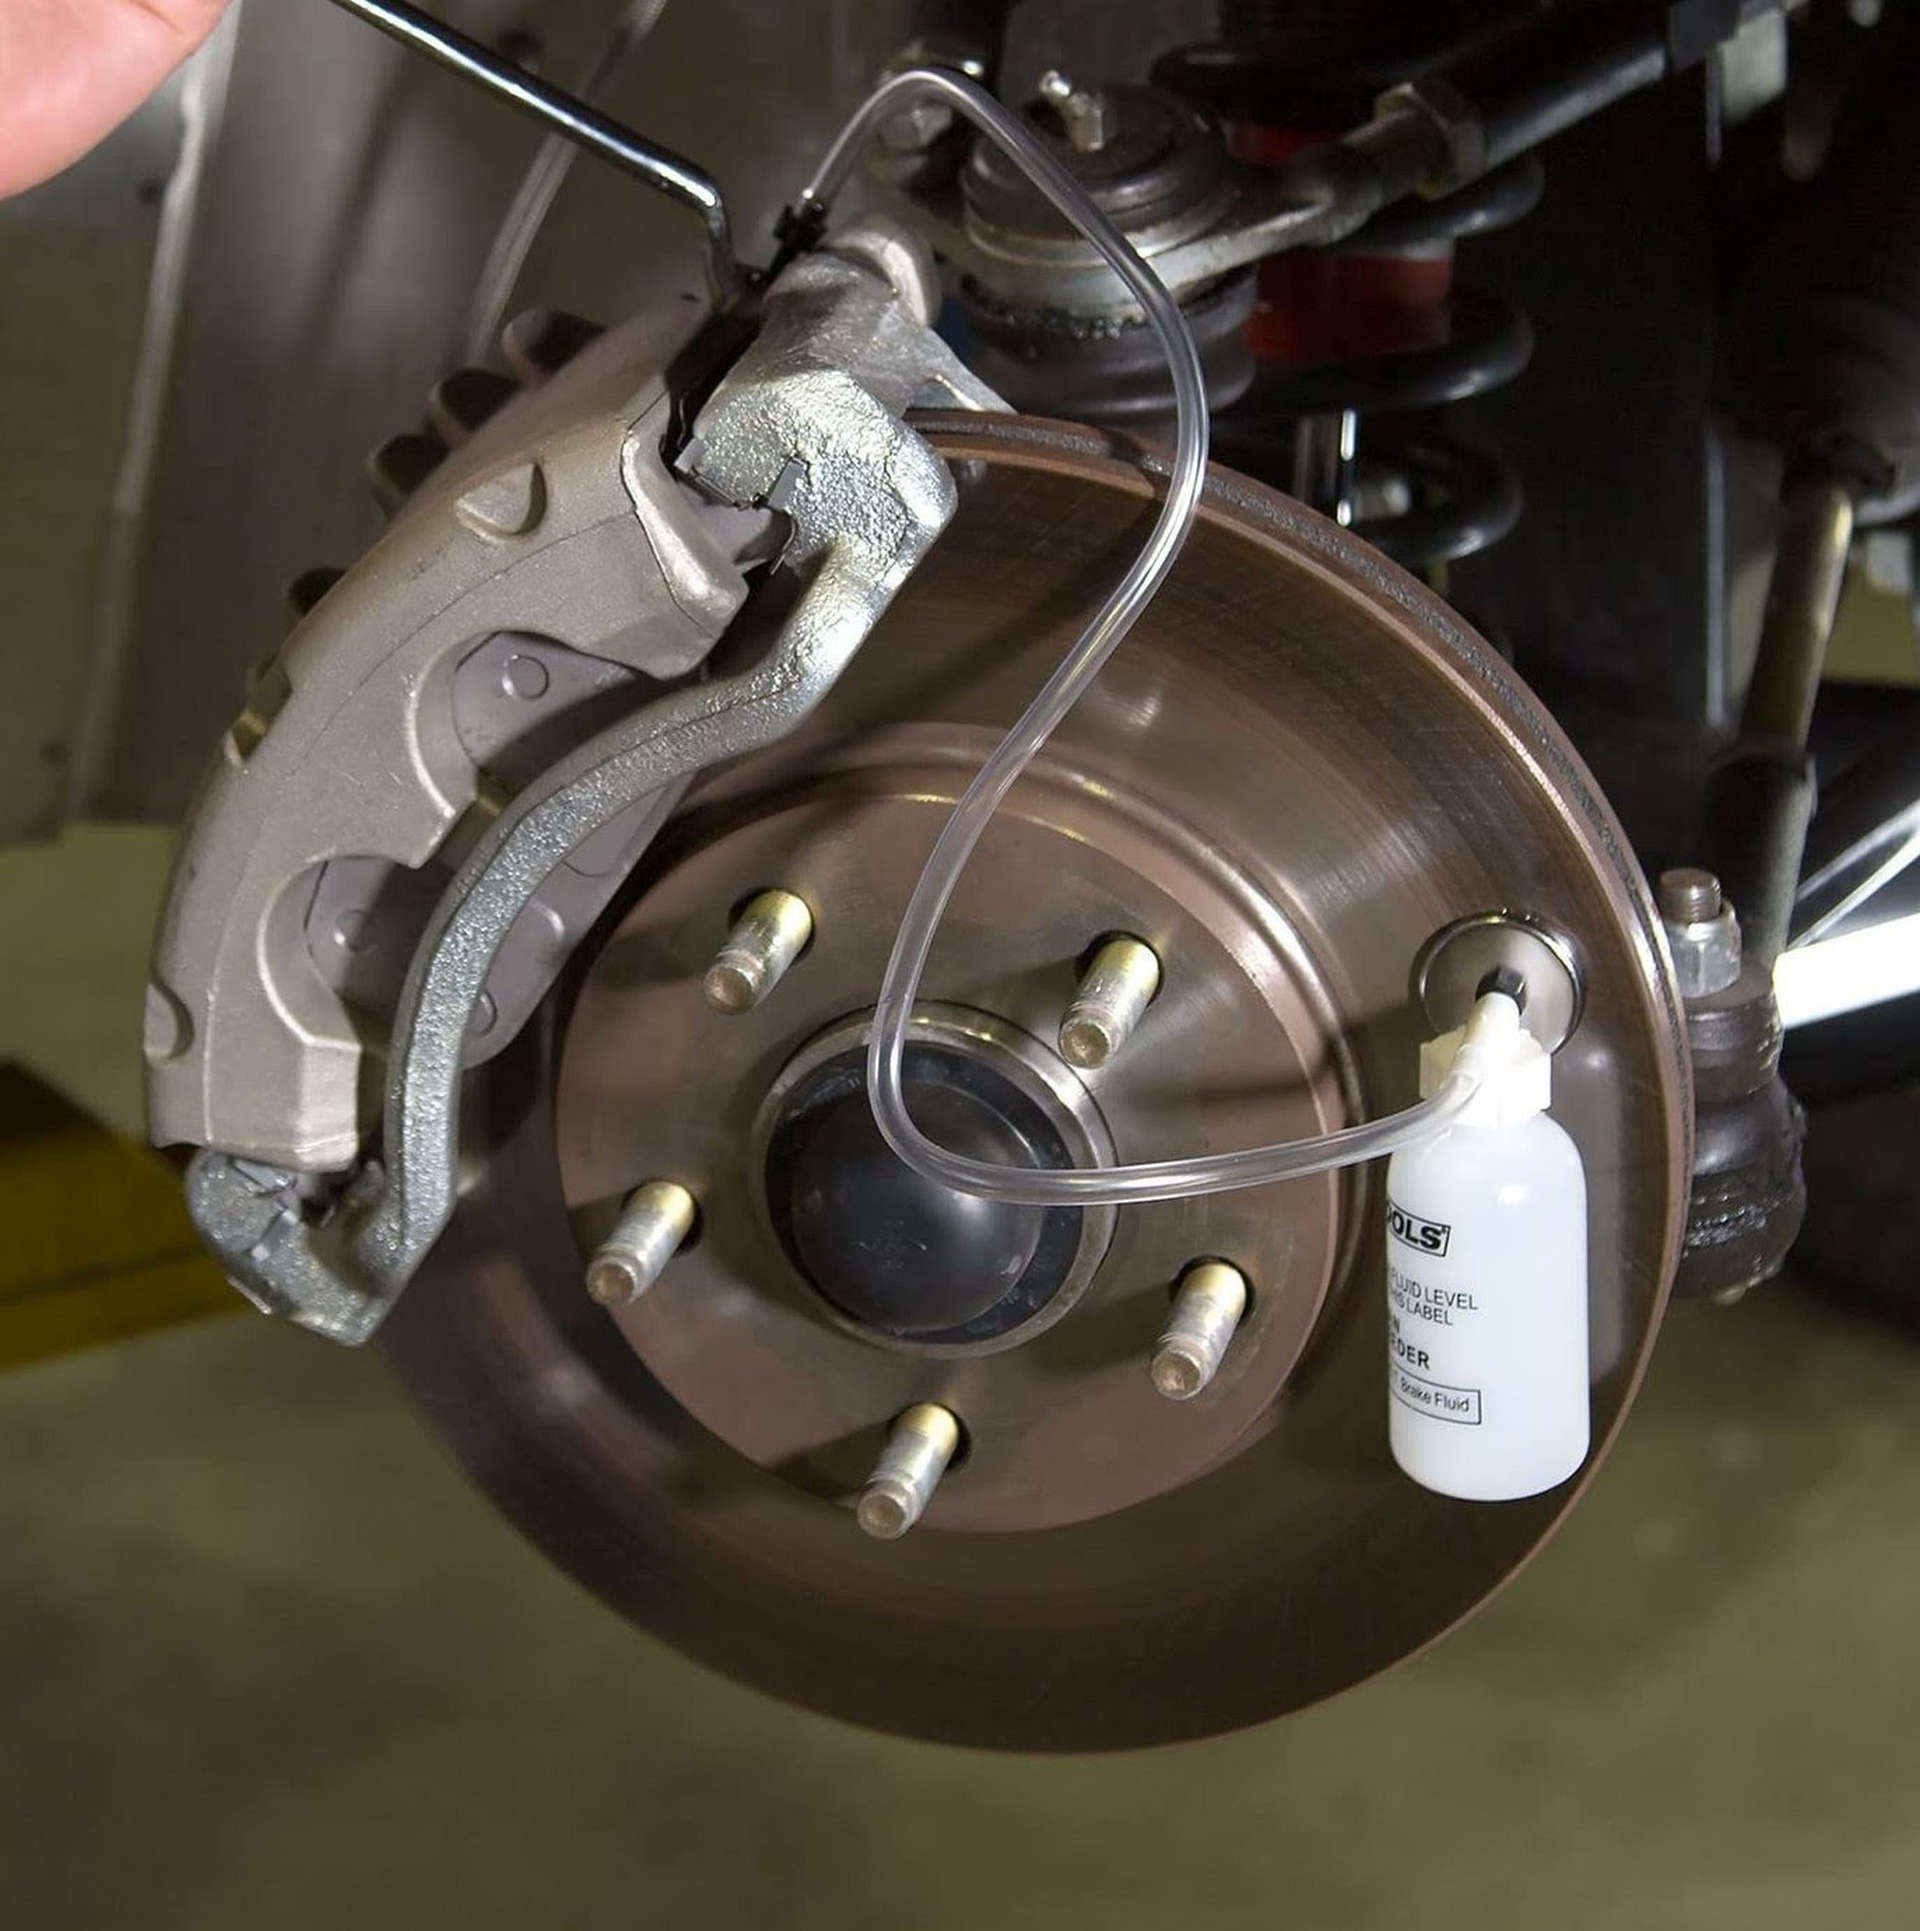
Gravity is your best friend when it comes to bleeding brakes without a power bleeder. Most Bleed-O-Matic type kits have a small bottle and magnetic plate that can be placed in plain view, somewhere beneath the bleeder valve. Once you’ve got your bottle mounted and hose fitted to the end of the bleeder valve, it’s time to pump the brakes and pressurize the system. Then, loosen the valve with your wrench and watch the reservoir fill with old fluid and air.
If gravity isn’t enough to complete the job and you still have a spongy pedal, see if you can find a friend to pump the pedal while the bleeder valve is closed. Once the system is pressurized, crack the valve and have them hold pressure on the brake pedal to flush all the old fluid and air out of the lines. Make sure to tighten it back before they release pressure or risk letting more air into the lines.
Pressurize. Hold. Bleed. Repeat.
Bleeding brakes without a kit
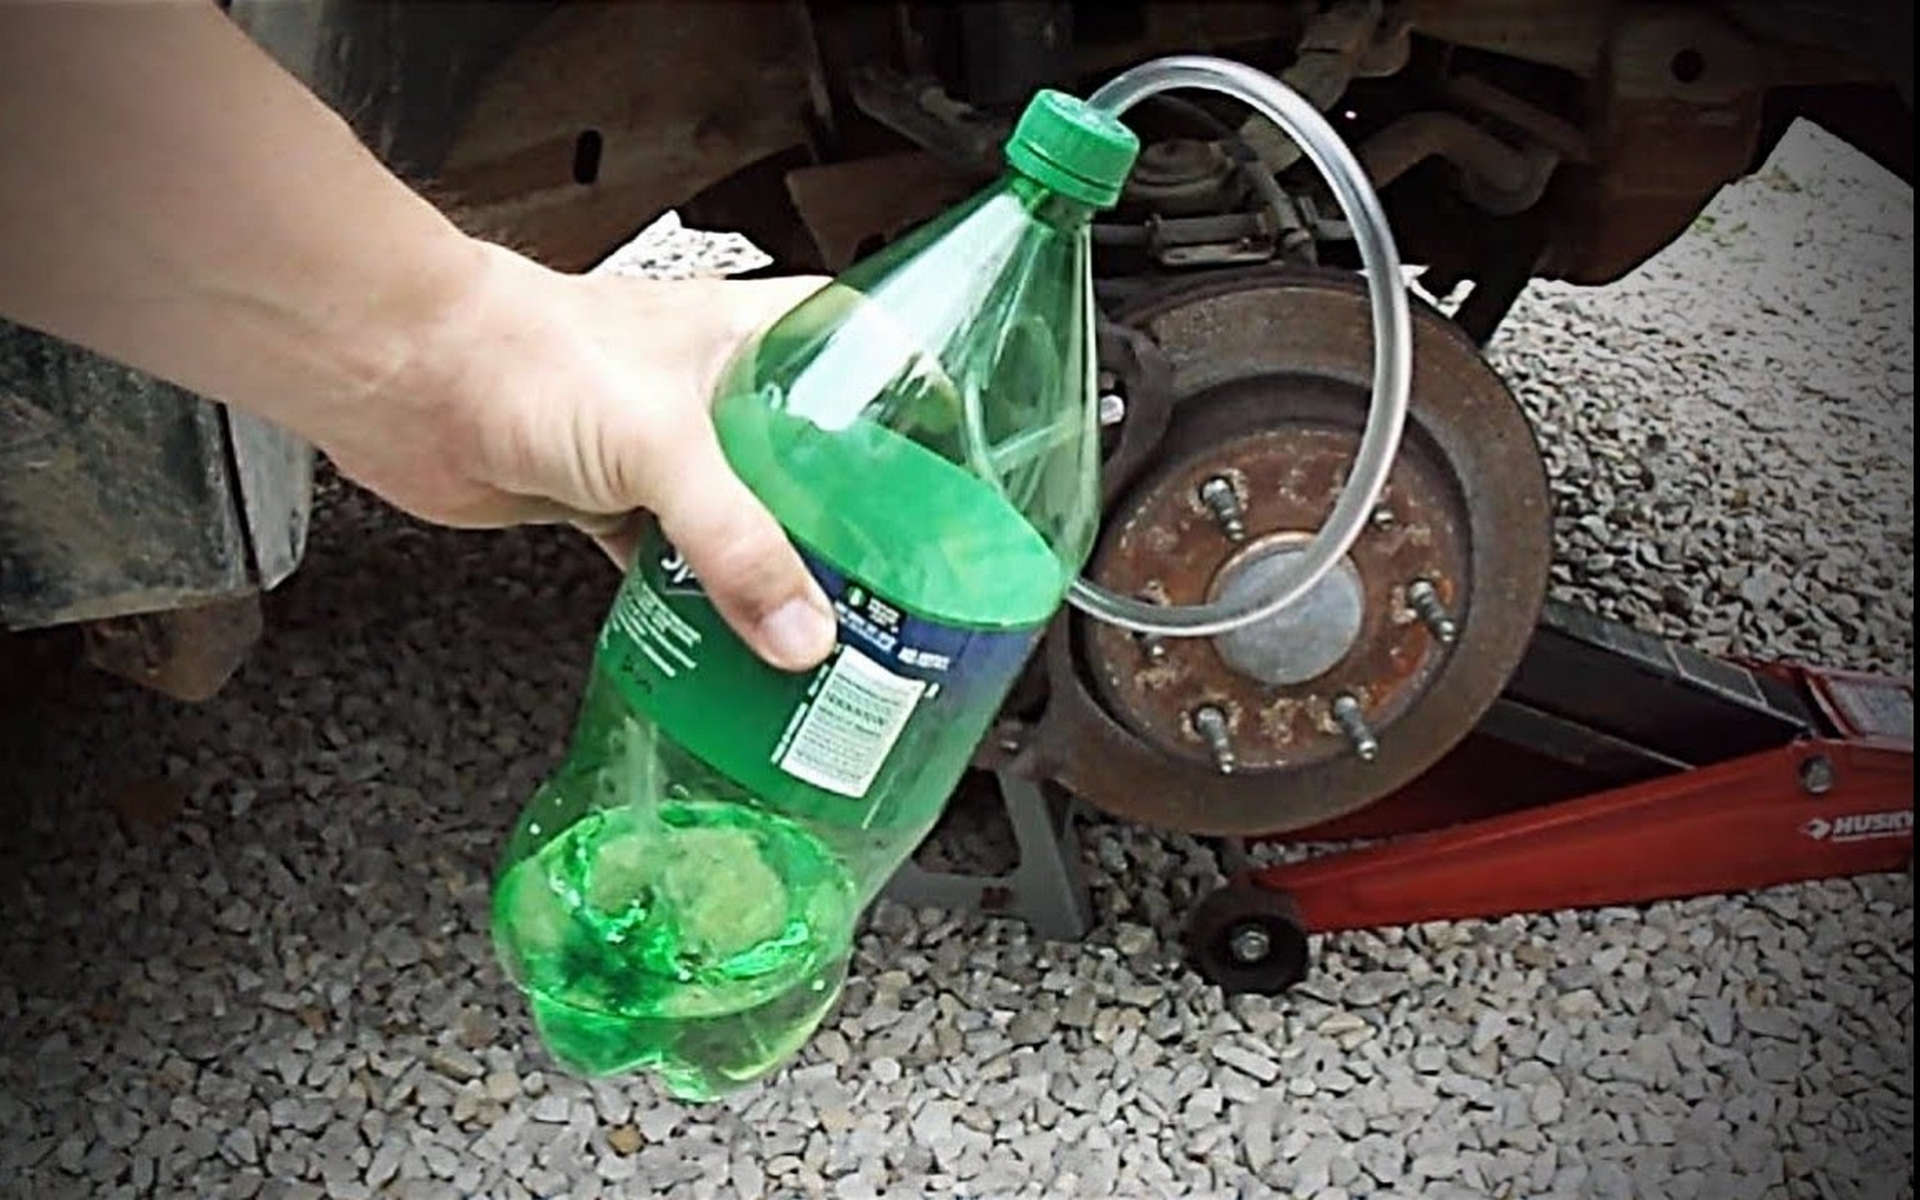 Photo credit: The Daninator via YouTube
Although a bit trickier, brakes can be bled without a kit. This can be achieved with some vinyl tubing and a makeshift fluid reservoir, such as a two-liter soda bottle with a hole drilled through the cap. By running the tubing into the bottle with the other end attached to the bleeder valve, crack the valve and initiate the flow of old fluid. Then, step into the car and pump the brakes five to seven times until there’s no air or bubbles in the line. Simply tighten the bleeder valve once the air has been purged and move onto the next wheel.
Remember—Pressurize. Hold. Bleed. Repeat.
Bleeding brakes with a power bleeder
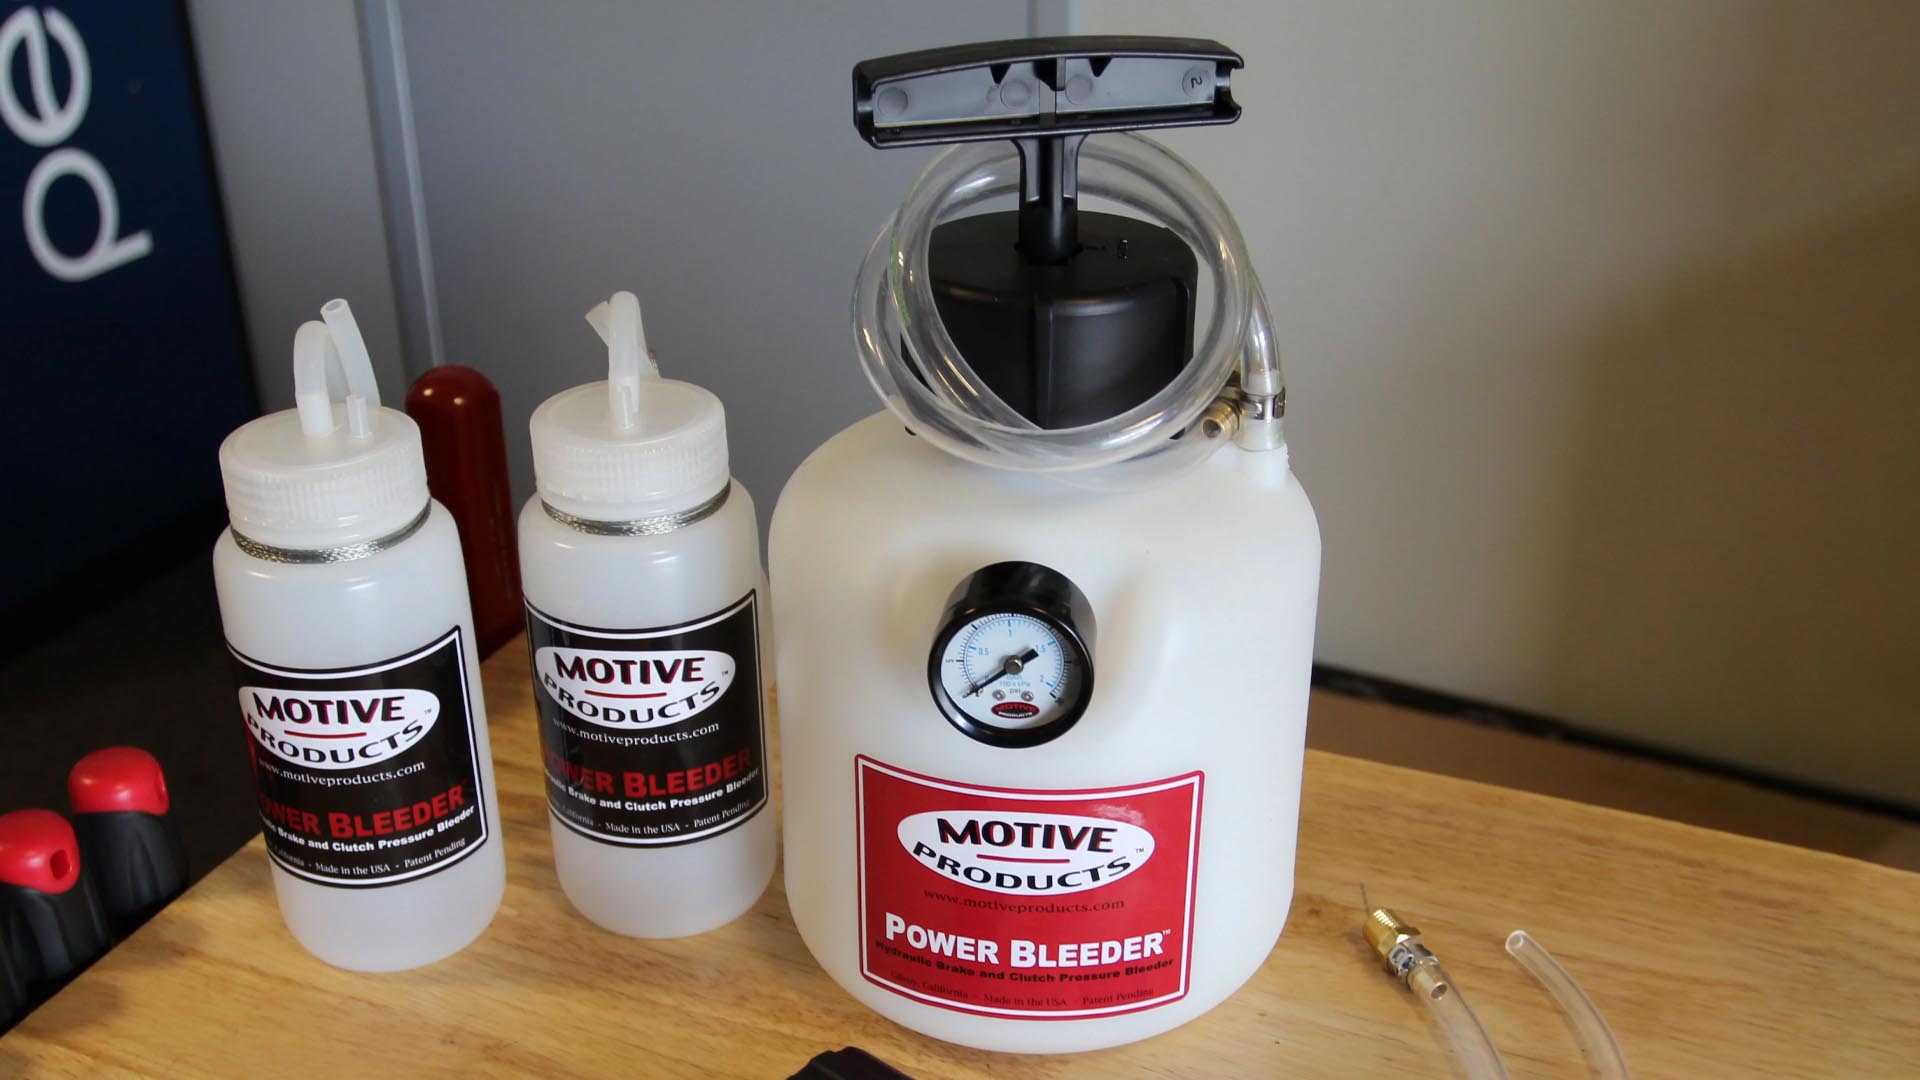
This is, by far, the easiest and most straightforward way to complete a brake bleed. It can be performed by one person, and every last bit of old fluid is extracted from the system.
For a full-on walkthrough, check out this how-to using a Motive power bleeder.
Things to remember
If your brake pedal is still spongy, there may be air in the lines. This can be remedied by repeating the bleed process until the pedal is firm, making sure that the system is still pressurized when you close the bleeder valve. Air will not go away on its own, so it’s crucial that you properly purge it from your brake system.
Brake fluid is extremely corrosive, so be careful not to get any on your vehicle’s paint. Additionally, unopened bottles have a long shelf life, though if the seal has been broken, it’s best to throw the remaining fluid away after a couple of weeks.
If you have any questions or comments about the process of bleeding your brakes, leave them in the comments below.