In this Brake DIY Scott Skrzypczak goes over the process of replacing brake pads and rotors on a B8 chassis Audi S4. This DIY will help with the important steps needed to perform the install yourself while learning more about your car.
Must Haves for this:
- Jack
- Jack Stands
- Ratchet
- Gloves
- T-30 torx driver
- Bucket, or coat hanger
- Hammer
- Breaker bar
- Anti seize
- 13mm socket
- 21mm socket
- Audi brand lug cap remover
- C-Clamp
- Flat Head Screwdriver
- 18mm
- Sand Paper
- Vagcom cable along with VAGCOM software
Note: For the rears you will need a vagcom cable VAGCOM software, and a computer in order to release the parking brake on the S4 or any Audi which has an electronic parking brake.
Other recommended items that may help:
- Drill
- Ear Plugs
- Silicone brake lubricant
- PB Blaster
- Music
- Beer
- Two extra hands
- Muscles
- Picture of Tools
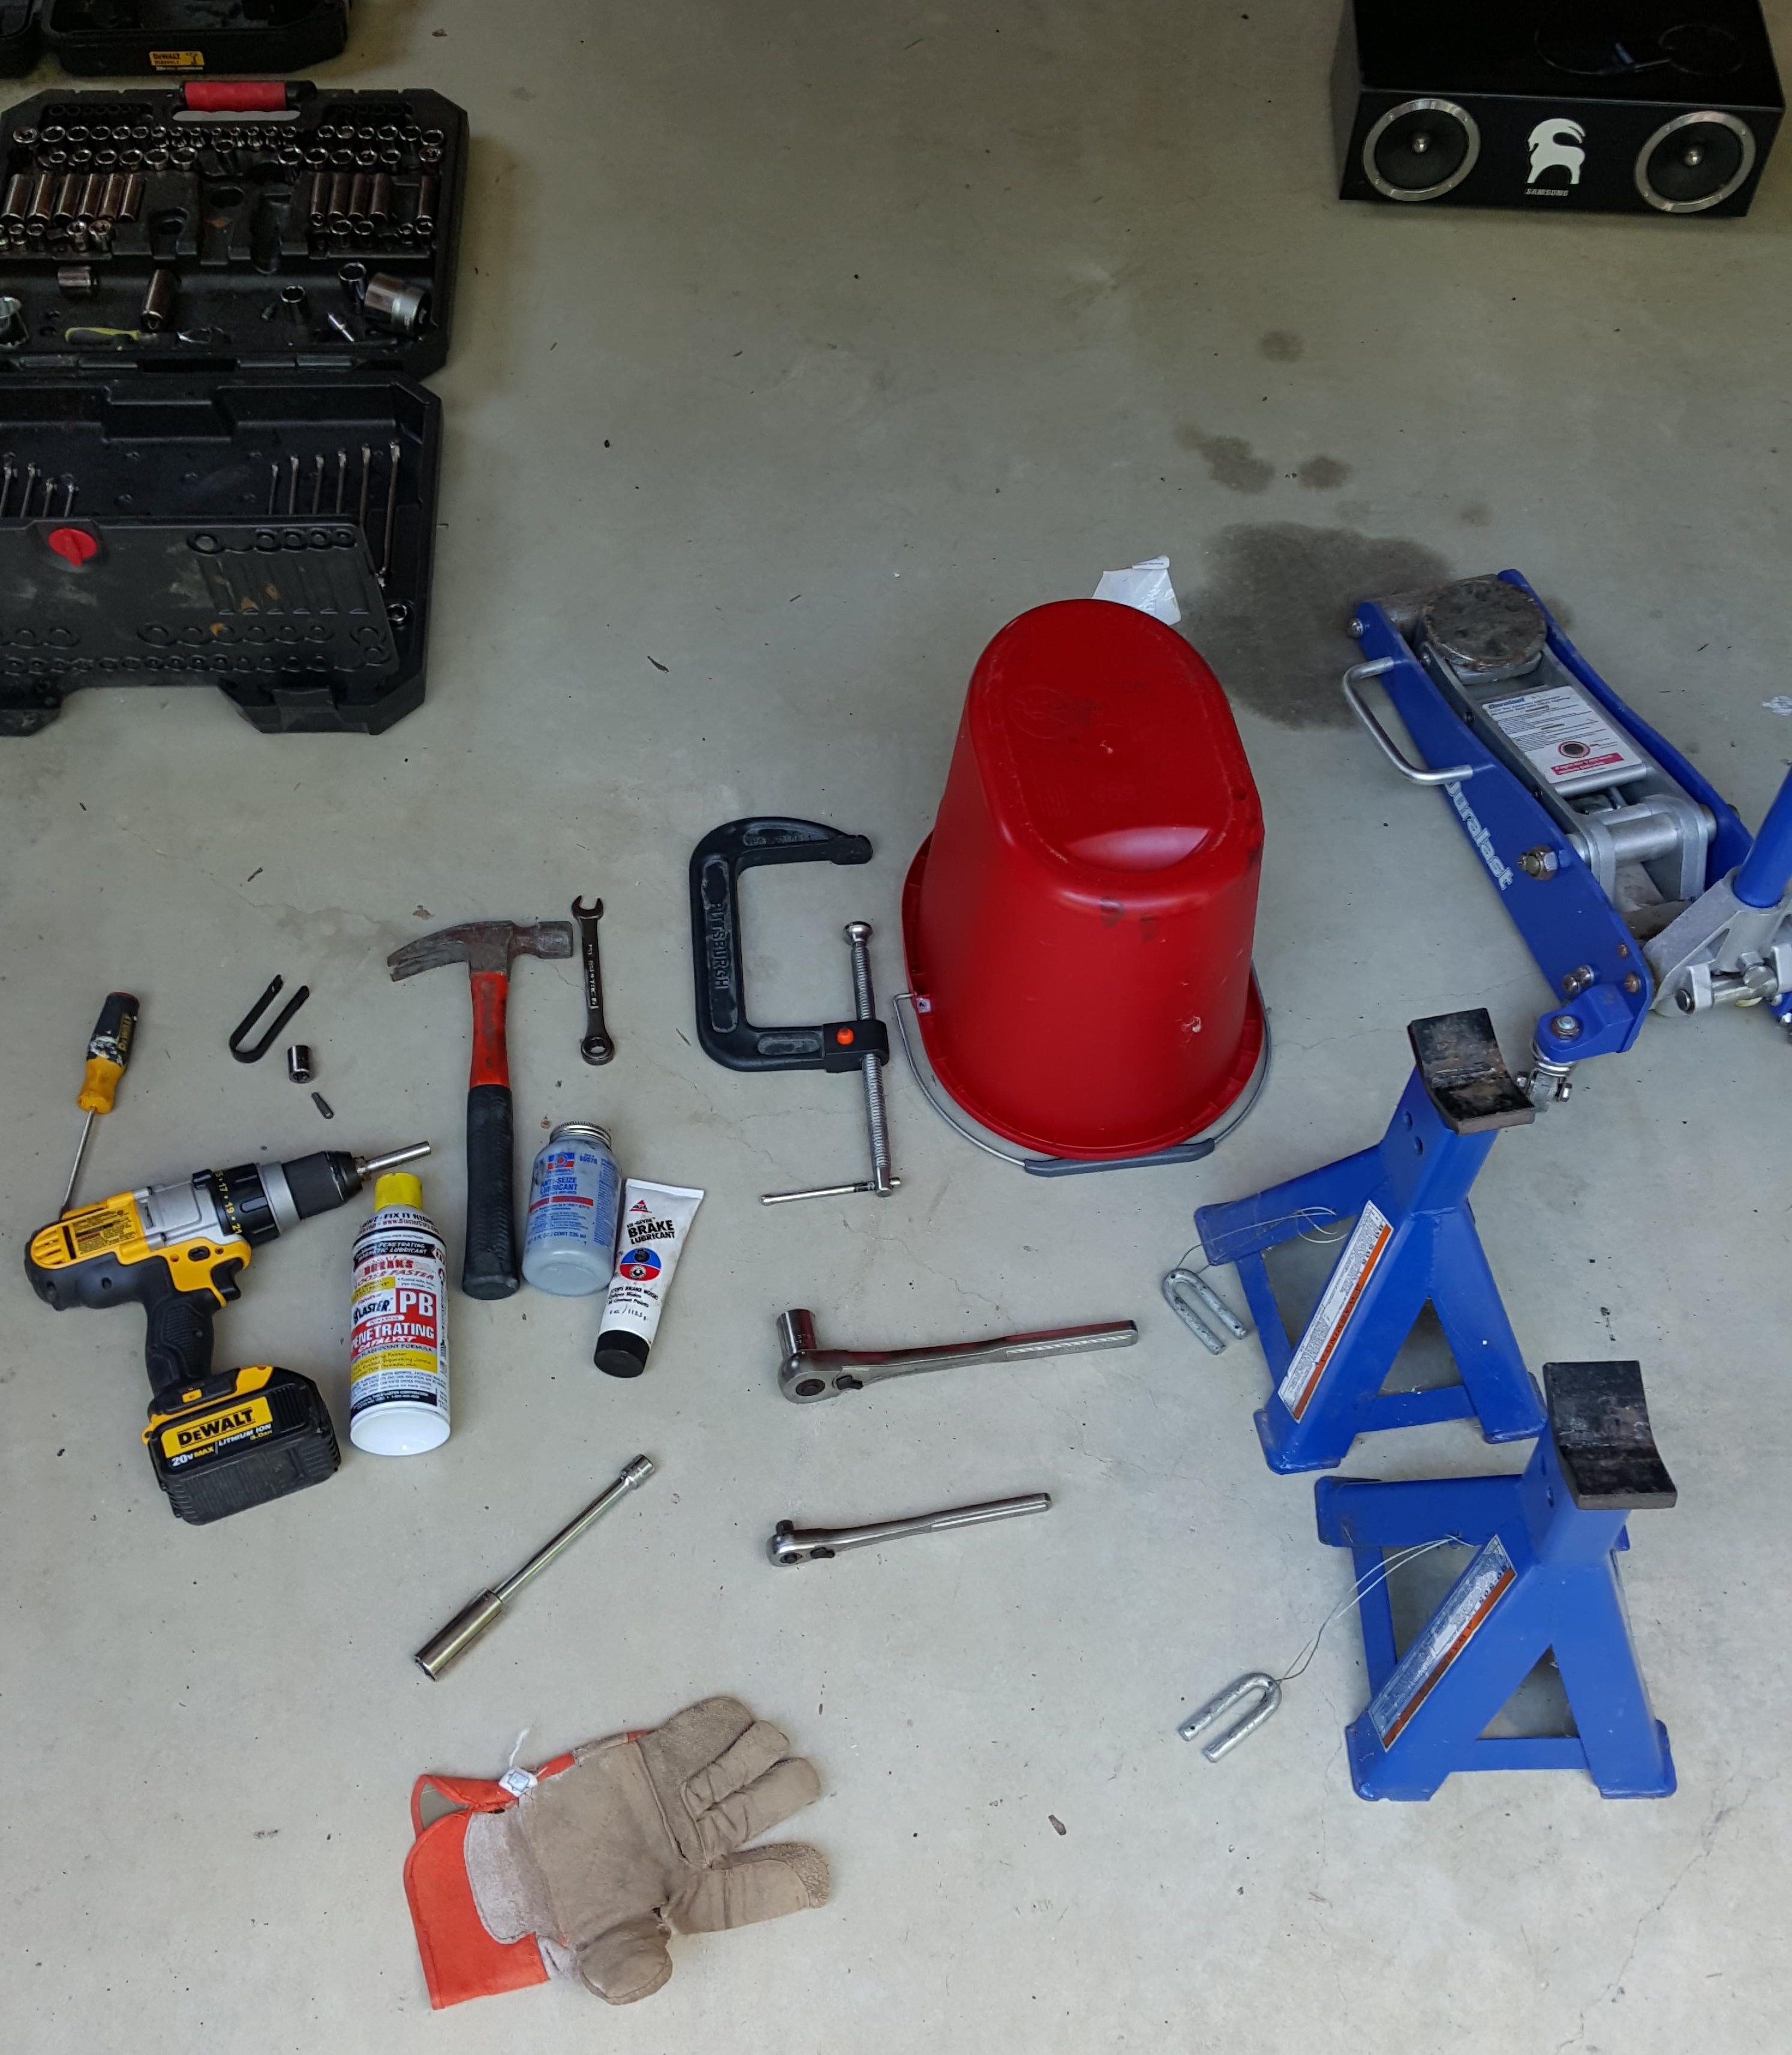
Anyways, on to the DIY
Step 1
Use your Audi tool to take off your lug caps; seriously, if you do not have this $4 tool, (which the service department will actually just give you if you are nice to them) then stop this DIY because you will get so frustrated trying to take these caps off by other means that you will rage quit this diy. Seriously this tool is a godsend. Repeat 9 times
Step 2
Use an 18mm socket to break your lug bolts while the car is ON the ground. Do not remove lug bolts, just break them. do this on the front passenger, and front driver wheel. repeat 9 times
Step 3
Jack your car up in the recommended jack points and put jack stands underneath them
Step 4
finish removing the wheels
Step 5
Turn the car on, turn the steering wheel all the way to one side, turn the car off
Step 6
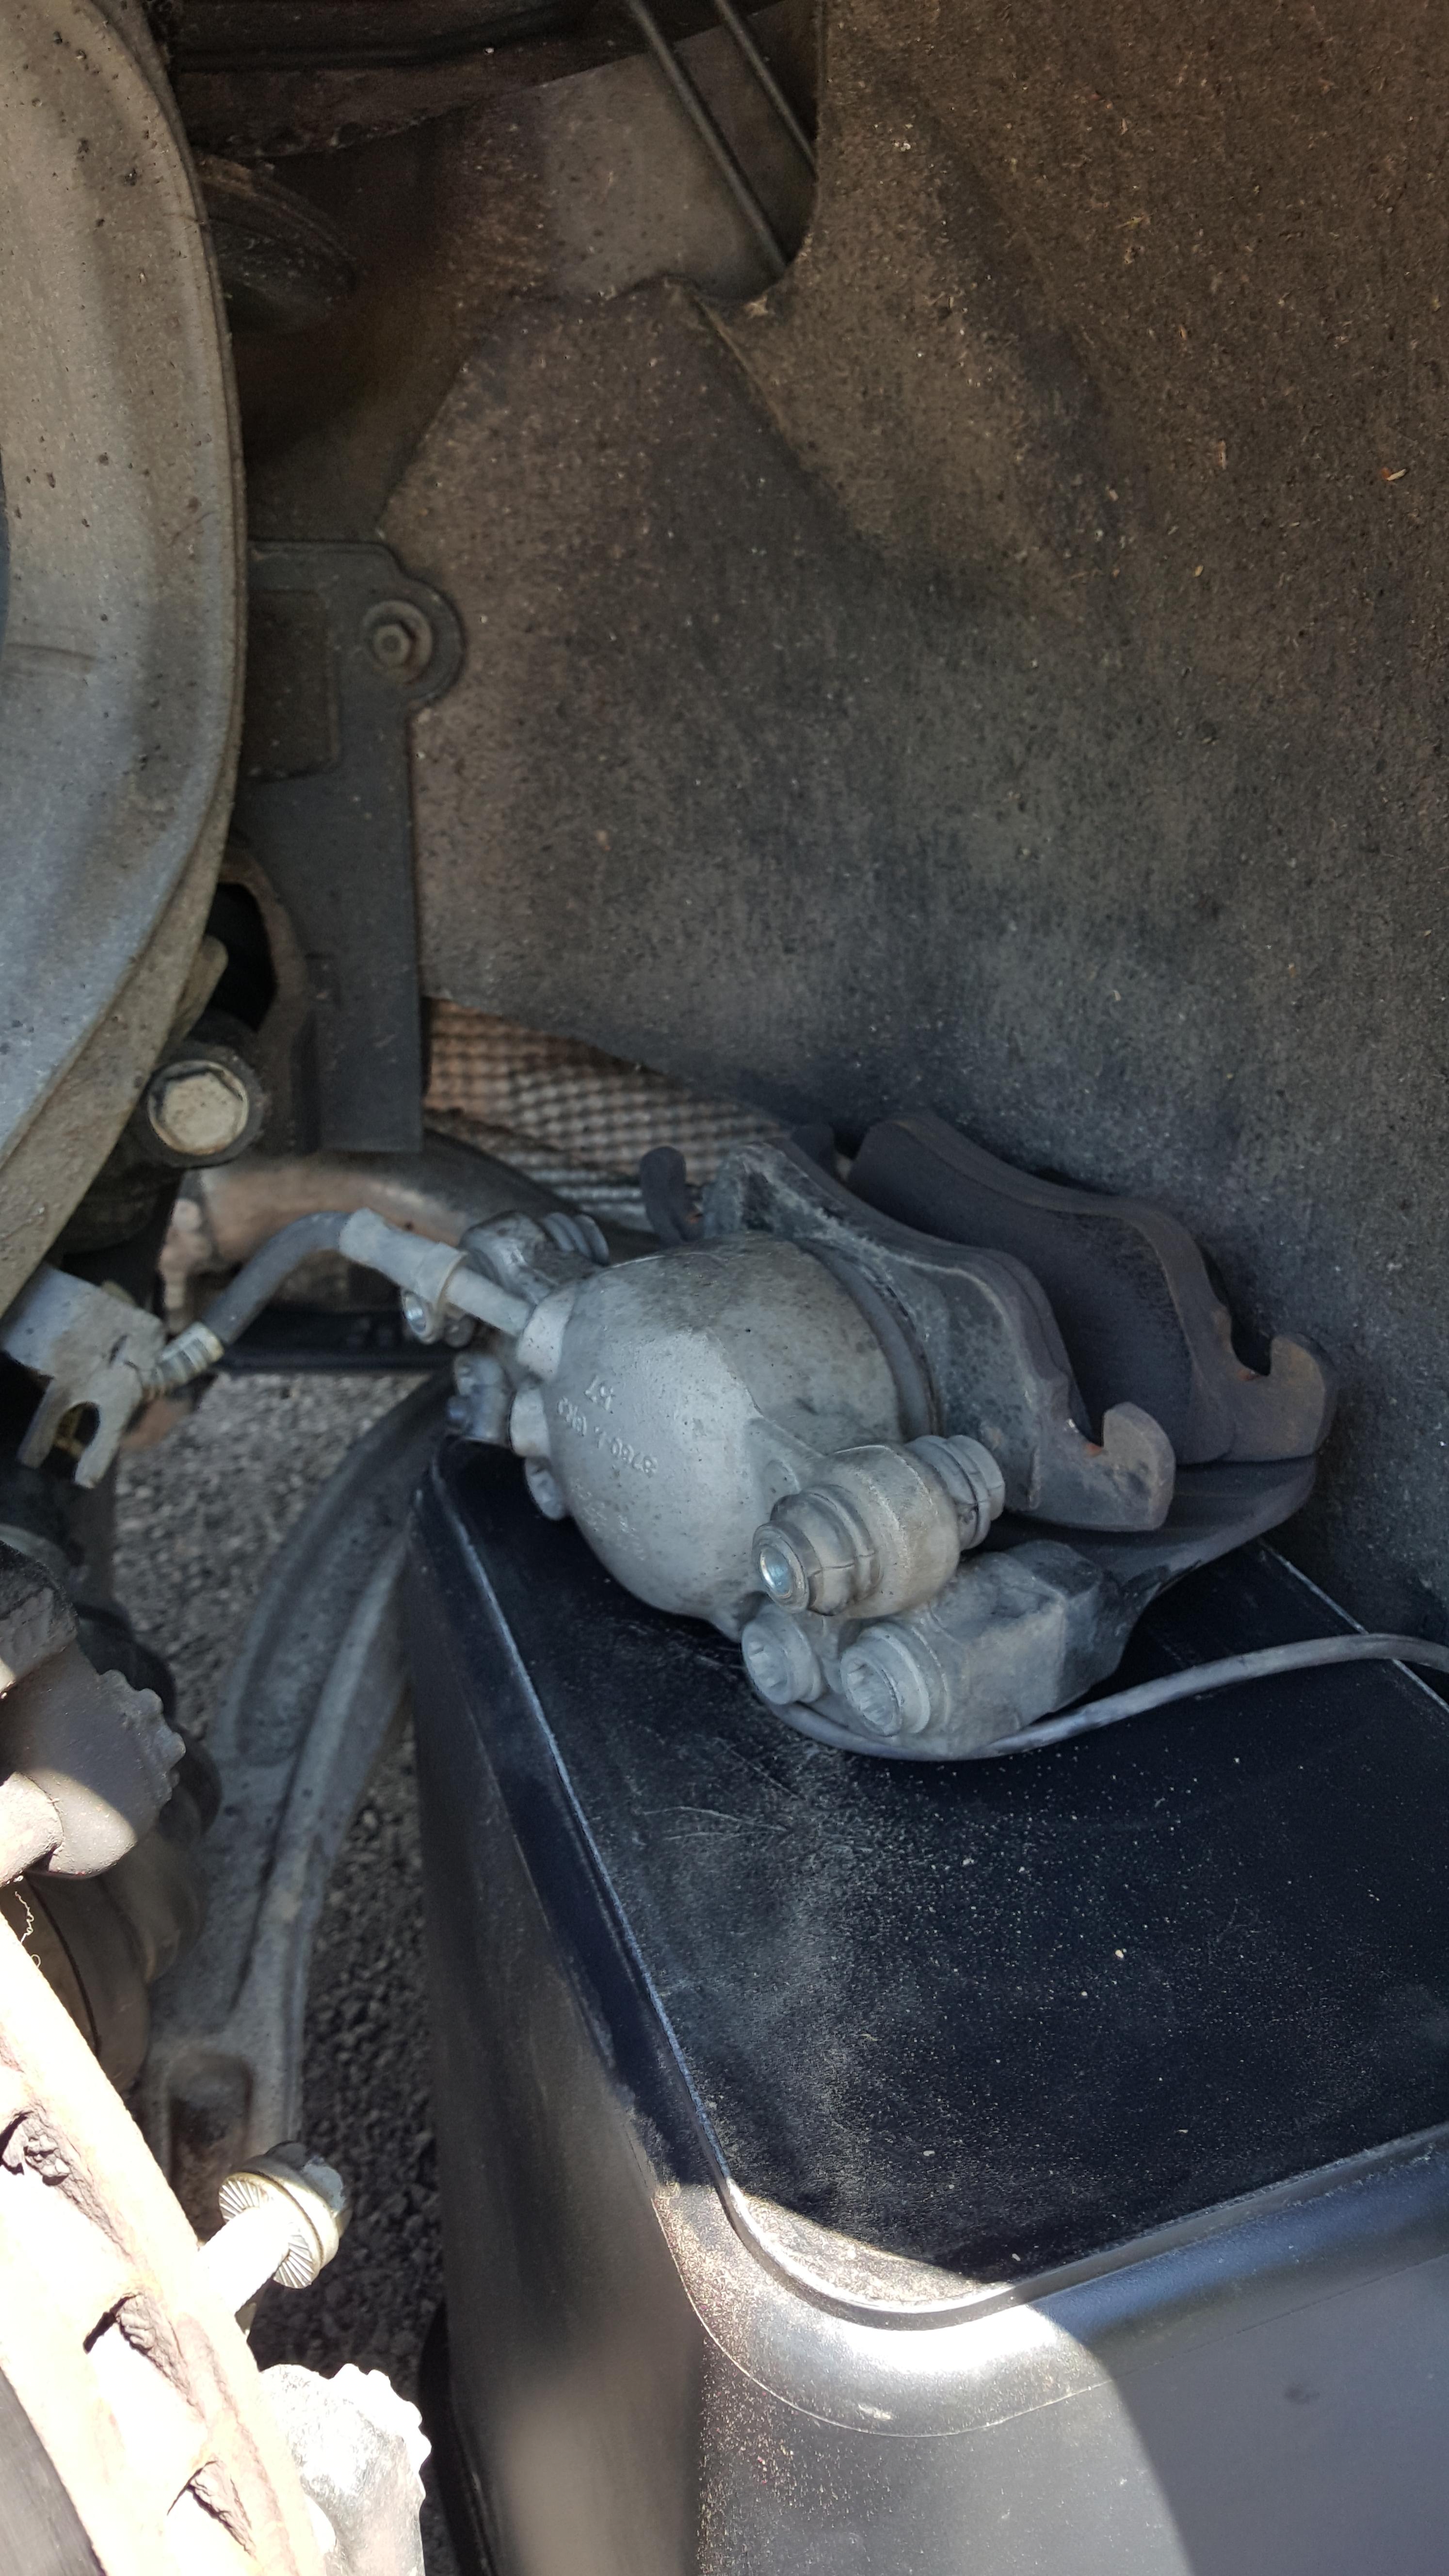
Take a second to inspect your brakes
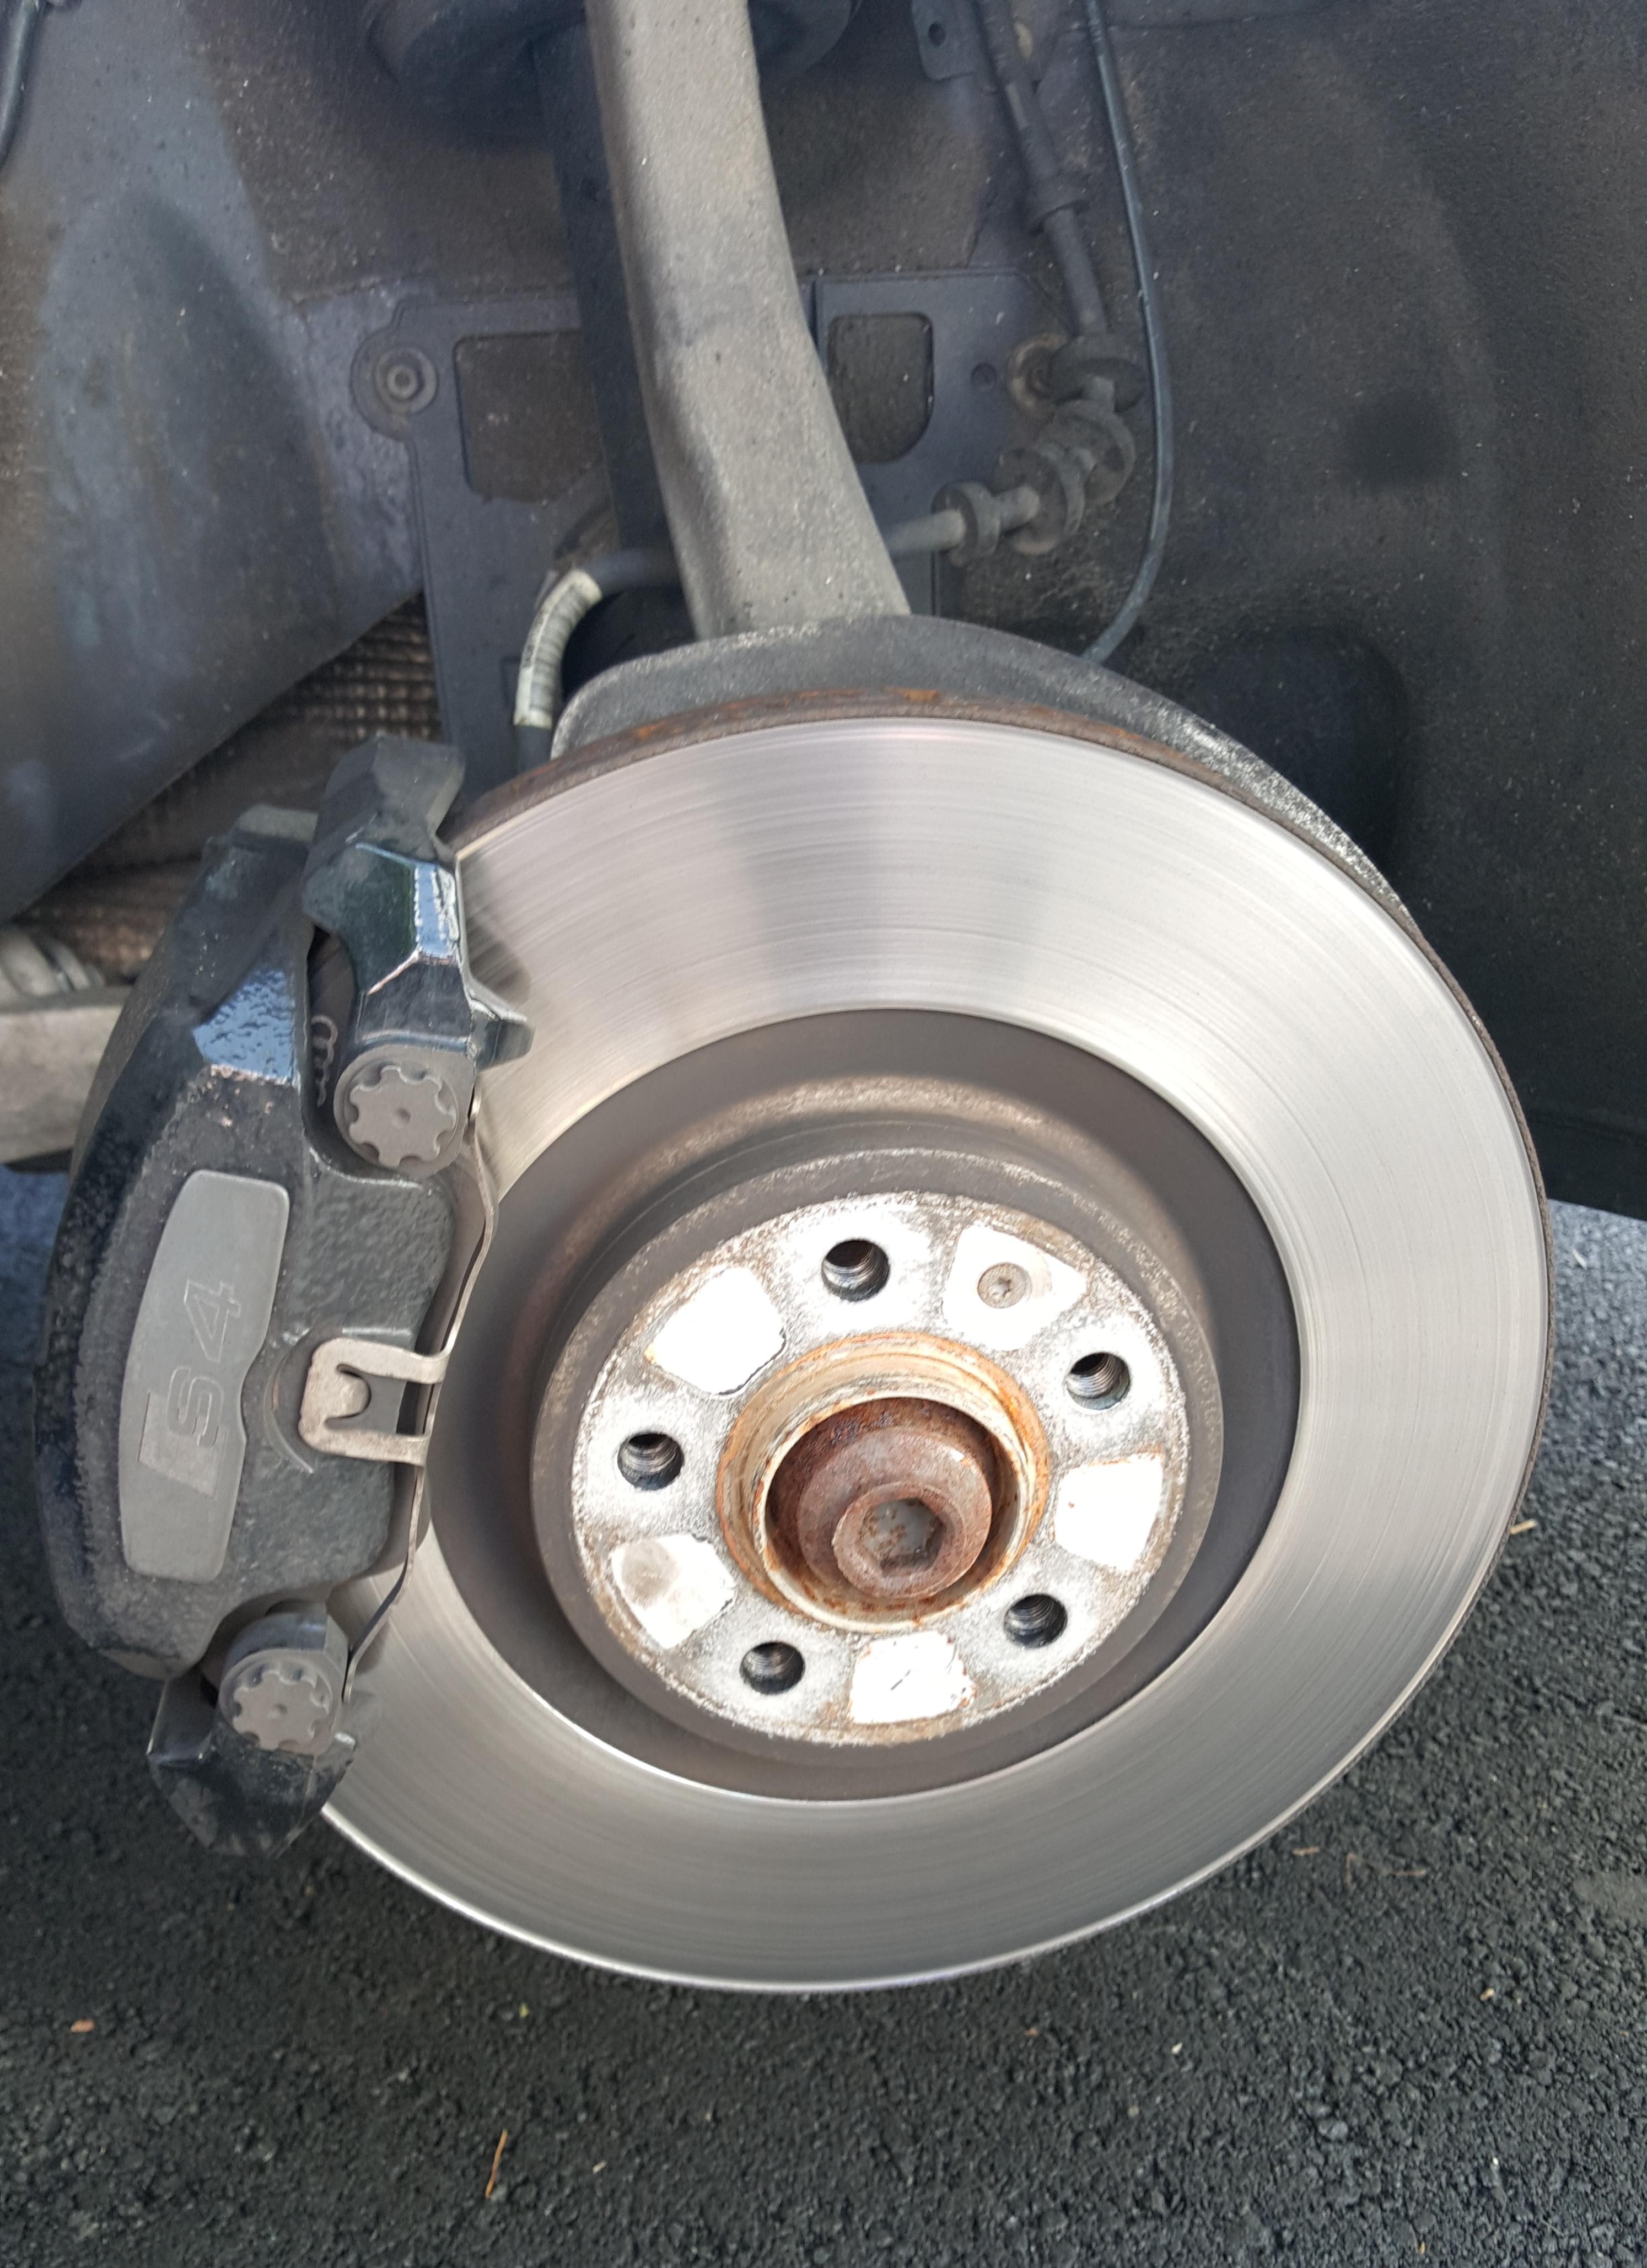
Step 7
Identify your 4 main bolts, essentially, with all brakes (disc brakes) there are 4 main bolts, per caliper that need to be removed in order to do everything. Two hold the caliper, and two hold the caliper carrier. These bolts are located on the inside of the wheel well. Referencing this picture.
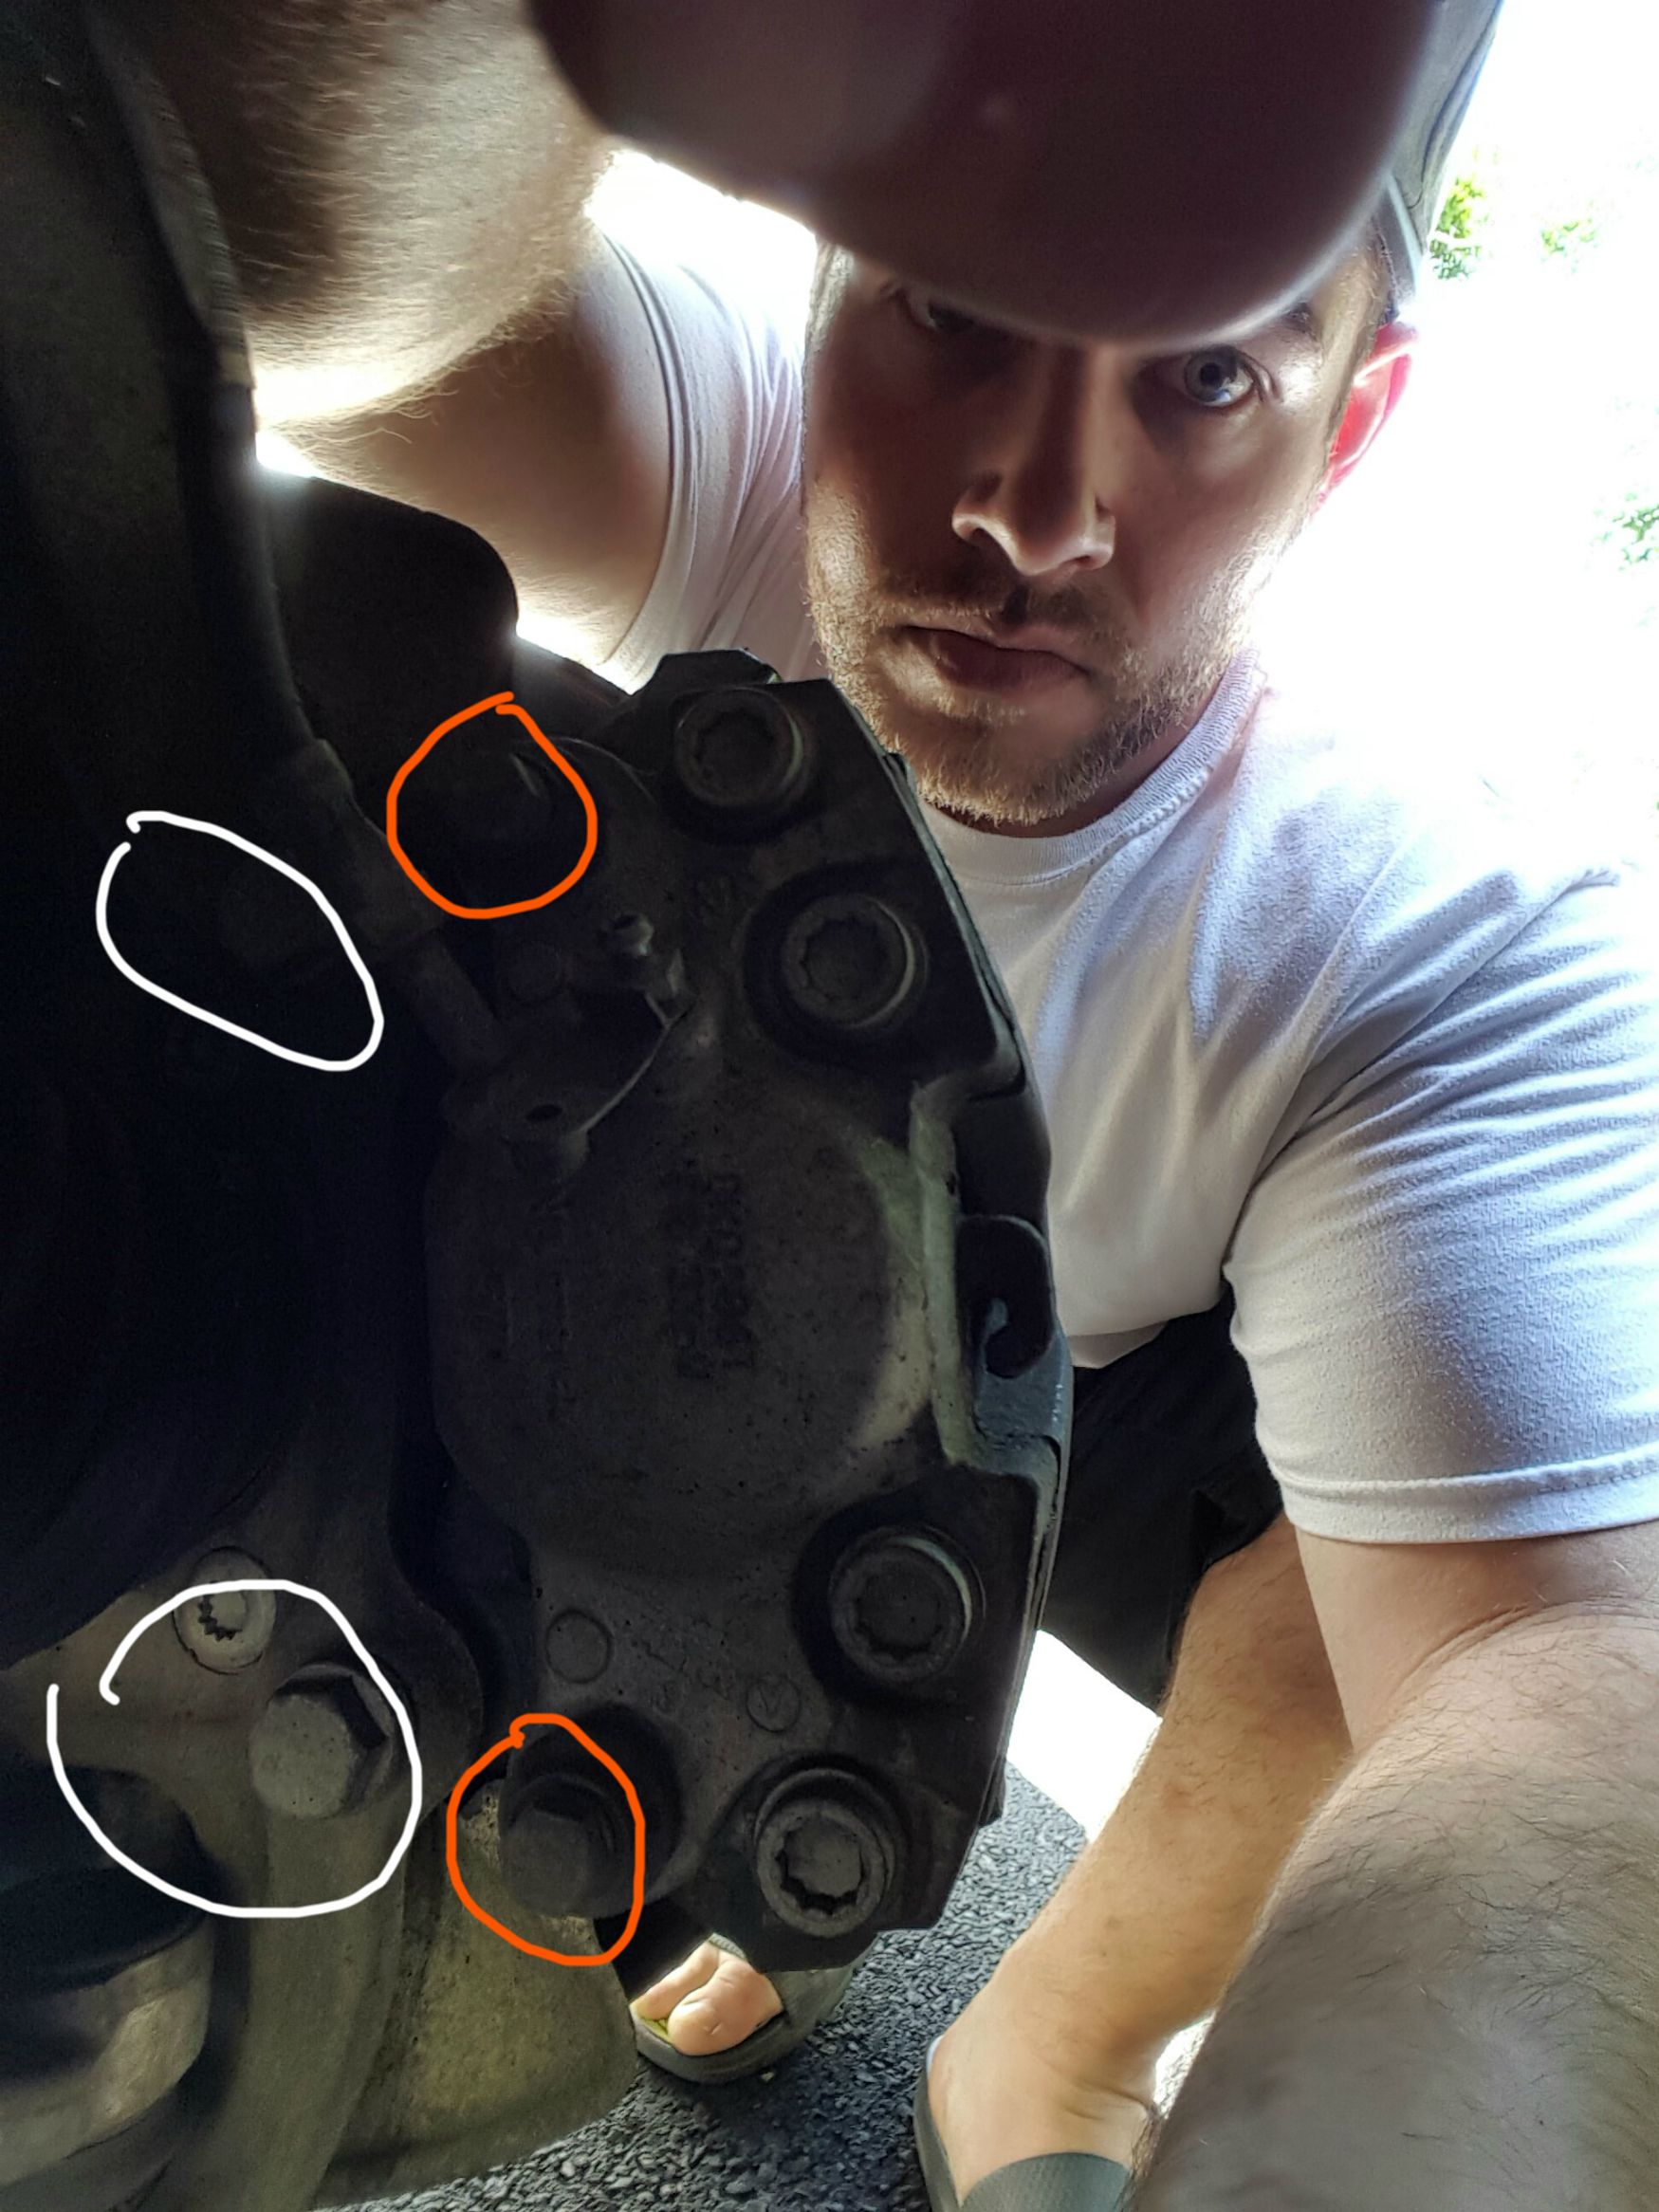
Orange is size 13mm - These are the bolts you need to remove to change the pads
White is size 21mm - These are the bolts you need to remove the caliper carrier in order to change the rotor.
Step 8
Remove the orange bolts, and the spring clip that is located on the front of the brakes. I removed the spring clip by putting a flat head screwdriver and leveraging it out, there are many ways to do this.
Step 9
Identify the spot where you can see the brake pads for inspection of wear. This is located in the center of the caliper and looking at my orange/white circle picture you can see a little hook thing, from here is where you are going to wedge a flat head screwdriver and use that to push the brake pads back a little. Then use your flathead to release the caliper from the caliper-carrier.
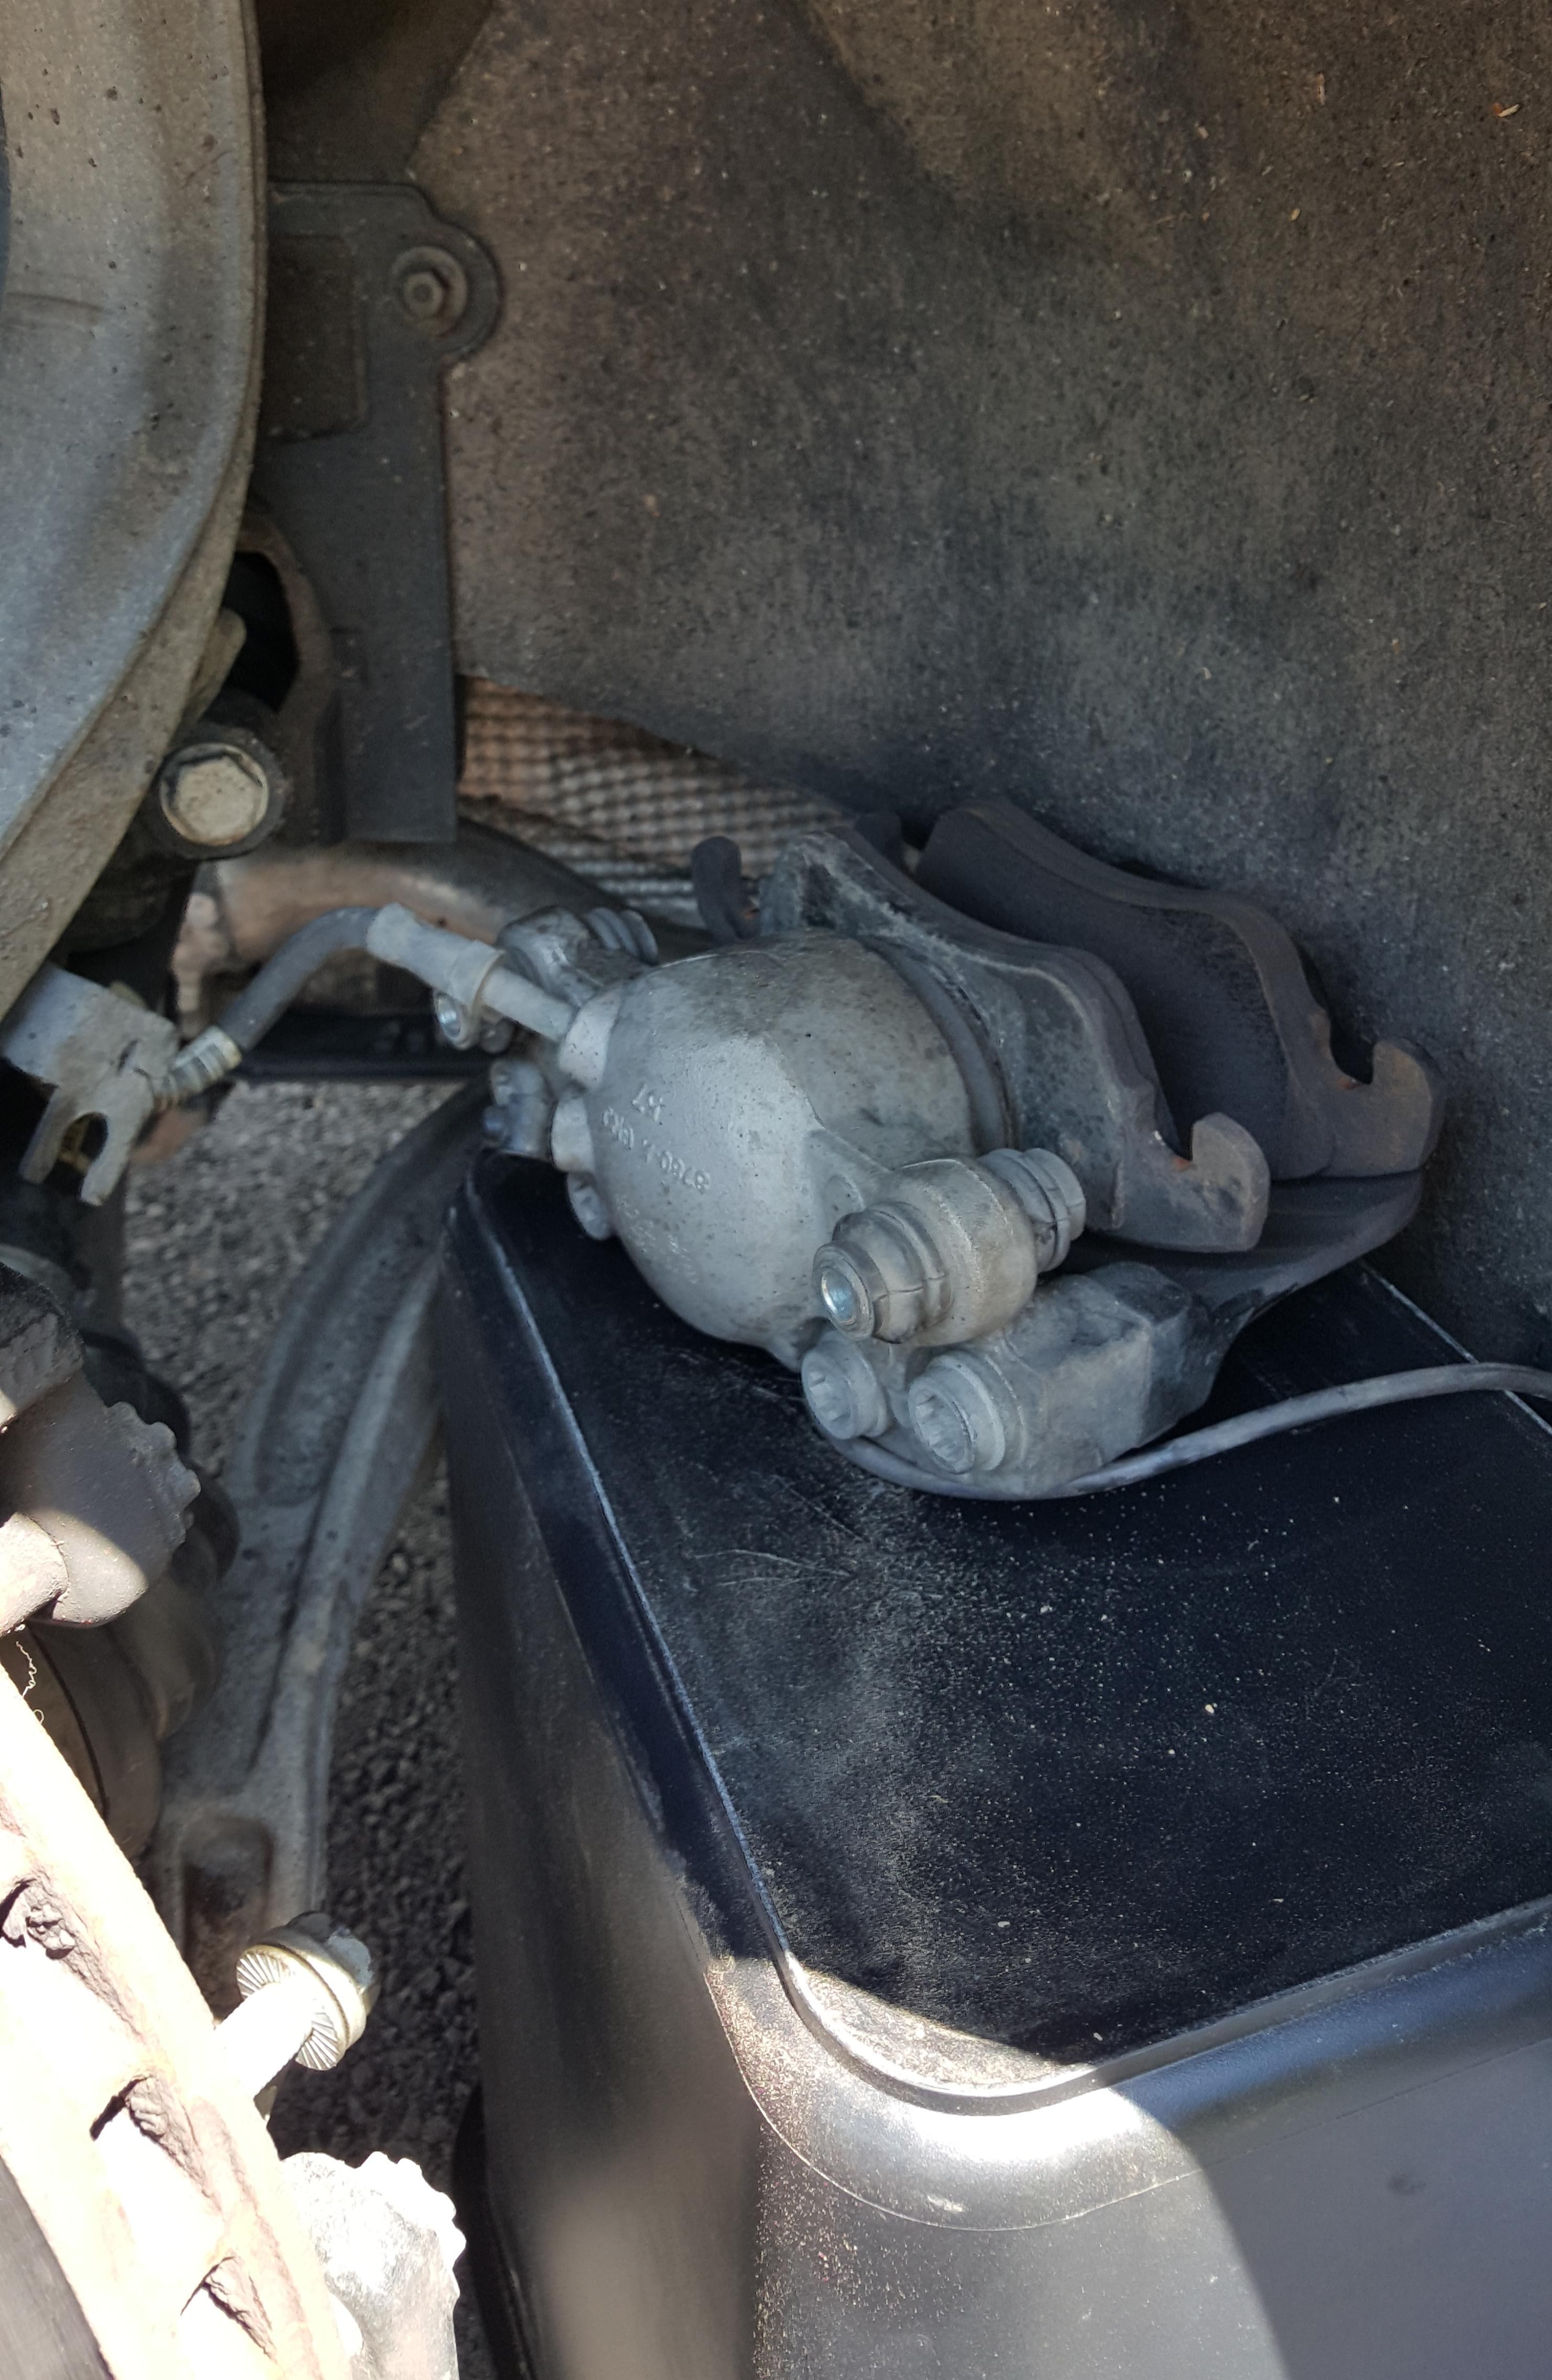
Place the caliper on a bucket, don't let it hang from the brake lines or you will have a bad time.
Step 10
Remove the white circled bolts (21mm) use a breaker bar for this, consider calling in the hulk, or thor, or using an impact driver, or praying to god, or using PB blaster, either way, these bolts have clearly been put on by the hands of some world champion strong man and I will promise you that at some point you will be making a deal with the devil to get these off.
Enough pressure will get these off i assure you it's much more than is necessary. Also these 21mm bolts are soft, and I currently stripped one so head my warning that you need a decent tool to get this done.
Step 11
Once those two bolts are off, the caliper carrier will fall off and hit your big toe. Using your T-30 torx, remove the small screw on the rotor (reference picture above, it's the bolt in between the lug-bolt holes.
Step 12
Toss some ear plugs in and grab a hammer, channel your frustration from those over torqued 21mm caliper carrier bolts and whack your old rotor as hard as you can with a hammer. continue to do this until the rotor falls off the hub.
Step 13
Using sandpaper, scour the hub of all it's corrosion, and apply some anti seize on the hub.
Step 14
Install new rotor and drive in that t-30 bolt, it does not need to be turned tightly, this bolt is merely used to hold the rotor in place when a wheel is off.
Step 15
Install the caliper carrier by putting back those demon 21mm bolts, i recommend putting some anti-seize on the threads, these bolts once they are tight, are good.
Step 16
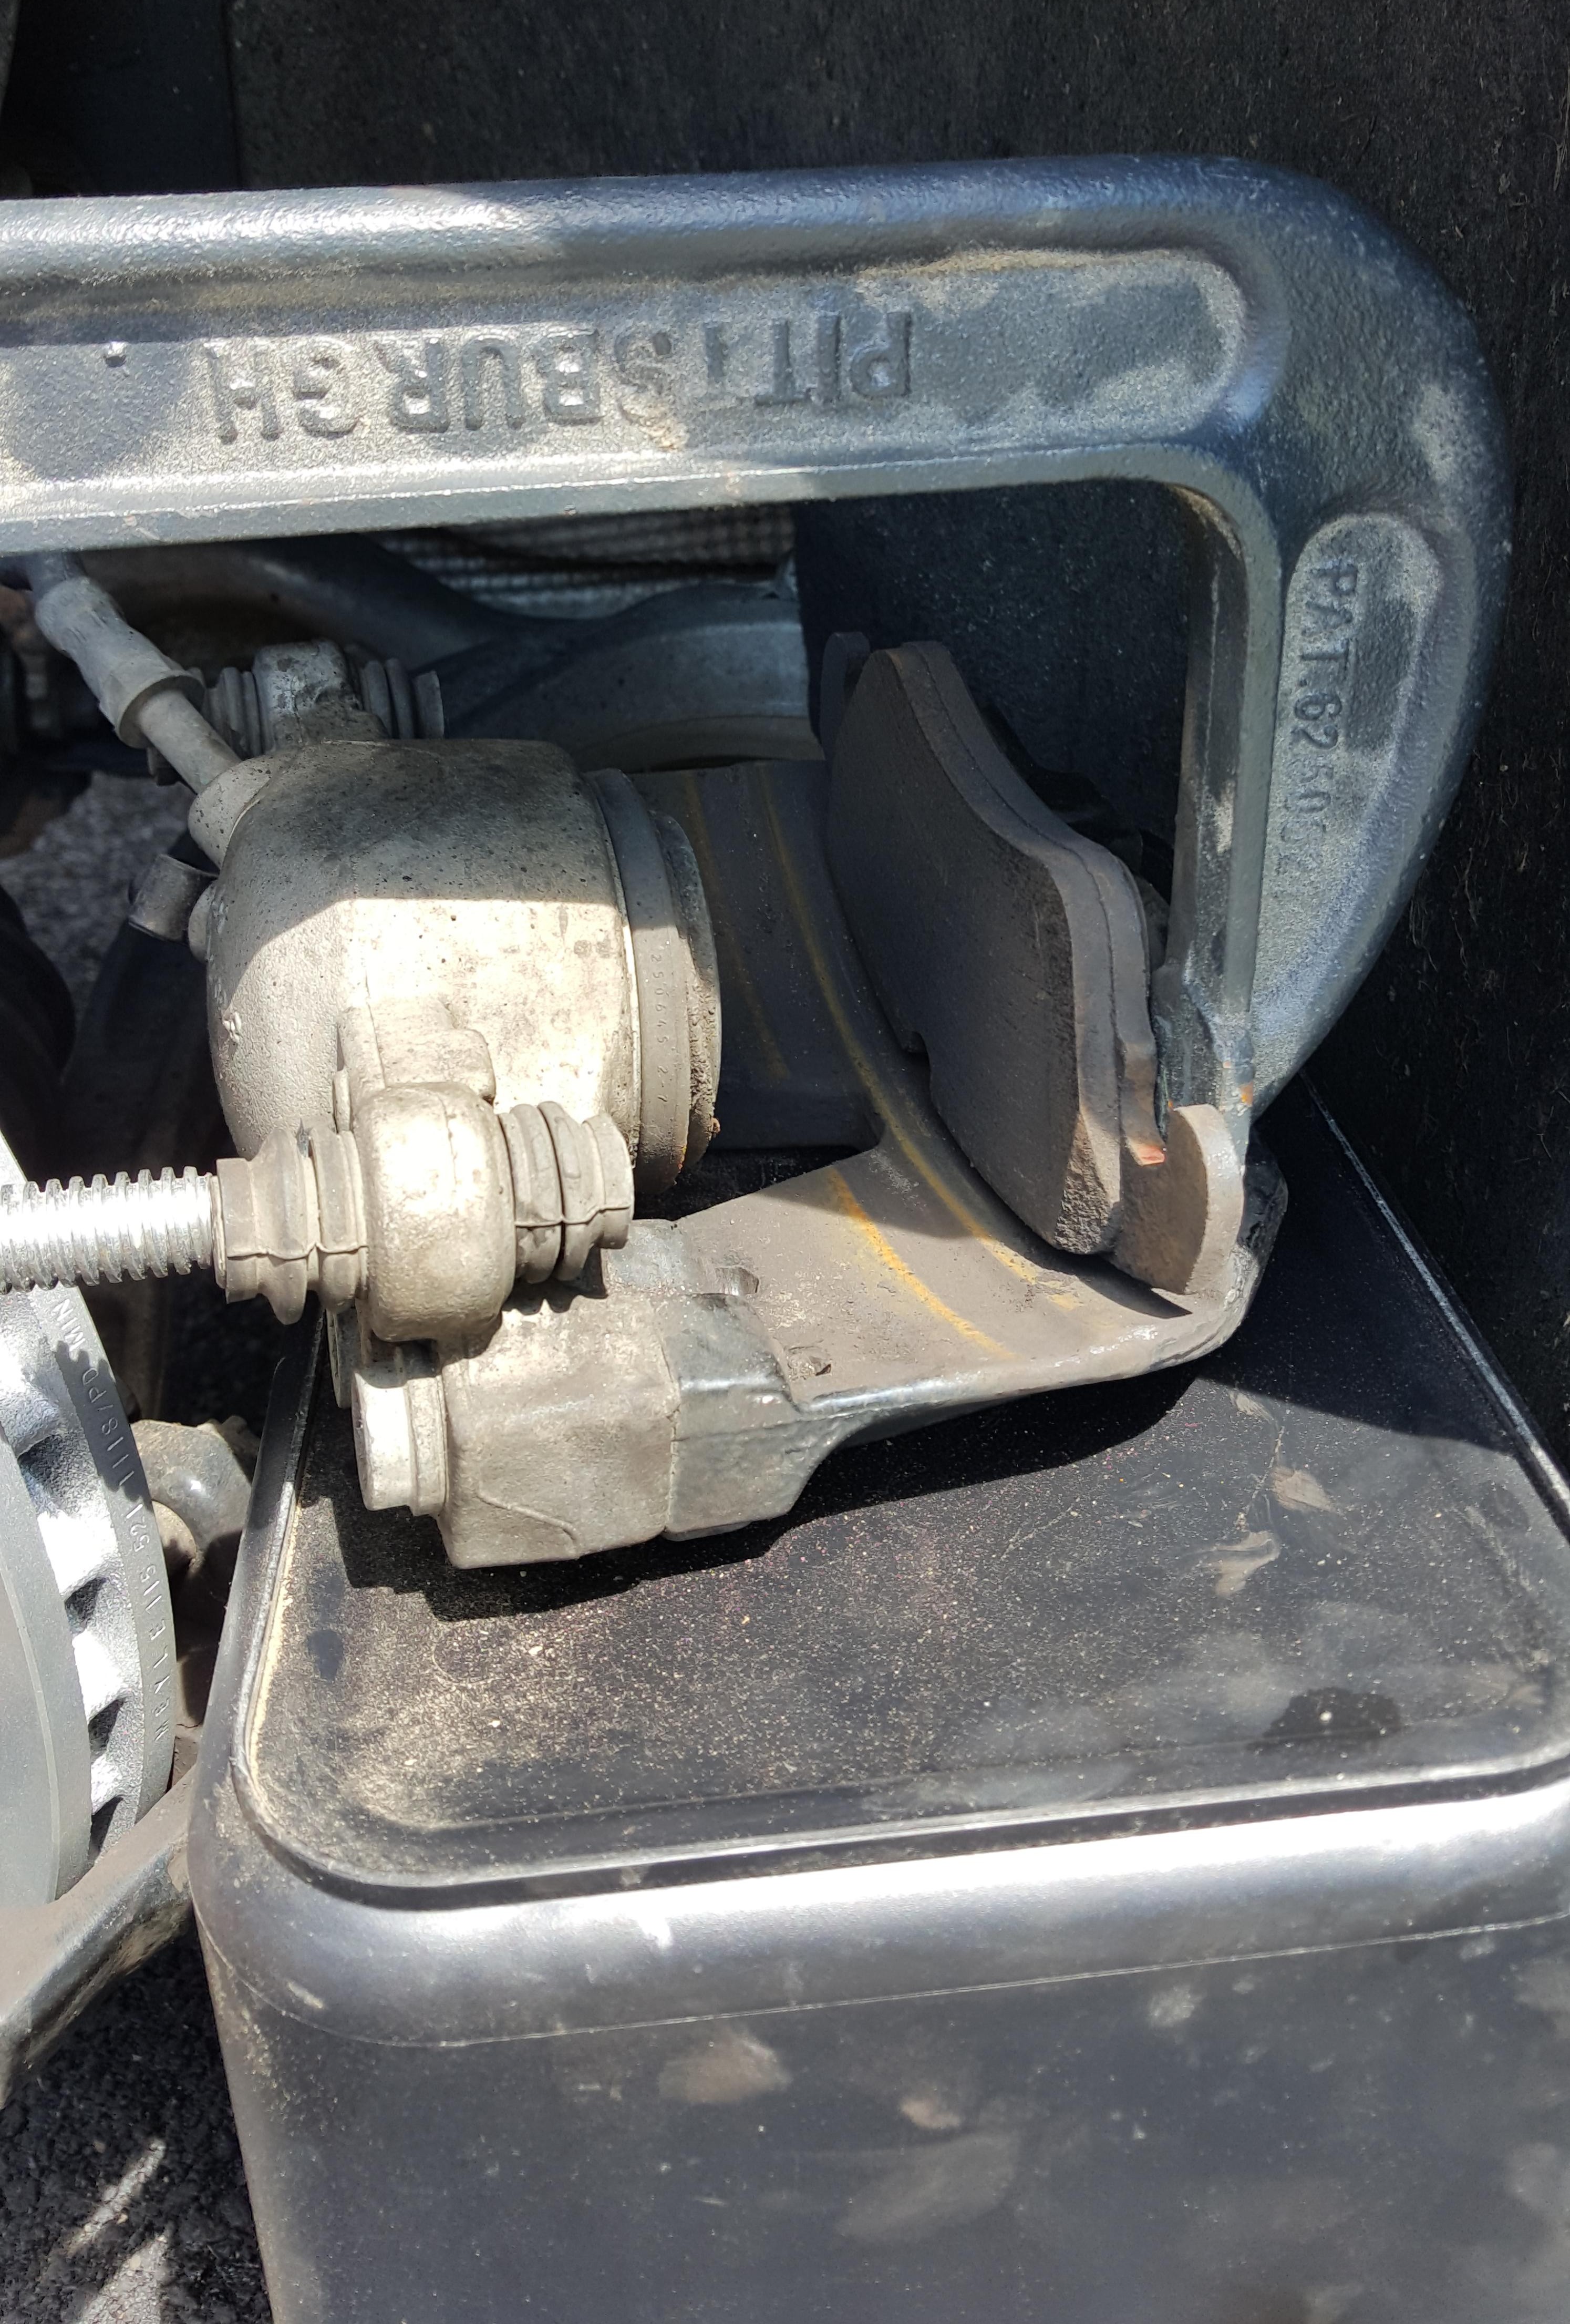
Using a C-clamp and the old pad, push the caliper piston back into place, this requires some discretion and patience once you push it back to its limit it will you will feel it.
Step 17
Pull the pads out from the caliper, the one that snaps into the caliper first needs to come out first (the pad closest to me in the picture here)
Then, using a c-clamp, rip the other pad from the caliper as someone from the Audi Factory thought it would be a great idea to GLUE this pad into place.
Step 18
Apply a liberal amount of brake lubricant to the backside of the pads, this is what makes your brakes NOT squeak so, depending on how much you value brake squeaking, use as much or as little as you want.
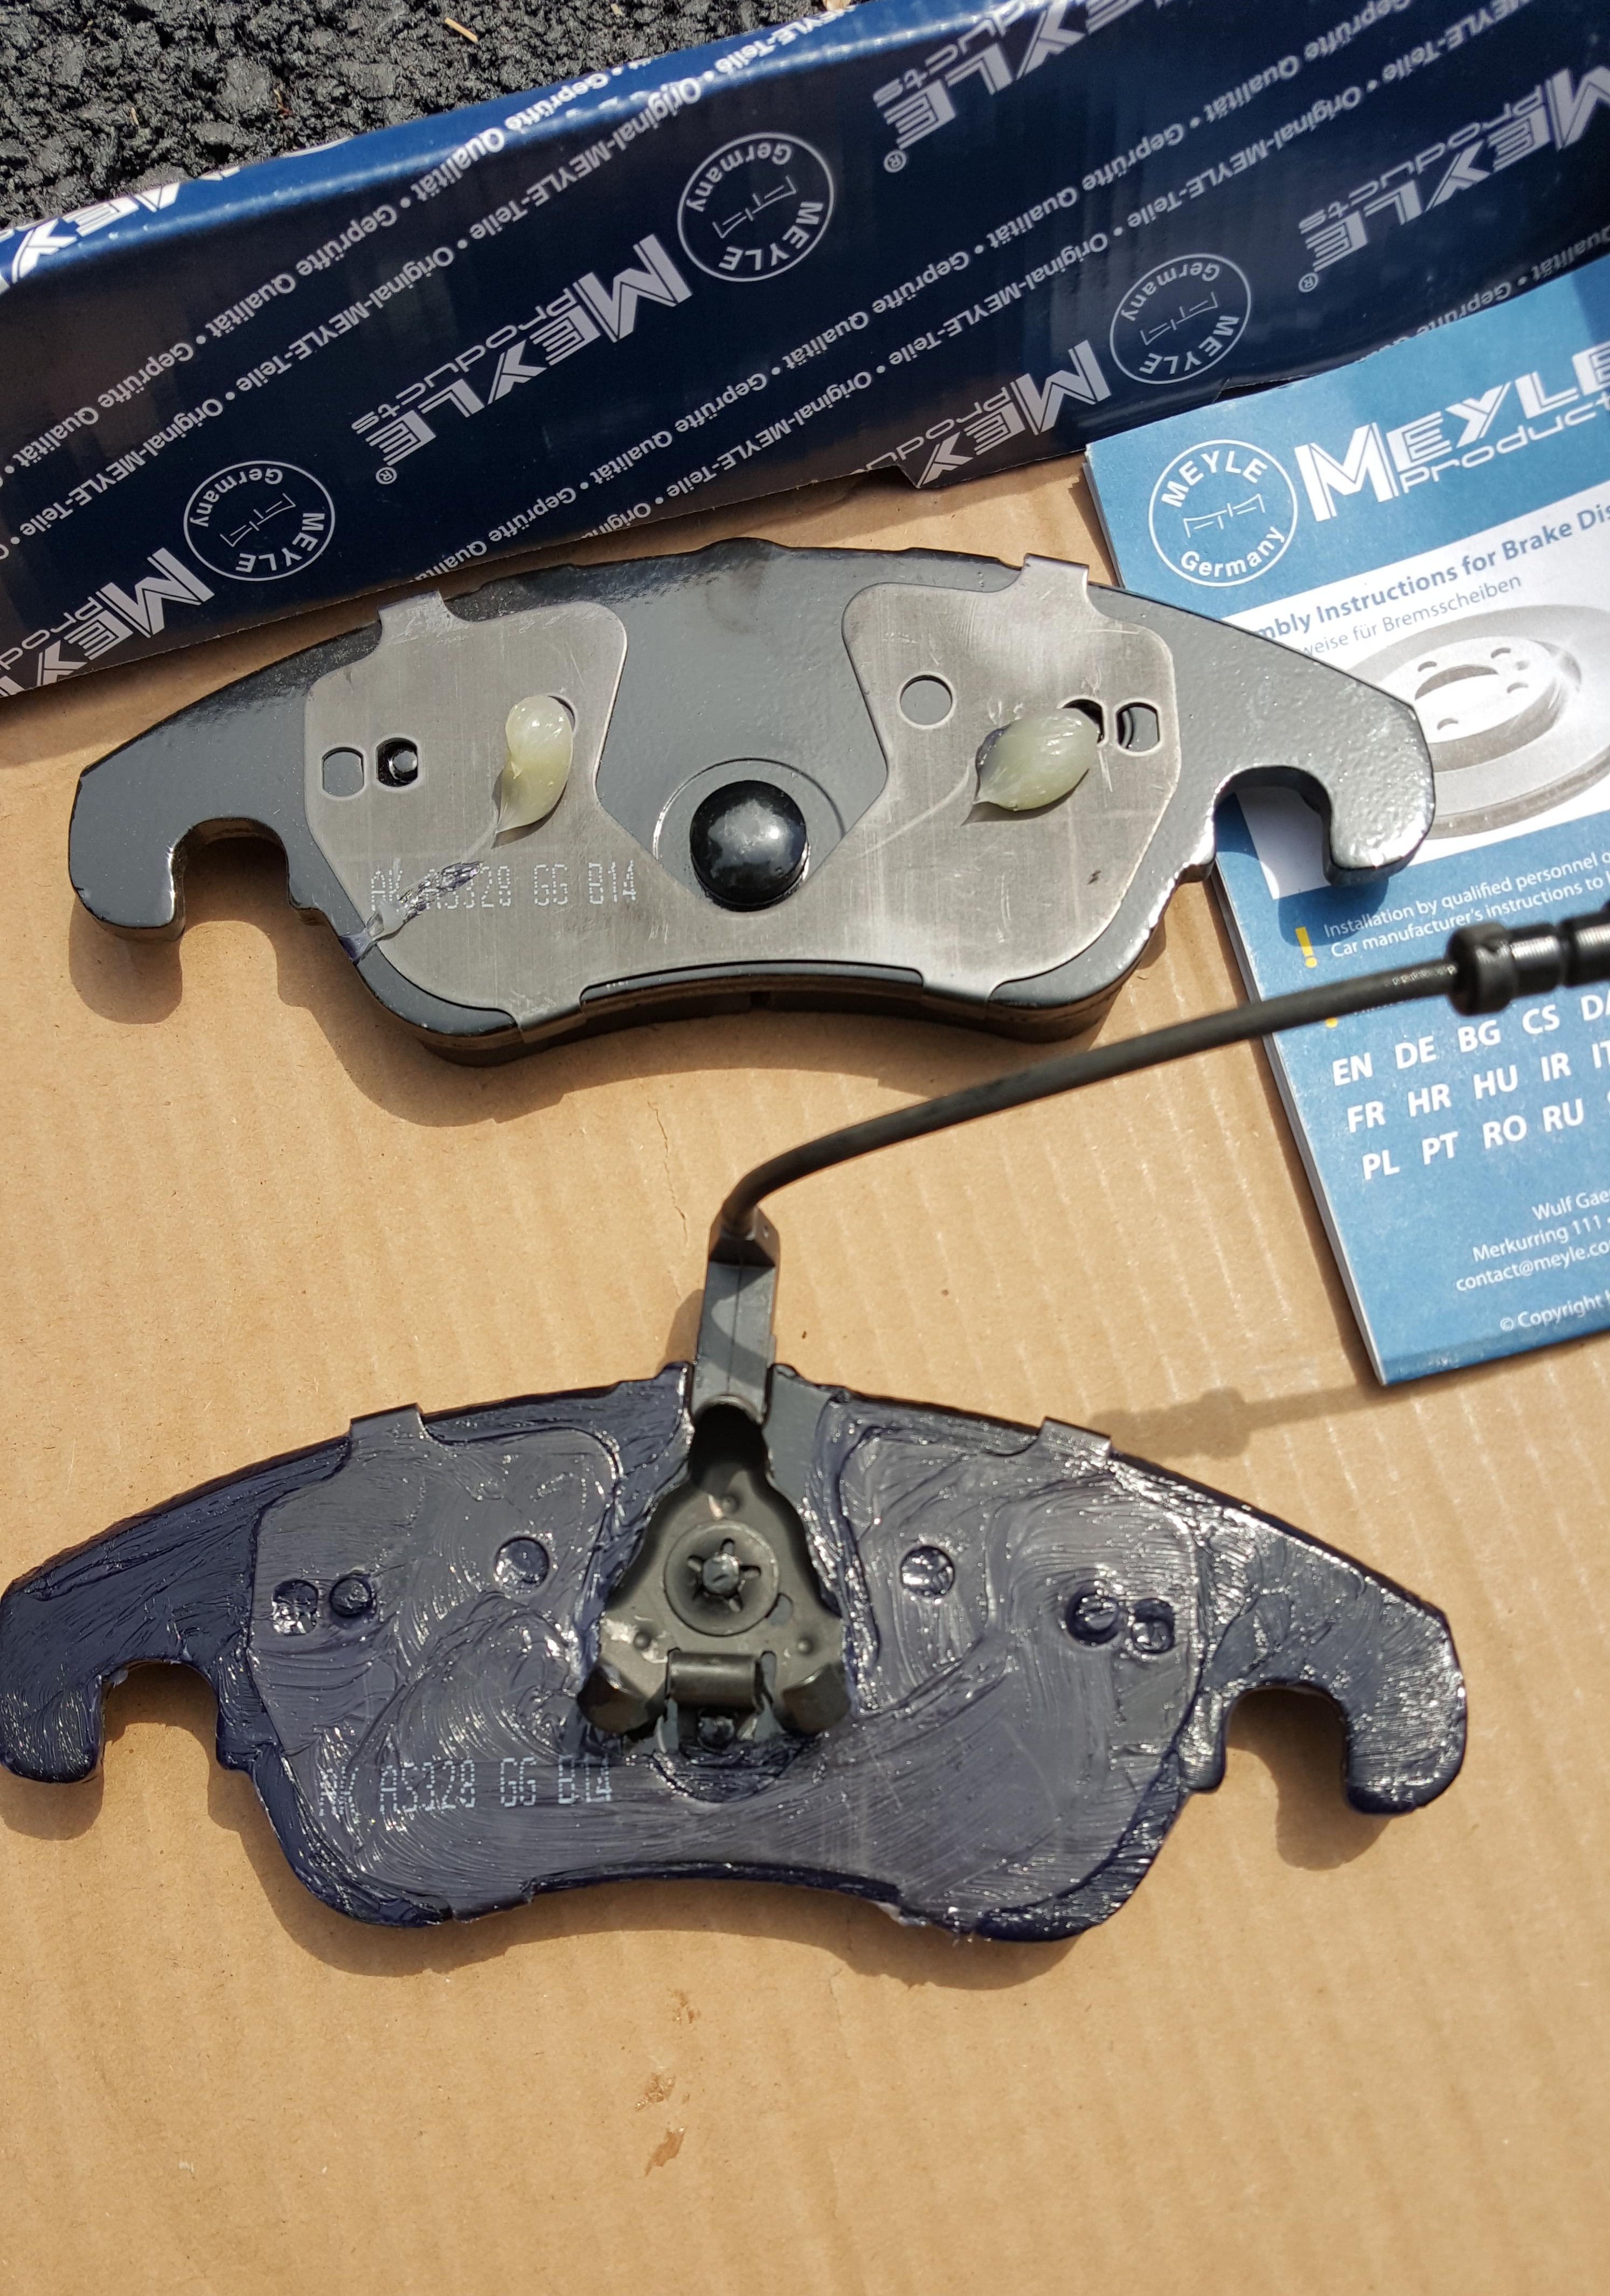
The pads will be very easy to figure out how they go back into the caliper, as one of them has the prongs, and one doesn't.
Step 19
Slide the caliper and new pads back onto the new rotor, put the 13mm bolts back in, and your brakes are done.
Side note - Wear sensor
One side of your car will have the brake pad wear sensor on it. this is very easy to deal with
Step 20
Remove the attachment, it's on of those standard Audi connections, so you need to push it forward a bit, then unclick it and pull. Then, remove it from the metal holder thingy attached in this picture,

If you look dead center, then up a little, and over to the right, you will see this metal piece with a small hole, and below it, a horseshoe looking shape. The sensor fits into this.
VERY IMPORTANT POST INSTALL PROCEDURES
Get in car, start, and pump the brake pedal several times, don't freak out when the pedal goes straight to the floor, remember you pushed the caliper piston all the way back and it needs a few pumps to orient itself.
Break-in procedure for Brake Pads and Rotors
I took my car out, and did several 60 to 20 mph brakes and several 80 to 40 brakes never letting the car reach a full stop (this will glaze the pad, and you don't want that)
if you have to come to a complete stop make sure you have like a 1/2 mile cool down from your last hard brake.
Brake DIY by Scott Skrzypczak