
Replacing the tie rod ends on a 2004 Saab 9-3 Arc is an easy DIY that takes about 1 hour to complete. I recommend scheduling a professional wheel alignment at a nearby repair shop that has Tech 2 software needed to calibrate Saab’s steering sensors, timing it so that it’s ready to be performed immediately after you’ve completed this DIY.

Parts & Tools You’ll Need:
- Right Tie Rod End (passenger side)
- Left Tie Rod End (driver side)
- Floor Jack, Jack Stands + Wheel Chocks
- Torque Wrench
- Wrenches
- Small Sledge Hammer
- Impact Wrench (optional)
- Sockets (optional)
- About 1 Hour Of Free Time
Ready To Replace Your Tie Rod Ends?
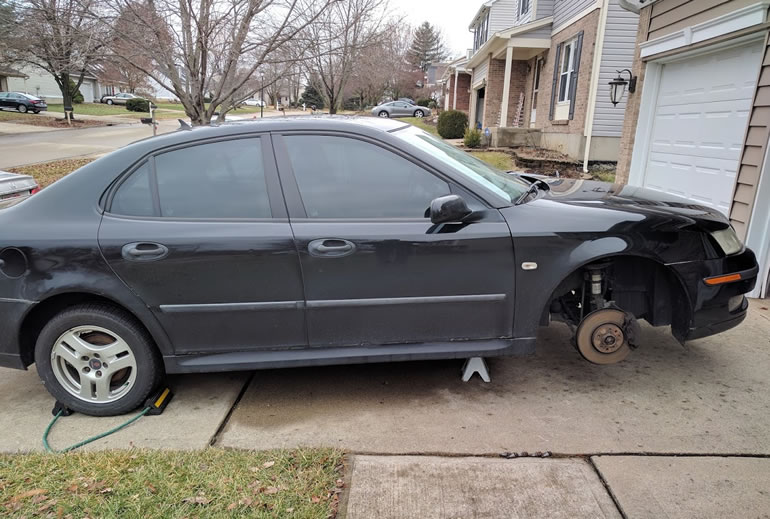
Step 1: Place wheel chocks at the rear wheels, jack up the front of the car, set it on jack stands and remove the front wheels:
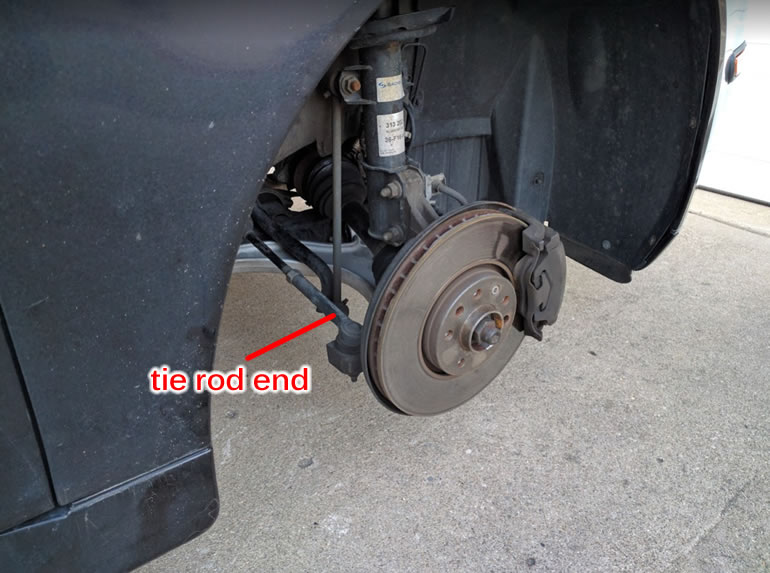
Step 2: Here I’m starting with the passenger side. Locate the tie rod end:
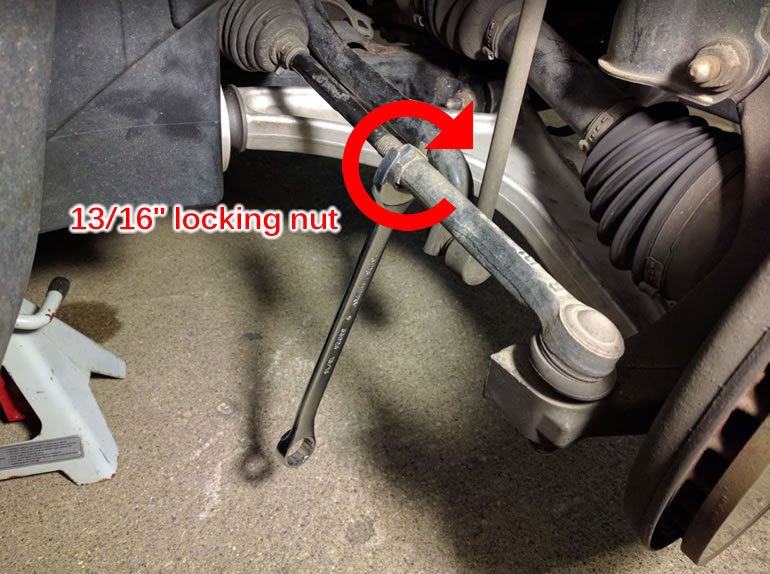
Step 3: Crack loose the locking nut about half a revolution so that we maintain the same position for the new part later. A 13/16” wrench seemed to be an exact, snug fit. I needed to hammer on the wrench to break it free:
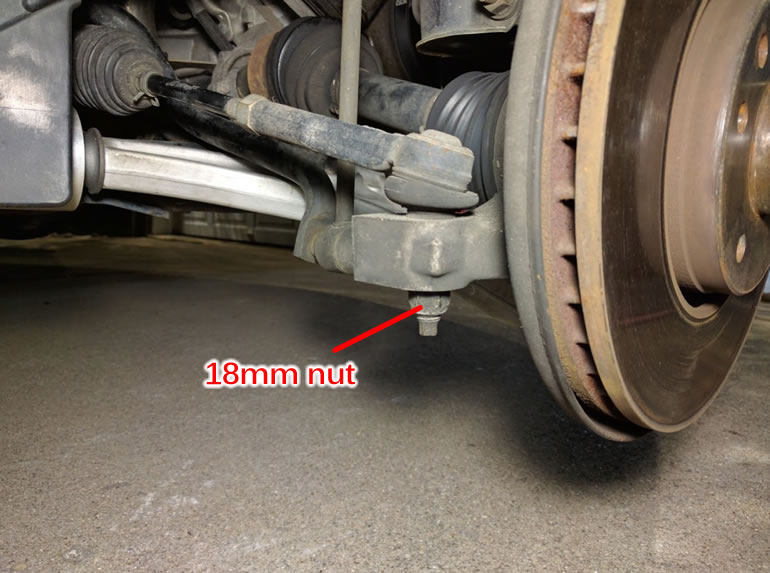
Step 4: Loosen the tie rod end nut so that it’s flush with the shaft it’s threaded on so that you can hammer it out in the next step. You may need to counter-hold the shaft if needed, or use an impact wrench like I did for quick removal:
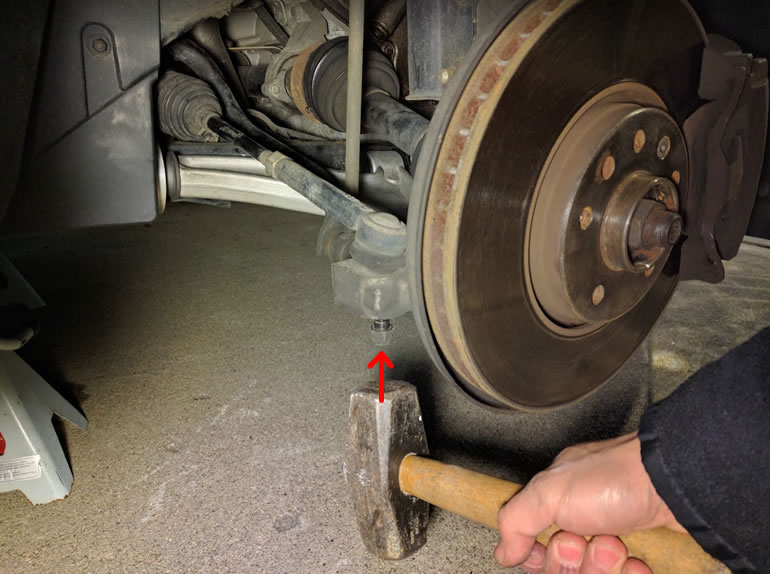
Step 5: Hammer out the tie rod end with a small sledge hammer:
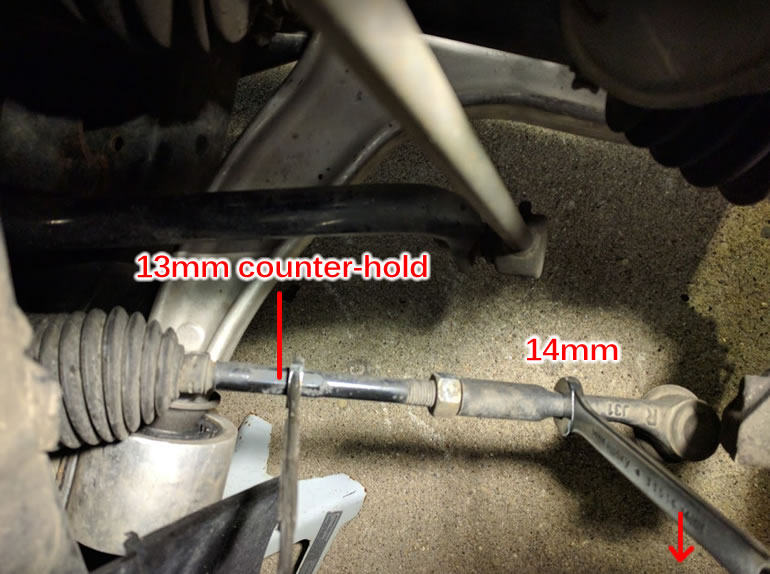
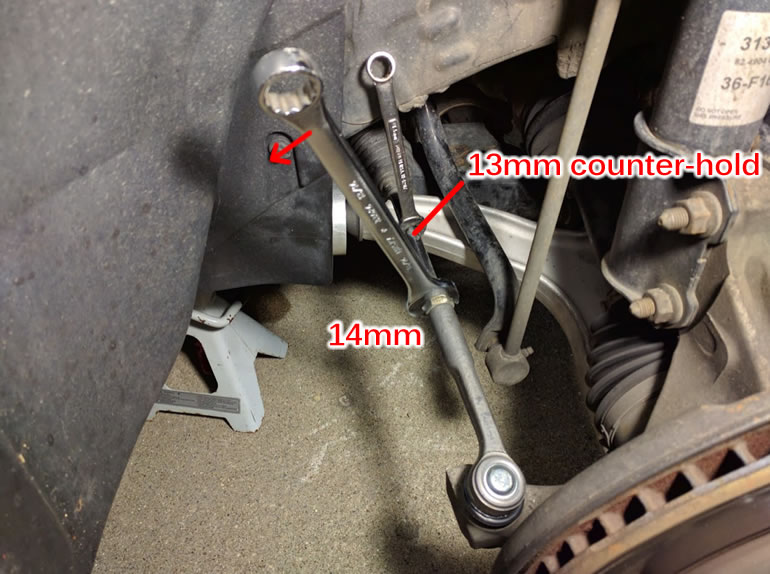
Step 6: Rotate off the old tie rod from the steering shaft. If it’s stuck on you may need to use wrenches to counter-hold the steering shaft while rotating off the tie rod end:
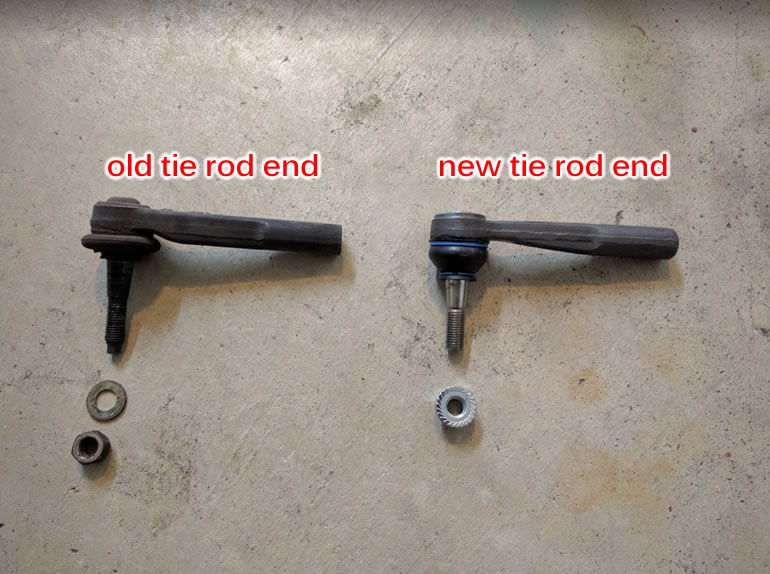
Step 7: Compare the old tie rod end with the new one. My old one’s ball joint was somewhat loose and would have needed to be replaced soon. The lengths appeared to be similar so the resulting alignment should be good enough to drive afterward for a nearby professional wheel alignment.
Step 8: Installation is the reverse of removal. Thread on the new tie rod end until it reaches the old tie rod end’s previous position (set earlier by the locking nut being cracked loose about half a revolution).
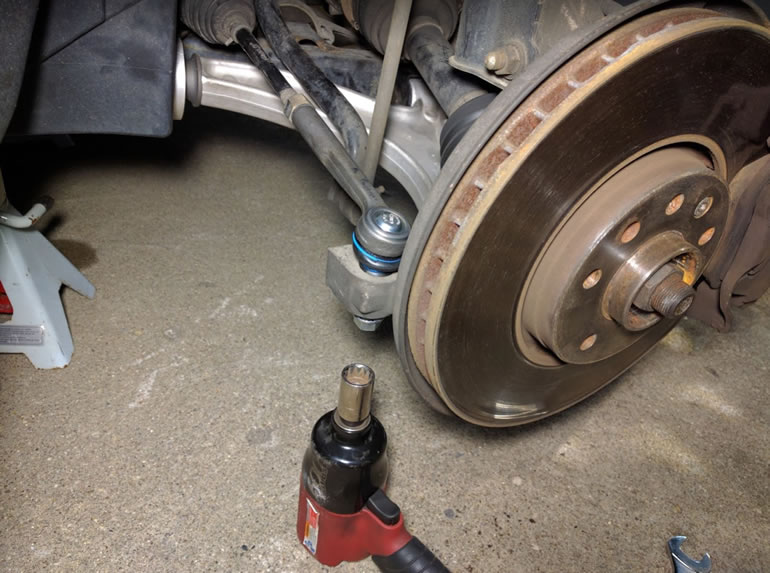
Step 9: Torque the new tie rod end nut to 26 ft-lb. That’s what WIS specifies but I just used an impact wrench without overdoing it:
Step 10: Tighten the locking nut to 52 ft-lb while counter-holding the steering shaft (that's the torque specified in WIS but I didn't have an easy way to do this so I guesstimated):
Step 11: Repeat the above steps for the driver side. When you’re all done install the wheels, lower the car and torque the wheel bolts to 80 ft-lb.
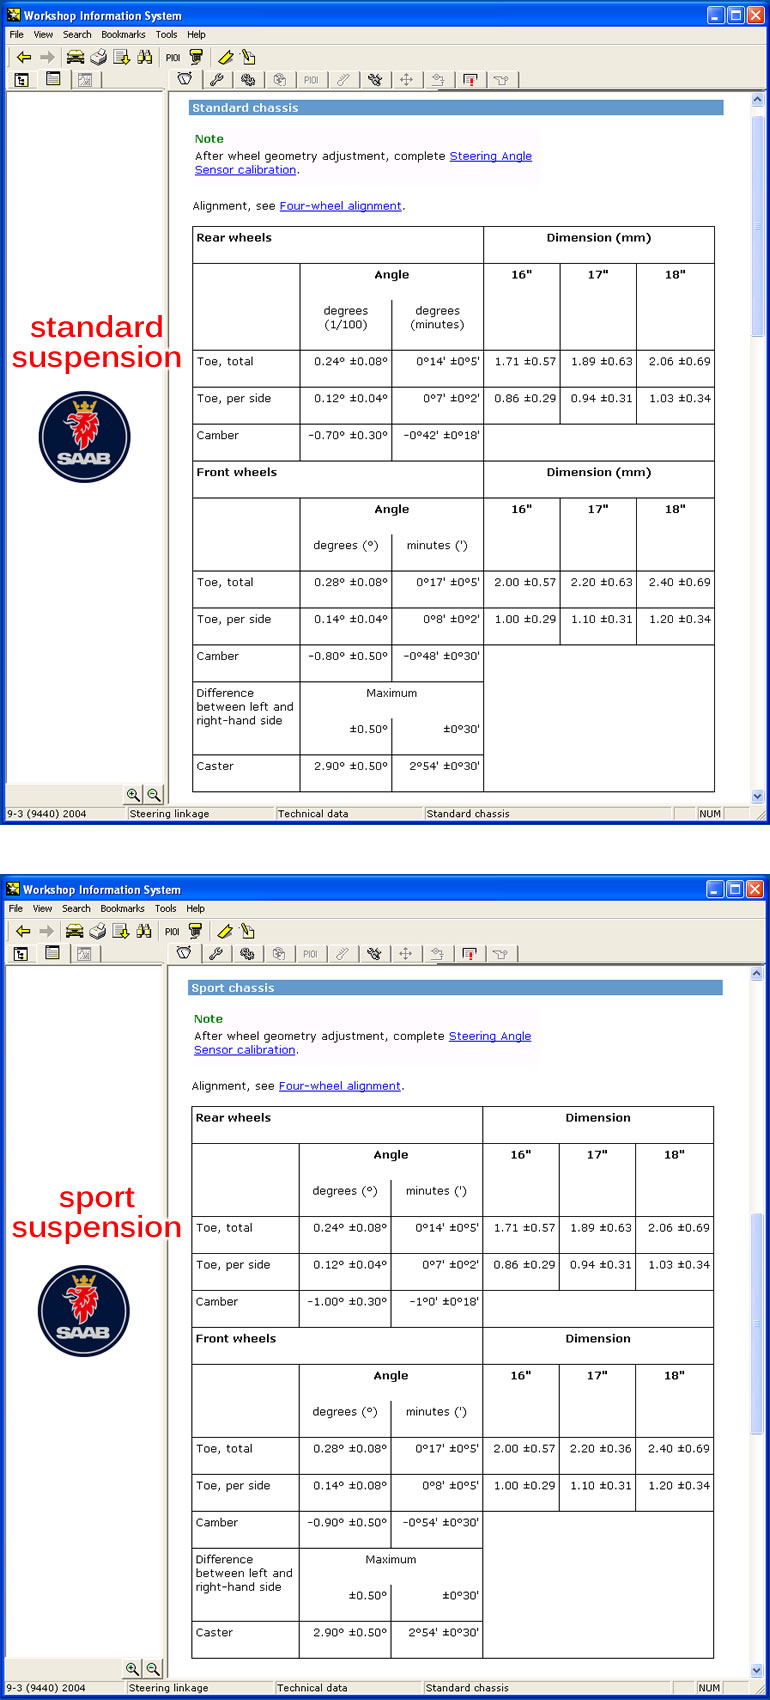
Step 12: Put away your tools and take the car in for a profession wheel alignment, ensuring your steering sensors get calibrated afterward. Here are the alignment specs listed in WIS for a standard suspension (what I’ve got) and a sport suspension:
Enjoy years of reliability with your new tie rod ends!


