
Replacing the the water pump on a 2001 Volvo S60 T5 is an easy DIY that takes about 1 hour to complete if you have the timing belt already off the car. If not, plan for an additional 1-2 hours to complete that easy-to-moderate level DIY. You can follow [Jason’s DIY Timing Belt Video]
up until the 8min 45secpoint then come back here to change your water pump.
Parts & Tools You’ll Need:
- Water pump
- Coolant
- Distilled water
- Sockets, ratchet
- Torque wrench
- Drain pan
- Single edge razor blade
- Inspection mirror
- Flashlight (optional)
- About 1 hour of free time
Ready To Replace Your Water Pump?
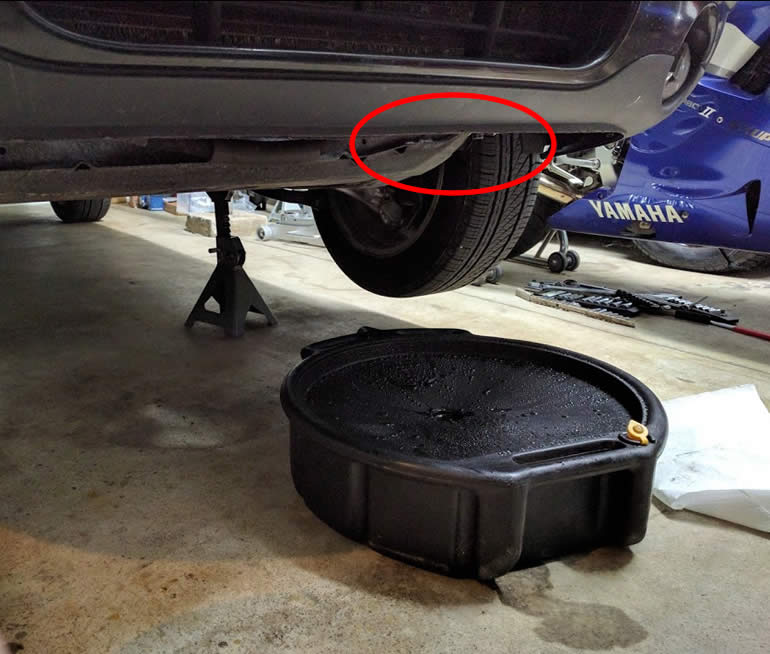
Step 1: Start by positioning a drain pan near the front driver side corner to catch the coolant you’re about to drain:
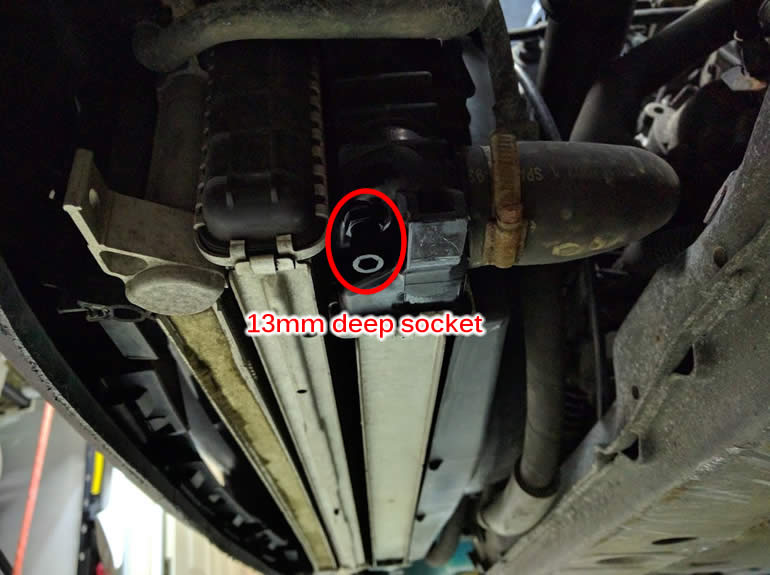
Step 2: Look underneath and drain the coolant by removing this plug:
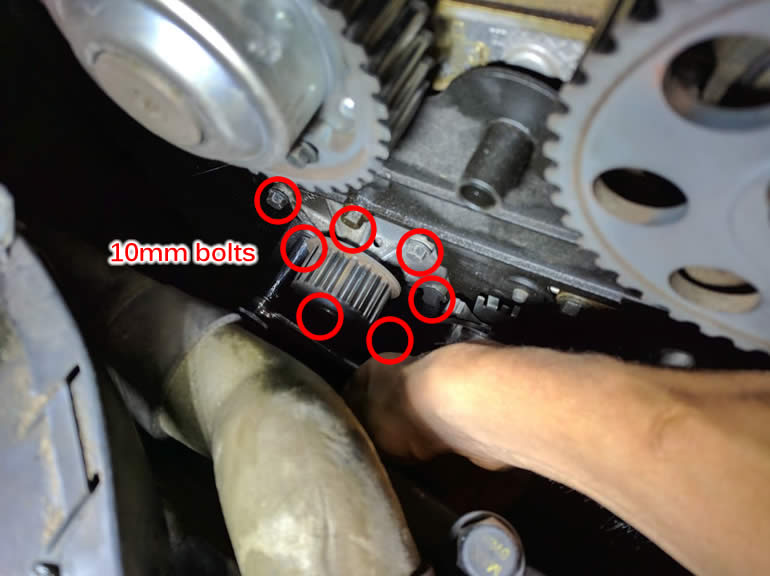
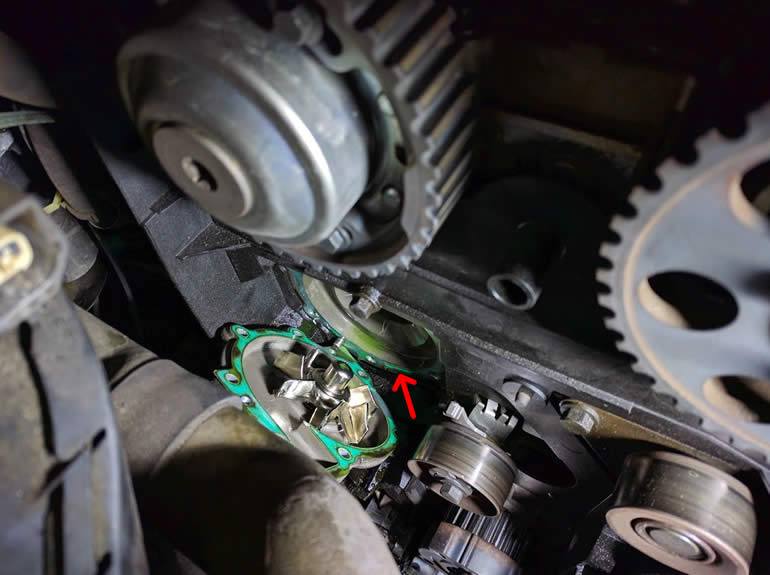
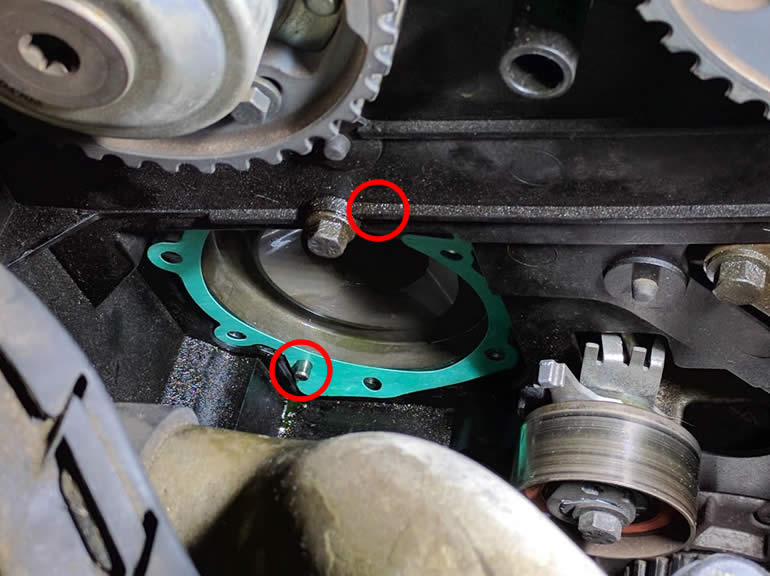
Step 3: Head up top, locate the water pump, remove the 7 bolts and remove the water pump:
Step 4: As you remove the water pump you may find that some of the gasket material didn’t come off the engine block. You’ll need to scrape this off so that you have a clean mating surface for the new water pump’s gasket:
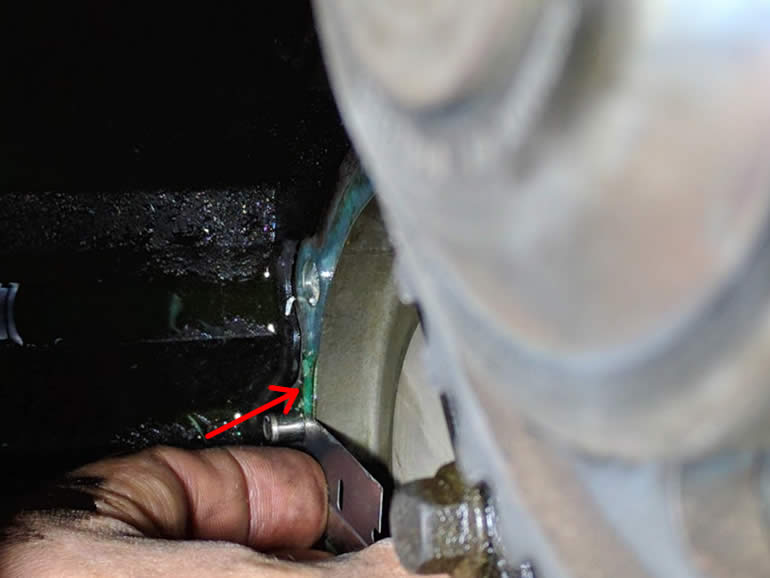
Step 5: I used a single edge razor blade and carefully removed the stuck-on gasket material until the surface was clean and free. There isn’t much room so I opted for this method while being super careful and patient so I didn’t drop it or cut myself:
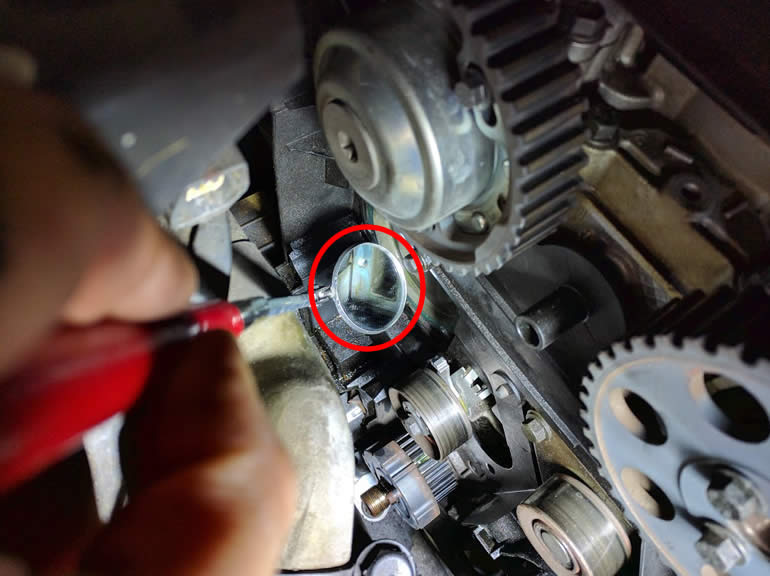
Step 6: Check the entire mating surface to ensure it’s clean and free. You’ll need a small inspection mirror as the cramped area doesn’t allow you clear line of sight:
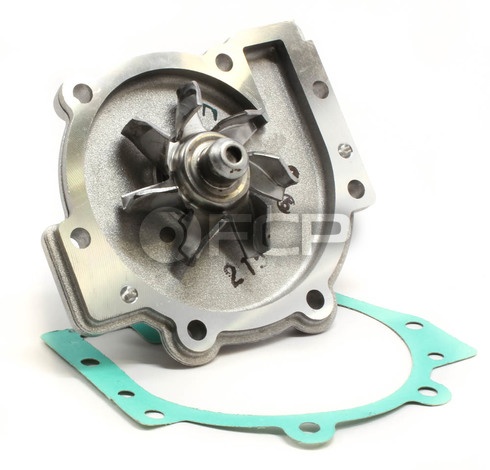
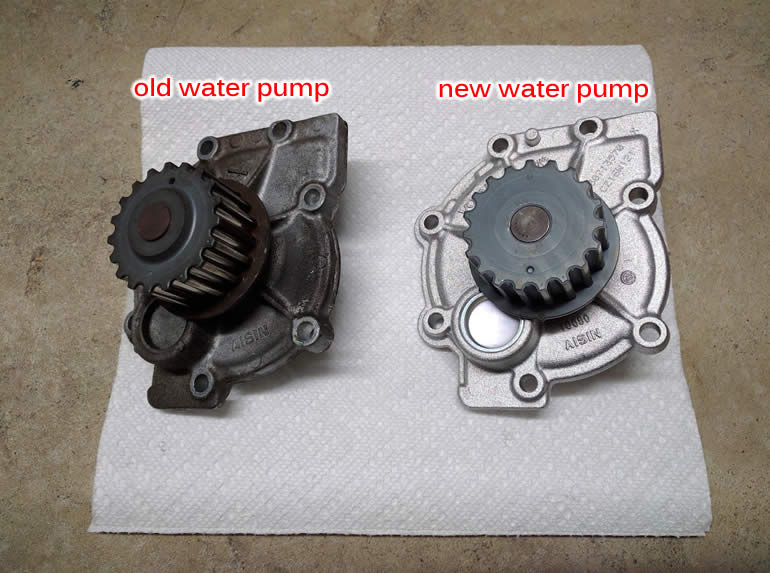
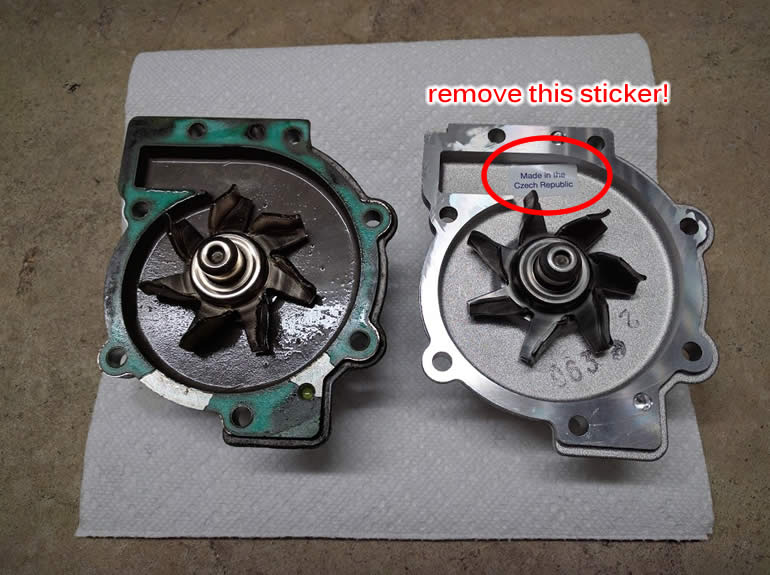
Step 7: Now that the area is ready for the new water pump, let’s compare it with the old one. My old one was in pretty good shape with no bearing play. I replaced it anyway as it’s a pain to get to and I’d hate regretting to replace it now that the timing belt is out versus having to do all that if the pump fails in the next few years.
Step 8: Be sure to check the back of the water pump as well. I found this stick behind the new water pump: remove this! You don’t want that floating around inside your cooling system. I’m surprised the sticker wasn’t placed on the outside surface.
Step 9: Place the new gasket onto the mating surface. There are two dowels that hold it up in place:
Step 10: Hand-tighten the new 10mm bolts that came with the new water pump:
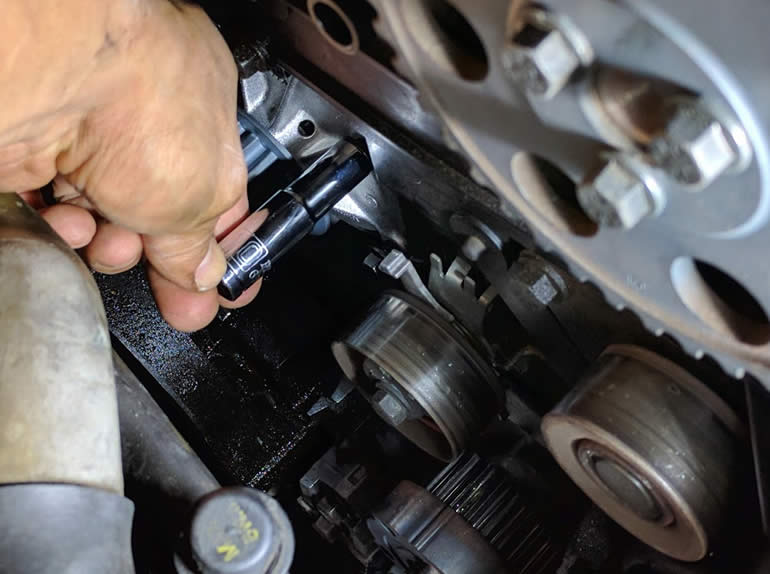
Step 11: Torque down the new 10mm bolts in a criss-cross pattern to 15 ft-lb:

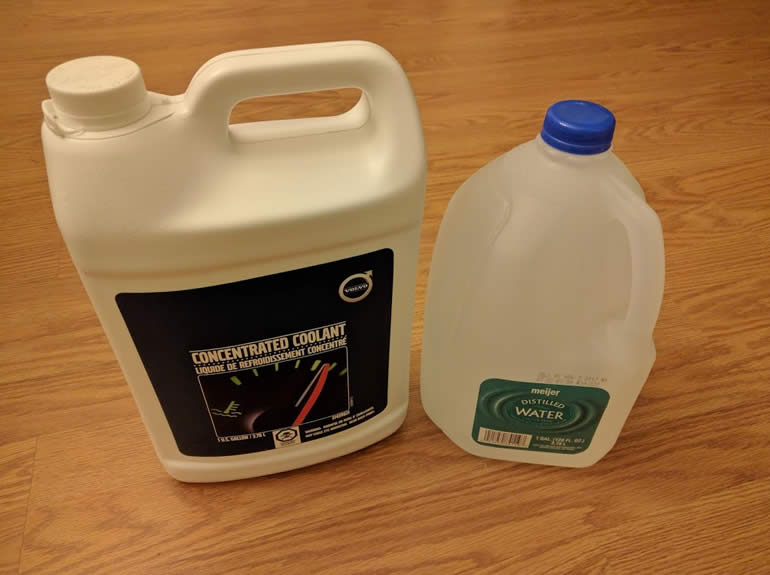
Step 12: Now grab your coolant and distilled water and mix it up to get your 50/50 solution:
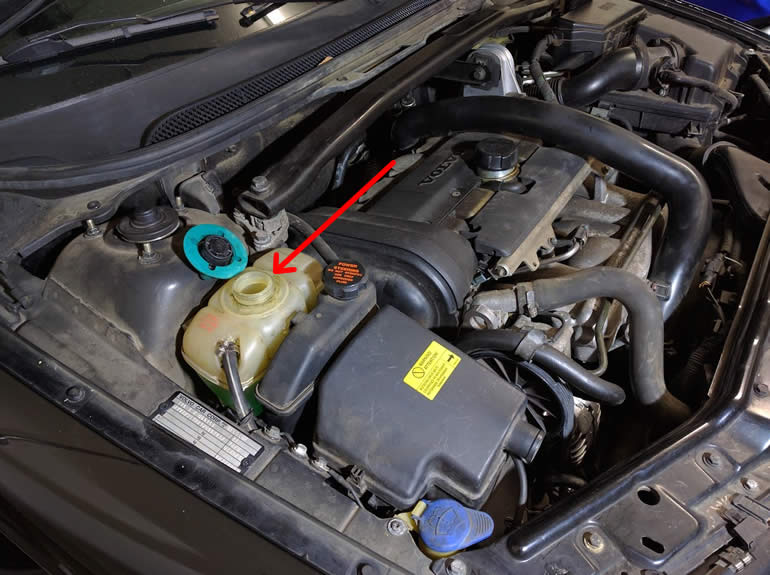
Step 13: When the car is put back together (refer to Jason’s video mentioned at the beginning if needed), fill the coolant reservoir with your 50/50 solution then start the car. Let it reach it’s normal operating temperature and set the interior cabin temperature to the hottest setting with the fan on high. Let the radiator fan cycle several times and keep checking the coolant reservoir to ensure it’s topped off as the system burps the air out:
Now enjoy years of water pump reliability!


