- 02/01/2017
- 2 Min Read
- By: Gerry Tseng
Replacing The Serpentine Belt And Tensioner On A 2001 Volvo S60 T5

Replacing the serpentine belt and tensioner on a 2001 Volvo S60 T5 is an easy DIY that takes about 1 hour to complete. It also helps if you have small hands to maneuver in tight quarters.
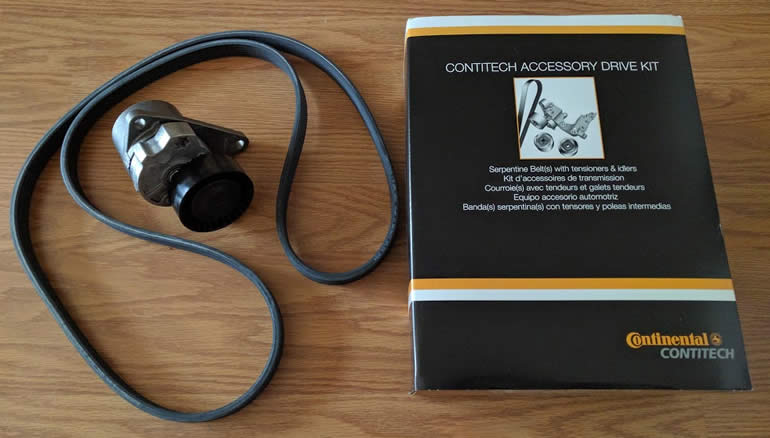
Parts & Tools You’ll Need:
- Serpentine belt kit
- Sockets, ratchet
- Torque wrench
- Volvo belt tensioner tool (or a short Torx T-60 bit)
- Serpentine belt tool (if needed)
- Vise grip (optional)
- Flashlight (optional)
- About 1 hour of free time
Ready To Replace Your Serpentine Belt & Tensioner?
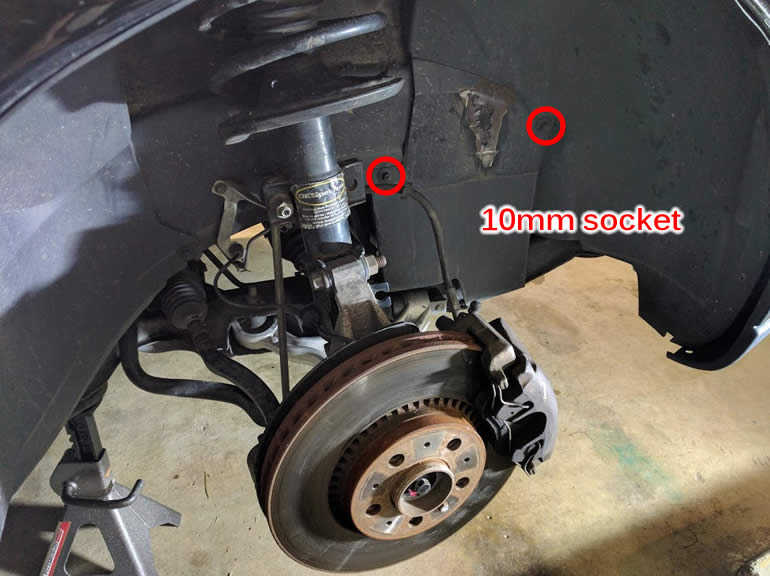
Chock the rear wheels, raise the front passenger side, secure it with a jack stand and remove the front passenger side wheel with a 19mm socket. Now remove these 2 nuts to remove the metal plate that it secures:
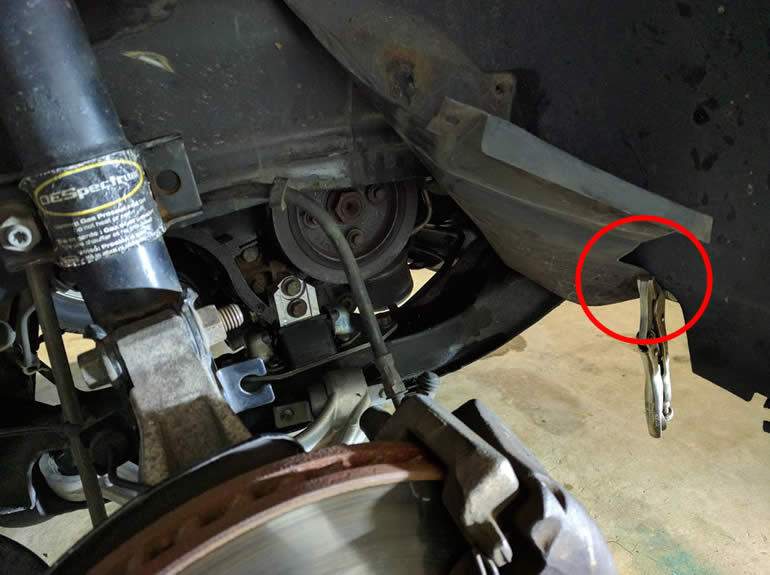
Bend the liner back along the seam and use a vise grip to secure it so it’s out of your way:
Go up top and raise the engine hood. You’ll be working in this area:
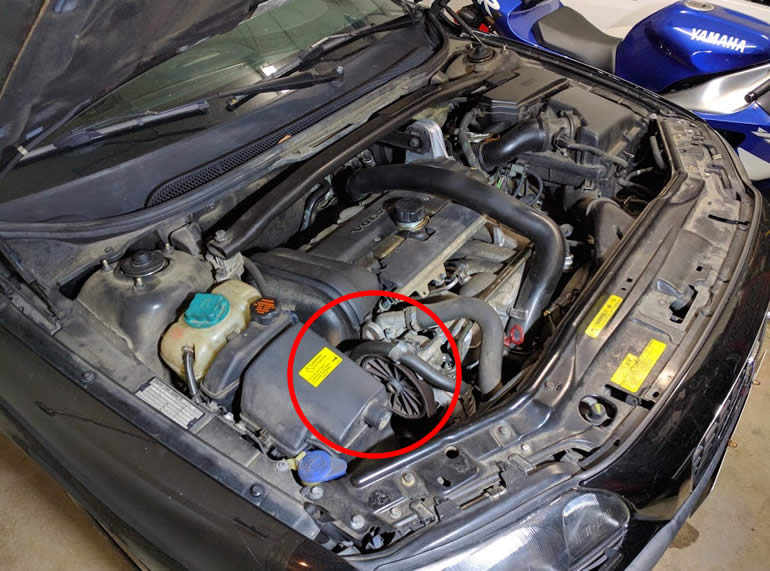
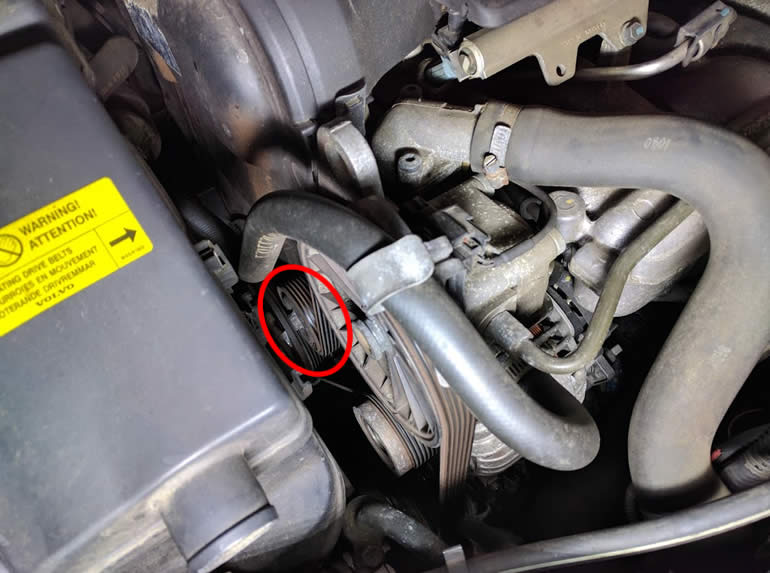
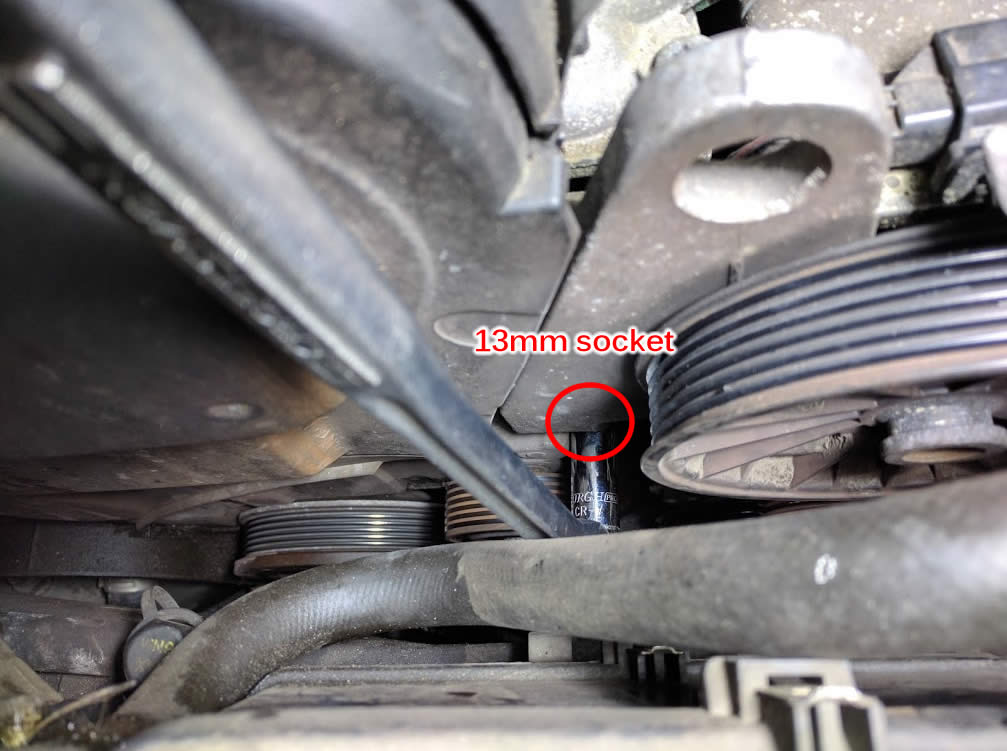
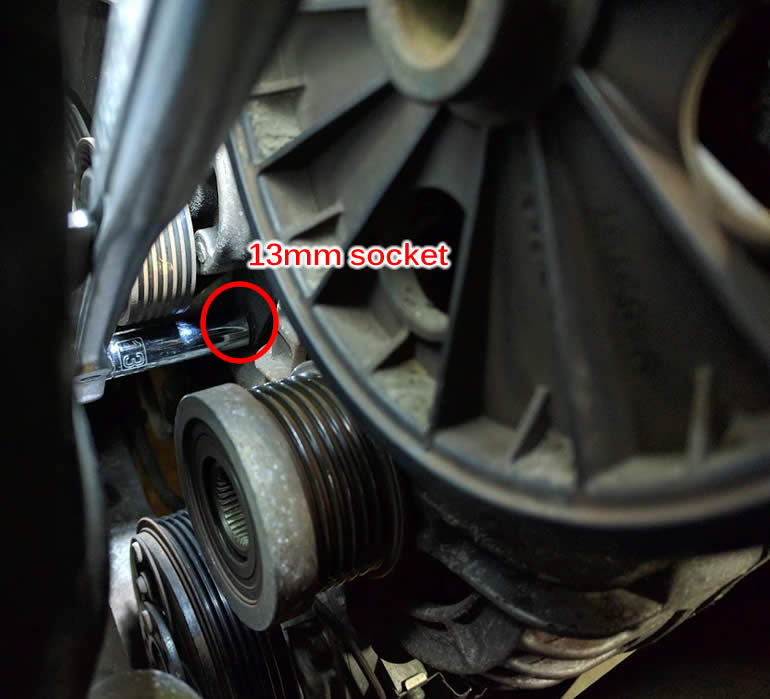
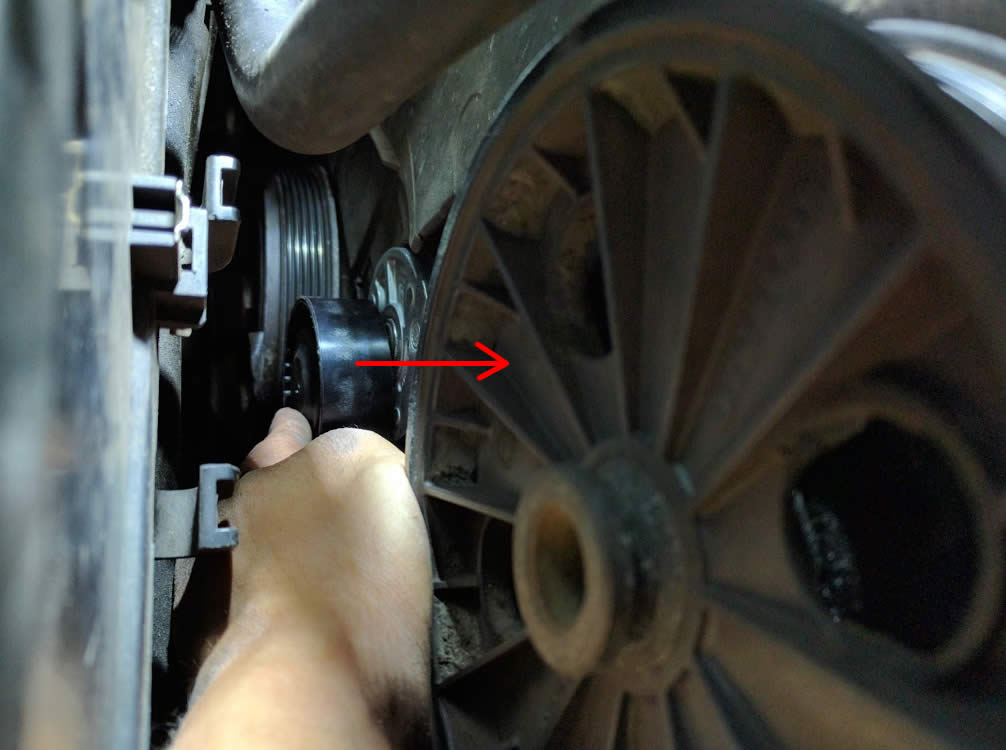
Locate the belt tensioner:
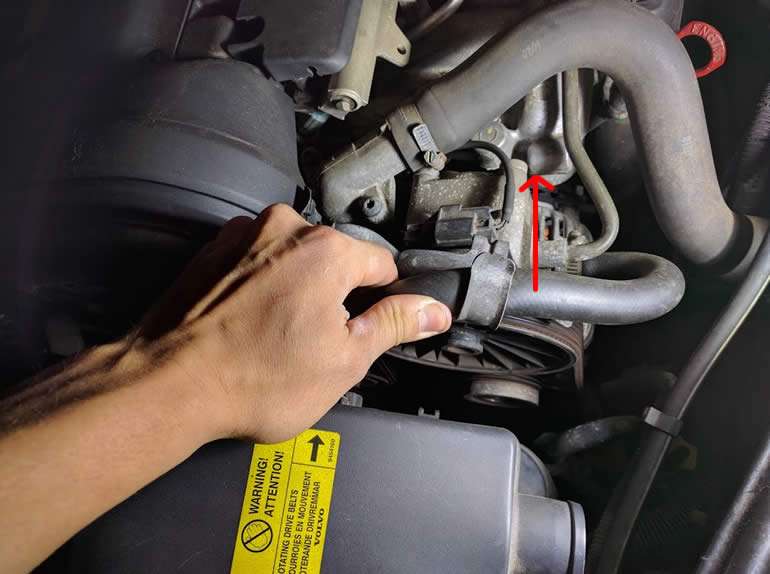
Unhook this power steering hose so you can work around it as needed. You can also choose to lift out the power steering reservoir it connects to on the passenger side fender so you can get that hose completely out of the way (I chose not to do that):
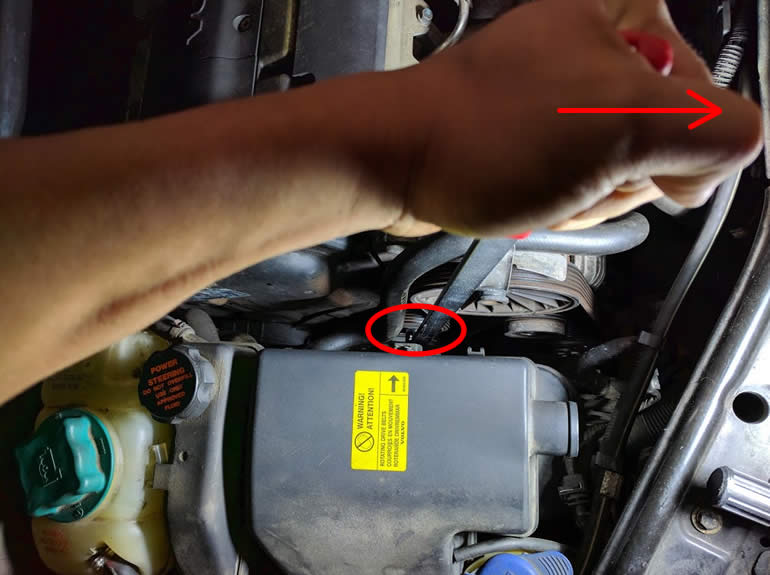
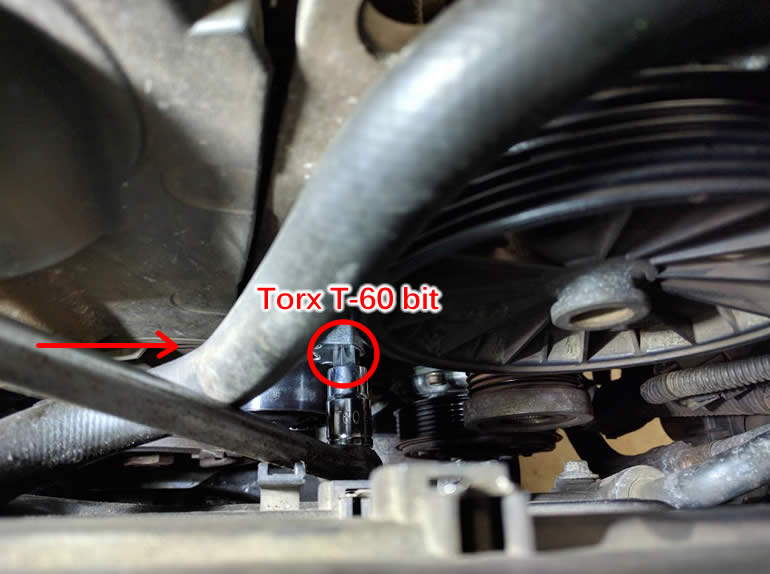
Attach the belt tensioner tool and rotate clockwise to relieve tension and remove the belt from the car. Note the routing of the belt first so you won’t get confused during reassembly. Also note that your tensioner may have a different tension release point: my old one needed a 14mm socket but the new one required a Torx T-55 bit. This is why I listed both in the tools list above and why I didn’t specifically list the bit needed in the picture:
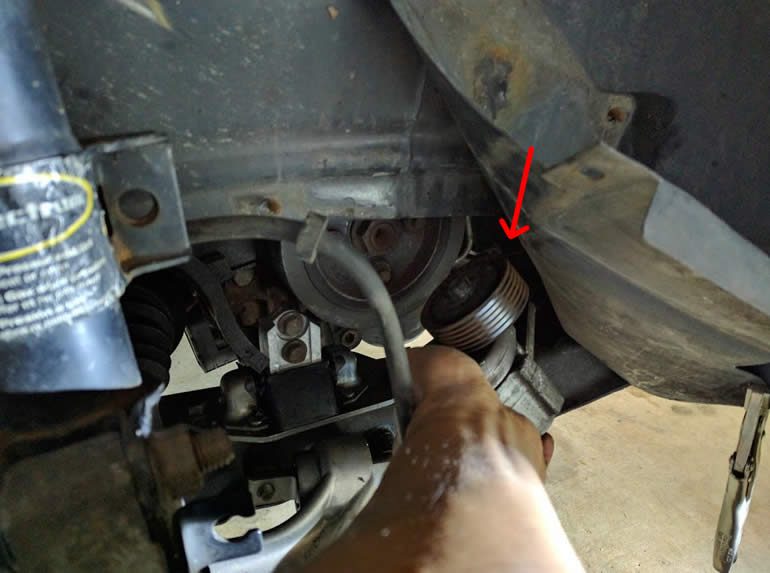
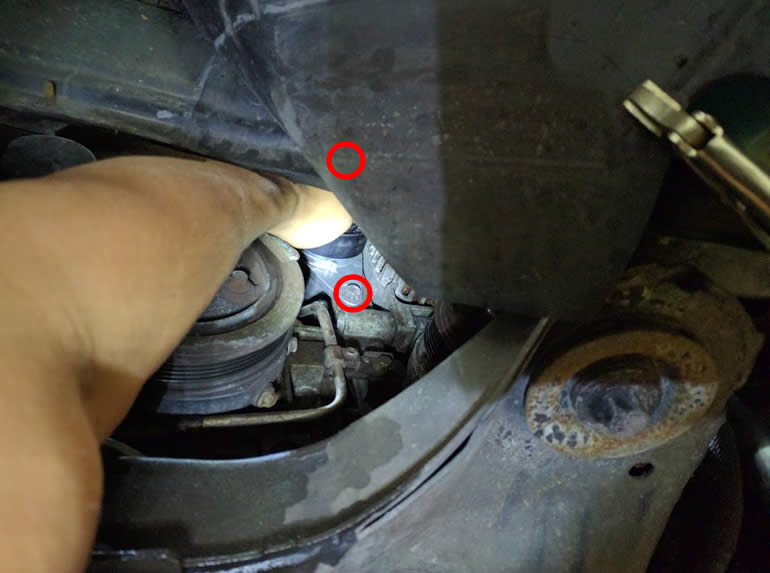
Remove the 2 tensioner bolts with either a socket with an extension or simply with a deep socket. There’s one at the top and one at the bottom, both are pretty much out of view so you’ll have to feel for them. I took them out from the top of the engine but you could also take them out from underneath the car through the front passenger wheel well.
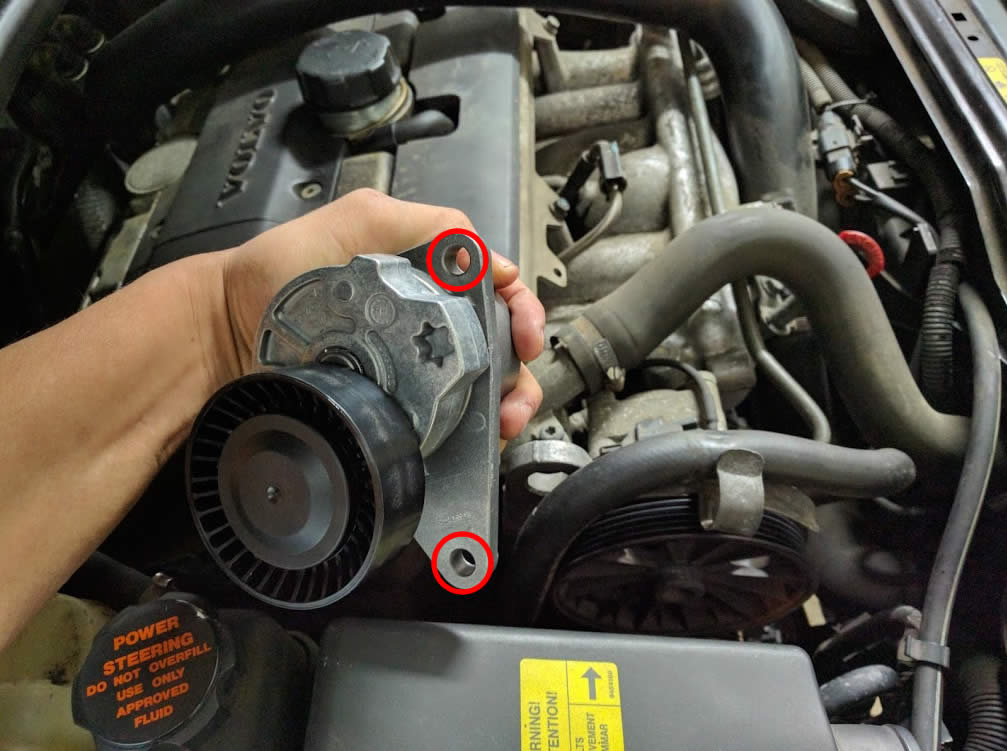
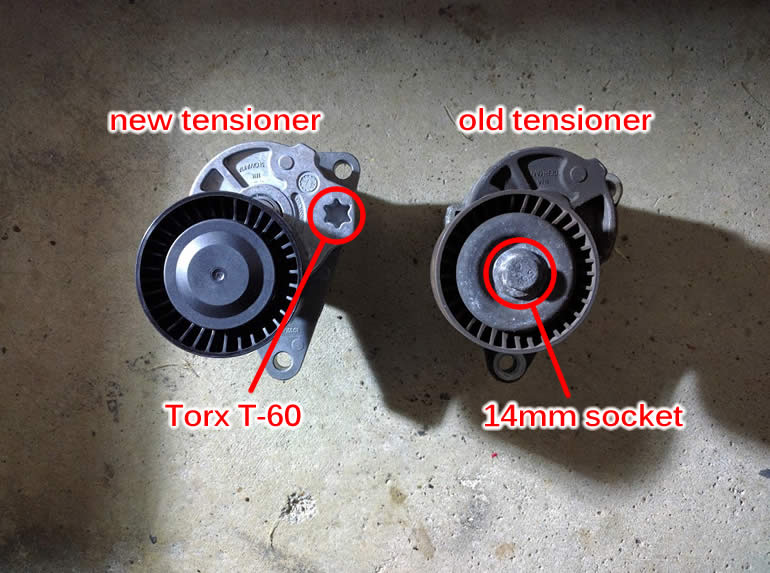
Here’s a picture of the new tensioner so you can better see the top and bottom locations of where the bolts are. Also note the recessed locations which puts the bolts out of view and the new tensioner’s Torx T-55 rotational attachment point that I mentioned above.
Exercise a little patience to reduce any swearing while getting your hand in that tight area. Get your ratchet and socket on the top bolt and remove it:
Then get your ratchet and socket on the bottom bolt and remove it:
Remove the old tensioner through the front passenger wheel well as it’s too big to come out of the top:
Compare the new tensioner with the old one. My old one had a really loose pulley and seemed worthwhile replacing. I suspect it would’ve soon failed and caused an annoying screeching sound: good thing I got the kit to prevent that from happening!
Installation is the reverse of removal:
Route in the new tensioner up through the front passenger wheel well and set it into the area:
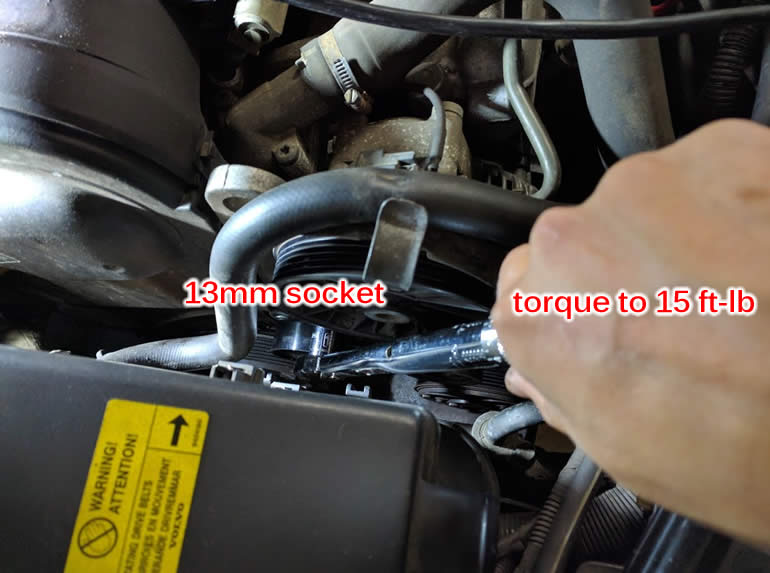
From underneath the car hand tighten both bolts through the front passenger wheel well:
Torque both bolts to 15 ft-lb:
Route the new belt onto the pulleys and while keeping tension on it so it stays on the ribbed pulleys. Use one hand to keep tension by pushing it close to the tensioner pulley while using the other hand with the Torx T-55 bit on either a belt tensioner tool or a slim head ratchet on the tensioner to relieve tension. Slip the belt onto the tensioner pulley and allow the tensioner to go back into place.
All other steps are the reverse of the removal steps indicated above. Hand tighten the nuts securing the fender liner plate and torque the wheel bolts to 105 ft-lb.
Now enjoy years of trouble-free serpentine belt reliability!