- 02/01/2017
- 2 Min Read
- By: Alex Fiehl
Replacing The Front & Rear Engine Mounts On A 2001 Volvo S60 T5

Replacing the front & rear engine mounts on a 2001 Volvo S60 T5 is a moderately easy DIY.
Parts & Tools You’ll Need:
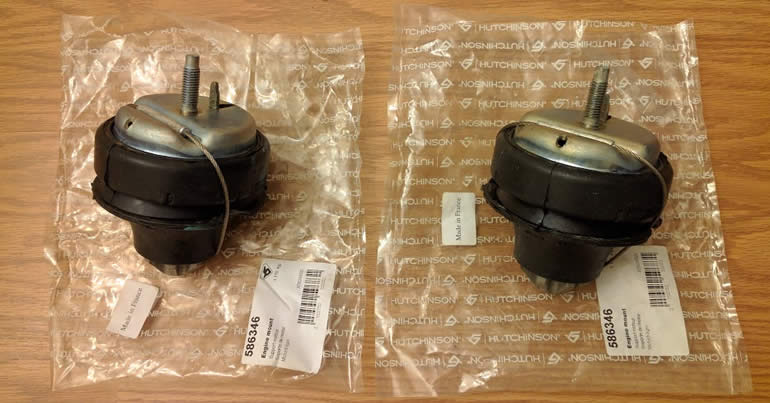
- 2 New Engine Mounts (They’re identical for front & rear)
- Floor jack, jack stands, wheel chocks
- Sockets, Ratchet, extensions, universal joint
- Wrenches
- Torque wrench
- Pry bar
- Flashlight
- About 1 hour of free time
- Impact wrench + impact sockets (optional)
- About 1-2 hours of free time
Ready To Replace Your Front & Rear Engine Mounts?
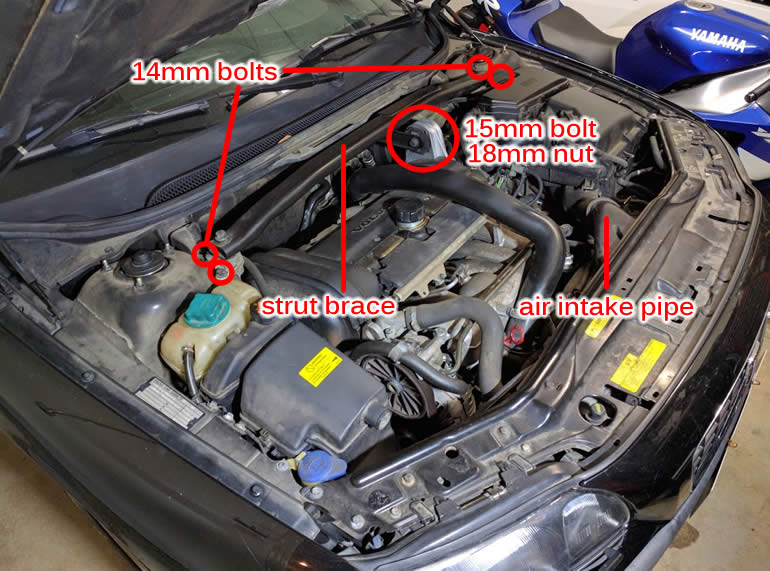
Step 1: Place wheel chocks at the rear wheels, jack up the front of the car and secure it with jack stands. Then raise the hood and remove the strut brace and air intake pipe:
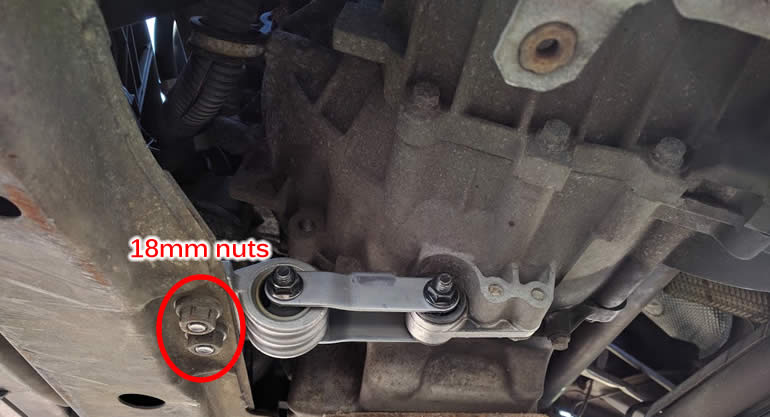
Step 2: Head underneath the engine and remove the torque rod nuts so that it’s not connected to the frame:
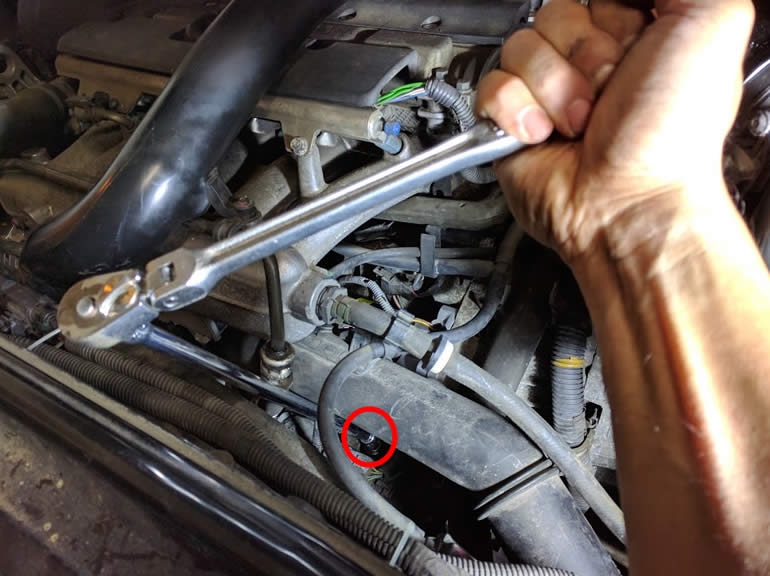
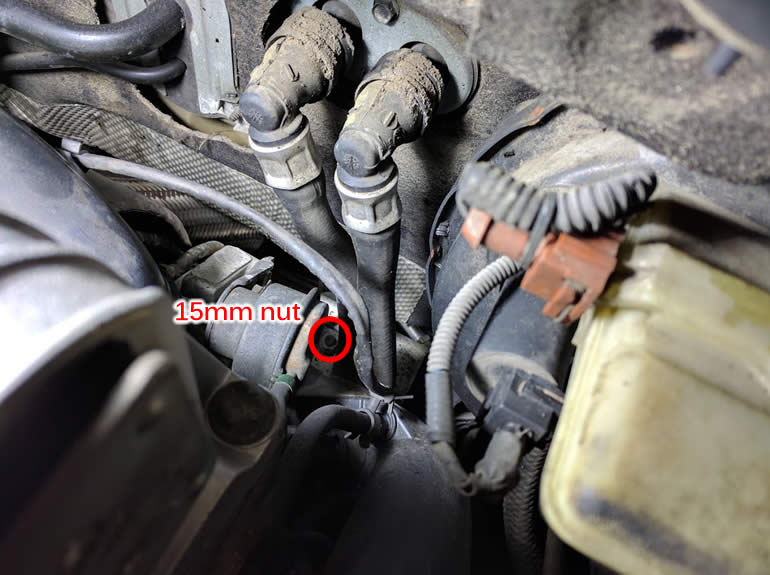
Step 3: Head back up top and start with the front engine mount by removing the top nut:
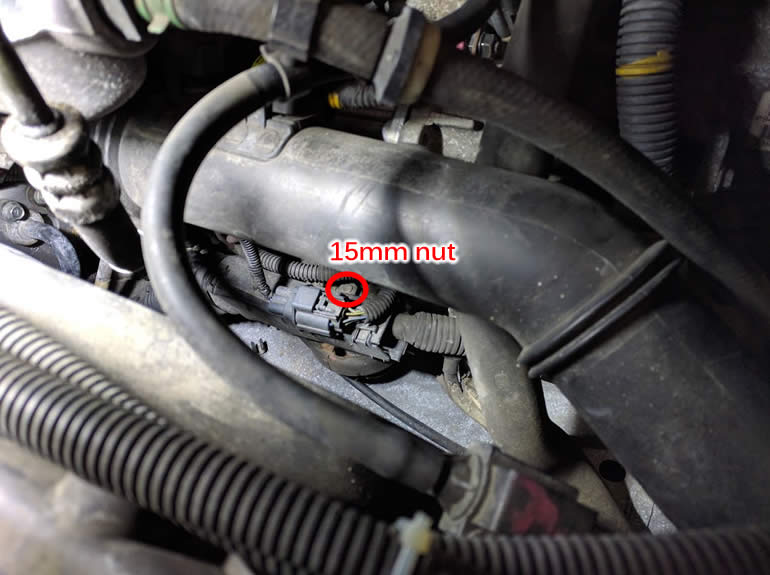
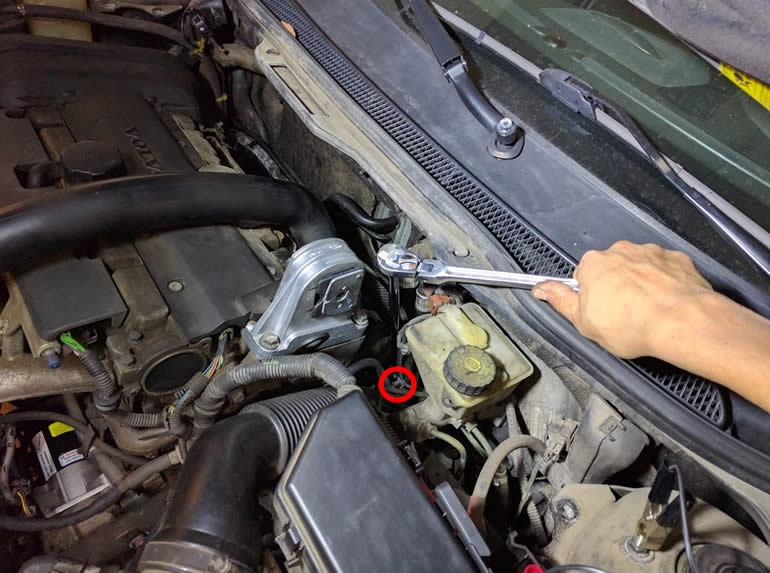
Step 4: I found that a long extension with a universal joint on a short socket worked best to get that top nut off in that cramped area:
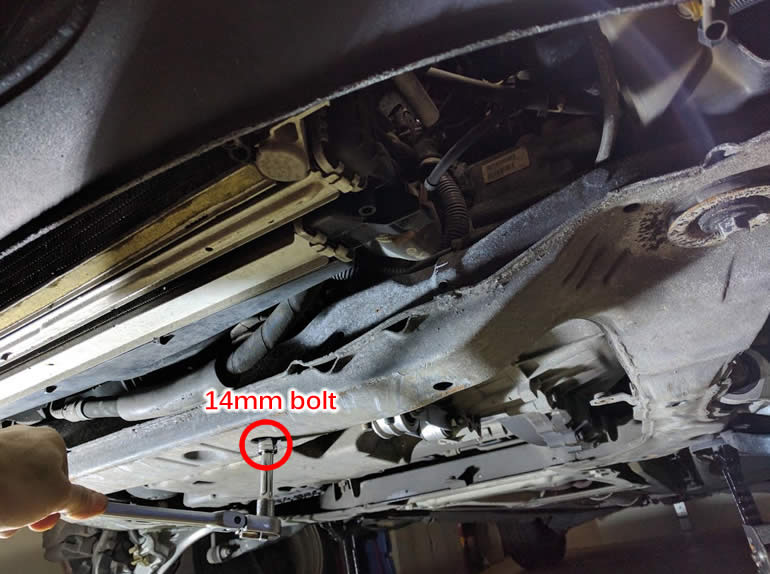
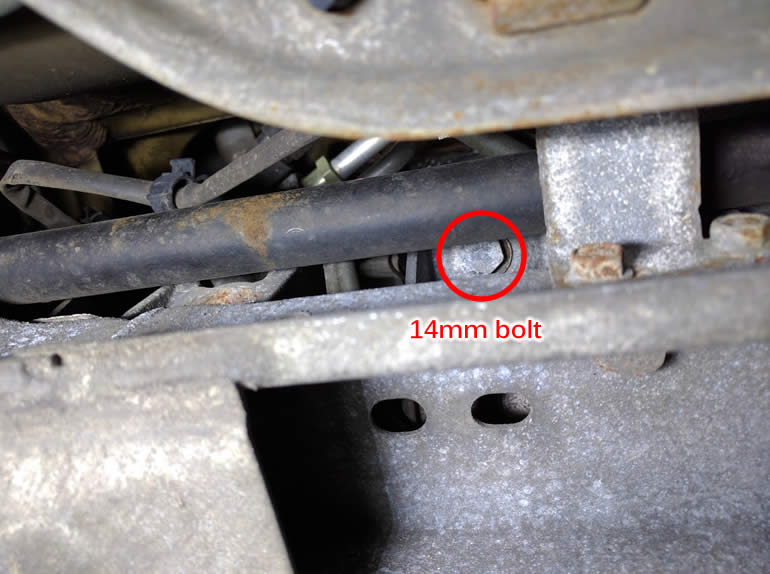
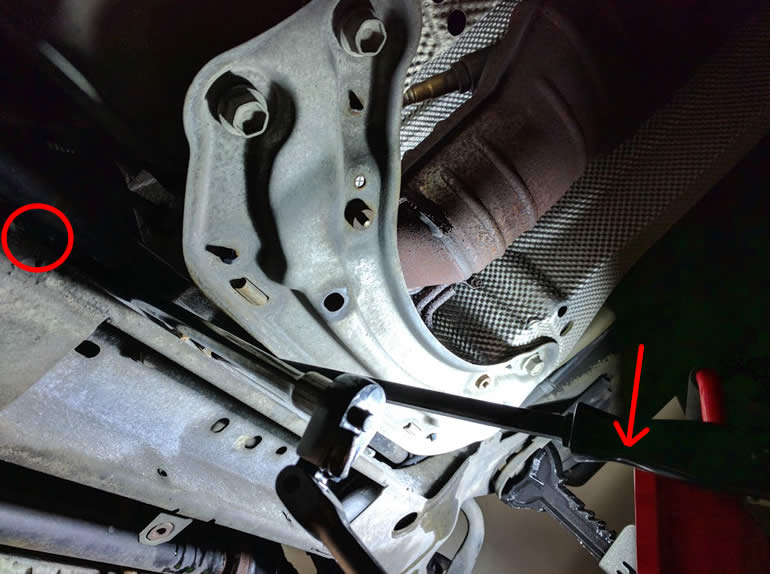
Step 5: Head back underneath and remove the 14mm bolt that can be accessed through the hole in the frame:
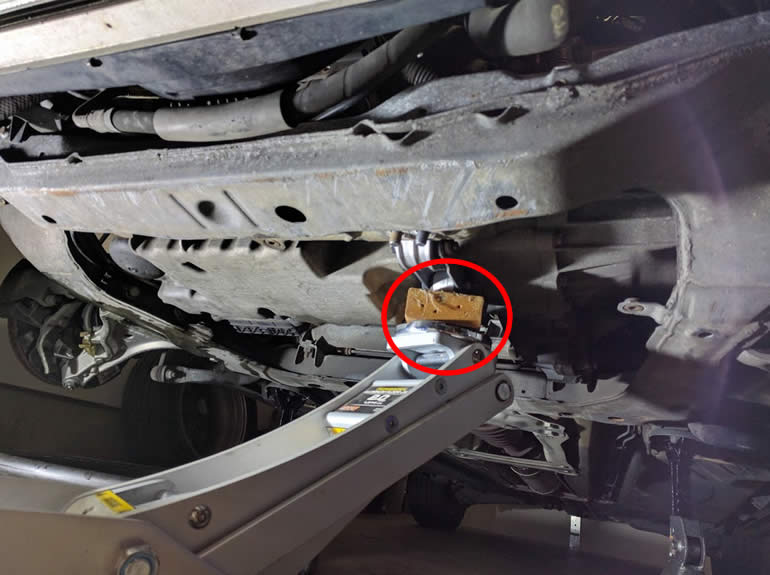
Step 6: Carefully jack up the torque mount where it meets the engine. You want to slowly lift it just high enough to get the front engine mount out:
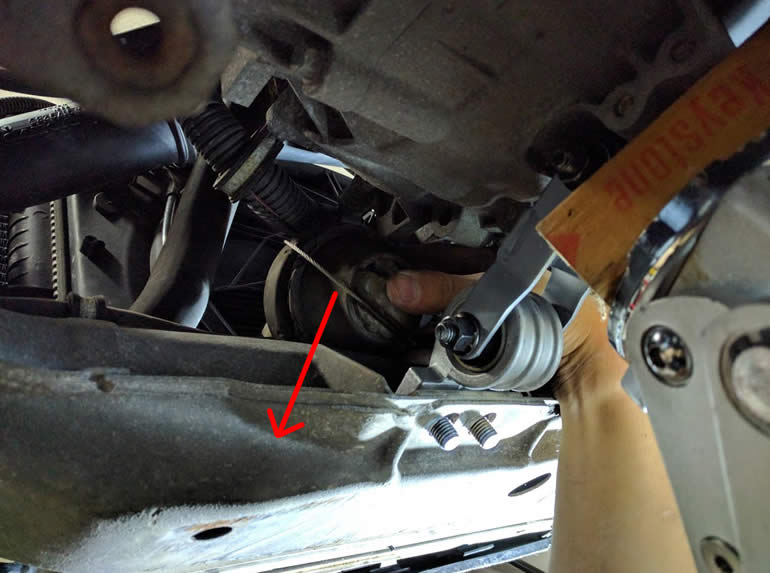
Step 7: With the engine lifted just high enough for the front mount to clear, remove it from the car by sliding it out:
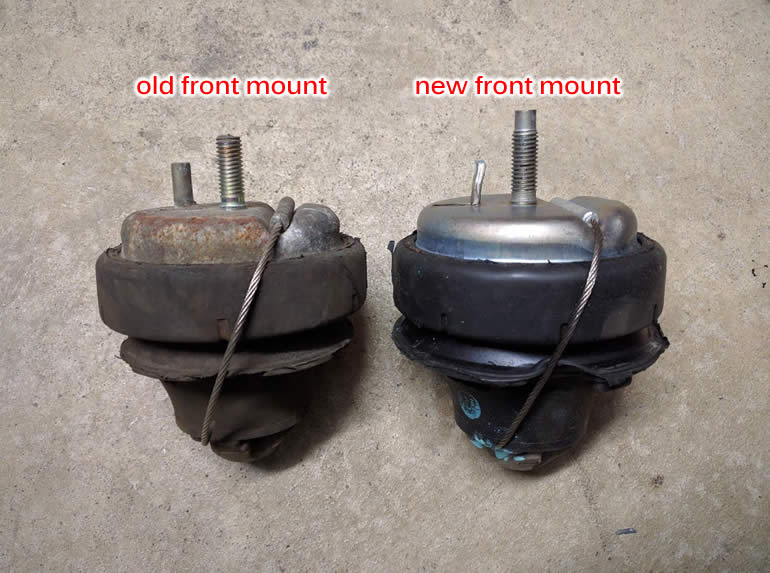
Step 8: Compare the old front mount with the new one. Mine wasn’t in too bad of shape with some signs of deterioration but it really was due to be replaced as it lasted for just over 200k miles. Note that the tab/dowel should be positioned to the rear of the car:
Step 9: Installation of the front mount is the reverse of removal. Note that the new mount had a longer thread so I had to lift the engine a bit higher to get it to clear. Be slow + careful when lowering the engine back onto the mount to ensure everything is lining up.
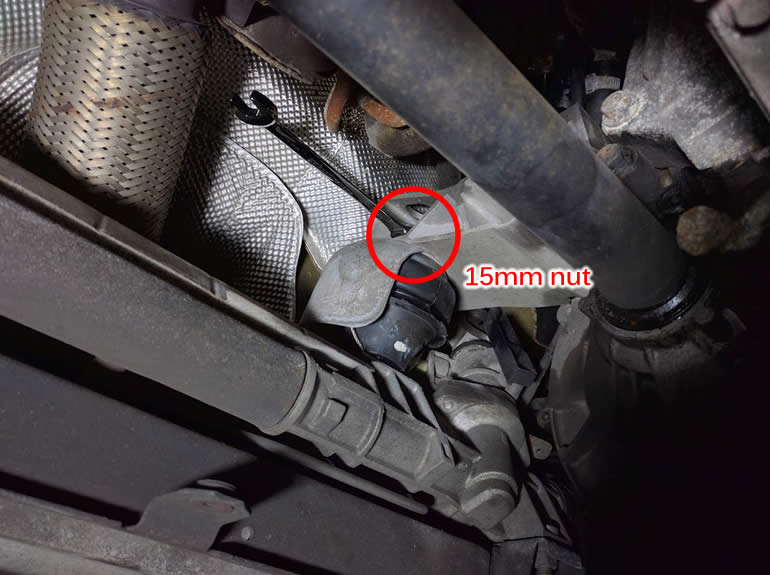
Step 10: Now head back up to the firewall on the driver side and remove the top nut on the rear mount:
Step 11: Again, using long extension with a universal joint on a short socket worked best:
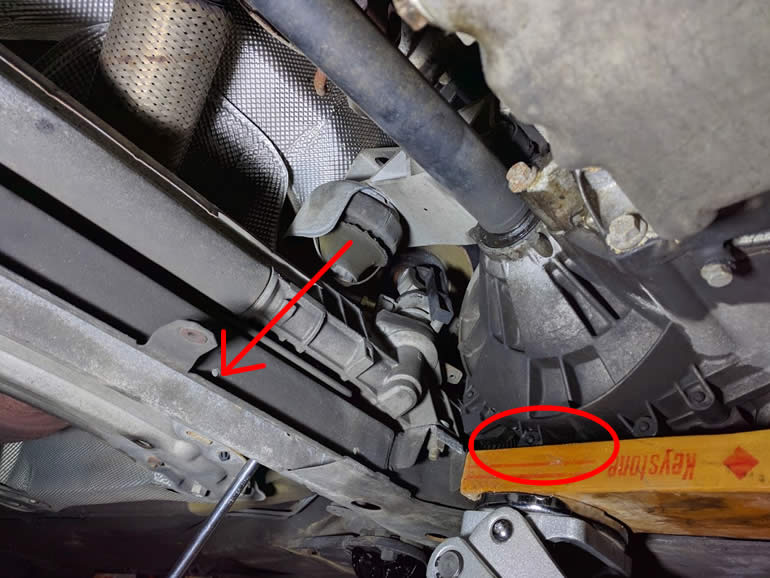
Step 12: Head back underneath and remove the bottom bolt of the rear mount:
Step 13: You’ll find that there’s really no room to get that bolt out with considering the removal of the sway bar. What I did was use a pry against the sway bar held by my armpit while getting a short socket with a medium length extension in there. It was just enough to fit!
Step 14: Carefully jack up the transmission near the rear mount. Lift it just high enough to get the rear engine mount out:
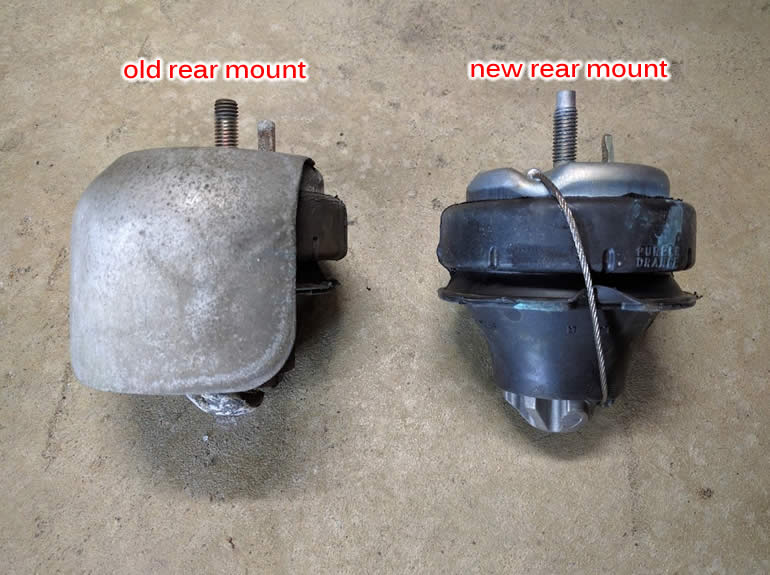
Step 15: Compare the old rear mount with the new one. Mine was like the front mount where it showed some signs of deterioration and was in decent enough shape but really should be replaced after seeing over 200k miles of use. Transfer the heat shield over to the new mount and ensure that the tab/down is position toward the front of the car when installing it.
Step 16: Installation of the front mount is the reverse of removal. Again, note that the new mount had a longer thread so I had to lift the engine a bit higher to get it to clear. Be slow + careful when lowering the engine back onto the mount to ensure everything is lining up. Also note that the top nut is way easier to install from underneath the car with a wrench:
Step 17: All other steps are the reverse of the removal steps indicated above. Tighten the torque rod nuts to 48 ft-lb and hand-tighten the rest.
Take the car for a test drive to ensure all is good and enjoy years of solid engine mount reliability!


