- 02/01/2017
- 1 Min Read
- By: Alex Fiehl
Repairing a Power Plug for Valentine 1 (or Escort) Radar Detector

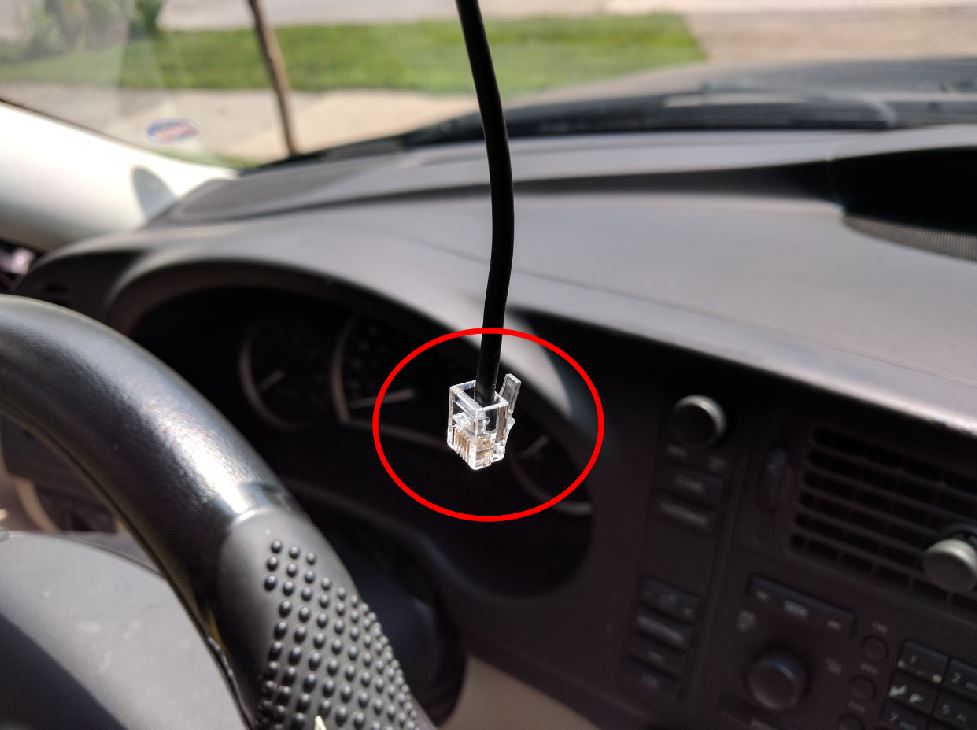
The power plug for my Valentine 1 radar detector (which should be the same for an Escort) was missing the locking tab but I dealt with it for a while as it still worked. Eventually the plug itself just failed to supply power so I had to either replace the entire line by buying a replacement from Valentine 1, or simply replace the plug itself. I opted for the cheaper method as I’ve done this sort of thing before with network cables and it wasn’t much different here.
This DIY is pretty easy to do for most people. The money you saved would go into owning a new crimper for future DIYs (if you didn’t already own one).
Tools you’ll need
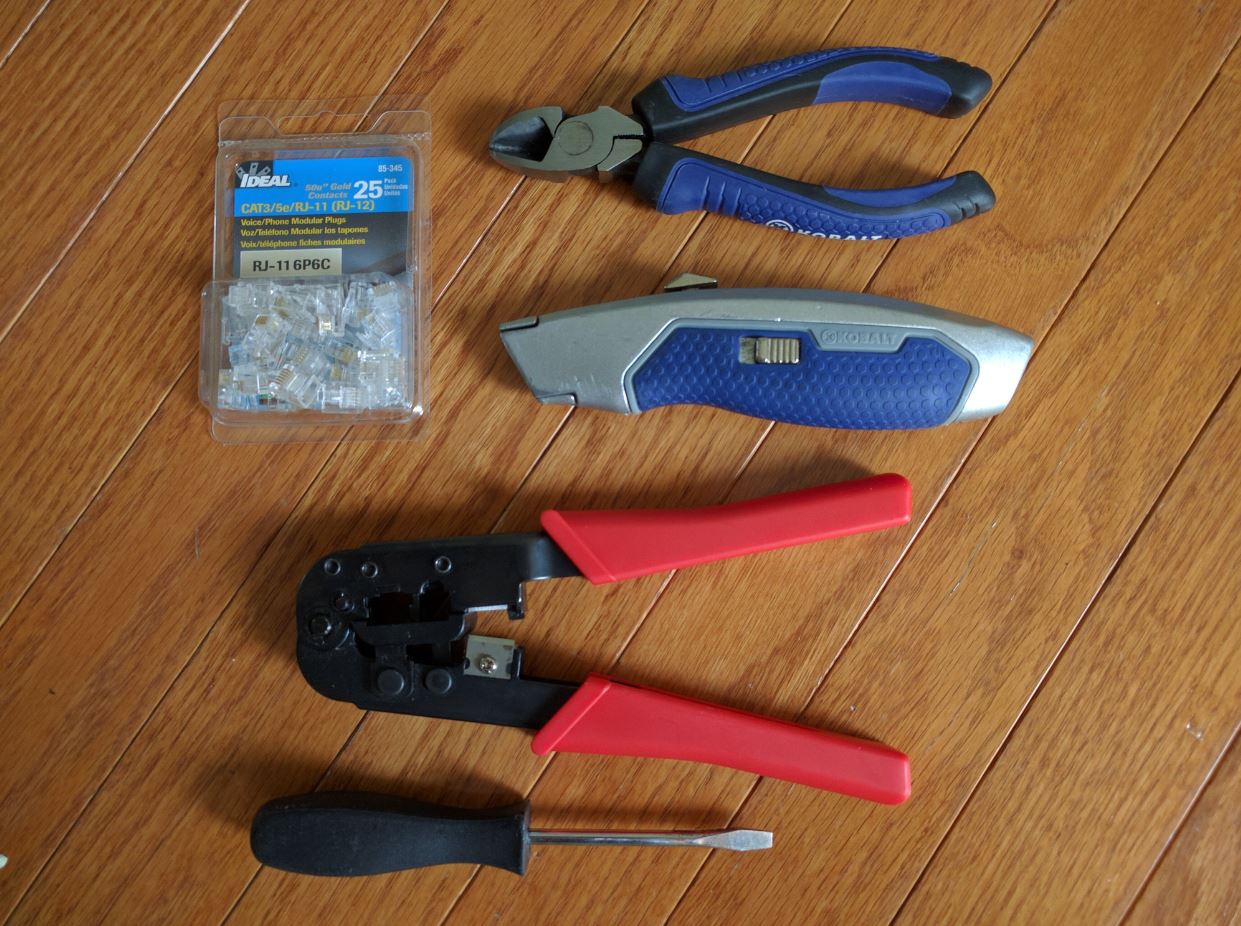
- New RJ11 plugs (I used RJ12 plugs which work fine)
- Crimper
- Snips
- Utility knife
- Flathead screwdriver
- About 30min of free time
Ready to replace the power plug?
NOTE: The pictures below were taken using the old wires as I didn’t have enough hands to take pics while installing the new plug.
Make sure the power to the plug is off ! Start by snipping off the old plug as close to it as possible:
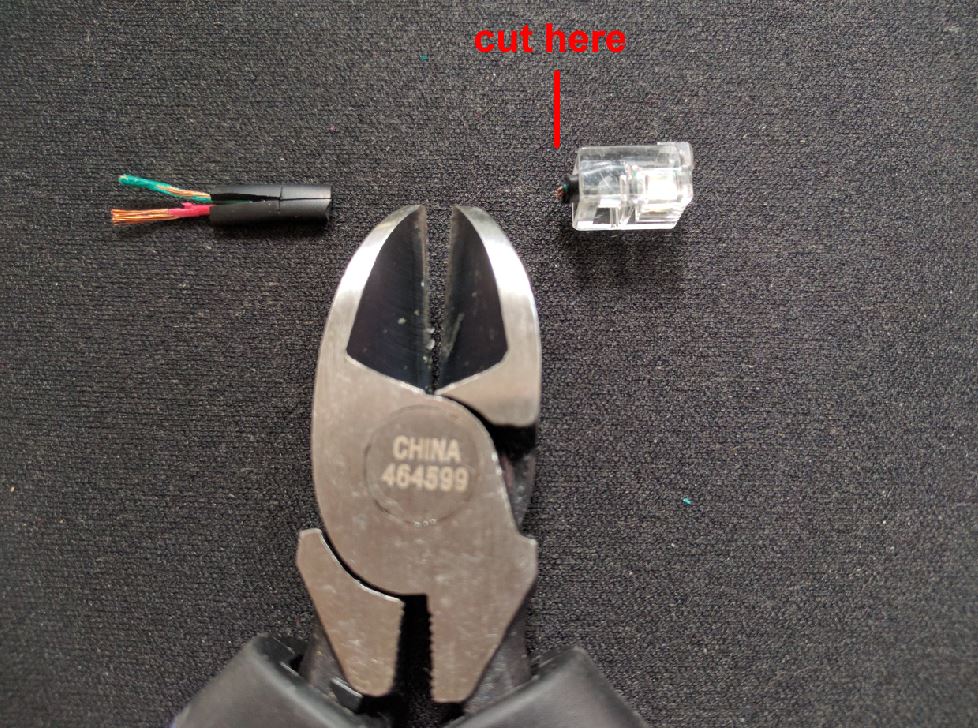
Strip the wire as much as necessary to remove any frayed portions while keeping the outer jacket near the ends about 1⁄4” so that the new plug can effectively “bite” into the outer jacket.
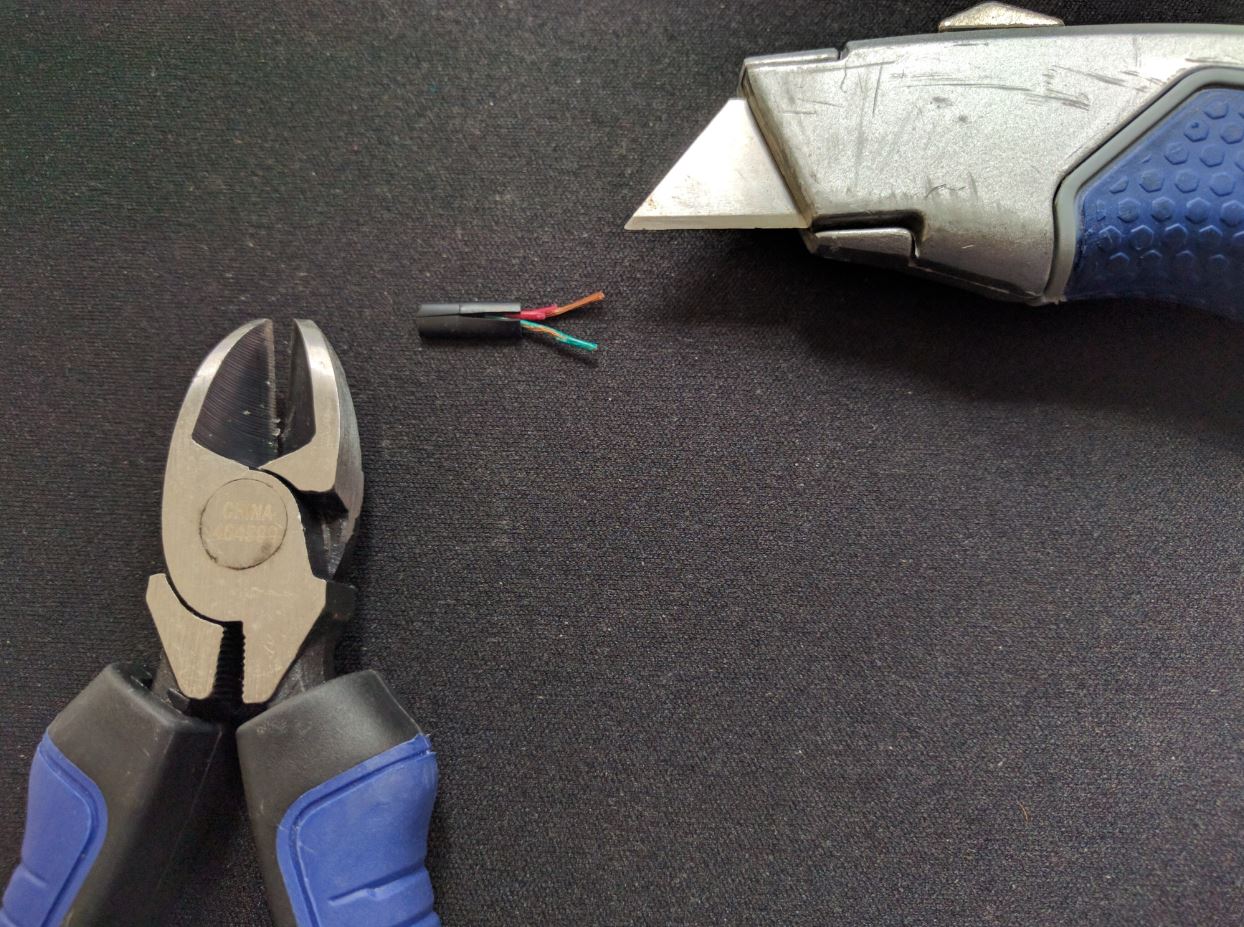
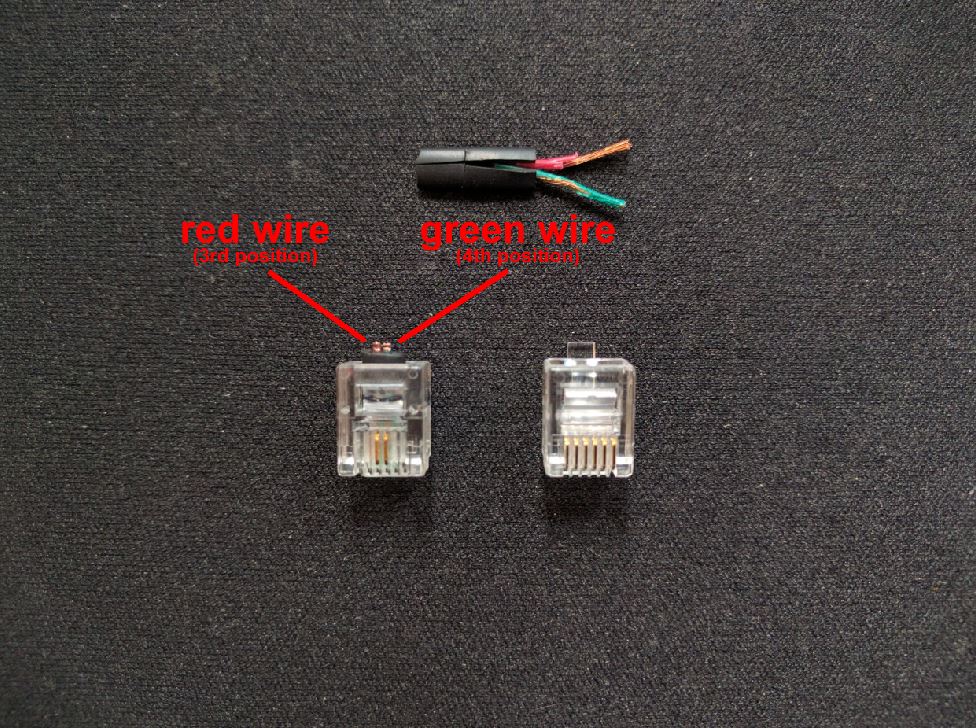
DO NOT strip the wires down to where the copper wires themselves are exposed: the new plug is designed to tap into those sheathed wires (shown in red + green below). The knife was used to cut off the outer black shell while the snips were used cut the wires to the desired length. Ignore the old wire I used in the pics below (as I mentioned above) which show the exposed copper wires you’ll see that mine had extensive fraying which was likely the cause of my power failure. I had to cut this wire back enough to get nonfrayed wire to feed into the new plug and what you’re seeing is the old scrap:
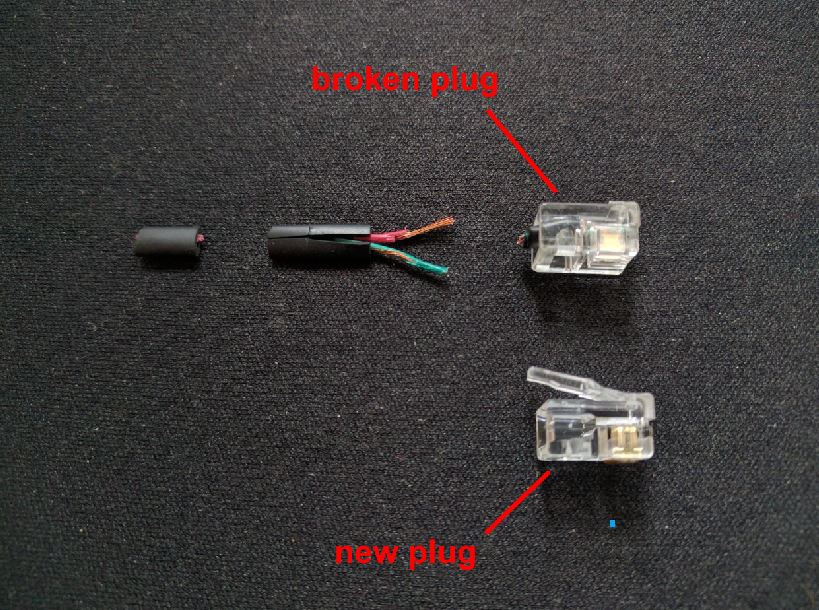
Here’s a comparison of the old and new plug:
Note: the wire locations of the old plug as you will need to feed the wire into the new plug in the same positions. Mine were noted below, yours might be different:
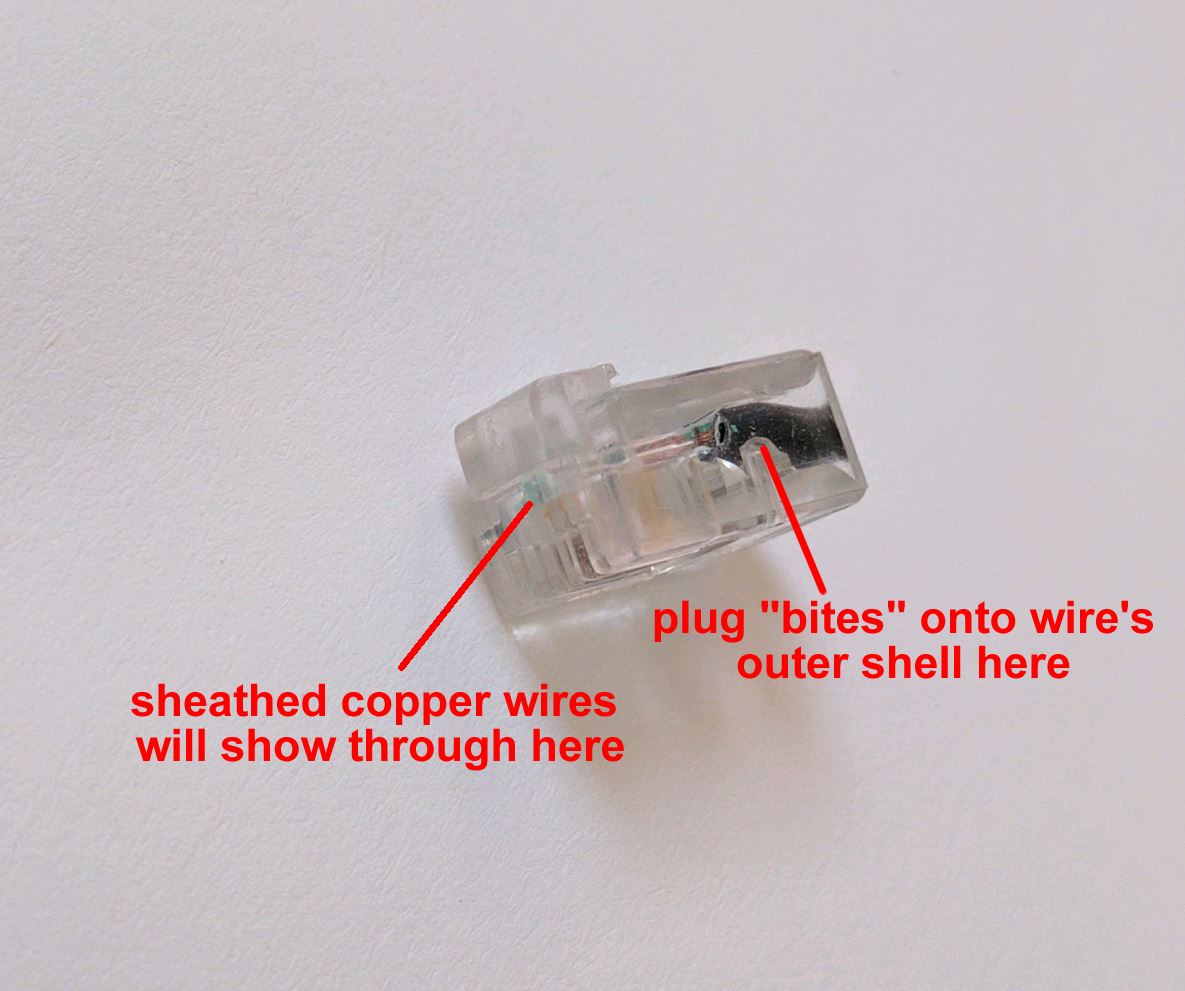
Test that your wire has been cut correctly enough BEFORE you start crimping anything as you can’t uncrimp (i.e. all the steps above will need to be repeated). The 2 key things are that the wires push against the end of the new plug and are showing through at the edge (you’ll see the sheathed copper ends) and that the outer shell is inside the new plug such that the plug’s “bite” can sufficiently grip onto it.
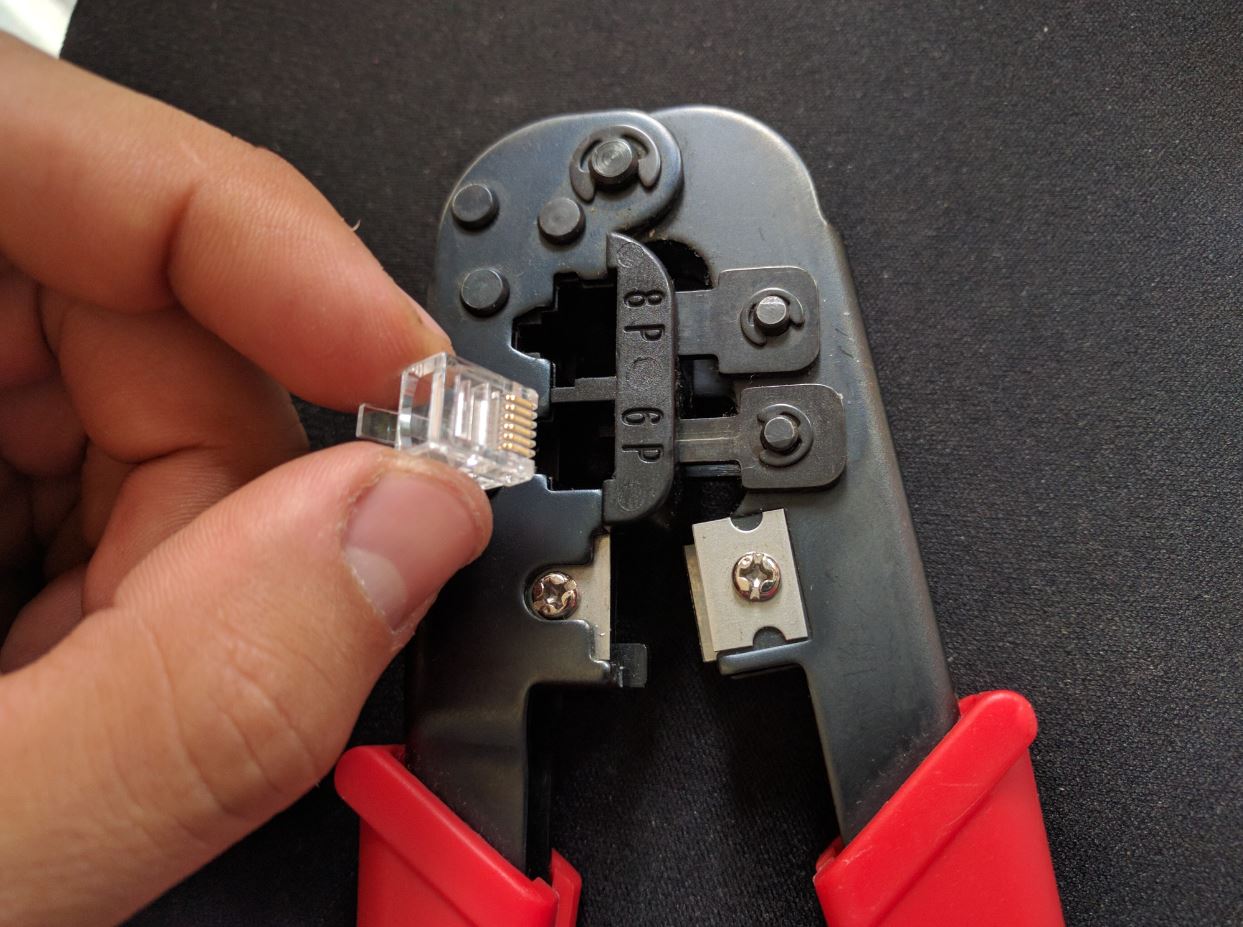
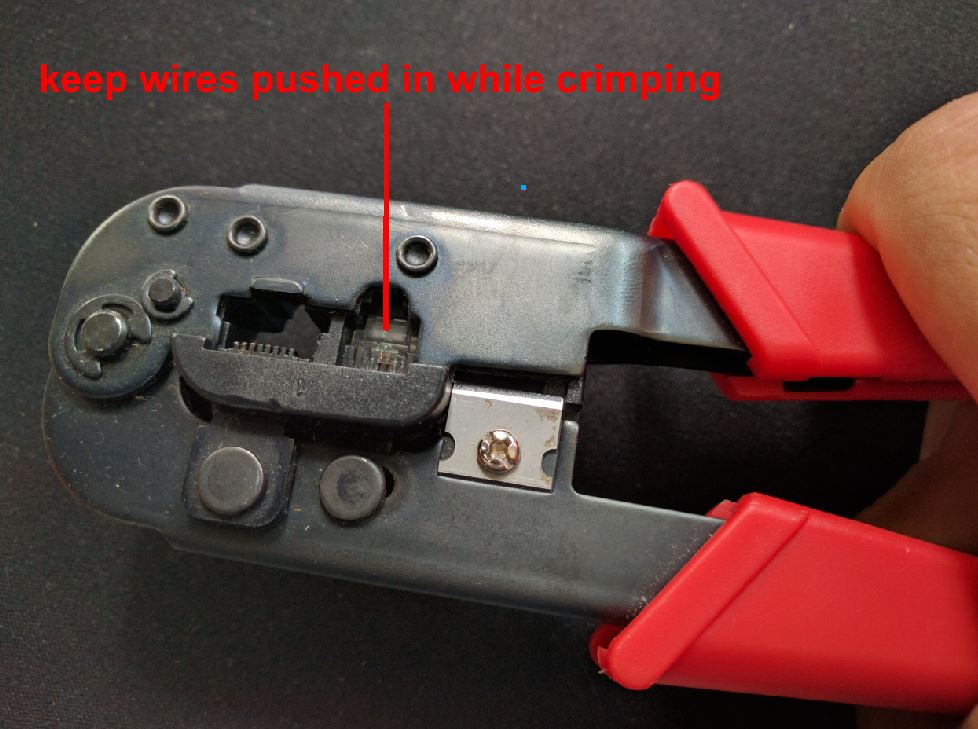
Place the new plug into the crimper:
While pushing the power wire into the new plug in their correct locations (which you’ve noted above) and ensuring the wires are showing through, crimp down on the new plug.
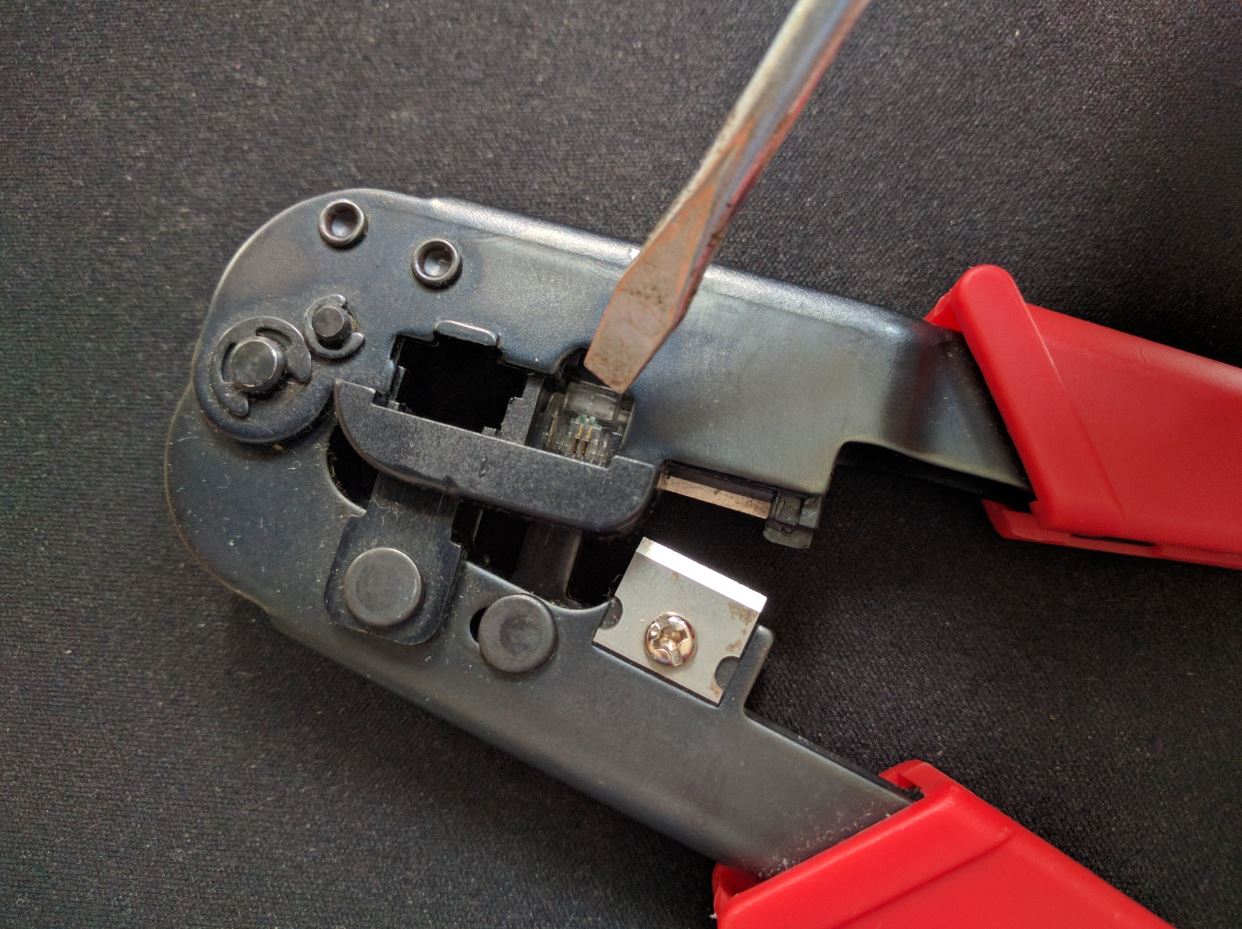
Push out the new plug from the crimper using a screwdriver if it doesn’t easily come out:
Turn the power back on to the plug and test it with your radar detector. You should be good to go!


