- 09/22/2014
- 1 Min Read
- By: Dan Bullmore
Mk1 Volkswagen Rabbit Fuel Injector Replacement

The gas engines in early VW Rabbits and Golfs are very solid. Many of them have made their way beyond 300,000 miles (as is the case with our model for this article). They continue to work day in and day out to provide great value to their owners. Maintenance on these engines is not usually a back or wallet breaking exercise. However, the mechanical fuel injectors used on many of the early K-Jetronic models do wear out over time and can cause some serious drivability issues. Changing these injectors should be a small matter, but their location on the head proves a bit difficult. With a little bit of coaxing and some patience, you can save yourself a lot of trouble by doing it yourself, and save yourself a lot of money by not buying a special tool.
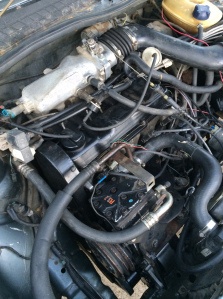 VW Rabbit 1.7l K-jetronic
It’s important to do some study on your specific model, as some versions came with air shrouded injection, while others did not, and some users prefer to change the cup that the injector sits in at the time of replacement. We did not do so in this case, but will mention it as we go along.
First, drain the fuel pressure from the injection system. This is accomplished by pulling the fuel pump relay while the engine is running (relays are in different locations on different models, but typically are just above the driver’s left knee). This will kill the engine quickly. At this point, I would suggest attempting to remove the fuel line fittings from each injector. If you find that you can’t, given the tight space, you can do so after you remove the injector from its cup. We found ourselves having to do this.
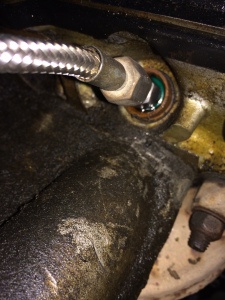 Here, we can see how the o-ring (green) fits into the cup (brown).
The new injector includes an o-ring which is rolled up the shaft of the injector into a groove. This o-ring is what holds the injector in place. The o ring squeezes into a small cup in the manifold, and when popped into place, is held by the interference between the cup and the o-ring. It’s an effective design, but it makes it quite difficult to remove the old injectors if they have been in there for a while. The removal tool involves a bent and slotted piece of flat stock that is slipped around the injector and then leveraged with a screwdriver on the valve cover. Buying the tool will obviously make the job easier, but we were able to make do with a long screw driver and a wrench that was just wide enough to go around the shaft of the injector. This allowed the flats of the wrench to butt up against the fitting nut. We then leveraged the wrench with our screwdriver, and with relatively little effort, the injectors popped right out. Very simple indeed, just be careful not to damage the fitting!
If you go on to remove and replace the cups, you will need a large Allen head socket, as the cup threads into the head by means of an internal hex. Be extremely gentle with these cups, as they are known to break, and plastic shards in the intake will mean plenty of trouble for you.
I like to put a small bit of petroleum jelly on the o-rings before popping in the new injectors. It allows the o-ring to settle in the groove without binding up and potentially tearing- just a dab will do. At this point, firm pressure will allow the injector to pop back into place. Firmly tighten your fuel line connections, and you are done!
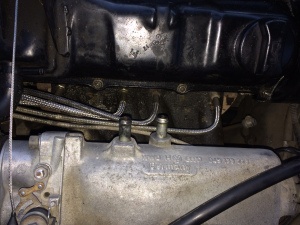 A view of the injectors from behind the head. Note the vacuum hoses having been removed to aid access.
Priming the fuel system to remove the air should be simple. If you have a fuel pump relay that primes the system before starting, I would cycle the key several times without cranking to build up fuel pressure. If you have an aftermarket relay that does not prime, you will have to either jumper the pump manually, or crank continuously until the engine fires. The first few seconds might sound a bit rough- this is normal as the fuel system purges the air. If however, your engine continues to run poorly after the fuel system purges, you may want to make sure that all of the injectors seated correctly, and that there are no vacuum line or air leaks at the intake. Otherwise, there may be a defective injector, or damaged cold start valve.
The job is not particularly difficult, and can save you plenty of money over shop labor or purchasing the tools. Just be careful, work slowly, and take note of everything that you have to remove for reassembly.