- 10/23/2014
- 2 Min Read
- By: Bryan McPhail
Mercedes E & S-Class Ball Joint Replacement (W220, W211)

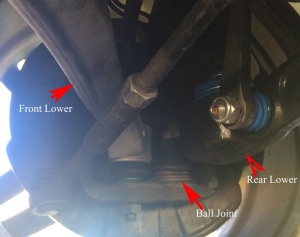
The lower front ball joints on the W220 and W211 chassis can take a real pounding, and are often the first thing to fail on the front-end suspension. A creaking noise is the usual giveaway but you may detect handling problems before this, usually in cornering. You can use a prybar to check for play in the joint, or jack the car and see if the wheel moves in any direction other than the one it should rotate in! Although I'm referring to the E & S-class cars in this post, a few other models are practically the same procedure - such as the SL range.
It's possible to use the press with the hub on the car
The first thing to do is break the lower rear (lateral) arm free from the joint using a jaw style ball joint remover. Then repeat the process on the lower front arm to give more clearance. It's perfectly possible to use the joint press with the hub still on the car, but if you are doing other work at the same time you may want to remove the entire upright - remove steering joint, caliper, speed sensor and upper arm - then the whole upright will lift out. Be warned it's very heavy! Using a jack to support the hub from the bottom as you release the upper arm is a good tip.
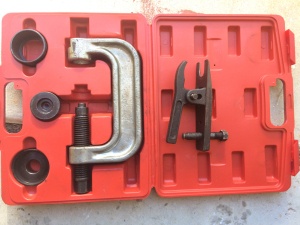 Ball joint press and ball joint jaw style remover
The ball joint we're looking to replace is pressed into the hub assembly. To remove it we need to press it out with considerable force. The press consists of a large screw which connects to a cup that fits under the joint. A large cup envelops the top side of the joint and touches against the hub assembly. Thus when the screw is turned pressure is applied to the joint forcing it upward into the receiving cup. What makes the job trickier on these cars is the fact the joint sits in a recess - so make sure you have access to a W220/W211 specific ball joint set. These are lower profile than the regular generic parts you may rent at a local store so the installation cup will fit inside the recessed area. Although the generic set may work to remove the joint, be warned re-installation will be near impossible!
The key thing to note here is the amount of force require to press apart these two pieces of metal! I used a 3ft breaker bar and 1" socket to turn the screw, and another bar of similar length as a brace against the C frame. I found the drivers side to be exceptionally difficult to remove but the passenger side noticeably easier. If you have a larger breaker bar then definitely use it.
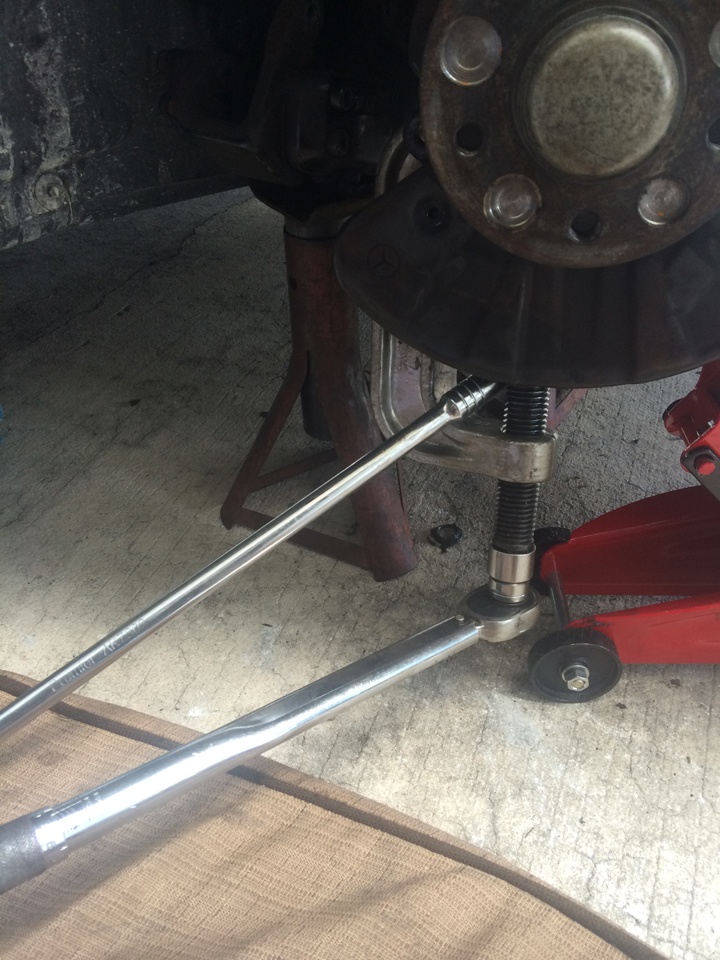
 Press mounted around joint
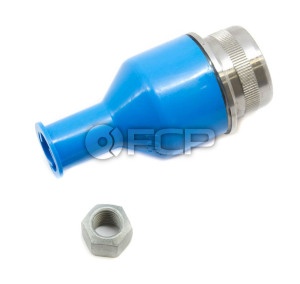
To reinstall, setup the press with the receiving cup turned around - so it's now pushing down on the flange of the joint, and a larger cup underneath holding the assembly. So the screw now pushes the joint back down into the space. A tip is to keep the new ball joint in the freezer overnight - with the idea that the metal may slightly contract and make pressing in easier. I'm not sure it makes much difference but I don't see that it can hurt.
As you reinstall pay close attention that the joint is going in straight - if it's not straight it won't go in all the way and you risk damage as the pressure increases. If you find it's not straight, just disassemble the press, re-position, and try again. When complete the flange on the joint should be tight against the hub assembly.