

As our classic Mercedes age, so do many of the original plastic components. One such system that has a fair number of plastic and rubber parts is the vacuum controlled HVAC system.
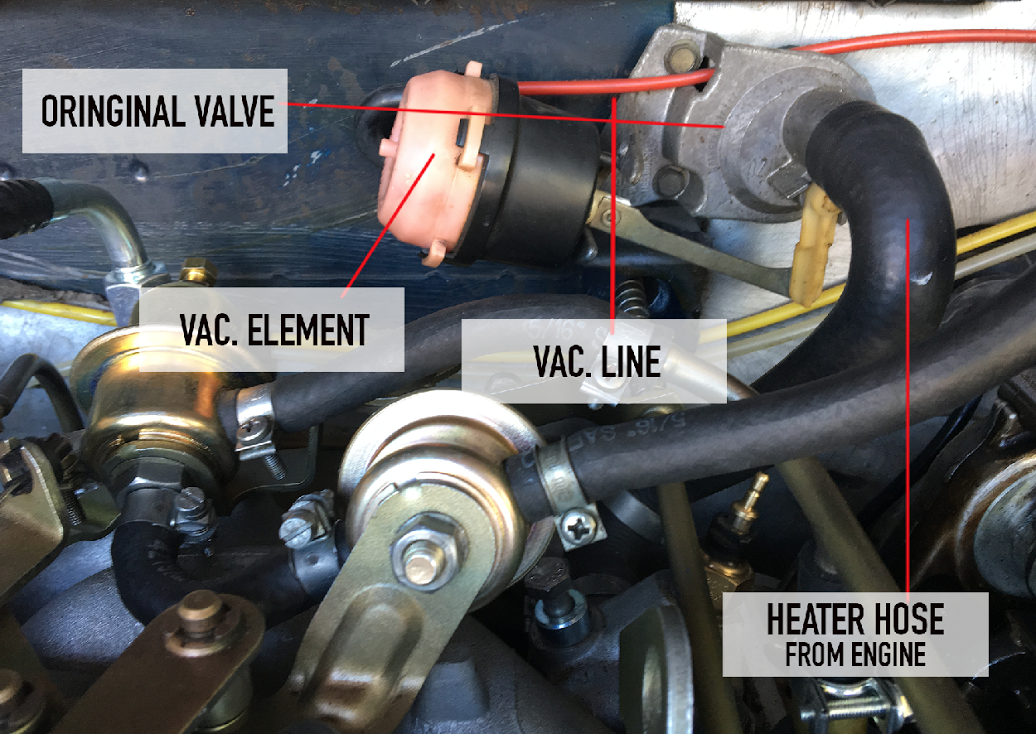
While the 1975 450SL and earlier models relied mostly on manual A/C and heater controls, a few components relied on vacuum for operation. In this article, we will cover the 1975 450SL original metal heater control valve or water tap. A portion of the device is vacuum operated which opens and closes a type of gate valve to start and stop the flow of water to the heater box under the dash.
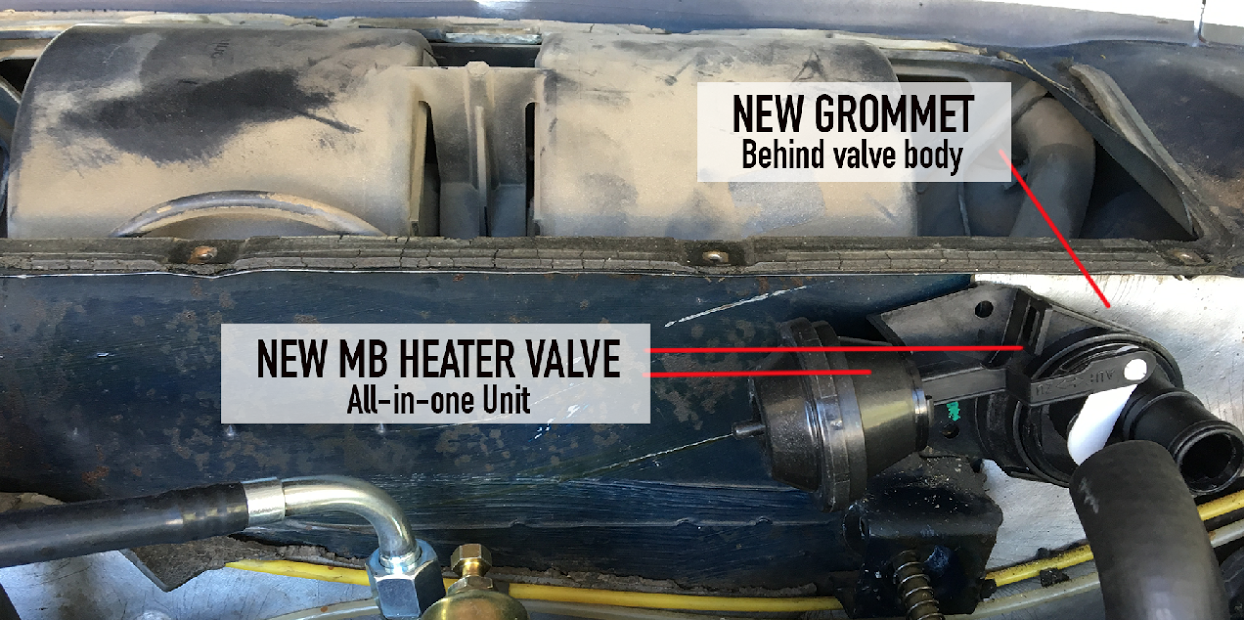
Several parts on this system can fail. One is the vacuum element (module) and the other is the valve itself. If the cooling system has not been properly taken care of, the valve may be corroded and not eligible for restoration. If however you inspect the valve and it is in good working order you may simply replace the attached vacuum element. If however the valve is in need of replacement, a new updated Mercedes Heater Control Valve is available. The new updated unit differs slightly from the original as the new is an all-in-one plastic unit shown below.
In the case of my 1975 450SL, I was able to salvage the original aluminum BEHR “Wassereintritt” or water inlet used from 1972 to early 1976), but needed the replacement vacuum element. One of the difficulties however was sourcing that vacuum element. Unfortunately Mercedes-Benz no longer manufactures an “exact fit” vacuum element for the 450SL system and all reference numbers now pointed to the all-in-one system. With some persistence though, I discovered the original vacuum element was also used on my 1981 240D, to control the leg area HVAC flap. With this discovery, I was able to keep my 450SL visually stock. RESTORATION NOTE: The separate vacuum element does require a modification to the attached valve lever which will be covered in a later article on restoring the original system.
INSTALLING YOUR MERCEDES HEATER VALVE
The new all-in-one unit is pretty much a “plug and play” job. First step is to remove the blower motor cover. Remove the small screws around the cover and lift off cover. If the cover has not been removed in sometime, if ever, it will more than likely feel glued into position.
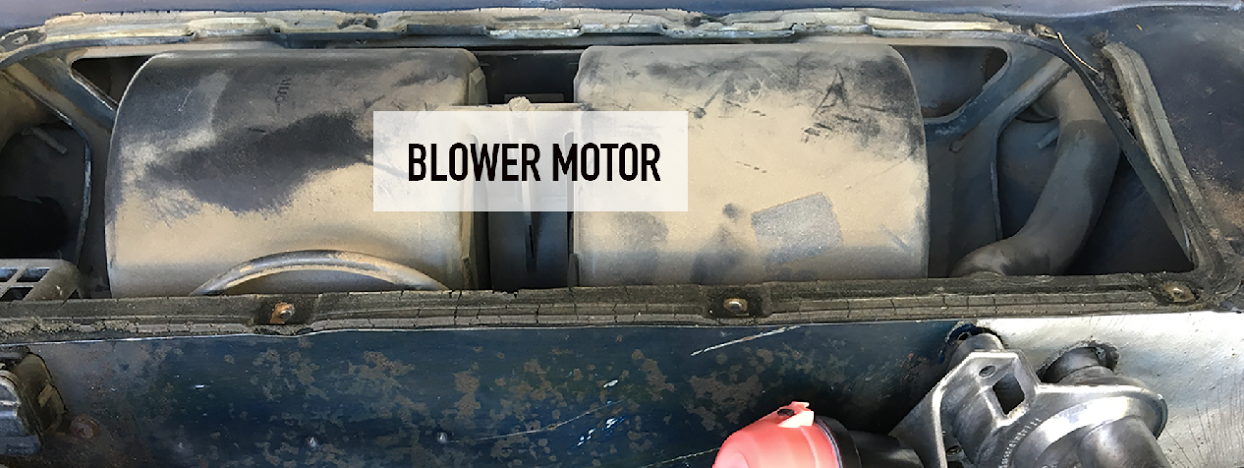
Remember, all the plastic parts on this car are old and very susceptible to cracking. Work carefully and gently. Once the blower cover is removed you will discover the need for a https://www.fcpeuro.com/products/mercedes-blower-case-seal-r107-genuine-mercedes-1078350023new blower cover gasket. Be careful not to lose the metal retaining clips between the gasket and cover.
Now to remove the water valve. First loosen the two hose clamps on either side of the valve/ firewall and remove the hoses. Be sure to catch the coolant when disconnecting the hoses. I do not personally see the need to drain the system at all. If you disconnect the hose quickly and keep it upright, water will not continue to drain as it will be the highest point in the system. Water will also flow to a degree from the valve body. Be sure to clean up any fluids well as you go.
At the point your hoses have been separated from the valve, you may now unscrew the valve body using an 8mm socket. Keep the original screws as they will be reused for the new valve. With regard to hoses, if they are original or near original, they should be replaced while you are this far into the job. While the left side hose (valve side) from engine to valve is easy enough the hose at the back of the valve to the heater box is a bit more complicated and that too will be covered in my upcoming valve restoration article.
NOTE: There should be a rubber grommet between the valve and the engine side of the firewall. Mine disintegrated upon removing the valve and it will be replaced. This grommet is important as are all firewall grommets. These seals keep unwanted under hood oder and heat, etc. from enter the cabin.
With the old valve removed, simply revers the process by installing the new all-in-one valve. As the photo above shows, the new valve is in place but not not attached as I will be using this valve.
At this point if you are installing the new style valve, simply reconnect your hoses securely, reattach vacuum line and start the car. Do not replace blower motor cover as of yet until you turn your interior heater switch all the way to hot. Check for leaks on both sides of the valve. If all is leak free after five minutes of running, you should be good to go to install the new blower motor cover gasket and close everything back up and you are ready for winter!
PARTS NEEDED
- 1 Heater Control Valve
- 1 Hose (Engine to Valve)
- 2 New Clamps (check for reuse)
- 1 Blower Cover Gasket
TOOLS NEEDED:
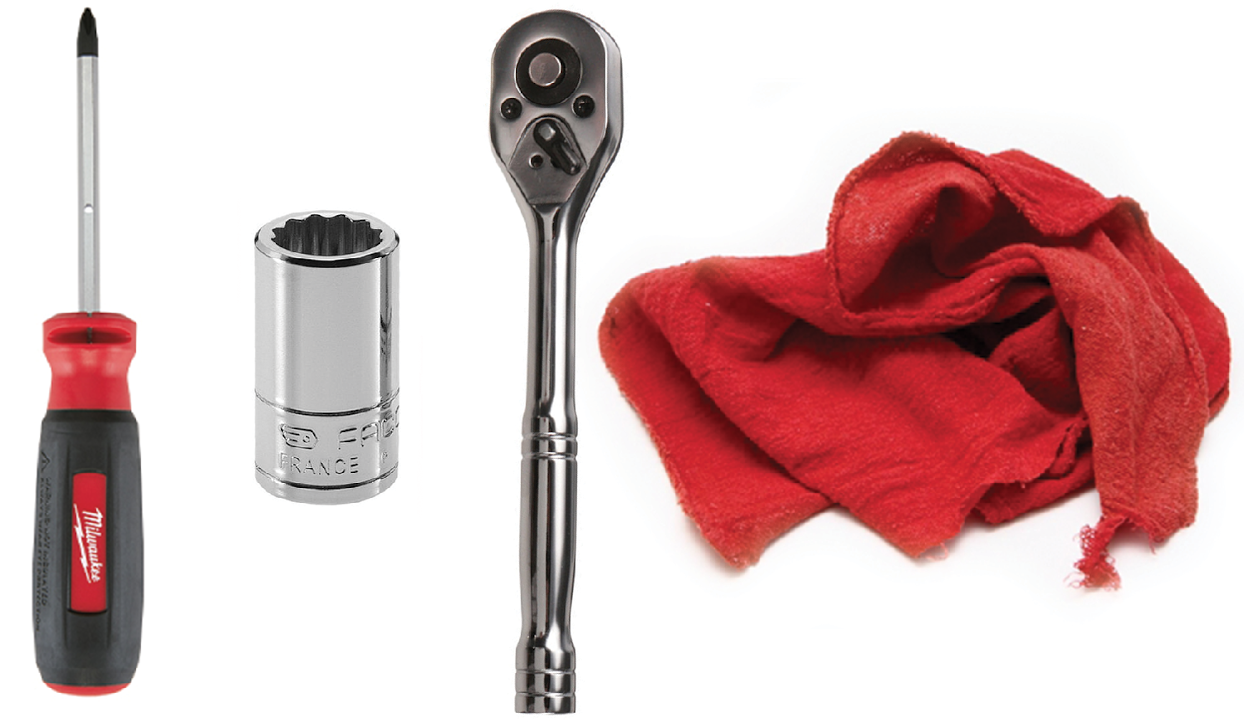
Shop Mercedes Heater Control Valve


