- 02/02/2017
- 2 Min Read
- By: Alex Fiehl
Mercedes 450SL Timing Chain Installation - Part 3


Our timing chain three part series concludes with the installation of the chain. It is of utmost importance to be thorough and to check everything two and three times.
Be sure your engine is set to TDC as discussed in the previous articles of Chain Gang. Once the engine is at TDC you will need to mark all your positions with a yellow automotive marker.
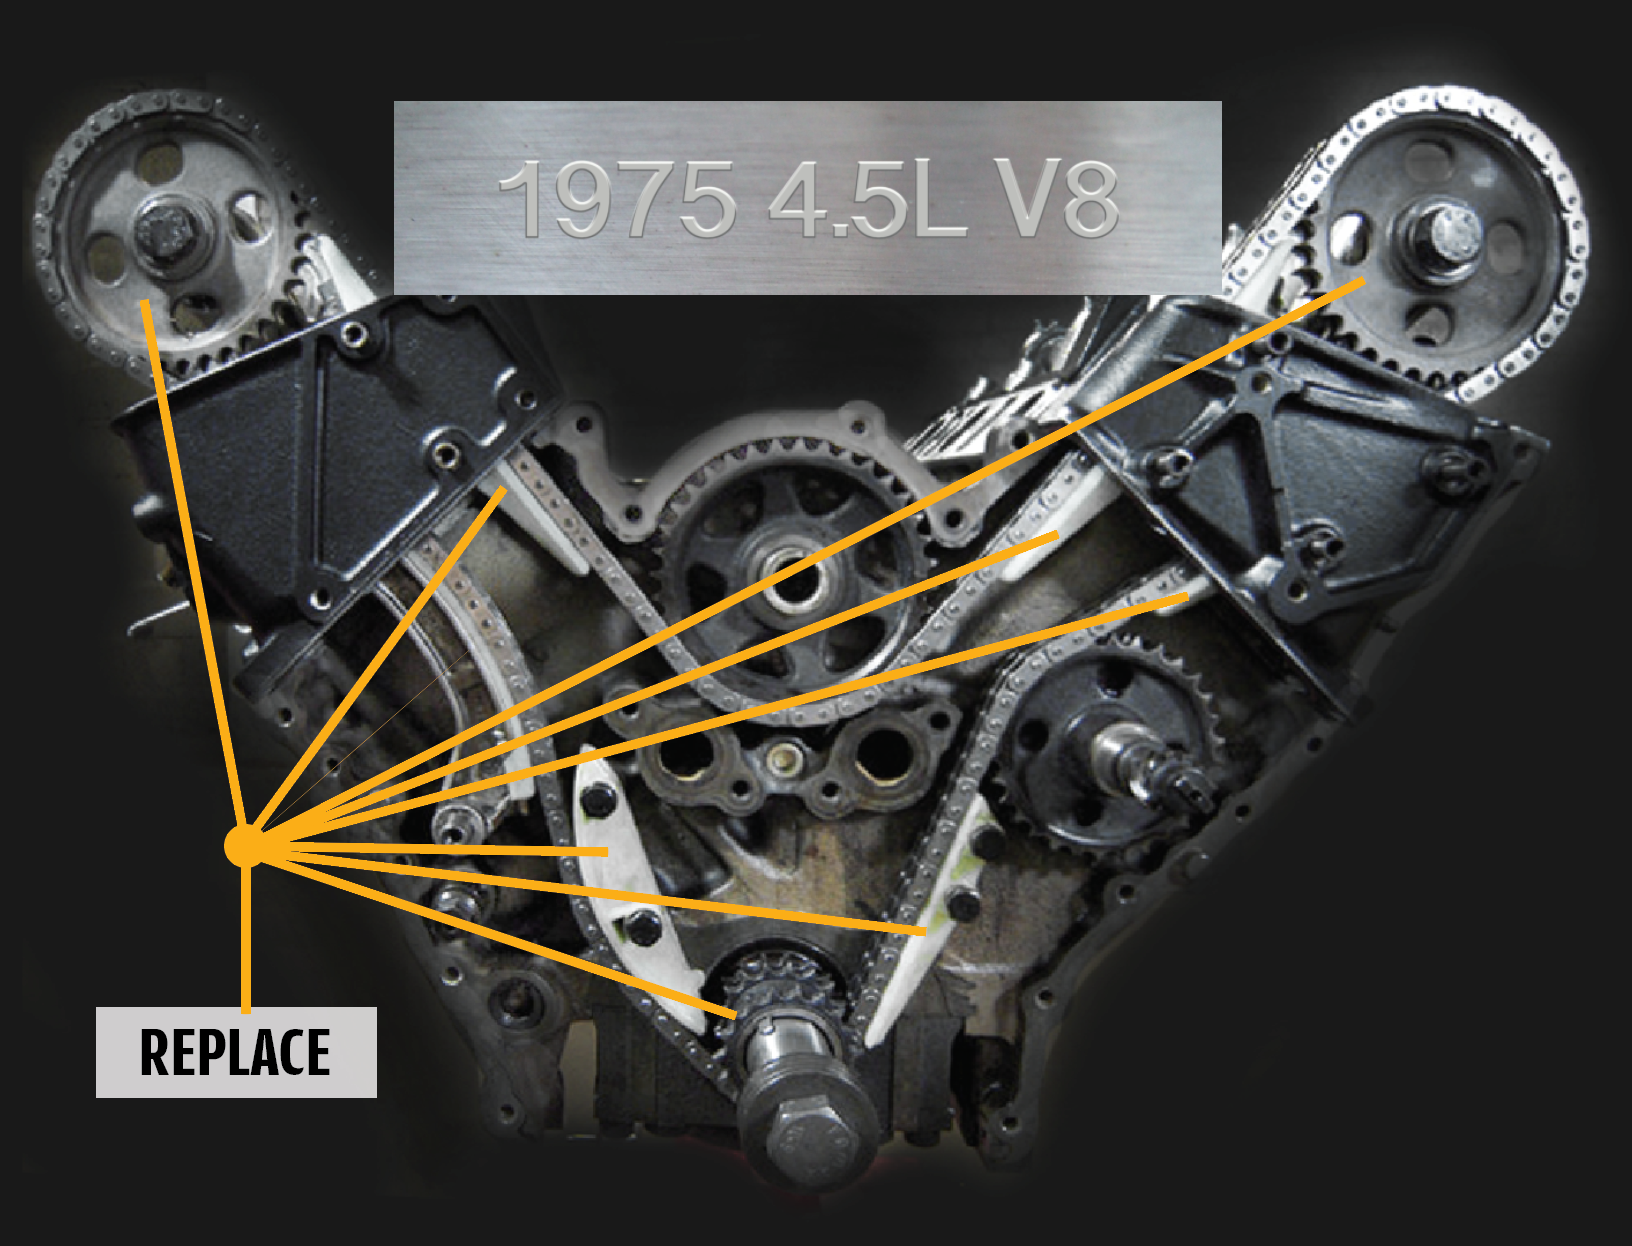
Next, remove the camshaft hub using a puller, oil pan and oil pump followed by front timing cover (front of engine).
IMPORTANT: When removing the timing cover, DO NOT damage the head gasket!!
Also, whenpulling the crankshaft hub, do not lose the small woodruff key. Most of the bolts will have been removed prior while removing all the accessories. Once the cover is off, you will see what is indicated in the photo above. PARTS NEEDED: Front and Rear crankshaft oil seal. Be sure to purchase the seal marked “repair” seal. This is critical as it has a fractionally small I.D. to compensate for years of wear to the crankshaft in that location. If you install a non-repair seal, you will most likely end up with an oil leak.
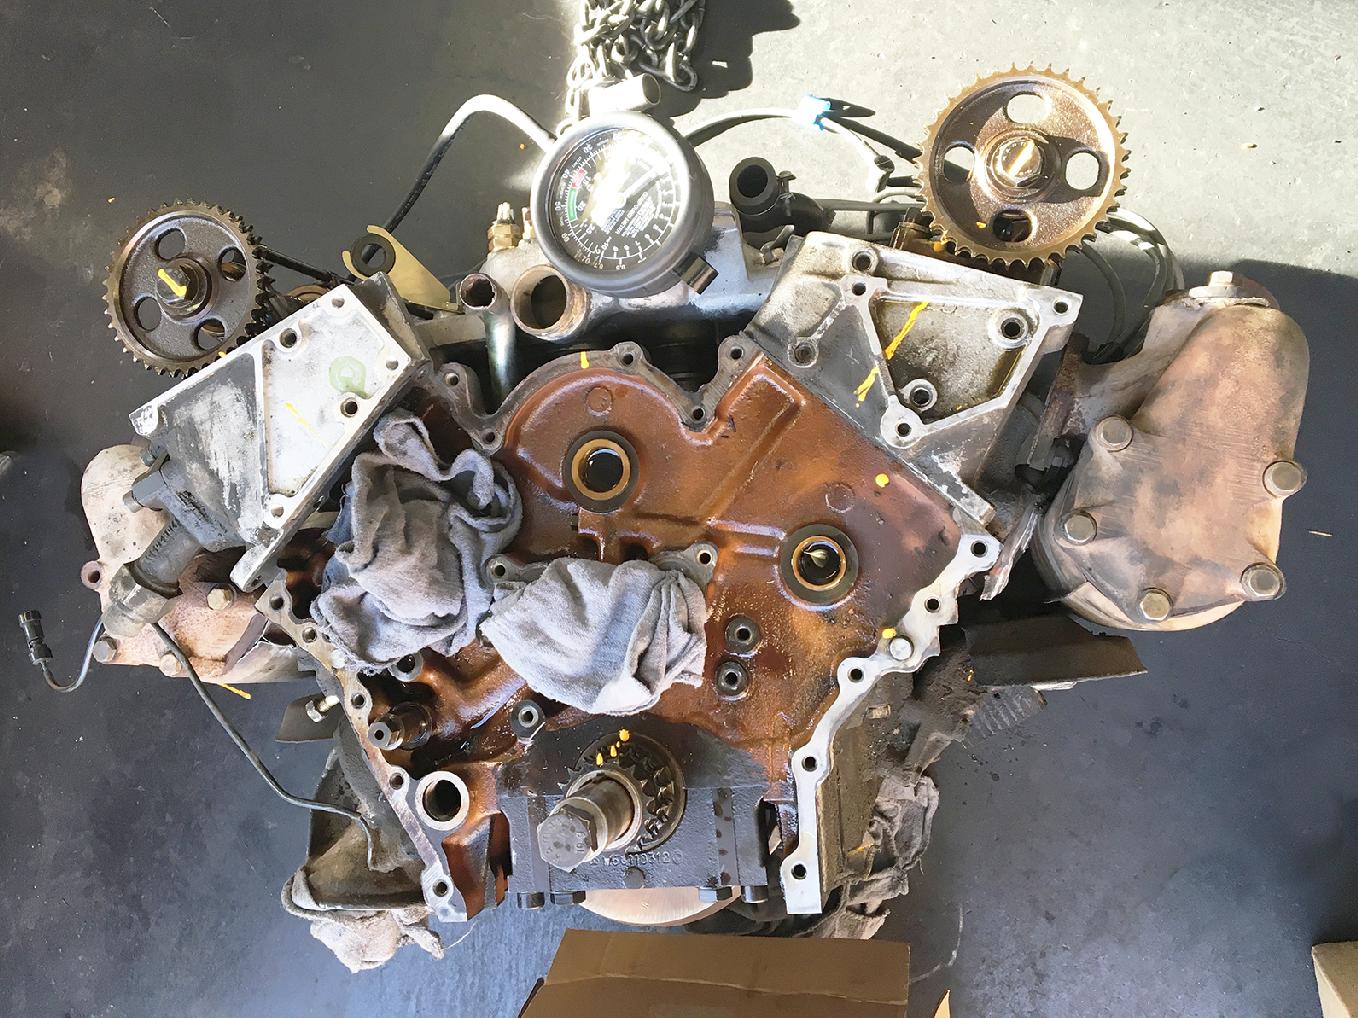
Now it is time to make sure you plug all openings on the front of the engine so NOTHING can accidentally fall in. As you can see clean shop rags were used for this purpose.
As you can see in this photo, the yellow marks prior to pulling them for replacement. Everything must line up exactly as it came off. Timing marks, etc. If your gears do not go back properly you will be unable to time your engine.
 It is now time to remove the chain guides. For this job you will make the job easier if you have the correct tool or you can use a slide hammer. The image show the Mercedes-Benz guide rail pin puller. Each guide has a threaded center that the cain guide puller or slide hammer will thread into. Read all directions for either tool carefully before using.
Once all the guides have been removed along with the two camshaft gears the chain will easily removed by pulling both sides down through the head. Now remove your chain
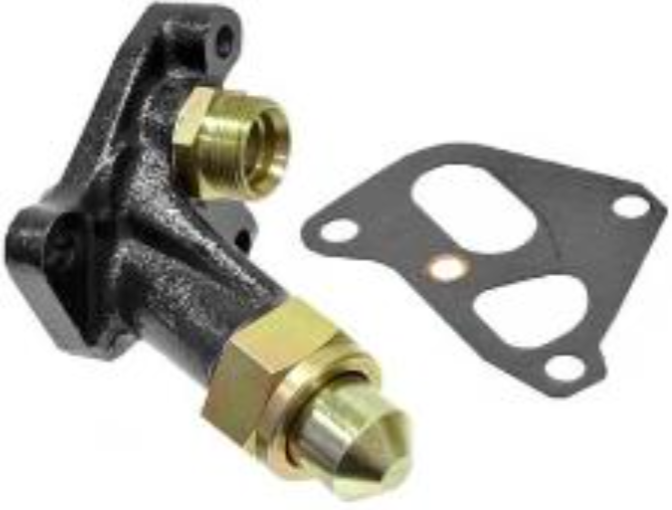
tensioner. This part will simply bolt on. Do not try to make any adjustments to this part as they are pre-loaded and set at the factory. Remember this part also contains the threaded end for the air pump. Image to right is chain tensioner for a 1975 450SL.
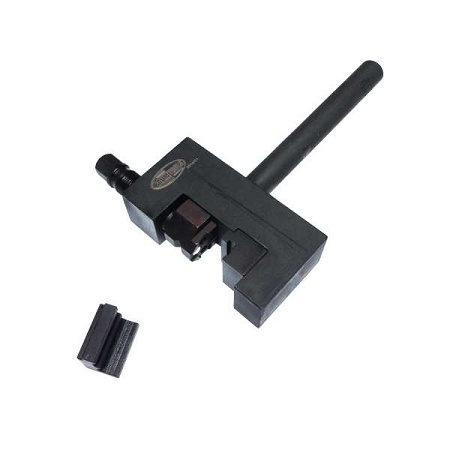
According to my mechanic there are two choices at this point. The chain can either be linked off the engine or after it is put on. In this case, we decided to link the chain off the engine as it would provide more flexibility in maneuvering while using the link compression tool. IMPORTANT: You must make sure your links have been properly pressed on. Under no condition do you want your chain to fly apart while the motor is running. The image to the left shows the chain link press tool. Follow all directions on how to use the press and how to properly fit the chain link together before pressing.
Now it is time to revers the process used to remove the chain. In addition to the removal process however, you
will now replace the front crankshaft oil seal.
Once the chain is in place, begin installing your gears and getting the chain aligned on the sprockets. That being done, begin to fit your chain guides and install pins by gently tapping flush. Be sure not to drive them at an angle. Now fit your chain tensioner. PARTS NEEDED: Replace o-ring oil seals prior to fitting timing chain cover.
It can’t be stated enough, how important it is to have marked all your gears to be fitted in exactly the same way. Your engine’s ability to start and stay running with any precision will depend on this step.
The engine is now ready to be turned over BY HAND! Return the crankshaft pulley bolt and washers without the hub. Turning the engine clockwise only, repeat the steps prior by rotating until the engine is back to TDC. Once compression builds on cylinder 1, which has your pressure/vac gauge, you will want to make sure all timing marks are perfectly aligned. If they are not, you must retrace your entire rebuild steps and figure out where the difference is. If you have marked everything carefully and followed all directions, your timing however, should be spot on. NOTE: This timing is not to be confused with distributor timing. The timing that is being performed here is mechanical, while we will later address the distributor (electrical) portion of the timing and this will be covered in a later article.

With timing on the mark, you may now place the timing cover back on the engine. The cover should be sealed with, my preference, Hylomar Blue gasket sealant. Run enough around the entire cover edge to create an even spread when pressing together. It should not ooze all over the place. Follow the directions on the box for application. When the cover is seated, use a few of the proper bolts for your timing chain cover, to securely hold the cover in place, allowing time for the Hylomar to cure. Hylomar will never get hard and if need be the object can be removed and re-seated without cleaning off old Hylomar. The product how've can not come in contact with dirt or grease, otherwise a new coating of Hylomar will be needed.
Now you can in stall your crankshaft hub but first remove your crankshaft pulley bolt and washer. DO NOT FORGET to fit the woodruff key on the crankshaft prior to installing the hub. Also be sure as you are tapping the hub back into place the woodruff key does not pop out of place, my experience was it wanted to not slip back into place willingly.
This pretty much wraps up the timing chain replacement process and the engine is ready to be returned to the car. Be sure to have checked your engine mounts and front subframe mounts prior to reinstalling the engine.

I must note, it is not absolutely necessary to remove the engine to replace the chain if you have no stretch or worn gears. A chain can be fed in to this engine from the top. This process however, is not recommend as the chain should only need replacing every 100,000 miles and the chain as well as the crankshaft and cam gears will have sufficient wear at that time and will need to be replaced and so we are back to square one.
By doing every job well, the end result will be exceptional and is sure to deliver years of driving pleasure.


