- 02/03/2017
- 1 Min Read
- By: Gerry Tseng
How to Track your Engine's Health through Oil Analysis

Oil analysis helps us figure out the health state of the engine’s oil, which is essentially the lifeblood of the engine. It’s often a mystery to figure out as newer cars have much longer oil service intervals while older cars may have hidden problems lurking.I was fortunate to have historical data for a 2004 Saab 9-3 Arc that the previous owner elected to do with Blackstone-Labs.com. I was also fortunate that the previous owner also exclusively used the same oil type + grade that I plan on continuing to use for the car: Mobil-1 0w-40 full synthetic. This allows me to compare the engine’s health over time as I keep a key variable constant (the oil itself).
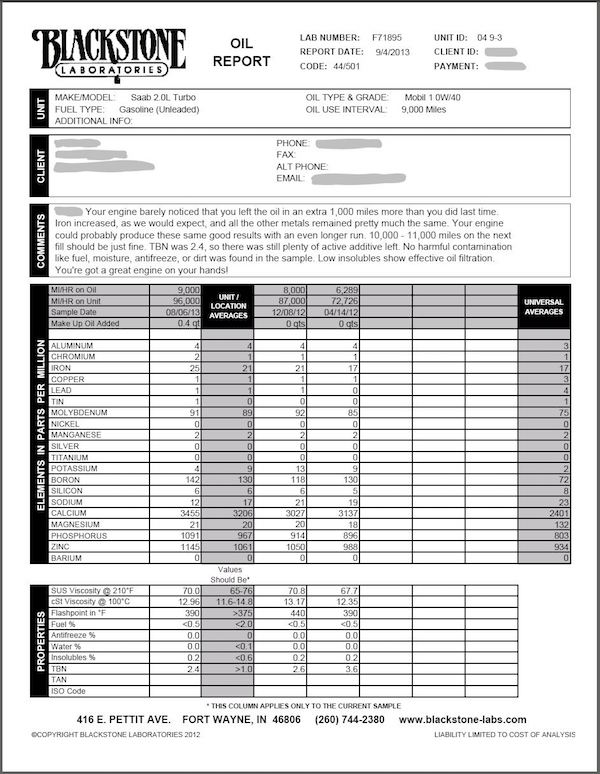
What’s helpful about this analysis is the laboratory’s comments and recommendations, in addition to tracking the results over time to spot any trends that may need attention. You can read up about each element here if you’d like: I won’t get into that within this DIY.
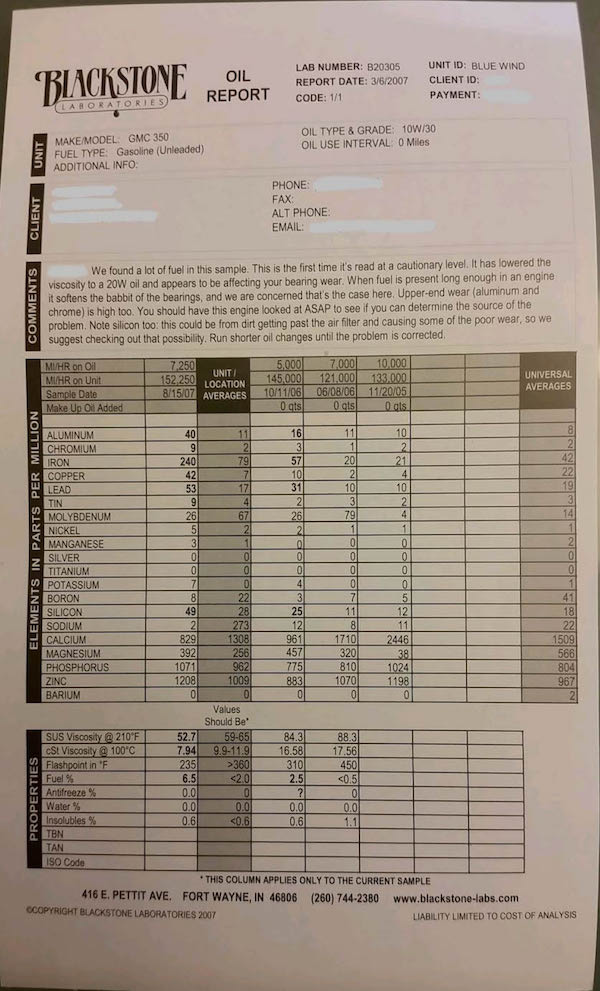
For the price of the analysis I can at least get a clearer sense of how well the most costly part of the car (the engine) is doing while also understanding if the oil + interval should be adjusted to produce better and/or more cost-effective results. I should either be breaking even or saving money in the long term as a result of this information. Here’s another example:
It’s pretty easy to do as an additional task to a scheduled oil change. This DIY assumes you’re doing just that.
Tools you’ll need:
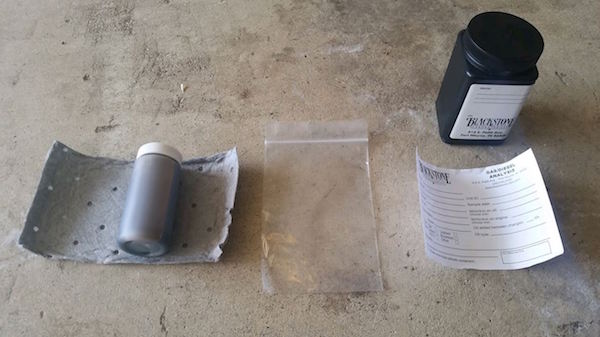
Below is a kit from Blackstone-Labs.com. There are probably others but I wanted to be consistent with the lab’s prior data and I’ve heard good things about them anyway.
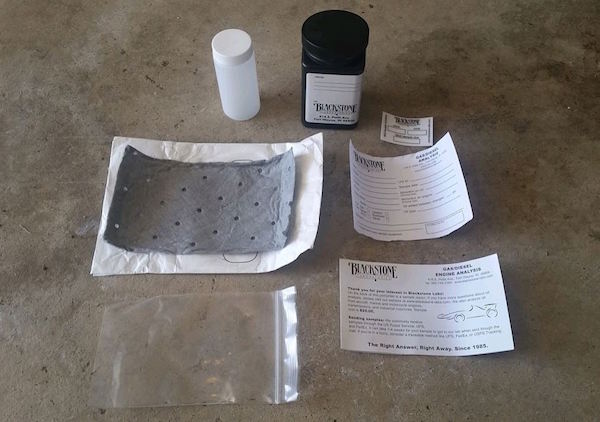
- A sample kit (provided free via mail)
- Paper towels or rags
- Marker + pen/pencil
- About 15 minutes of free time (in addition to the tools+time needed for an oil change)
Ready to collect an oil sample?
Ensure that the car has been ideally driven on the highway and running for at least 20 minutes. This gets the oil up to operating temperature and in a steady state for optimal sample conditions. Avoid letting it just idle on the driveway.
While the car is still pretty warm and you’re about to remove the oil drain plug, grab the white container and some paper towers and keep them close within easy reach.
Once you start draining the oil, grab the white container and wait for around the midpoint to collect an oil sample. Fill it as much as you reasonably can and avoid catching it too early or too late. Timing is critical here for a good, worthwhile sample so don’t get distracted.
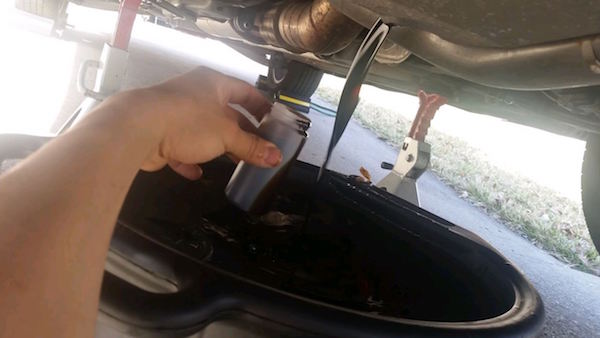
Seal the container and wipe away the excess. You can place this aside for now and complete the rest of the oil change.
Write your name on the sealed container, wrap it with the dark absorbent material, insert it into the plastic bag and seal it. It will then go into the black container with the completed form.
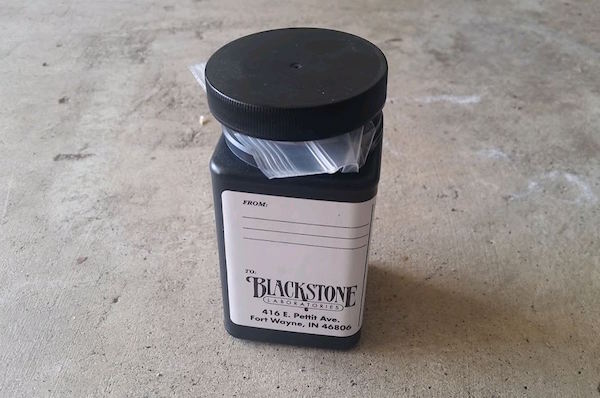
Let’s follow along! Insert the bag and the completed form into the black container:
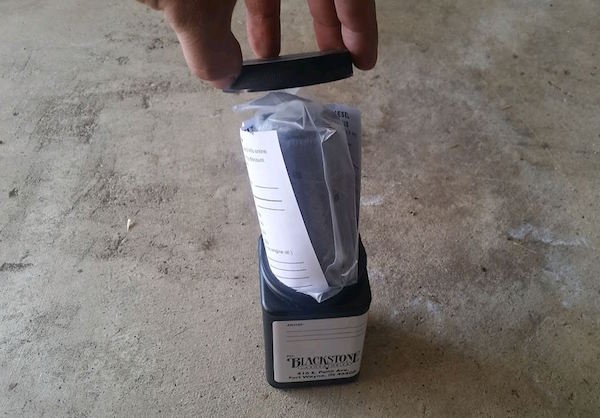
Push it all the way in so you can tighten the lid:
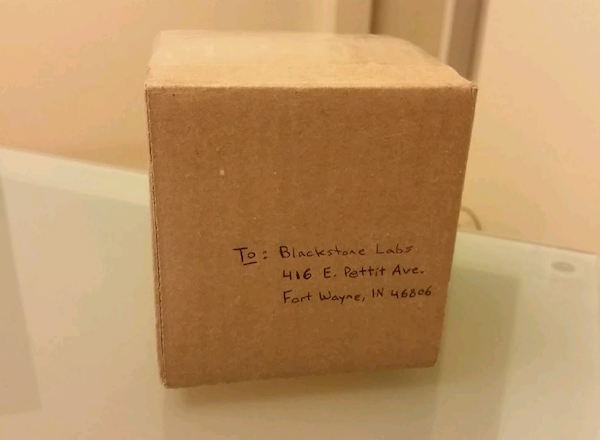
Place it in a box (since the post office prefers square boxes anyway) and send it away. The packaging meets USPS regulations and it’s not hazardous to send so no worries there. Feel free to pay for tracking if you wish: Blackstone Labs won’t charge you until the analysis is done anyway so this really isn’t needed unless it’s super important for some reason…?
Give it at least a month before you get the report. You can read their hilarious FAQs if you’re OCD on the wait time.