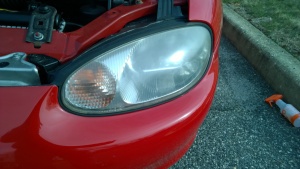
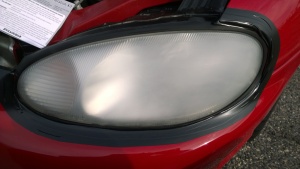
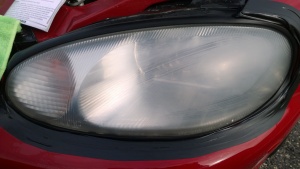
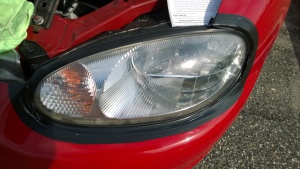
Over time, UV light can start to discolor your clear headlight lens into a cloud like yellow color. If left alone for a long time, it can get so bad that the light from your bulbs can be blocked by as much as 30%. The light coming out of the lens will also no longer shine correctly and will be scattered in all directions, causing a large drop in visibility, as well as blinding on-coming drivers.
This is why it's so important to restore your lens before it gets to this point and this is how to do it.
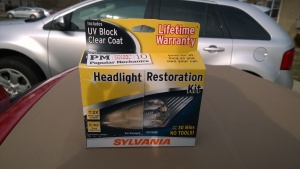
First, you'll need a headlight restore kit. I highly recommend the Sylvania Headlight Restoration Kit. It's definitely the best one on the market right now. You'll also need a spray bottle full of water and some microfiber towels. Also, please read through this whole how to before starting this project.
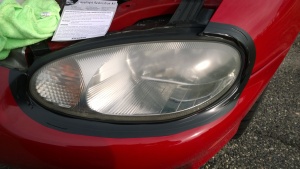
Step 1: The first thing you want to do is clean your headlight with some soap and water. This will remove the heavy dirt from the lens and surrounding areas. Once the lens is clean and dry, take the provided tape and tape up around the headlight. I did to layers to make sure it was wide enough. You do not want to slip past the sand paper and scratch the paint.
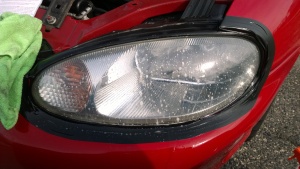
Step 2: Once the headlight is taped up, open up the kit and take out "Step 1", which is the UV block removal fluid. Spray the headlight liberally and let it soak for 30 seconds. This will remove the yellow discoloring that is one the lens. Once the soaking is done, rinse the fluid off with lots of water and dry with the microfiber towel.
Step 3: Find the 3 pieces of sand paper within the kit. There should be a 400 grit, 1000 grit, and a 2000 grit piece. Fold each piece in half and set aside the 1000 and 2000 grit pieces for now. You will be wet sanding the lens with the 400 grit first. Spray the whole lens down with water and also spray the sandpaper. Start sanding in a circular motion with medium pressure for about five minutes. When you are done sanding, then lens should look completely cloudy with no clear or rough spots.
Step 4: Now, repeat step 3 with the 1000 grit paper. Make sure during the sanding process you keep the lens wet. The 1000 grit sanding will also take about five minutes. You will start to feel the lens becoming smoother and a little bit clearer.
Step 5: Now sand with the 2000 girt sandpaper. This time you want to sand with a firm amount of pressure. Do this step for about five minutes.
Step 6: Grab the white paper towel that came with the kit and also "Step 2", which is the pouch. Open the pouch and put about a quarter size dab on the paper towel. This will be about half the pouch. Wet the lens down again and polish the lens with the compound. Do this for about five minutes. Once complete, clean the lens with water and let it dry for a few minutes. This lens will still look somewhat cloudy, but it will have improved a little bit each time you went up in grit number.
Step 7: Now, find the "Step 1" and spray again and spray the lens down, as well. Let it sit for 30 seconds and then clean the lens off with water. Let it dry for 15 to 20 minutes. During the wait time, repeat steps 1 through 7 on the other headlight.
Step 8: Once both headlights are done and dry, it is time to use the "Step 3" bottle and the blue towel. This will apply a new layer of UV block to the lens to help keep it from discoloring again for a long time. You apply the UV block by putting on the provided glove, taking the blue towel and soaking the folded edge in the "Step 3", the fluid.
You want the fluid to cover about a 1/2 up the towel from the edge. Now, slowly and in a constant motion, "paint" the lens with the fluid on the towel. You want to do this in a left to right position and have each stroke overlap a little bit. ONLY APPLY ONE COAT to the lens. It will mess up your work if you go over the lens again after applying the UV Blocker once. Once the lens is coated, do the other side. Once both lens are done, it will take about an hour for the UV block to harden enough to be able to touch the lens, and about 6 hours for it to be hard enough to drive the car.

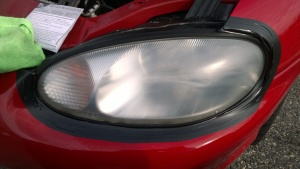
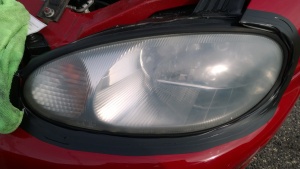
That's all there is to it. The difference is truly night and day and the whole process can be completed in as little as an hour. If you have any questions, let me know.