I bought a replacement steering rack used from the local Volvo recycler. I had begun experiencing lumpy steering, and after doing a power steering fluid flush, it wouldn't go away. For whatever reason, I guessed it was the rack as opposed to the pump. Luckily, I guessed right, and it was obvious what the problem was when we pulled the rack. The steering rack boots were filled with dirty ATF. The sight of the boots so filled with ATF made me second guess myself, and I thought that maybe there was supposed to be fluid in there. Nope. The seals were gone, and it was leaking bad. Replacing it was also quite the task as originally, the plan was to take a slightly newer rack on the shelf and put it into my car Well, it wouldn't fit, so we pulled the rack from a Volvo 760 with less miles on it than mine. It wasn't leaking, and seemed to be in pretty reasonable condition.
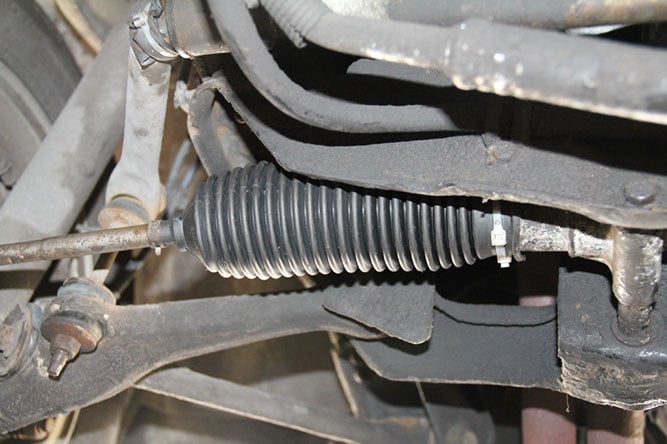
But as with every old part, there can be certain consequences for not buying new. About a year later, one of the steering rack bellows failed. Not having the correct part at the time and also not wanting dirt to deposit itself and grind away the seals on my relatively new rack, I sealed it up with saran wrap and duct tape, which to my pleasant surprise, was still holding up until I tackled the repair a month later.
[Disclaimer: This guide was written for a 1991 Volvo 940 GLE. The method should be very similar for many cars, especially other RWD Volvos. Specific steps and parts will differ.]
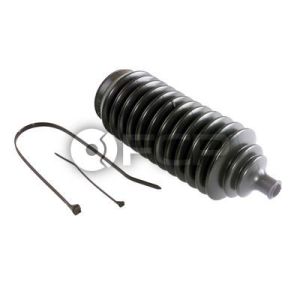
To start, I bought the appropriate steering bellows for my car: Volvo Steering Rack Bellow
Step 1. Remove your wheel
Remove your wheel to get to your tie rod end. Mark your tie rod end in order to facilitate re installation. If your tie rod is not in the exact same position as it was before, your steering will be off and you'll need an alignment. To remove your tie rod end, follow the diagram below.
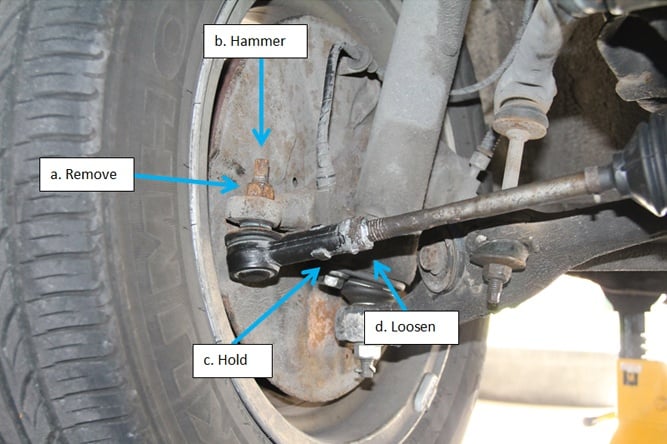
A. Remove this top nut. If you're not using an impact wrench, you may run into the issue of the tie rod spindle spinning with the nut. in this case, simply hold the top part of the tie rod while turning the nut.
B. Hammer down on this. It should pop out pretty easily. On some tie rod ends, the threads will go all the way to the tip. In order to prevent damage to the threads, move the nut all the way to the top, and hammer on top of the nut. For extremely stuck tie rod ends, use a tie rod puller.
C. Hold the tie rod end while you loosen the locknut (d.).
D. Loosen the locknut.
E. Spin off the tie rod end.
F. Spin off the locknut.
Step 2. Remove the old bellows
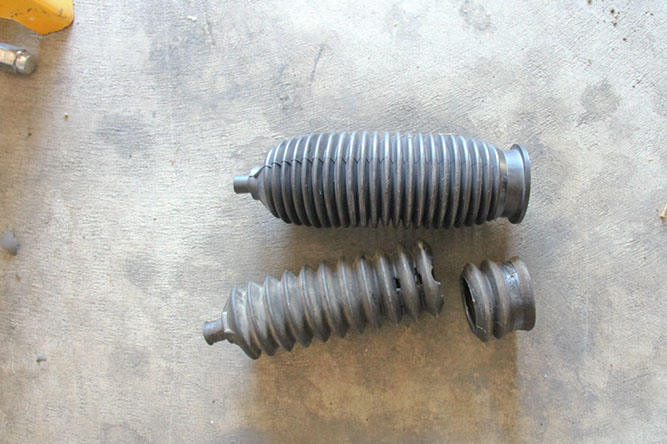
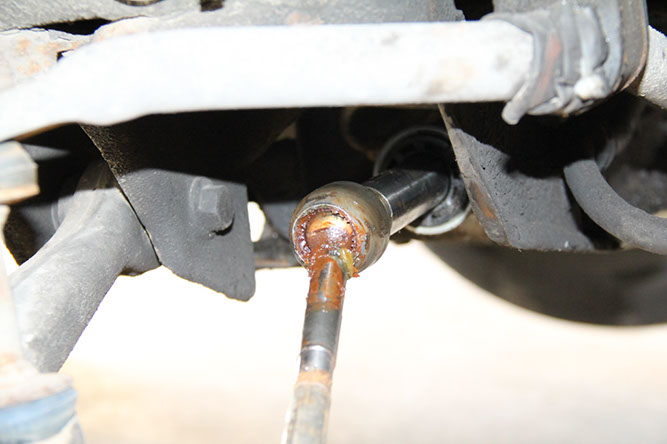
Slide off the old broken bellows after removing the clamps. You may have to wiggle it around to remove it, but it should come off with little effort. Examine your rack and inner tie rod. My inner tie rod will need replacement in the near future, but for now, I packed in some grease to prolong its life. I also slathered some grease on the sliding rack itself to replace what was lost during the time of a broken bellows.
Step 3. Install the new bellows
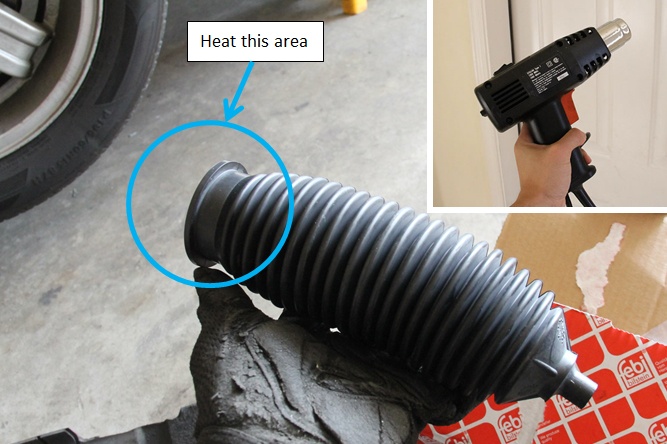
Look closely at your new bellows and compare it to the old one. I personally had quite a frustrating problem of fitment. Because the new bellows used a harder plastic compared to the OEM rubber, it was extremely hard to slide over the steering rack on the side of the large diameter. There was a lip that, try as I could, would prevent an easy installation. I ended up heating the large diameter end of the new bellows with a heat gun, making the material more pliable. It was only after I did this was it able to slide on. Otherwise, it was simply impossible. Be sure not to melt your new bellows with the heat gun! For bellows that are made of rubber, you can skip this step. Just use a bit of grease on the inner lip.
Step 4. Secure your bellows
Use the supplied clamps or zip-ties to secure each end of the bellows. For simplicity, I used zip-ties.
Step 5. Re-installation
Install everything back to how it was. With few catches, installation is quite simply, reverse of removal. When re installing, put some anti-seize on the lock nut and the threaded tie rod area to aid your future self. There you have it. A brand new steering rack bellows ready for the winter season.