- 07/03/2015
- 2 Min Read
- By: Alex Fiehl
How to Replace Volvo Climate Control Light Bulbs (P80)

Part of the excitement in buying a used car is the refurbishment process. I've never purchased a car that didn't need something, so to get the ball rolling on something easy was a great start. It gives me a connection to my new vehicle that can't be attained just by driving it. In the past I've owned a few reliable Japanese cars, and that connection never came to fruition because nothing ever went wrong.
It may sound strange, but replacing little things like HVAC bulbs and doing an oil change after buying a used car is a necessary part of the ownership experience, and for a car enthusiast, that's step one of falling in love. Of course, you may just be interested in seeing what temperature the auto-climate is set to, and that's a reasonable request - even if you don't love your Volvo.
My recently acquired '04 C70 had a few cluster and switch bulbs out. A slight bulb-OCD and desire to have a perfectly lit dashboard means that not only I'll enjoy the fruits of my labor, but the next owner of this car will have a nicely sorted vehicle when the time comes and have less to haggle about in the purchasing process.
Parts
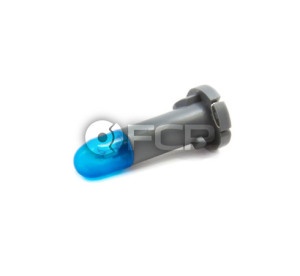
Volvo Climate Control Bulb - Genuine Volvo 9454848
Procedure
This guide applies to all '98-'00 P80 chassis vehicles, including the S70, V70, and -'04 C70.
Protect the shift knob with a cloth, and slide the radio out.
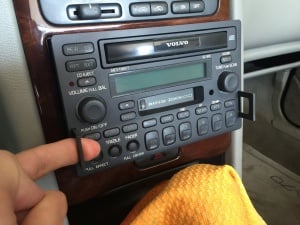
Adjusting the cloth so it protects the knob and dashboard, set the radio aside. It does not need to be unplugged. If you do, be sure to have the radio code handy or it will not work when plugged back in.
Press the rear of the HVAC control panel upwards towards the vents. This will pop the face of the control panel outward, allowing the unit to be slid out.
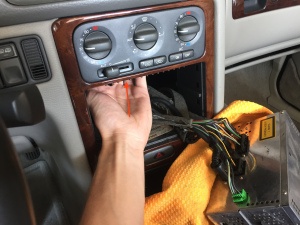
Slide the unit outwards once the face is popped out. Remove the two connections at the rear.

Remove the four phillips-head screws holding the unit together. Then, gently pry up the four tabs and separate the two halves.
[gallery type="square" columns="2" size="medium" ids="9970,9971"]
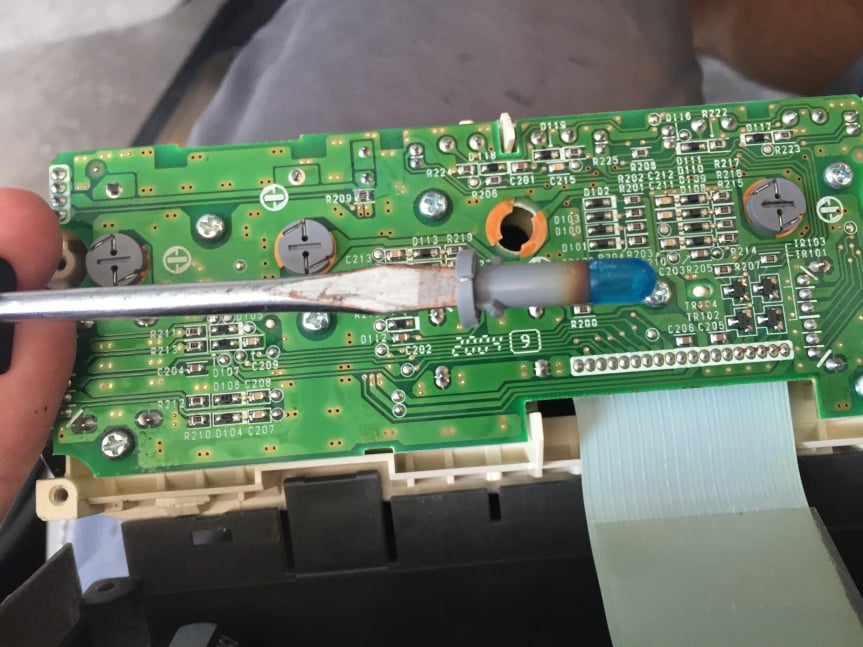
With the halves separated, the circuit board is now visible. Volvo HVAC units utilize four bulbs. Place a flat-blade screwdriver into the recess on the back of each bulb, and gently turn counterclockwise until it stops. The bulb will be loose in the housing, and will come right out.
[gallery type="square" columns="2" size="medium" ids="9972,9973"]
Replace the bulbs using only Genuine Volvo bulbs - I have not found an alternative that will slide into the housing. While expensive, they guarantee perfect illumination that matches the color of the other dashboard switch and radio components. With 116,000 miles on my C70, I only needed to replace one bulb, and found that its color did not match that of the other 3 faded bulbs. If budget is of no concern, it may be wise to replace all four bulbs at the same time to guarantee a perfect color match.
About the Author: Alex Fiehl
Alex is FCP's Blog Editor and a Desktop Engineer from Endwell, NY. He has over 9 years of experience working on a wide array of import makes, but has found his home with European cars. With a Volkswagen and a pair of Volvos at home, the garage is always busy.


