- 07/29/2015
- 2 Min Read
- By: Anthony Peacock
How to Replace the Shift Interlock Microswitch (Volvo)

For 3-4 weeks my shifter seemed to be getting worse and worse. Not knowing what the immediate cause of this was I would just wiggle and jiggle the handle until it got into gear and then be on my way. For a few days I would park it and leave the key in the ignition for fear I couldn't get it into gear again. Now I know that there should be a shift interlock button on there, which in a jam like this can get you out of a serious jam. However thinking that was initially the problem months ago I removed it. Silly me right?
After replacing the knob and then doing a little more digging I discovered the problem was the micro switch that connects the brake pedal to the shift knob. While the center console was taken apart I saw that there is a solenoid which blocks the system from shifting out of park. The micro switch serves to complete the connection only when the shift knob is in park, this is so the mechanism doesn't fire each and every time the brake is depressed.
Thankfully I happened to have a brand new micro-switch (long story) sitting on my desk still and got to work with the pretty straight forward change out.
Shifter removal
To begin you'll need pretty open access to the area around the shifter. Keep in mind the plastics can be fragile
Move the Shift knob (if you can) to the N position.
Remove the coin tray by pulling up and away, remove the coin dish next and unplug the heated seats at the same time.
Open up the arm rest then pop off the cover in the base of the storage stray. Remove the two 8mm bolts.
Remove the rear cigarette lighter and cover put pulling down and out. Behind this are two more bolts you'll need to remove.
With these all removed you should be able to lift up on the whole of the center console pieces and pull them up and back out.
Here is where you decide how much else to remove. This should be just enough room to work on the switch and solenoid. For my own car I spent more time and removed all of the center console trim but you may be able to work around this.
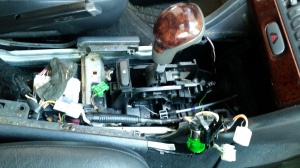 Center console looking naked
Solenoid removal
Looking at the shift mechanism from the passenger side you'll see the yellow and blue solenoid, there is a black U shaped bracket that holds is in place. Using a small flat head screw driver I pride the top section off and then worked out the bottom piece with my hands.
Below that there is a small piece holding in the grey coated cable. Much in the same fashion use a small screwdriver to remove the cable from its holder to free up a little more space.
Moving to the drivers side of the car you can find the switch in its holding bracket and it can be removed with tin fingers or by pressing the locking tabs in and pushing the whole assembly back out of the shiftier undercarriage to the passenger side.
Unplug the solenoid unit, it is the green/black two cable connector, then remove the assembly.
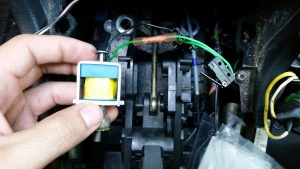 The culprit removed (given this is after I changed the switch)
Replacement
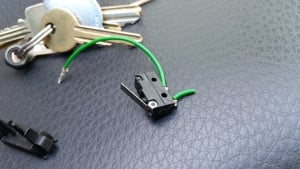
With the unit out you should observe the replacement kit. One wire end has a crimp the other a slide pin that is meant to be placed in the original connector. The connector can be disconnected using a very tiny flat head screw driver. I happened to have one from a micro tools set that was perfect for the job.
Now that the pin in removed you need to cut and strip the wire running from the switch to the solenoid, make sure to leave extra wire in case you mess this next part up.
With about 1/4" of wire exposed place it in the crimper and use pliers or clamps to secure it in place.
Replace the pin in the plastic connector and test the unit.
Test the system by turning the car to position 2, holding down the micro switch and the brake pedal should cause the solenoid to retract.
Reassemble everything.
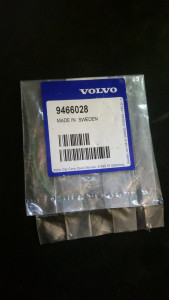
The whole unit, switch and all, is available as a replacement but it is a bit more expensive then this option.
About the Author: Anthony Peacock
 Anthony Peacock is a small business owner and Volvo DIY enthusiast. He is an experienced videographer and editor with a long running reputation for owning and promoting Volvo cars and their many excellent qualities.