- 01/31/2017
- 3 Min Read
- By: Alex Fiehl
How to Replace the Serpentine Belt Tensioner on a Saab 9-3

Saab doesn’t have a replacement interval for the serpentine belt tensioner. It could last a long time, or components such as the internal spring or pulley bearings can go bad at any time. I’ve never seen a sudden failure but I guess it could theoretically happen.
Personally, I treat this as preventative maintenance and like to replace this when it’s seen over 100k miles. Sometimes the pulley’s bearings go bad and you’ll hear an audible chirp/squeal which is a sign that it really does need to be replaced. If the serpentine belt is due for replacement and the belt tensioner is over 100k miles old then I would replace both at the same time.
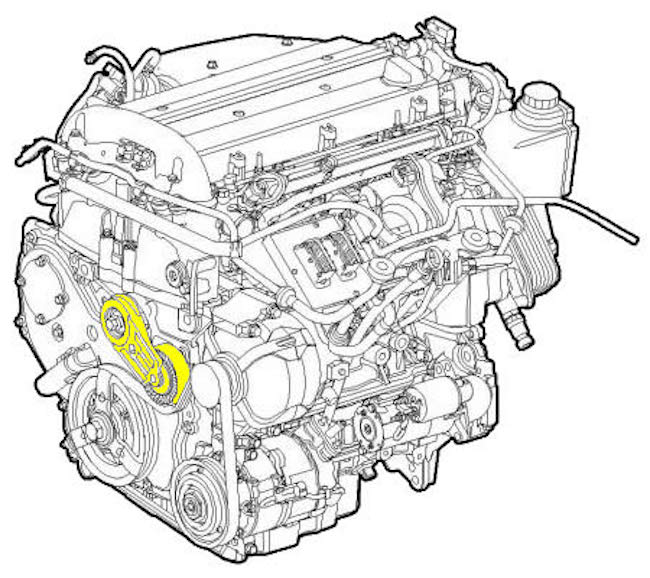
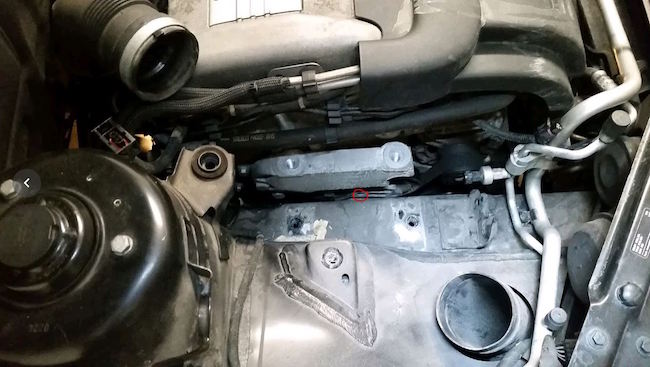
It’s located on the passenger side of the engine with limited room to access it between the engine and the fender. Below I’ve highlighted the serpentine belt tensioner:
Tools you’ll need:
Since access will be tricky given the limited amount of room you’ve got to work it, I share which tools worked for me:
- New serpentine belt tensioner
- Floor jack, jack stands + small 2x4 wood section
- Air compressor, impact wrench, impact sockets + torque wrench
- ⅜” drive ratchet with a slim head (I used a ⅜” torque wrench as that was my slimmest)
- Pry bar (this will be your best friend)
- Ratchets, sockets, Torx bits + wrenches
- Flathead screwdriver
- Work light
- About 2-3 hours of free time
- A friend to help with extra hands (recommended but optional)
NOTE: I know you can use a long reach serpentine belt tool from the bottom of the car but I opted not to buy that and use tools I already had listed above. If you have a serpentine belt tool then you should be to do this job a little easier when it comes to rotating the belt tensioner.
Ready to replace your serpentine belt?
On a 2004 Saab 9-3 Arc you could potentially work solely from the top of the car but it does help to also gain access from the wheel well to help get at the lower portion of the serpentine belt. I’ve included this in the steps below:
Head over to your parked car, raise the engine hood, jack up the front passenger tire, secure it with a jack stand and remove the tire with your impact wrench and a 17mm impact socket.
Increase your workspace by removing these two 10mm nuts holding the wheel well. This will help access the lower portion of the serpentine belt in subsequent steps.

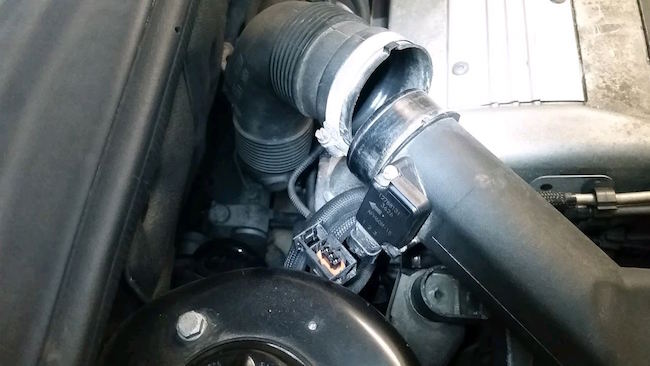
Head over to the top of the engine. You’ll need to remove the air filter housing so disconnect the harness plug and air duct near the firewall using a flathead screwdriver. Be careful when unplugging the harness as the lock slides out before you’re able to pull the plug off.
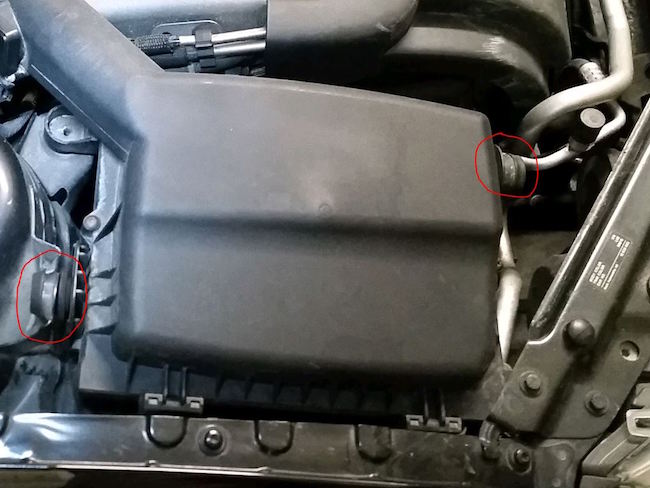
Remove the air filter housing by working the box out of the brackets and set it aside. Note the intake duct at the bottom: you’ll need to align the housing’s intake port with that intake duct when reinstalling this later.
Place the floor jack underneath the engine near and using a small 2x4 wood section carefully raise and support the engine. Don’t try raising the engine, just add enough support so you can perform the next step.

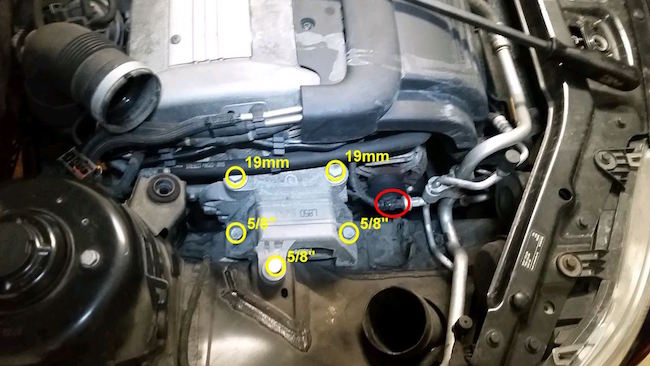
Remove the front right engine mount and the nearby a/c harness plug to gain better access to the serpentine belt and the belt tensioner. Use caution to ensure the floor jack below is providing sufficient support before removing the last 19mm bolt: go slow if you need to. An impact wrench and sockets made this a breeze.
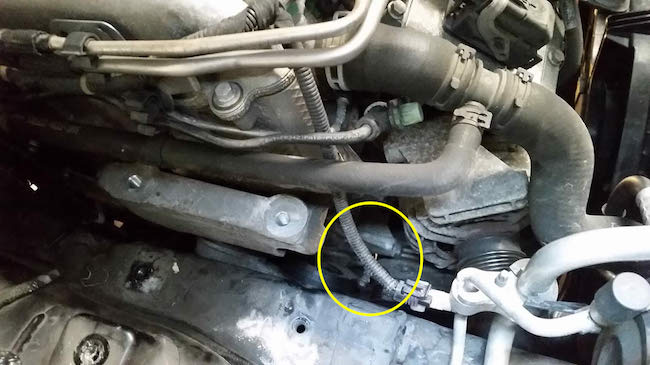
With the engine mount out of the way you can now access the belt tensioner. You’ll need to rotate it counter-clockwise using a ⅜” square drive at the location circled below in order to loosen the belt and free it from the pulleys:
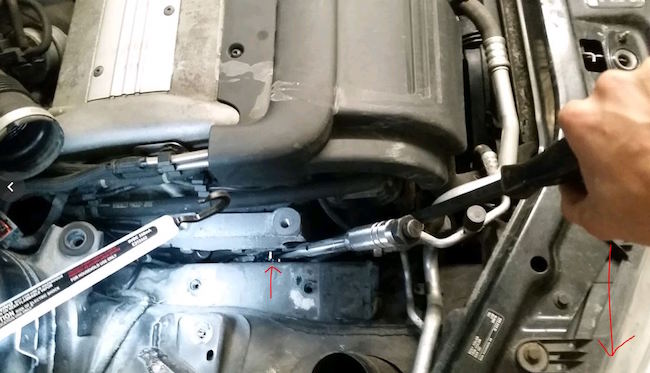
Using your ratchet with a slim head (I’m using a torque wrench) and a pry bar, carefully get the ⅜” square drive into the belt tensioner. This is when the pry bar becomes your best friend if you don’t have a serpentine belt tool as you need just a little bit of room to get this in. You may also need to raise the floor jack slightly to get the engine a bit higher, just don’t overdo it. Once it’s in, carefully rotate the belt tensioner counter-clockwise just enough to loosen and remove the serpentine belt from the pulleys. Avoid over-rotation to prevent any damage to the belt tensioner’s spring inside.
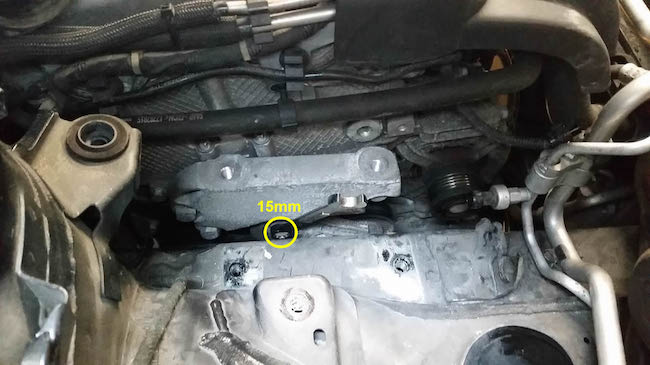
Once the belt is off the pulleys you can move it out of the way and focus on removing the belt tensioner. Use a 15mm wrench to remove the bolt counter-clockwise. Be sure to use your fingers as you get closer to removing the bolt else you’ll get the wrench stuck in there once it comes out as there won’t be room to dislodge the wrench (I made this mistake).
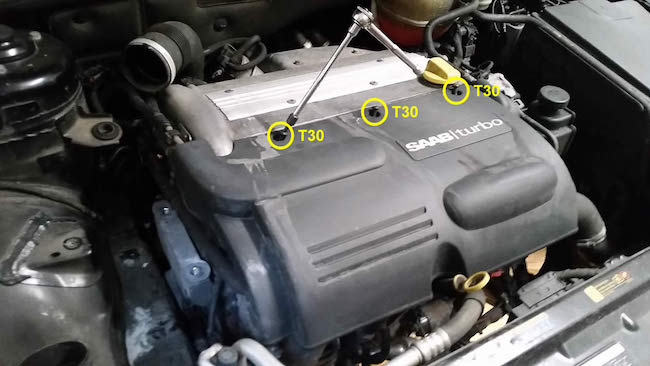
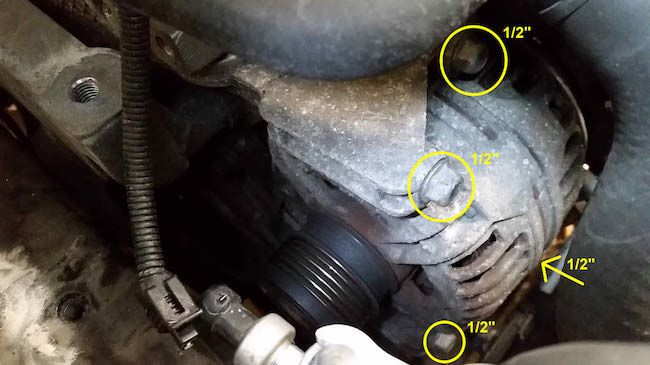
Since there’s no room to actually remove the belt tensioner at this point I took the route of getting the alternator moved out of the way. Remove the engine cover using a T30 torx bit:
Use a ½” socket + ratchet to remove the 4 bolts securing the alternator and move it out of the way to make room for the belt tensioner to come out:
With the alternator out of the way you now have enough room to get the belt tensioner out. You will need to use the pry bar against the engine to create enough room to get the belt tensioner out with its bolt still lodged in it.
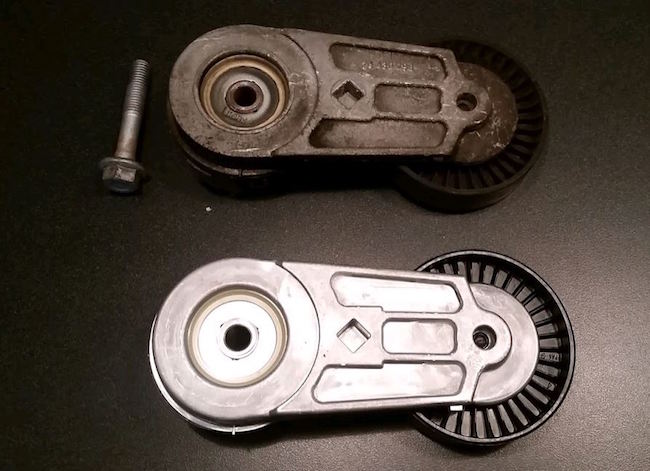
Here’s a picture of the old tensioner at the top and the new one on the bottom. You will need to reuse the bolt on the new belt tensioner.
Work the new belt tensioner back in and ensure it’s seated into the engine. There’s a notch on the back side where you’ll feel it slip into.

Reassembly!
Installation is essentially the reverse of removal. Here are a few tips to note along the way:
I bolted the alternator back in without a torque spec: if you prefer to do this I believe it’s 18 ft-lb.
I bolted the engine cover back without a torque spec. I don’t know if there’s even a torque spec for this so I can’t answer that one. I just tightened it without overdoing it.
Assuming you are also replacing the serpentine belt in this job, you will likely need to remove the belt from the wheel well (at least that’s how I was able to do it). That access point also helped me get the new belt back onto the lower pulley. You’ll need to position it as best you can such that when you’re ready to rotate the belt tensioner to get the belt back on you can do so from the top of the engine. Carefully push the belt onto the belt tensioner pulley while the rest is on the other pulleys as you slowly rotate the belt tensioner counter-clockwise so you have just enough room.
Once the belt seems to be on, make sure you double-check that it’s completely on all the pulleys without a rib hanging off an edge.
Position the front right engine mount such that the bolts are all in with the engine held in a neutral position (I used my hand to push against the engine to center everything as best I could). Tighten with the impact wrench without overdoing it, then lower and remove the floor jack supporting the bottom of the engine. Again, I didn’t bother to torque this down to spec as I’ve never had a problem with this method. If you decide to do it, I believe the torque is 50 Nm (about 37 ft-lb). Don’t forget to reconnect the nearby a/c harness plug if you disconnected it earlier.
Reinstall the air filter housing ensuring that the intake port underneath is properly mated to the intake duct. Reconnect the intake duct and harness plug near the firewall.
Reinstall the wheel well cover nuts and secure the cover. Don’t overtighten as these appeared to be made of plastic.
Reinstall the wheel and hand tighten the wheel bolts.
Raise the car using a floor jack to remove the jack stand and lower the car so the car is back on the ground. Torque the wheel bolts to 80 ft-lbs.
Remove your tools and start the car to ensure the serpentine belt appears to be completely on and rotating just fine..
Enjoy years of reliability with your new serpentine belt tensioner!


