
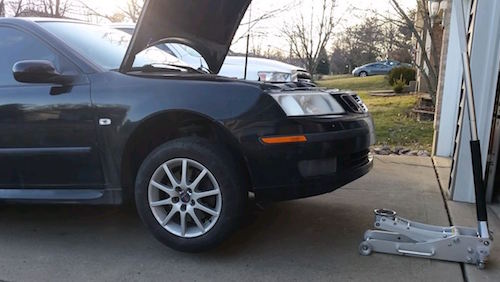
Whenever I drove over uneven ground - particularly speed bumps - I’d hear loud sounds that sounded like a creaking door from the front of the car. At first I thought it was scraping underneath somewhere or if something needed to be lubed but then checked the car and researched that worn sway bar bushings are often the culprit. This 2004 Saab 9-3 Arc has over 120k miles on the original bushings so this was likely the problem and I dealt with it until it started to become more embarassing and annoying.
I initially thought this would be a fairly quick replacement but it ended up being another life lesson on patience + perseverance. It’s basically in a tight spot and access is limited. If I were to do this again in the next ~120k replacement I’ll do it when I have plenty of free time and it’s a super nice day out.
Tools you’ll need:
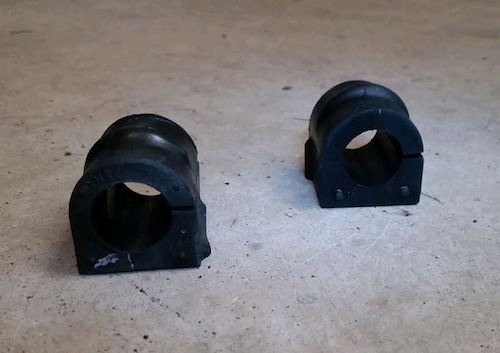
- New 24.2mm sway bar bushings (for a 2004 Saab 9-3 Arc’s front sway bar)
- Floor jack + jack stands
- Wheel chocks (recommended but optional)
- Car ramps
- Open ended combination wrenches
- Sockets + ratchets
- Work light
- Pry bar
- Torque wrench
- Impact wrench (recommended but optional)
- Lots of time + patience (perhaps about 2-3 hours of free time)
- Preferably a nice pleasant day as you’ll appreciate the ambient light and it will also help offset a potential swearing session that may ensue
Ready to replace your front sway bar bushings?
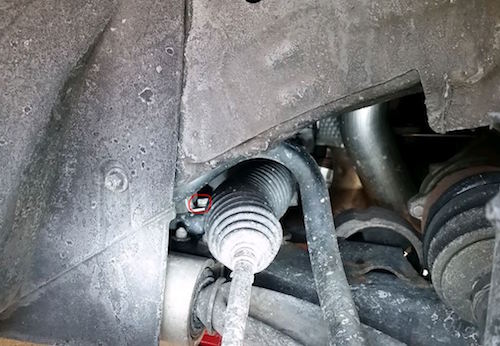
The front sway bar bushings are located between the firewall and the engine.
Head over to your parked car, ensure the handbrake is engaged and apply wheel chocks to the rear wheels as an added safety measure.
Loosen but do not remove the front wheel bolts.
Jack up both front wheels, position your jack stands, lower the floor jack and remove it so it’s out of your way:
Remove the wheel bolts and set aside the front wheels. An impact wrench will speed this up!
Remove the sway bar link using a counter hold to ensure you’re not spinning the joint as you remove the nuts. I’d be holding the wrench with my other hand if I weren’t trying to take the picture!
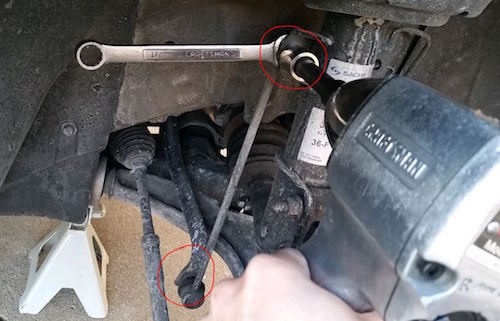
With both sides’ sway bar links removed you can check to see if your sway bar bushings are worn simply by trying to move the sway bar up or down. Mine creaked real bad! If it was fine it would have been hard to move as the bushings were intended to lock down movement.
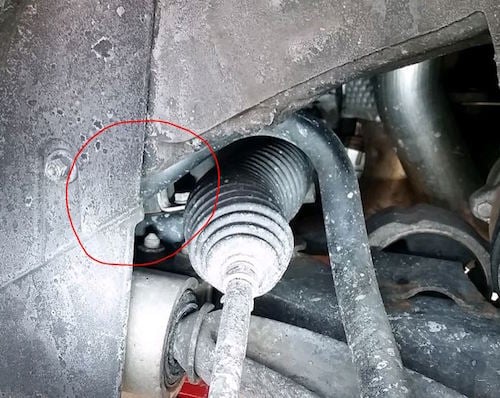
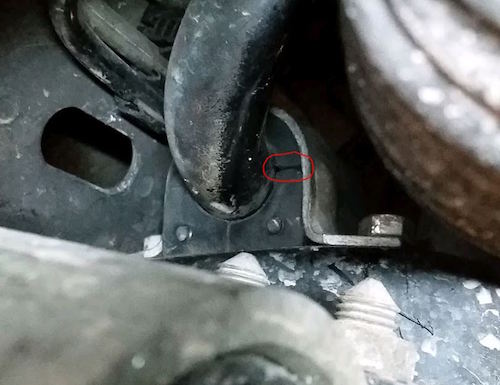
Locate the sway bar bushings using a light and you’ll notice access to the bracket bolts is limited.
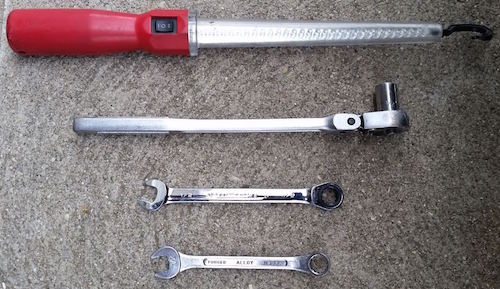
This is where a potential swearing session may commence as you’ll have to get under the car and constantly reposition yourself to find a good way to get both the right tools and correct body position to get to the bolts. I endured quite the ab+neck muscle workout while on my back in this job! After trying several tools this is what ultimately worked best for me in removing + reinstalling the bolts: a work light that can fit in there, an angled-head ratchet with a ½” socket, a ratcheting ½” wrench and a ½” wrench with an angle on the closed end.
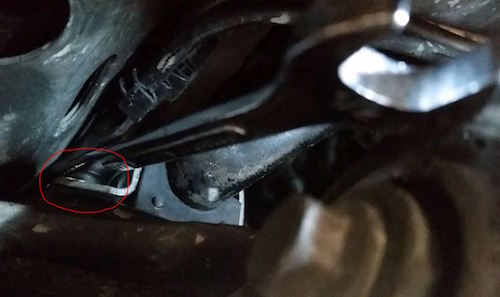
Remove the forward bolt on the engine side. The picture shows the front bolt but not the rear bolt:
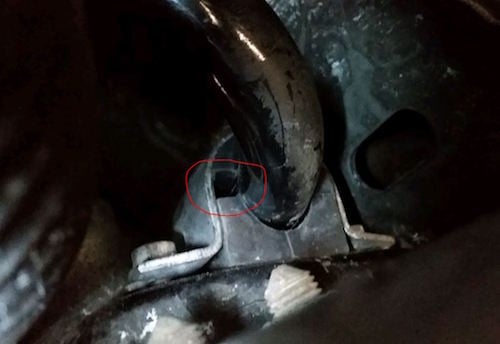
Loosen but do not remove the rear bolt on the firewall side. Loosen it so that you have enough slack for reassembly later. The bracket slips into the bolts and since the rear bolt is much harder to access it’s best to leave the rear bolt loose so that you can slip the bracket back on it.
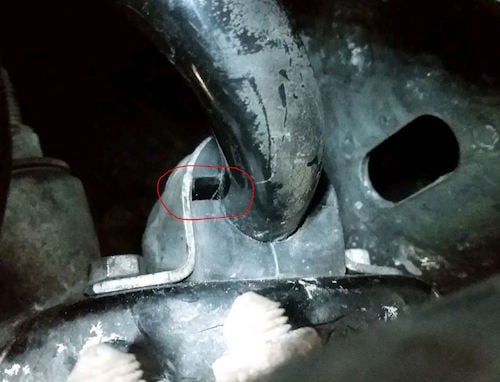
Remove the sway bushing bracket and pry off the worn bushing. You may need to loosen the other side’s bracket if the sway bar is too tight and hard to move. This is what you can expect:
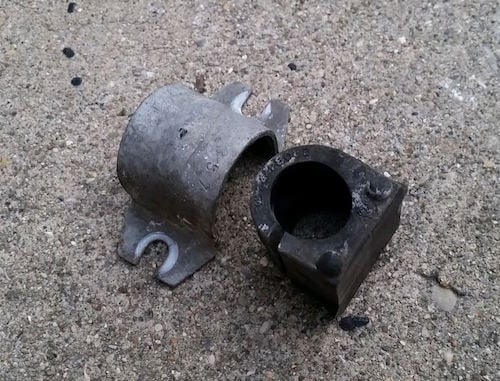
Compare old (left) versus new (right) bushings. The old bushing's inside diameter were much larger than the new ones so these definitely needed to be replaced.
Reassembly!
Installation is essentially the reverse of removal. It will be a harder to fit the new bushings on so take your time to get it into position and get the bushing bracket slipped onto the rear bolt. The front bolts will be a pain as the threads may not catch easily: using a pry bar helped to compress the bracket and adding pressure to the bolts helped catch the threads.
Once you’ve got both brackets’ bolts threaded on don’t tighten them down yet as this will need to be done later when the car is under load.
Reinstall the sway bar links using a counter hold to ensure you’re not spinning the joint as you tighten the nuts. Torque down the link nuts to 47 ft-lb. Some have said to torque these down under load but I tried it and couldn’t get any of my tools to fit onto the nuts while the wheels were on. I determined it was much more important to tighten the sway bar bushings’ bracket bolts under load than the sway bar end links.
Reinstall the wheels and hand tighten the wheel bolts.
Raise the car using a floor jack to remove the jack stands and position car ramps under each wheel. Lower the car so the wheels are now on car ramps and torque the wheel bolts to 80 ft-lbs.
Grab the same tools you used to remove the sway bar bushing bracket bolts (see pic of tools above) and squirm your way back underneath the car to tighten all 4 bolts. Take your time and get into a comfortable position with your light angled in there. Here’s a pic showing my need for a ½” wrench with an angle on the closed end to tighten the rear bolt:
I couldn’t get a torque wrench to fit so I tightened them as best I could making sure not to over tighten and strip them out (that’s an acquired thing over years of car work). Once you feel the bolt is getting tight against the body frame then you’re pretty much there. With my 6” long wrench I could only muscle it to say a quarter or half a revolution.
Once tightened down the bushing’s open end should appear more closed. Here’s a pic of the passenger side’s new bushing:
I noticed that the driver side bushing’s open end didn’t appear as closed as the passenger side so I loosened it back up to see if it needed to be repositioned:
After attempting to nudge the bushing inward and retightening the bolts this was as good as it was going to get. I was ok with this and figured the bushing may work itself in better after driving several miles. More importantly, I didn’t experience any issues later anyway.
For kicks, you can try to see if you can fit a torque wrench onto the sway bar end link nuts behind each wheel. If you can, then you can choose to loosen and re-torque them down while the car is under load. I couldn’t do this and I’m not losing sleep over it.
Remove your tools, remove the wheel chocks from the rear wheels and drive off the car ramps.
Test drive the car and enjoy years of restored sway bar bushing performance!


