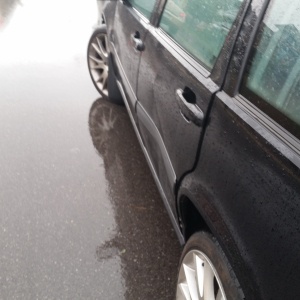
You never envision yourself making auto body repairs. The only visions I have are of proper upkeep and performance upgrades. Never did I think I would be replacing an entire door on any of my vehicles. After getting essentially t-boned at an intersection this Fall, my newly acquired and relatively low mileage 2000 V70 XC was wearing a pretty unsightly dent. With a $280 replacement cost before labor I decided I was better off finding my own door and seeing what I could do.
The replacement of most parts on the P80 Volvos is fairly straightforward and changing an entire door is no different. After finding a worthy candidate at the local pick and pull M & M U-Pull-It, and of course having no problem fitting it in the back of the wagon, I was set for home to complete this twenty-five minute job. It took longer the first time at the junkyard but that's why I can write this down now for everyone here.
Tools Needed:
- 2-4 Hands
- 12mm Socket
- T40 Torx Bit
- 6" socket extension
- Socket wrench
I started by removing the interior panel covering the pillar behind the driver's seat. All three pieces can be removed by hand and with some finesse, pull straight back. Twist the red tab 90º, then pull straight back. The two metal 'T' pieces pinch inwards.
[gallery type="square" ids="7161,7162,7163"]
Treat it like an air bag
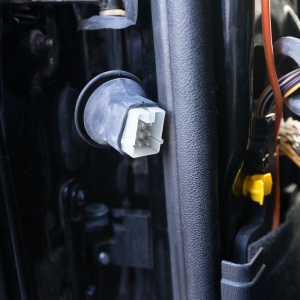
At the bottom of all this you'll find a rubber boot and with a quick peek inside you'll locate the wire loom. While grasping the plug inside the pillar of the car pull back while wiggling up and down. Unlike most connectors on these cars this one does not have a tab that needs to be released and instead should just pull free. The orange and white wire is attached to the seat-belt pre-tensioner, use caution and treat it like an air bag - carefully.
[gallery type="square" ids="7164,7165,7166"]
Once it's out, you want to remove the check stop from the vehicle side of the door. If you can't immediately see it the bolt is located inside the elbow shaped boot at the middle of the door, the bolt is a T40 torx.
[gallery columns="2" link="file" ids="7168,7204"]
It's pretty stubborn
With the check stop free you will be able to swing the door open a little bit farther than usual. Open the front door and then let the rear door become perpendicular to the vehicle. With the door in this position the boot at the bottom of the door will have a little more room to give. From the outside or inside of the car work the rubber boot out of its hole in the frame. It is pretty stubborn both in removal and replacement so you many want to use silicone or elbow grease. I found it easiest to work the boot out by pushing from the inside and pulling from the outside at the same time. The hole for your fingers is not very sharp but it would be wise to use caution.
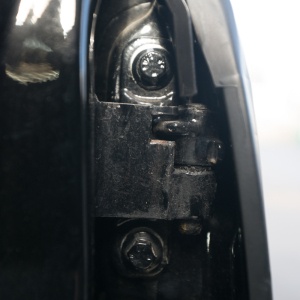
Two of the three systems holding the door in-place are now taken care of. The last step to removal can be done in two ways. First you could remove the external torx bolts that hold the pins into the door, kind of like a Jeep Wrangler. This requires a bit of force and can pretty quickly mess up your paint in such a small area. The second way is to undo the 4 bolts that attach the door itself to the hinge. I chose the latter.
This is where you may want to employ a second set of hands though they are not 100% necessary. Where they will come in handy (get it?) is holding the door up as it comes loose. Shut the door so it sits as it normally would and take out the the bolts, [12mm] being cautious as once they are out the only thing holding the door in place is the door latch.
 With all four removed grab the left side of the door and the door handle on the right, pull the handle, and off it comes. The door weighs about 35-40lbs and is very bottom heavy.
At this time you may want to exchange any known recently replaced parts on to the donor door. While I was not sure if all my systems were working when this exchange happened I lucked out in that they were all fine. The only thing I kept was my T5 SE door panel.
Replacement as you would expect is the reverse of removal, take your time when doing up the bolts on the hinge being sure the door is level all around and lines up as the old one did. Using the missing paint marks from the old door is a good gauge for proper positioning.
Good luck and be safe.
Shop Volvo Interior at FCP Euro
 Anthony Peacock is a small business owner and Volvo DIY enthusiast. He is an experienced videographer and editor with a long running reputation for owning and promoting Volvo cars and their many excellent qualities.