

The Mercedes-Benz 450SL V8 water pump is very straight forward to remove. More than likely you will be changing your thermostat before the pump, but it is always good to be ready for what ever comes down the road. As with many jobs on our classic Mercedes, it is not difficult, but it is a bit time consuming.
To do this job you will need to drain the coolant, upper radiator hose, and remove the fan shroud, and fan/pulley assembly. The reason for this, is to gain access the crank pulley in order to turn the engine and the engine must be turned to gain access to the two lower bolts securing
the water pump. You do not need to remove any of the belts. You will also need to either disconnect the lower radiator hose from the thermostat or the radiator.
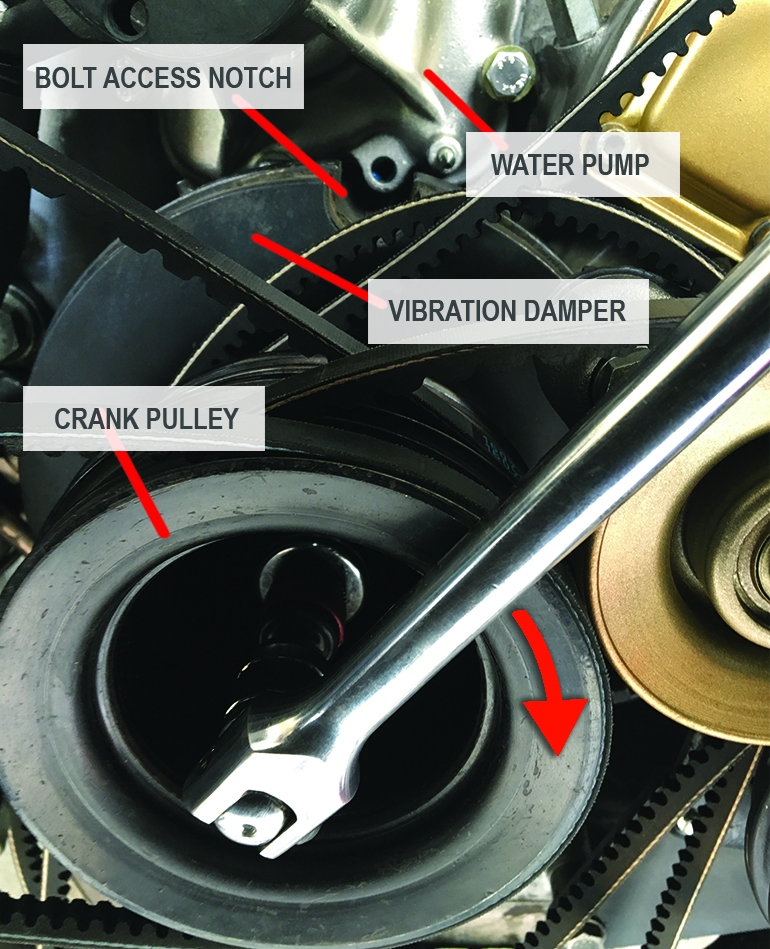
The photo above shows the breaker bar and socket in place on the crankshaft hex bolt. Turn the engine clockwise only! Never turn the engine with any of the accessories. I have read in numerous places that the power steering pump can be used to turn over the engine. According to a long time Mercedes tech, that is not at all good and can damage the “driveshaft” of the power steering pump—makes very good sense.
With the necessary components removed, crank the engine clockwise until one of the two notches in the damper align with one of the two bolts to be removed from the water pump. This process will be repeated once more for the second bolt. If you miss your mark, go around, clockwise, until you reach the next notch in the vibration damper.
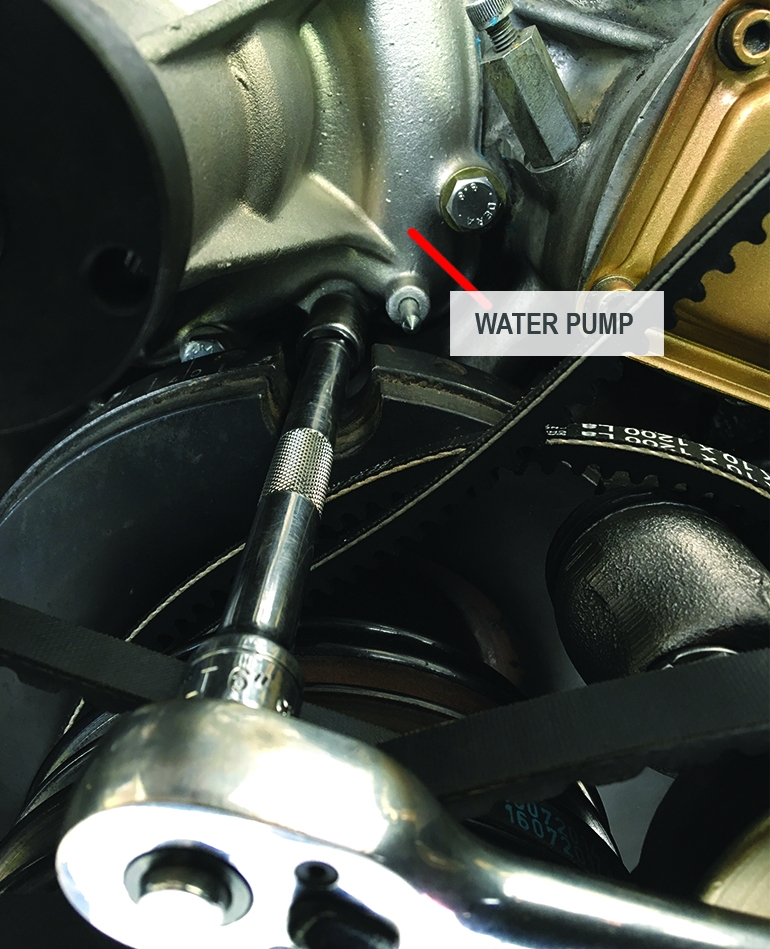
The photo above shows the 13mm socket and extension in place. This same photos also shows the notch in the vibration damper aligned with one of the two bolts at the water pump. With the two lower bolts removed, you may now remove the top portion of the pump. It certainly does not have to be done in this order, but I would prefer to do the “harder” jobs first.
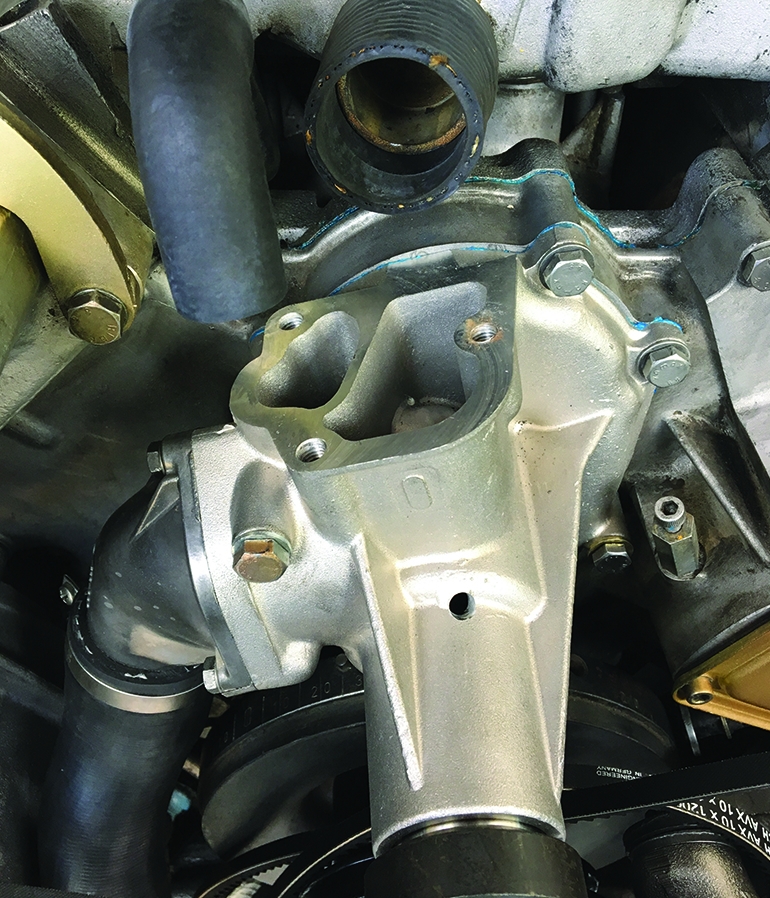
The image above shows the assembly which houses a water temperature sensor, the fitting for the upper radiator hose, the connection for the heater line and a mount for the air cleaner housing. Also attached are two eye hooks for removing the engine.
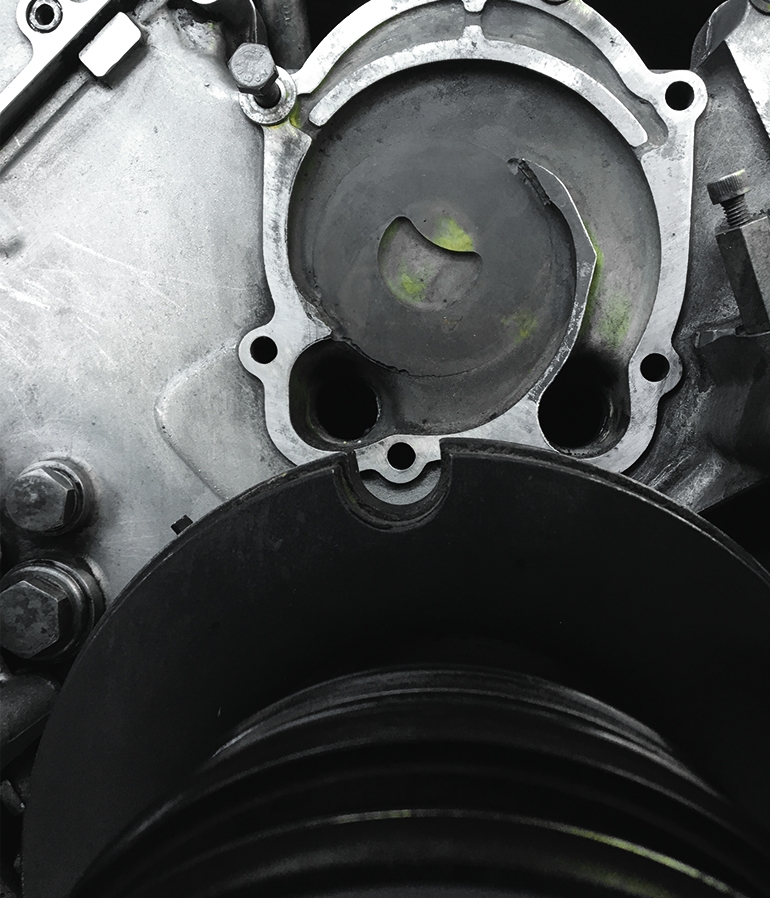
The image above shows the top assembly of the water pump removed, while the image below shows the pump removed altogether. Be sure to remove any calcification at this point. If there is a considerable amount, consider doing a cooling system flush with the MB citric acid cleaner. Also be sure to check your thermostat for corrosion.
To install, the process will be reversed. Make sure to completely clean any remnants of gasket or gasket adhesive from all surfaces with a razor blade and/or appropriate solvent. I recommend using a THIN layer of Hylomar Blue sealant on both metal faces along with the paper gasket for both the water pump and the upper assembly before reassembling. Hylomar is an excellent sealant that prevents 99% of potential leaks. Follow the instructions for use. Make sure all surfaces are clean and do not have any burrs. When reinstalling bolts, tighten in a rotating pattern to prevent any warping. Check all belts and hoses at this time for replacement. Be sure to properly top off your coolant and check for leaks.
Helpful tools:

Potential parts needed:
- 1-Water Pump + 2-Gaskets 1-Thermostat + o-ring 6-Hose Clamps
- 4 Hoses
- Coolant Belts


