
Saab’s Workshop Information System (WIS) indicates a 20k mile replacement interval for the cabin filter. Occasionally I’d smell something odd coming from the vents and a passenger once said the same thing. I decided to change it ahead of schedule at 15k miles to ensure I wasn’t negligently breathing in anything weird.
Tools you’ll need:
- New cabin filter (regular particulate filter, or a charcoal-activated filter which is nicer)
- A small flathead screwdriver
- About 15 minutes of free time
Ready to replace your cabin filter?
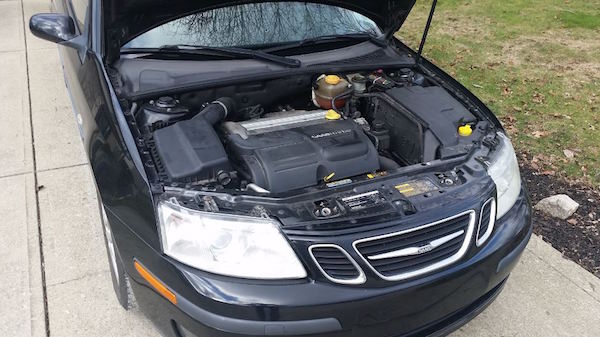
On a 2004 Saab 9-3 Arc the cabin filter is located near the passenger side firewall.
Step 1: Head over to your parked car and raise your vehicle’s hood.
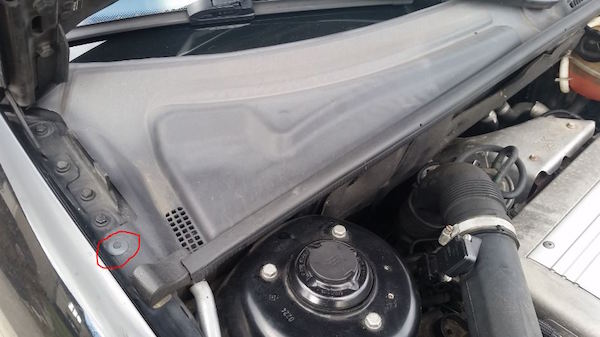
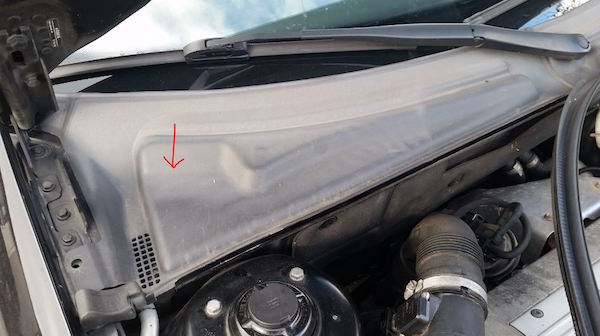
Step 2: Right behind the passenger front strut tower you’ll need to remove a drain cover starting with a rivet.
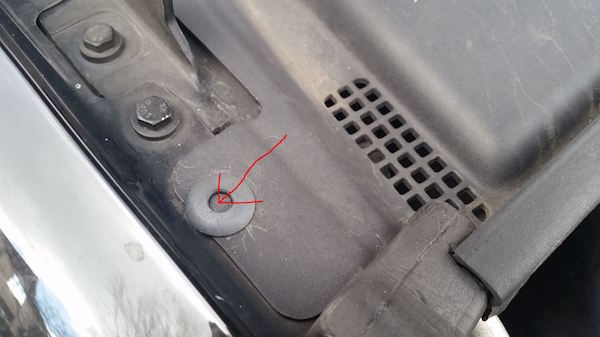
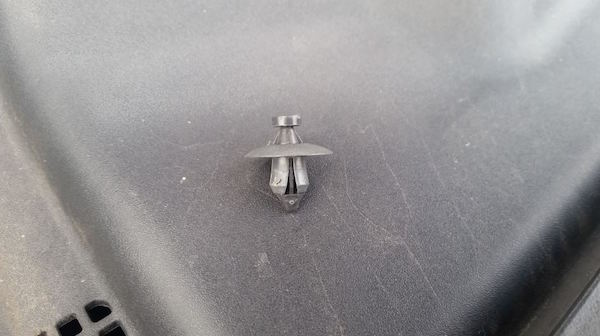
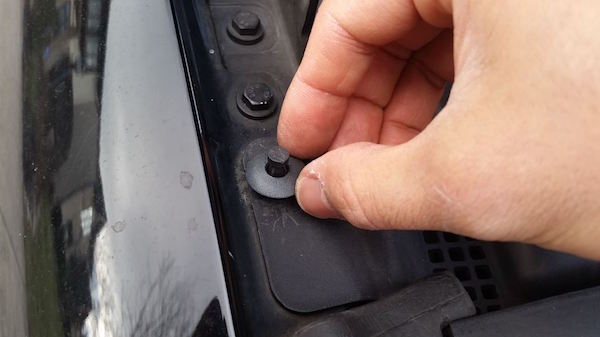
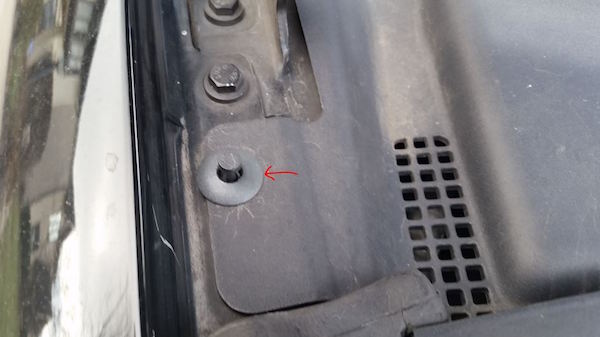
Step 3: Using your small screwdriver gently push the center of the rivet so that it clicks inward. Don’t use too much force else you may lose the center entirely as it can fall through. I’ve done this once with regret.
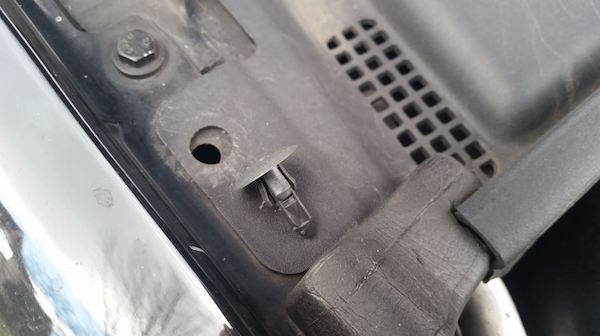
Step 4: You can now work the rivet out with your finger nails (or your flathead screwdriver). Here’s what it looks like when it’s out:
Step 5: Reset the rivet by pushing the center back up so that it’s now above the surface. The anchor points below the surface will then be able to bend back inwards to fit the hole during re-installation later.
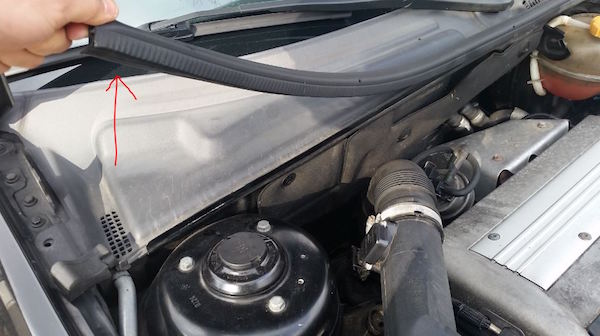
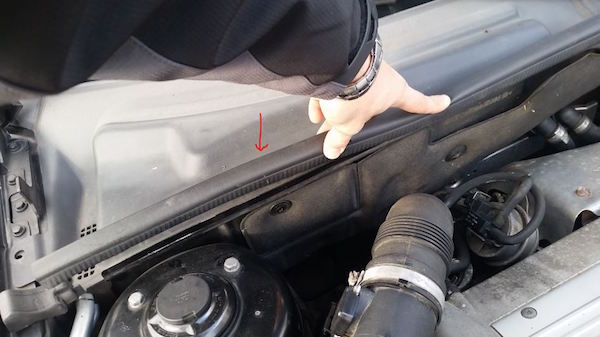
Step 6: Place the rivet off to the side somewhere so you don’t lose it and remove the hood weatherstrip by peeling it up about halfway. Lay it off to the side.
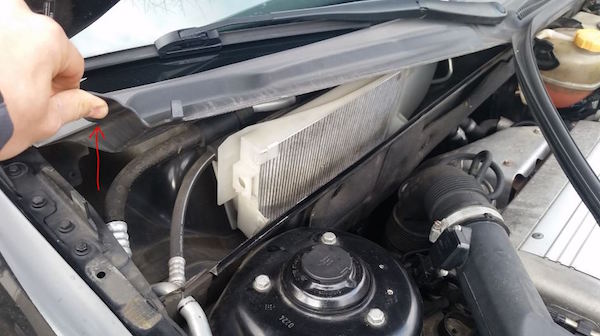
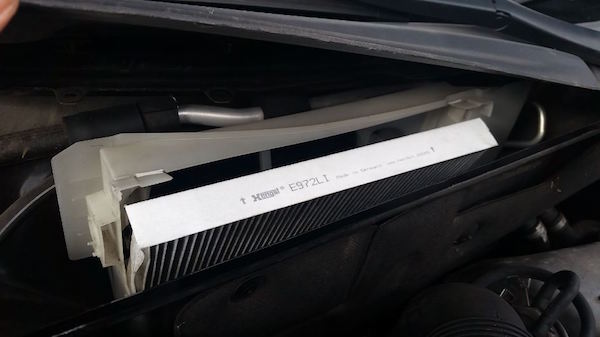
Step 7: Carefully lift up the drain cover and you’ll now see the cabin filter exposed.
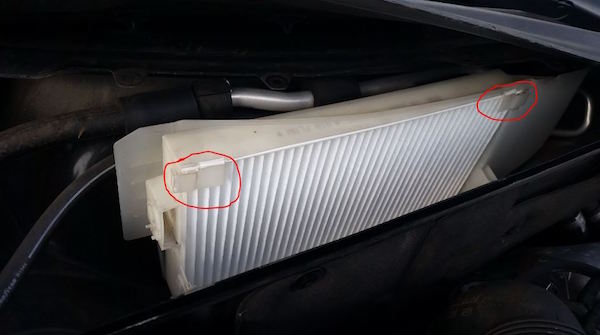
Step 8: Use your fingers to gently unclip the two ends holding in the cabin filter. The clips engage from the sides so you’ll need to lift up on them.
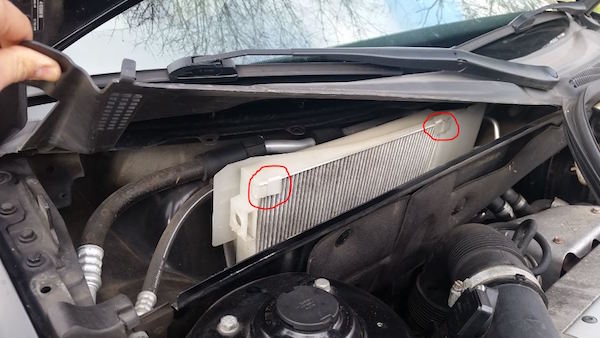
Step 8: The cabin filter will now slide out after the hold mounts are unclipped.
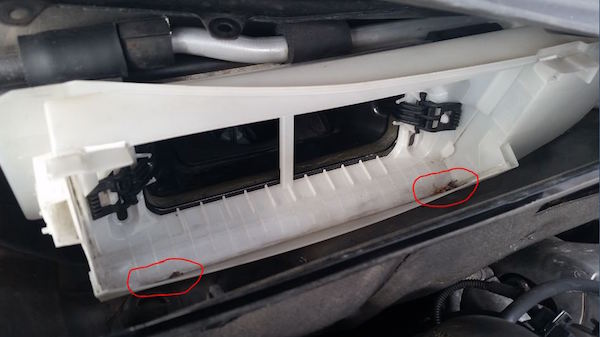
Step 9: Remove any debris you may find once the cabin filter is out. I used a vacuum with a crevice tool attachment but you can also use your fingers.
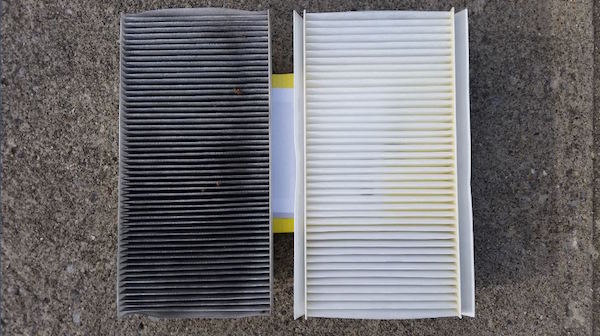
Step 10: Here’s a picture of the old filter on the left and a new one on the right. Note that the old filter contained activated carbon which helps absorb unpleasant odors so it’s dark color is associated to that plus absorbed pollutants. The new one on the right is just a particulate filter without activated carbon. I prefer carbon-activated filters but wanted to use a particulate filter that was in a box of new parts from the previous owner.
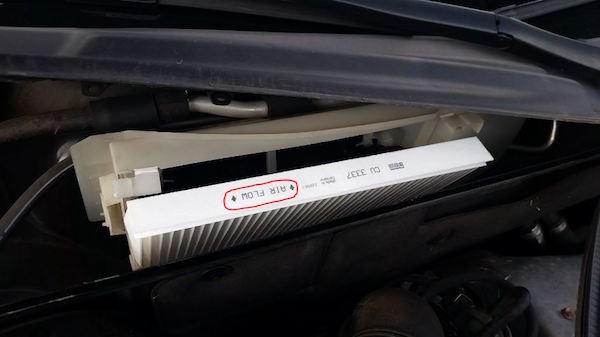
Step 11: Installation is reverse of removal: slip in the new cabin filter and ensure the flow direction is toward the firewall.
Step 12: Engage the clips at the top corners by pushing them back in.
Step 13: Lower the drain cover.
Step 14: Massage the hood’s weatherstrip back into the firewall lip.
Step 15: Carefully insert the rivet into the drain cover.
Step 16: Push in the rivet base so it’s flush with the drain cover.
Step 17: Gently push in the center of the rivet so that it’s flush with the rivet base. That will lock in the rivet and complete your cabin filter replacement.

Lower + lock your vehicle’s hood and enjoy fresher air in your car with your next drive!


