Many times I’m asked how to address paint imperfections such as scratches, fading, peels, bubbles and flakes. Covering that whole spectrum would be like writing a book so I’ll specifically tackle paint scratches as that was a recent fix on my daily driver, currently a Volvo S60.
What level of repair do you want?
Dealing with paint scratches largely depends on the type of car owner you are. Do you own a show car that must be kept in pristine show-winning condition? Is your daily driver showing a visual annoyance? Are you somewhere in-between? Depending on your needs here, you may or may not want to have a professional do the repair. What I’m covering here is self-learned over the years with an attitude of trying the repair and defaulting to a paint shop if I screw up (ie. I’m not PPG certified or anything).
When I was younger I was more demanding and always took vehicles to a reputable paint shop. As I matured I realized how expensive that was getting and could accept basic repairs that saved my wallet. I also learned that it was hard to find an inexpensive paint shop that delivered quality work. Sometimes I’d look at the result and say to myself “I could have done better than that!”.
I’ll assume that you already considered going to an automobile paint shop and you want to try and tackle this yourself to save on the expense. That’s how I got started and invested part of the savings into reusable equipment! But if you’re not comfortable trying this stuff after you read this article then you can always reconsider the paint shop.
Types of scratches
Scratches fall into different categories: scuffs, swirl marks, clear coat scratches and deep gouges into the sheet body exposing bare metal. I’ll briefly cover how I deal with each:
● Scuffs: This usually looks like paint from another object rubbing off onto the paint. Sometimes it happens from light contact with another vehicle. I can usually get this out with wax, a clean cloth and lots of elbow grease to eventually get it off. I then buff it out to a shine and all is good.
● Swirl marks: This gets pretty common with dark colored vehicles as they are more noticeable on them. You could be good-intentioned by always hand-washing your car to keep it clean but you may end up with swirl marks on the paint surface. I can usually get this out temporarily with a multi-coat wax job but it would require repetition over time as the wax wears off. I could choose to use an orbital buffer with a light abrasive compound to buff out the swirl marks but over the years I’ve been doing this less on my own vehicles as it seems like a never-ending problem with dark colored vehicles.
● Clear coat scratches: This is a deep scratch but if it appears white then it may have just affected your vehicle’s clear coat layer. I will probably use clear coat touch-up paint and an orbital polisher with some rubbing compound I’d research on that’ll buff out as much of the touch-up paint residue as I can.
● Deep gouges into bare metal: This is the worst as you can see metal showing. Prolonged exposure will create rust and slowly destroy that area. If I get this it’ll be prioritized and fixed ASAP. Deep gouges will be this article’s focus as I had to deal with this on a black Saab.
How I deal with deep gouges
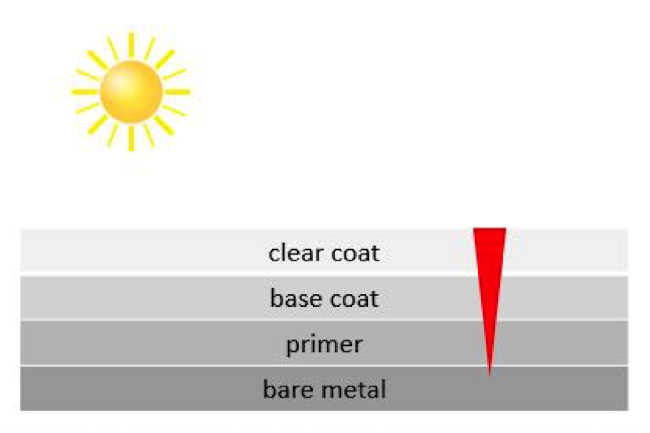
Here’s a quick snapshot of how automotive paint is usually layered onto a vehicle. I’ve also included a representation in red of how far a deep gouge gets:
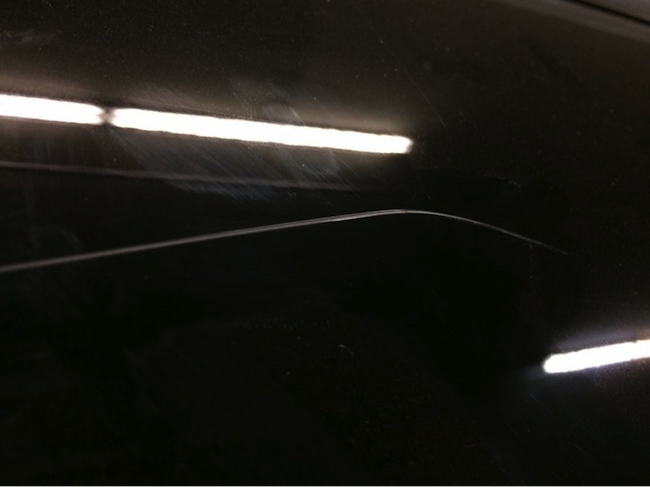
I always seem to rub against the car if I’m parked in tight quarters. When something like a coat zipper, pocket light, belt buckle or keys contacts the paint I’m almost certain to be dealing with it when I get a chance to evaluate the damage. In this example you’ll see a spot where I nicked the car and created a deep gouge which exposed bare metal:
The way I see it I need to protect bare metal ASAP before any corrosion starts. This is my daily driver and don’t need this to be pristine (at least not yet) so I prefer to get some quality touch-up paint at a local store and carefully apply it into the scratch grooves to get it protected. Make sure you clean the area first before applying any paint! This is what I found + purchased:
![]()
There were two options to dispensing paint with this product: there’s a “pen” side underneath the clear cap and a small brush inside if you unscrewed the cap. I chose to use the pen side where I hold it like a ball-point pen and while squeezing the tube I’m basically writing in the scratch groove to get the paint in there.
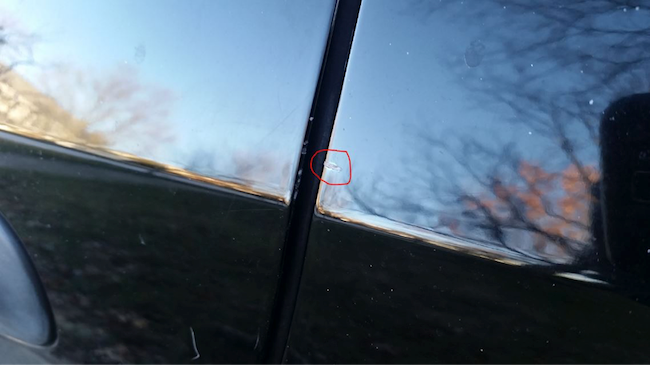
It turned out much better than if I had to freehand it with a small brush. Here’s an example where you can’t see the touch-up paint previously applied to other deep gouges:
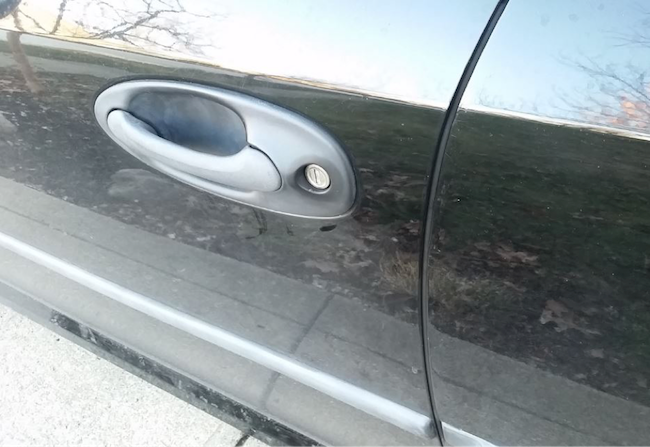
Here’s a different angle to the same spot. Light is reflecting onto the surface in a way where you can see the surface imperfections from the scratch grooves and the touch-up paint:
I was happy with the results overall. I cared most about protecting the metal and reducing the visual annoyance of bare metal showing alongside black paint. Touch-up paint doesn’t completely fill recessed scratch grooves but that’s not really what it’s designed for. If I choose to get this back to pristine shape then I’ll likely take it in and have a professional do it as it will require a lot more steps, tools and time. For now, I can focus on more important Volvo parts and apply the savings there.