- 01/22/2015
- 1 Min Read
- By: Alex Fiehl
How to Install Mud Guards on a Volkswagen CC/Jetta/Passat

Driving a four-door coupé in the winter is not my idea of a good time. The impracticality of this front-wheel drive sled is exacerbated by the wide front wheels (Skinny snows? Nope.) and poor rear visibility in all types of weather. Despite all of this, the car is still drop-dead gorgeous. I can put up with its strange shape and super-low ride height in exchange for some eye candy in the garage.
Since I care about this car, it's rarely driven in the winter. That's what the Volvo S70 is for - the perfect winter beater. But, it's also the perfect Volvo, and being a perfect Volvo means it's on jackstands a few weeks of every year by default. I need to get to work no matter the weather, so a set of mud guards and monster mats were in order to get my 2013 CC ready and safe for salt season when inevitability strikes.
Tools needed:
- T25 Torx Driver
- 5mm drill bit (3/16" or 4.762mm)
- 8mm drill bit (5/16" or 7.938mm)
- Large Pliers
- Genuine Volkswagen Mud Guard Kit (CC) Front - 3C8075111A
Installation
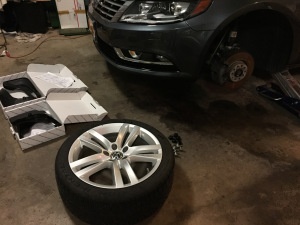
- Jack the vehicle and remove the wheel. Gather all of the hardware and prepare it for each side.
- Remove the existing T25 screw and discard it.
- Clean the area where the mud guard will sit. Any dirt trapped under the rubber will scratch the finish and cannot be maintained after installation.
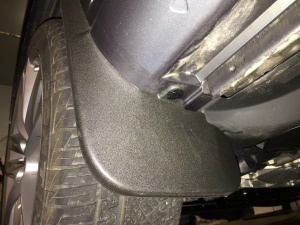
- Fit the mud guard to the car, taking care to fold the rubber tab underneath the fender lip so it disappears.
- With the mud guard in place, affix it to the vehicle using the new, longer T25 screw included with the kit.
- Drill into the fender liner with a 5mm bit, using the mud guard as a template. It may be helpful to turn the wheel to make room for the drill.
- Place the two push-pins into the newly drilled holes, and lock them into place.
No, it's not over yet. These mud guards were engineered for a Germany vehicle, so an excessive amount of fasteners were used in the interest of strength and redundancy. I can't imagine these will ever come off. Onward...
- Place the plastic tab into the mud guard, it should recess into the guard and lay flat. (It only goes on one way)
- Slide the metal clip into the plastic tab, sandwiching the folded flap behind the fender and the front of the mud guard.
- Using a pair of large pliers, grip the clip and the mud guard, compressing it into the plastic tab fully until it is seated.
Underneath the vehicle there will be one last hole. Drill through this hole using an 8mm bit, then insert the single large push pin and lock it closed. This vehicle is now equipped with the sturdiest mud guards on the road, protecting the paint from flying debris and alleviating the need for excessive car-washing in the winter. Though not listed on the website, FCP Euro has access to Genuine Volkswagen and Audi accessories via e-mail or phone.


