- 01/31/2017
- 3 Min Read
- By: Alex Fiehl
How to Change the Engine Oil + Filter on a Saab 9-3

For a 2004 Saab 9-3 Arc the owner’s manual states that the Saab Information Display (SID) will determine when an oil change is needed based on mileage and driving conditions. This is estimated at approximately 15k miles or 2 years (likely shorter if you’re driving it pretty hard).
It also specifically says to use approved oils that meet GM-LL-A-025 requirements to minimize oil sludge build up. I read many forum discussions about this and didn’t want to risk nightmare reports of oil sludge so I stuck with what’s recommended: Mobil-1 0w-40 full synthetic.
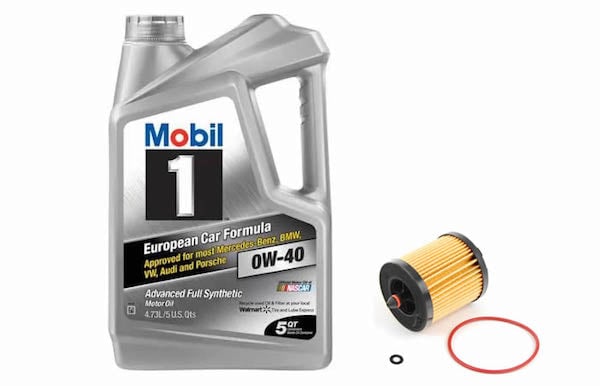
Make sure you also change the oil filter, especially if the oil change interval is pushing extended periods of 10-15k miles. This shouldn’t be skimped on and doesn’t cost much. The previous owner used non-synthetic oil filters and never had a problem with them so I kept that preference since I’m taking oil changes out to 10k miles versus the full 15k.
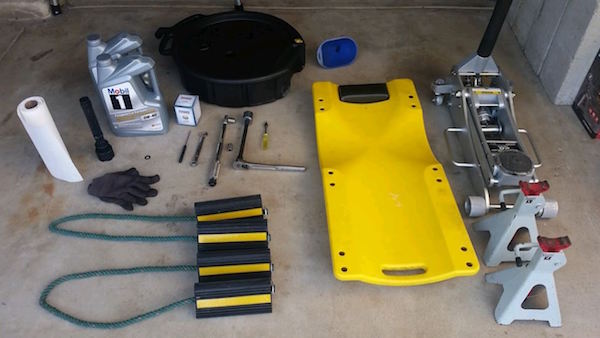
Tools you’ll need:
- New engine oil (at least 7qts of Mobil-1 0w-40 full synthetic)
- New oil filter
- New drain plug gasket
- 32mm short socket
- 15mm wrench
- 15mm socket
- Ratchets, extensions + torque wrench
- T30 torx bit + bit driver
- Angled pick
- Drain pan
- Floor jack, jack stands + creeper (car ramps should be fine too)
- Paper towel or rags
- Gloves + eye protection
- Oil funnel
- Wheel chocks (optional but recommended for safety!)
- Creeper (optional)
- Flashlight (optional)
Ready to complete an oil change?
On a 2004 Saab 9-3 Arc the engine’s oil filter can be accessed from above and you drain the oil underneath the car.
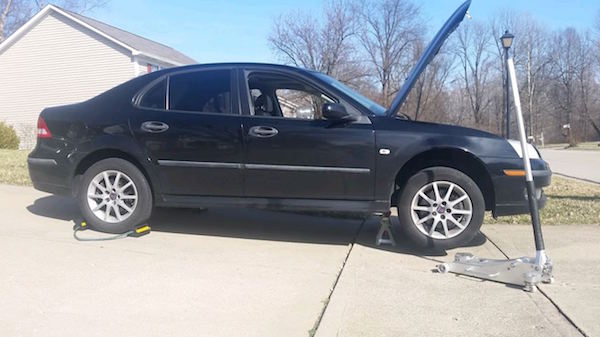
It would be ideal to park the car in a way that raising the front results in a mostly-level state. This helps to drain most of the oil while also getting an accurate read of the oil level after refilling it later. I have a decline in my driveway so I backed it in, raised the hood, placed wheel chocks at the rear tires, jacked up the front and positioned jack stands:
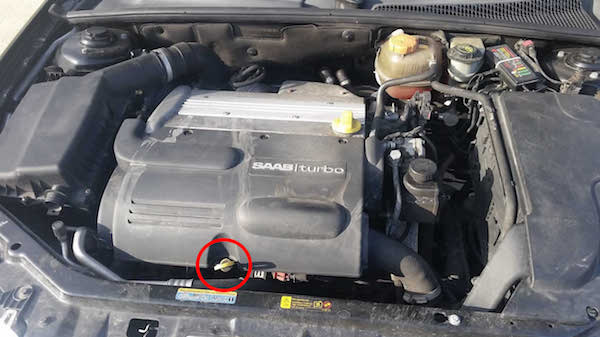
Crack open the oil filler cap to help drain the oil better:

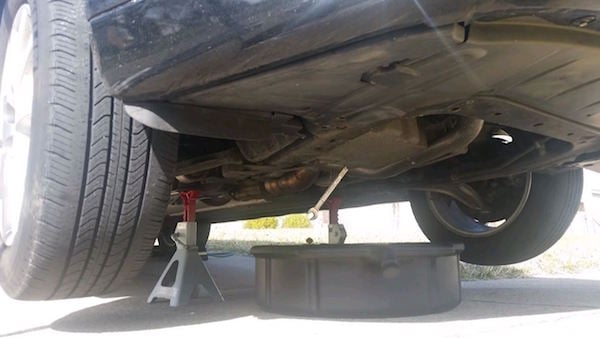
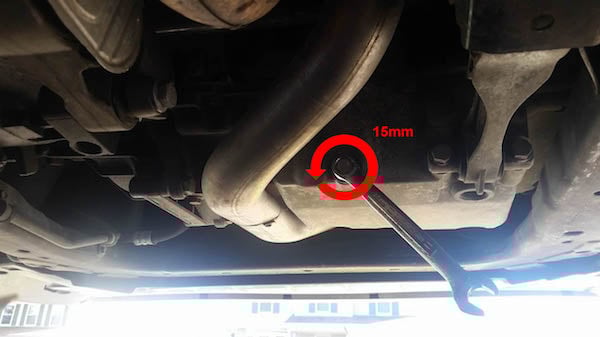
Position the drain pan underneath the oil drain plug:
Use a 15mm wrench to remove the drain plug. It will likely be stiff so use some elbow grease to break it loose.
Let the oil drain as it approaches slower drips. We’ll let this go on while we now focus out attention above the engine.

Use a T30 torx bit and bit driver to remove engine cover.
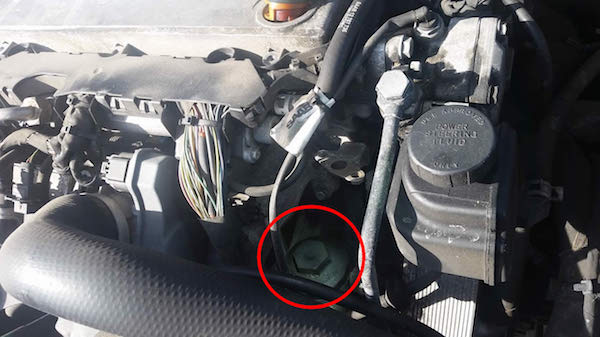
Locate the oil filter cap. I had to shine a light on it so you can see it down in there:
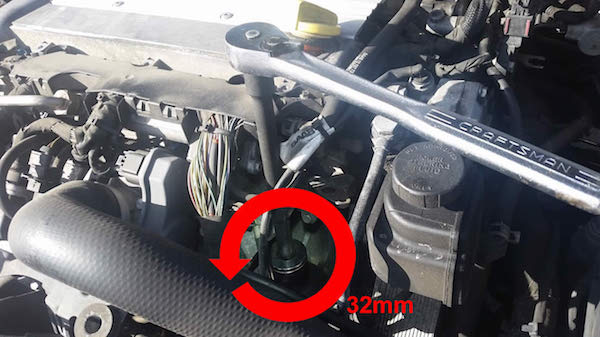
Use a 32mm short socket, a long extension and ratchet to break the filter cap free. You won’t have much clearance so once it’s loose enough to spin it off by hand take off the socket else you won’t have room to do so later.
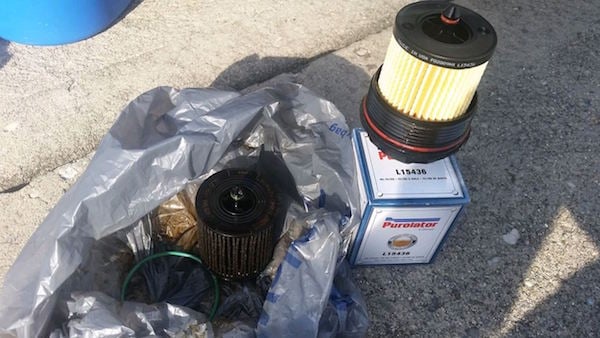
It’s tight clearance but eventually you’ll be able to work the old filter out. Here’s a picture with the old filter on the left and the new filter on the right:
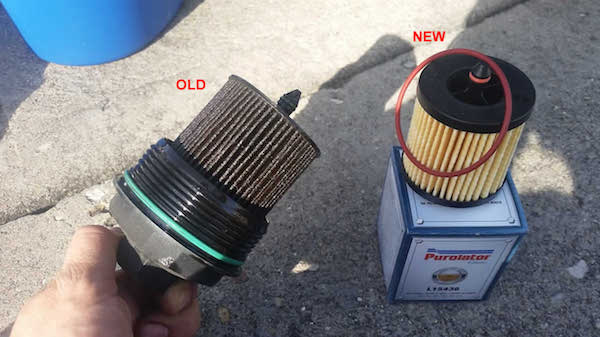
Remove the old filter and the gasket from the filter cap and install the new filter + gasket. Apply a very light coat of oil on the surface of the new gaskets:
Reassembly
Installation is essentially the reverse of removal:
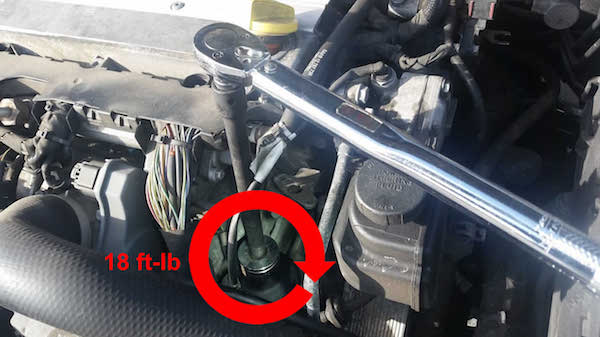
Work the new filter back in, thread it on by hand then torque it down to 18 ft-lb:
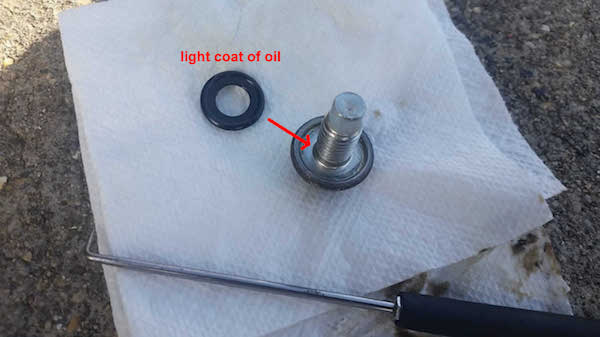
Remove the old gasket from the drain plug using an angled pick:

Clean up the drain plug, apply a very light coat of oil on the new gasket then install onto the drain plug:
Install and tighten the oil drain plug using a 15mm socket and torque it to 18 ft-lb. Wipe up any oil so it’s clean and dry. (Sorry, I forgot to take a picture here but this should be self explanatory.)
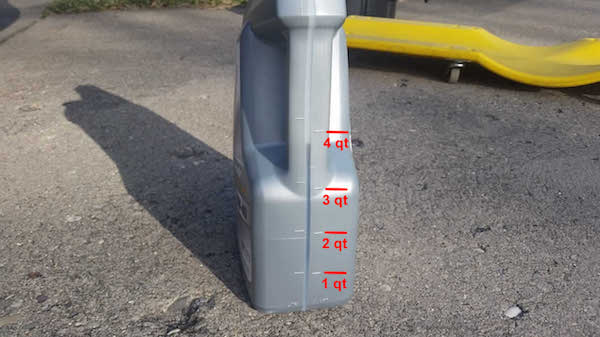
Using a funnel, carefully pour in 6 - 6.3 qts of new oil:
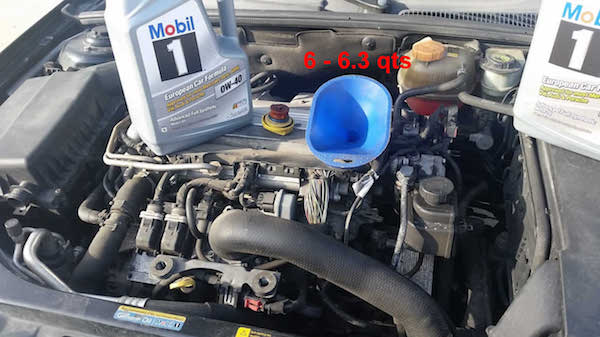
Use the oil container marks to figure out how close you are. In this case, I poured in approximately 6.3 qts after completely emptying the first 5-gal jug and reaching this point on the second 5-gal jug:
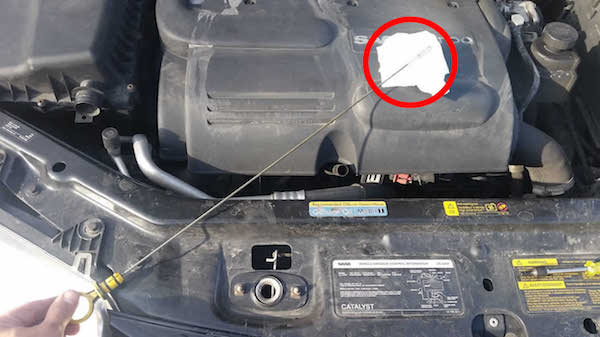
Tighten up the oil filler cap, reinstall the engine cover, locate the oil level dipstick and pull it out:
Wipe the end clean, start the car and run the engine for about a minute.
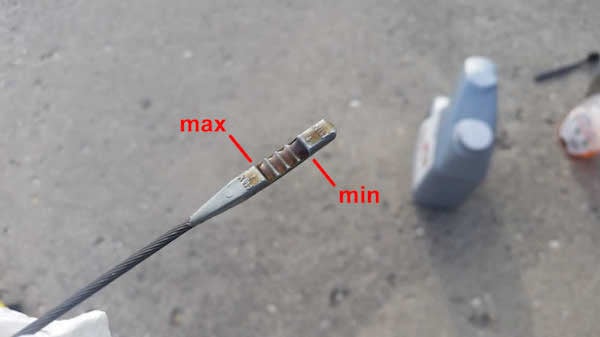
Shut off the car, wait 3-5 minutes, insert the clean dipstick and pull it back out to check the oil level. It should be between the max + min levels: avoid going over or under these marks as it can harm your engine.
Put the dipstick back in, close the engine hood, lower the car and remove+clean your tools. Place the used oil in an empty oil jug (or any sealed container) and drop it off later at a recycler: most auto parts shops will take it for free.
Reset Service Indicator
Reset the system’s service indicator by turning the ignition on and waiting for the system to start. Press CUSTOMIZE and navigate to: System Settings -> Service Info -> Reset Service Ind. Select "Yes" to confirm the reset procedure. Check if Service Data is set to fresh values: you should see oil quality set to 99% or 100%.
If you don't see the "Reset Service Ind." option it's likely because you're not under 10% oil life when it gets triggered. I experienced this as my oil life was 11%. The work-around is to change the date on the SID 1 to 2 years ahead and you'll then see the option. Just don’t forget to change back to the current year after you complete this step!


