I probably don’t need to bore you with my tales of vacuum leaks on my car. I finally relented and took it into a shop to get it smoke tested and traced my leak to the throttle shaft seal.
In the following diagram of the air intake system of my B234F engine, you can see the small seal as #20, Volvo P/N: 419568.
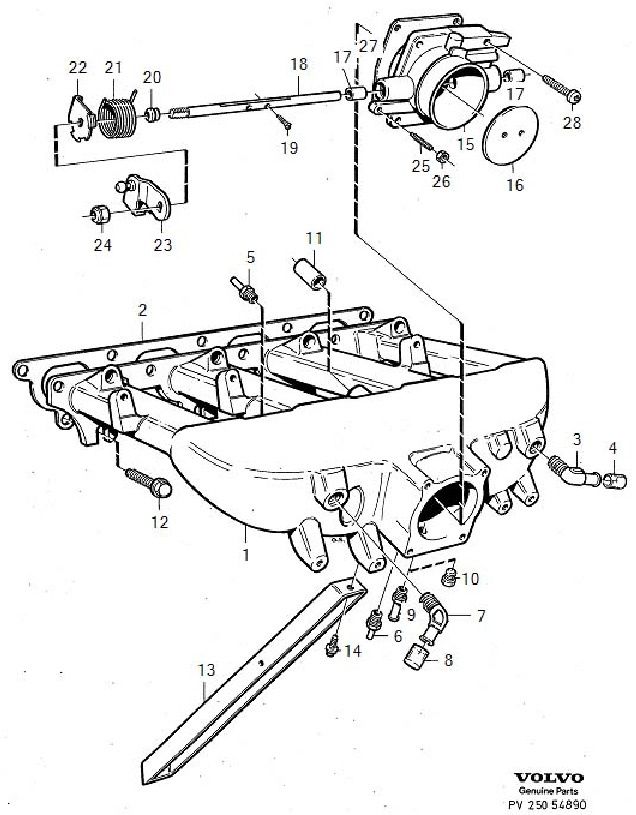 B234F intake diagram
Luckily, it’s quite a simple procedure.
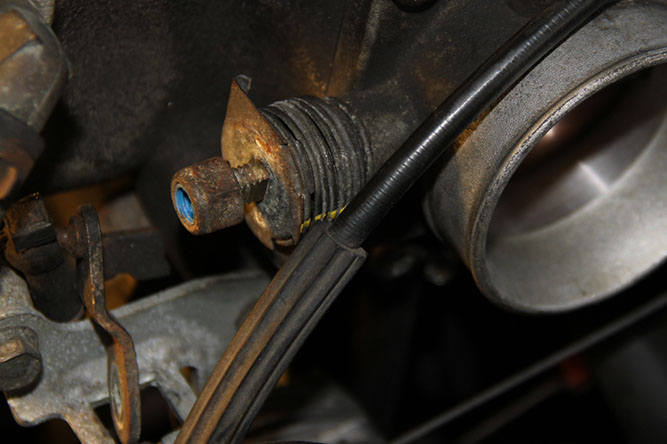
Step 1: Mark the throttle return spring
The throttle return spring doesn’t have much tension in it, but it is important to make sure that it is positioned properly. Take a paint pen and draw a horizontal line across it so you know exactly where to wind it back to after you have removed it.
 Step 1: Mark the throttle return spring
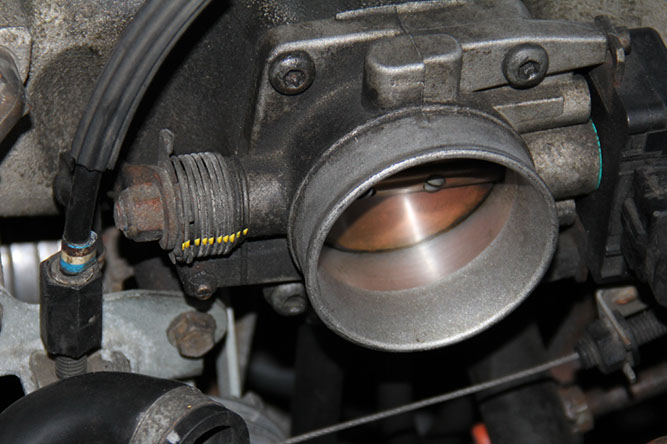
Step 2: Remove the locknut and intake tube.
Take a 14mm wrench and remove the locknut. You should have little to no difficulty in removing it. As the throttle plate rotates clockwise, you don’t need to hold the plate to remove the nut. Also remove your air intake tube to help you get better access to all your components.
 Step 2: Remove the Locknut and intake tube
 Good thing you marked the spring...
Step 3: Remove the throttle link (#22 on the diagram) spring, and the old seal
Take a small flathead screwdriver or a pick and an remove the old seal. My seal was falling apart so it was a very simple task to remove it.
 Step 3: Throttle Seal removal
Step 4: Clean the sealing area and Install the new seal
You can use some carb cleaner and clean the sealing area. You can use an old rag to get in there and get rid of the old residue.
Use some grease to lubricate the seal. Push the new seal in straight until it sits fully in the hole. Don’t be worried if the outside of the seal doesn’t touch the inner diameter of the throttle shaft cavity. It’s not designed to touch.
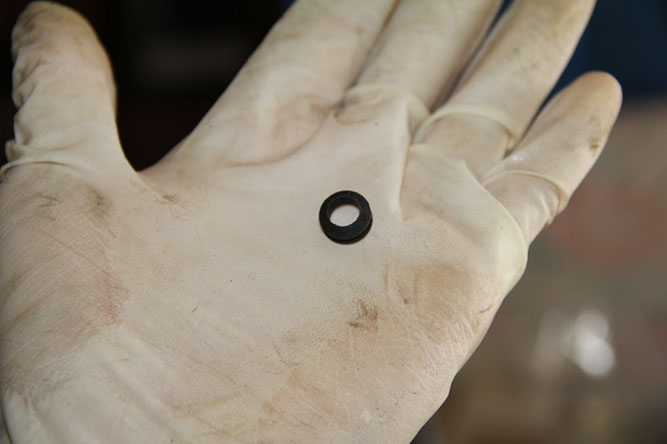 Step 5: New seal in hand
Step 5: Reassemble
Place your spring back on, making sure to reorient the spring properly, using your previously marked line as reference. Put the throttle linkage back on, and finally put the locknut back. If the nylon sealing of the nut has deteriorated, its not a bad idea to put some Loctite on it. Tighten the nut to hand tight, keeping in mind that you will need to secure the throttle plate with your hand in order to tighten fully. Whatever you do don’t use a screwdriver to hold the plate as you could damage it.
Start your car up, and hope for the best! Unfortunately, this didn’t seem to make much of a difference to my car, so it looks like it’s back to the drawing board.
About the Author: Tim Wong

Tim is a Canadian from Windsor, with a knack for taking things apart, and sometimes putting them back together. He is a mechanical engineer by day and backyard mechanic by night. His mantra in life is to never break another bolt.