A dead lightbulb in modern cars is extremely simple to diagnose. You’re driving along, and suddenly a message pops up on the dash, “Bulb Failure Position Light”. Easy button, hit. 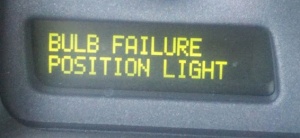
Cars with 80s and early 90’s engineering don’t have this luxury. Usually, a light will flicker on the dash indicating a bulb failure. Where? Well, that’s for you to figure out. Time to turn on all your lights and have a stroll around your car to figure out what’s gone wrong. For the most part, a bulb will be visibly out and all that’s needed is a click on FCP to buy the appropriate bulb.
When a bulb in the circuit is out, there is no resistance
It all started with a right turn. The usual ½ second interval of the turn signal ‘click’ turned into a ¼ second interval, ‘click click’. What happens is, the circuit knows there is a certain resistance from the bulbs themselves. A defined current is sent through the circuit. When a bulb in this circuit is out, there is infinite resistance, causing the working turn signal bulb to ‘click’ faster. In my 1991 Volvo 940, the only indicator of a burned out turn signal bulb is a faster turn signal ‘click’. The bulb failure light is for all other lights.
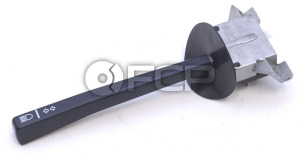 Volvo turn signal lever
Obviously, my first guess was the check the bulb. I turned on the four-way flashers and walked around only to find all my bulbs working perfectly fine. If my bulb is fine, the wiring must be fine as well since the four-way flashers work. I then flicked my turn signal on only to find the offending side of bulbs all flashing very quickly. What gives? Next step was to check if the turn signal stalk worked properly. Luckily, I had a spare and was able to plug it in. Not so luckily, the problem still persisted.
Next was the turn signal relay. I didn’t think this was the issue as the four-way flashers worked, but you never know sometimes. I pulled it out from under the dash and re-flowed all the soldered joints instead of replacing the relay. I did notice some cracks in the solder which might have contributed to the problem and figured I was doing preventative maintenance anyways. I plugged it in but alas, the problem persisted.
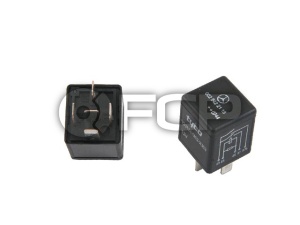 Turn signal relay
There was only one option left: check the connection at the bulb. I guess this should have been one of the first things to check, but I figured since the bulb worked, the connection was fine. Lo and behold, it was immediately obvious what my issues were. The connections at the bulb were oxidized. I can only surmise that the four-way flashers pushed out more current than the turn signal, overcoming the bad connection while the lower current from the turn signal was inhibited by the oxidation.
The fix was a simple bit of sanding on the bulb connection surfaces to clean it up, and that was it. The bulb went back in place and I was on my way, not a penny poorer, but a working turn signal richer.
In summary, If you have a suspected bulb failure do the following:
- Check proper operation of the bulb by activating all circuits which use that bulb. For example, flash your high beams if a low beam is out on single bulb headlight systems. If the bulb is not functional, replace it with a known-working bulb from the opposite side of your car to rule out any other issues.
- If your bulb still doesn't work, check the connections at the bulb. Make sure the wires are properly connected and all connections are free of oxidation. This includes both the socket and the bulb.
- Check the fuses. If in doubt, replace it and see if it changes anything.
- If the fuse is good, check any related relays in that lighting circuit. If you have a pin-out diagram, pull out the relay and connect +12 volts to the appropriate pins and ensure proper operation. If it doesn’t work, re-flow the solder with a soldering iron and test again before deciding to buy a new relay. Use a volt-meter to check continuity,
If these four steps don’t fix it, your best bet is to check the wiring diagram and look a little bit further into the circuit and where there are more possibilities of failures.
 About the Author: Tim Wong
Tim is a Canadian from Windsor, which means he has plans to use his Volvo as an emergency space heater. He is a mechanical engineer by day and backyard mechanic by night. His mantra in life is to never break another bolt.