- 02/01/2017
- 3 Min Read
- By: Michael Hallock
Elevate Volvo P1 Intercooler Installation and Review

Without the proper cooling of an intercooler, turbo cars are at risk for heat sink which can hurt performance and also cause serious engine problems. If you live in a colder climate, the stock intercooler may be sufficient for a mild power build. However, the stock intercooler has also proven inefficient for completely stock cars in hotter regions. If your car is being built for maximum performance, then upgrading an intercooler is a necessity.
The Elevate Performance Front Mount Intercooler is a track and street tested part providing maximum gains and cooling for P1 Volvos. Designed as a direct replacement for the Factory Intercooler, the Elevate unit is one of the largest intercoolers that can fit with no cutting or modifying required. Installation does involve removing the front bumper, however, P1 Volvos can be disassembled and reassembled in a matter of minutes with basic hand tools.
The follow instructions will step you through the process of removing the front bumper for intercooler replacement. This guide may also be useful for replacement of the front grille, washer fluid reservoir access, fog light installation, and many other tasks.
Necessary Tools:
- T20 and T25 torx bits and driver
- flat head screw driver
- 8mm socket with ratchet
- Bone Tool or butter knife
Bumper Cover Removal
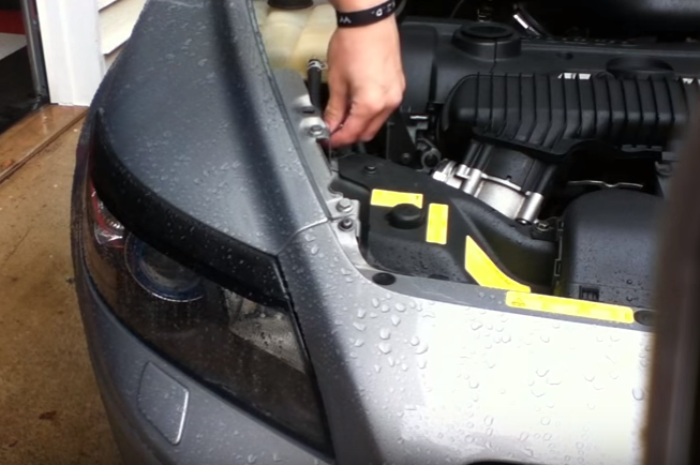
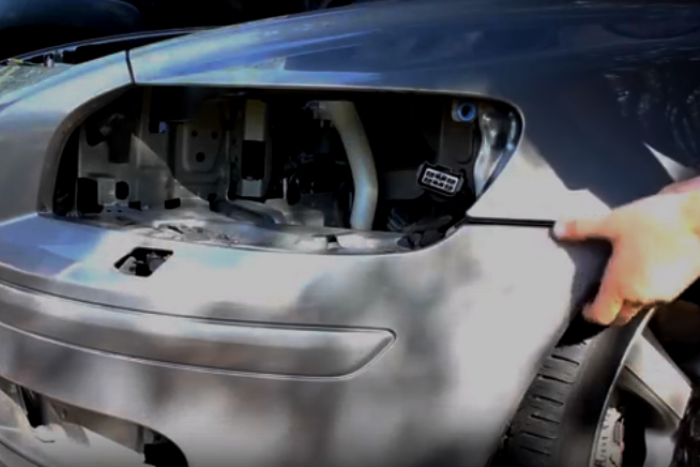
Step 1: Remove the headlights by pulling the retainer pin from the back of the assembly, sliding the headlight out of position, and disconnect the wiring harness. Further detailed instructions can be found under the maintenance section of the Volvo owner's manual.
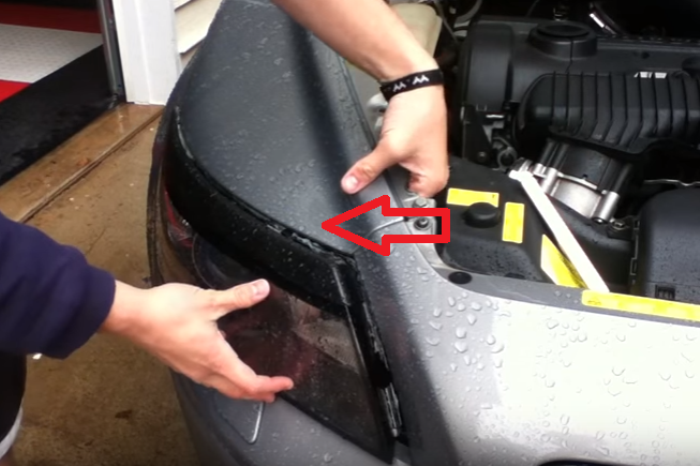
Step 2: Using your T20 torx bit, remove the two screws which hold bumper to the front fenders. Screw size may be T25 depending on model year.
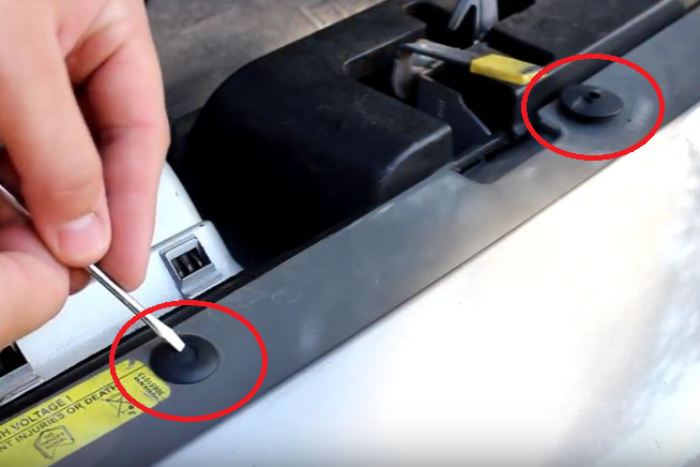
Step 3: The next step requires removing the five push clips which run along the top of the bumper near the hood release. Volvo used two different types of release clips, both pictured below. On the left is a retainer clip which requires using a flat head screw driver to push the center pin straight down. On the right is a retainer clip which requires using a flat head screw driver to pry the center pin upwards. In both cases, once the center pin has been released, the entire clip will lift straight out of the bumper.
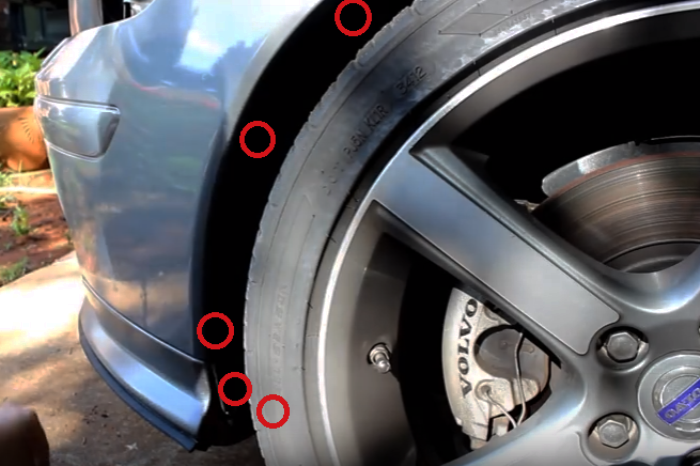
Step 4: With the upper screws and clips all removed, turn your attention to the wheel wells.There are five T20 screws which hold the wheel well liners to the front bumper. Turning the steering wheel to angle the front wheels will provide better access to these screws.
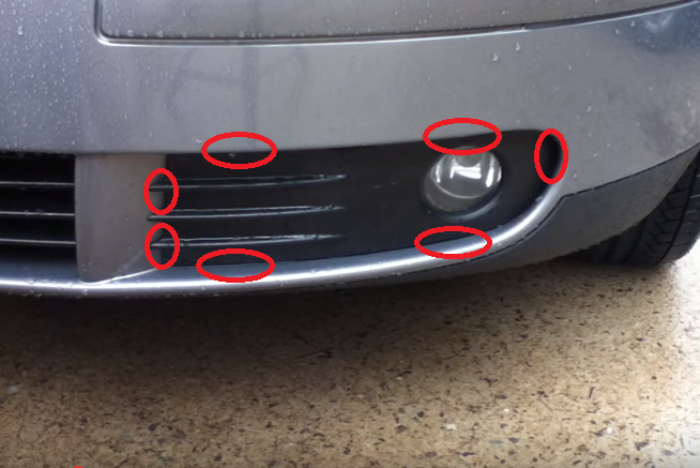
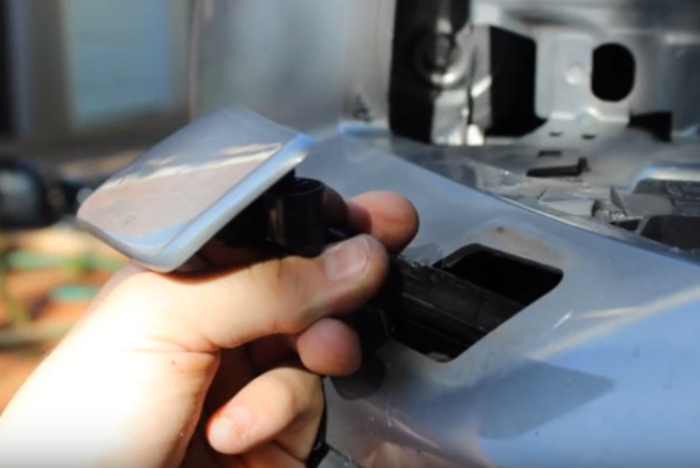
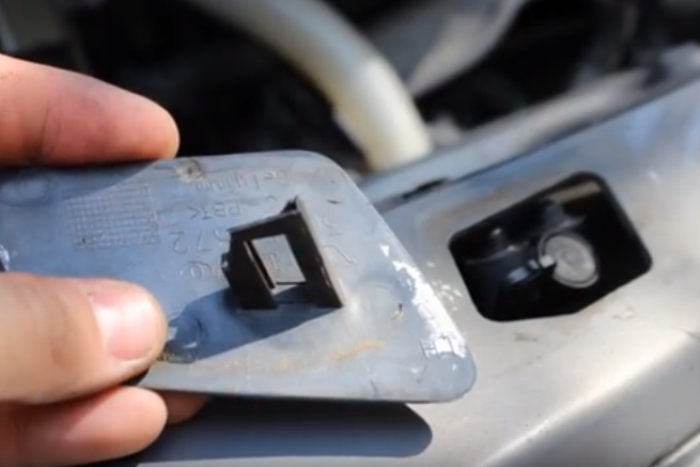
Step 5: If your vehicle is equipped with Fog Lights, you will need to remove the covers and the lighting assemblies. If you do not have fog lights, you may skip to step 7. To remove the fog light pry the fog light cover off using a bone tool or butter knife. There are seven tabs which hold this cover to the bumper; it is generally easiest to release the bottom edge first.
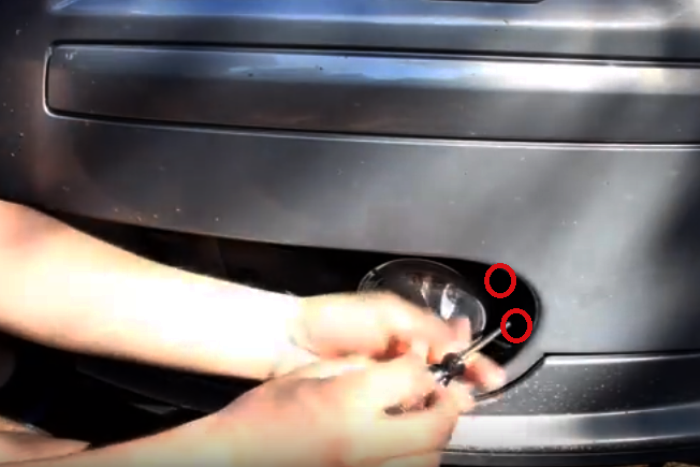
Step 6: With the cover removed, unscrew the two T25 torx screws which hold the fog light housing in place, then disconnect the light bulb plug from the back of the assembly.
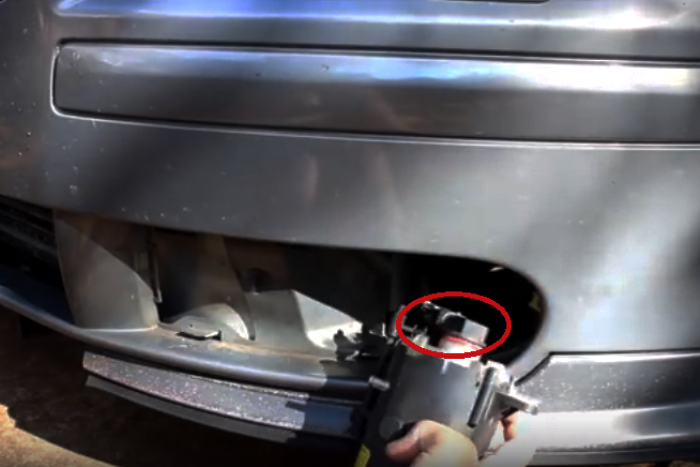
Step 7: If your vehicle is equipped with headlamp washer sprayers, you will need to disconnect the spray caps before removing the bumper. If your car is not equipped with these sprayers, proceed to step 8.
Step 8: Carefully lift the spray cap straight outwards. Using a flat head screw driver, release the plastic tab on the underside of the cap. Be exceptionally careful as this plastic may be brittle on an aging car. Once the cap is removed, the sprayer nozzle should recede back into the car.
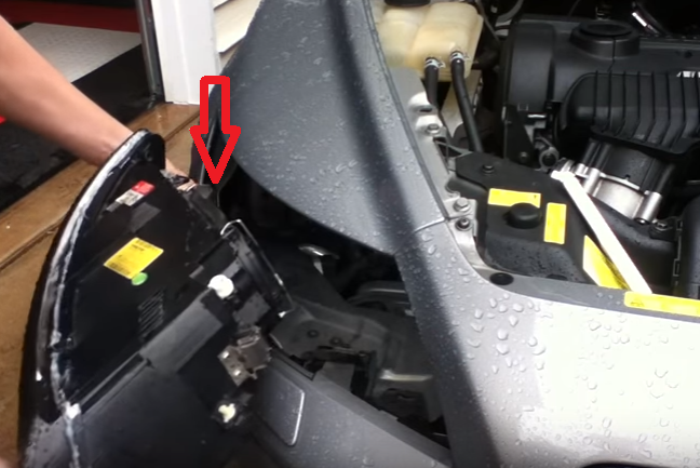
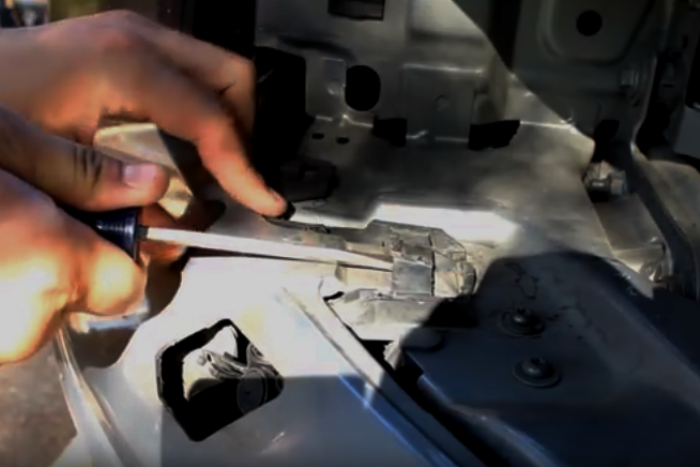
Step 9: Confirming that all components on the front bumper have been disconnected, use a flat head screw driver or bone tool to release the remaining two bumper tabs. These tabs are located underneath the headlight assemblies, one on each side of the car.
Step 10: The bumper is now free to be removed. Carefully prying from the sides, lift the entire front bumper off of the car. You may wish to place a towel or blanket along the ground to avoid scratching the bottom of your bumper cover.
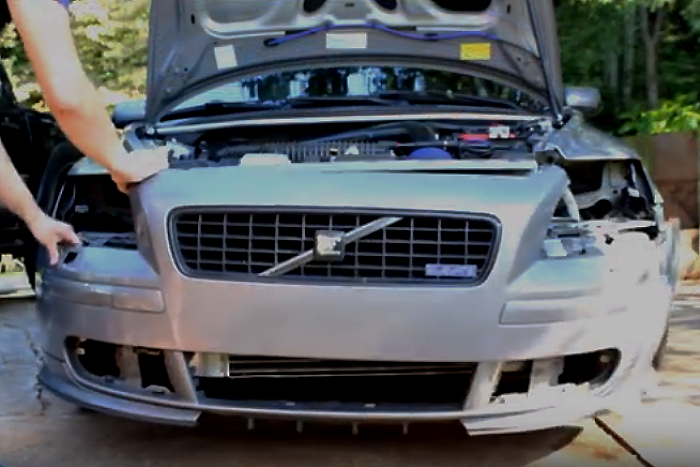
To reinstall the bumper, simply follow these instructions in reverse order.
Elevate Intercooler Installation:
Because the Elevate intercooler uses the same mounting points as the stock intercooler, swapping units is a straight forward task.
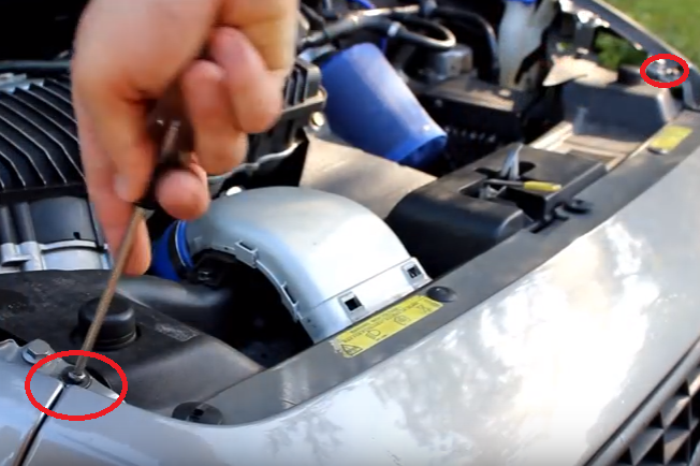
Each end of the intercooler has a single T25 screw which holds the unit to the frame of the car. After these screws have been removed, use the 8mm socket wrench or flat head screw driver to loosen the band clamps which connect the hoses to the hot and cold side of the intercooler.
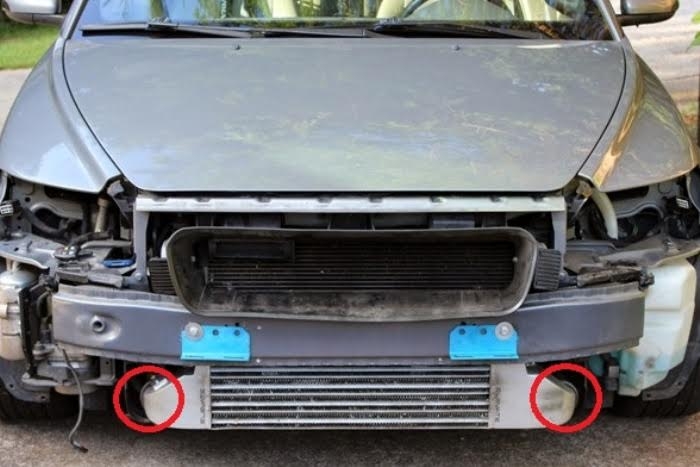
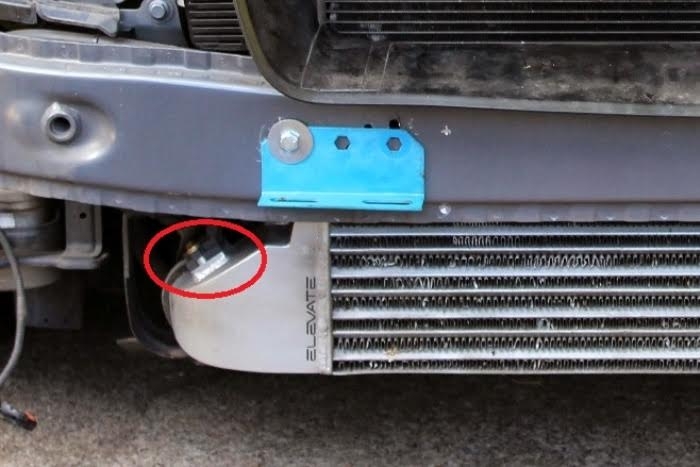
Before completely removing the intercooler from the car, disconnect the MAP Sensor, often referred to as the boost pressure sensor, from the cold-side end tank. This sensor is held in place using a single T25 screw.
Driving Impressions:
While a bigger intercooler adds more weight to the nose of the car, the difference is minimal and will generally go unnoticed. However, the enhanced power delivery is immediately felt and the car pulls noticeably stronger as boost begins to rise. Upgrading to the Elevate intercooler is an absolute necessity for a performance build and highly recommended for those who enjoy spirited driving during the hot summer months.