- 07/08/2014
- 4 Min Read
- By: Tony Robinett
E36 BMW M3 Upper Secondary Chain Tensioner Replacement

If you own an E36 BMW, no doubt you have experienced excess noise coming from the engine compartment. Finding the solution to these noises can seem taxing, especially since VANOS noises are so common with these cars. The VANOS ticking can sometimes overshadow other things making excess noise.
It was allowing my chain to have excess slop
 Last year I did a full rebuild of my VANOS unit in my E36 M3, including new seals and anti-rattle bearings. After the procedure I had a well-functioning and “quiet” VANOS - It was a dream come true. A few months after during a drive home from a car meet, I did a “fully responsible” street race. Immediately after I was done having my fun, I noticed what I describe as a loud, lifter tick-sounding, metal on plastic noise that followed the rev-range. Using a stethoscope I determined it was coming from the VANOS unit area. So, disappointed, I figured it was an extreme VANOS problem. After doing my teardown and inspecting my VANOS I realized it was still in perfect order. After some poking around I found that my upper chain tensioner was very easy to compress and came to the conclusion it was the culprit and not my VANOS. It was allowing my chain to have excess slop, resulting in the noise.
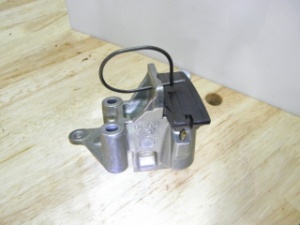
If you suspect your upper timing chain tensioner is failing or if you want to do some preventative maintenance; removal of the VANOS Unit is needed to replace the tensioner.
Let’s get started
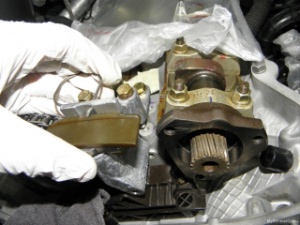
- Remove the VANOS unit.
- Remove the 4 torx bolts holding the exhaust sprocket together.
- Remove the retainer disc on the exhaust side.
- Next, remove the 3-10mm nuts holding the intake sprocket assembly together.
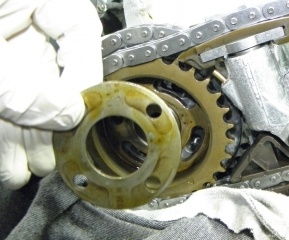
- Remove the 4mm thick disc over the spring diaphragm. Be sure to mark which faces mate with each other.
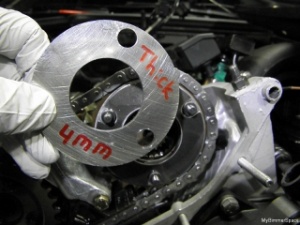
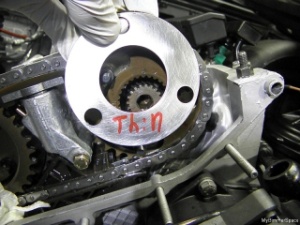
- Beneath the spring diaphragm should be a 2mm thick disc. Remove and mark the face that mates with the spring diaphragm.
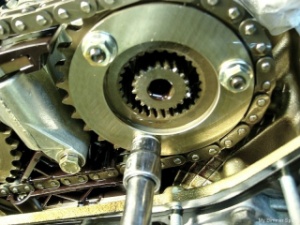
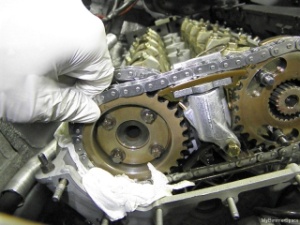
- Using a Sharpie mark the chain-to-sprocket relationship on both sprockets.
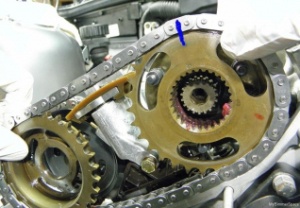
- At this point the intake and exhaust sprockets should come off together with the chain. Keep outward tension so the sprockets don’t fall in and lose their clocking position. Set them on a towel on a flat surface.
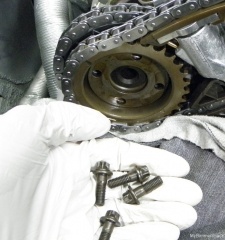
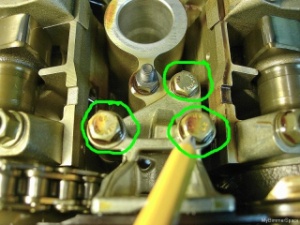
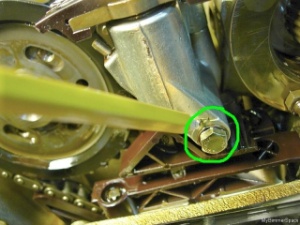
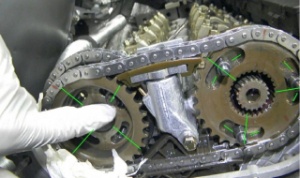
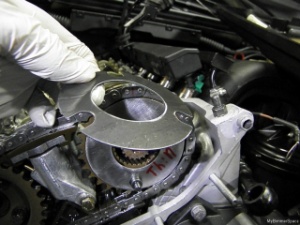
- Now we can remove the tensioner. There are 4 bolts securing it. One large bolt in the front, and 3 on top in a triangular formation. Remove them with a 10mm socket and remove the tensioner.
At this point you can inspect the guide rail. If you have a car with high mileage (100k and up) I recommend replacing the guide rail along with the tensioner. The guides can develop wear marks from the constant contact with the chain. Sometimes when the tensioner has been failing the chain slop will wear chain grooves into the guide rail or actually take chips out of the guide rail. To remove the guide rail, remove the 2 bolts securing it. When installing the new rail, torque the bolts to 8 ft-lb.
- Clean the mounting surfaces of the upper chain tensioner.
- Place the tensioner in its place and get the 4 bolts lightly snug, then torque them to 8 ft-lb.
Your new tensioner comes with a pin to keep it compressed, leave it in.
- Next, re-install your sprocket and chain assembly, be sure not to lose the clocking position between the intake and exhaust sprockets.
- To double check sprocket alignment, rotate the intake sprocket so the elongated holes are centered on the intake camshaft mounting studs. If clocking is correct, the exhaust sprocket elongated holes should be centered on the exhaust camshaft holes.
If the clocking is off by 1 tooth, it is very noticeable. If both are centered as close to center as possible, alignment is good.
- Next install the exhaust sprocket retainer plate that was removed earlier. Install the 4 torx bolts - only finger tighten so the sprocket can rotate.
- Moving over to the intake sprocket, lightly lubricate the 2mm disk, 4mm disk, and diaphragm spring with oil. Install the 2mm disk over the sprocket studs.
- Next, install the diaphragm spring over to 2mm disc. You want the spring to bow out towards you.
- Then, install the 4mm thick disc over the spring diaphragm.
- Now you can install the 3 nuts onto the intake studs. Torque them to 8 ft-lbs.
At this point grab the VANOS sprocket turning tool and rotate the sprockets back and forth, there should be a moderate drag. It will take effort but should not be locked.
At this point you are ready for VANOS install; please see the install section of my VANOS Replacement article. Working with the timing of your vehicle can seem intimidating, but if you work slow and organize the parts that you are removing this job can be done within a few hours.
About the Author: Tony Robinett
Tony lives in Spokane, Washington and is a 3-D Design Engineer, machinist, and welder. When he's not at work he is designing and fabricating parts for his M3, and other BMWs alike.


