
It often starts the same way.
You leave a friends house and they point to a fluid patch on their driveway. You stop the car and inspect closely and wipe your finger over the substance. First you smell the fluid, then rub it lightly between your fingers. Many car enthusiasts know this feeling and can often tell fairly quickly what the substance is. Apart from air-con water, this almost certainly means a repair job is imminent.
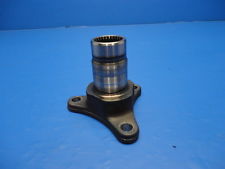
In this post I would like to focus on oil leaks coming from the rear of the gearbox housing seal and an economical repair I used recently on a BMW 525i. In most euro vehicles the output flange seal sits snug behind the output flange at the rear of the gearbox. Despite being tucked away there, it is still exposed to the elements. Other manufacturers use a slip yoke design and this is even more susceptible because of the slip yoke movement in and out of the rear housing; in any-case this is exacerbated because areas exposed under the car are often more susceptible to wear because of the road dirt, grime and dust they encounter on an almost permanent basis. Over time this eventually wears a tiny groove into the machined surface of the output flange.
A word of caution though, oil leaks from the rear of the gearbox housing seal can be caused by more serious problems such as damaged bearings or propshaft damage causing vibration and oil leaks. So, check the rear output shaft play on the bearing and ensure this is within tolerance and replace/repair as necessary. Also this is a good time to check for any other possible causes for the leak.
Remove the output flange to allow access to the seal. On most vehicles this is done by removing the prop-shaft from the vehicle and removing the large centre nut of the flange. The process for removing the prop-shaft is quite simple and similar to that explained in an earlier post of mine about uni-joint wear.
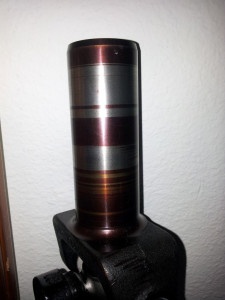 Once the output flange is out you can inspect the machined surface for wear. If you are lucky the surface is intact and the leak is caused by a worn and hardened seal. Seal replacement is the fix. However any wear at all on the machined surface of the flange will likely result in oil seepage/leak from the rear of the gearbox housing even if a new seal is installed. Many mechanics will tell you that the only fix is to replace the seal and the flange. If the wear is minute and I mean very MINUTE it maybe able to be resurfaced with a piece of emery cloth, however, this rarely works well and you are often under the car within weeks doing the same repair again. Another fix is to send the flange to a machine shop for grinding. But in my experience the most economical and permanent fix is to fit a Speedi-Sleeve over the flange. The process is not too difficult and can be done at a fraction of the price. Some vintage cars can also be fixed in this way if a new flange or slip yoke is no longer available.
First remove the seal and replace with a new one. Be very careful when prising out the old seal as you don’t want to damage the seal carrier or the output shaft of the gearbox. I use a proper seal removing tool, but the right size screwdriver will often do the trick. Replace with a good quality seal, and lubricate the rubber with whatever oil you’re running in the gearbox. I also use a very fine layer of silicone sealer in the carrier to assist in preventing oil seepage and also this can assist in seal insertion. Make sure silicone is not able to make its way up into the rear of the carrier surface of the gearbox. Also ensure you press the seal in evenly, because if it kinks even slightly you could damage the seal and/or carrier and also prevent the seal from doing its job. If I don’t have the special seal insertion tool from the dealer I use a large socket or suitable piece of pipe that fits snug on the outer edge of the seal and tap very gently until it is seated nicely in the carrier.
Now for the Speedi-Sleeve
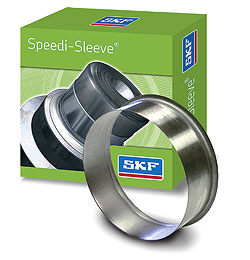
Speedi-sleeves come in all shapes and sizes, typically they are around 0.011" thick and will come in the diameter and length needed to cover your flange or yoke. They are thin enough so that you are able to use the original size seal. Follow the instructions provided with the Speedi-Sleeve. Usually all that’s needed is to clean the machined surface of the flange then press/gently tap the sleeve over the machined area of the seal contact area. No sealant is usually used between the sleeve and the flange, and heat is not applied as this can result in distortion and change the properties of the sleeve. But again, some sleeves have different installation requirements and the amount of wear on the flange may also require more than just a clean, so check the instructions.
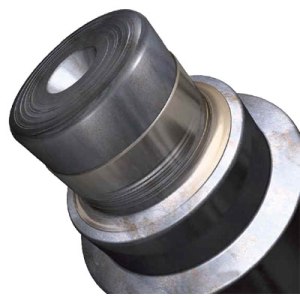
Once sleeve is in place reassembly is easy, just make sure vehicle is in gear so that when inserting the flange you can turn it to engage the teeth in the output shaft. Check and top up the gearbox oil, and no more oily driveways!


