- 02/02/2017
- 1 Min Read
- By: Doug Dykaar
2001 W210 E320 4matic Ball Joint Replacement DIY (Wagon)

Worn balljoints may introduce vibration at highway speeds, vagueness in the steering and in extreme cases clunking noises in the suspension. At the first indication of wear, or if the boots are broken, these balljoints should be replaced. Most E/C/CLK and SLK models from the mid-90’s through early 2000’s share the same lower balljoint. This joint was also used in all 4Matic W220’s.
Symptoms:
Vibration at ~60 mph. Different from the bouncing over bumps when the shocks go bad.
Tools:
- 27 mm (axle nut)
- 21 mm (old ball joint nuts)
- 22 mm (new ball joint nuts)
- 17 mm (wheel nuts) sockets
- big ball joint press
- torque wrench
- open end wrenches (not required)
- jack(s)
- jack stands
Note: I don’t know why Mercedes uses oddball nut sizes. The old ball joint nuts were 21 mm, the new ones are 22 mm. Both sets came from FCP.
Procedure:
Step 1
Loosen the wheel nuts, jack up the car, and get a jack stand under there.
Step 2
If you didn’t loosen the axle nut with the car on the ground and someone pressing the brake pedal, you’ll need to wedge something in the rotor
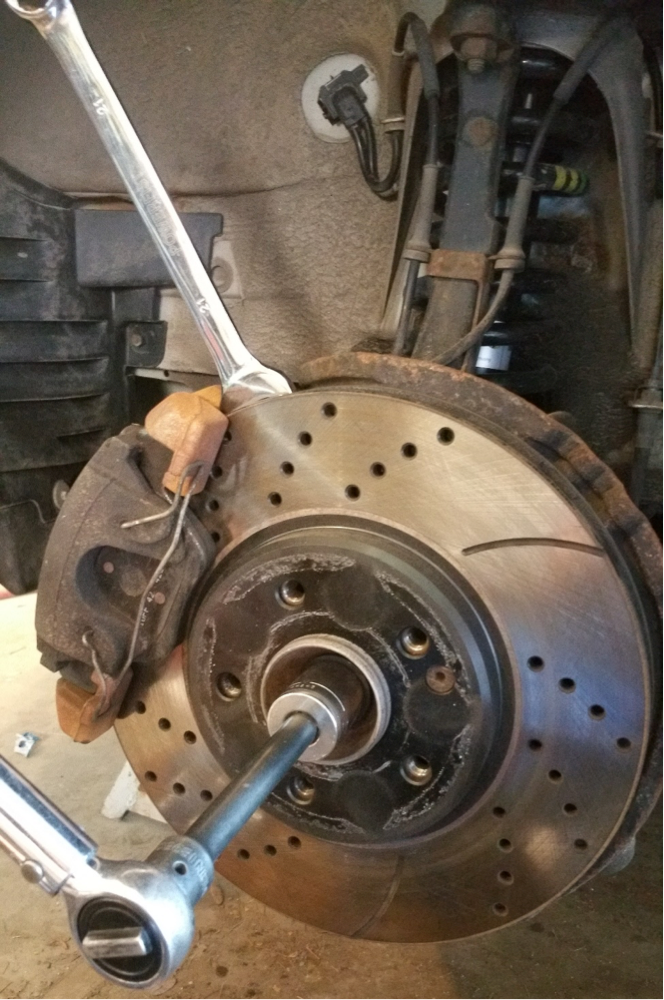
Step 3
Loosen the nut in the ball joint and push the ball joint tool over the rubber cover on the wheel hub

I left the nut on so as not to distort the threads. Not necessary as this ball joint is toast.
Step 4
With the lower joint off, the wheel hub can be slipped off the axle shaft and tied off (mostly) out of the way. I use heavy gauge insulated solid copper wire as it’s flexible and reusable. A tie down also works.
Step 5
Push the ball joint tool onto the upper ball joint mount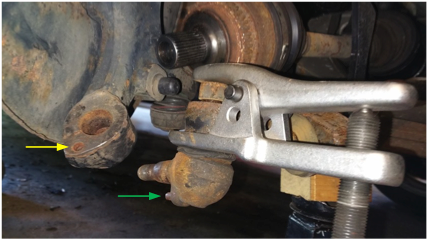
I still have the nut on and the ball joint was so loose it spun the ball after I popped it out, so I had to press it back in a bit. Note that I used a jack to lift the control arm slightly to get the bottom joint out of the wheel hub easier after the joint was popped. Also note the hole on the wheel hub (yellow arrow) where the alignment pin (green arrow) needs to go.
Step 6
Old and new ball joints. I knew these were bad because the boot had decayed and was open to the elements.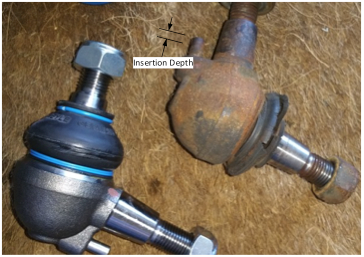
Note the alignment pin on the bottom. You can see from the old ball joint that the alignment pin doesn’t go in all the way: there will be a gap between the ball joint casting and the wheel hub. Make sure the new one gets the pin in the hole in the hub when you install it.
Step 7
Here is the new ball joint installed, pin in the hole and note the gap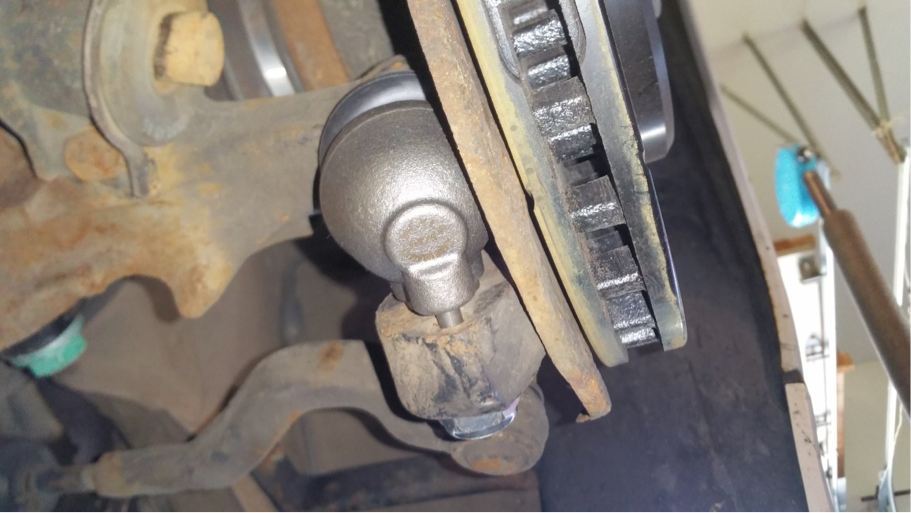
Both nuts are torqued to 105 Nm. I installed the top first, then maneuvered the wheel hub back into position, getting the axle shaft back in the hub, screwing the axle nut in (to keep the axle from slipping back out) and then wrestling the ball joint bottom into position. As noted, make sure the pin is in the hole.
Step 8
Note that the torque for the axle bolt (it’s a different value (280 Nm) if you have the nut) is 270 Nm. My torque wrench tops out at 150 foot pounds, so be aware. One of the axles was recalcitrant about going back into the hub, so I used the axle bolt to pull it back into place.
Shop Mercedes Ball Joint Front Lower