BMW introduced the pencil-style ignition coil to the US market in 2001 with the S54 engine. The one-piece (coil and spark plug connector are integral) design simplified the preceding two-piece, and within a few years, all of BMW’s engines were using the new style. The M54 engine received these ignition coils for 2003, starting with 9/2002 production cars. While the M54 was still in production, the N52 engine entered the market with the E90 chassis in 2006. That's where things got a little strange.
BMW N52 Ignition Coil Plug Update
On early production N52 engines, BMW introduced a new part number for the pencil-style ignition coil, which used a different 3-pin connector than what had been seen on the S54 and M54 engines. It was used only on the earliest engines, up until 4/2006. After 4/2006, BMW equipped all N52s (and other engines) with the older style connector first seen on the M54’s coil.
What makes this matter more confusing is BMW discontinued the early production N52 specific ignition coil on 6/19/2017. After this discontinuation, BMW updated ETK, requiring that all N52s need to use the same ignition coil, including the early N52s with different connectors. All engines still using the short-lived connector now require an update to the more common style. You can see this reflected in the latest information from ETK:
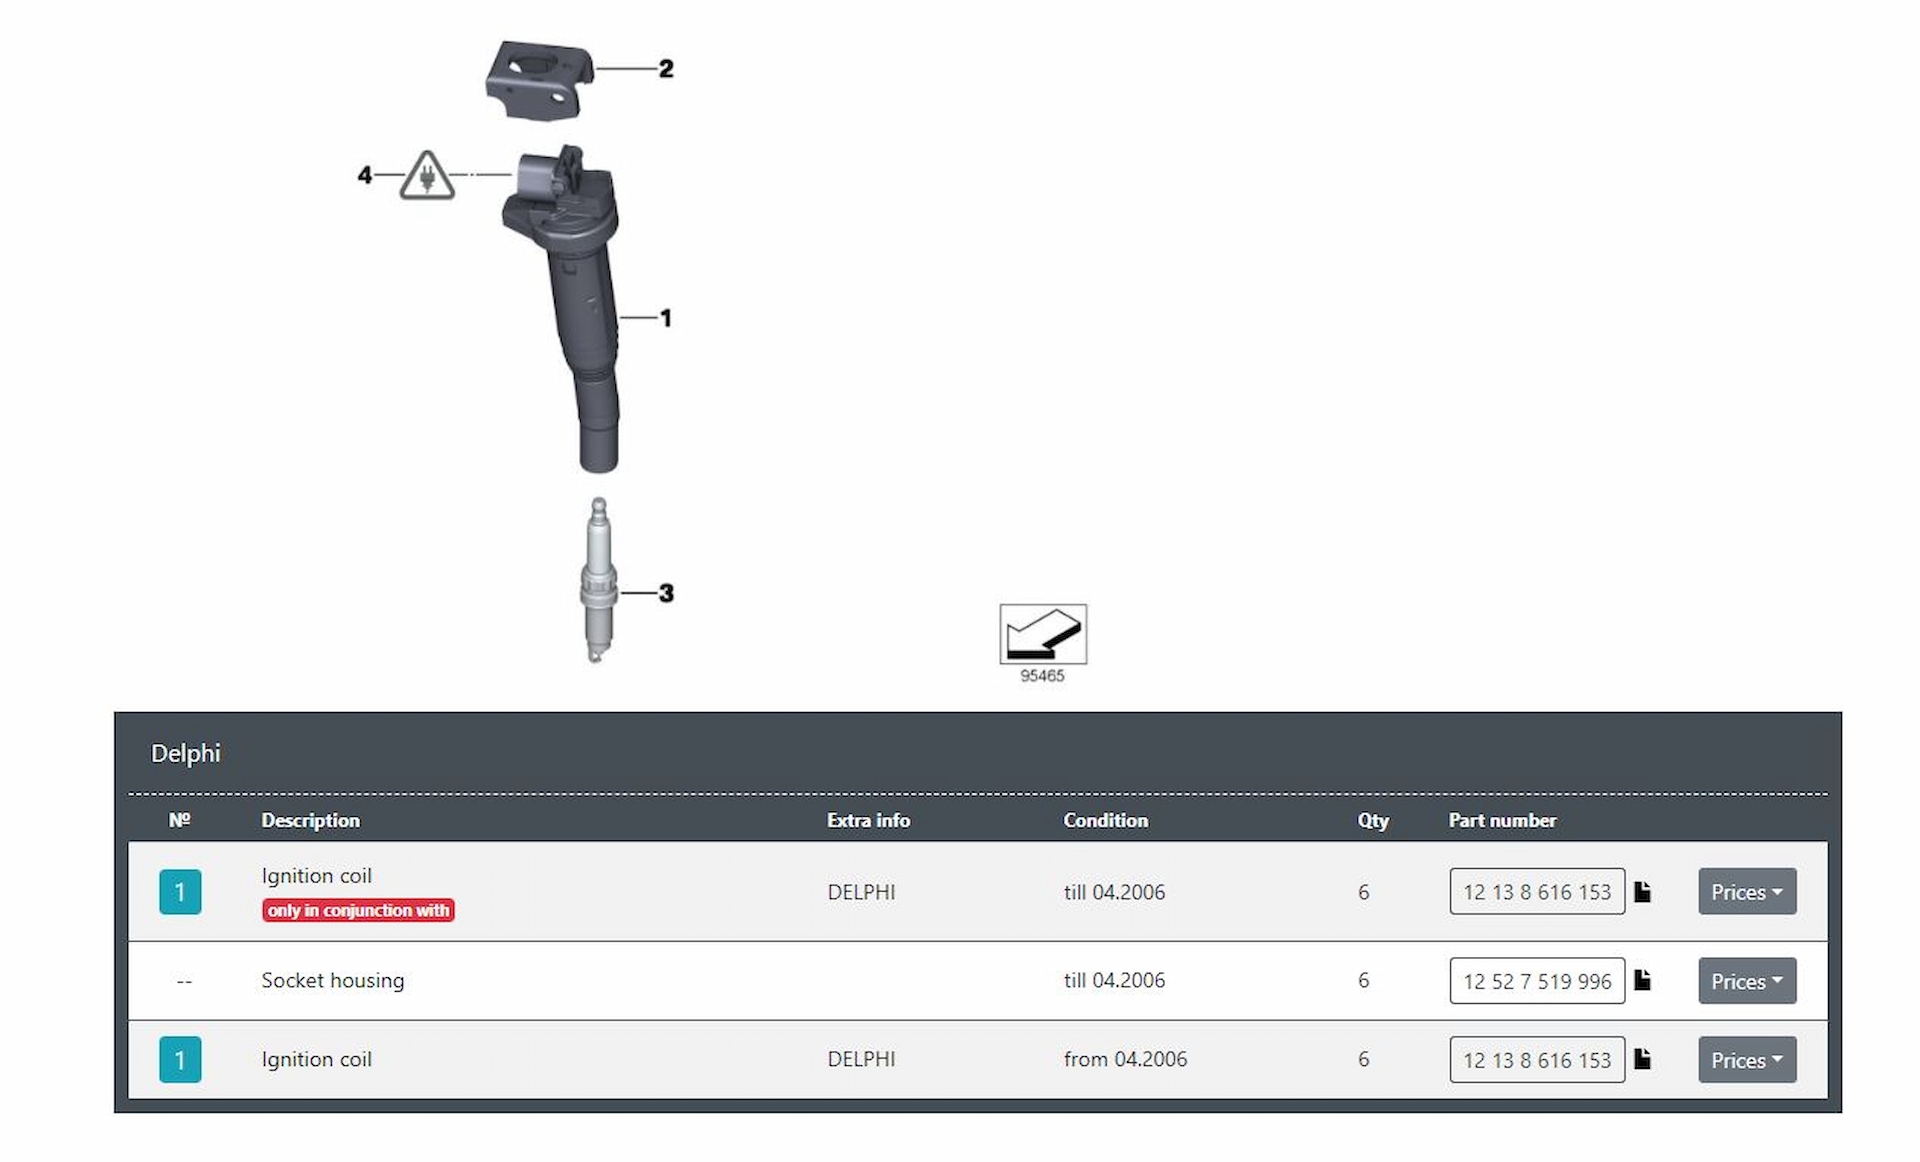
“Till 4/2006” requires ignition coil 12138616153 and connector 12527519996, while “from 4/2006” only requires ignition coil 12138616153. This is due to the discontinuation of p/n 12137594936, which used the original style connector on N52s built before 4/2006.
Parts & Steps Required To Update BMW N52 Ignition Coil Connectors
In order to perform this update, you’ll need the appropriate connector terminal removal tool which we carry at FCP Euro, CTA 9812. In addition, you will need the updated connector to match your newer style ignition coils, p/n 12527519996. This connector can be used with ignition coil p/n 12138616153 or p/n 12138647689. Once you have these parts and tools, all you need to do is follow our step-by-step guide in the linked video: