
After 17 or more years in operation, a Volvo 850's blower motor might start to get a bit vocal. The bearings dry out, and the motors tend to howl or squeak. Don't let this noise turn into something more serious, as increased current draw from the blower motor can also cause premature failure of the blower motor resistor. With summer arriving, a properly functioning A/C system is a wonderful thing, so let's get to it!
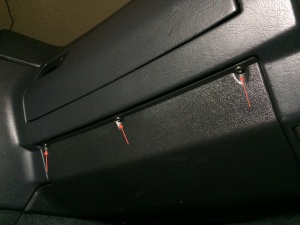
1) Remove the three T25 torx screws holding the lower dash cover on. This panel drops down, then slides out towards the seat.
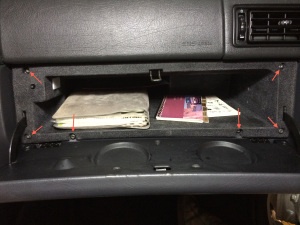
2) Remove the six T25 torx screws holding the glovebox into the dashboard.
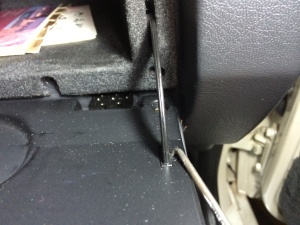
3) Using a pick or small flathead screwdriver, insert the tool into the sides of the glovebox support arms. Gently pry towards the tab to pop them out of the glovebox door. This may be a bit tricky, and the plastic can be very brittle, so be careful.
4) Slide out the glovebox, and collect the loose arms.
5) Remove the three 13mm nuts that hold the knee bolster onto the lower dash.
6) Remove the knee bolster by pulling it down and out. It will fight you - the bolster is tightly snapped on to the threaded studs. Give it a yank and it will pop out.
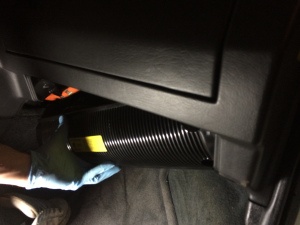 Drop down the driver's side first, then passenger.
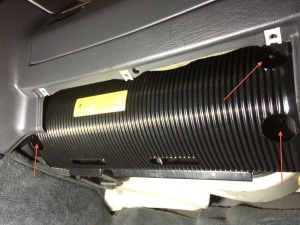
7) With the blower motor visible, disconnect the power wire, and slide off any wires or
Connectors that affix on to the blower motor.
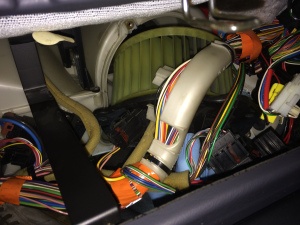
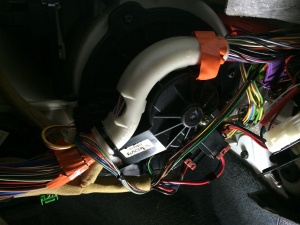
8) Remove the four T25 torx screws holding the blower motor on to the HVAC box. Gently pull the blower motor out of the HVAC box, rotating it as necessary to clear the bracketry and wires of the lower dashboard area.
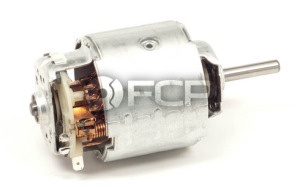
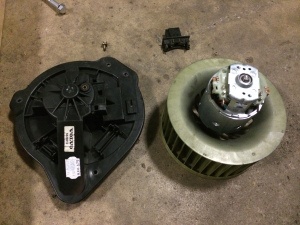
At this point, the entire blower assembly can be replaced, or just the motor can be replaced using the old blower assembly. The motor itself is a Bosch 0130111134, while the OE Behr blower assembly 6820812 can be also purchased for a quicker installation. Replacing just the motor only takes a few more minutes and can save you money.
 Blower Motor
If replacing the entire blower assembly, installation is reverse of removal. To replace just the motor, read on.
1) Remove the T20 torx screw on the back of the blower.
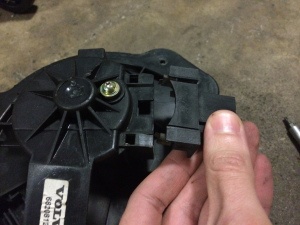
2) Gently pry up the two tabs holding the electrical connector on to the blower, and slide it horizontally off the unit.
3) Gently pry the blower cage down to extract the motor out of the black plastic housing.
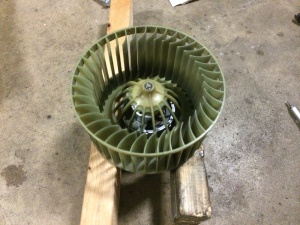
4) Rest the blower's "Squirrel Cage" on two blocks of wood to suspend the motor off of your work surface, and tap the motor's shaft out of the blower cage. I recommend a flat punch to avoid slipping around. *Note the original depth of the shaft into the cage, as you'll need to install the new motor to the same depth*
5) Apply a dab of grease to the hole on the blower cage, and flip it face down. Insert the new motor's shaft into the hole and gently tap the motor in with a hammer. Stop when the shaft is at the previously noted depth from step 4.
6) Slide the motor into the plastic blower housing, install the T20 torx screw, and slide on the electrical connector. Done!


