- 06/30/2020
- 5 Min Read
- By: Christian Schaefer
How To Replace A Volvo PCV & Oil Filter Housing - P1 Volvo XC70, S40, C70 & More

The PCV system is a universal concert for all engines. While under load, pressure can build up in the oil pan and crankcase, where there shouldn’t be any pressure. It’s the PCV’s job to open up and allow the engine to pull this pressure up through the manifold and into the combustion chamber. However, at idle, the engine isn’t building pressure as it does while under load, and the PCV is supposed to stay shut. P1 chassis Volvos are known for having faulty PCV systems causing a large amount of vacuum at idle. This unwanted vacuum will cause seals to wear, leading to oil leaks.
The P1 Volvo chassis PCV housing is also part of the oil filter housing. The oil will need to be drained during this job, so you’ll need an oil change kit as well as the PCV parts. Replacement of the PCV housing isn’t a monumental task by DIY standards, but it will require some patience. Follow along below to make sure all of the steps are done correctly.
Volvo Models & Years applicable:
|
|
|
|
|
|
|
|
What are the symptoms of a bad Volvo PCV system?
- A whistling or sucking sound coming from the valve cover
- Suction coming from the oil fill cap
- Idle speed fault code
- Rough running at idle
The best way to check if this is our problem is by removing the oil cap. If there is intense suction coming from under the cap when it’s removed, the diaphragm in your PCV valve has been compromised, and it will need a replacement.
How long will it take to replace a Volvo PCV/oil filter housing?
Removing the PCV housing is a tedious task. Set aside an hour or two to give yourself time to do it slowly and carefully.
How much will it cost to replace a Volvo PCV/oil filter housing?
The Volvo PCV/oil filter housing replacement kit costs around $280, and the oil change kit will run just under $70. Getting the parts from a dealership will cost far more, and the cost of labor will run you around the same as the parts cost from us.
Doing the job yourself will cost less than half of what a dealership or independent shop would charge, and it’ll give you valuable DIY experience.
Tools required to replace a Volvo PCV/oil filter housing:
- 8mm Socket
- 10mm Socket
- 10mm Wrench
- 17mm Wrench
- 36mm Oil Filter Socket
- ⅜” Ratchet
- Rachet extensions
- T25 Torx
- T30 Torx
- Flathead Screwdriver
- 90° Pick
- Snips
- Razorblade
Parts required to replace a Volvo PCV/oil filter housing:
Steps required to replace a Volvo PCV/oil filter housing:
Step 1: Remove the intake components
Several components of the intake system need to be removed to get to the PCV housing. Start by removing the intake pipe from the airbox. Use a flatbed screwdriver to loosen the clamps on the airbox side and the turbo side.
Two 10mm bolts hold the intake pipe to the engine. One bolt is on the back of the engine, and the other is tucked down by the airbox. There will be a vacuum line connected to the pipe just after the airbox. Push down on the blue part and pull the line off.
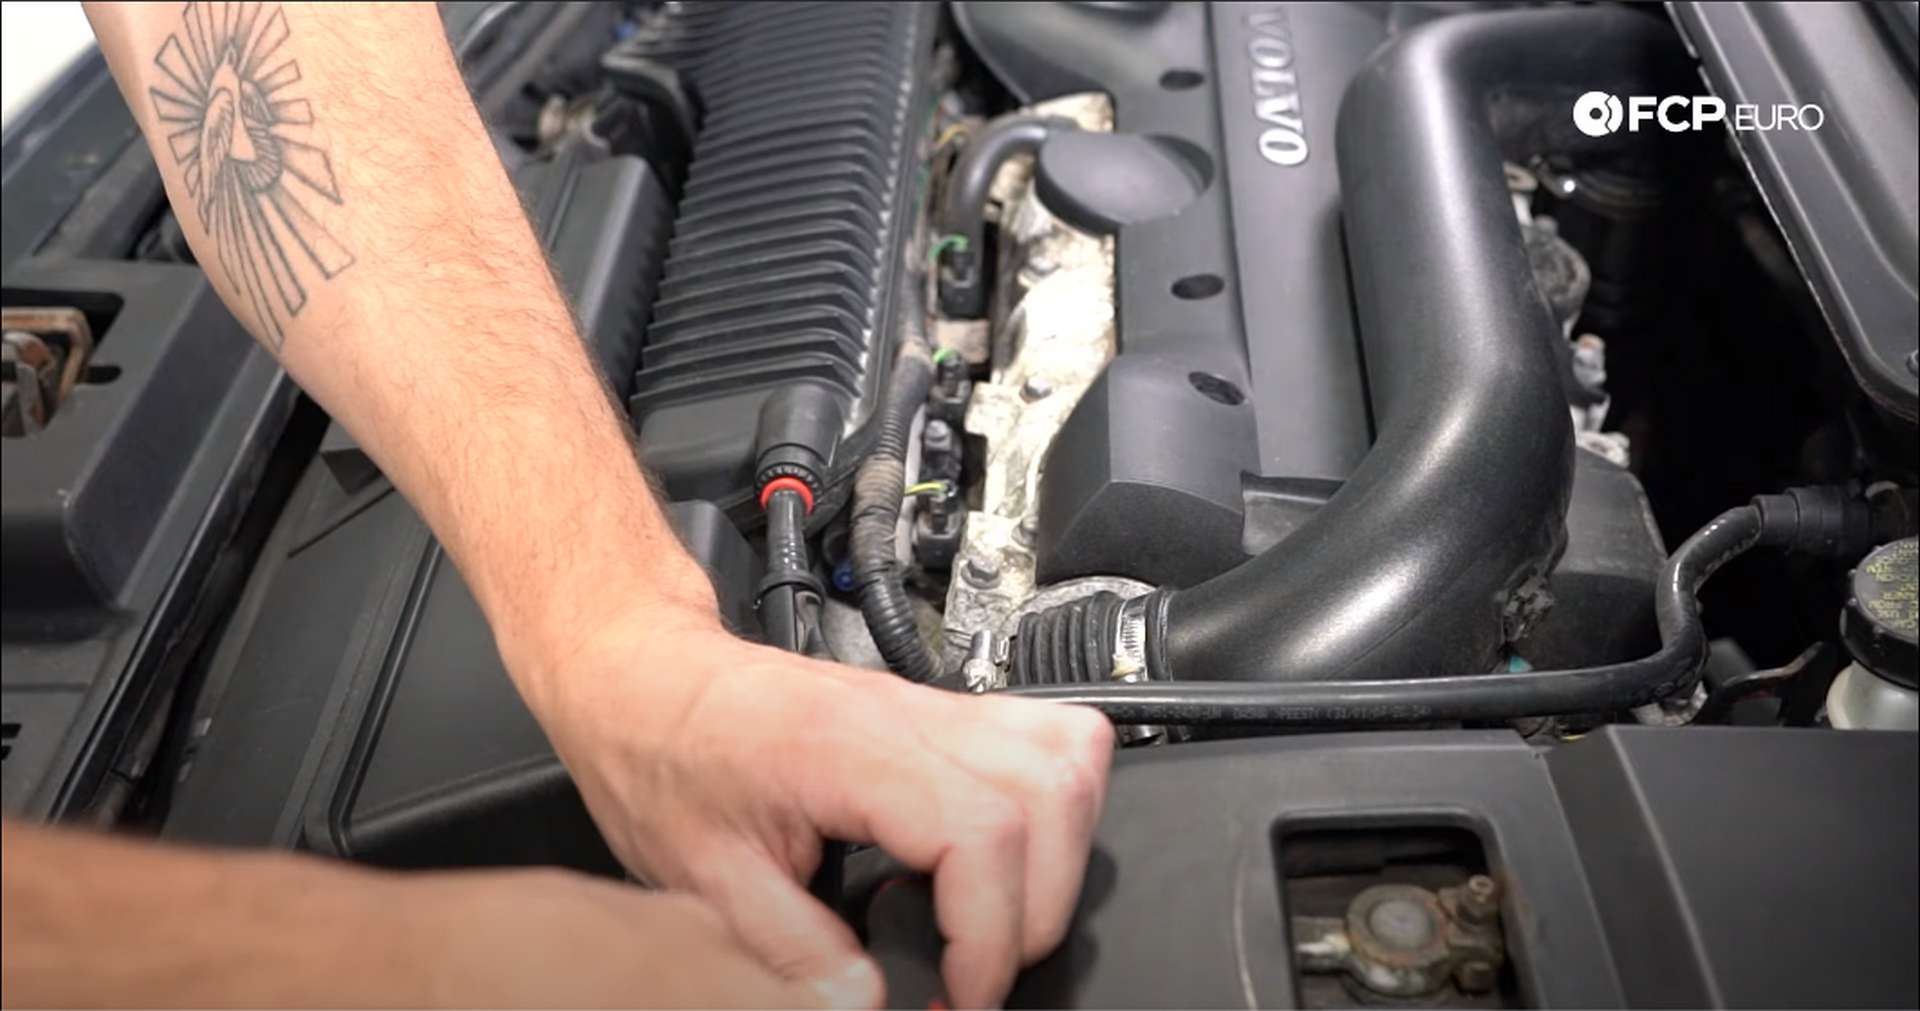
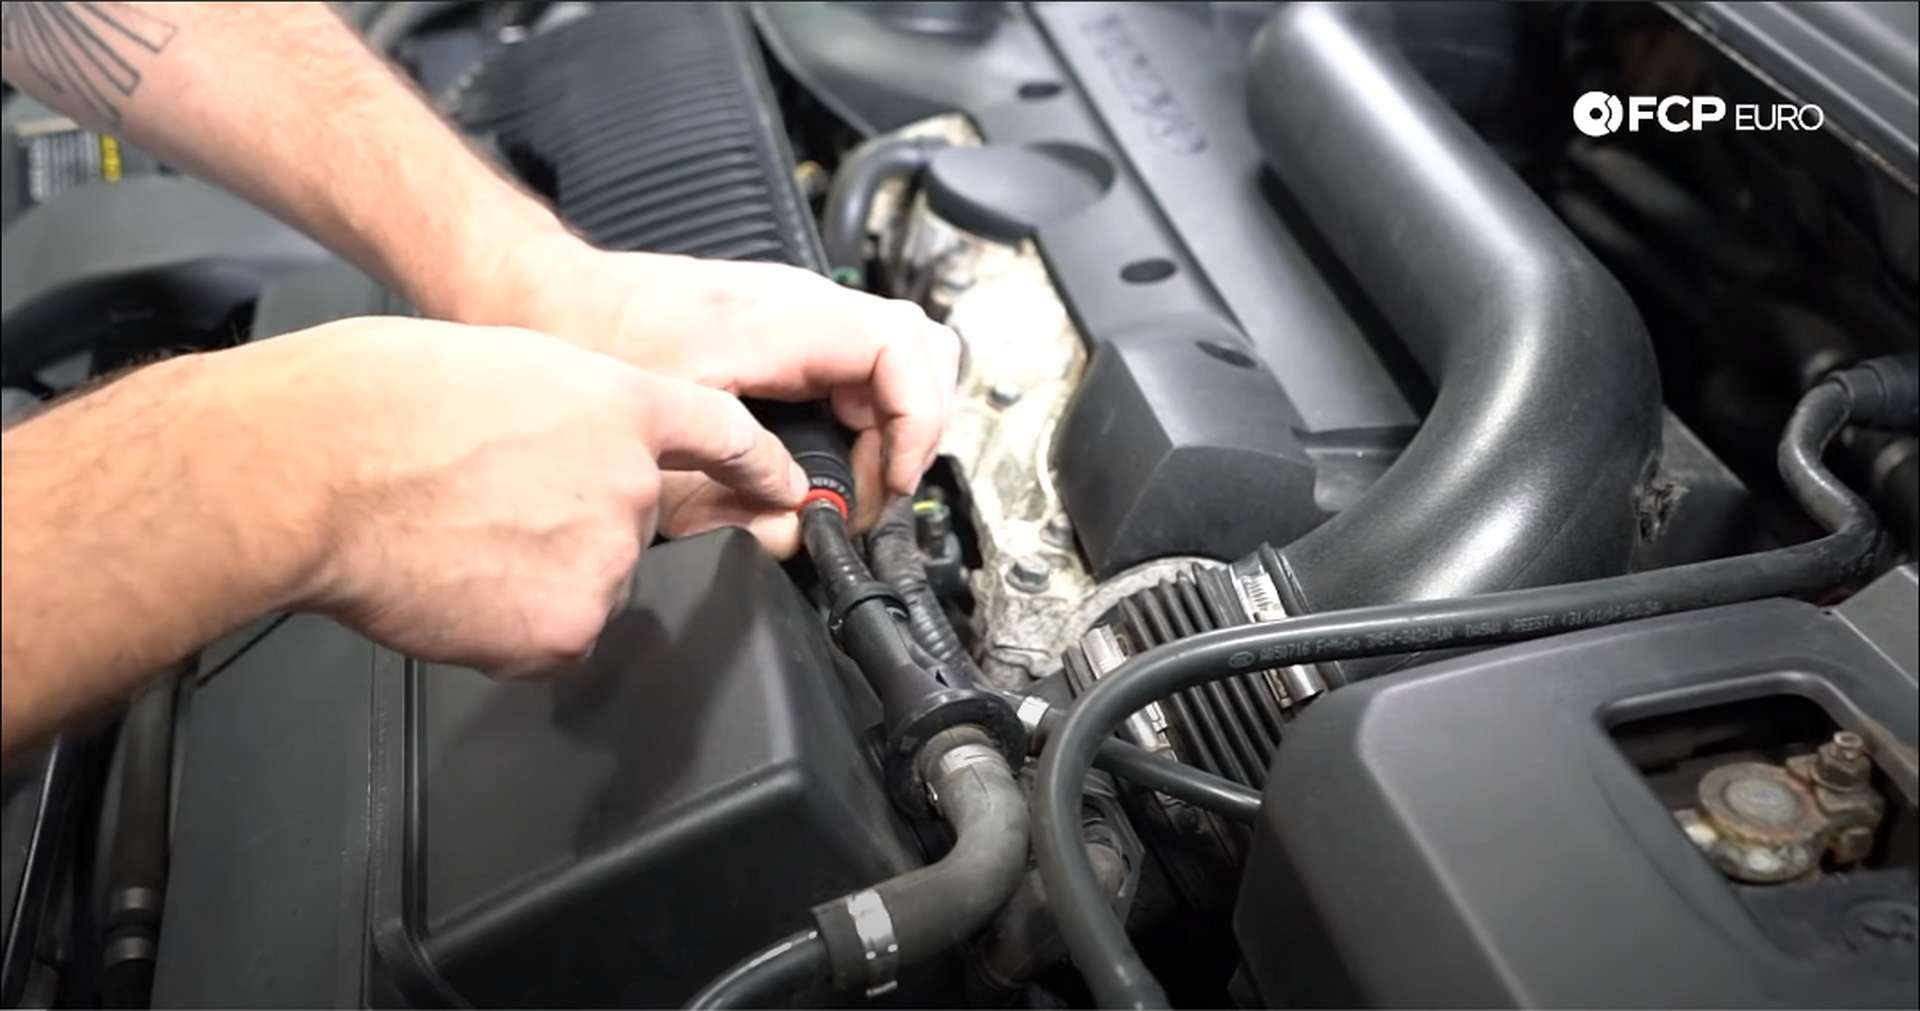
The series of vacuum lines can be removed before or after the intake pipe. Push in on the red collar and pull the line out. The last connection is by the firewall. Squeeze down on the black connector, and the line will pop off with a light tug.
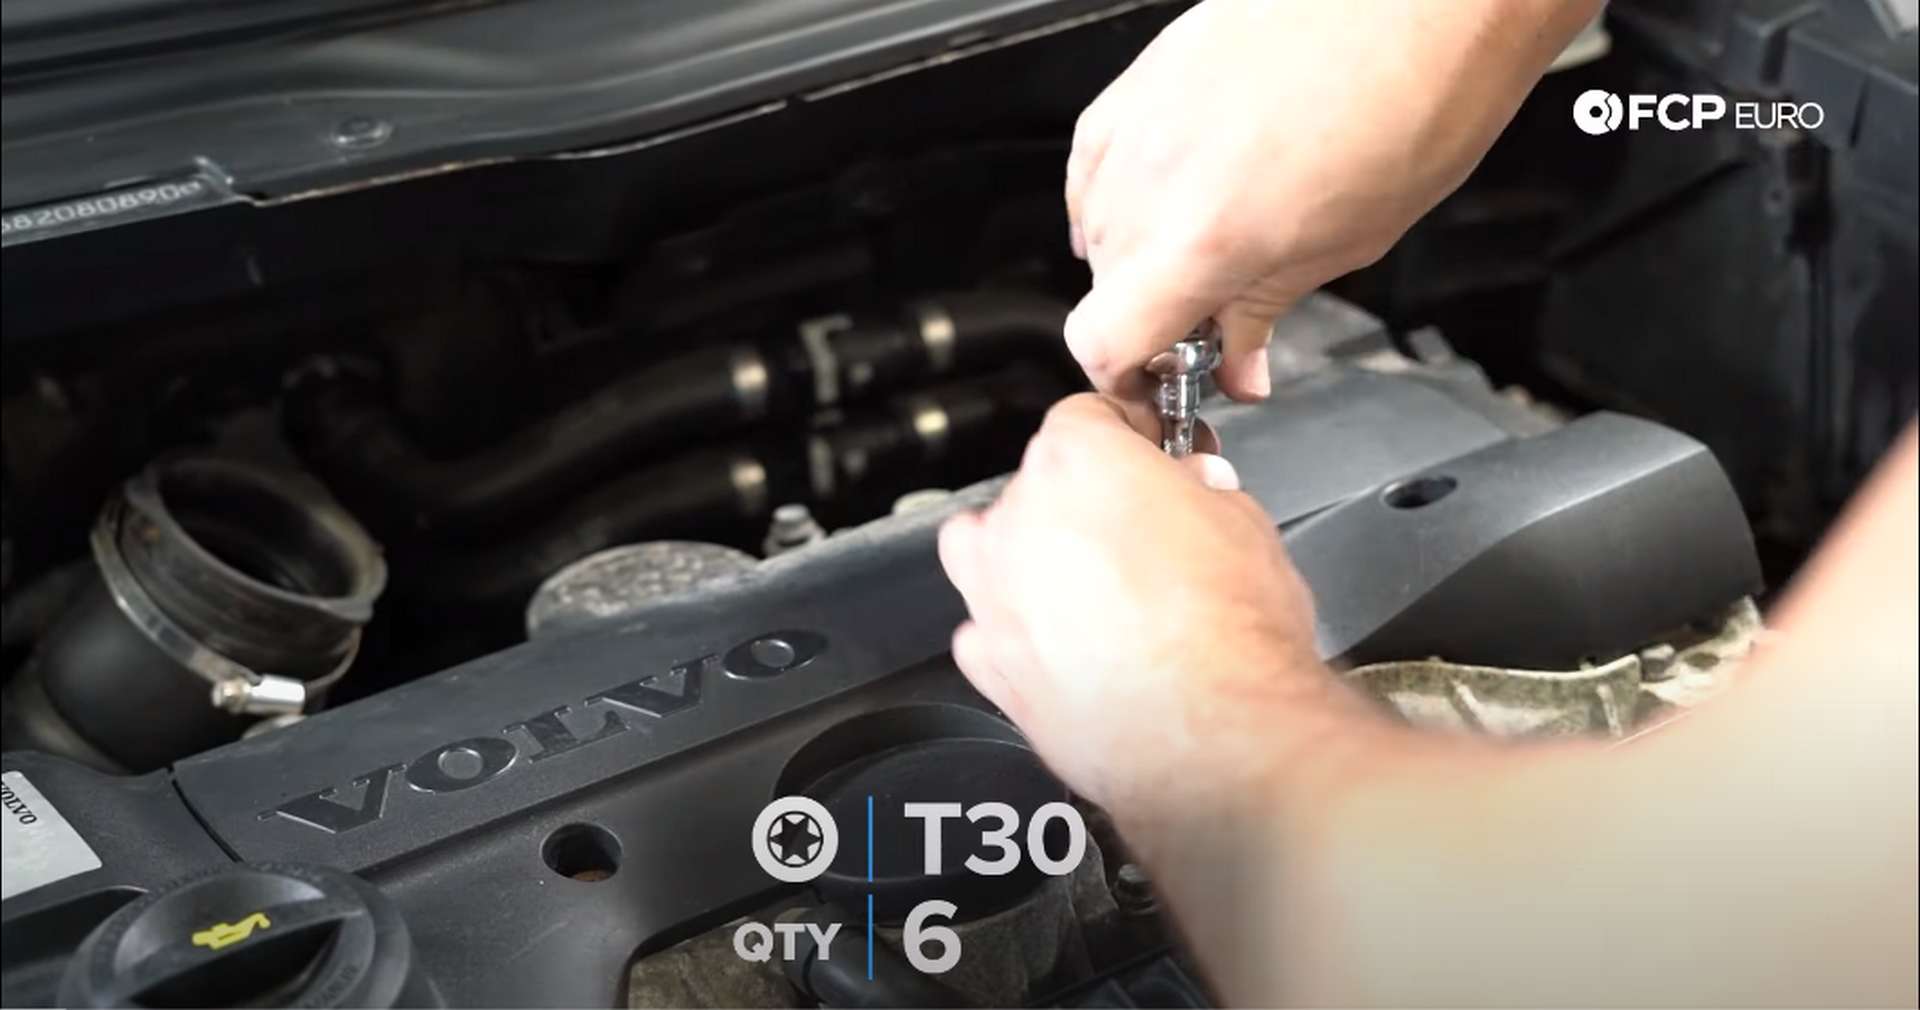
Next, you’ll need to remove the ignition coil cover. The cover is held on with six T30 bolts. Remove the bolts and set the cover aside.
Step 2: Remove the airbox
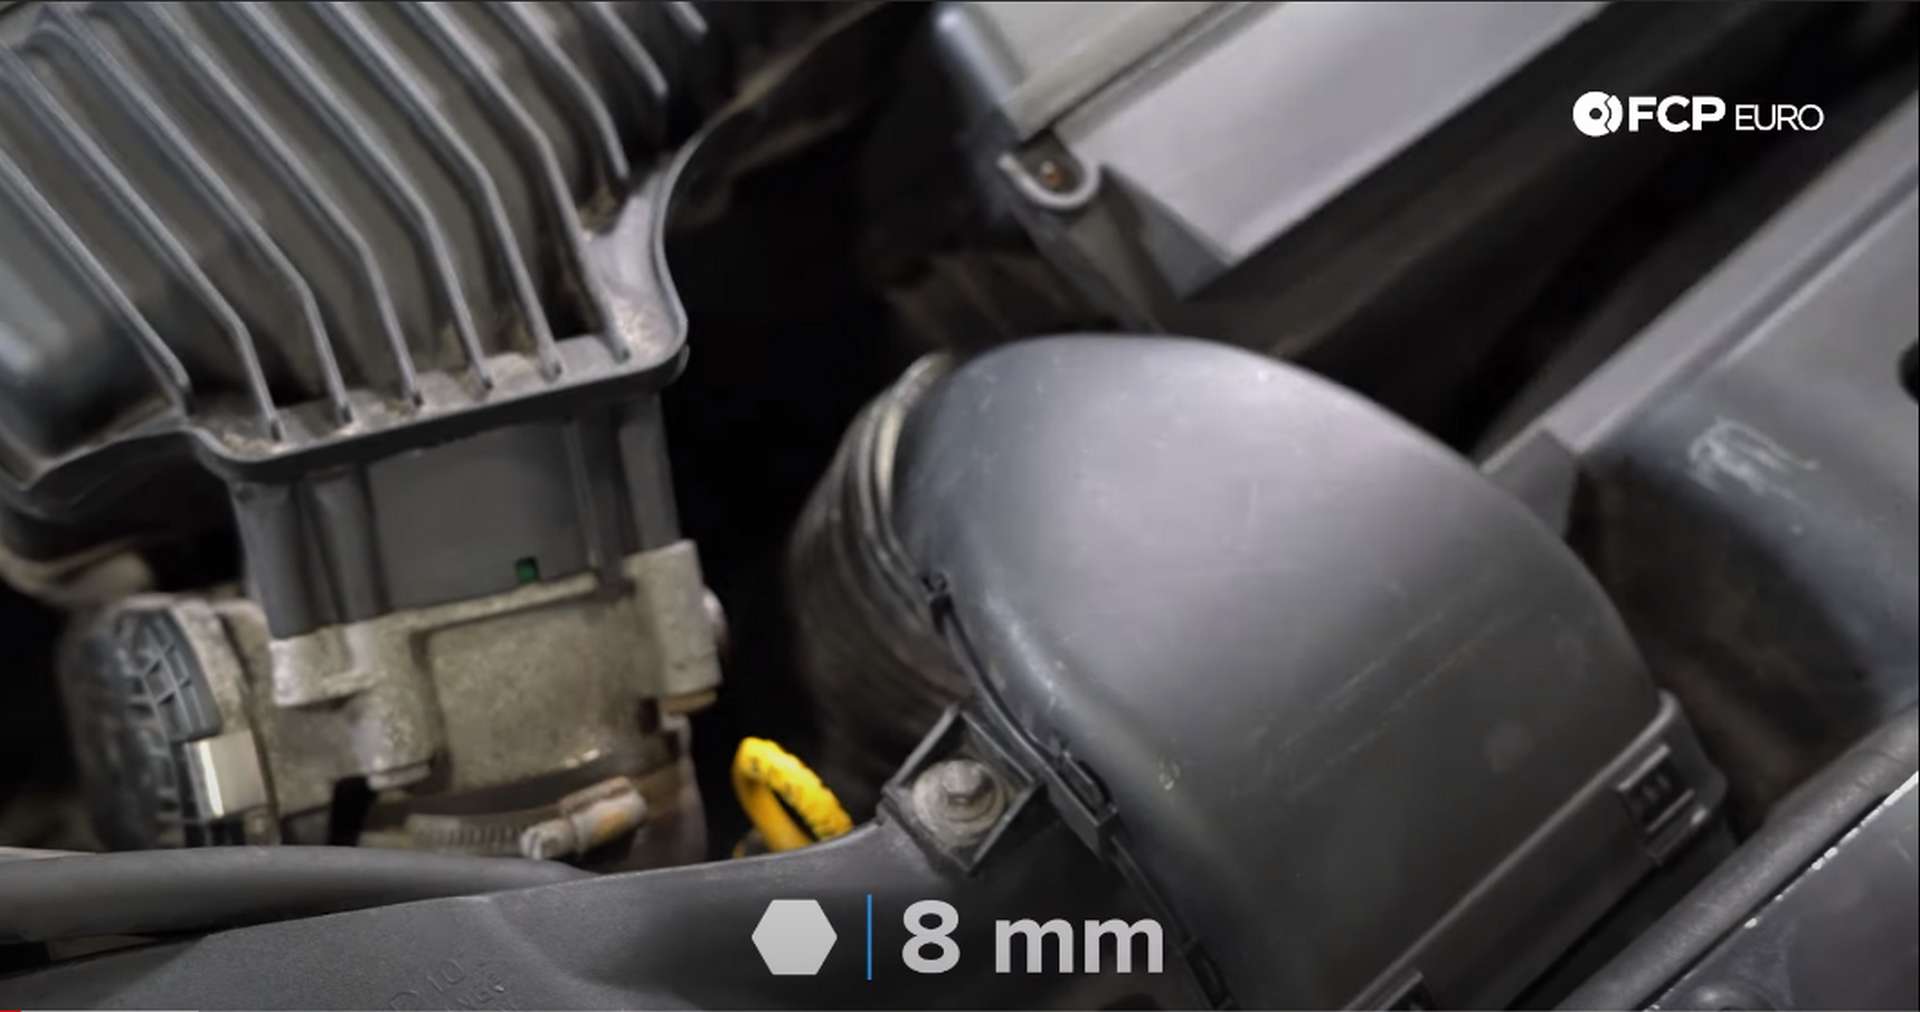
First, remove the airbox snorkel. Two 8mm bolts secure it to the radiator shroud. Reach down and pull out the snorkel to the passenger’s side of the car, once the bolts are removed. The top portion of the snorkel can be removed separately from the accordion-style elbow if space is too tight with them together.
Now move over to there the intake pipe connects and remove the mass airflow sensor. On the bottom side of the connector is the locking tab. Push down on it and pull the connector out. Two T25 bolts are securing the mass airflow sensor housing to the airbox. Remove the bolts and pull the housing off.

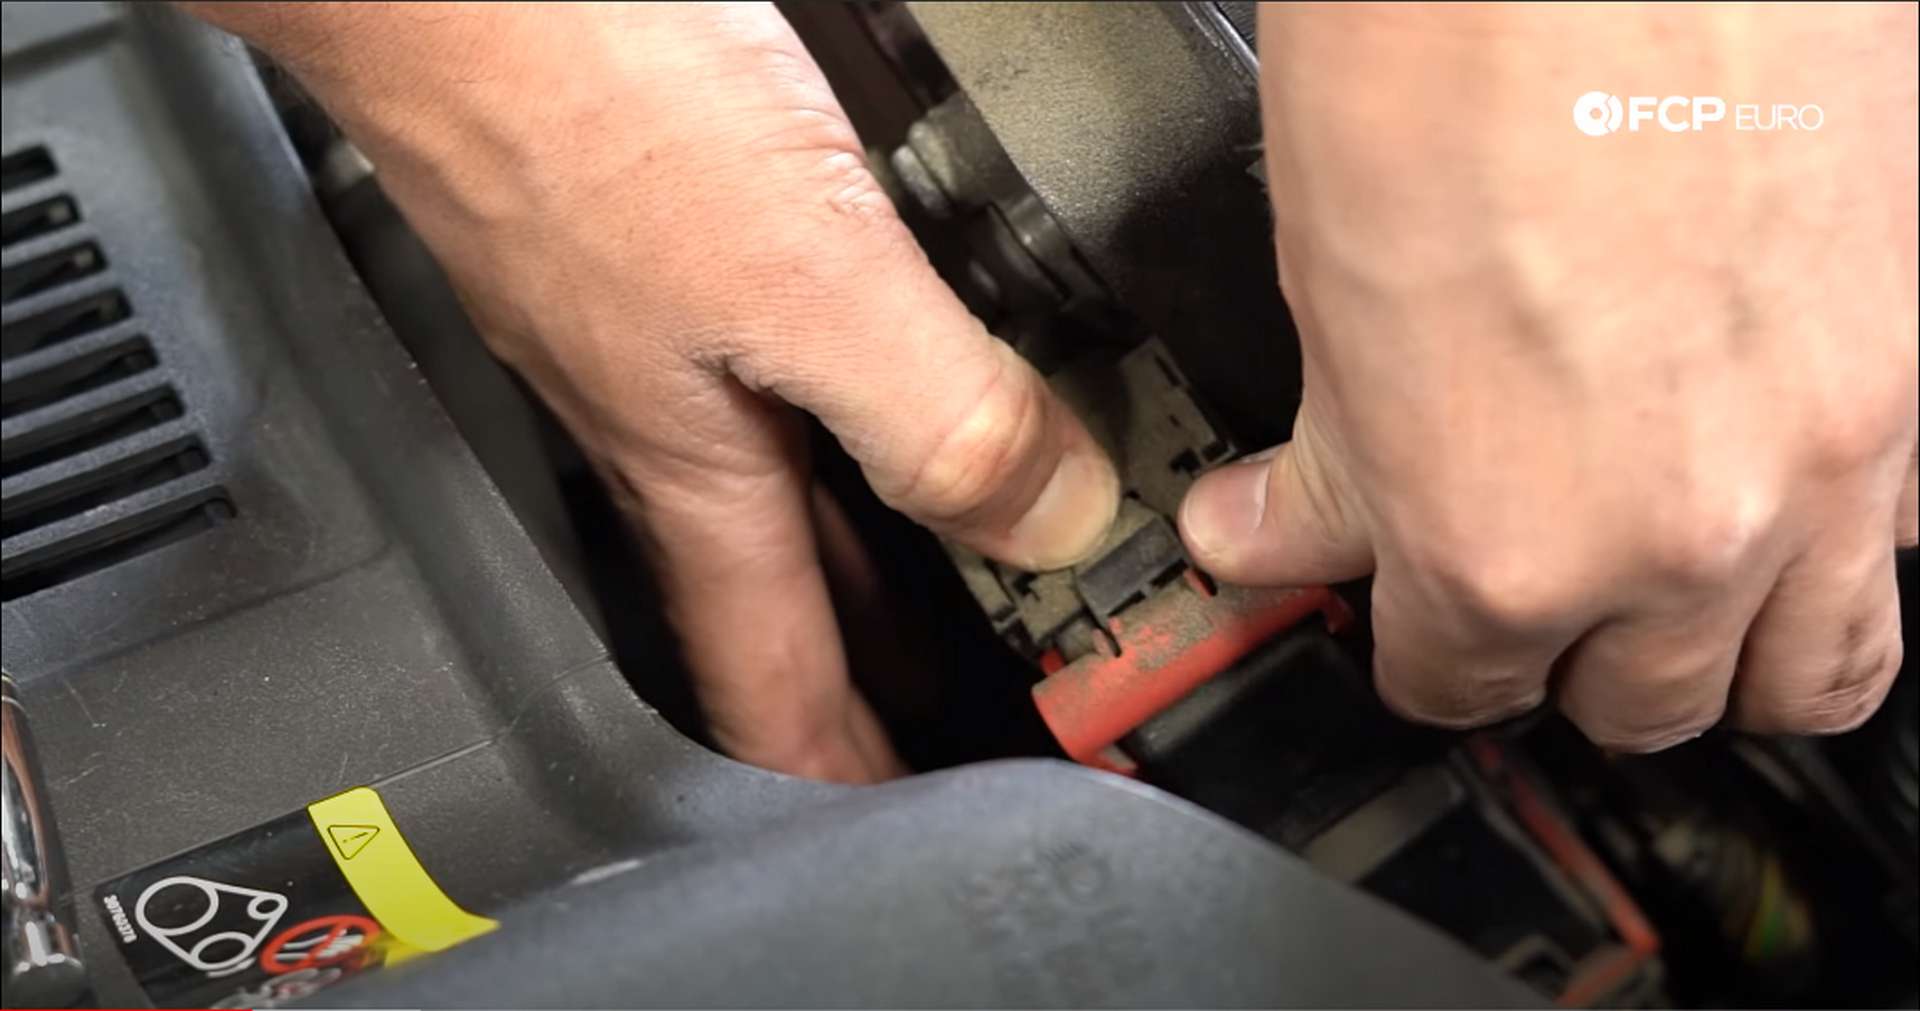
On the front side of the airbox, by the mass airflow housing, is the engine control unit. Grab the protective cover at the bottom and pull it off. Pull off the battery cover as well.
Remove the negative battery connection using a 10mm wrench or socket. The negative terminal is closest to the firewall. Tuck the connection to the side. Next, remove the ECU plugs. Push down on the small black tab and pull the red lever back, this will pop the connection off of the ECU. Repeat this for the other plug. Now remove the four T30 bolts that mount the ECU to the airbox.
The harness for the ECU connections needs to be taken off as well. Just down the harness from the ECU plugs is a zip tie that secures the harness to the airbox. Just behind that, a bolt is used to hold the harness on, and locating rivet holds the harness in place. Cut the zip tie, remove the T30 bolt and slide it towards the driver’s side to free the harness.
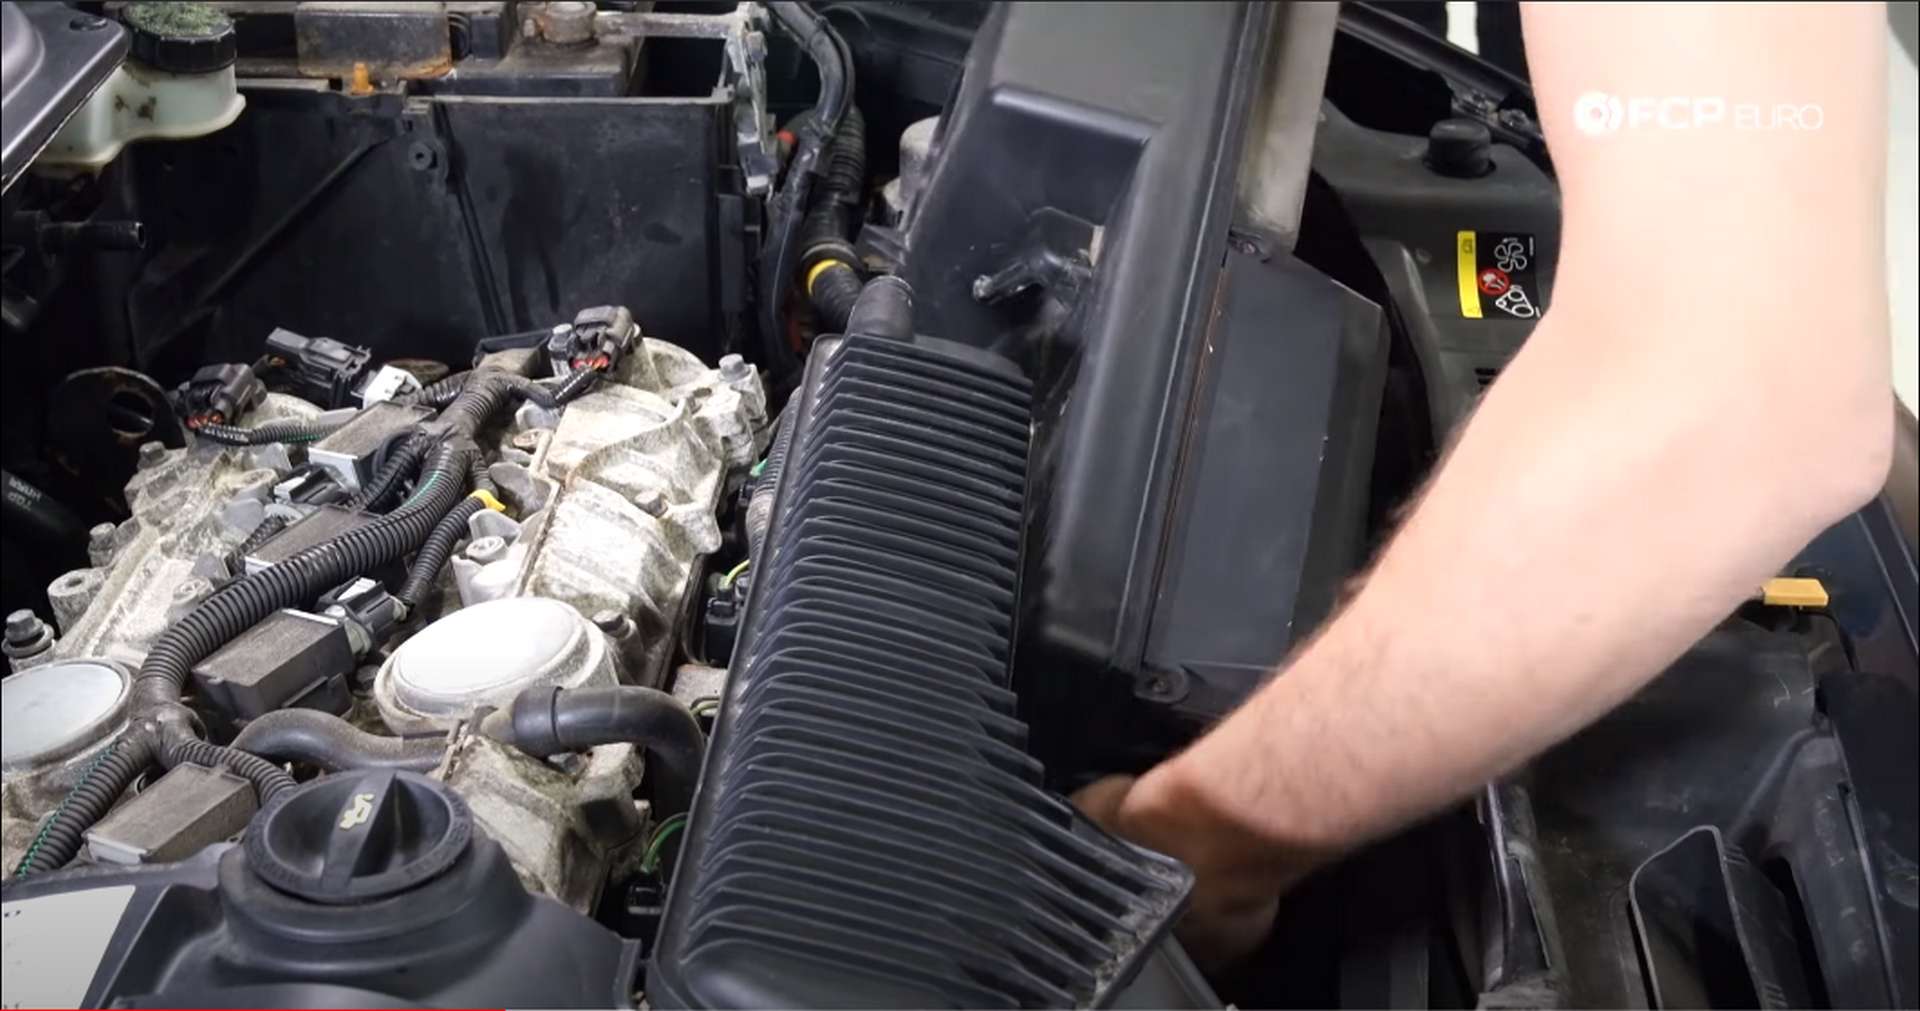
The airbox itself sits in three rubber grommets. Wiggle the airbox back and forth to pull it from the mounts. Once free, slide it out towards the driver’s side of the car. It will be a very tight squeeze and will need some finesse.
Step 3: Drain the oil and remove the PCV housing
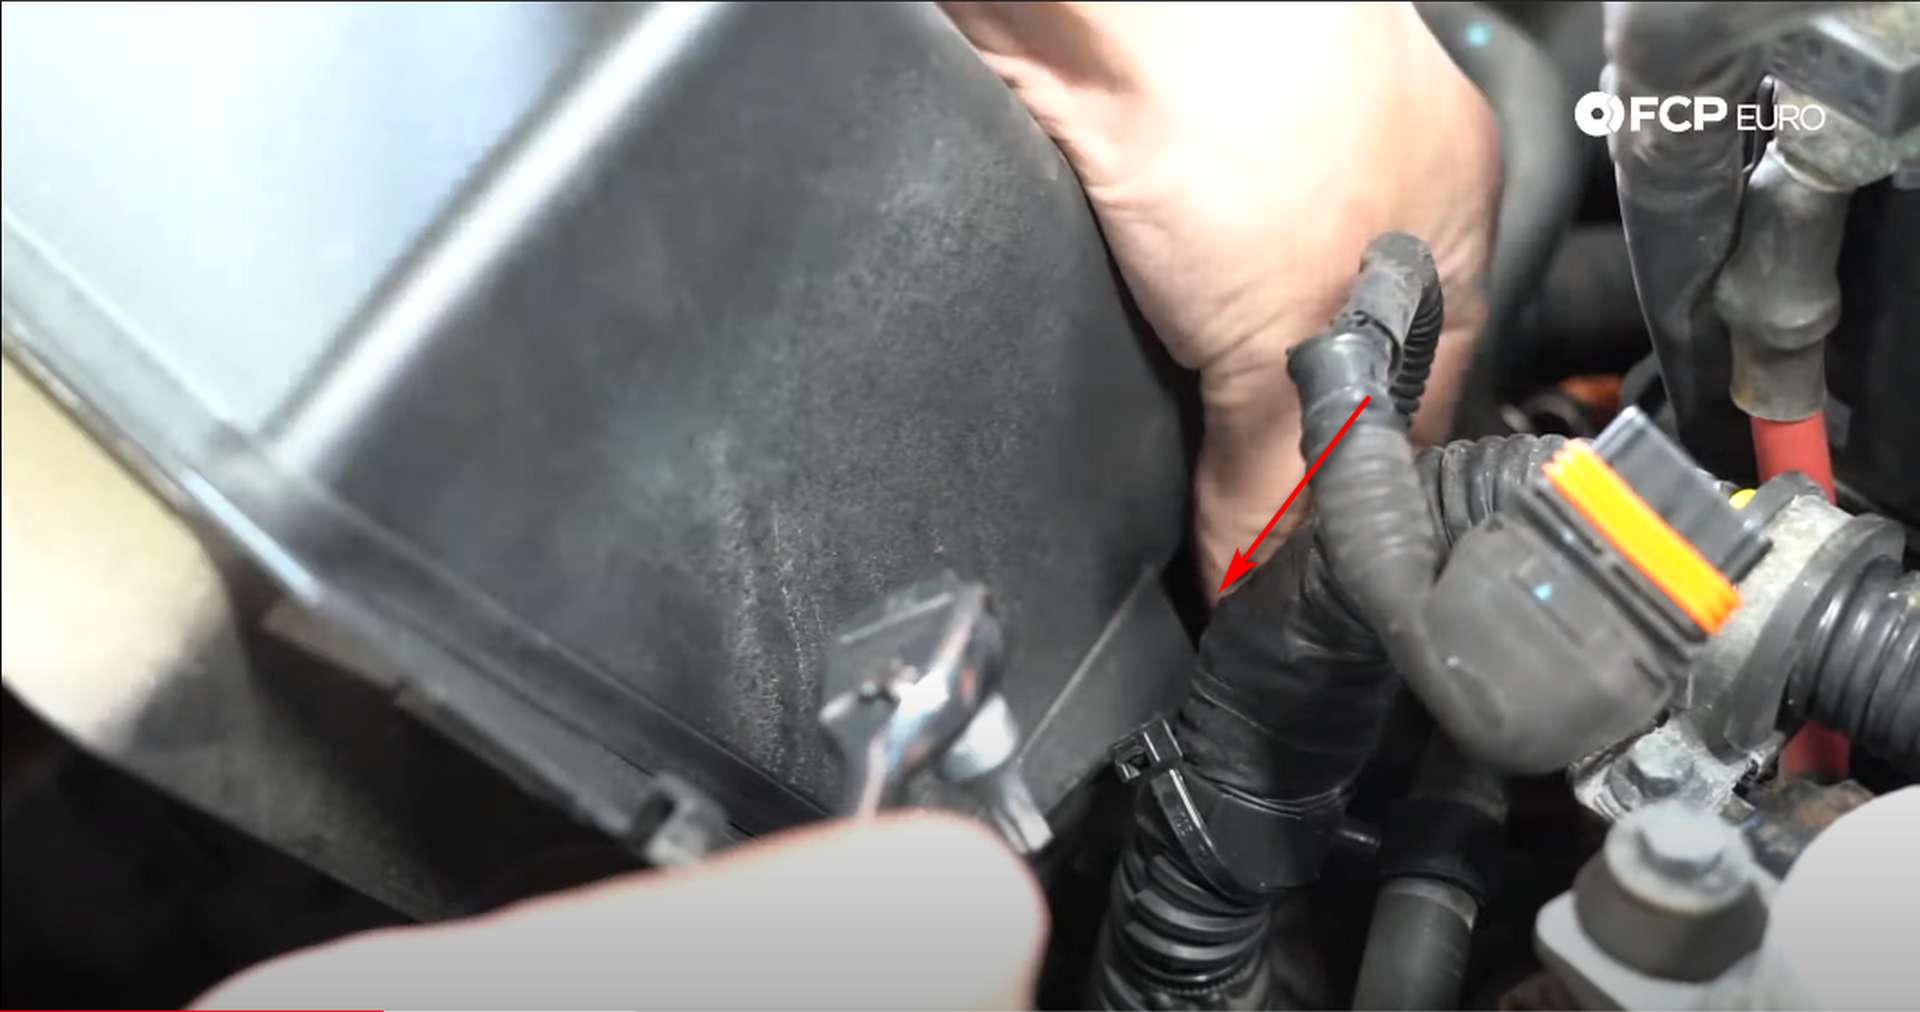
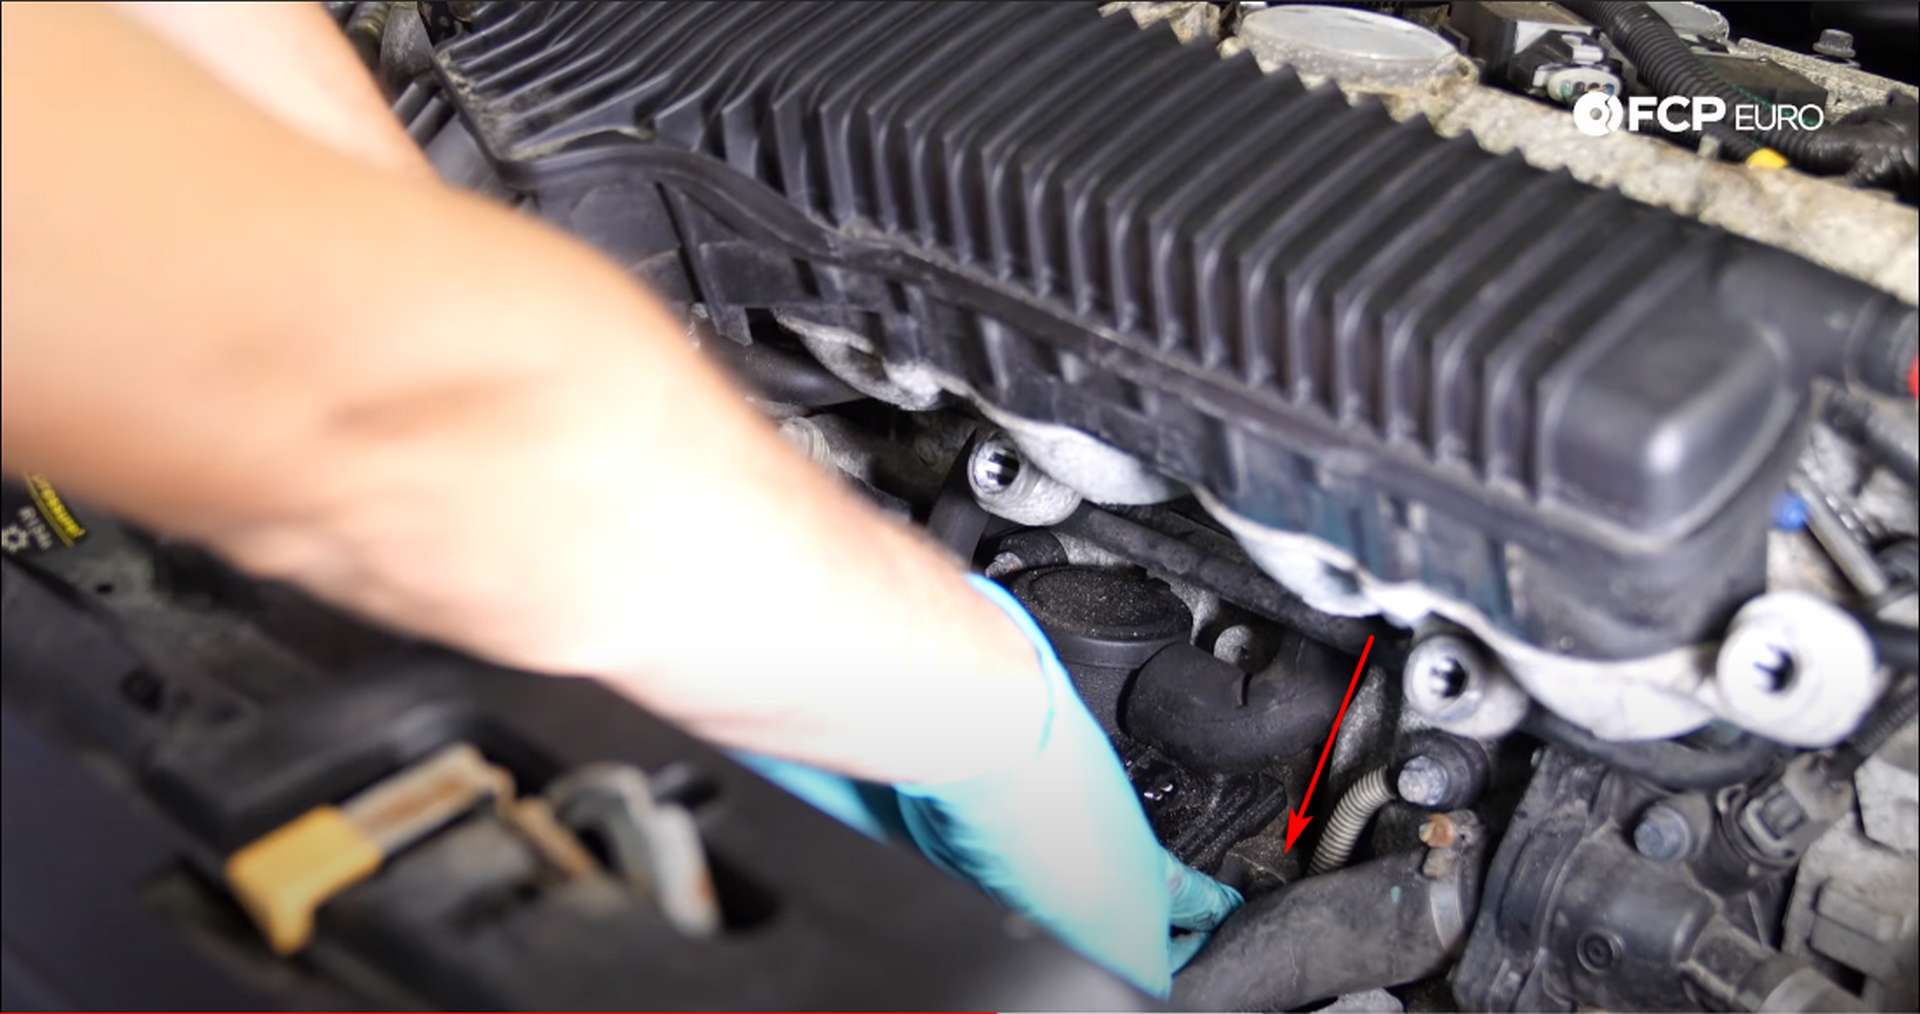
Using the 36mm socket, loosen the oil filter cap until the o-ring is exposed. Next, you’ll need to remove the top vacuum hose. The hose is secured to the top of the head by a single-use crimp clamp. Pry the clamp open using a flat blade screwdriver and pull the hose off.
Now get under the car and drop the plastic underbody panel. There are three T30 screws at the front of the panel and one at that back. Use a 17mm socket to remove the drain plug. When all of the oil has drained, torque the drain plug to 35 Nm, or 25.8 ft-lbs.
At the front of the engine, under the car, three 10mm bolts mount the housing to the engine block. Remove the bolts and move back to the engine bay.
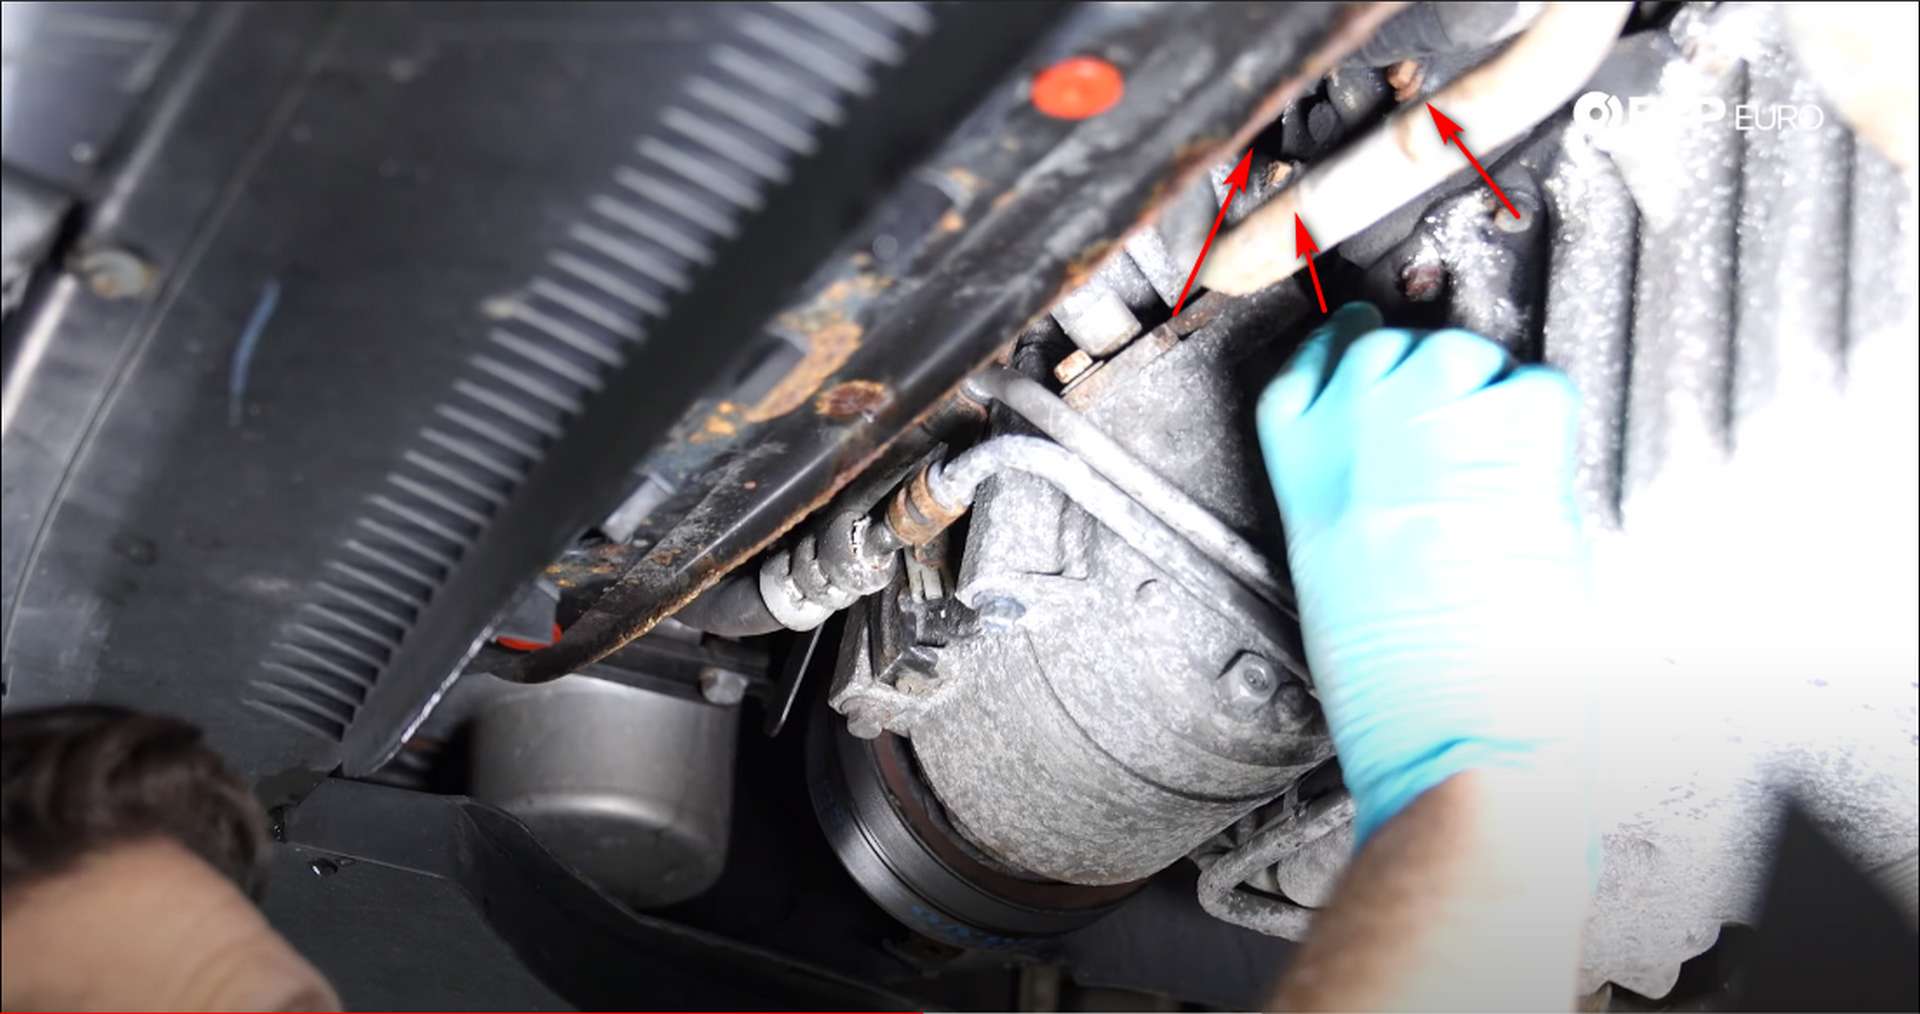
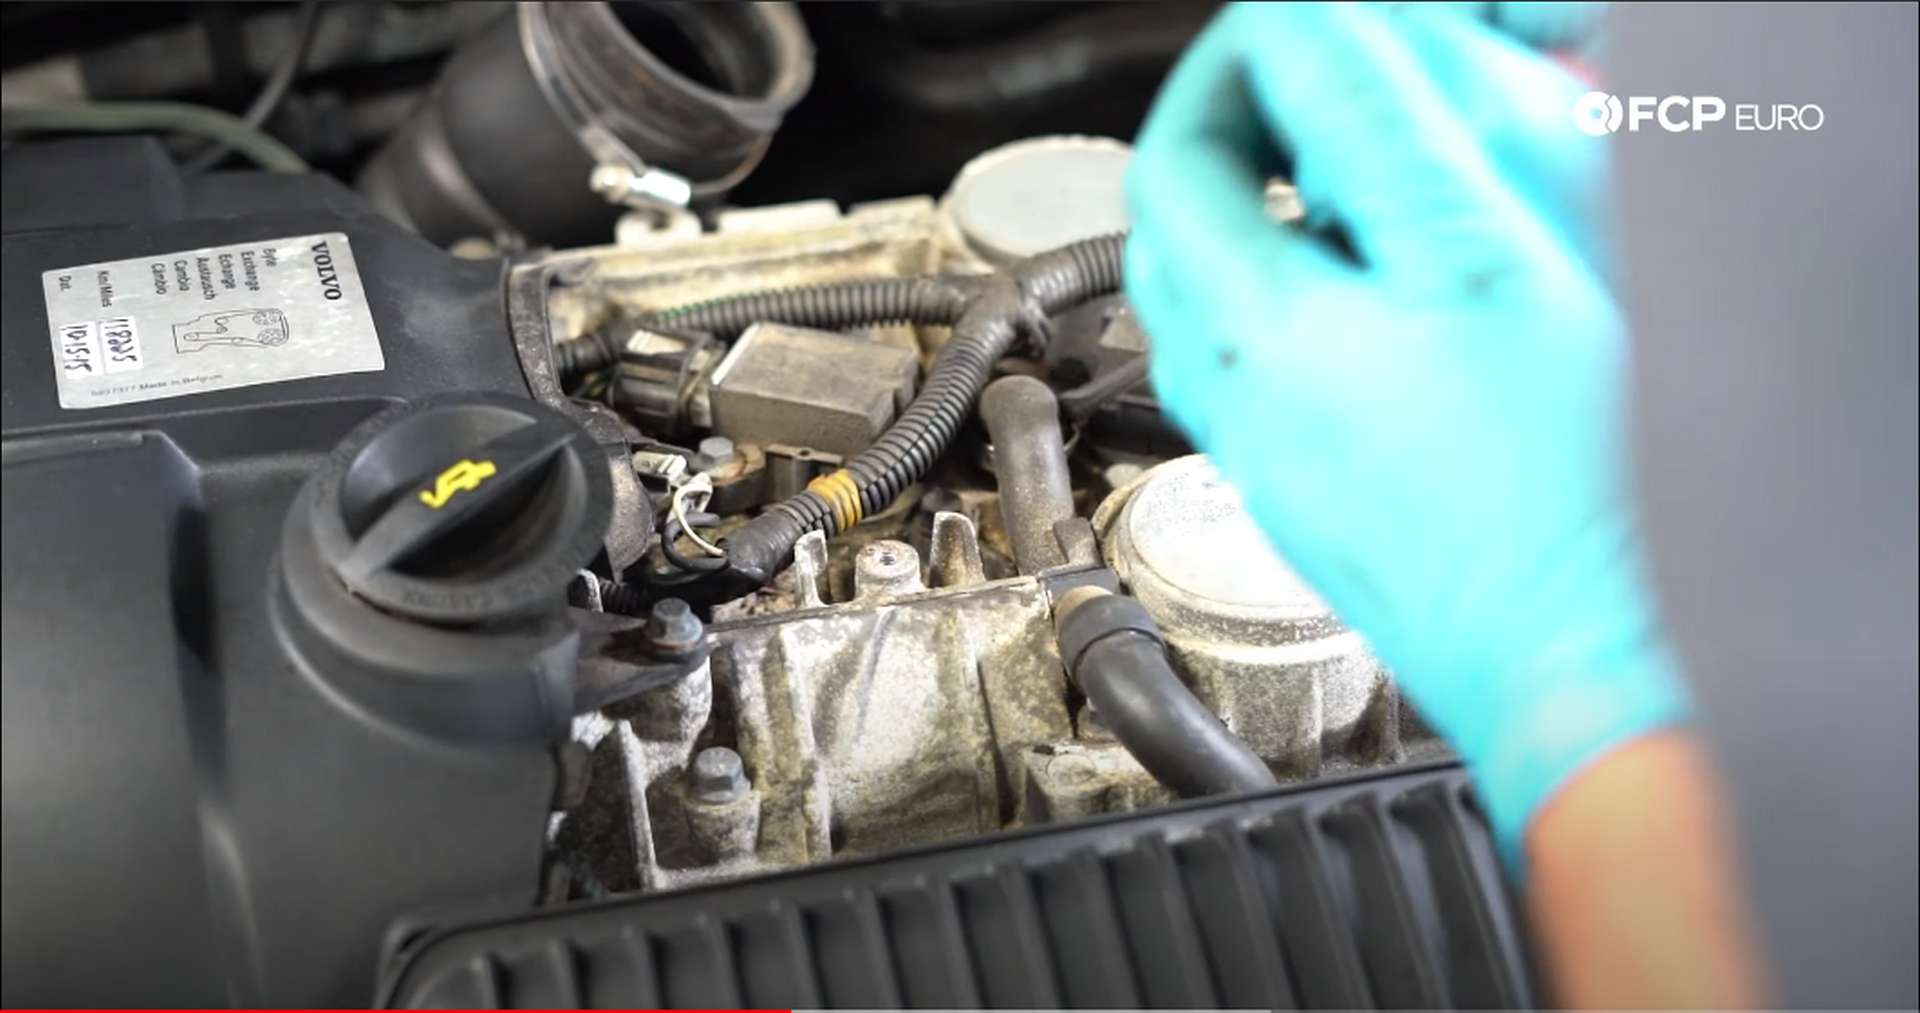
On the front of the housing, three 8mm bolts secure the oil dipstick tube and a bracket to the housing. Remove the bolts and move the dipstick tube aside.
Next to the oil filter cap is an electrical plug. Push down on the metal tab and pull it off. Next, use a razor blade and cut the two hoses connected to the housing behind the oil filter. Now, the only thing holding on the PCV assembly is one last bolt. The last 10mm bolt is at the top left of the housing, just behind a coolant hose. Remove the bolt and pull out the housing.
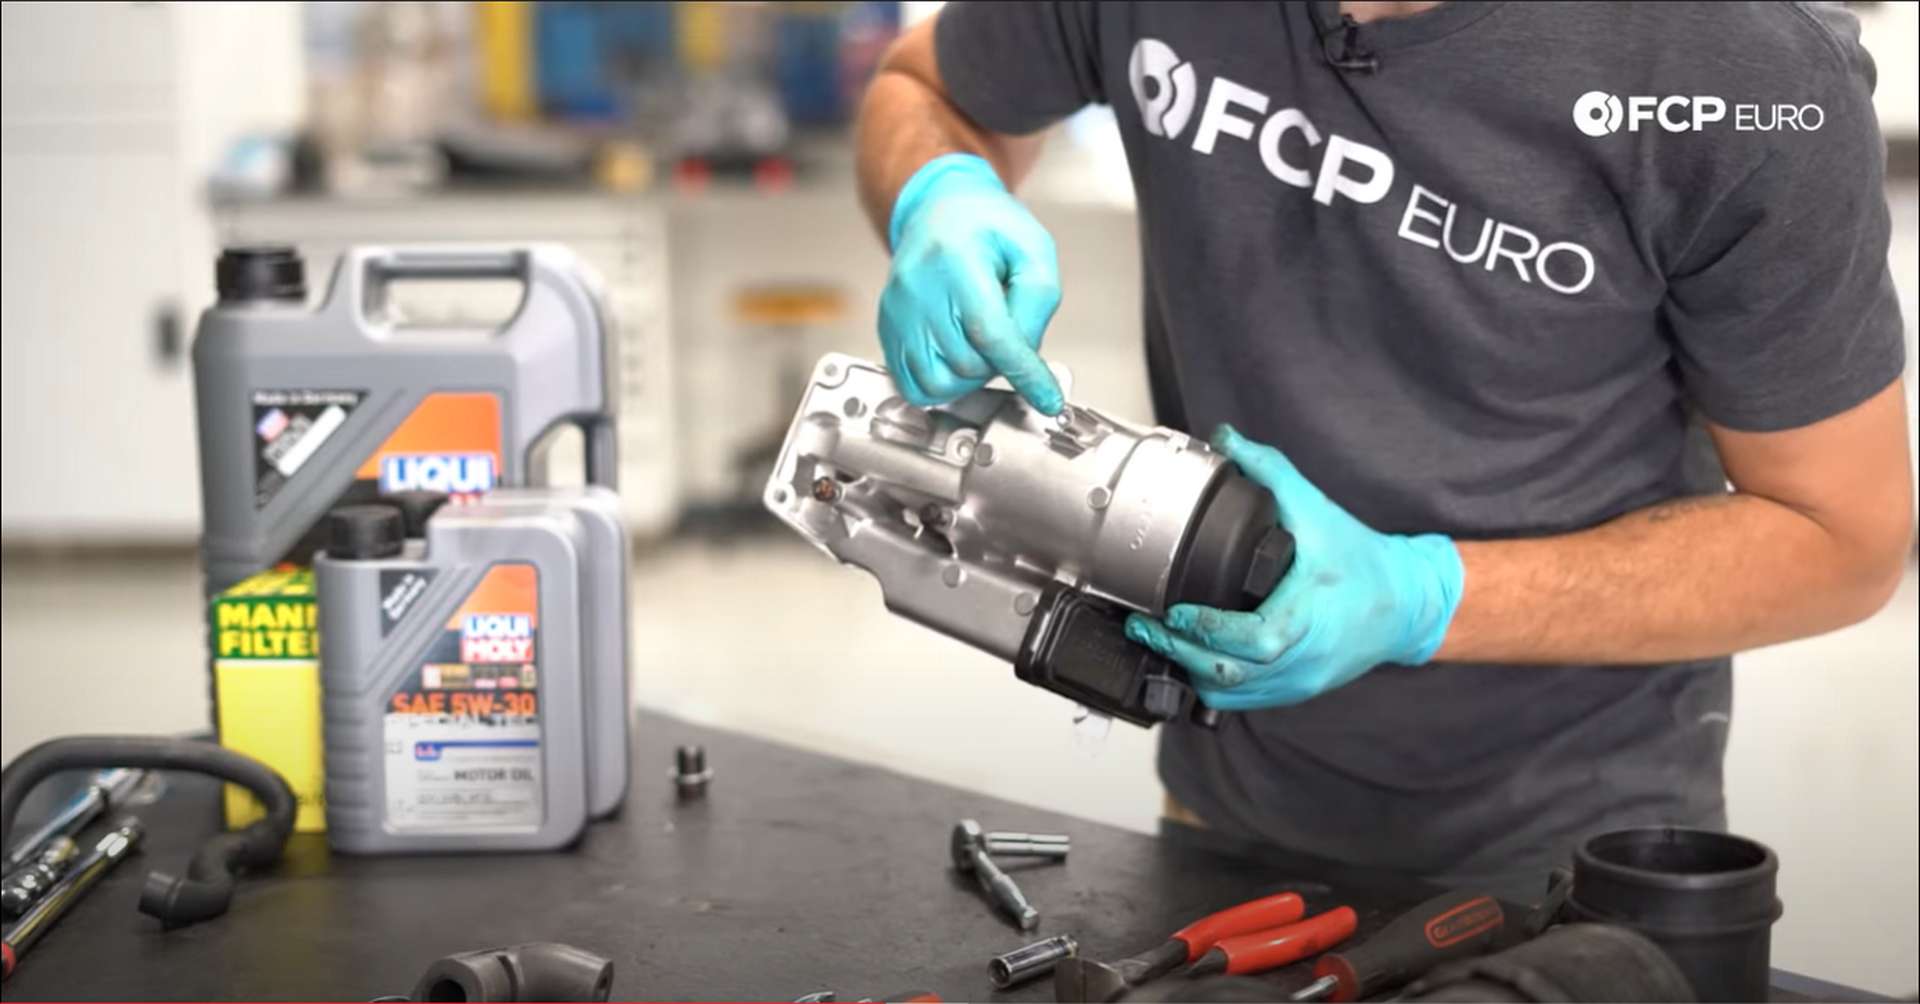
Step 4: Install the new PCV/Oil Filter unit
Take a rag and clean the engine block where the PCV housing mounts to ensure a clean seal. Next, grab the top vacuum hose from where you removed the one-time use clamp and pull it up to remove it. Then, take the new vacuum hose and feed it through. The second cut hose is still on the engine, remove this too.
The holes that the 8mm bolts thread into on the front of the housing don’t come threaded. The bolts are specially made to cut the threads into the housing. Use an 8mm wrench or socket to cut the threads into the housing slowly. Once the threads are cut, remove the bolts.
Carefully fit the housing into the engine bay and thread in the top 10mm bolt. Next, get under the car and thread in the three remaining 10mm bolts. Once all of the bolts have been threaded in, they can be tightened down.
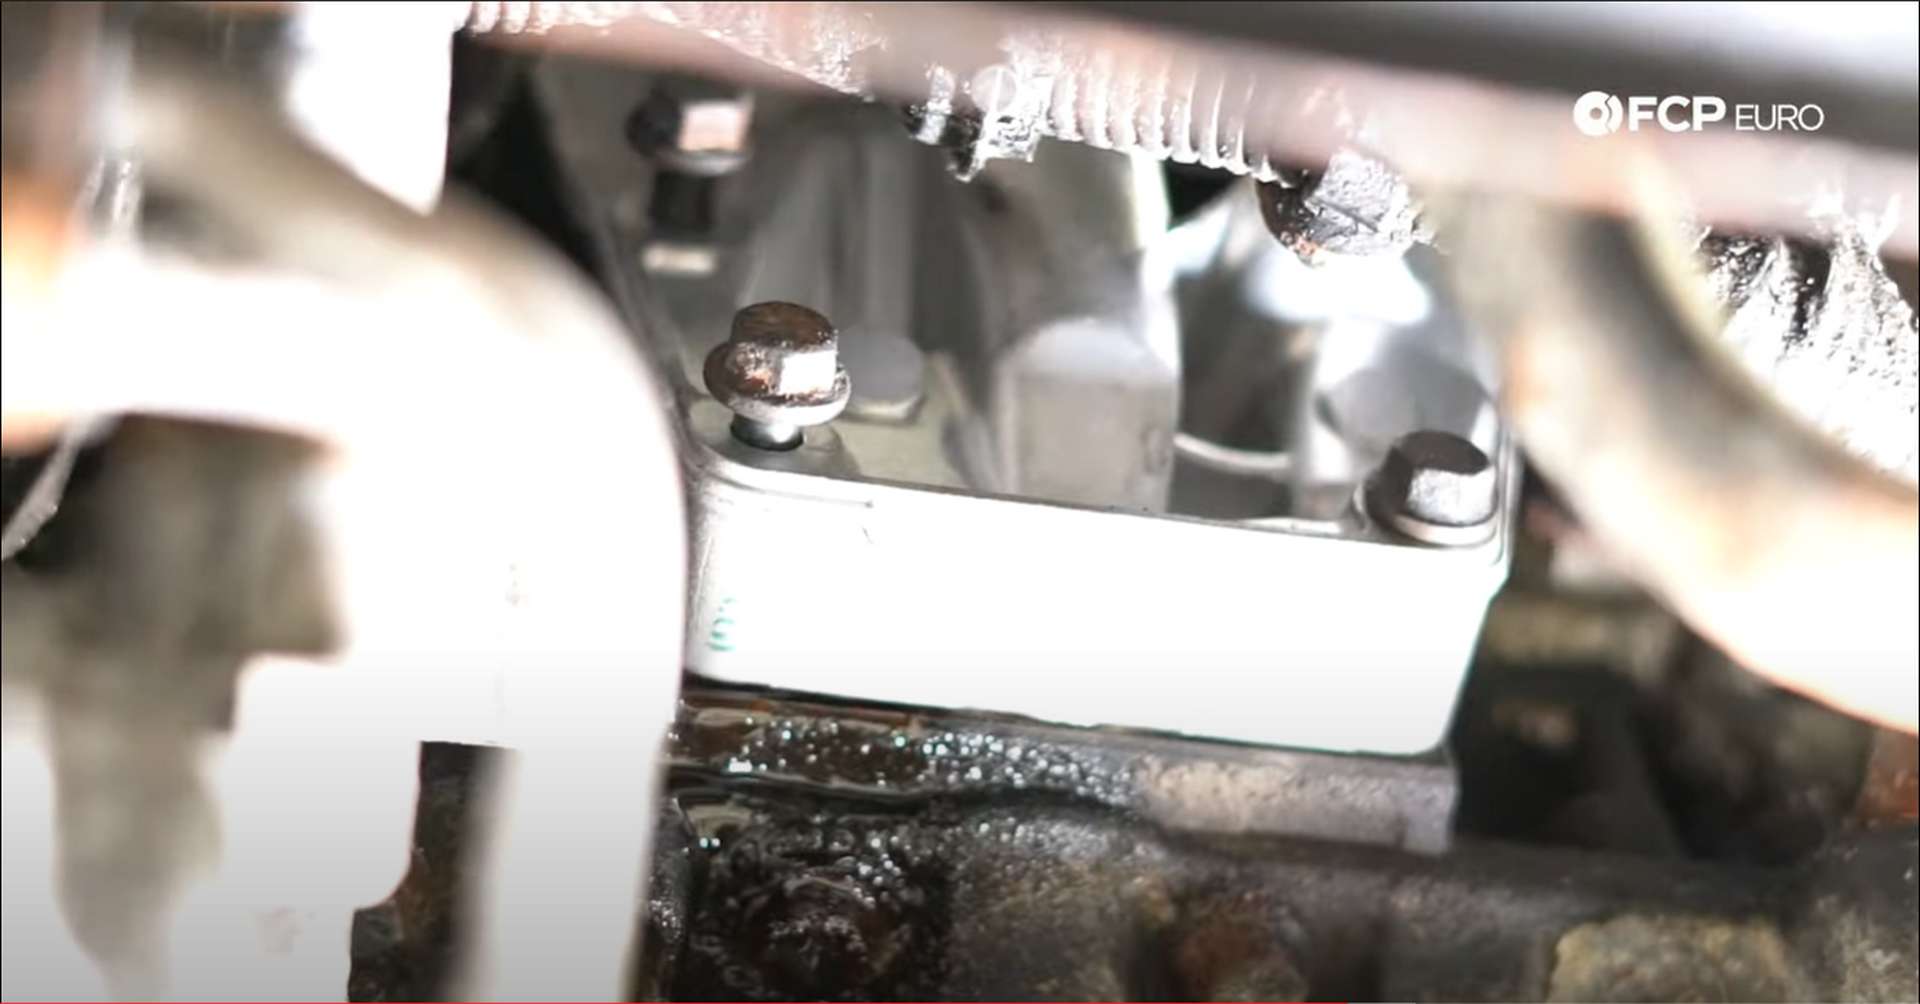
Next, take the new 90° vacuum hose and install it to the housing and engine block. Using the new clamps supplied with the kit, secure the top vacuum hose to the cylinder head and the housing. Now, plug in the electrical connection on the housing and secure the bracket and oil dipstick tube with the 8mm bolts.
Step 5: Reinstall the airbox and intake components
Reverse the first two steps to reassemble the engine bay. Before adding the airbox snorkel, remove the oil filter cap and install the new oil filter. Next, fill the car with oil and check for any leaks. If nothing leaks, you’re good to finish buttoning everything up.
Next, start the car and revel in your handy work. Check to make sure there isn’t any oil leaking now that the car is running. If you open the oil filler cap while it’s running, you will still feel and hear a slight vacuum. This is normal, and the system is working correctly. Reinstall the underbody panel and go for a drive.
If you’re interested in more DIYs for your Volvo, you can visit volvo.fcpeuro.com and subscribe to our YouTube channel.


