- 03/28/2015
- 3 Min Read
- By: Noah Jenkins
How to Replace Volvo Dashboard & Switch Illumination Bulbs (P80)

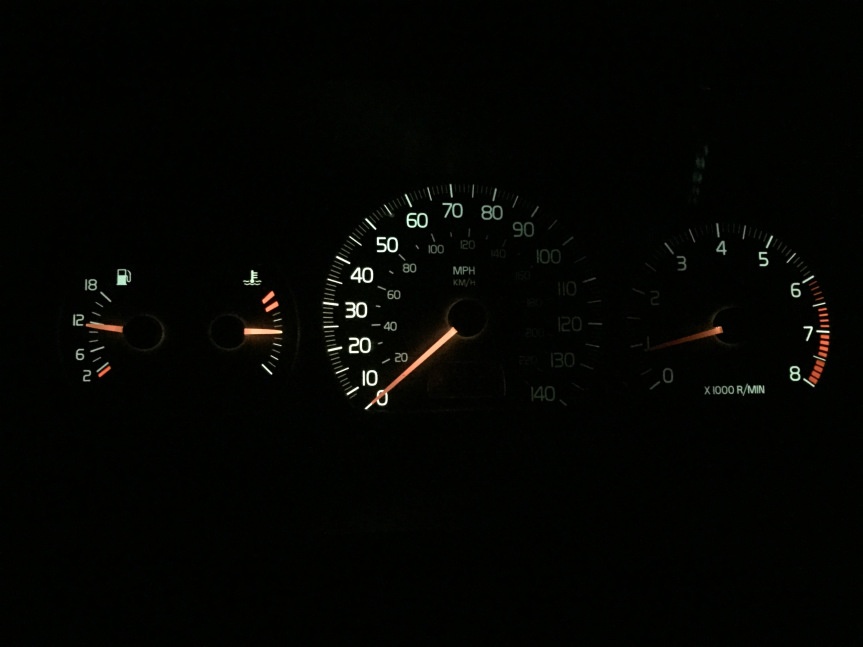
A few weeks back, the instrument cluster lights on my Volvo S70 seemed to go off randomly while I was driving and only half my speedometer would become illuminated. The lights would usually come back on with a good smack of the top of the dash board. Despite my best efforts of continually hitting the dashboard, its got to the point where some of the bulbs are now burned out for good. In addition to these bulbs being burned out, some of the lights for the rocker switches on the left and right of the steering column have also gone out. These are completely unreadable at night and I cannot even begin to count the times I've turned off the traction control when I wanted to vent the sunroof.
The procedure for changing these bulbs is very easy and straight forward. All these bulbs can be replaced in about an hour or so.
 Parts
Parts
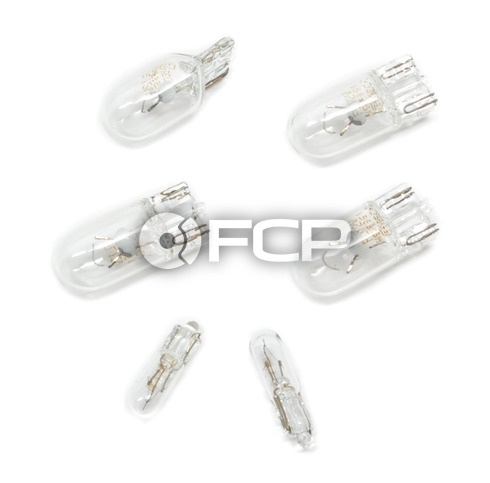
Volvo Dash Bulb Illumination Kit (S70 V70 C70) - Bulbkit70
Volvo Dashboard Switch Light Bulb - Genuine Volvo - 9148906
Tools Needed:
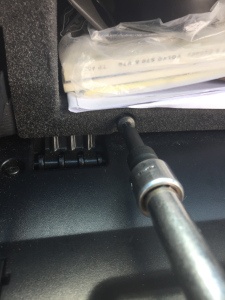
- Interior Trim Removal Tool or Flat Head Screw Driver
- T25 Torx Driver (Best to use T25 Torx Socket on a ratchet w/ extension)
- 10mm Socket
- 1/4" Drive Ratchet
- Precision flat head screwdriver
Replacing Dash Rocker Switch Bulbs
Begin by making sure your vehicle is off and the key is out of the ignition. It is not necessary to disconnect the battery to change these bulbs, however, if you prefer you may; I did not. (You DO need to disconnect the battery if you plan on changing these bulbs along with the instrument cluster bulbs too!)
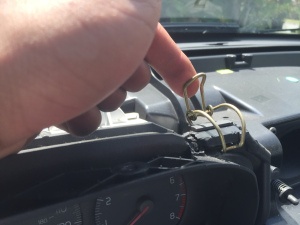
Next, take your interior tool or flat head screwdriver and GENTLY pry around the switch you would like to remove. They are only held in by two clips on the side of the housing. Be very careful not to break the button off as you may need a new switch! Release the electrical connecter with its push tab...this may take some force.
Once one switch is out, the neighboring switches are easier to remove as you can sneak your fingers behind the other assemblies and pop them forward.
With the switch out, use your precision flat head screwdriver and place it in the groove on the backside. This is the bulb housing. Turn it counter clockwise to release it from the switch.
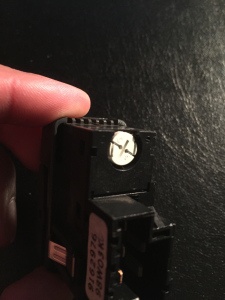
If you purchased the replacement bulb and base, then it's simple! Just twist the new bulb assembly into the switch, reinstall the switch and you're done.
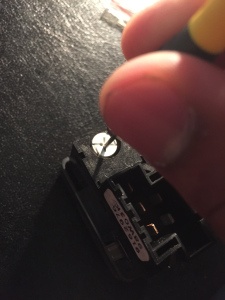
However, you can also buy just the bulbs without the plastic housing in which case you will have to pull the bulb out of the housing and slip a new one into it. They come out like this:
The wire ends of the bulbs are wound around the base of the housing. Using your fingers or your small screwdriver, you can unwind the wires from the base. Align them straight down (as pictured above) then you can pull the light bulb straight out.
Replacing Instrument Cluster Bulbs
First, if you have not already, disconnect the negative terminal on the battery using a 10mm socket. This procedure requires you to un-plug the passenger side airbag and in order to avoid any issues you MUST disconnect the battery. If the airbag is disconnected with the battery still connected, an SRS light will illuminate next time you turn the car on. Make sure you know what your radio code is as it will be required upon reconnection.
Getting the instrument cluster out of the car requires you to remove the dash pad. Don't worry! This is a fairly simple procedure and straightforward.
Take out the air vents, tweeter speaker covers and corner vents as this exposes some of the T25 screws you must remove. Again, be gentle when you pry around the edges. It may help to pull on the adjustment tab in the middle to help remove the air vents.
Next, remove all of the T25 screws in these locations. There are: (1) under each of the side air vents, (1) under each of the corner air vents, (1) under each tweeter speaker cover, (2) under the center air vents and (2) located vertically on top of the instrument cluster.
Open your glove box and remove the (6) T25 screws around the perimeter as well. Remove the glovebox by placing your hands on the inside edges and pulling. The entire inner glovebox comes out as one unit. It may stick a little so a bit of force may be required to remove it. Once the glovebox is out, locate the three 10mm bolts for the airbag. One is attached to the ground strap. Remove these. Also, look behind the ground strap and locate the white airbag connector. Unplug it.
Pull the dash pad forward and remove it from the car.
Locate the clips holding the instrument cluster in and release them. Unplug all of the connectors from the back of the instrument cluster. Carefully lift the instrument cluster out.
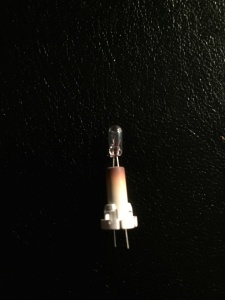
With the instrument cluster out of the car, flip it over and located the bulb housings.
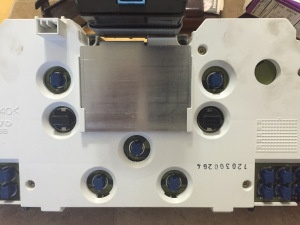
All of the bulbs on the bottom right and left sections are for your warning lights. The two closest to the top are your indicators. These are not the bulbs to be replaced for the instrument cluster illumination. However, if there bulbs are out, now is a good opportunity to change them.
All of the bulbs release by twisting their housings counter-clockwise.
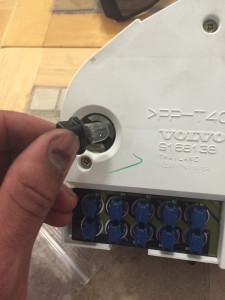
Remove the bulbs by pulling them from the housing. This works best if your hands are dry. Try not to put too much pressure on the bulb when pulling or you may break it! The new bulbs fit right into the existing housing.
Installation
Installation is simply the reverse of removal. Be sure to secure the ground strap for the air bag as well as secure the connector. Also, the T25 screws are all the same length...at least, they were for me, so don't worry if you mixed them up. Make sure to reconnect the battery.
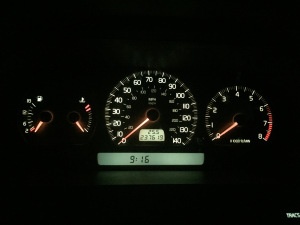
The best part is when night comes!
You can help the longevity of your new bulbs by using the roller switch on the left to dim the bulbs a bit.