- 09/03/2020
- 12 Min Read
- By: Christian Schaefer
How To Replace The Clutch, Flywheel, & Rear Main Seal On A BMW E46

The clutch is directly responsible for transferring power from the engine to the transmission. While the clutch is often referred to as one unit, several parts make up the assembly. The clutch disc is a plate with friction material on either side designed to grab the flywheel and pressure plate, connecting the engine to the transmission. The pressure plate is what allows the clutch to be released so that gears can be changed.
The pressure plate, clutch disc, and flywheel all eventually need replacement due to wear. An engine or transmission removal is necessary to service these items, so replacing them is the easiest way to save time. Doing the job yourself on your BMW E46 is not an easy task but is doable. Follow Gareth's step-by-step tutorial to ensure that you do it correctly the first time.
BMW models and years applicable:
|
|
|
|
|
|
|
|
|
|
|
|
|
|
|
|
|
Symptoms of a failing clutch on a BMW E46:
- Slipping under acceleration
- The engine revs freely, but the vehicle does not accelerate
- Difficulty shifting gears
- Squeaking noises whole clutch pedal is pressed
- Sticky or spongy clutch pedal feel when clutch pedal pressed
- Burning smell from a slipping clutch
When the friction material on the clutch disk wears down, it loses its ability to hold the torque the engine produces. Once this happens, the disc will slip in-between the pressure plate and flywheel, resulting in a loss of drive. A slipping clutch will also cause an excess amount of heat on the pressure plate’s friction surfaces and flywheel. This will generate hotspots and can cause these parts to warp.
While the engine or transmission is out of the car, any other items that might need service, such as the rear main seal, can be easily replaced. A leaky rear main seal can also wreak havoc on a clutch system. If the rear main seal is leaking, engine oil can coat the clutch system, significantly reducing its ability to hold torque.
What will it cost to replace the clutch assembly on a BMW E46?
The cost is relative. There are three specialty tools needed for the job that cost nearly $170 on their own. The lightweight flywheel and clutch kit used in the video is a hair over $1500. A standard OE clutch kit with the lightweight flywheel is a hair under $1000. Factor in any other tools, cleaning supplies, and snacks, and the job’s cost could near $2000.
However, it’ll still be cheaper than a shop performing the job. Ordering your parts through an independent shop or dealership will cost more off the bat due to them charging a markup. They’ll need to add around six hours of labor to complete the job, bringing the total cost close to $4500.
How long will it take to replace the clutch assembly on my BMW E46?
This is not a quick job. To get to the clutch and rear main seal, the transmission needs to be removed from the car. Even with access to a lift and specialty tools, certain parts of the transmission installation and removal process will be difficult. Expect the job to take at least a full weekend, even if you have all of the tools you need, have some experience turning wrenches, and a buddy to help out.
We recommend having at least every tool on the list below. Access to more may help speed things along. If you live in an area where rust is normal, good luck.
Tools required to replace the clutch assembly in my E46 BMW:
- Floor Jack
- Jack Stands
- 10mm Socket
- 13mm Socket
- 15mm Socket
- 16mm Socket
- 18mm Socket
- 10mm Wrench
- 13mm Wrench
- 16mm Wrench
- 17mm Wrench
- 18mm Wrench
- E10 Socket
- E12 Socket
- E14 Socket
- E16 Socket
- 6mm Allen
- Ratchet Set
- Ratchet Extensions
- Swivel Extensions
- Punch
- Mallet
- Flathead Screwdrivers
- Bearing Puller
- Flywheel Locking Tool
- Clutch Alignment Tool
- BMW Crankshaft Seal Tool
- MAP Gas Torch
- Impact Wrench (Recommended)
- Electric Ratchet (Recommended)
- Extractor Sockets
- Torque Wrench
- Thread Taps
Parts required to replace the clutch assembly on my BMW E46:
Or
Steps required to replace the clutch assembly on my BMW E46:
Step 1: Remove the exhaust
The E46 has a plastic splash shield that covers the underside of the engine. Use a Phillips-head screwdriver to rotate the seven fasteners 90°. That will release the fasteners, and the splash shield can be removed.
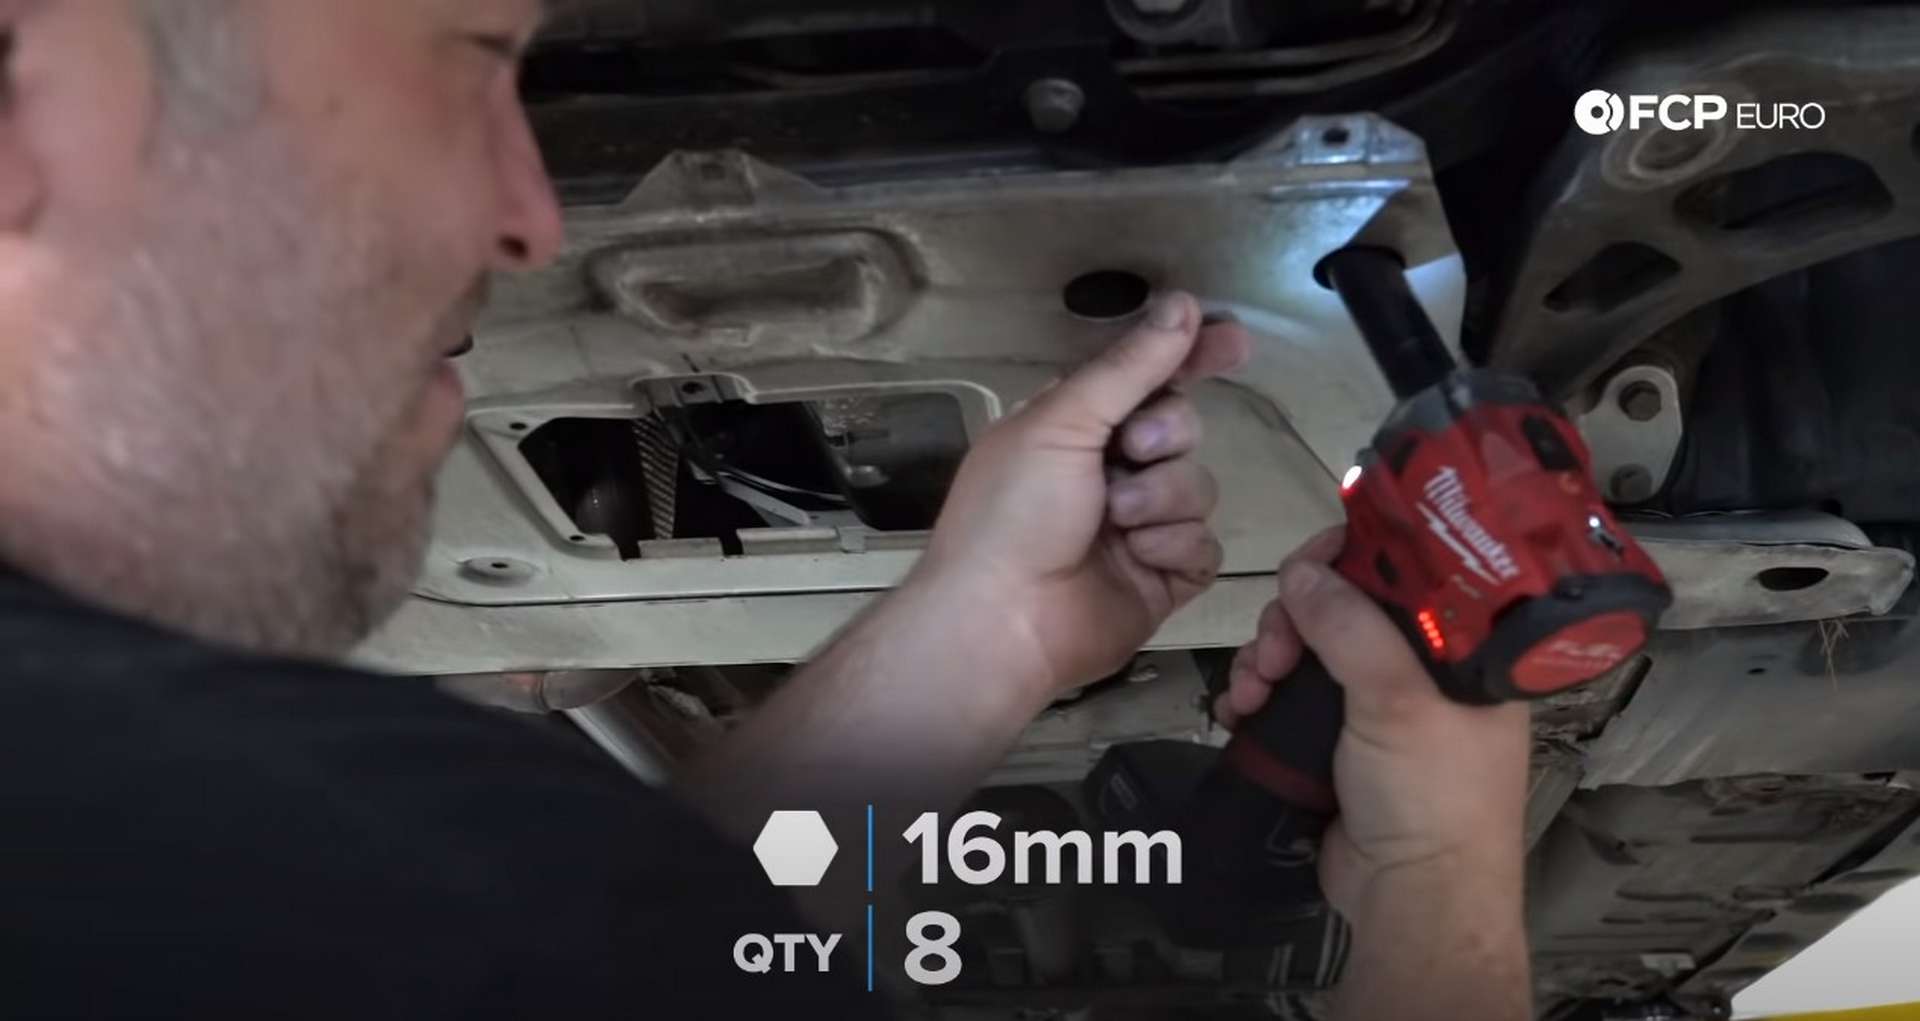
Next, move on to the subframe reinforcement plate, located behind the splash shield. Use a 16mm socket to remove the eight bolts securing the plate to the subframe.
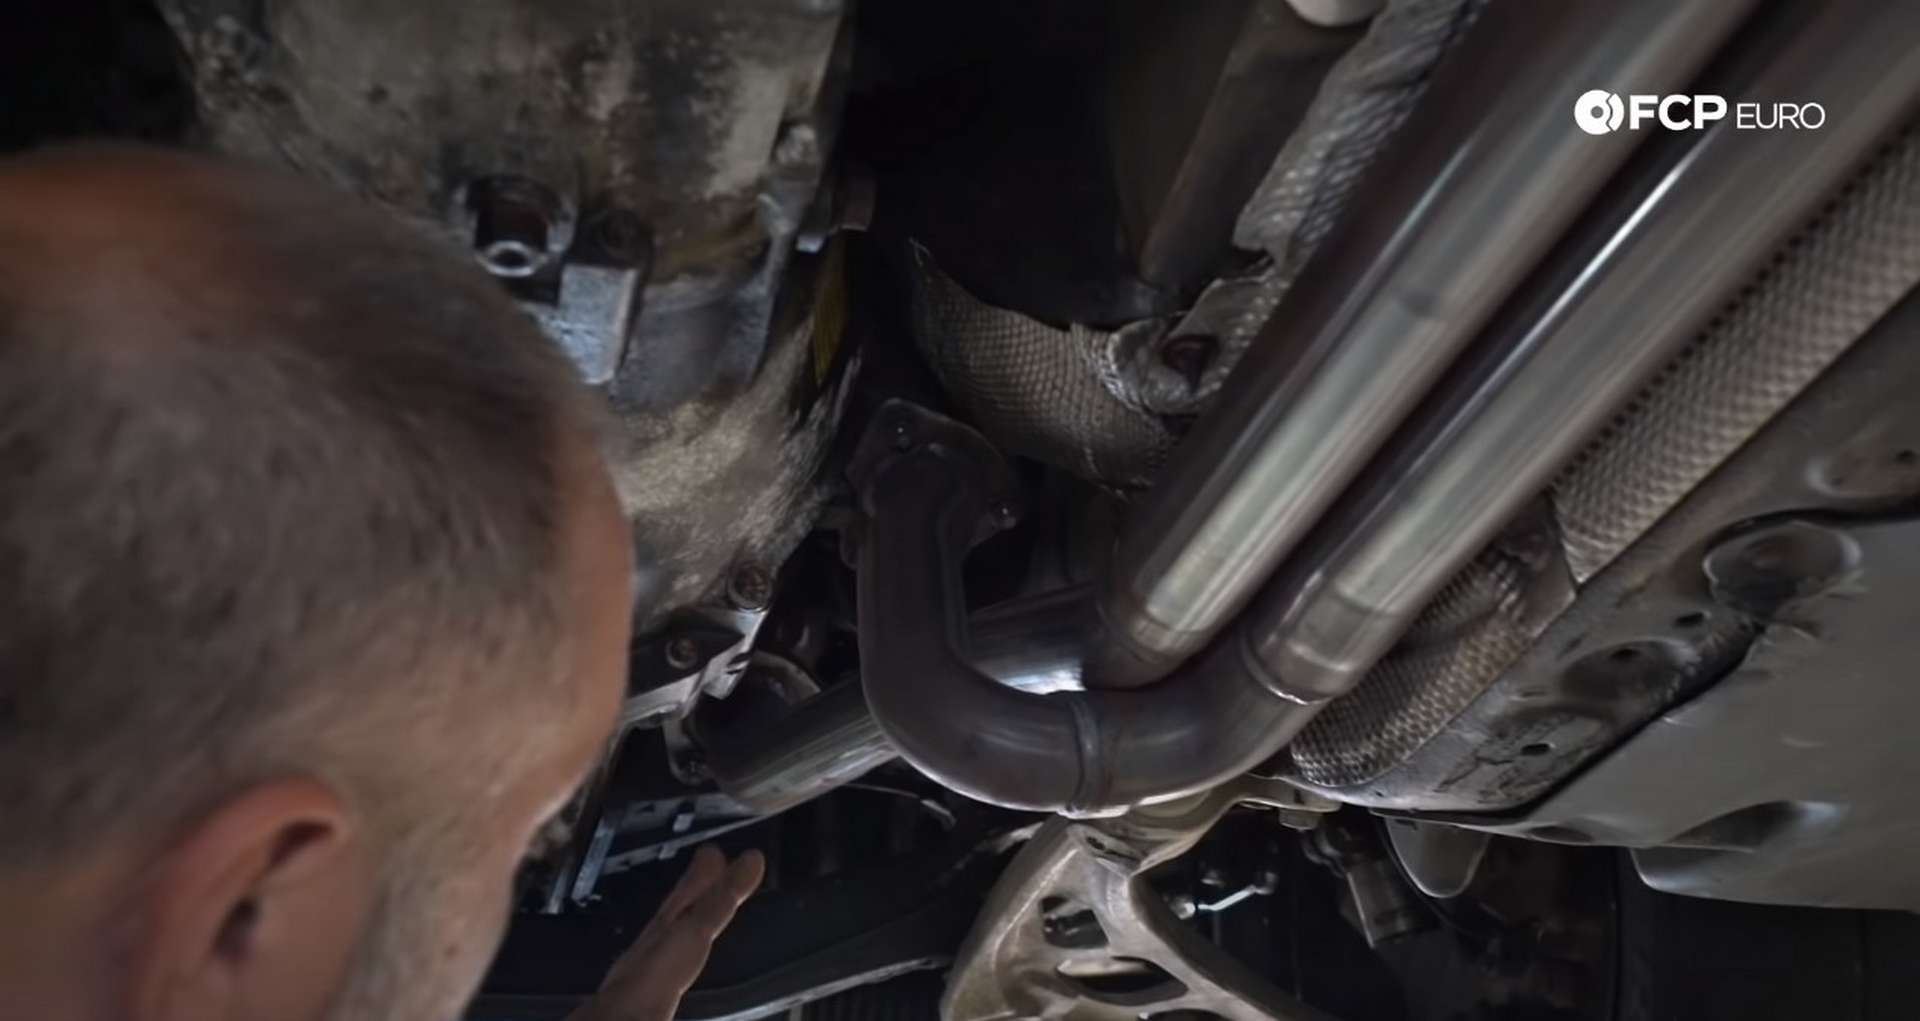
BMW uses copper nuts on the exhaust hardware. The nuts have a habit of becoming corroded and seizing, so lubricant or a heat source will help. Use a 15mm socket to remove the six nuts.

Support the middle of the exhaust with a jack or jack stands; otherwise, it can fall on you. Further down, the exhaust is a reinforcement plate. Remove the four 13mm mounting bolts, and remove the plate.
Finally, remove the rear exhaust hangar by removing the two 13mm nuts for the hangar bracket. If you don’t want to remove the bracket for fear of stripping the nuts, just remove the exhaust from the hangar.
Either way, the exhaust from the manifolds back can be removed from under the car. Above the exhaust and just behind the transmission, a heat shield sits over the driveshaft. Remove the two 10mm bolts and set the shield aside.
Step 2: Remove the transmission mount
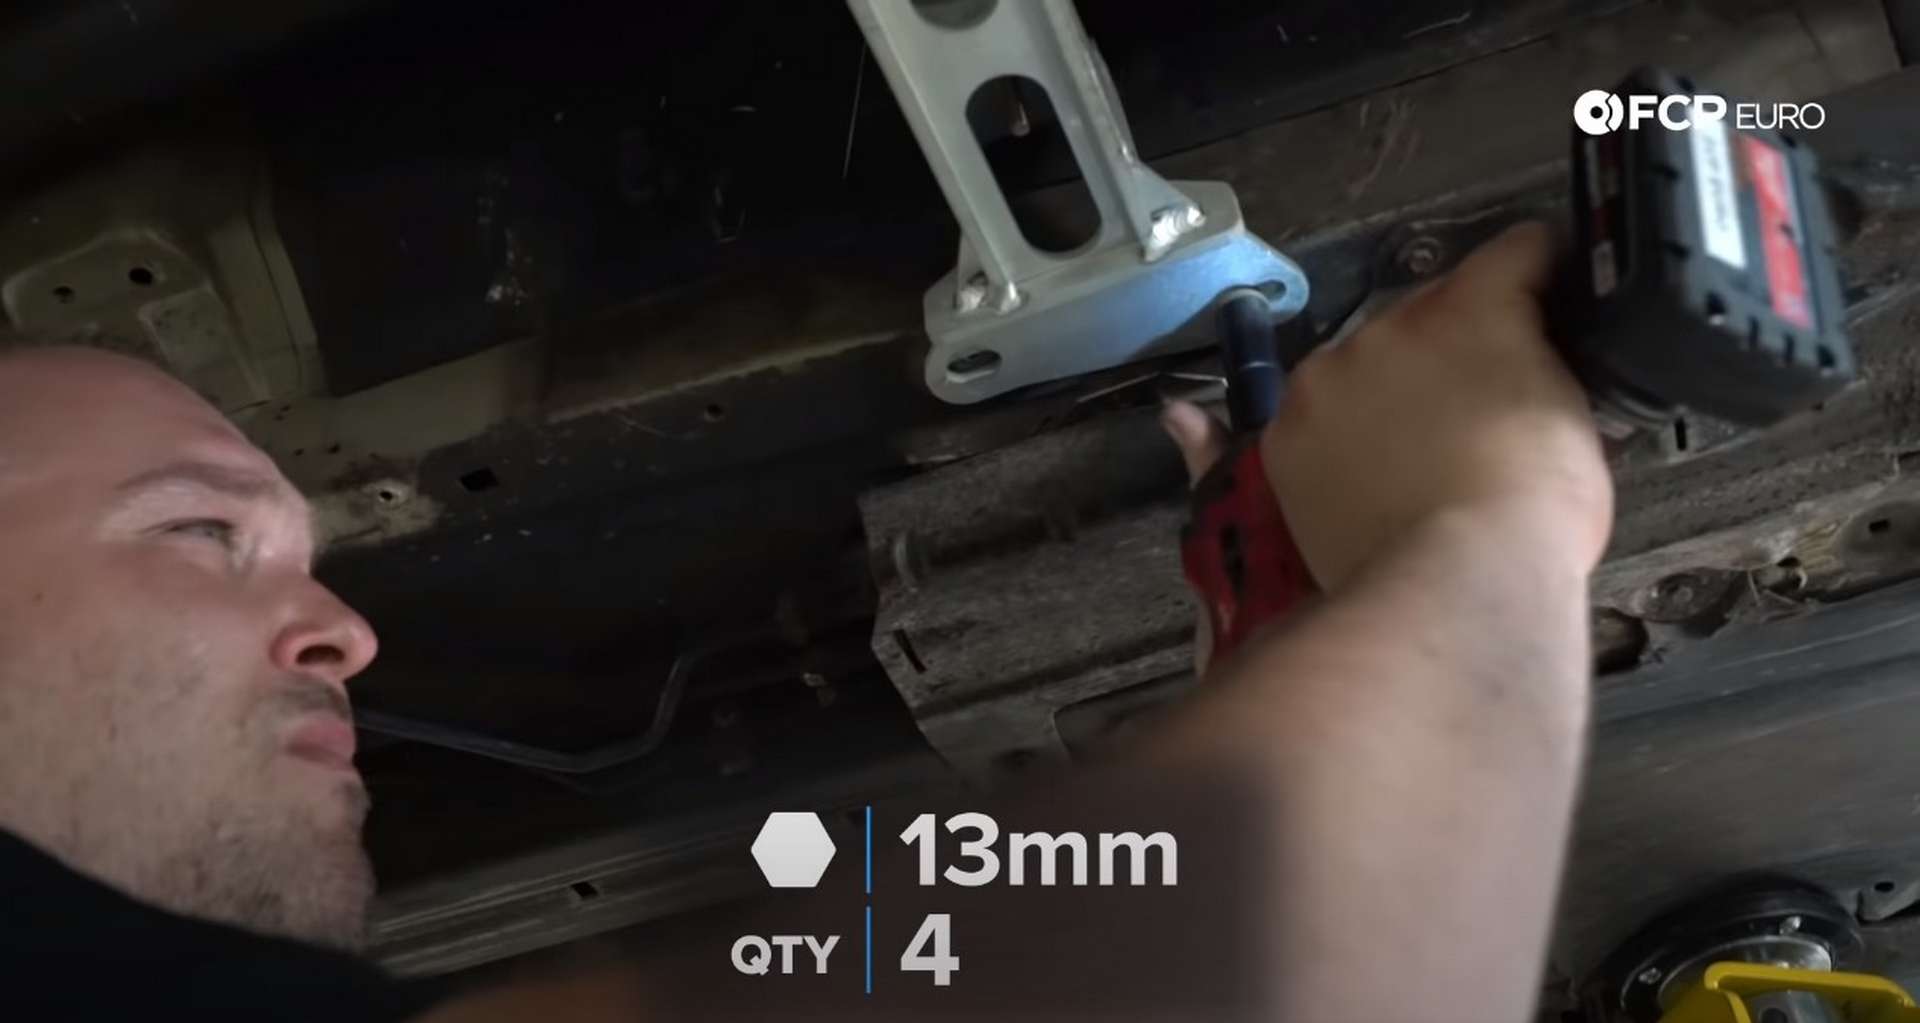
Before removing anything, support the transmission with a jack. Two bolts connect the transmission it the crossmember. Use a 13mm socket to remove the nut from the bolts while counter holding the bolt heads with a 13mm wrench.

Then, remove the four crossmember mounting bolts with a 13mm socket and remove it from the car.
Step 3: Remove the driveshaft
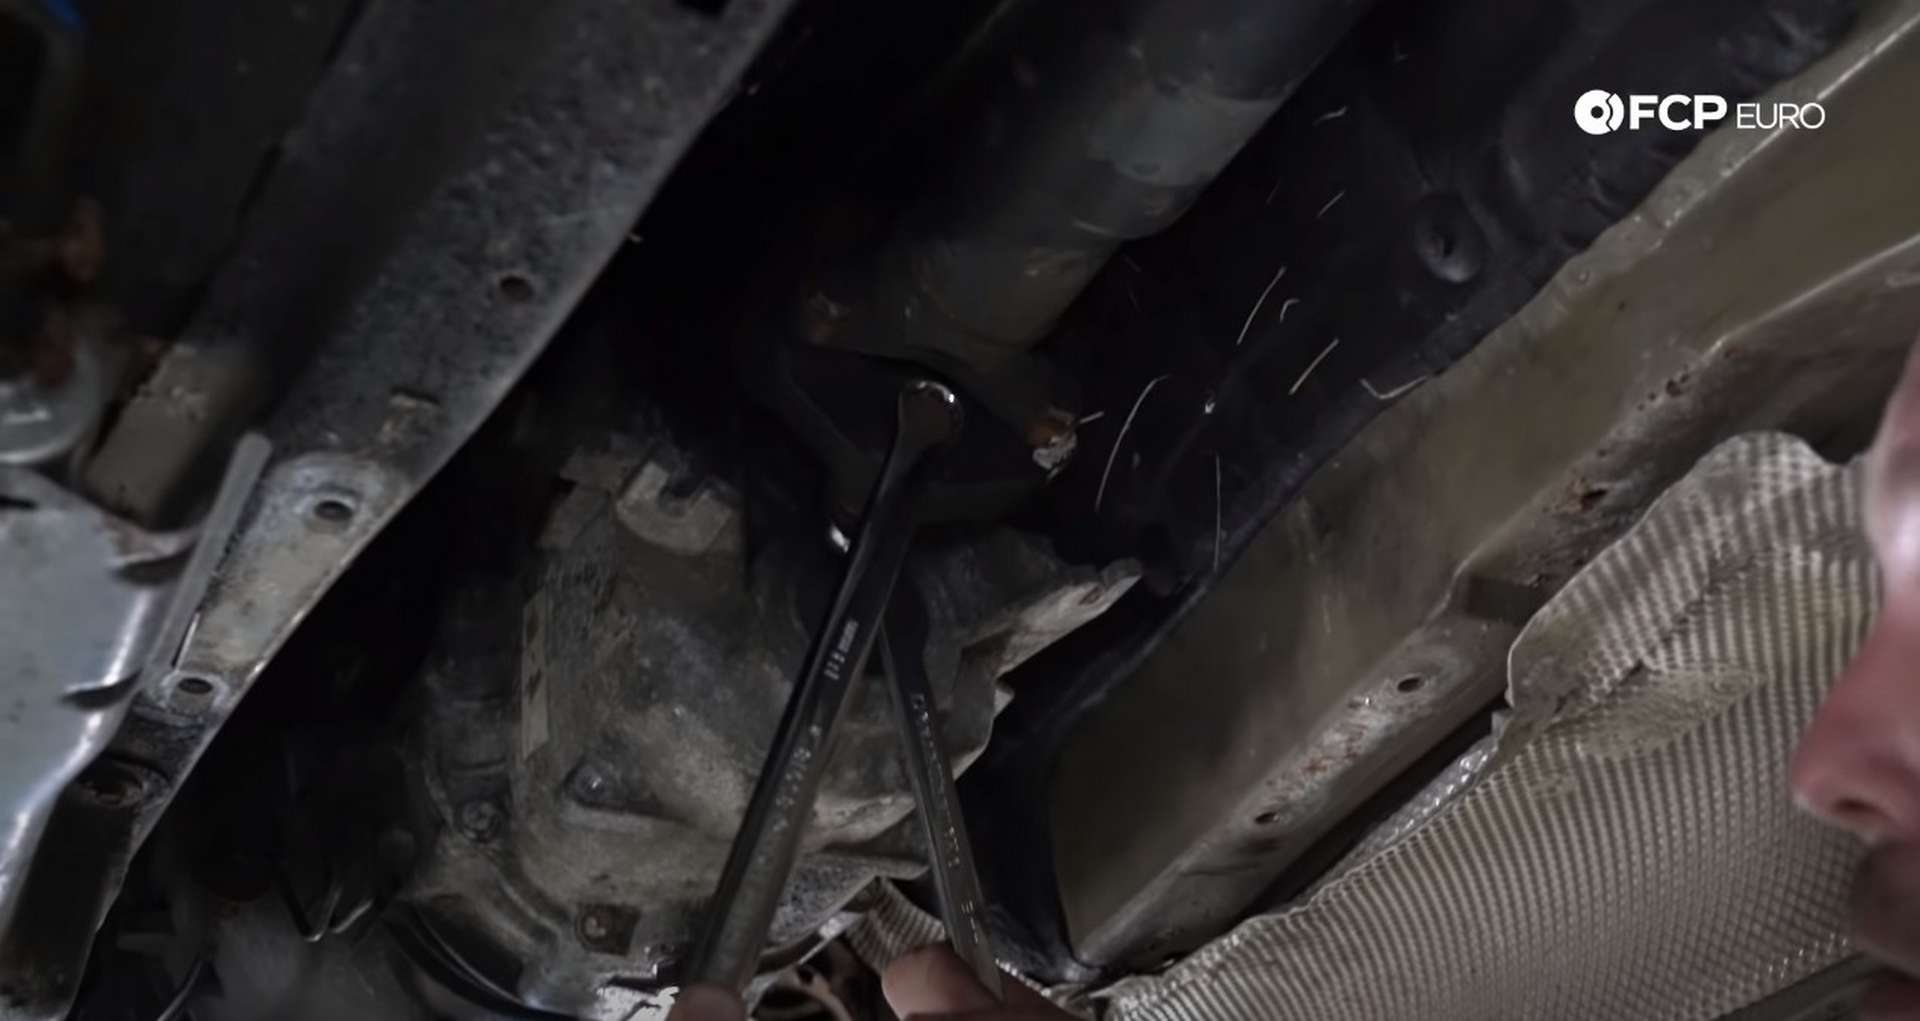
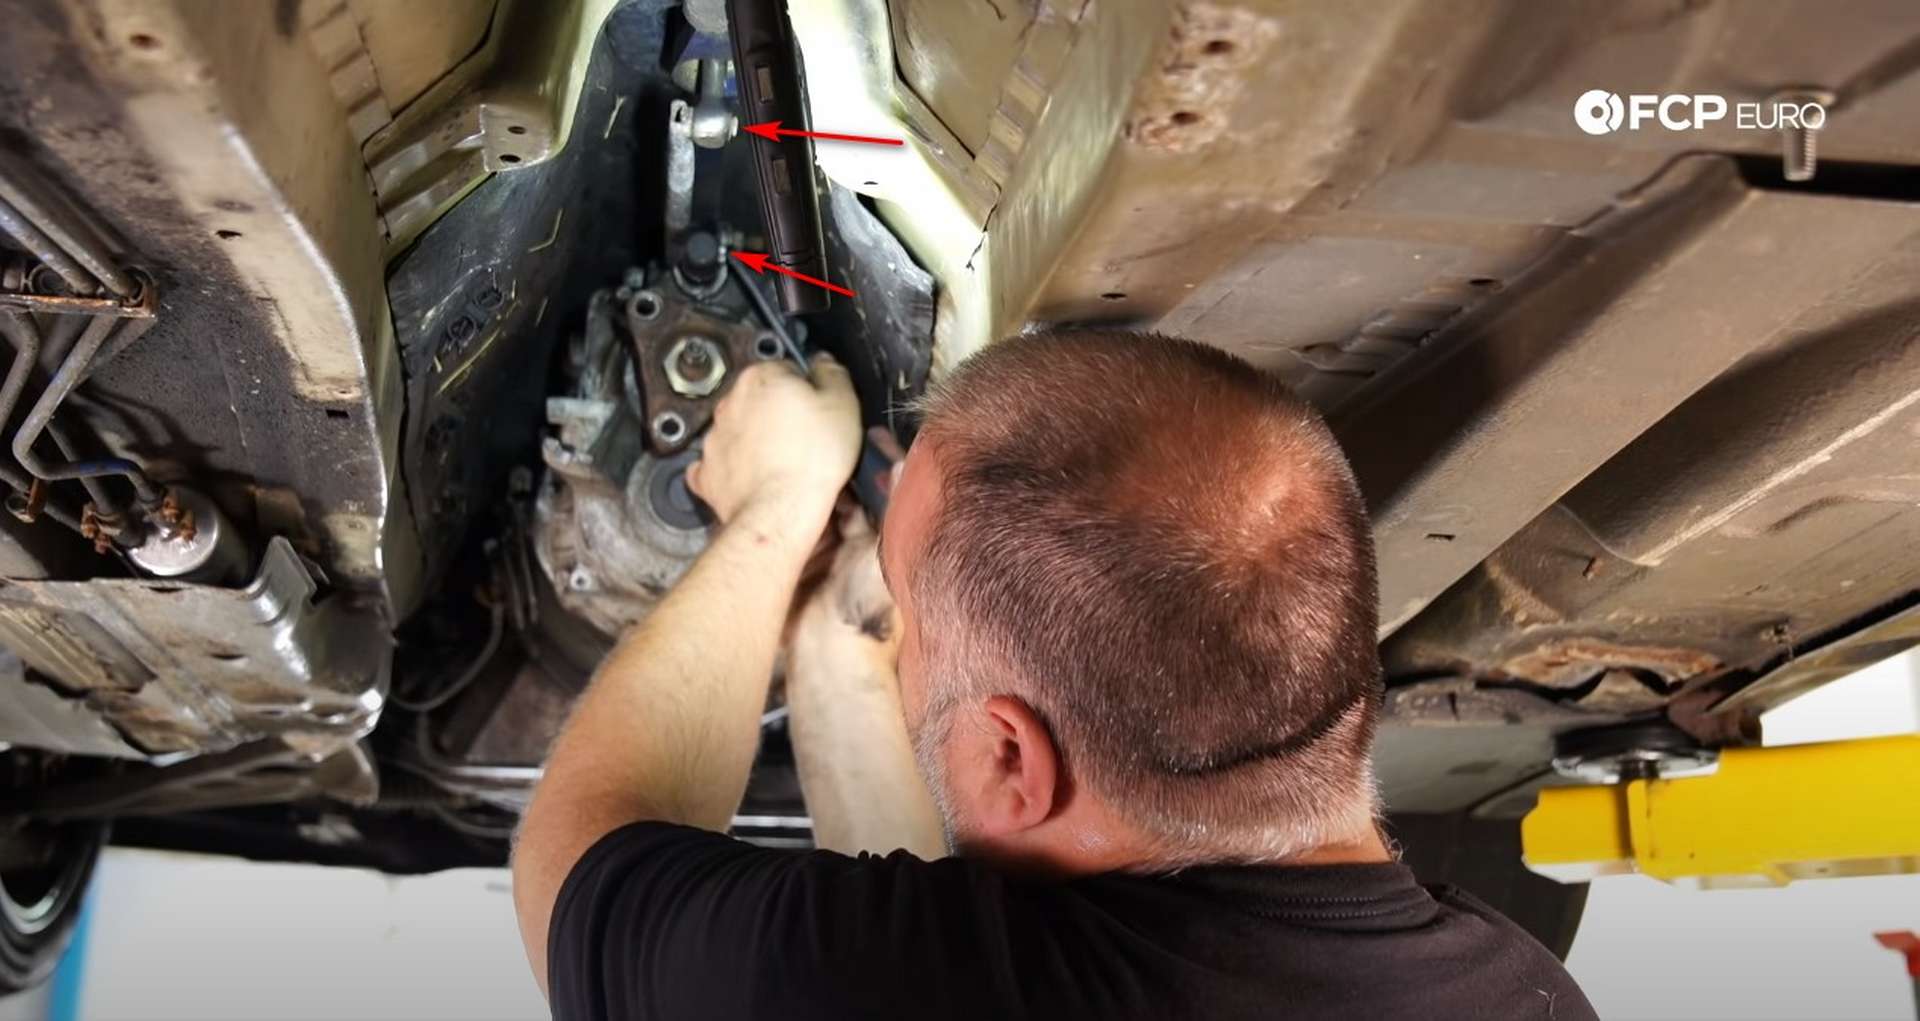
Starting at the back of the transmission, remove the three bolts mounting the driveshaft to the transmission flange. Hold the bolt’s head with an 18mm wrench and remove the nut with another 18mm wrench or an 18mm socket.
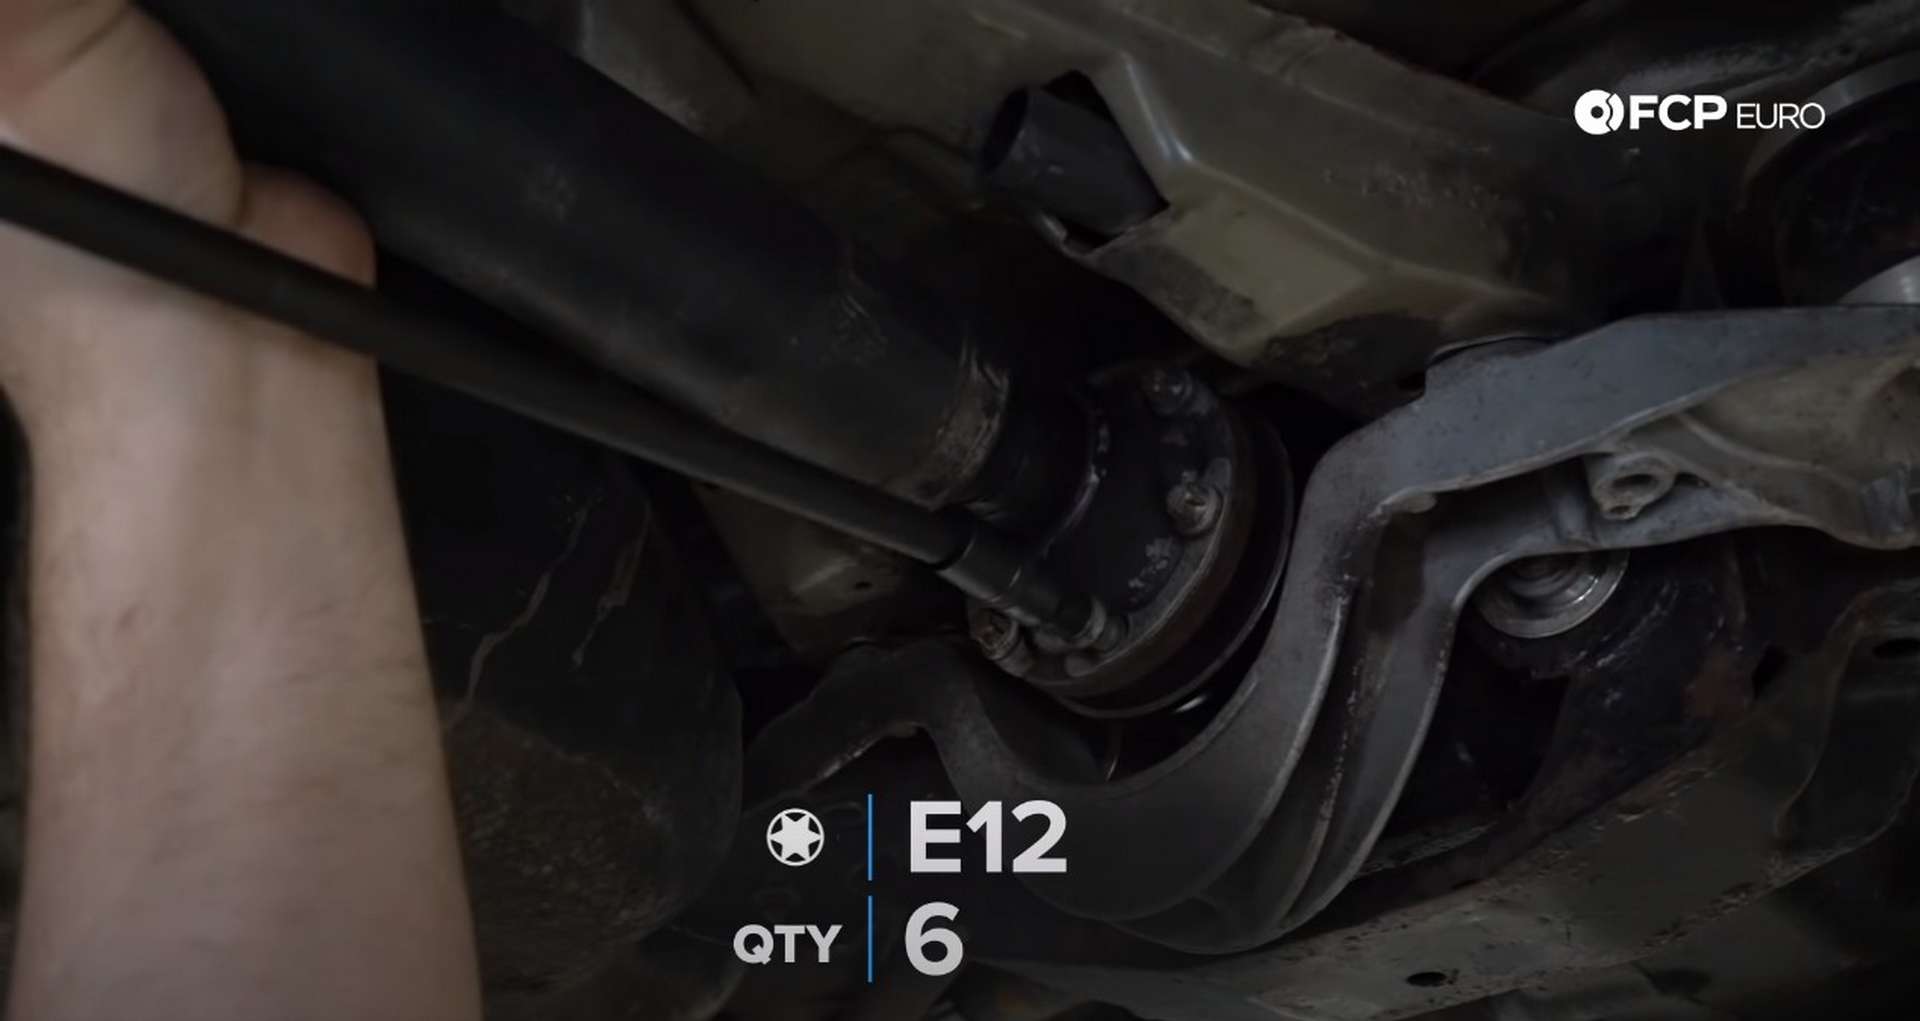
Next, head to the back of the driveshaft where it meets the differential. Use an E12 socket to remove the six bolts mounting the driveshaft to the differential flange.
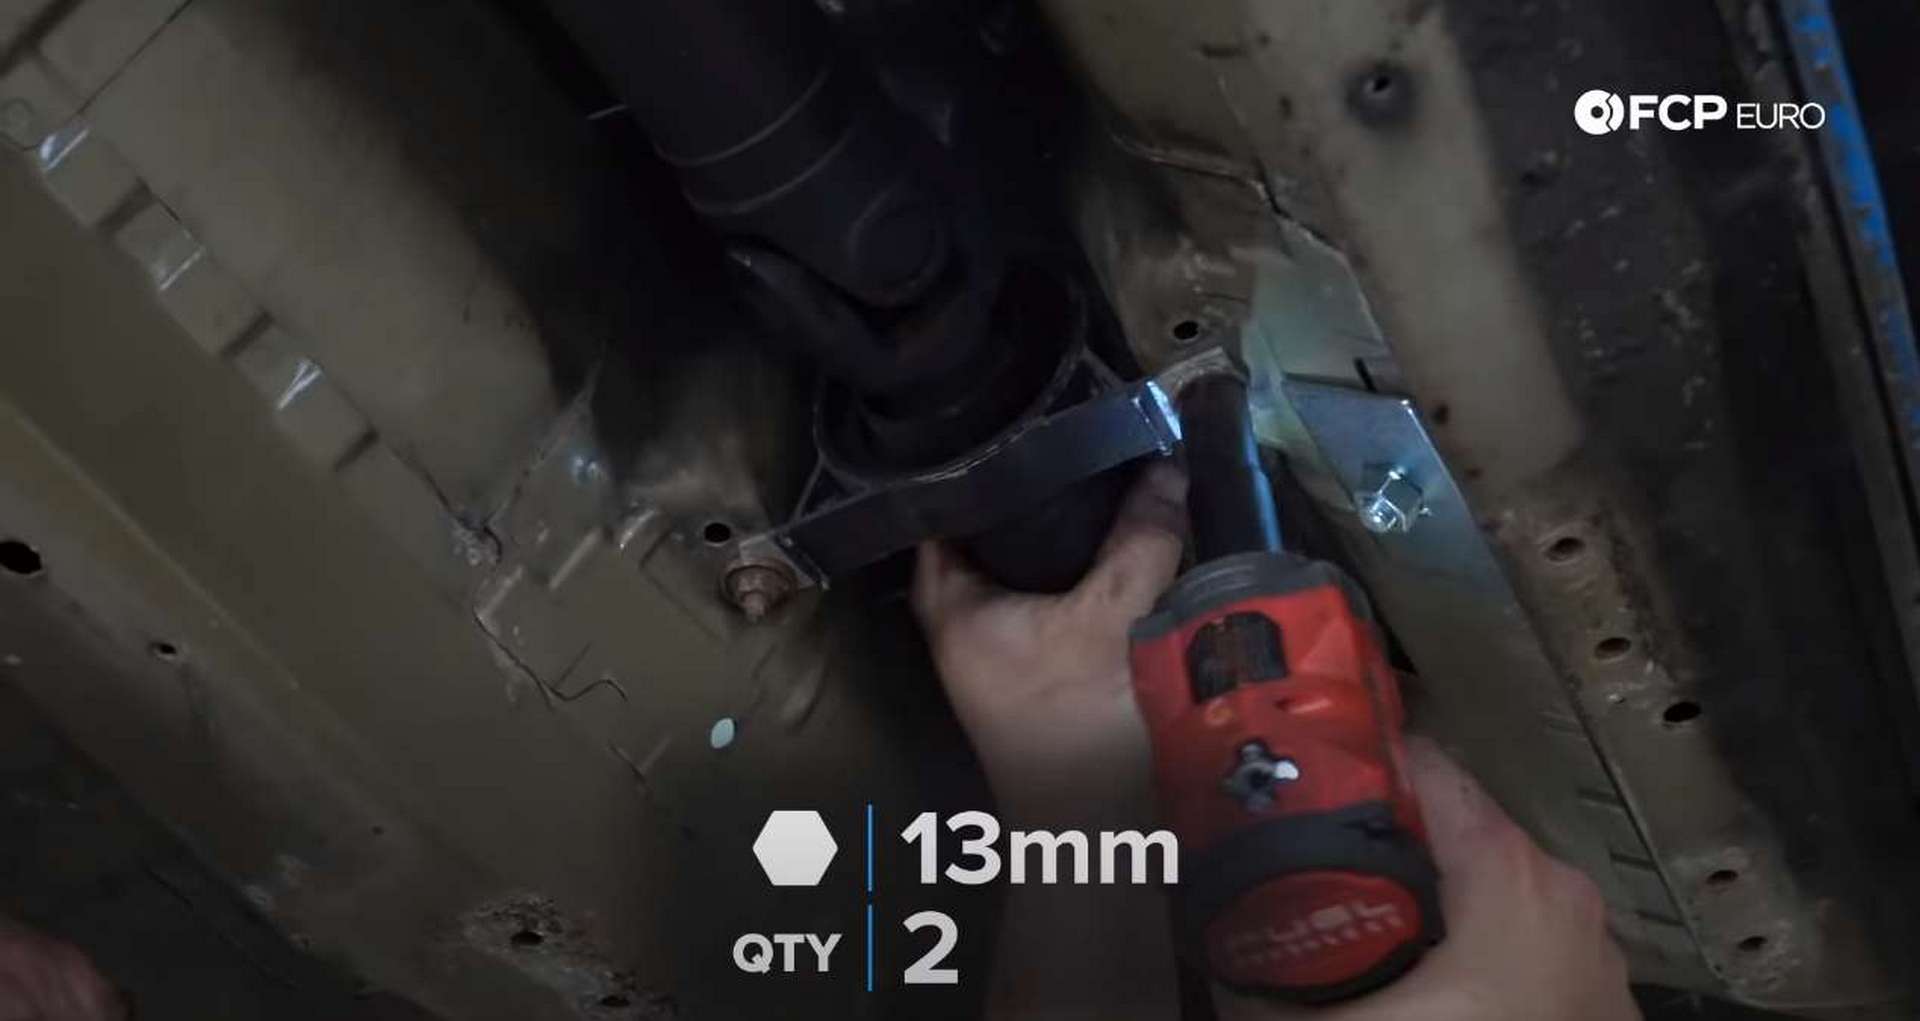
Finally, two 13mm bolts are supporting the middle of the driveshaft. Use a 13mm socket to remove the bolts, and the driveshaft will drop out of the car.
Support the center of the driveshaft as this will droop down first. Then, get the drive shaft separated from the differential flange first before separating it from the transmission flange.
Step 4: Remove the everything connected to the transmission
First up for removal is the linkage rod. The rod connects the shifter to the selector forks in the transmission. Use a flathead screwdriver to remove the clips on each rod’s end and then separate the rod from the shift assembly. Corrosion may make the rod removal difficult, give it a few taps with a mallet to free it.
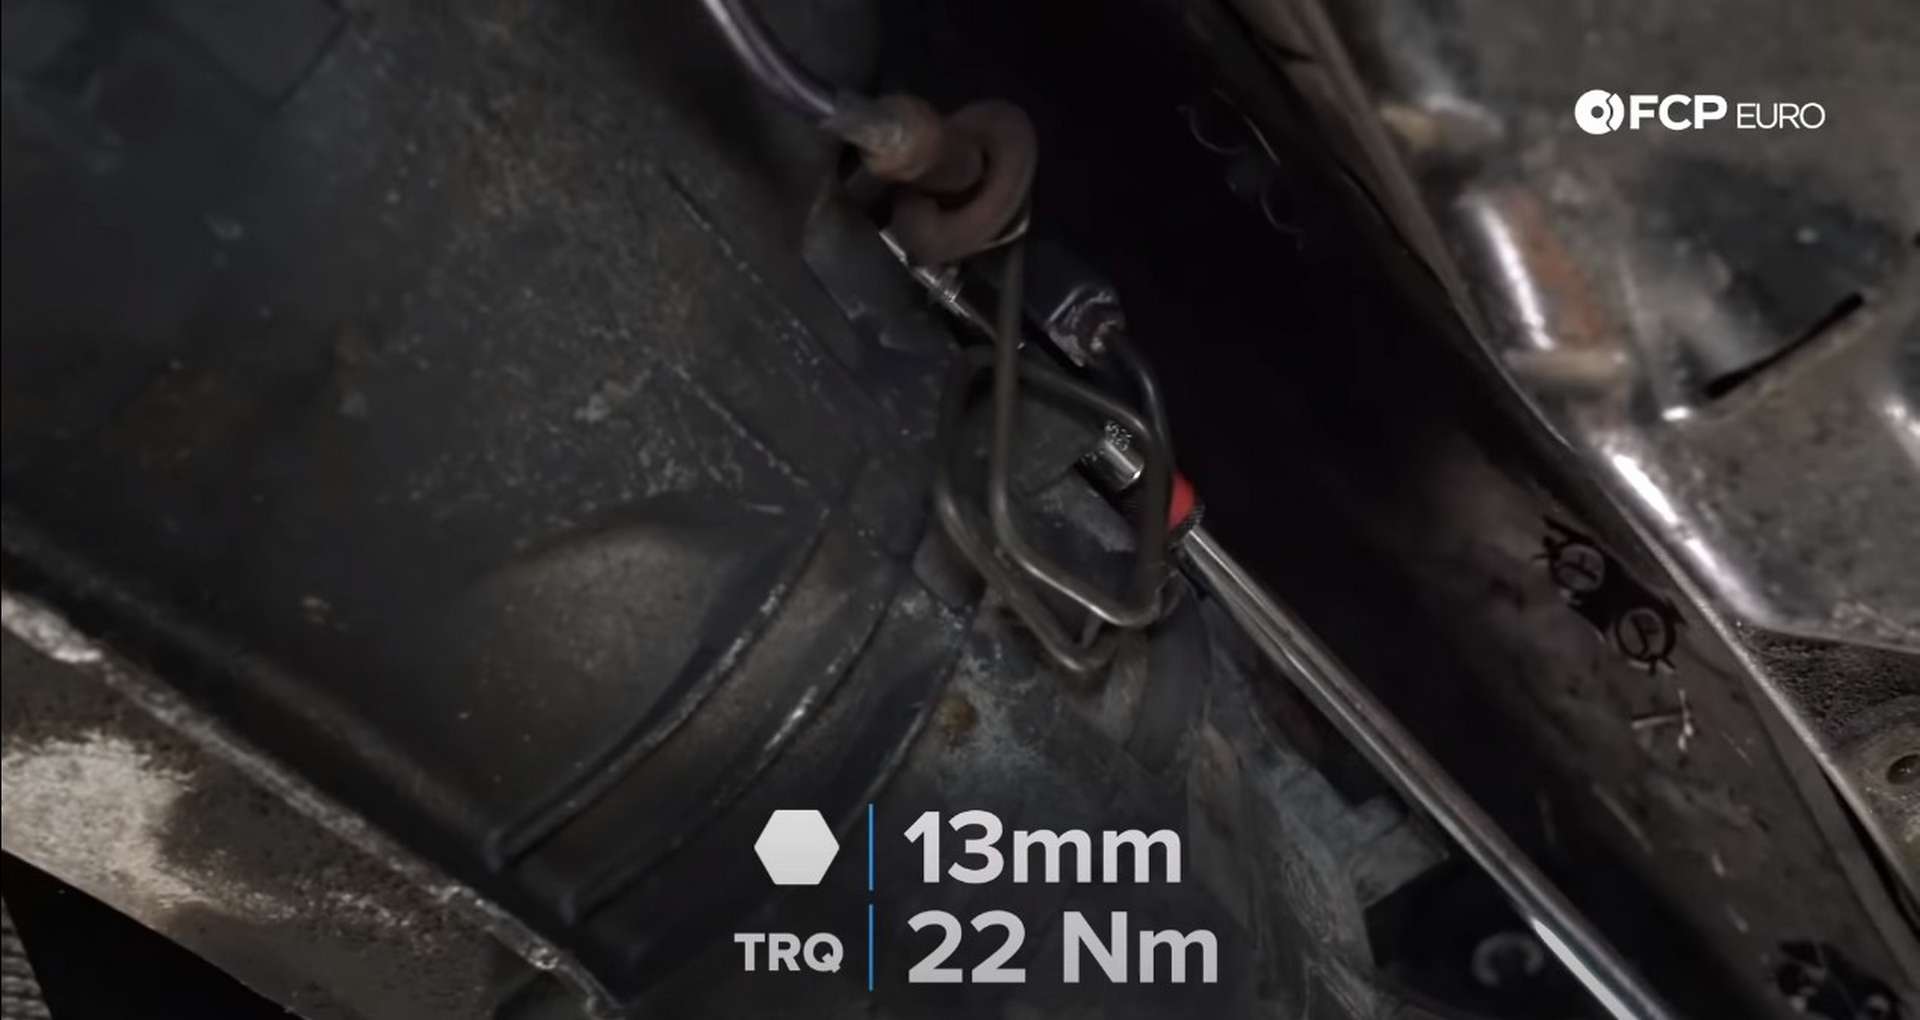
To save time, not bleeding a clutch, remove the slave cylinder from the transmission. Use a 13mm socket on a long extension to remove the two slave cylinder mounting bolts from the driver’s side of the transmission.
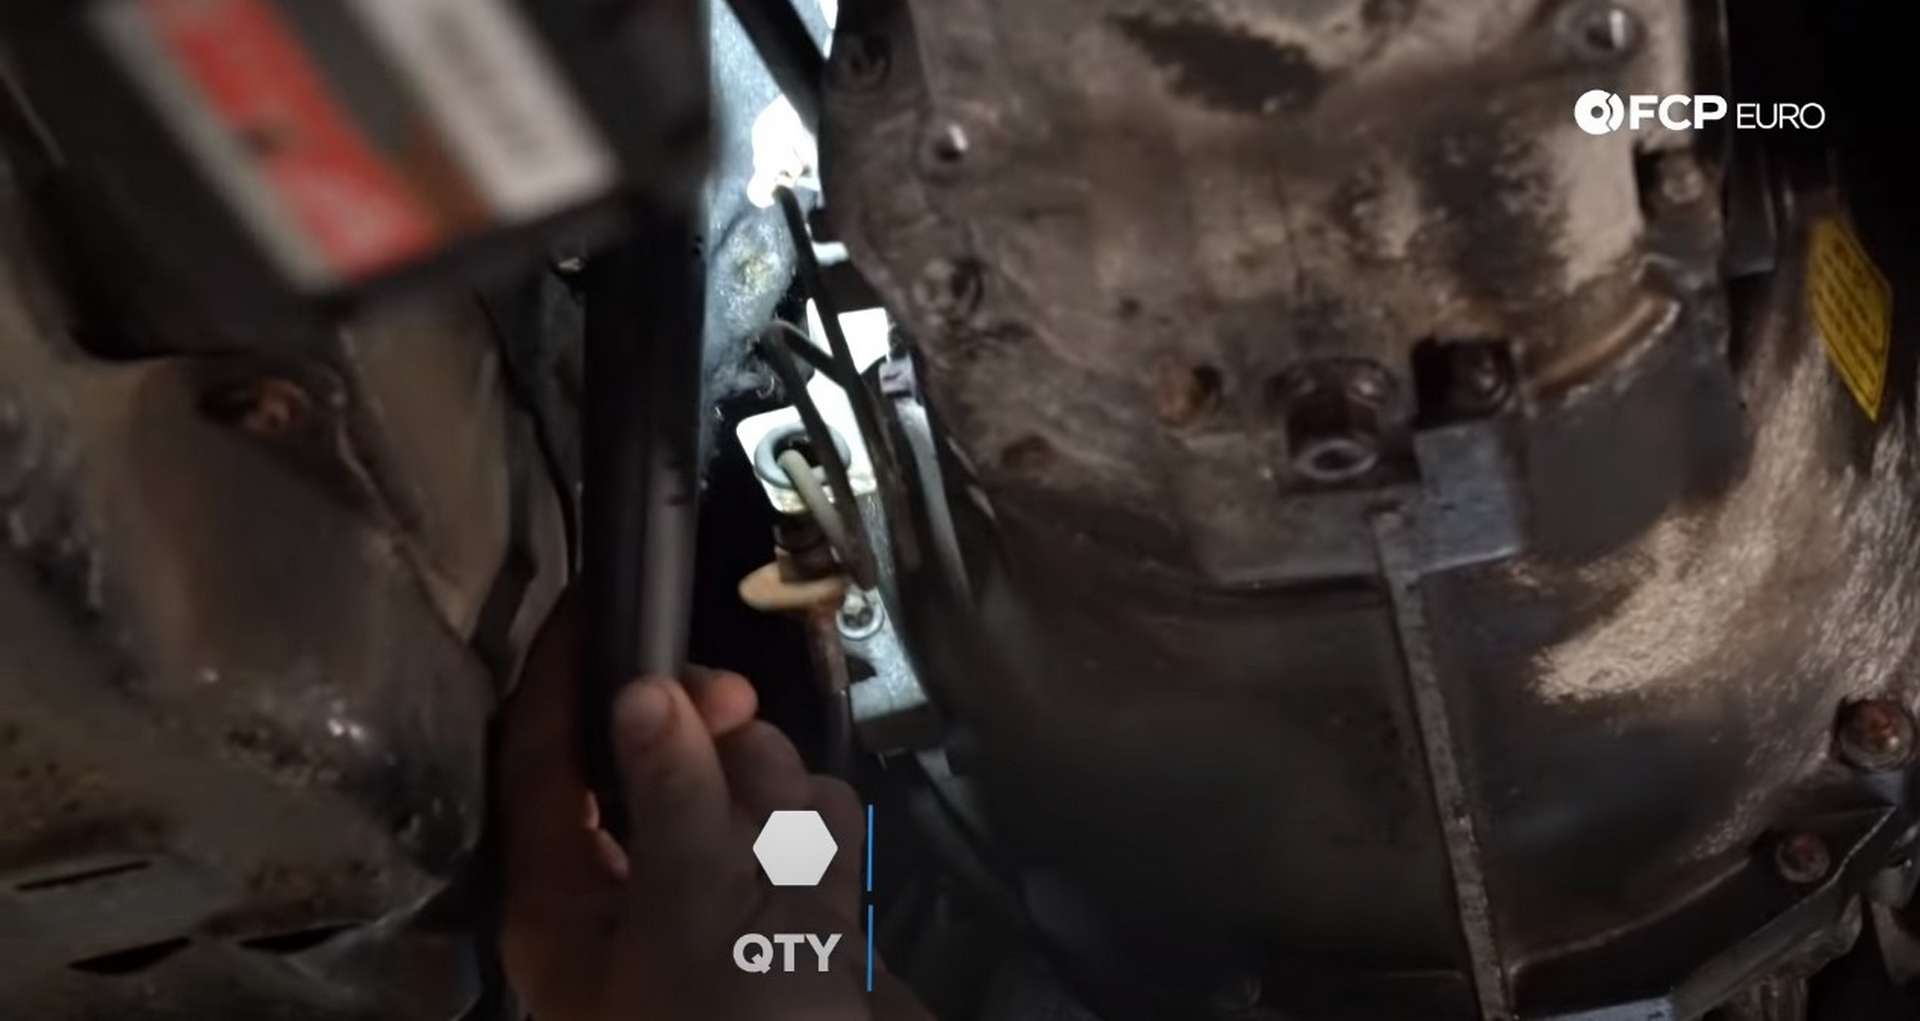
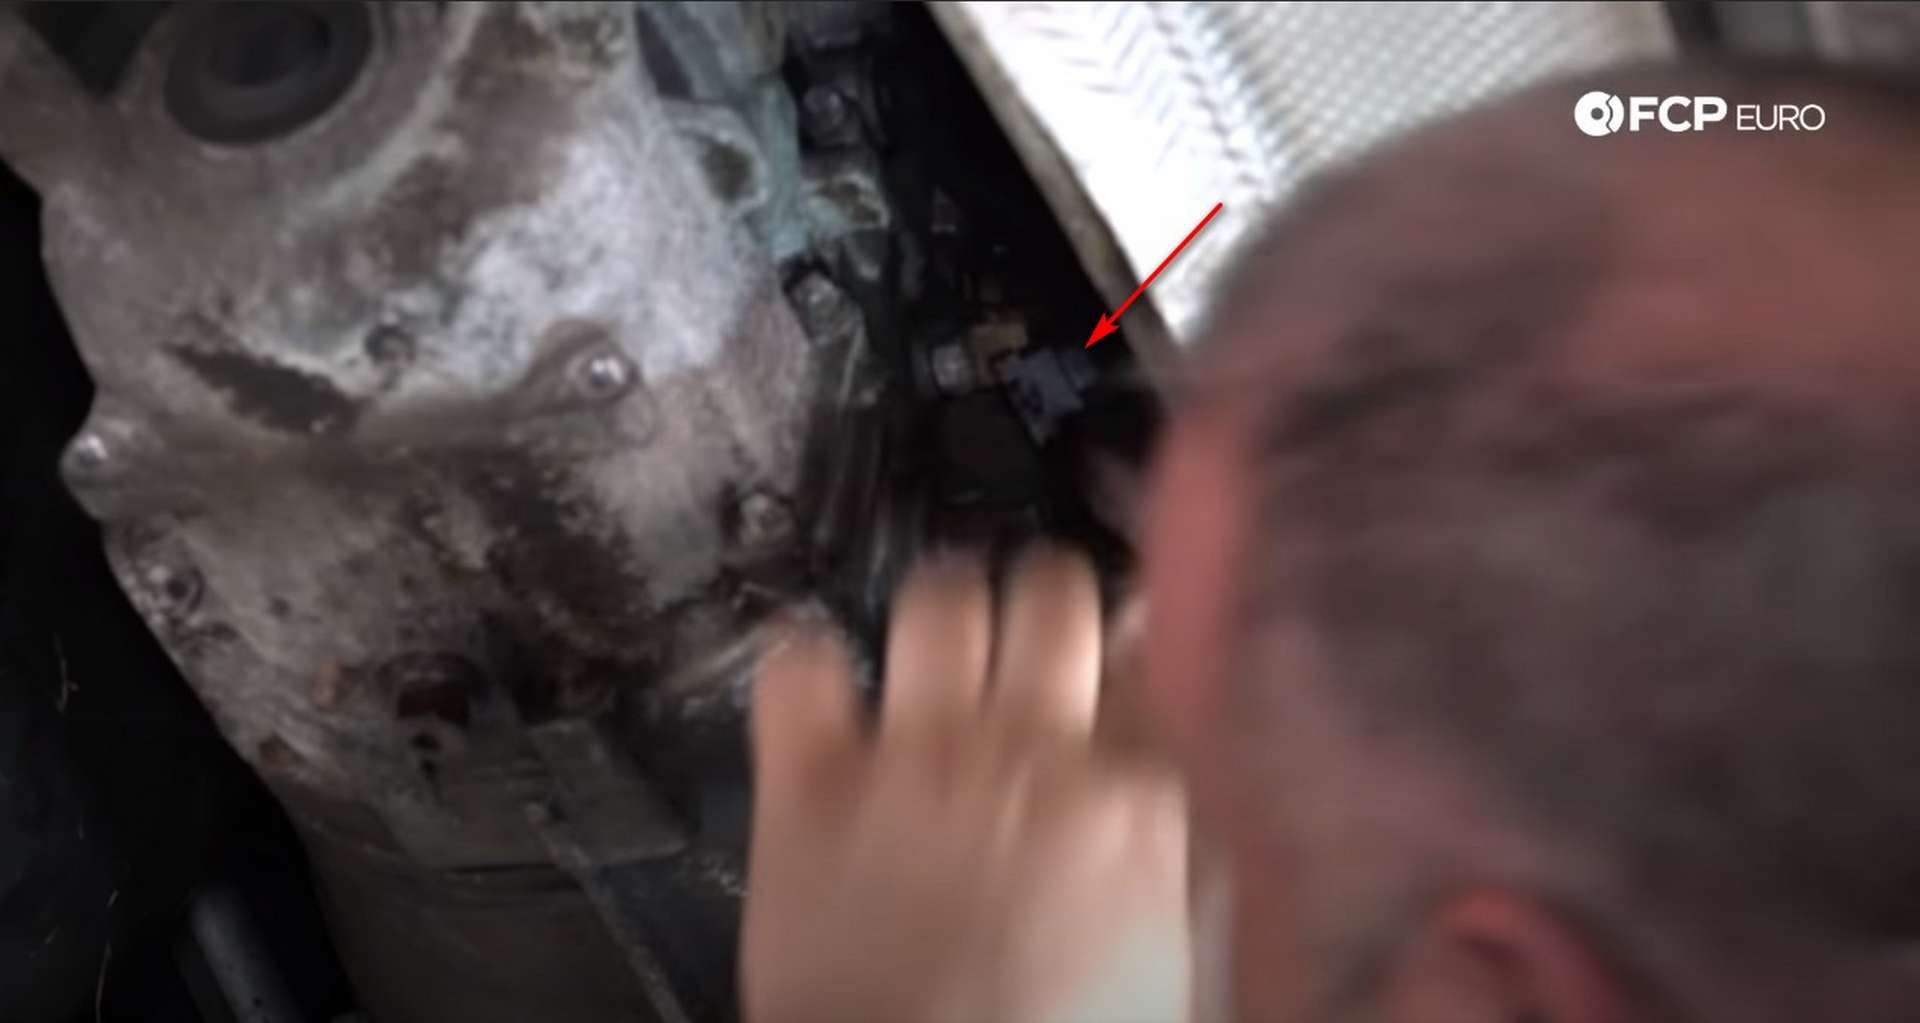
At the back of the transmission on the passenger’s side is the reverse light switch. Remove the plug from the switch and feed it up and over the transmission. The reverse light switch wiring harness is attached to the driver’s side of the transmission via a few clips. Pull the harness out of the clips so that it is no longer connected to the transmission.
Step 6: Remove the transmission
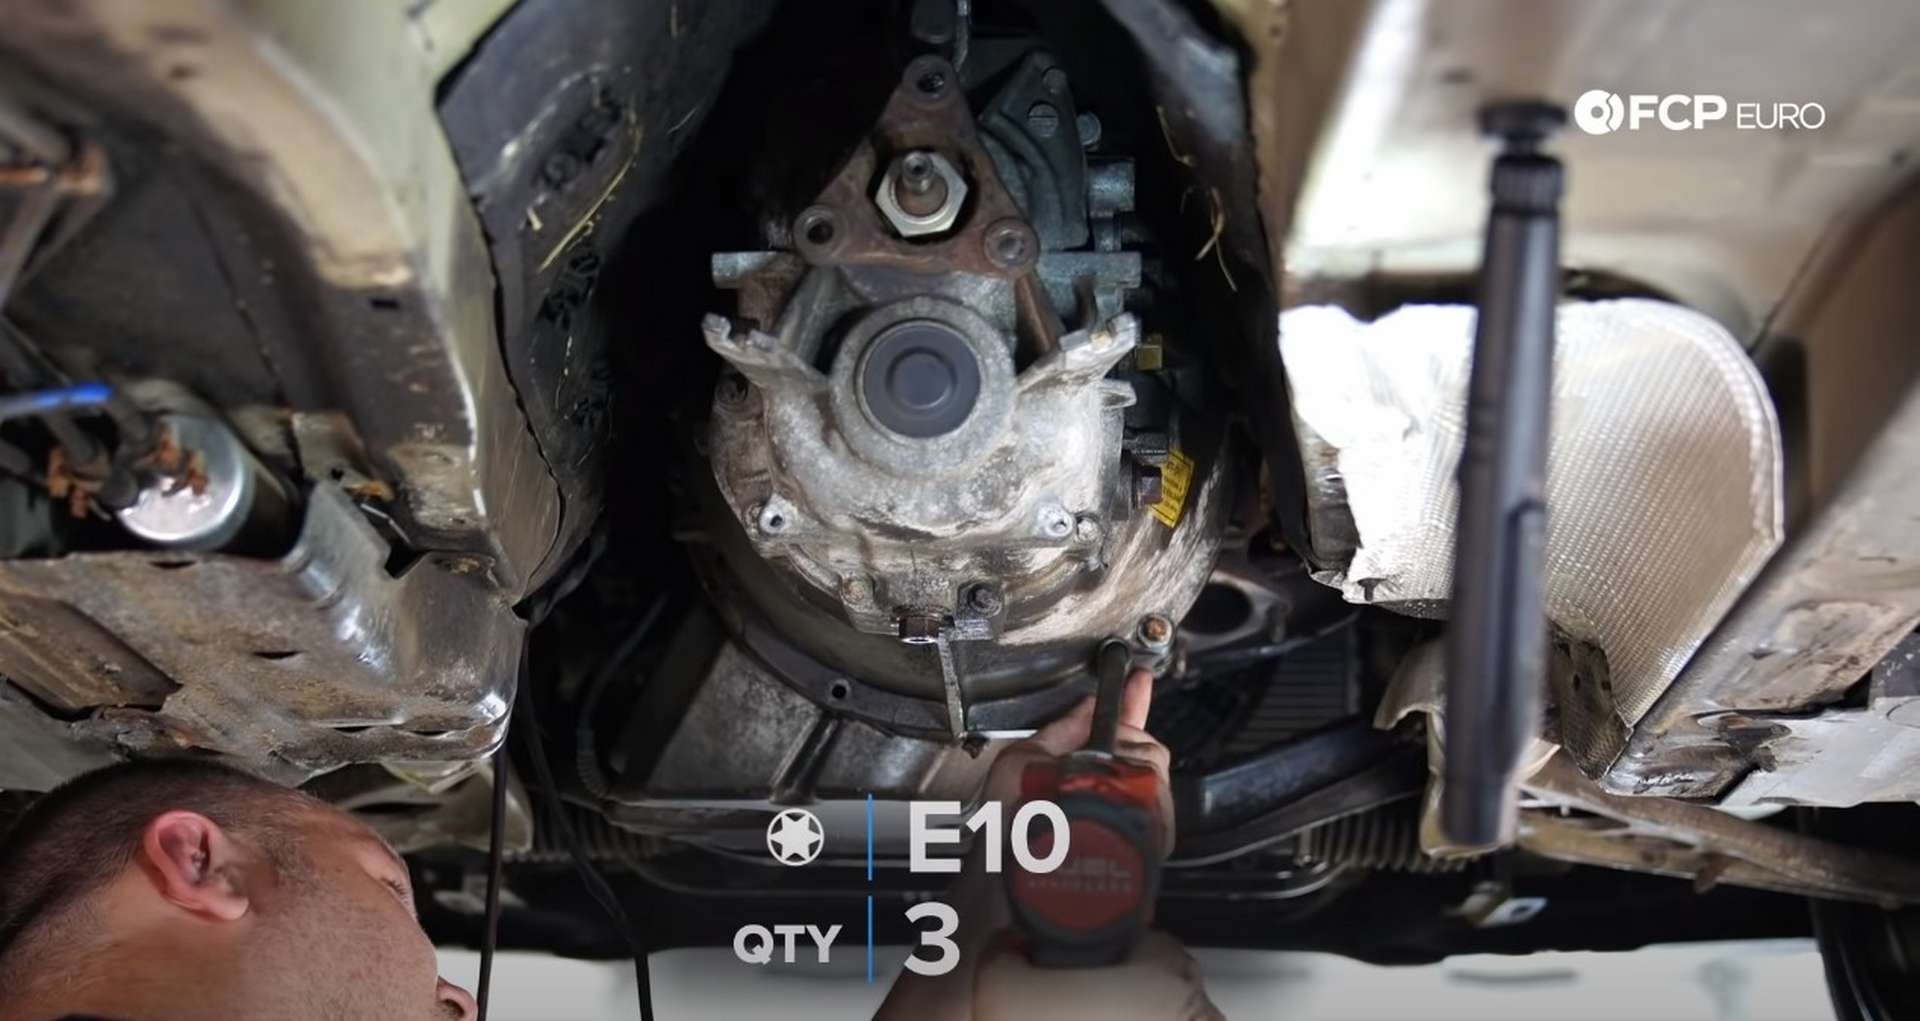
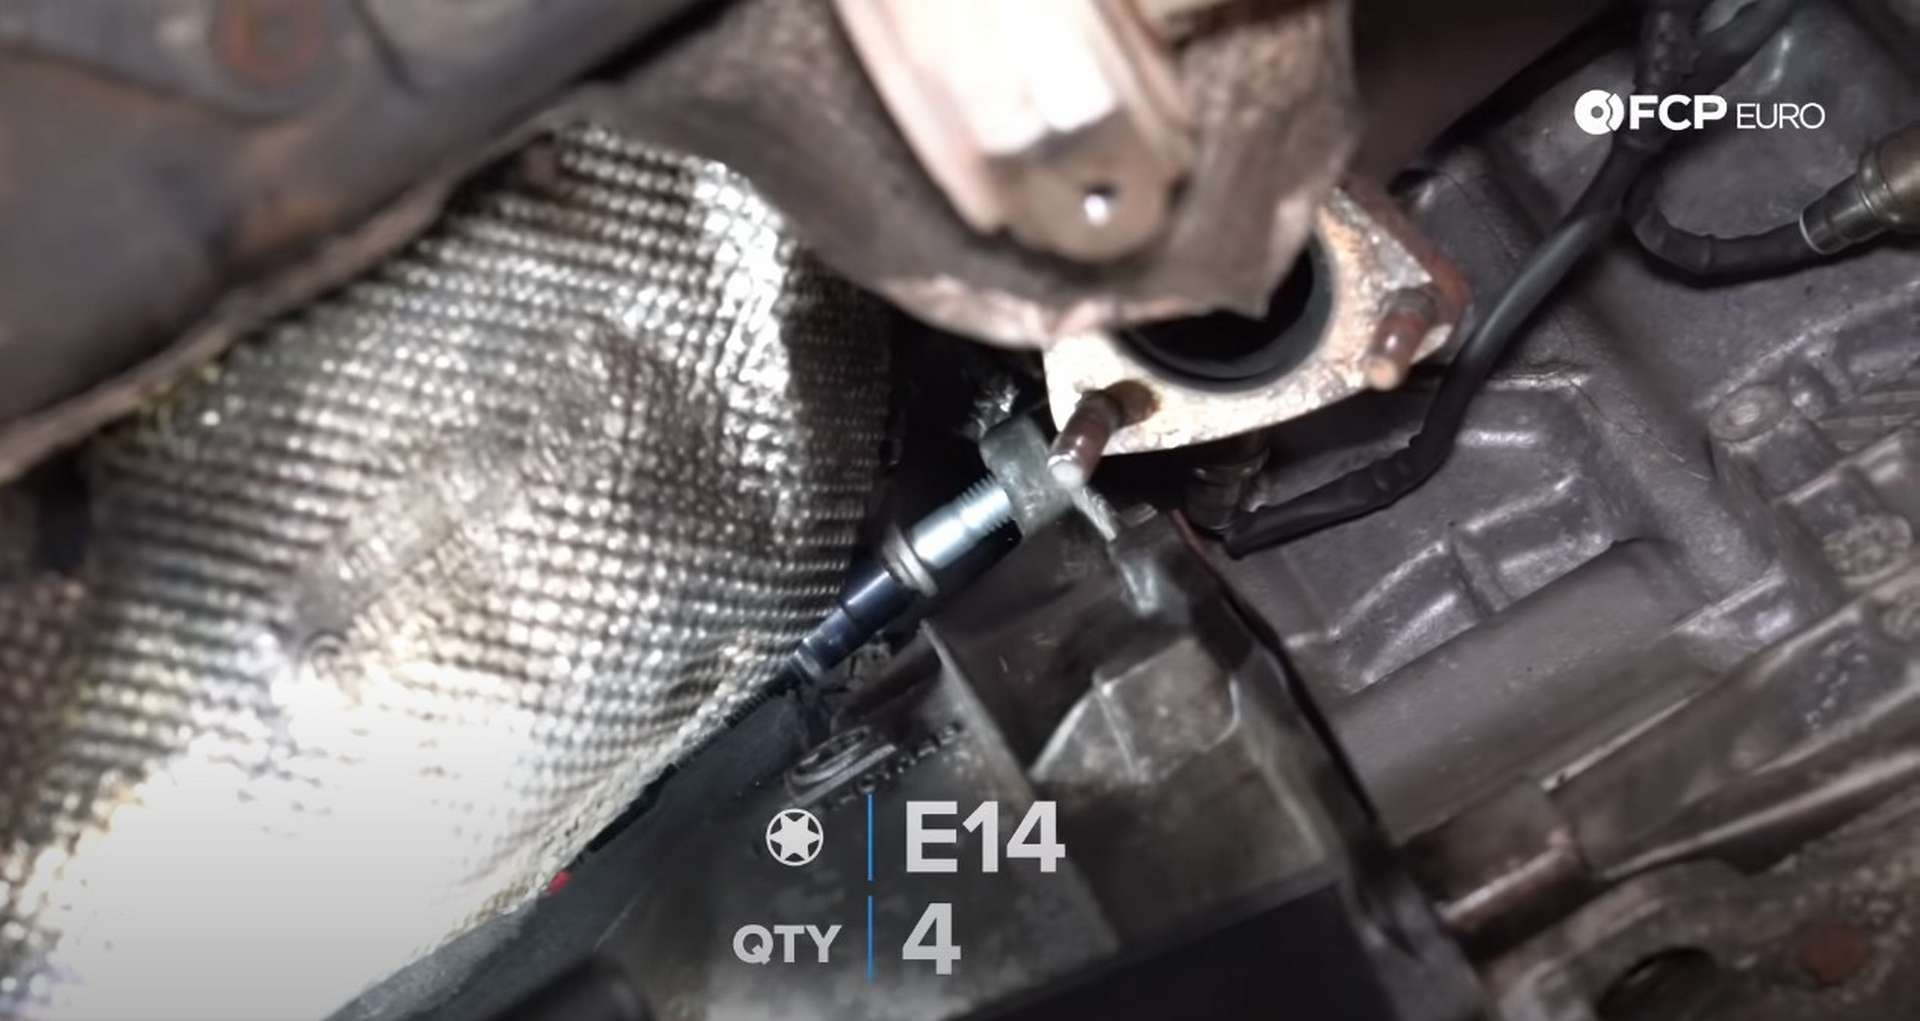
There is a series of bolts connecting the transmission to the engine. Four large bolts are the main fasteners and will need an E14 socket to be removed. Remove the three smaller bolts with an E10 socket. Then remove the two starter motor bolts with an E12 socket.
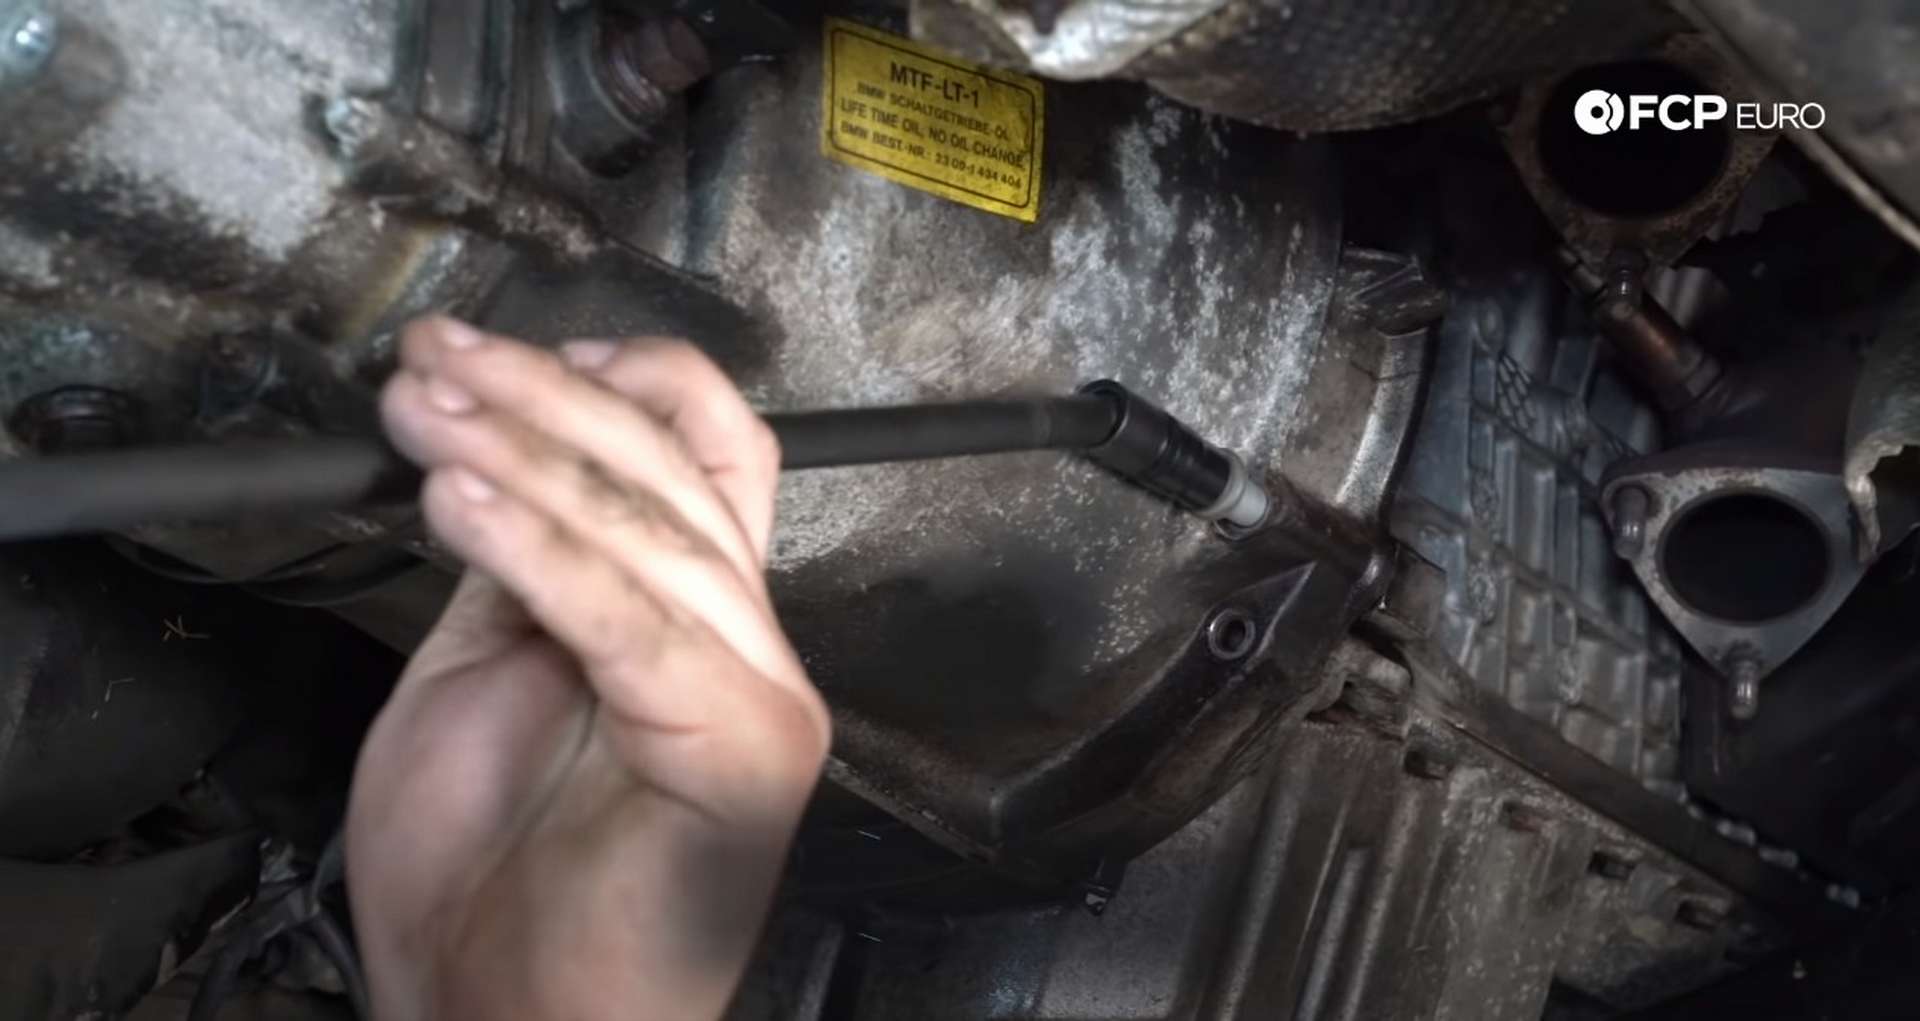
Long extensions and swivel sockets are necessary here as there are a couple of bolts on top of the bell housing up against the firewall. Lower the jack supporting the transmission slightly to allow the engine to tilt back and give more space to remove those top bell housing bolts.
Wiggle the transmission back slowly once all of the bell housing bolts are removed. Walk it back on the jack until the input shaft clears the pressure plate, then lower it down and drag it out from under the car.
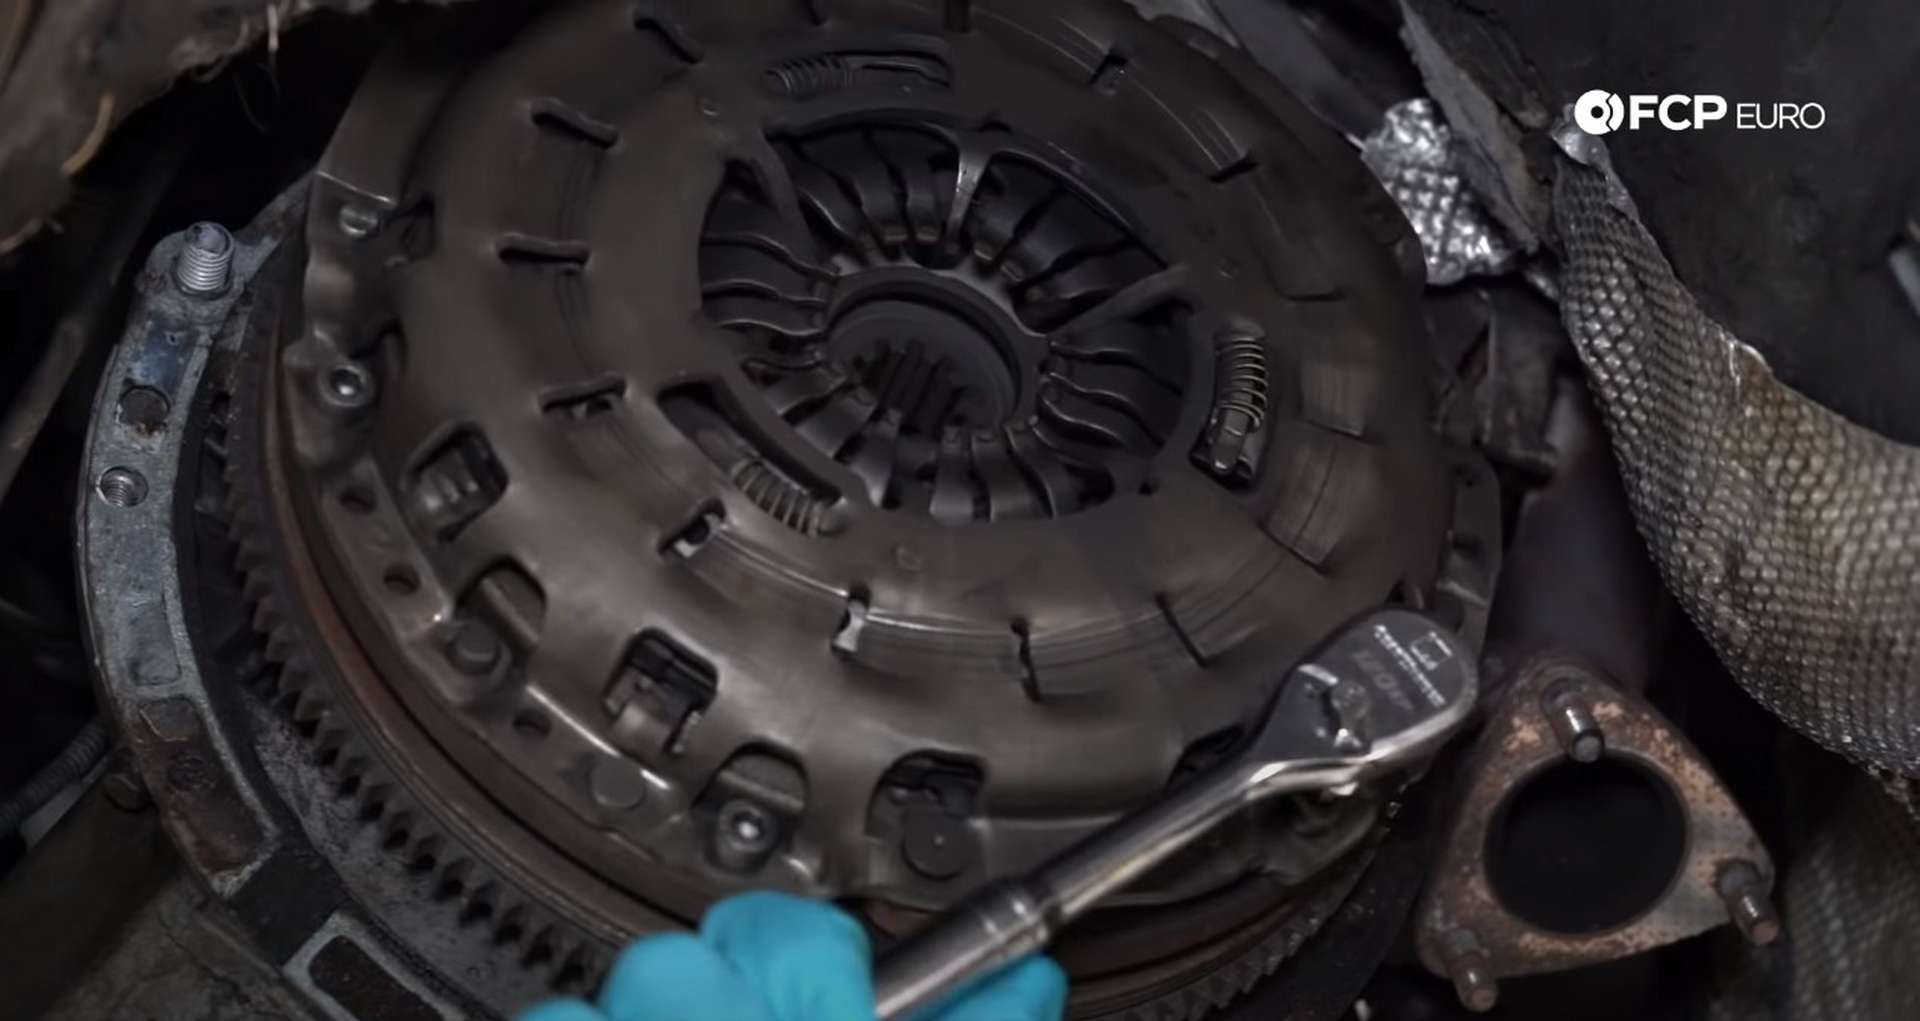
Step 7: Remove the clutch and flywheel
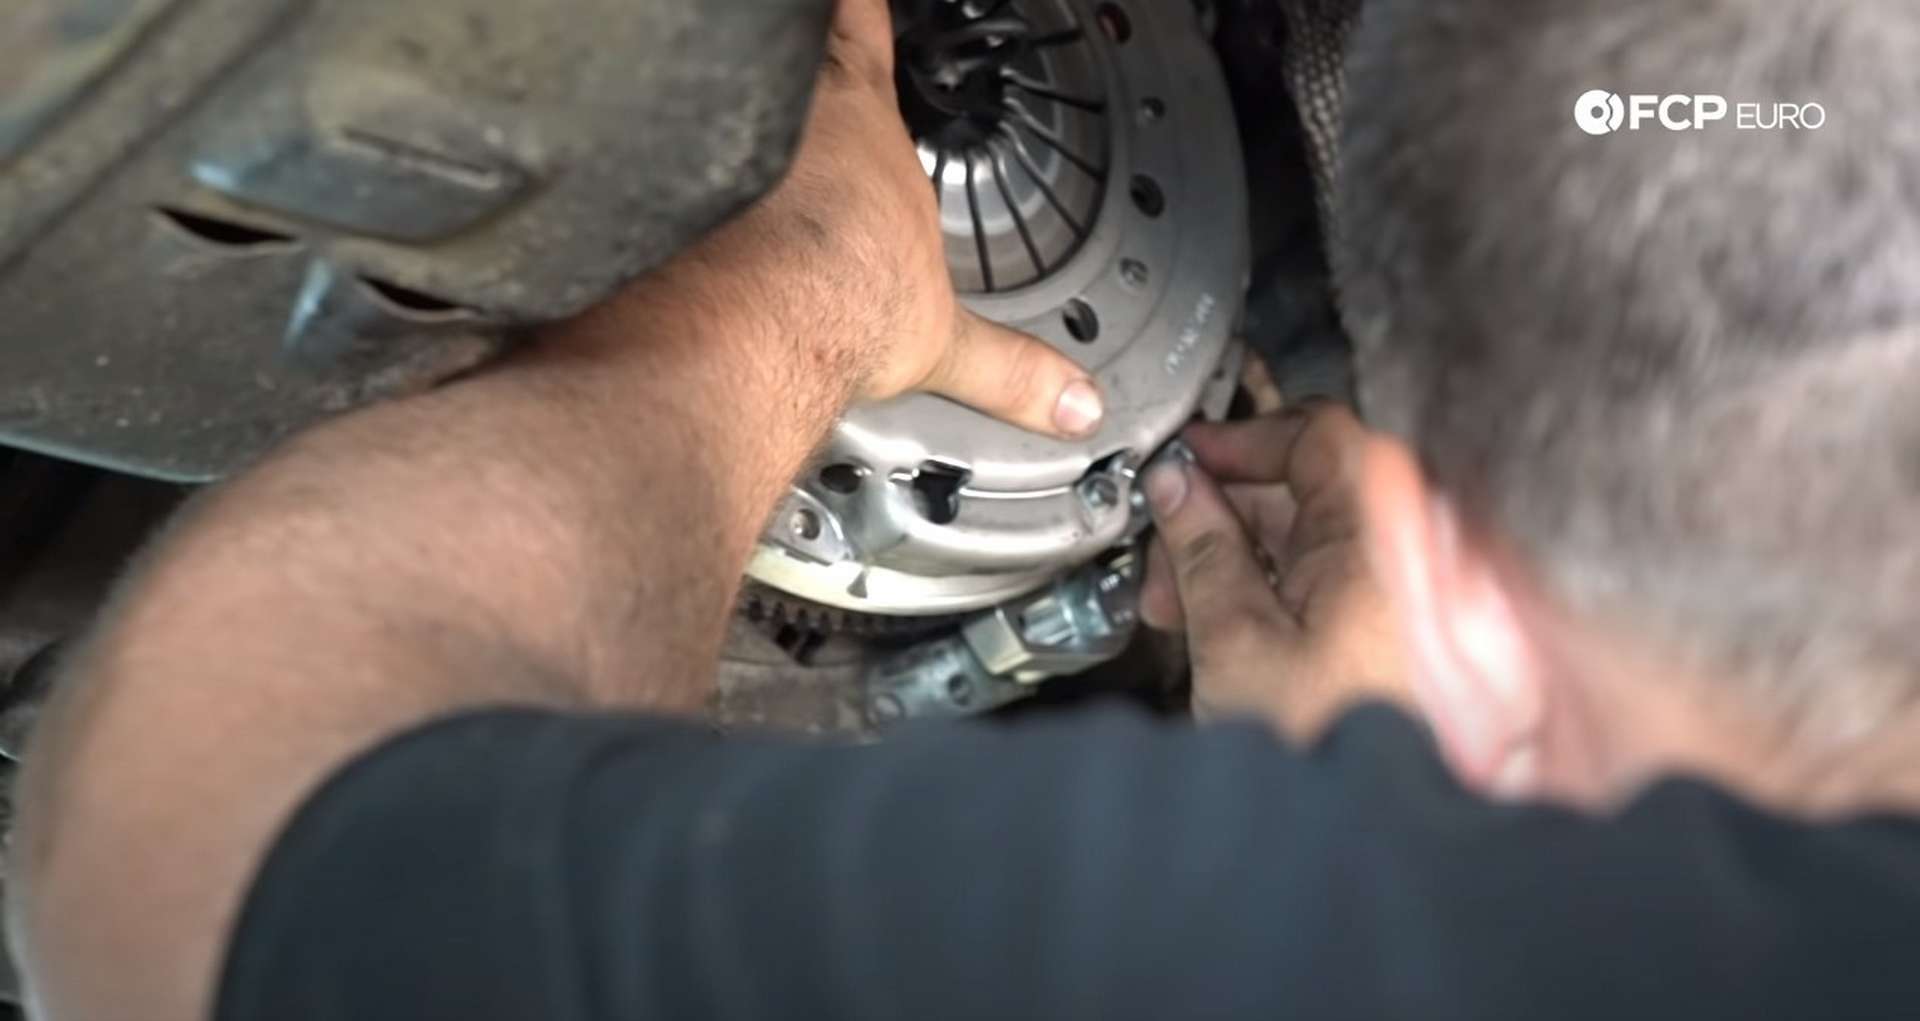
Use a 6mm Allen bit socket and remove the six pressure plate mounting bolts. Pull the pressure plate off of its locating dowel pins and toss it in the trash. Pull the clutch disc off as well.
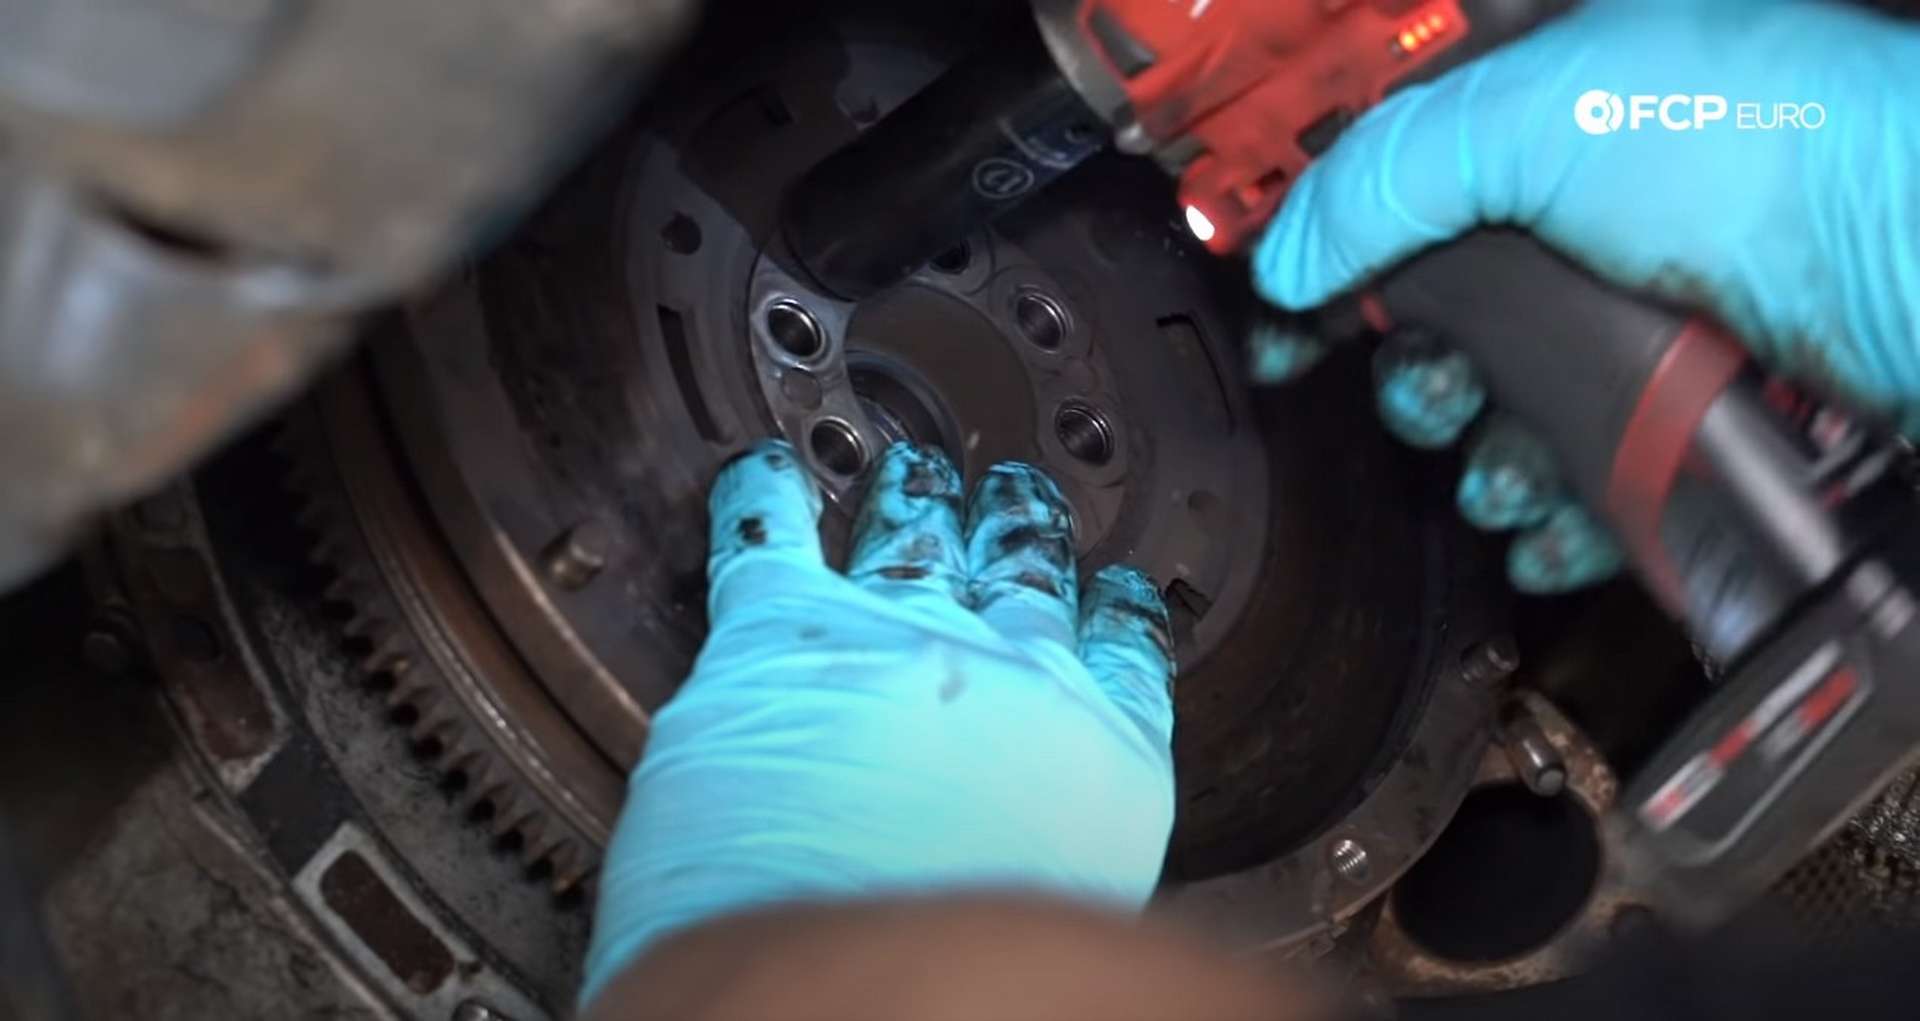
Use a 19mm socket to remove the eight flywheel bolts. The stock dual-mass flywheel is very heavy. Remove the last bolt slowly, so the flywheel doesn’t fall off onto yourself.
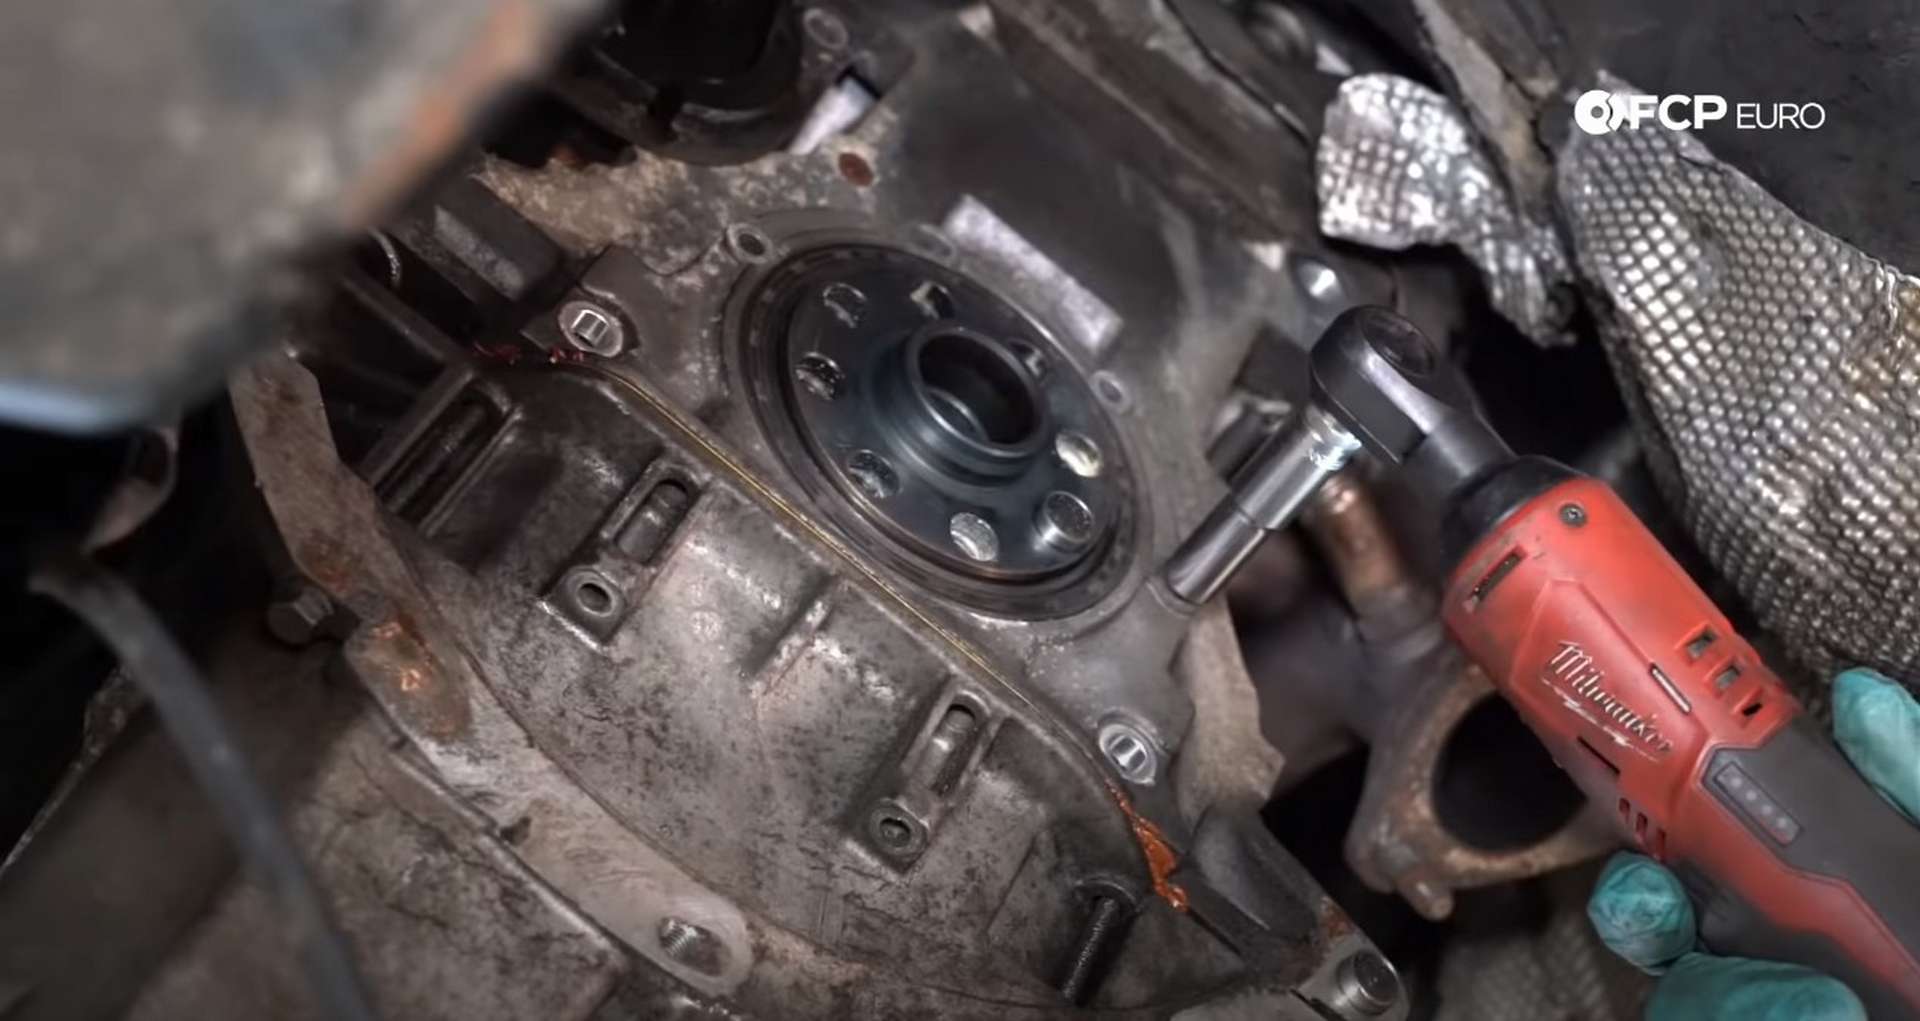
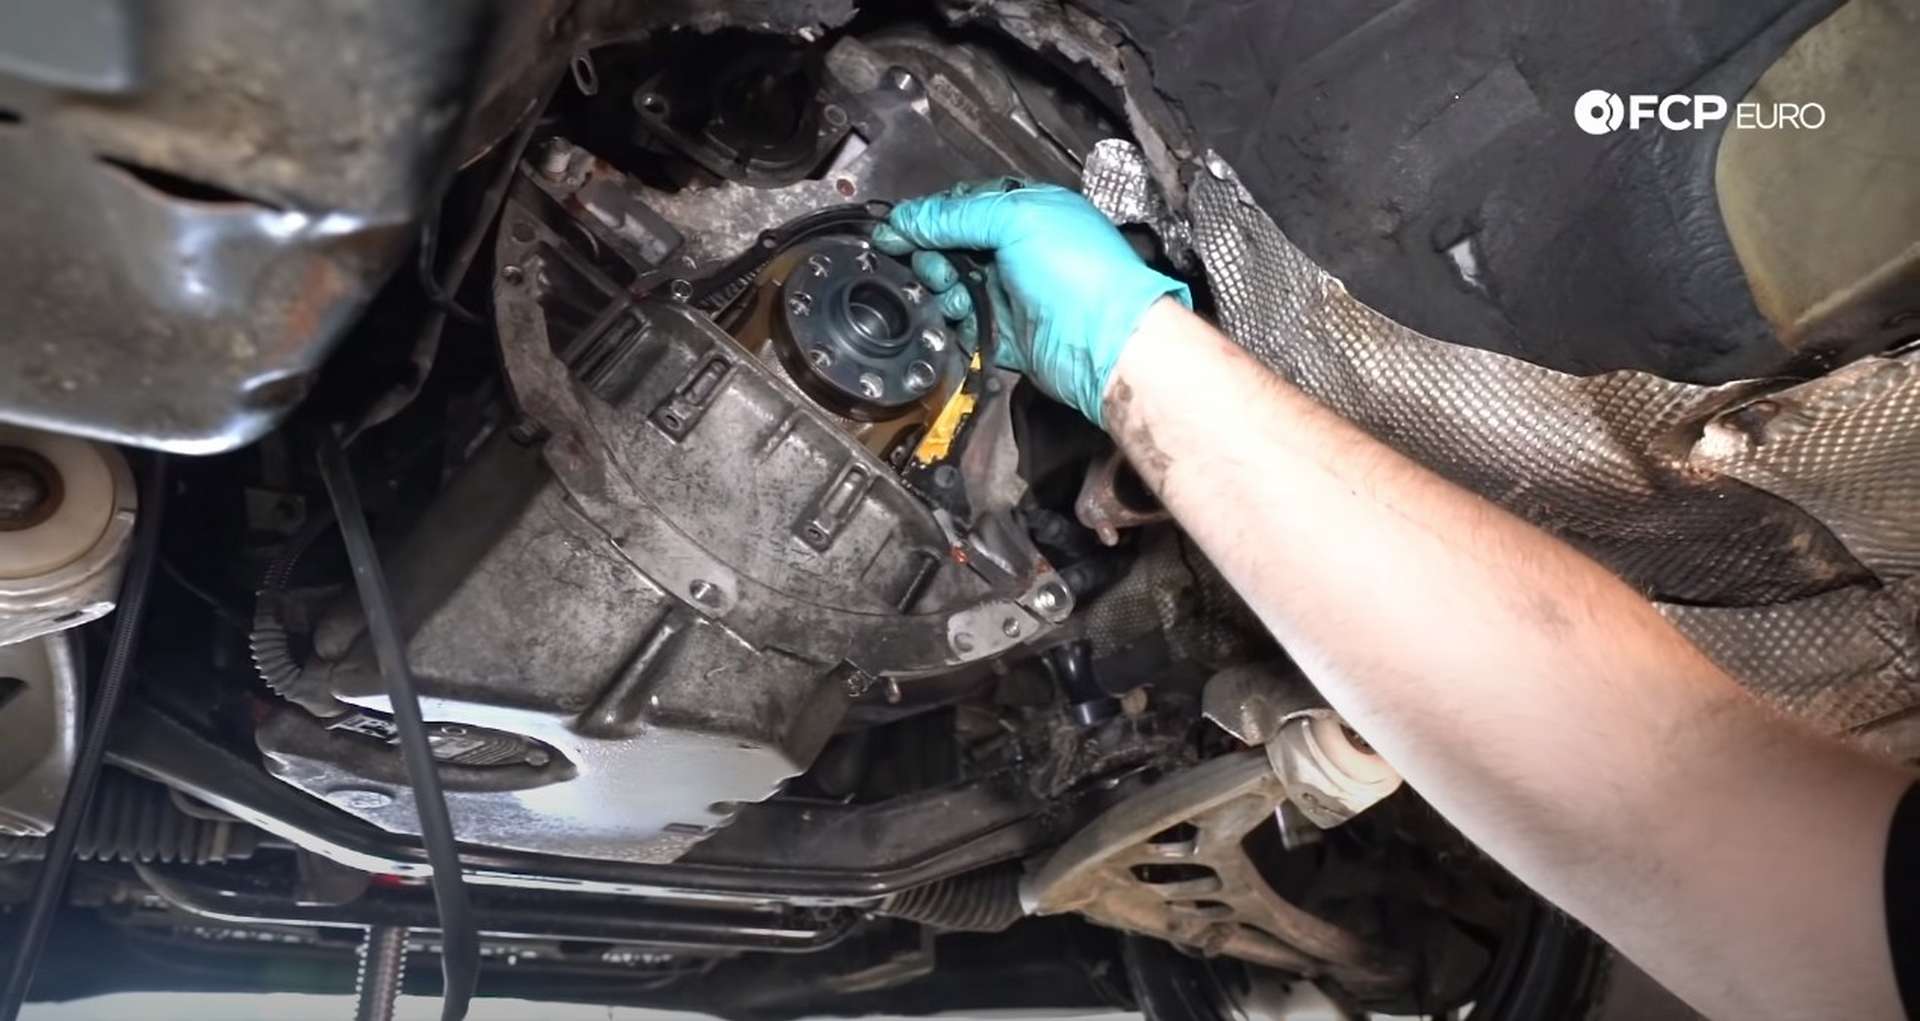
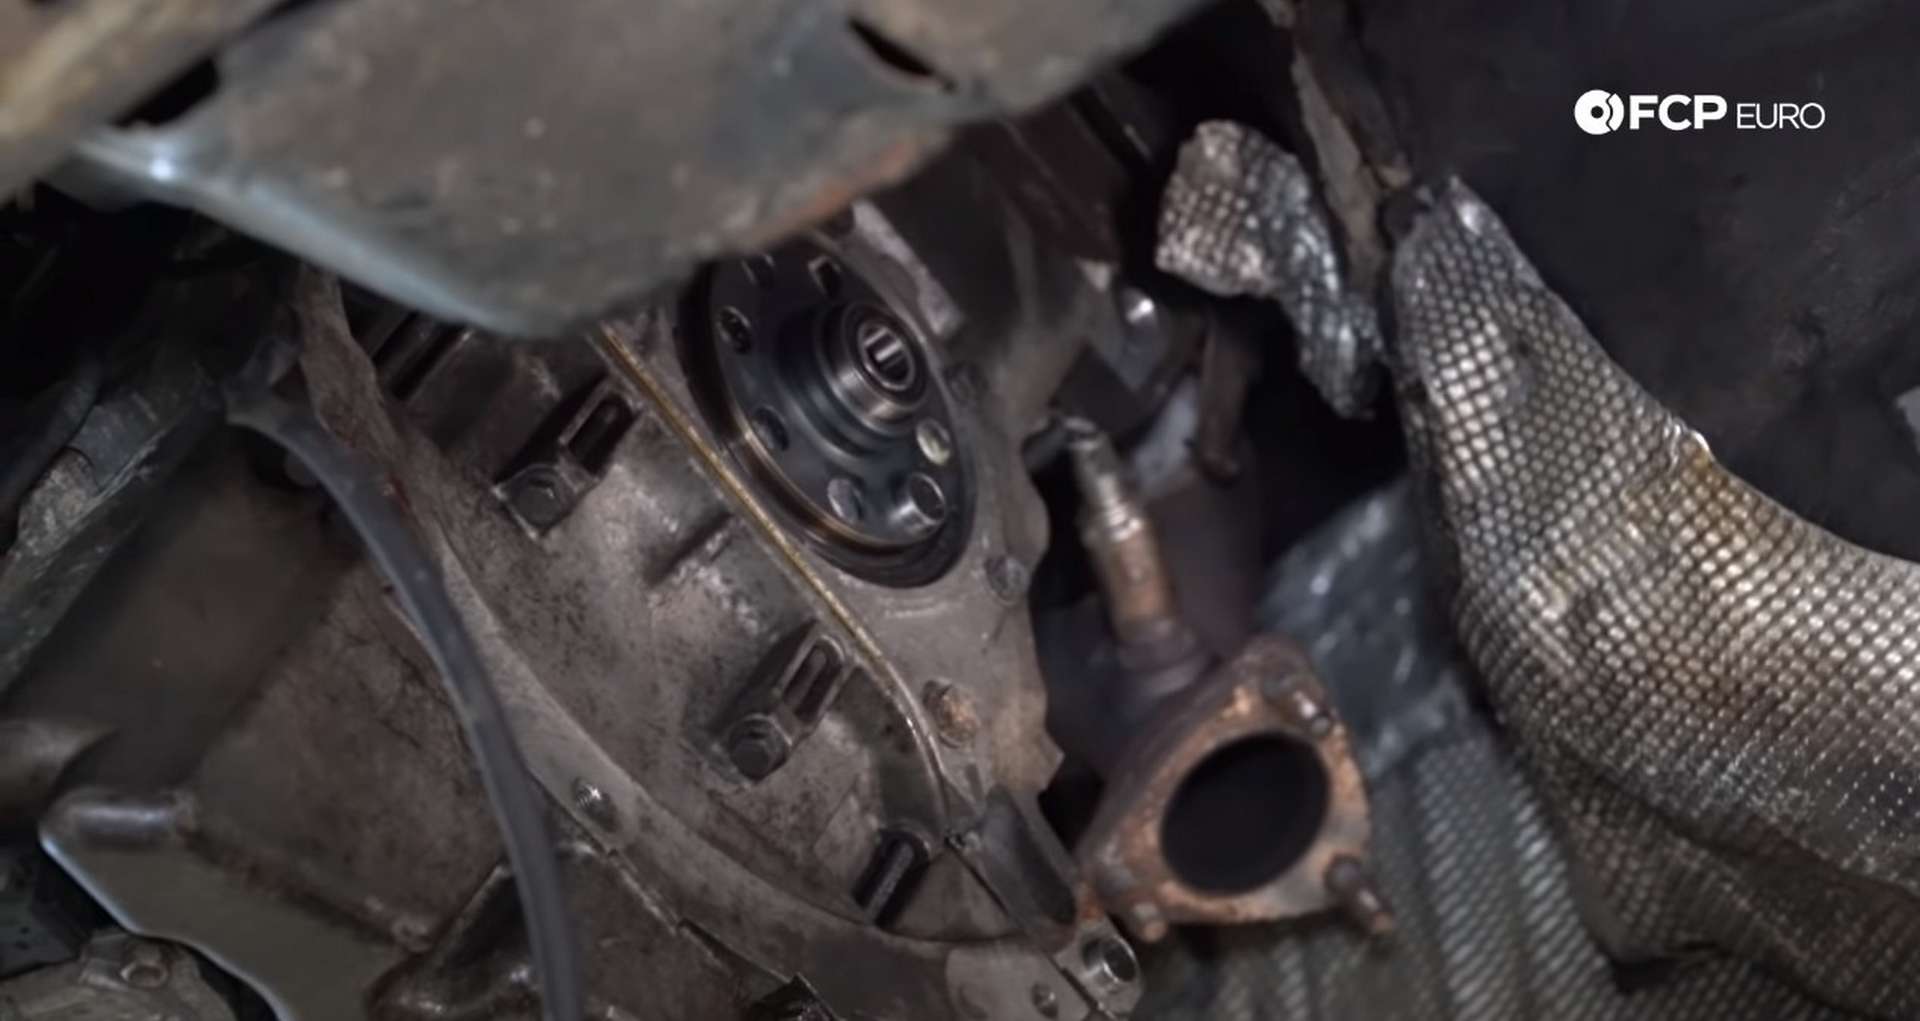
Remove the bell housing spacer plate from behind the flywheel. Then, use the bearing puller to remove the pilot bearing from the back of the crankshaft.
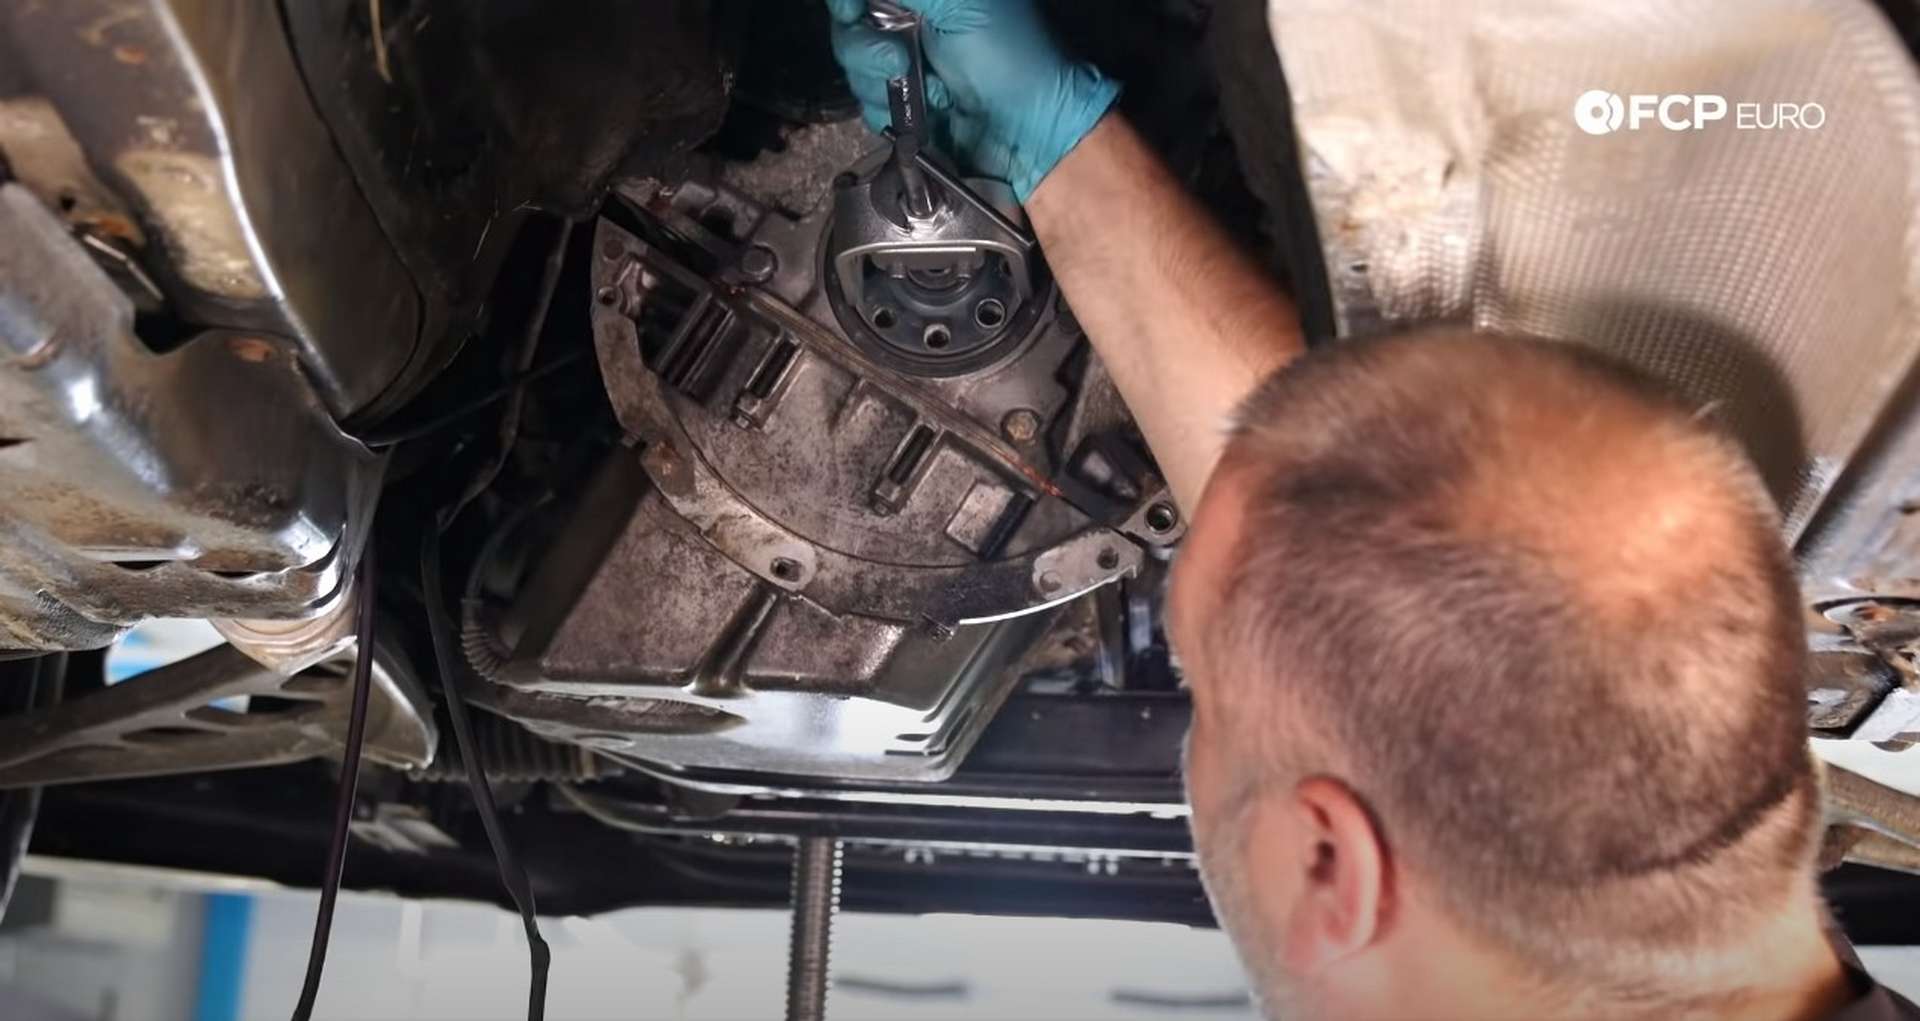
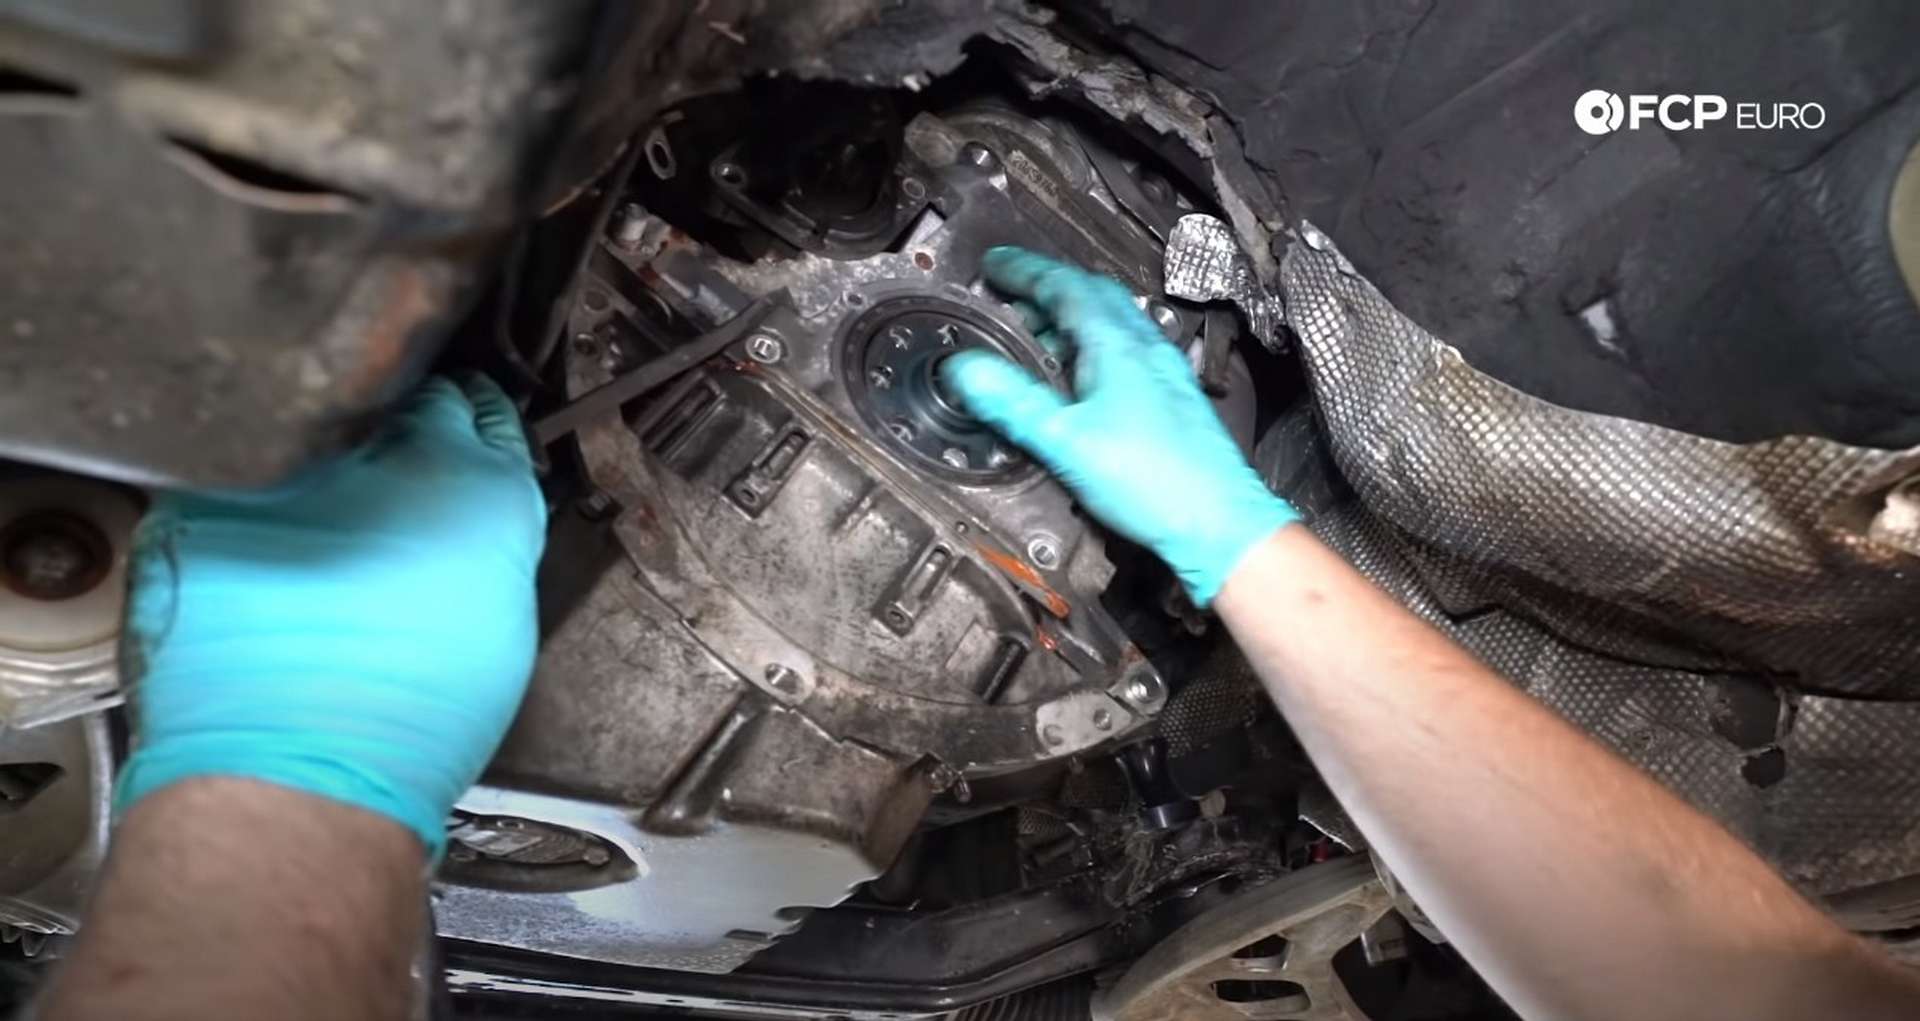
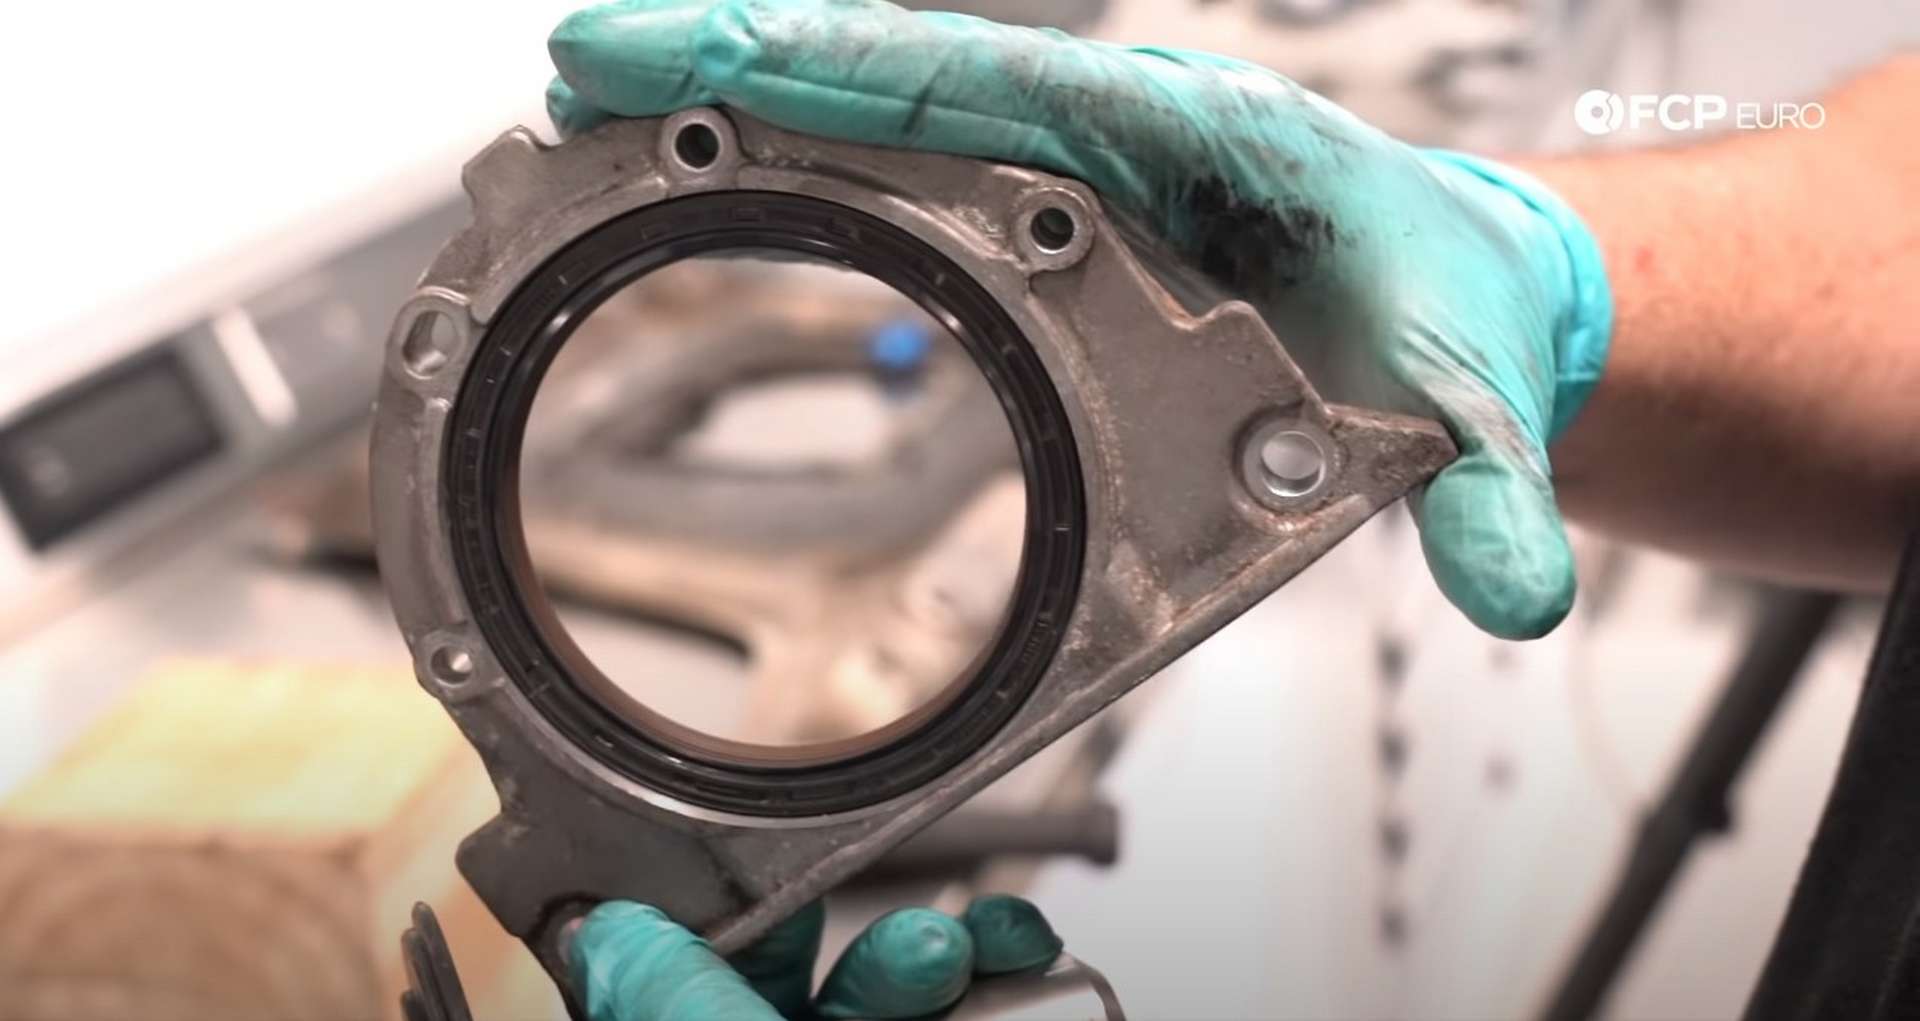
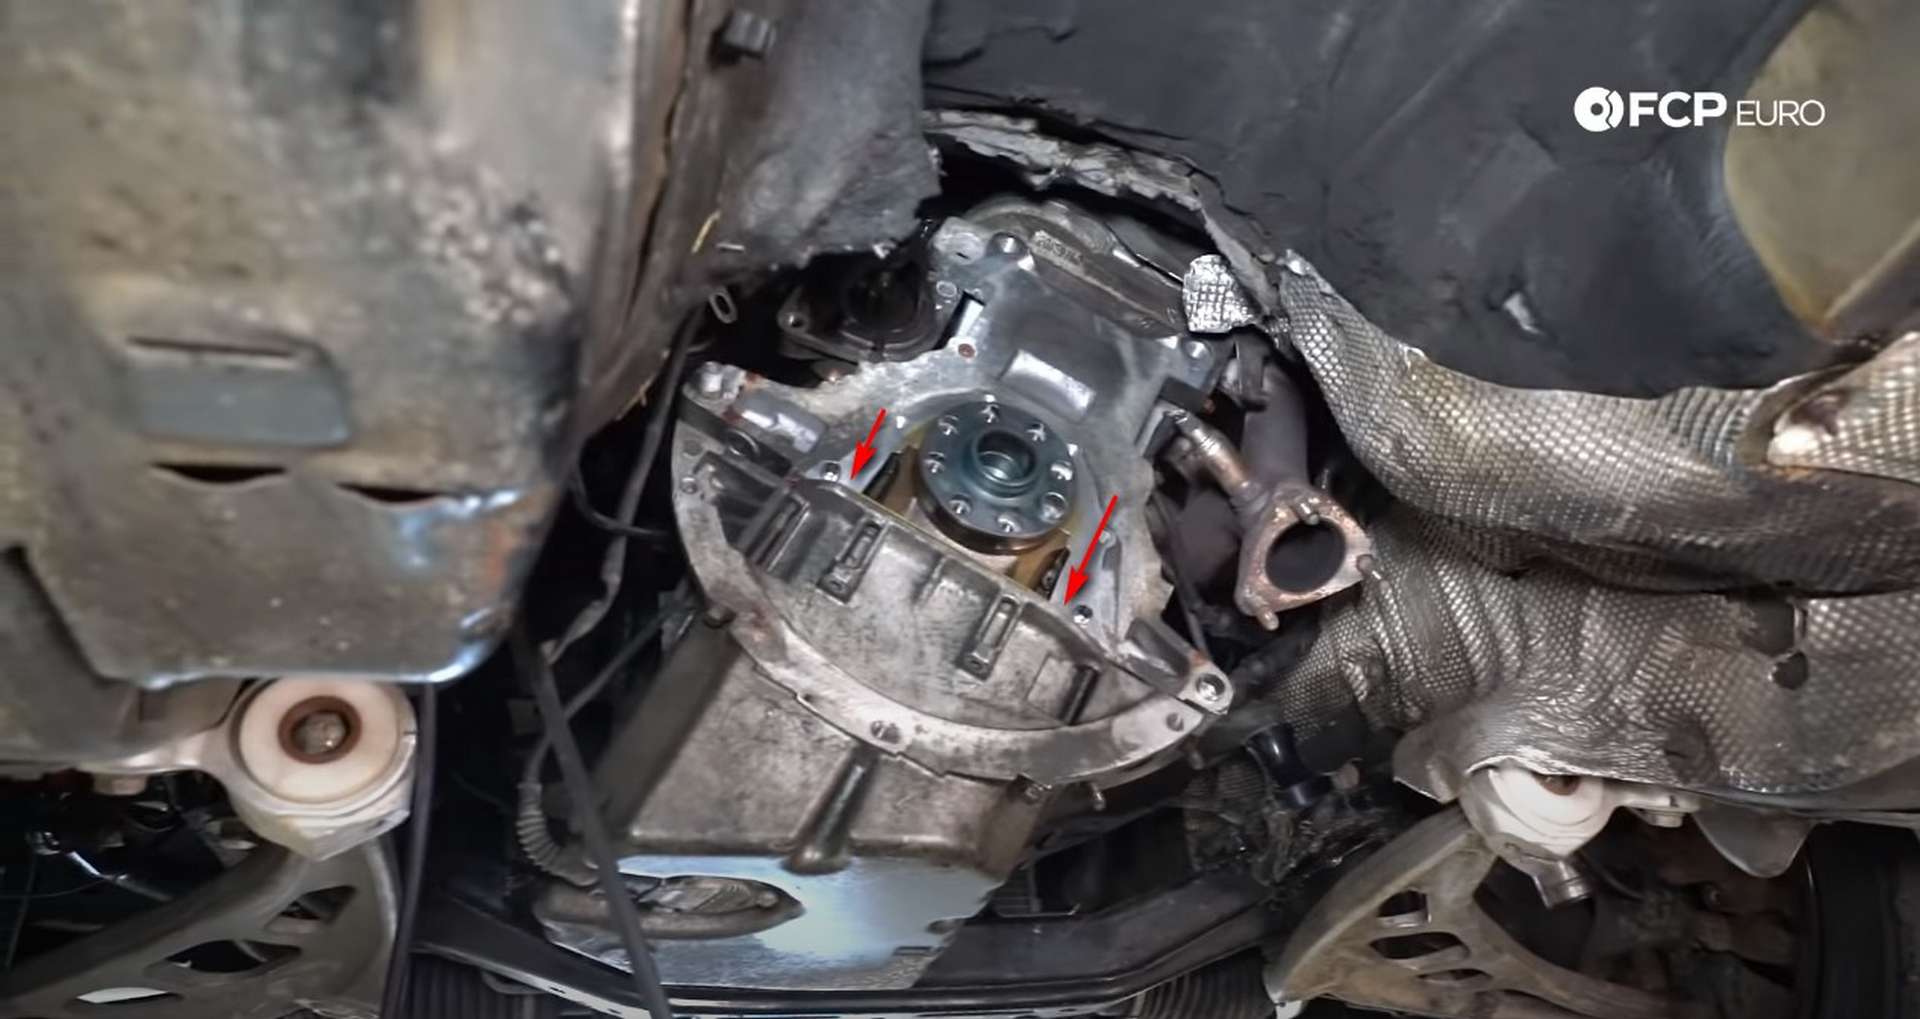
Step 8: Remove the rear main seal
The rear main seal is held in with a plate bolted to the back of the engine. Remove the two largest bolts with a 13mm socket and remove the remaining six bolts with a 10mm socket.
Above the 13mm bolt holes are two ears that can be pried against to pop the plate off the engine block. A big flathead screwdriver or pry bar will work.
Don’t forget to remove the old gasket from behind the seal’s housing.
Step 9: Install the new rear main seal
Knock the old seal out of the housing with a screwdriver or punch. Be careful not to scratch the inner surface of the housing as they will render the housing useless.
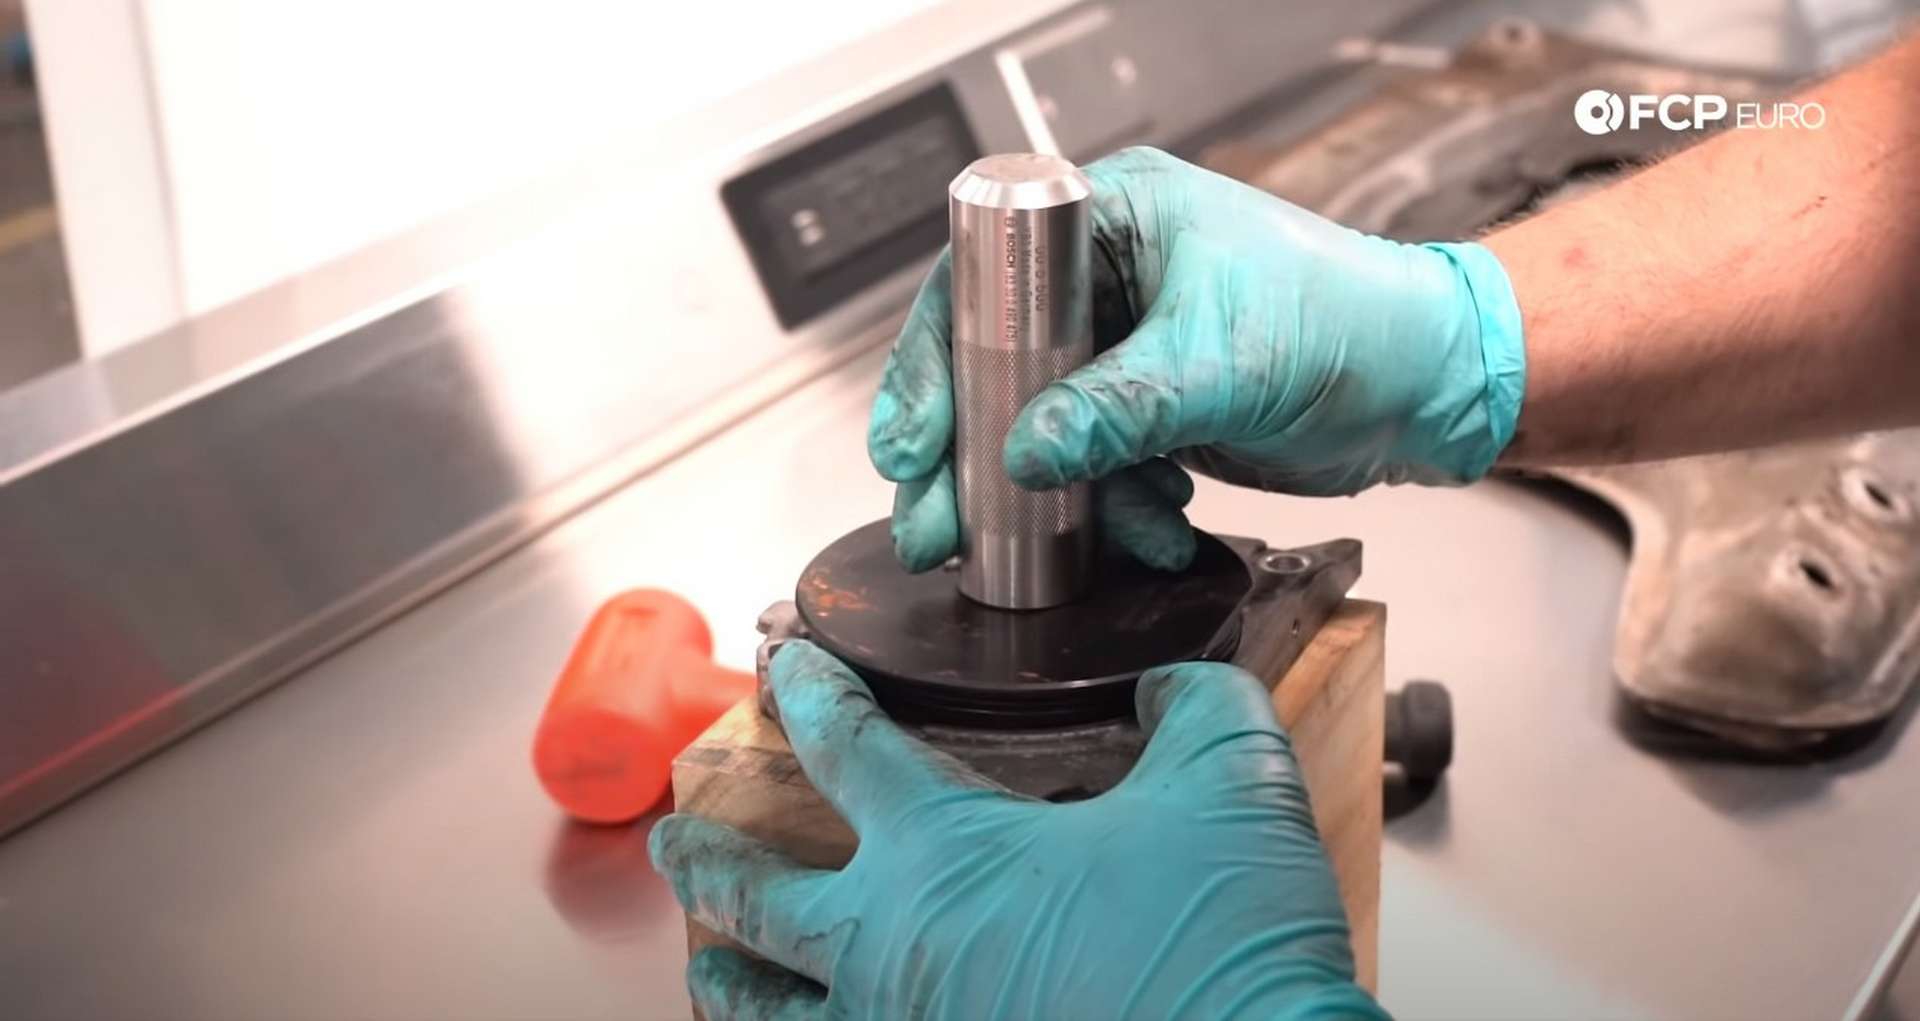
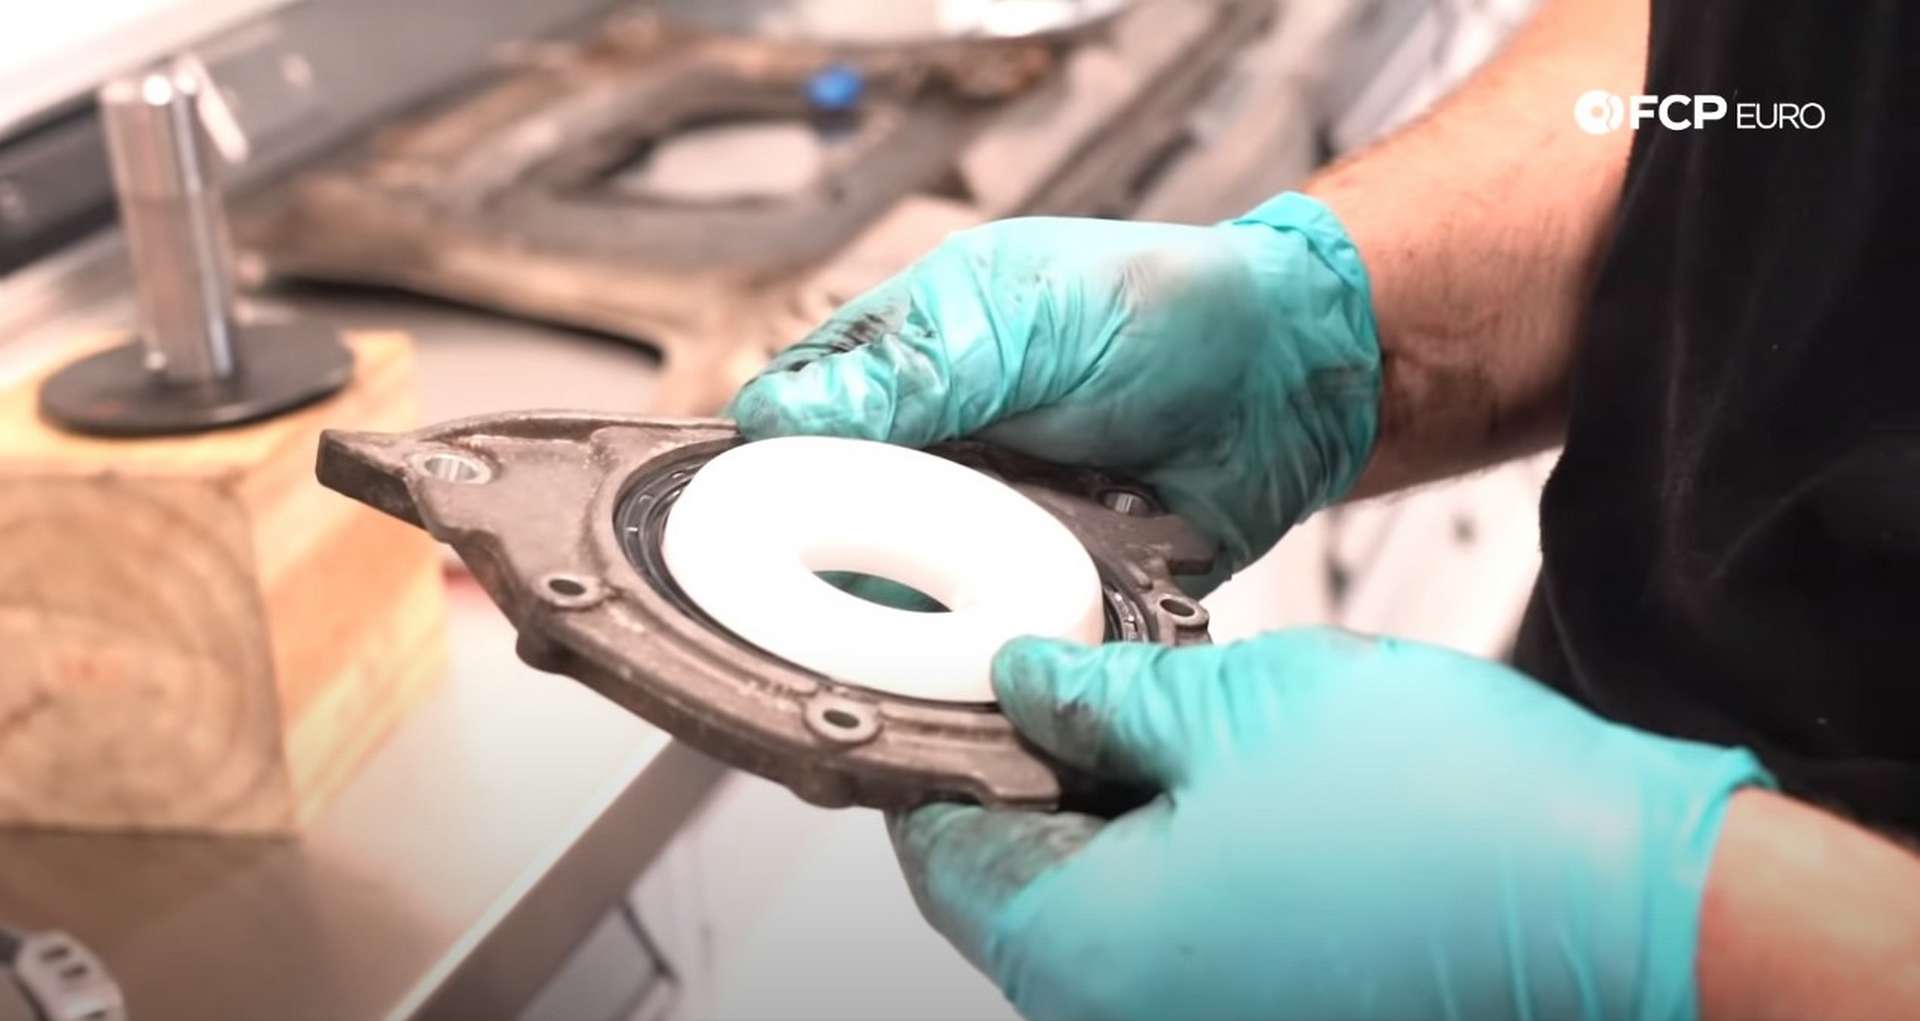
Place the new seal onto the housing and then place the seal driver on top. Hit the driver with a mallet until it bottoms on the housing.
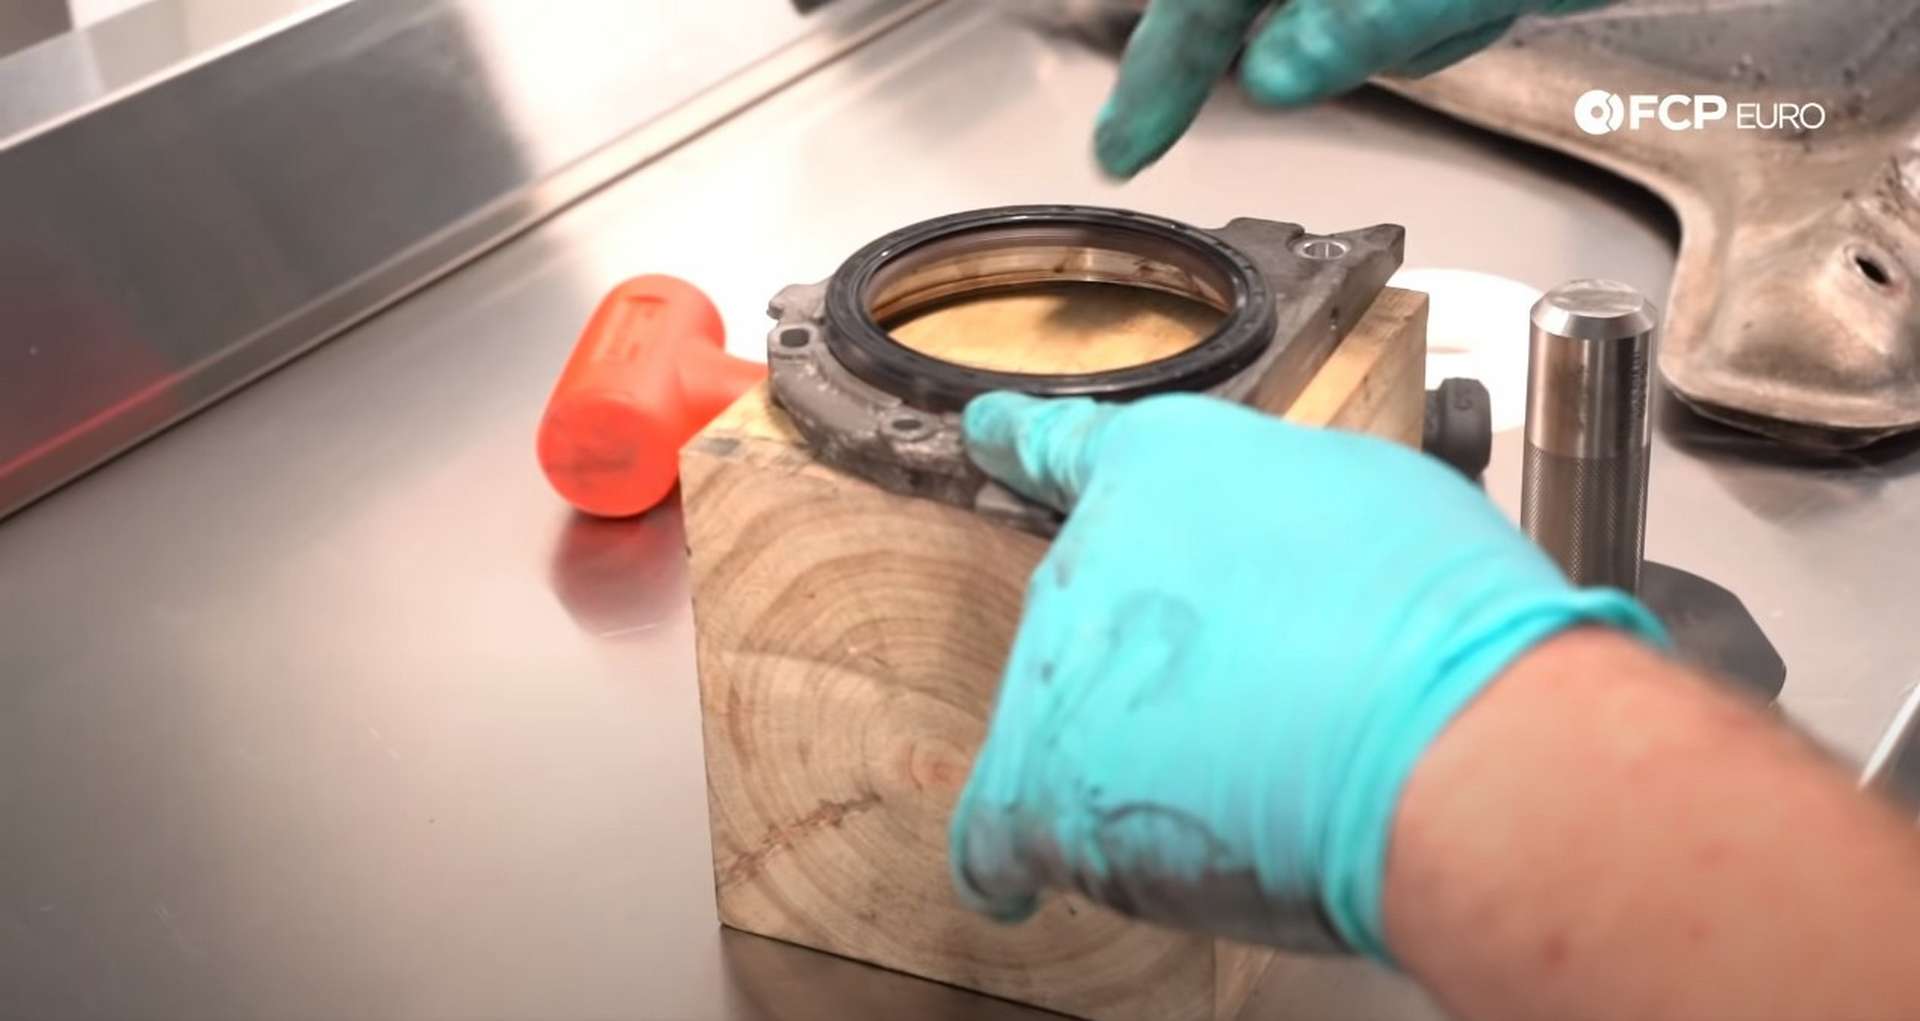
Next, lay a bead of sealant on either side of the lip that the housing’s bottom edge sits on. This will prevent any oil leaking from the corners. Then slide the new seal housing gasket into place.
Then, install the white installation tool inside the new seal. The white tool will prevent the seal’s edges from rolling up and getting stuck on the crankshaft. Bring the rear main seal housing over to the engine and seat it into place. Give it a few taps with a mallet to get it fully seated flat.
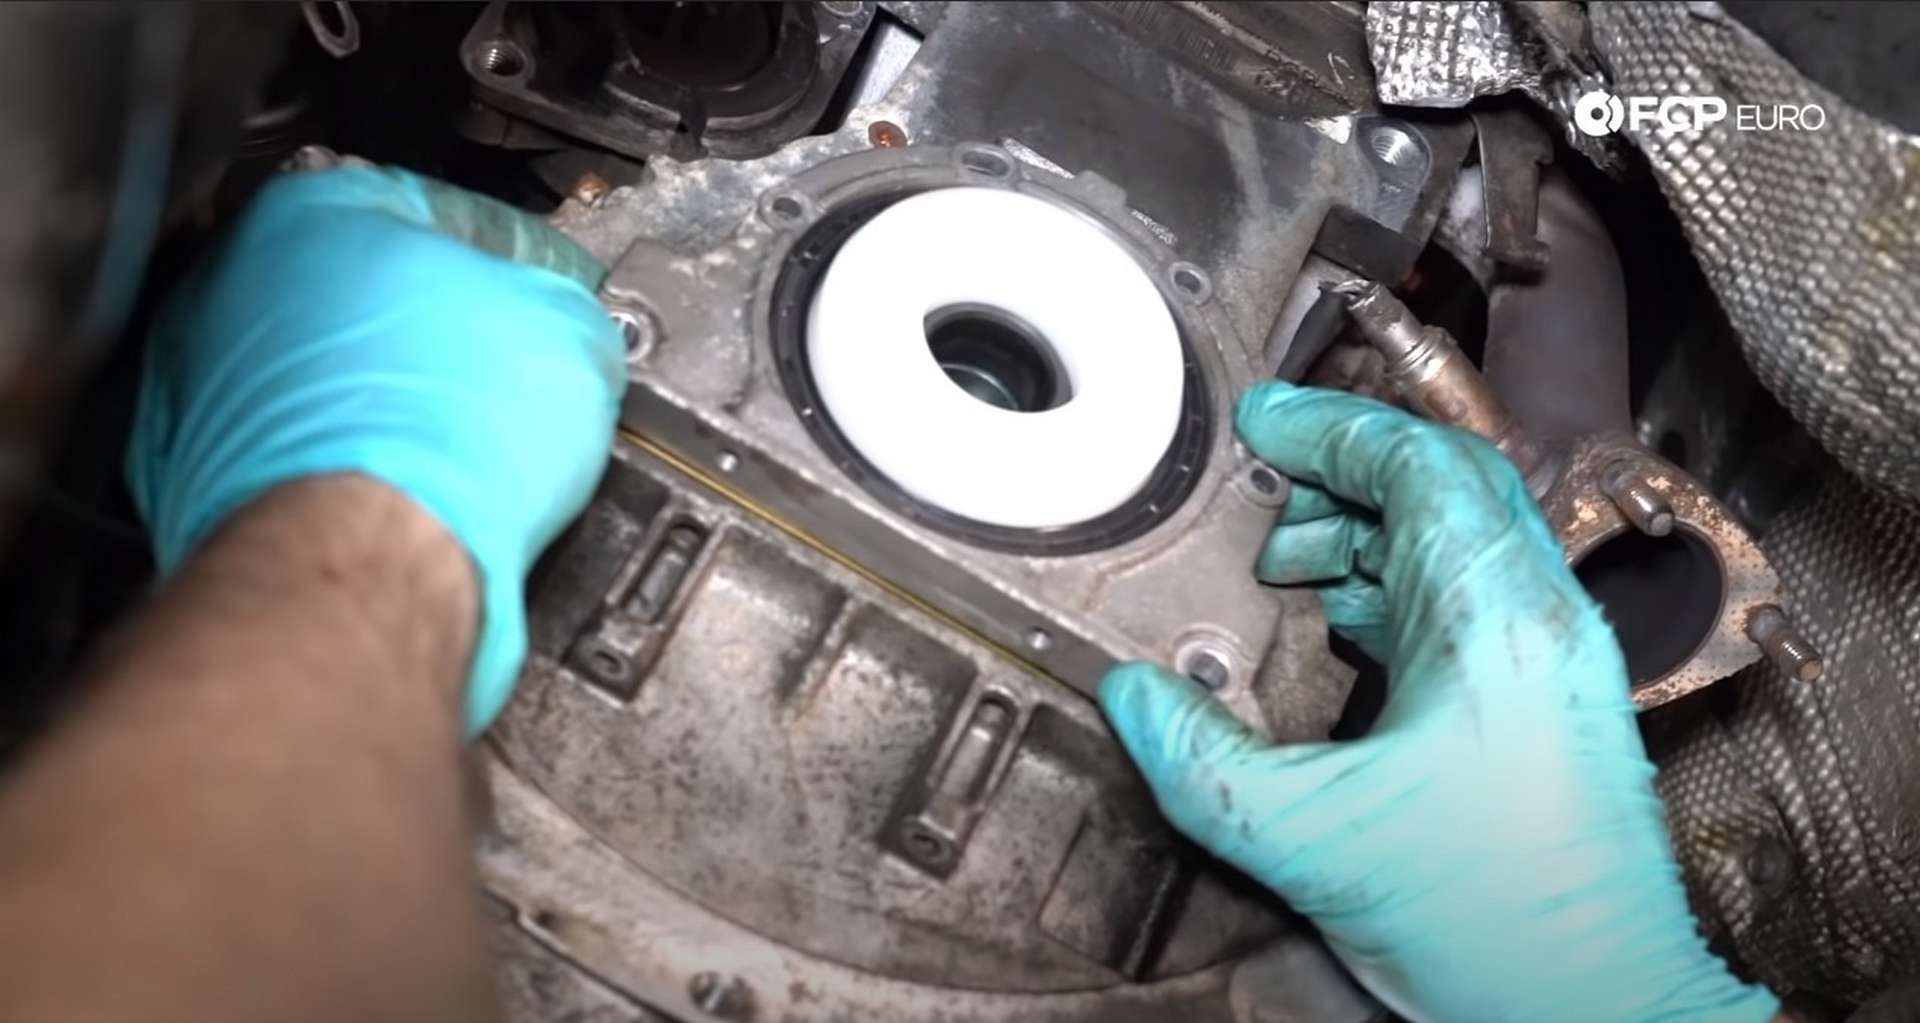
Thread in all of the bolts by hand and then tighten down the two 13mm bolts. This will help align the plate and allow the bottom two 10mm bolt to be threaded in. Torque the 13mm bolts to 18Nm and the 10mm bolts to 10Nm.
Sit the new pilot bearing into the crankshaft and tap it in with a mallet. Use a 22mm socket to drive it in until it bottoms inside the crankshaft.
Now would be the best time to chase the flywheel bolt threads. Use an M12x1.5 to clean the thread of any leftover thread sealant.
Step 9: Install the new flywheel and clutch assembly
One of the flywheel bolt holes on the crankshaft has a dowel pressed into it. This dowel corresponds with a specific hole on the back of the flywheel. Seat the new flywheel onto the crankshaft by matching the hole with the dowel and then thread in the flywheel bolts.
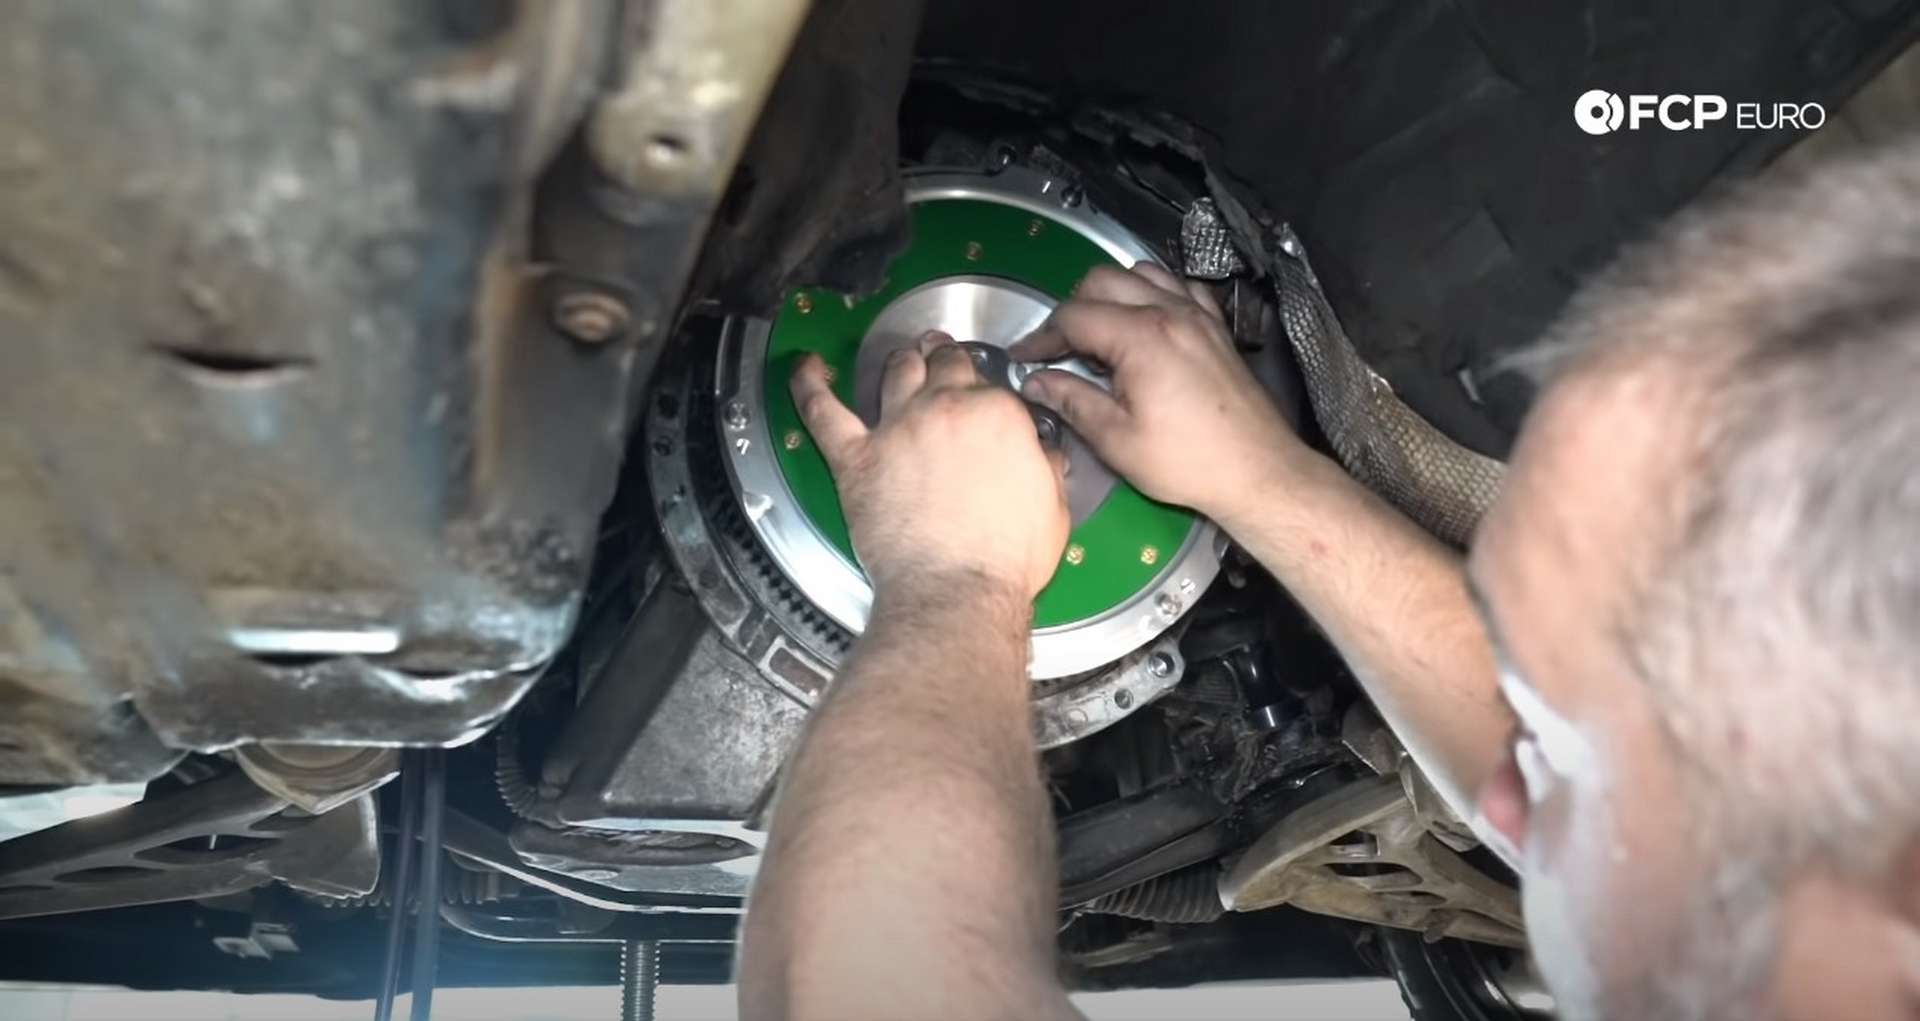
Next, install the flywheel locking tool. This will keep the flywheel in place while you torque the bolts. Use a 19mm socket tor tighten down the factory bolts and toque them in a crossing pattern to 100Nm.
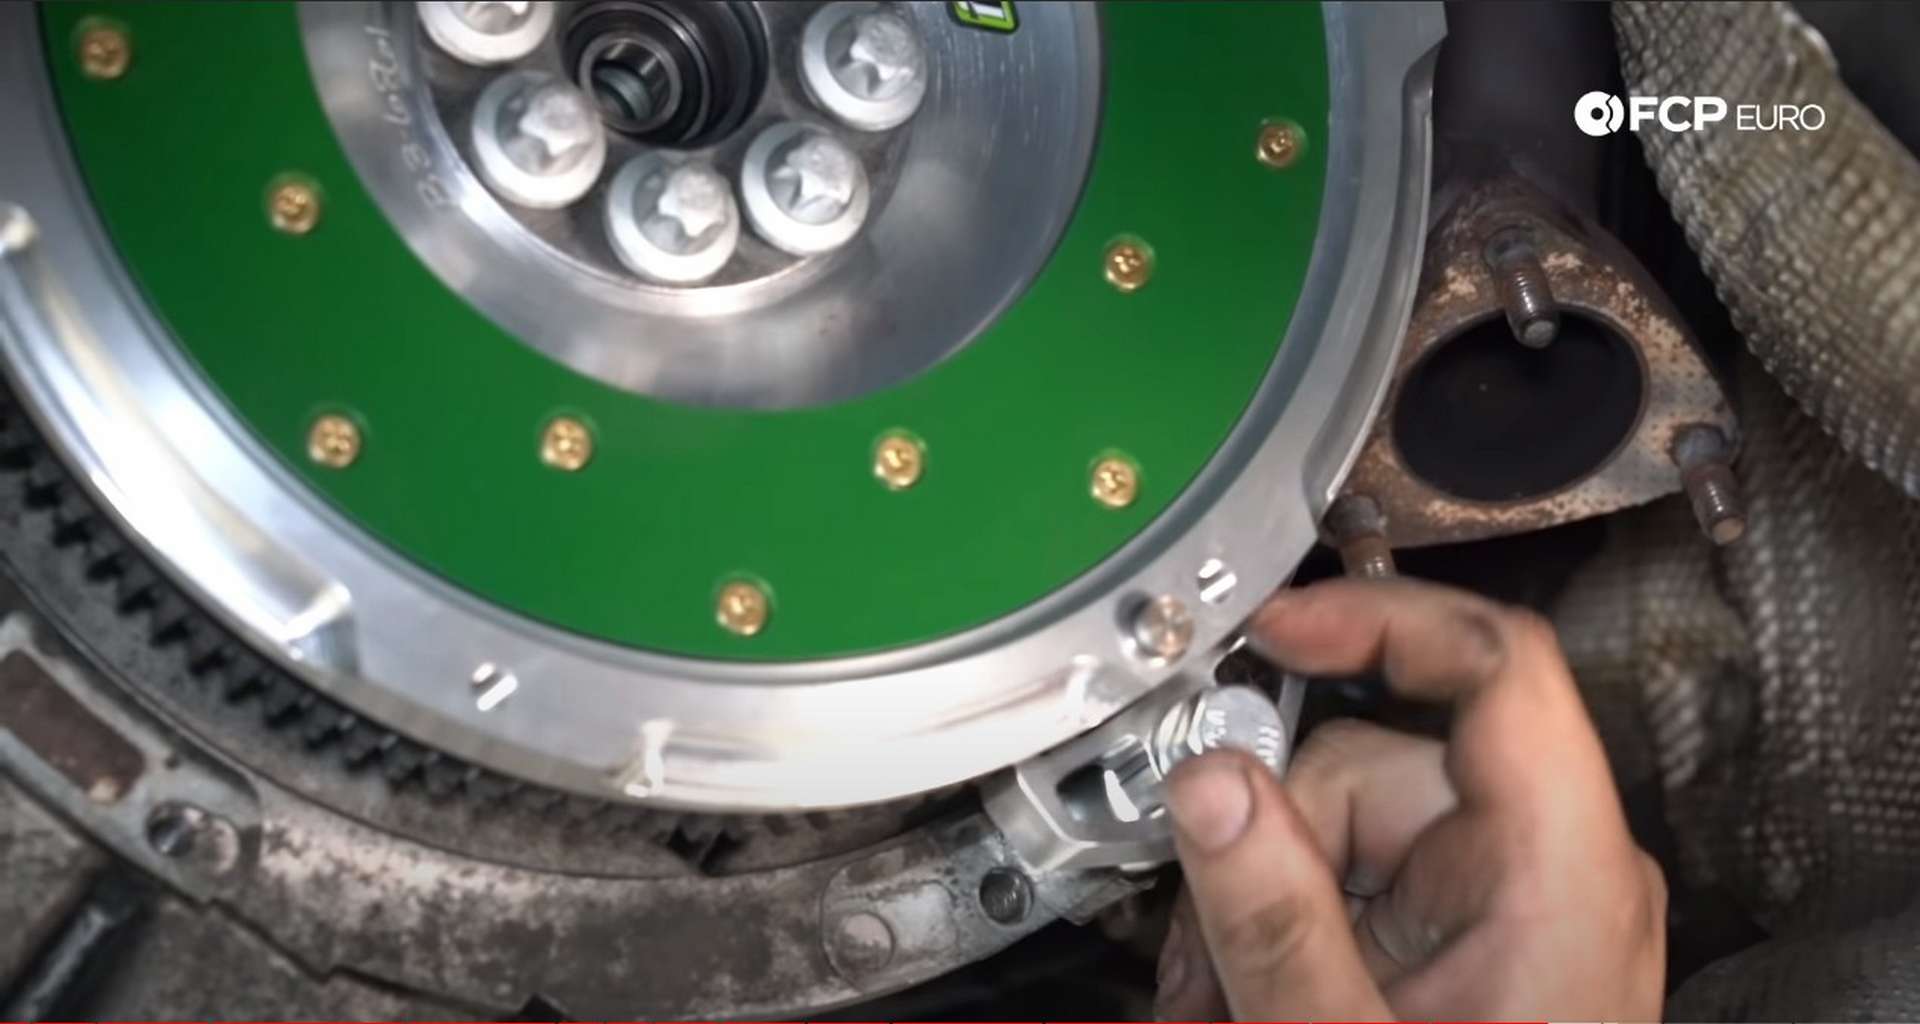
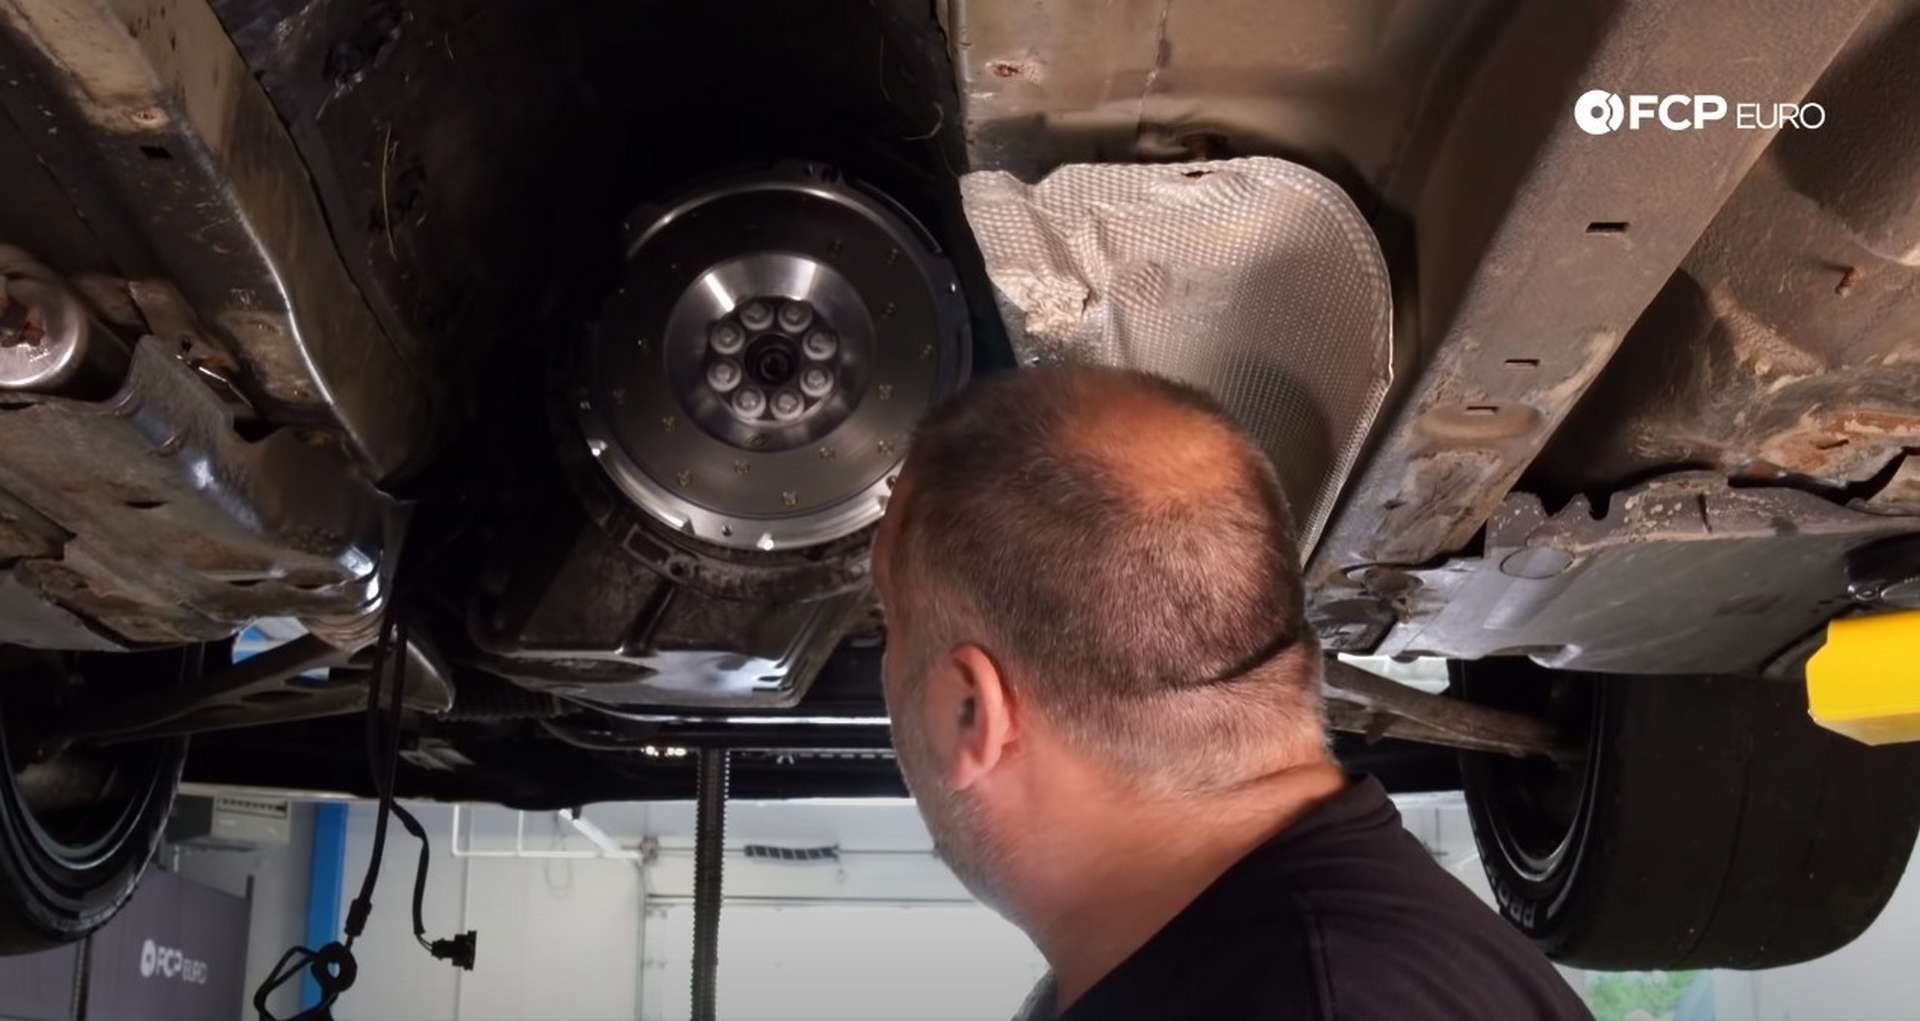
Torque the flywheel and then use rubbing alcohol or a very strong degreaser to remove the protective coating on the flywheel’s friction surface. Do not forget this step; otherwise, a new clutch will be needed once again.
Next, place the clutch disc onto the flywheel surface and position the clutch alignment tool into the center. The clutch disc is directional and identifies which side faces the transmission, below the friction surface. Leave the tool in place and slid the pressure plate over the disc and onto the two dowel pins in the flywheel.

Thread in the six pressure plate bolts and tighten then in a star-pattern with a 6mm all bit socket. Torque the bolts in the same pattern to 25Nm. Remove the clutch alignment tool after the bolts have been torqued.
Step 10: Service the transmission
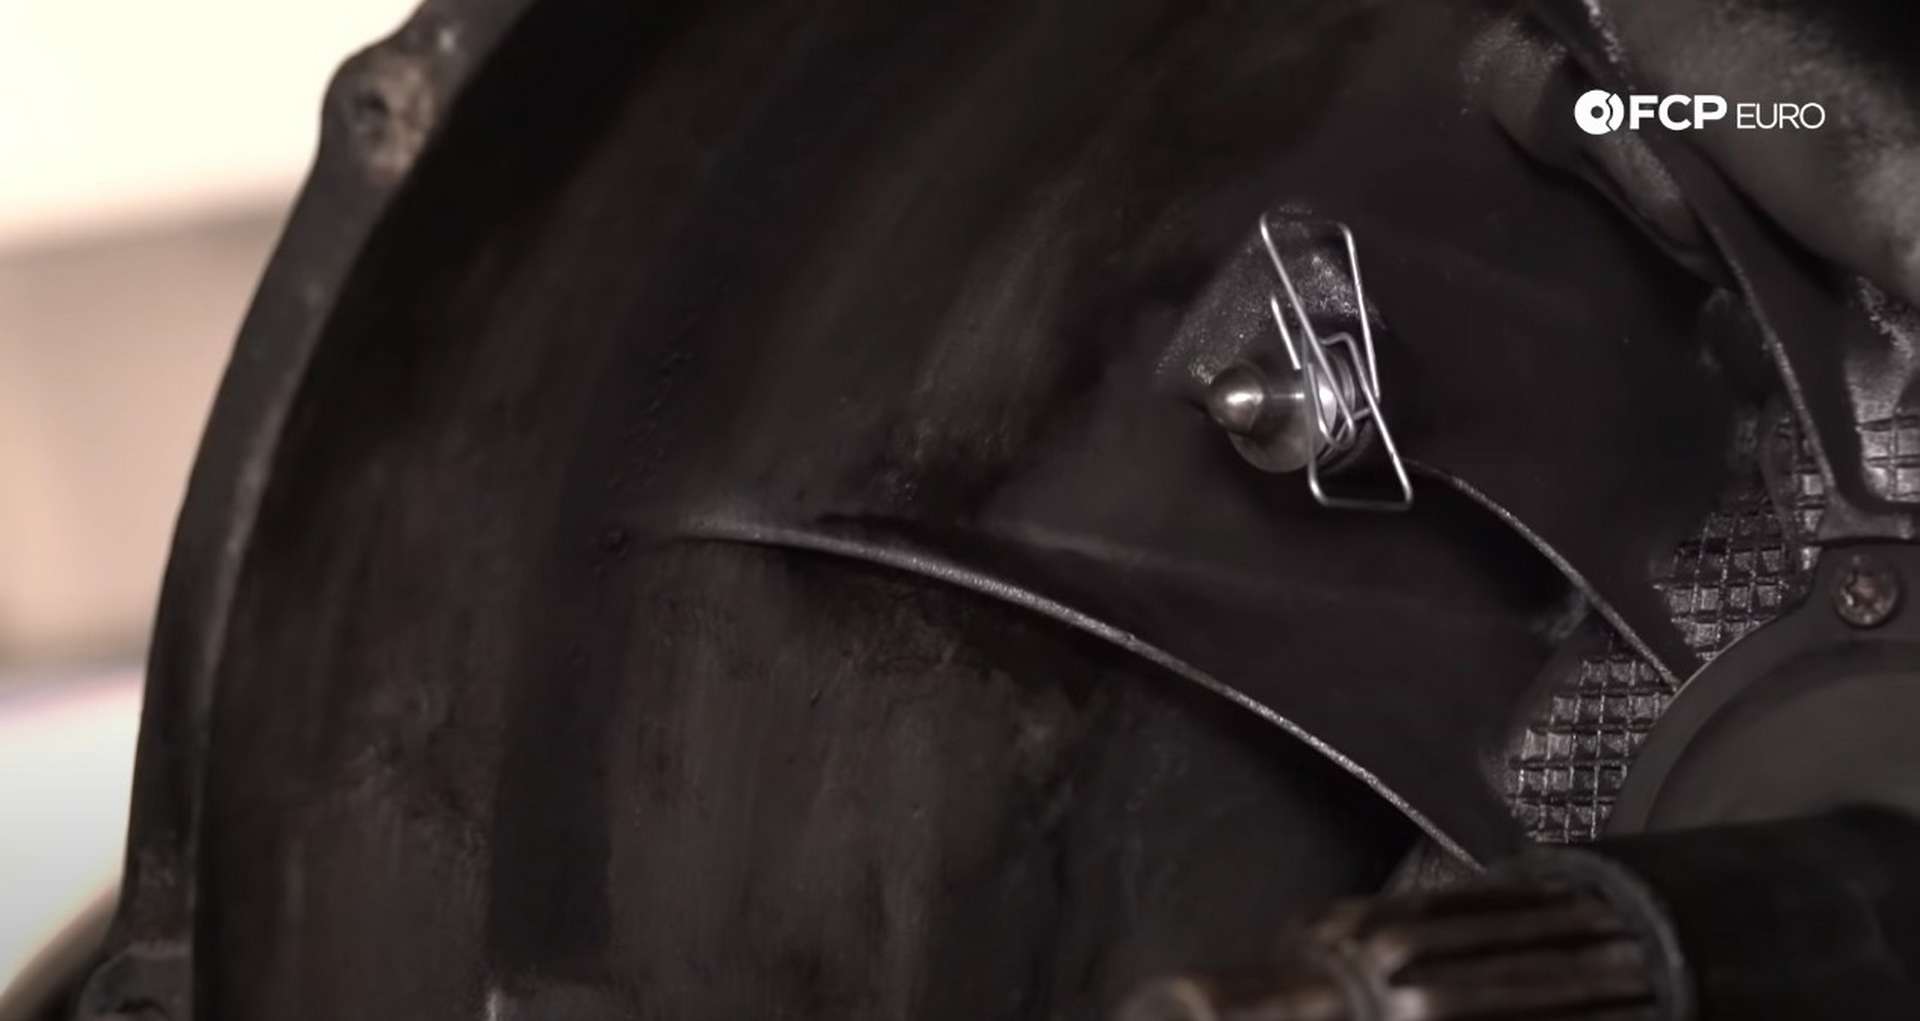
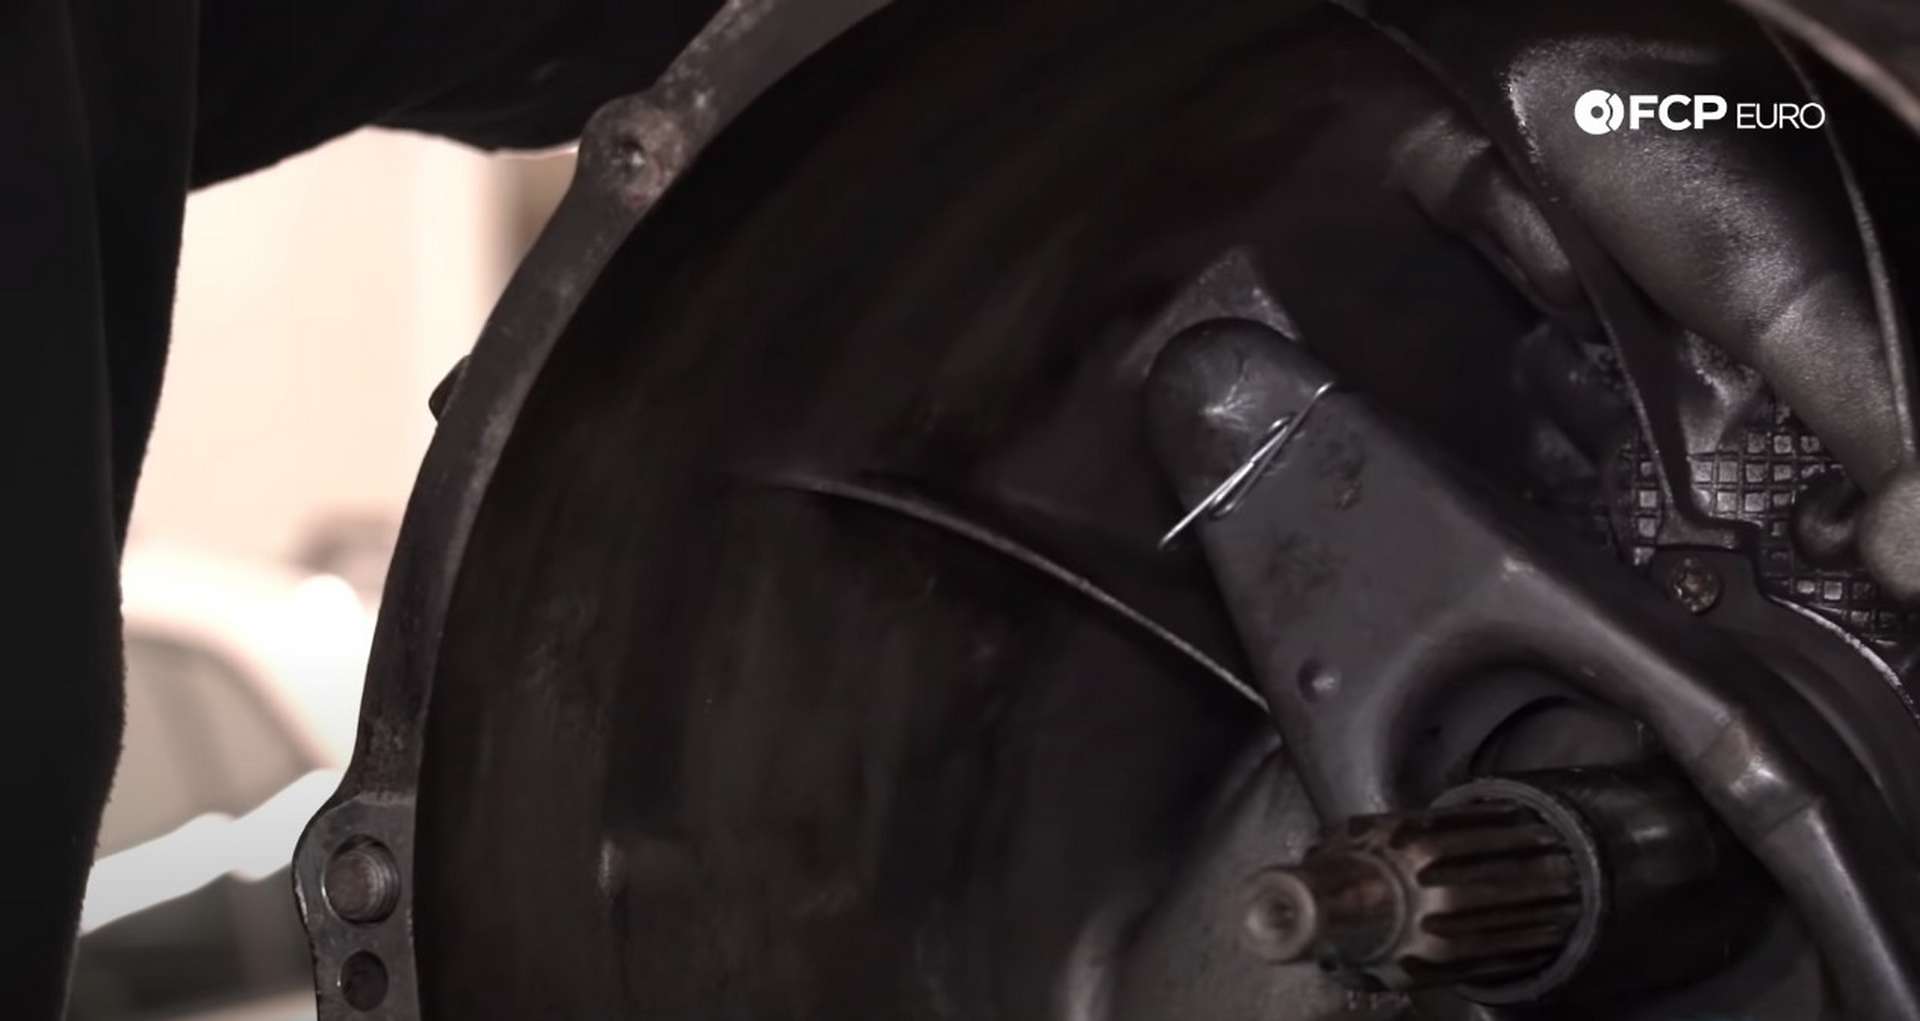
While the gearbox is out of the car, you should replace a few components. Remove the old throw-out bearing from the input shaft and then remove the clutch fork.
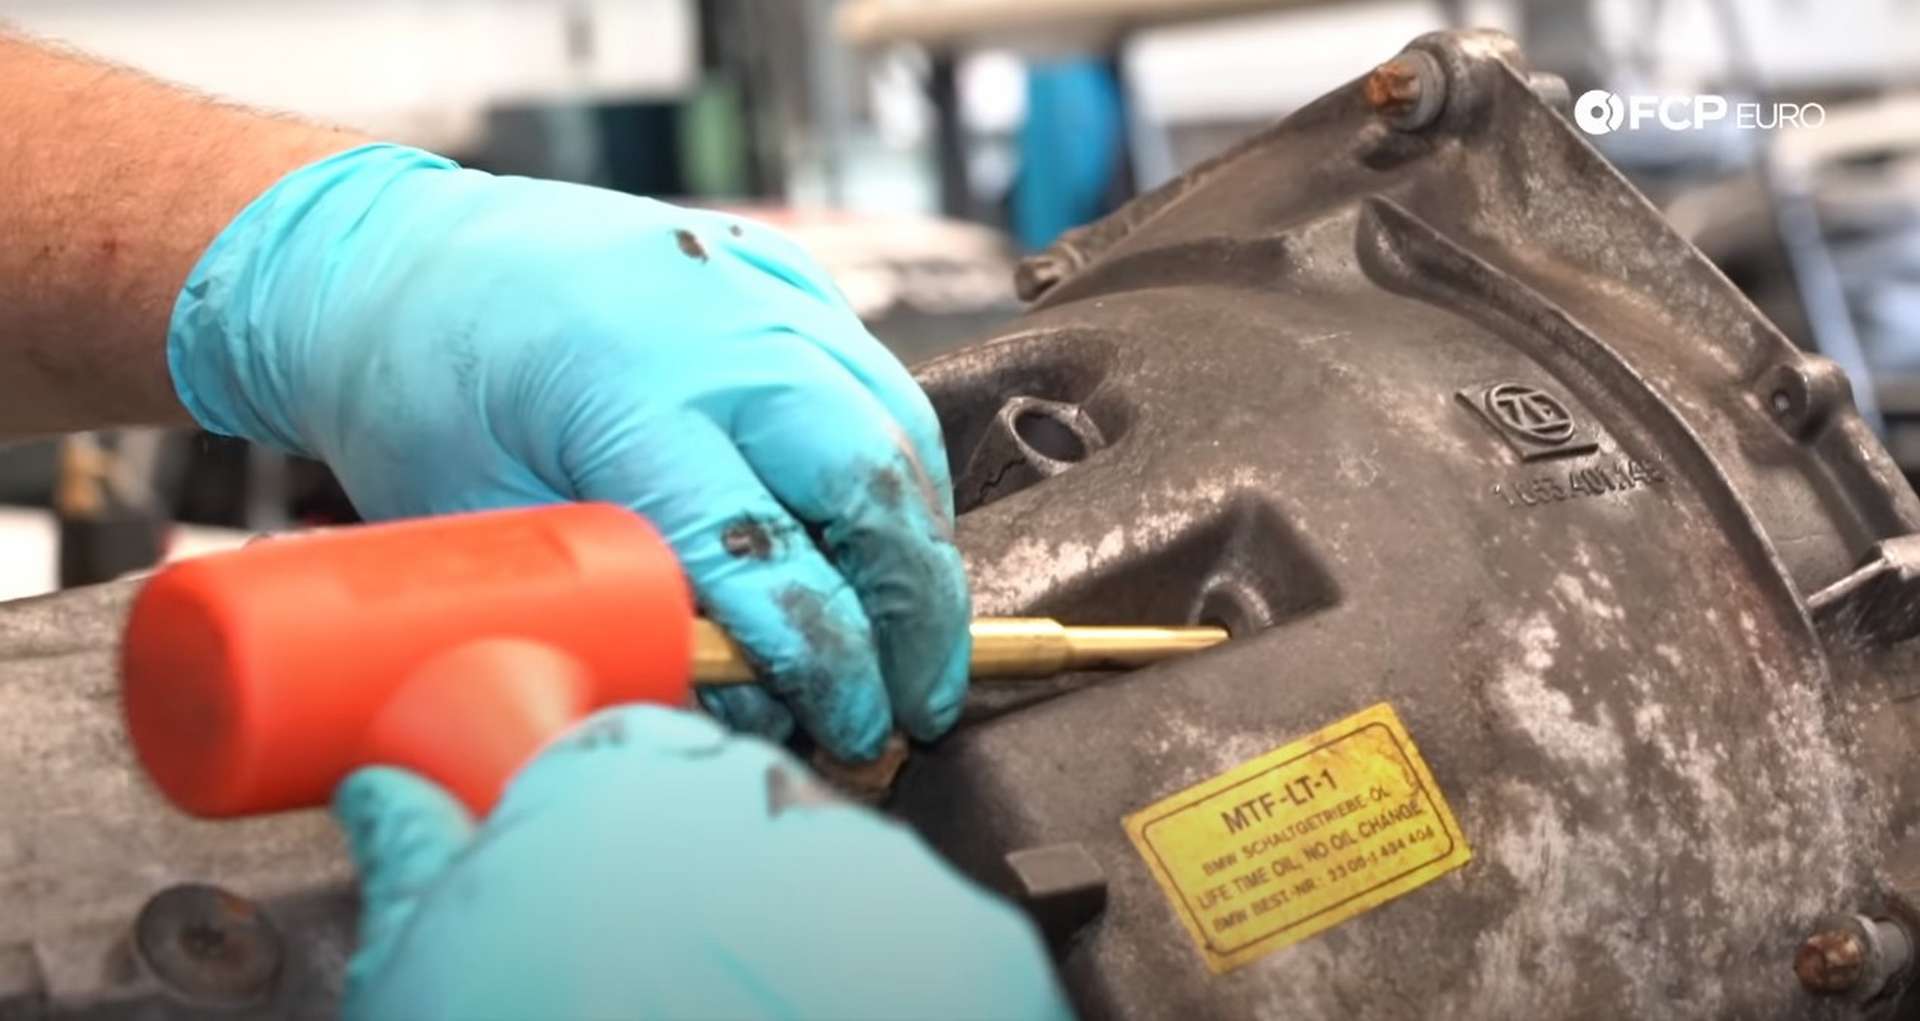
The clutch fork pivot that BMW used is made of plastic. The plastic pivot is notorious for breaking and requires the transmission to be out of the car for replacement. Use a hammer and punch to push the pivot out from the backside of the bell housing.
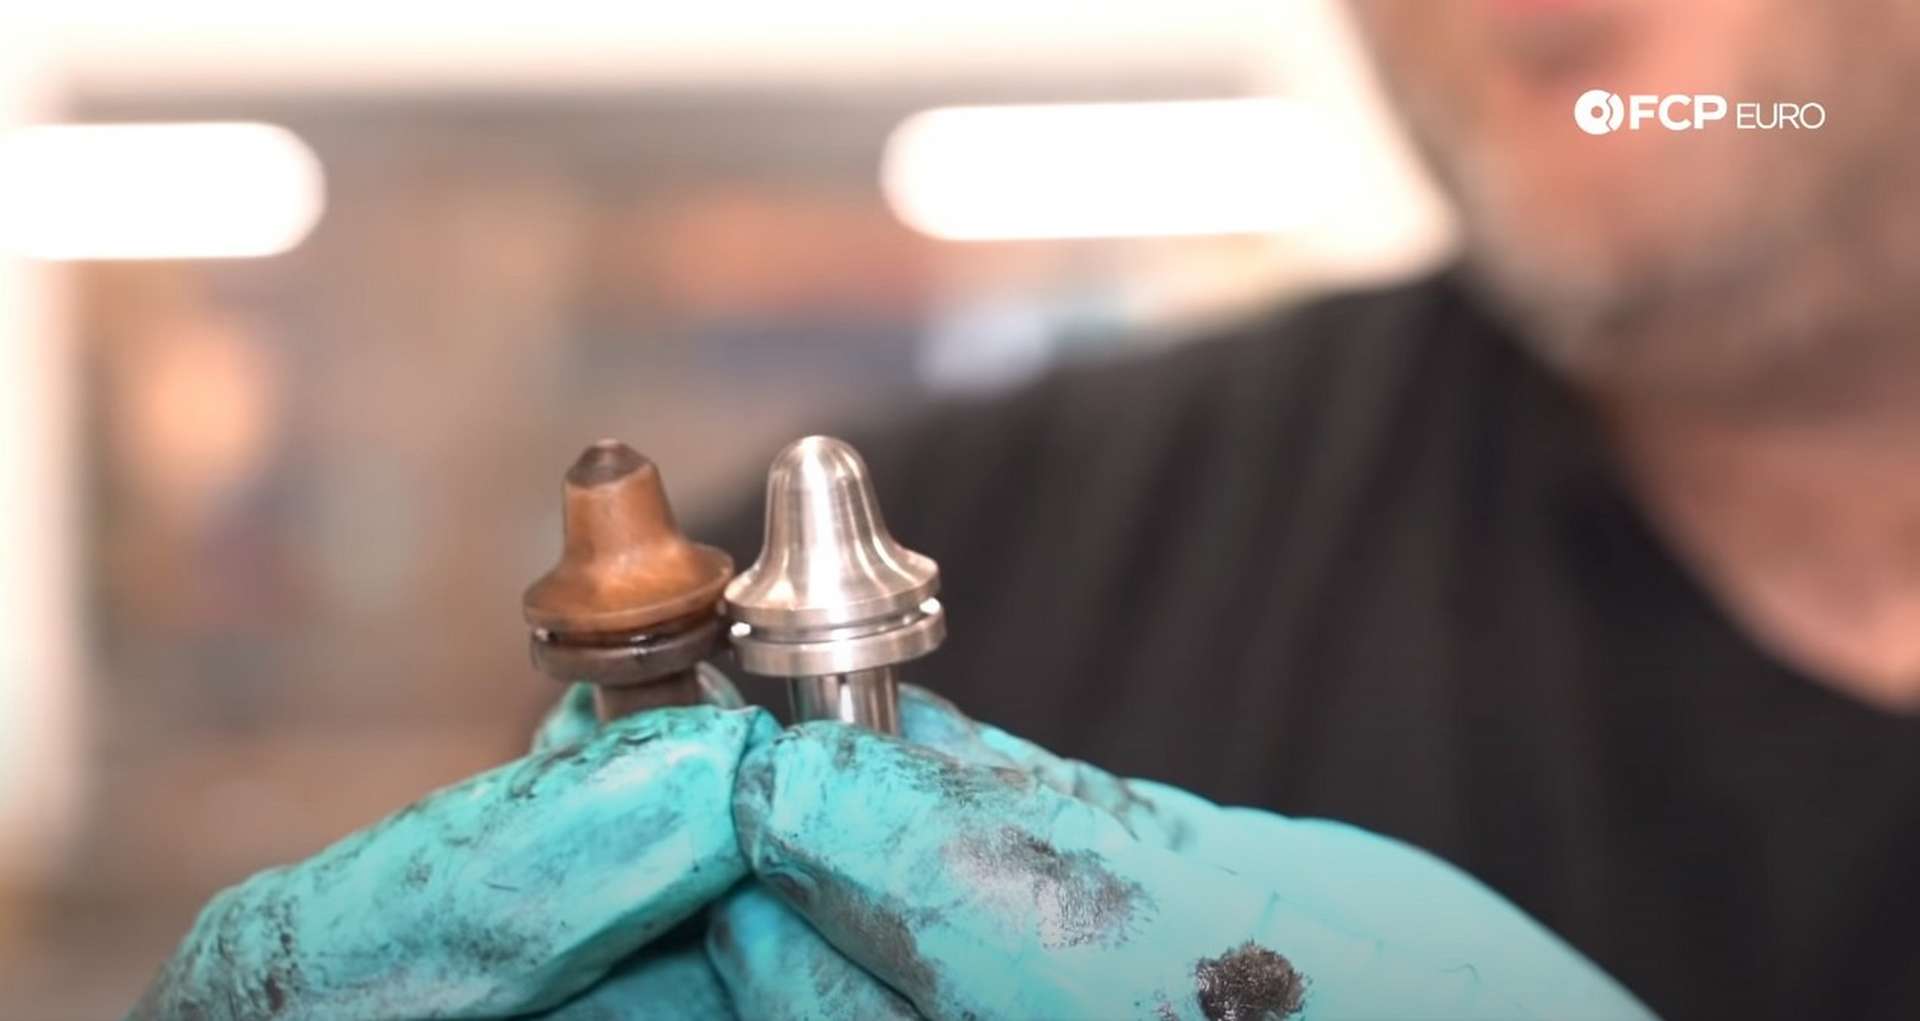
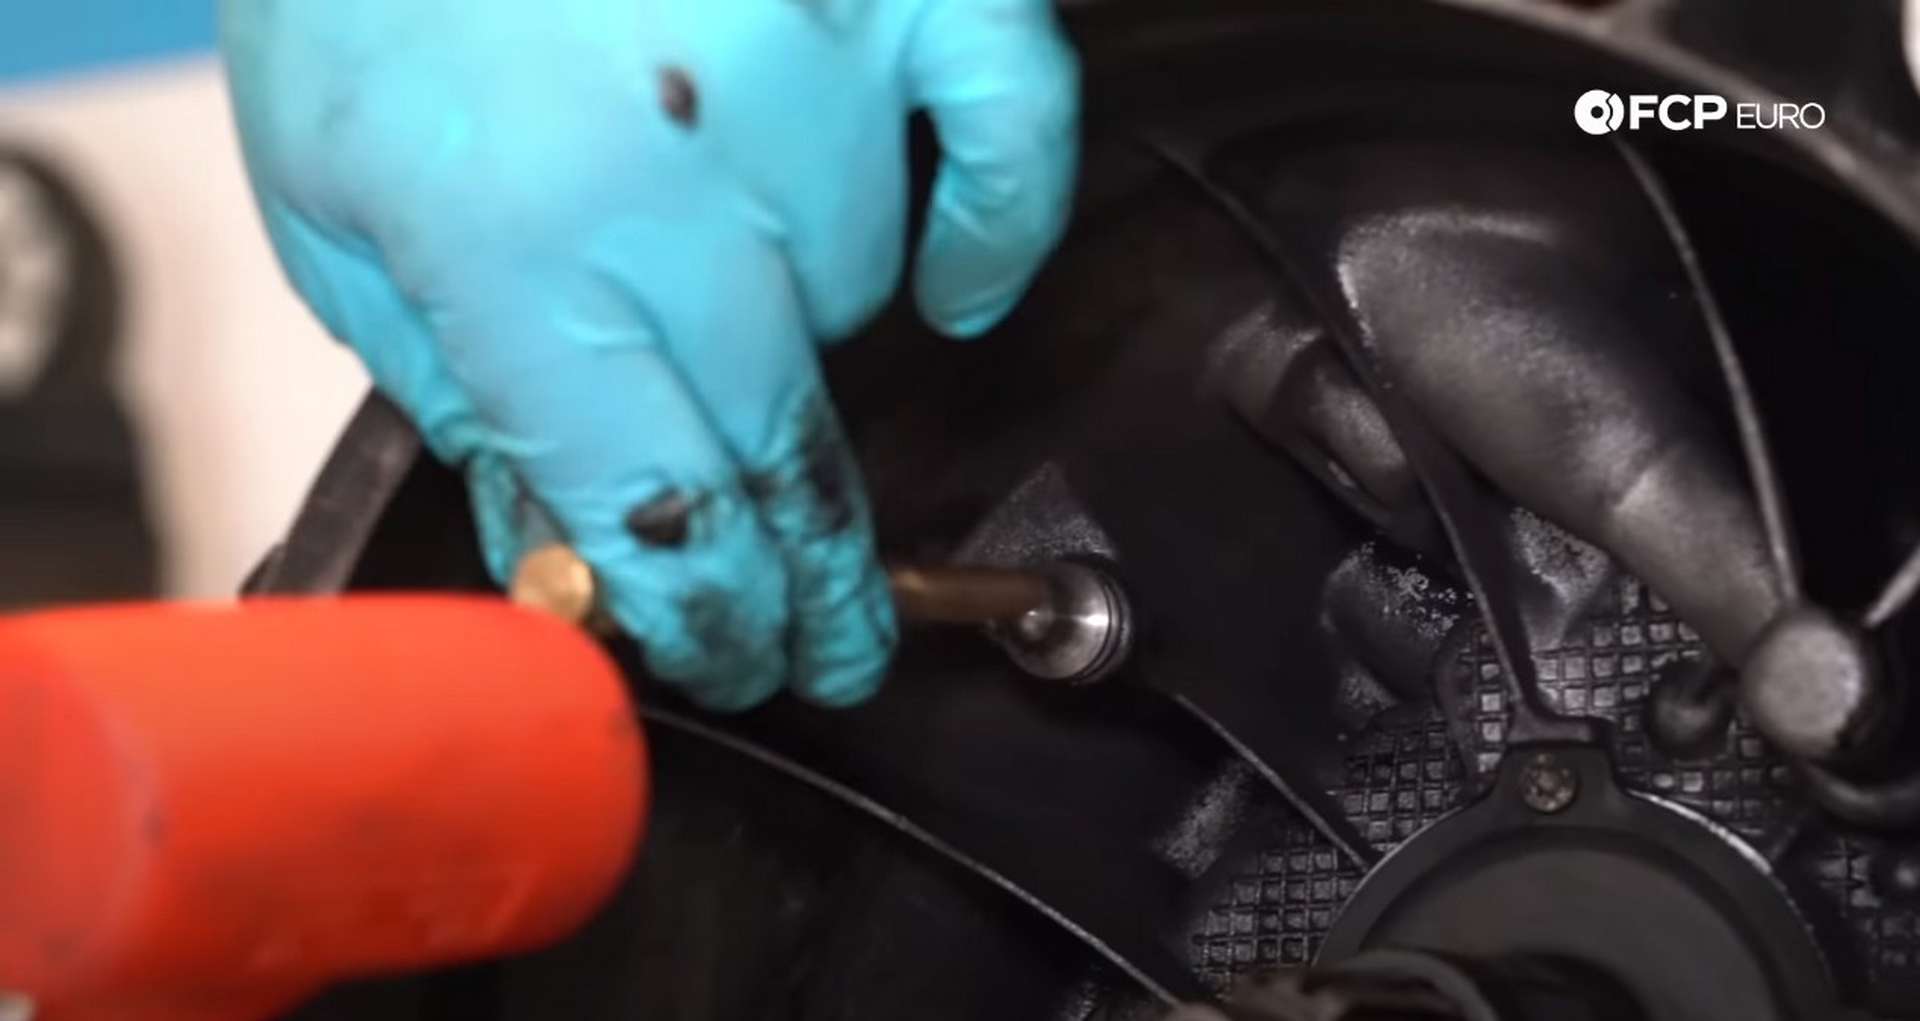
Rather than replacing the plastic pivot with a new plastic piece, we suggest upgrading to the updated steel unit. To install it, line it up in its hole and tap it in until it bottoms.
Take a dab of grease and place it on the tip of the pivot. This will prevent any squeaking and prevent rust from forming on the pivot. Lightly apply the grease included in the clutch kit to the input shaft on the transmission. Less is more here as excess can get onto the clutch friction surface.
Then, place the clutch fork retaining spring clip around the pivot. Slip the clutch fork over the input shaft and slide the pivoting end through the retaining spring clip.
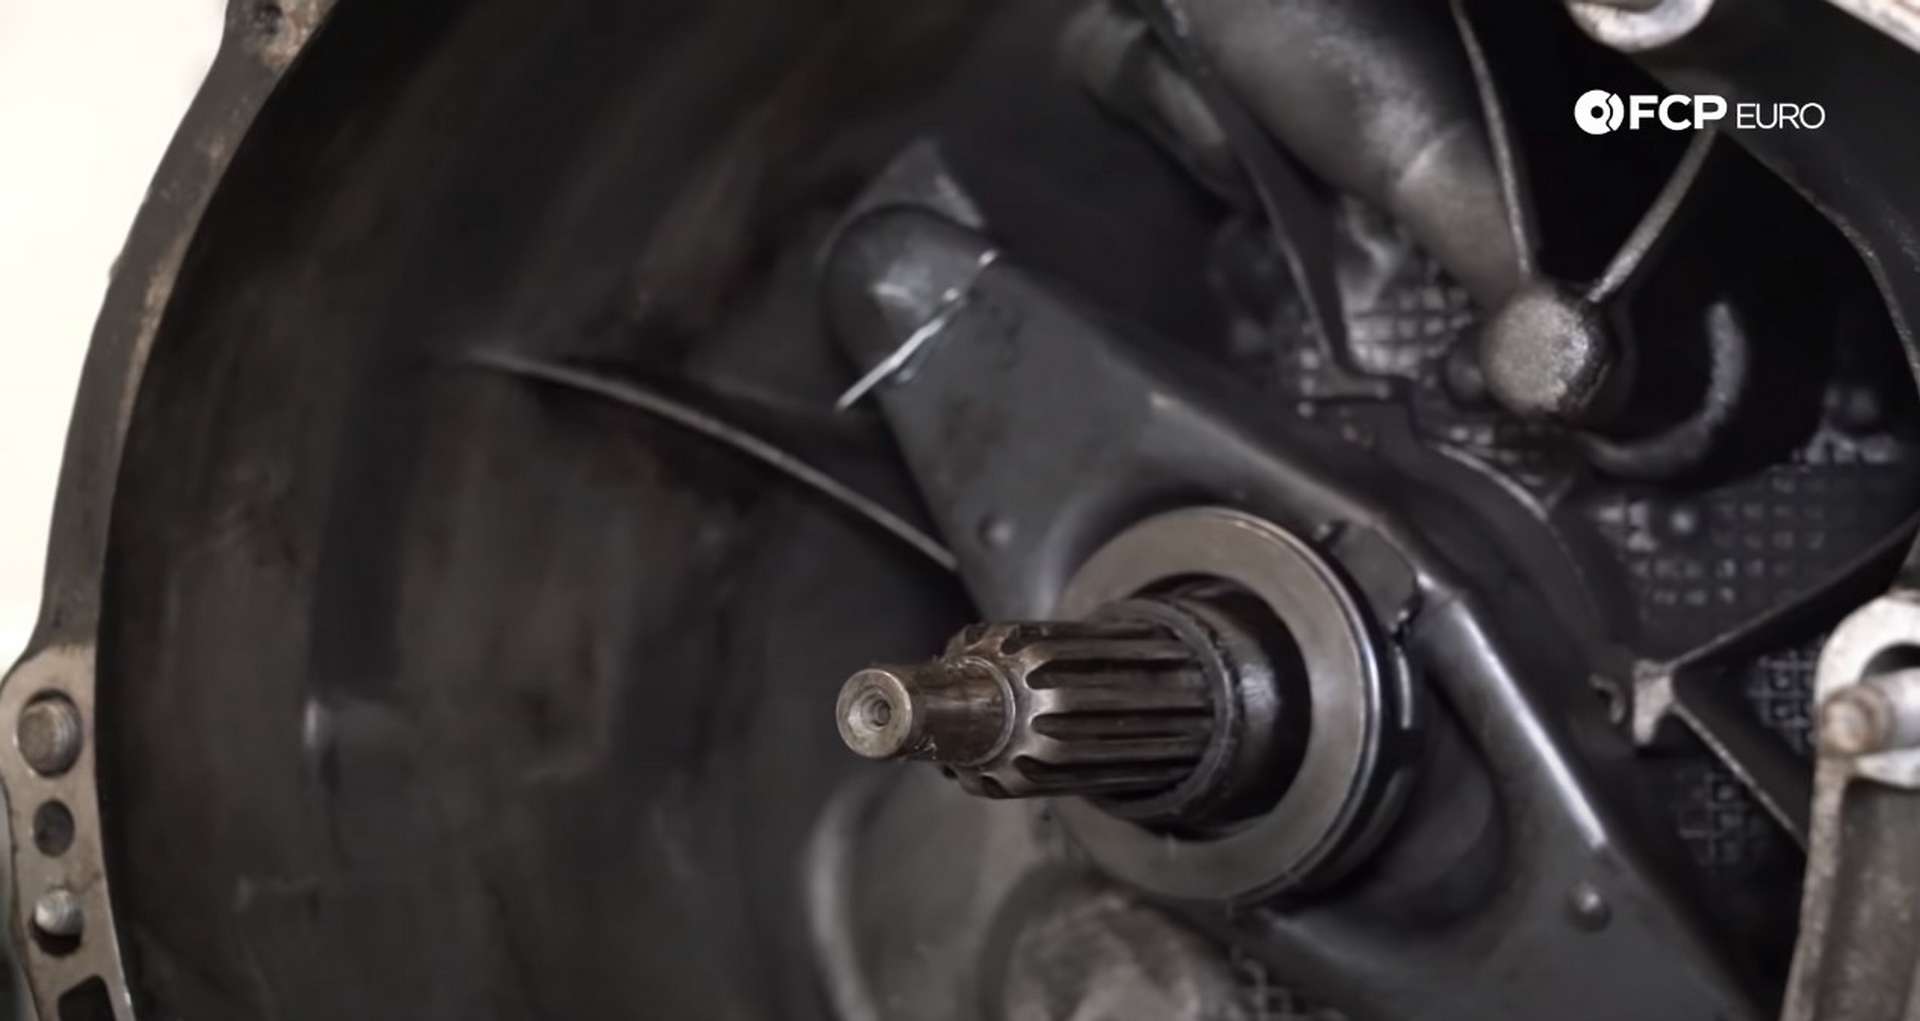
Slide the throw-out bearing over the input shaft after you install the clutch fork.
Step 11: Reinstall the transmission
Place the transmission on a jack, roll it under the car, and raise it to align it with the back of the engine. Roll the jack forward to slide the input shaft through the clutch assembly until the bell housing meets the flange on the back of the engine.
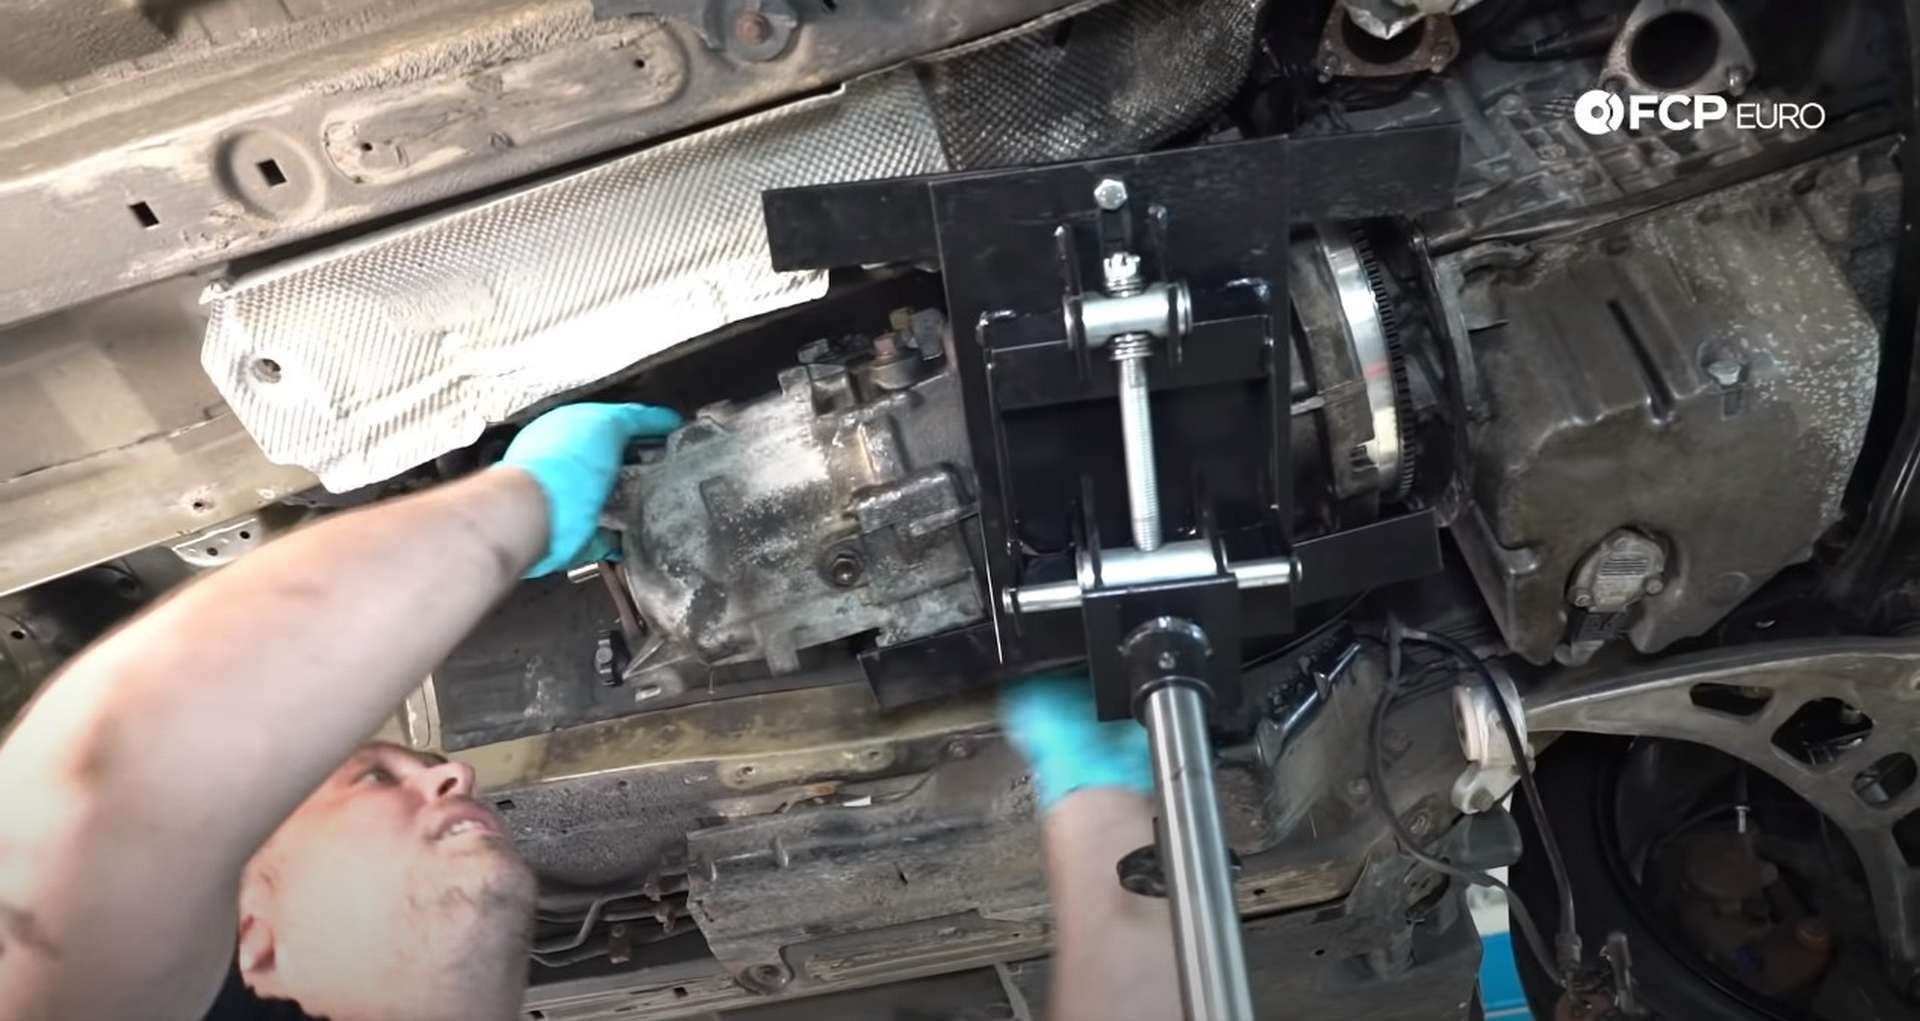
Mating the engine and transmission isn’t an easy process and will take some fighting. Brute force isn’t needed, but you will have to do some wiggling and twisting. Thread in one of the larger E14 headed bolts first when the transmission is aligned. Thread in the rest of the bolts and use the appropriate socket to tighten them down. Torque the E14 bolt to 66Nm, the E10 bolts to 19Nm, and the E12 bolts to 45Nm
Put the wiring harness for the reverse light switch back into its clips and throw it over to the other side of the transmission to plug it into the switch. Use a 13mm socket to remount the clutch slave cylinder and torque the bolts to 22Nm.
Step 12: Reinstall the remaining parts
Install the transmission crossmember and tighten the four body mounting bolts with a 13mm socket to 19Nm. Tighten the two transmission to mount nuts with the same socket and torque spec as the body mounting bolts.
Reinstall the shit selector rod, placing the clips on both ends to secure it to the shift assembly. Then, reinstall the driveshaft. Seat the two ends on their respective flanges and then use a 13mm socket to tighten the mounting bolts at the driveshaft center. The bolts for the rear flange use an E12 socket and get torqued to 85Nm. The front bolts use an 18mm socket and get torqued to 64Nm.
Put the heat shields back onto the car, using a 10m socket to tighten its mounting bolts. Reinstall the exhaust next. The manifold to exhaust nuts use a 15mm socket, and the rear chassis reinforcement plate and rear exhaust hangar bracket use a 13mm socket. Make these bolts tight.
Lastly, reinstall the front subframe reinforcement plate. Use a 16mm socket to tighten the bolts and torque them to 59Nm, plus another 90° of rotation. If you have the splash shield, throw that back on.
If you’ve made it this far, consider yourself a seasoned veteran. Whether it was a clutch job, rear main seal replacement, or the notorious detent replacement, your BMW’s drivetrain is back to full strength.
BMW E46 Clutch Replacement Torque Specs:
- BMW 13mm Rear Main Seal Housing Bolts = 18Nm or 13.3 ft-lbs of torque
- BMW 10mm Rear Main Seal Housing Bolts = 10Nm or 7.4 ft-lbs of torque
- BMW Flywheel Bolts = 100Nm or 74 ft-lbs of torque
- BMW Pressure Plate Bolts = 25Nm or 18.4 ft-lbs of torque
- BMW Main Transmission Mounting Bolts = 66Nm or 48.7 ft-lbs of torque
- BMW Transmission to Oil Pan Bolt = 19Nm or 14 ft-lbs of torque
- BMW Starter Bolts = 45Nm or 33.2 ft-lbs of torque
- BMW Slave Cylinder Bolts = 22Nm or 16.2 ft-lbs of torque
- BMW Transmission Crossmember and Mount Bolts = 19Nm or 14 ft-lbs of torque
- BMW Rear Driveshaft Bolts = 85Nm or 62.7 ft-lbs of torque
- BMW Front Driveshaft Bolts 64Nm or 47.2 ft-lbs of torque
- BMW Subframe Reinforcement Bolts = 59Nm or 43.5 ft-lbs of torque, plus 90°
If you're interested in more DIYs for your BMW, you can visit bmw.fcpeuro.com and subscribe to our YouTube channel.


