- 05/27/2020
- 5 Min Read
- By: Christian Schaefer
How To Replace The Cabin Air Filter On A Volvo P3 (XC60, S60, V60, & More)

Often overlooked, the cabin filter will collect leaves, twigs, and moisture over time, leading to a moldy or musty smell. Instead of living with this, replace your cabin air filter with a brand-new one, and quickly realize the difference that it makes.
Volvo’s P3 chassis vehicles, like many cars these days, have the cabin filter tucked away under the glove box. While not overly difficult, getting to it for a change can be a tedious and a involved-appearing task. The cabin filter is cheap, and to change it yourself, requires nothing but basic hand tools. Give yourself, and your sinuses, peace of mind this spring by changing your cabin filter.
Volvo Models and Years Applicable: |
|
|
|
|
|
|
|
|
|
Symptoms of a cabin filter in need of replacement: |
- A musty or moldy smell coming from the air-conditioning
- A struggling blower fan
- Poor window de-fogging
A clogged cabin air filter can be detrimental for a number of reasons. Firstly, it’s designed to catch things that could be harmful when breathed in. Once it’s clogged, any air being pulled through is being pulled through that debris. Secondly,, the debris will significantly inhibit the airflow capabilities of the filter. This will put an extra strain on your blower motor, causing it to wear quicker, leading to a possible need for replacement. A clogged air filter will put an unneeded strain on your health and your wallet.
How long will it take to replace my Volvo P3's cabin air filter? |
When attempting this job for the first time, it’s a good idea to go slowly to make sure nothing gets broken or replaced incorrectly. You’ll be removing the glove box along with several electrical connections and will be working in a tight space.
The total time between disassembly and reassembly should take around 35 minutes. Give yourself extra time just in case you get hung up at any point.
How much will it cost to replace my Volvo P3's cabin air filter? |
It’s difficult to pinpoint just how much the job would cost from a dealership as the cabin air filter is normally replaced during a larger service. To do the job yourself, all you’ll need to buy is the cabin air filter. The link below will bring you to the correct cabin filter, which lists around $27.
Tools required to replace the cabin air filter on a Volvo P3: |
Parts required to replace the cabin air filter on a Volvo P3: |
Steps required to replace the cabin air filter on a Volvo P3: |
Step 1: Disconnect the battery
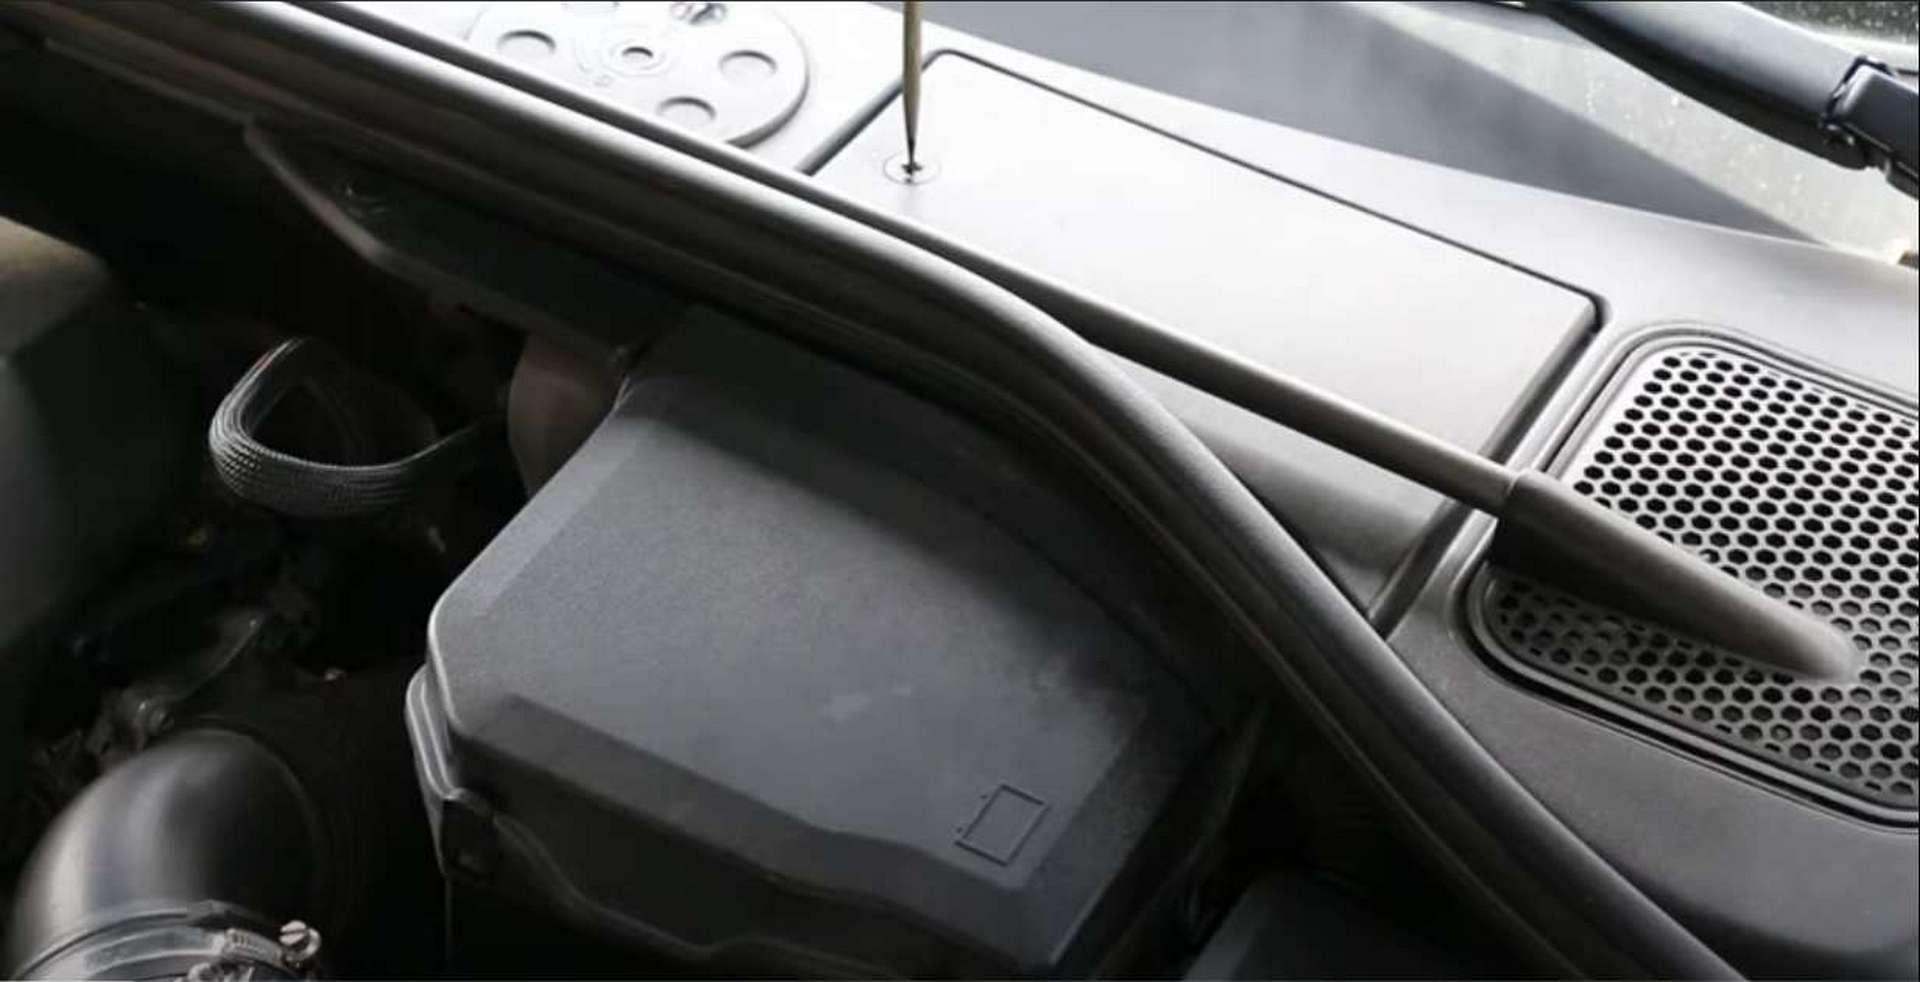
The battery is located against the firewall, under the hood. Lift up on the two tabs to remove the engine bay cover, and remove the screw on the cowl cover to remove that half. The rubber hood seal will easily pull off of the cover.
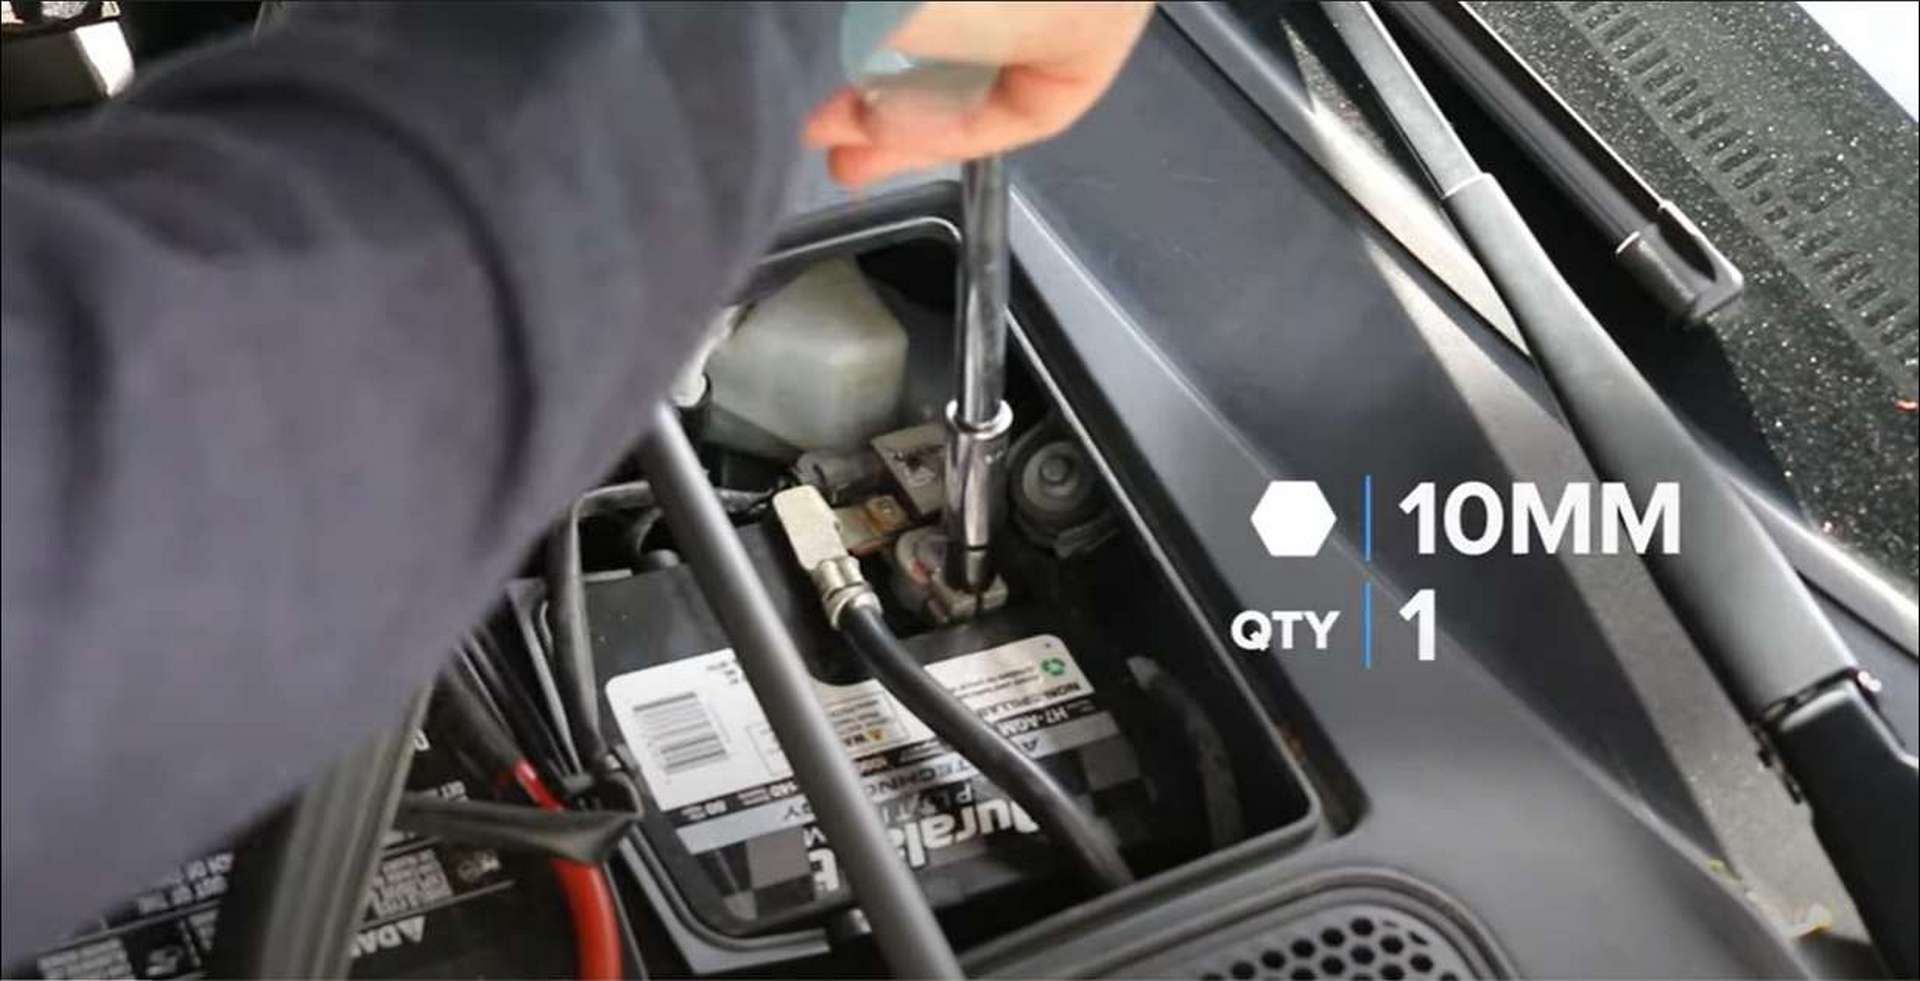
Once the battery terminals are exposed, remove the negative cable from the battery. The negative cable is black. Use a 10mm socket to loosen the clamping nut and remove the socket. Once removed, tuck it aside so that it doesn’t re-ground itself on the battery.
Step 2: Remove the glovebox
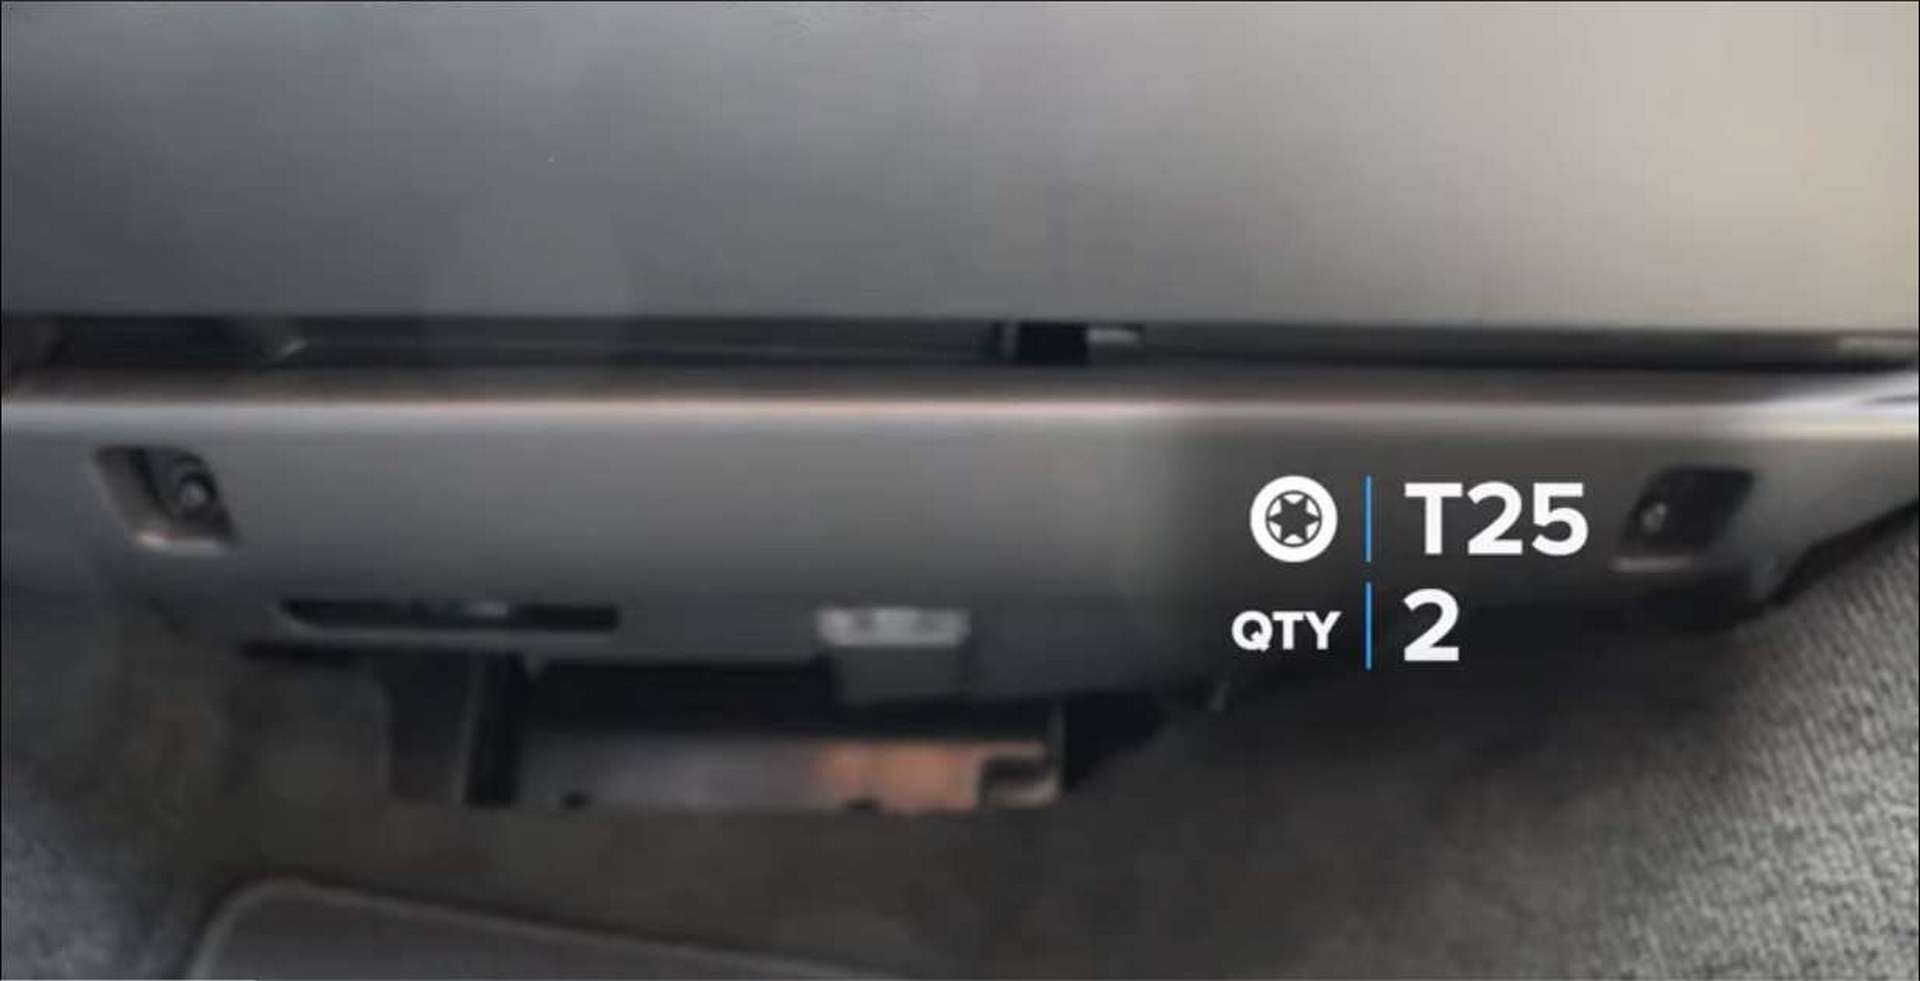
Under the glove box, there is a kick panel. Use the T25 Torx bit to remove the two screws securing it to the bottom of the glove box. There is a small light mounted on the back of the panel. Disconnect it before fully removing the panel.
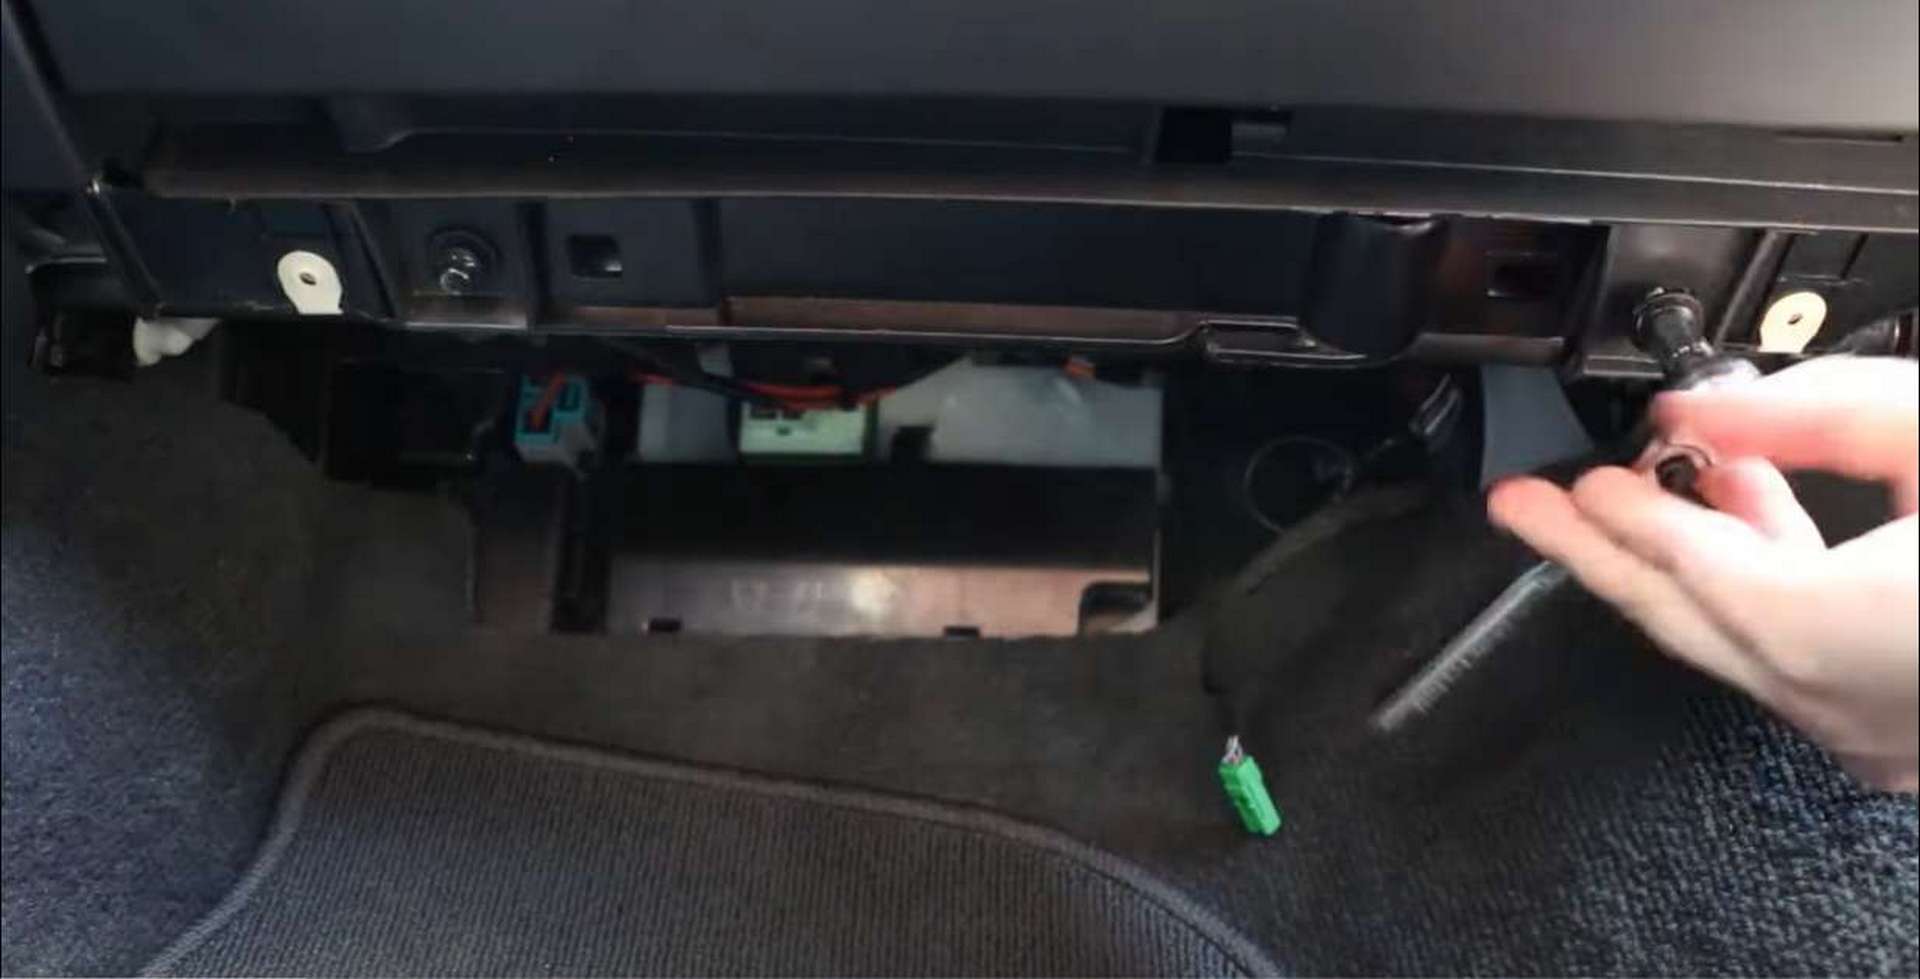
With the kick panel out of the way, you can see the two bolts holding in the bottom of the glove box. Remove them using the 8mm socket.
Next, open up the glove box. Inside, there are six T25 screws securing it to the dashboard. There is one screw on either side of the box itself and four inside of the box. Once the screws are removed, the glove box will only be held in by a few plastic tabs. Grab the glove box at the bases of the door hinges and wiggle and pull on it until it pops free. This will require a decent amount of force.
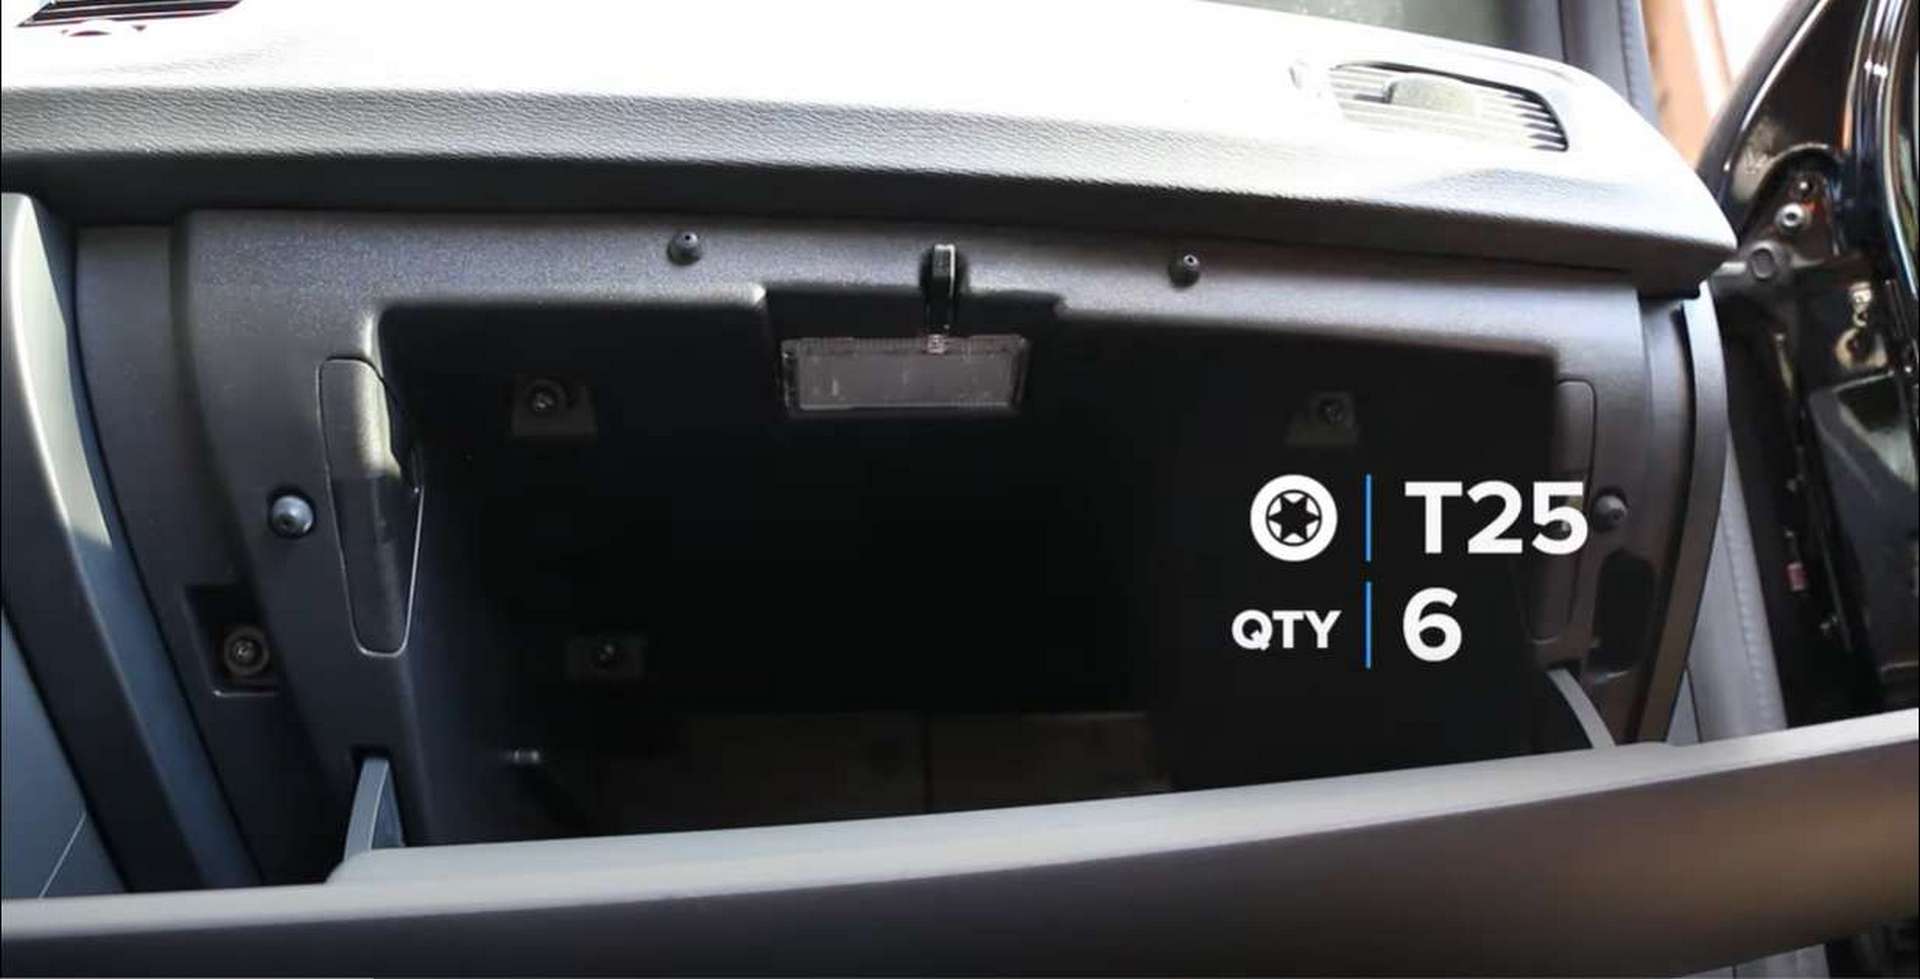

There are two electrical connections on the back of the glove box. These need to be removed before the glove box can be fully removed from the vehicle. To remove the connectors, push down on the tabs and pull them back.
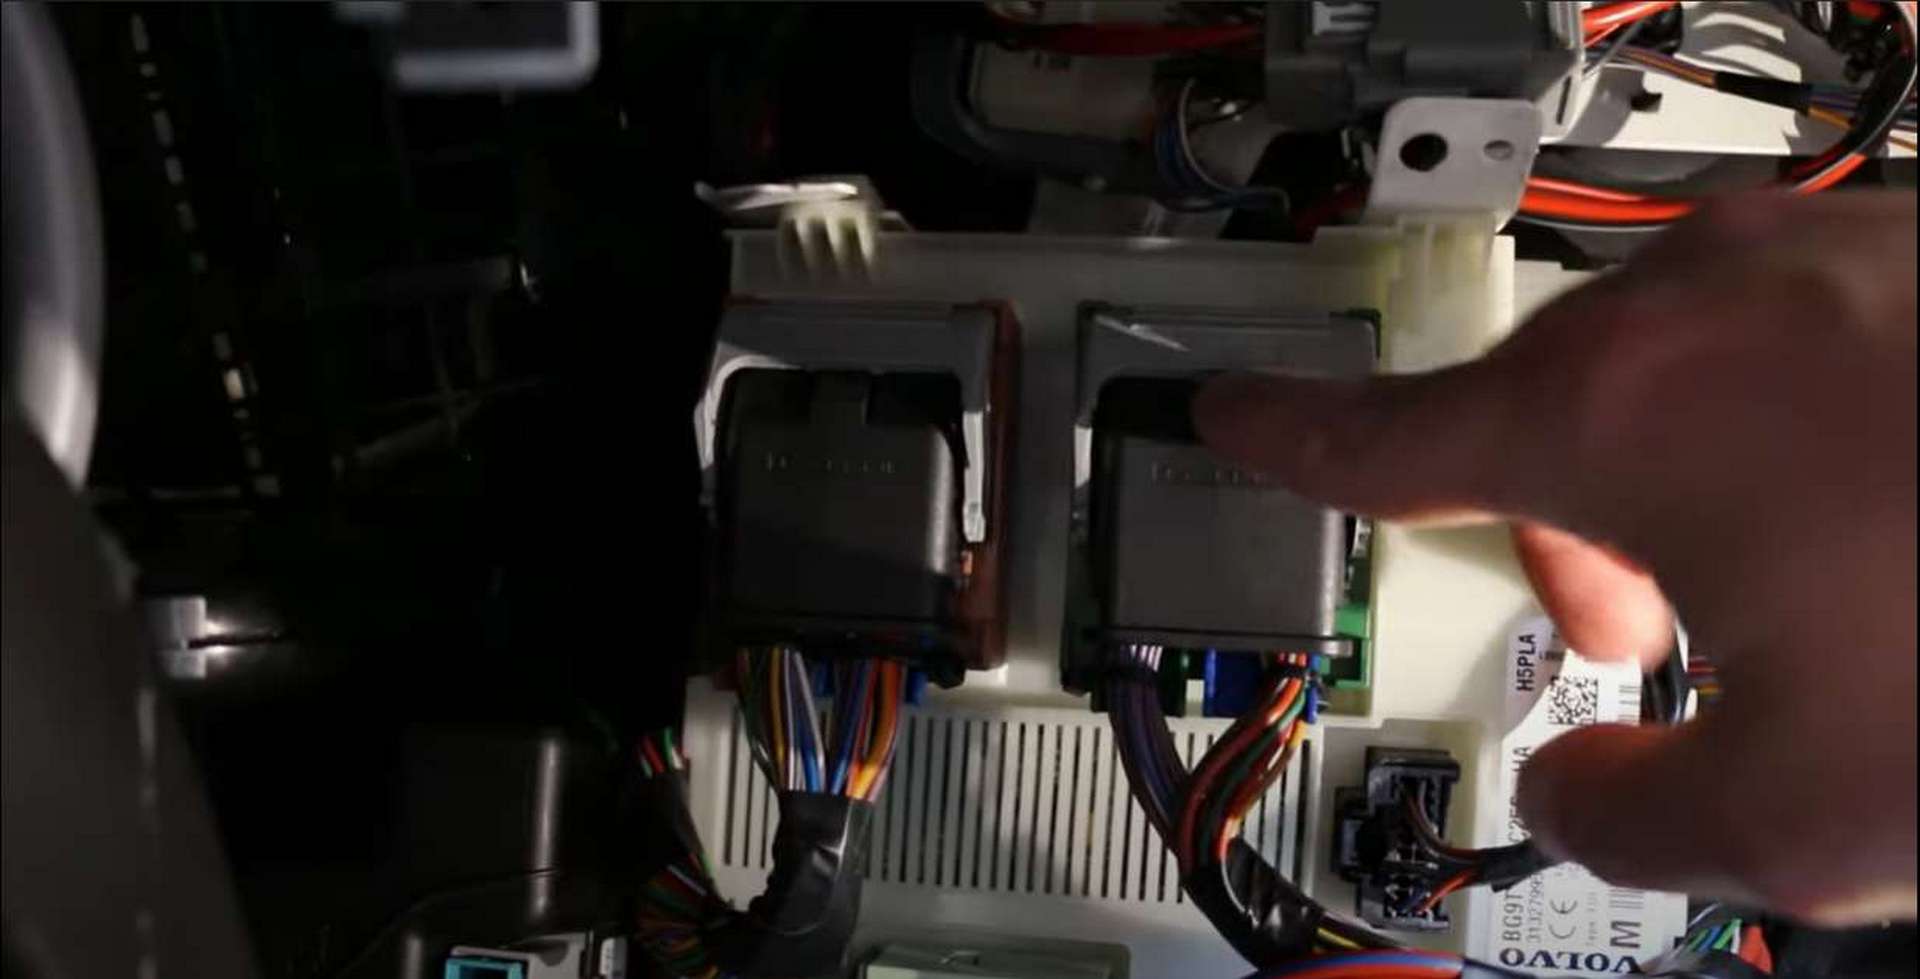
Step 3: Remove the fuse box and control module
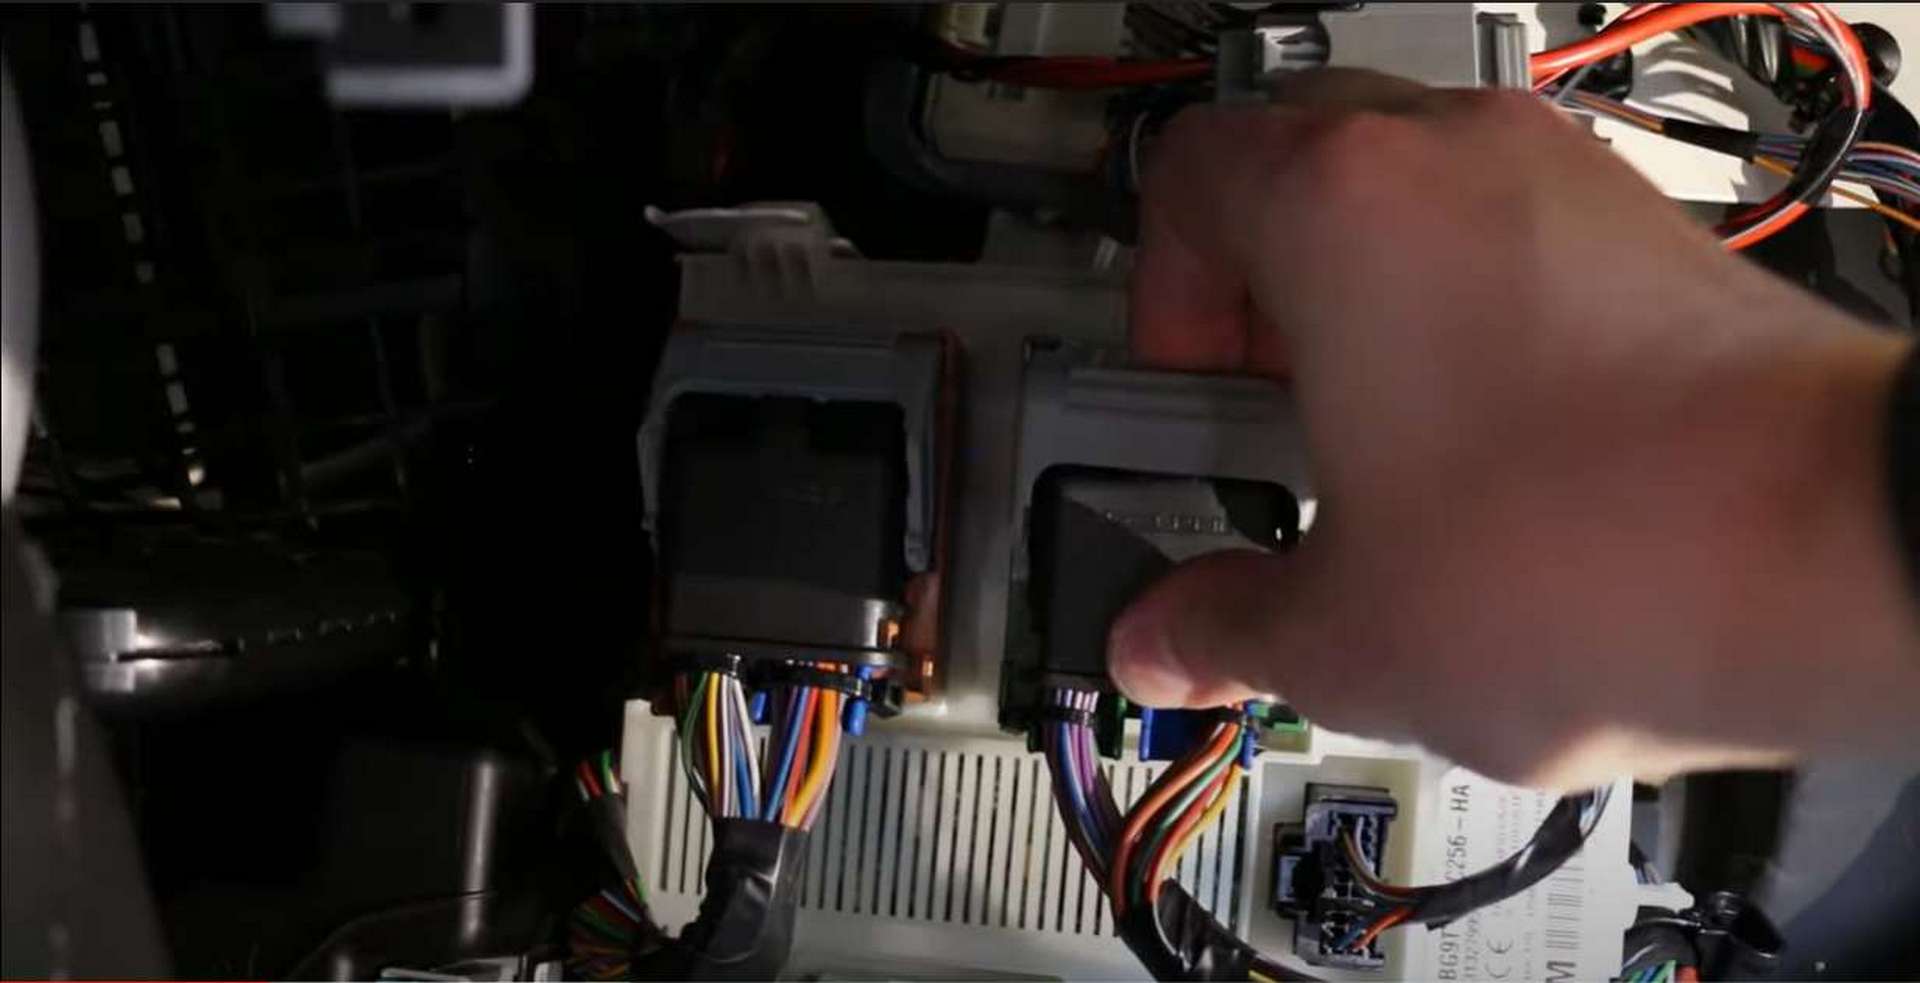
There are several electrical connections the must be removed before the control module and fuse box can be removed. The smaller plugs are similar to those on the glove box. Push down on the tab and pull them out. The three bigger black connections are a little different. At the top of the connectors, there is a button that needs to be pushed in. With the button pushed in, pull down on the white locking lever. This will release the connection.
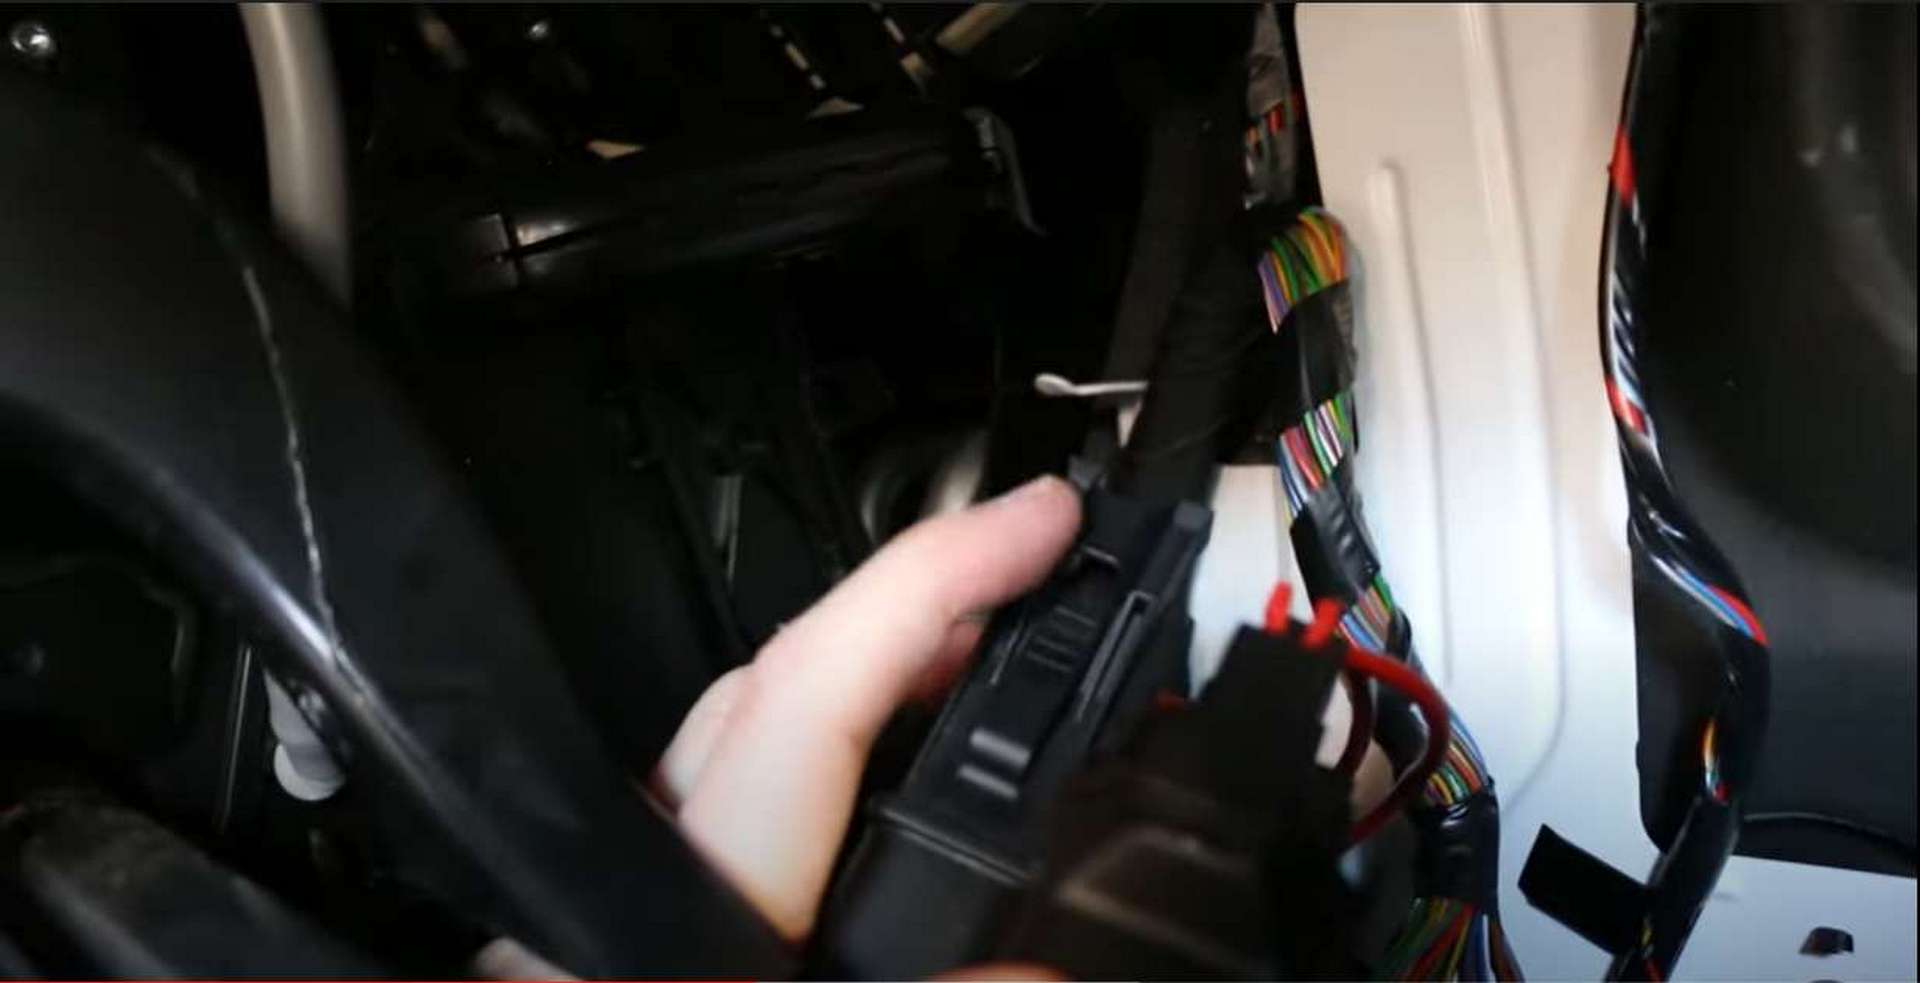
Below the two big connectors, there is a rectangular white connector with two wires. This connector is held in place by a sliding lock. Take the flat blade screwdriver and pry the lock to the left. The connector will be able to be removed once the lock is fully moved.
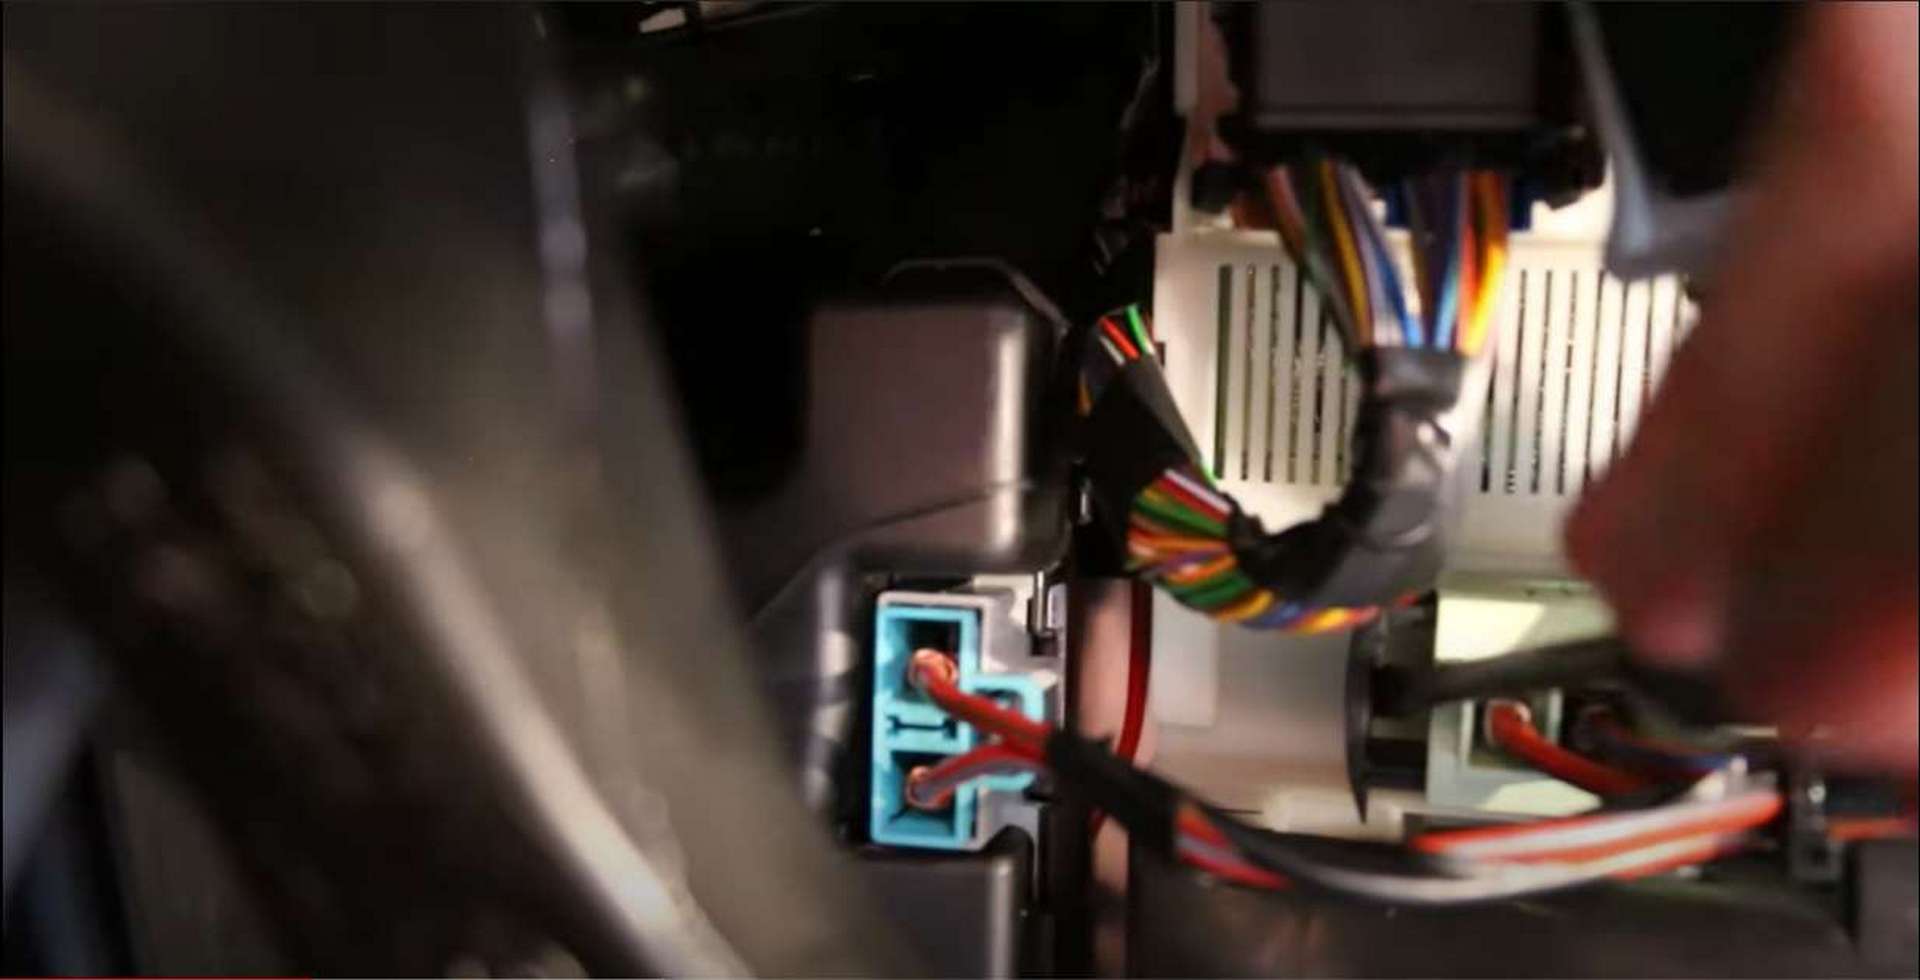
The third and final large, black connection is located behind the black cover on the module, just below the sliding lock connector.
With that final connector removed, the module can be pulled out. To release the module, push on the tab above the module, on the right side. The module will pop free and can be removed.
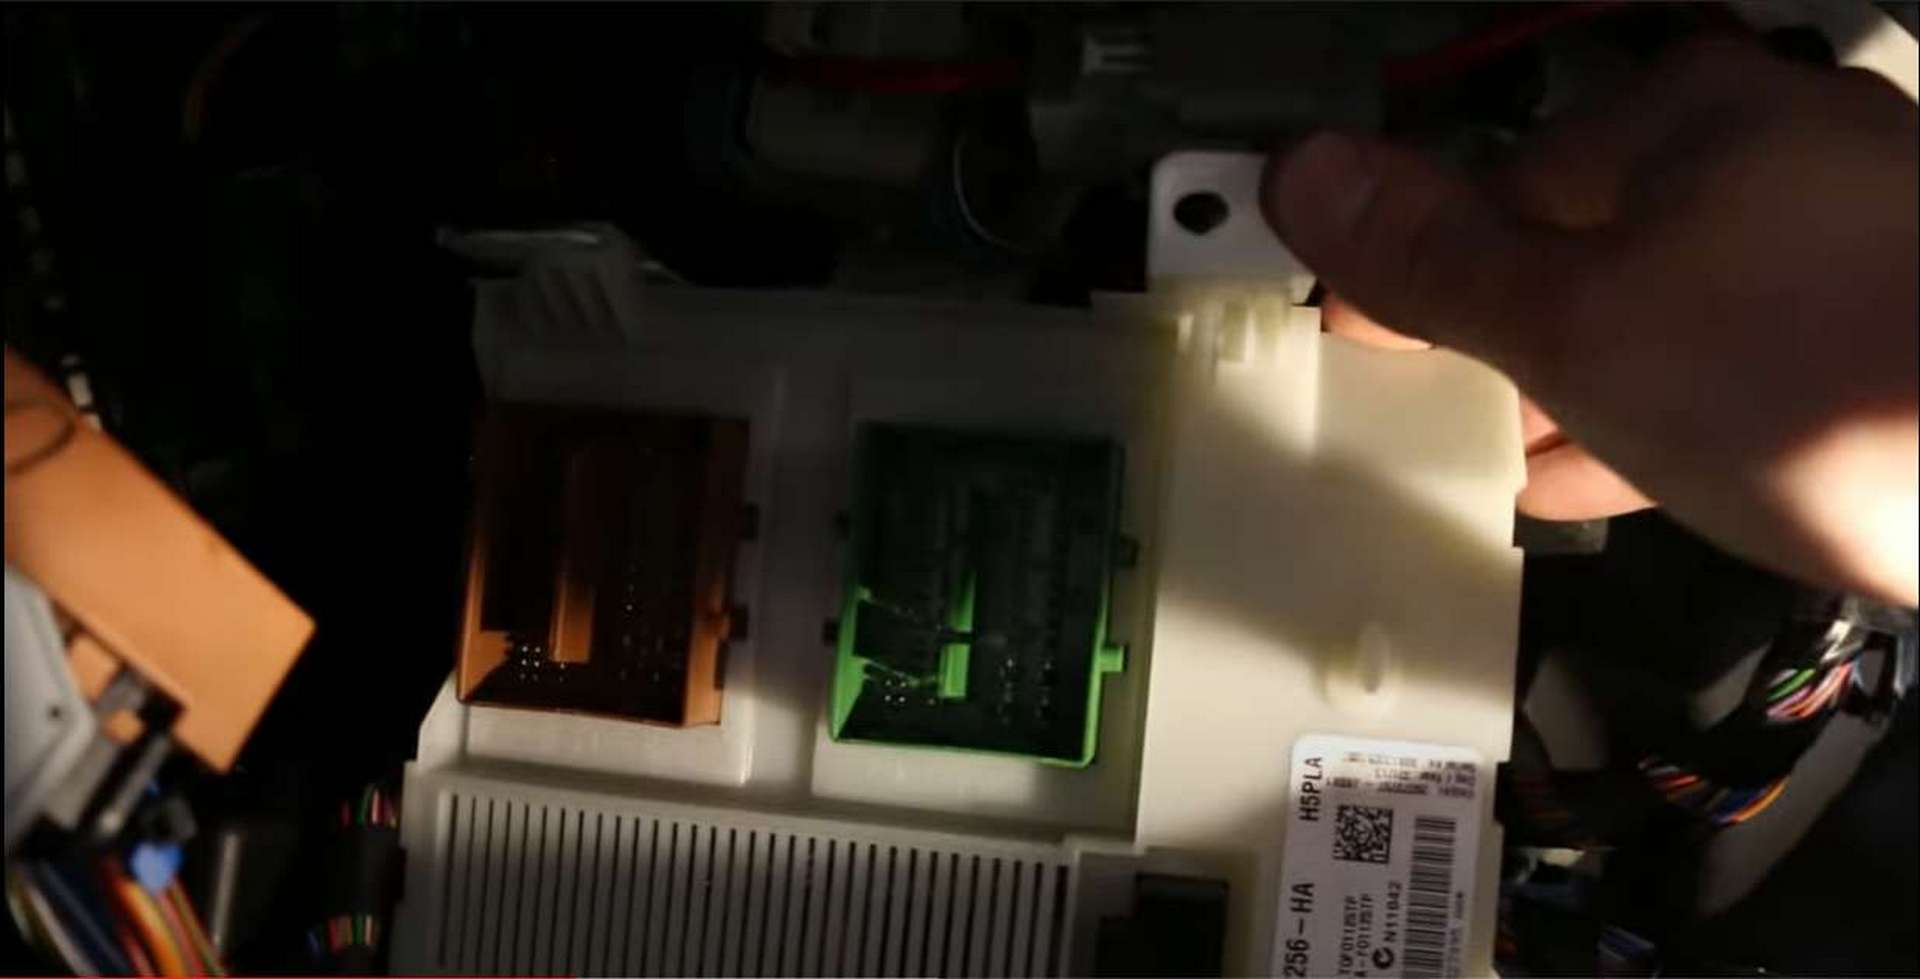
The last thing in the way of the cabin filter is a black fuse box. Similarly to the module, the fuse box is held in by one locking tab. The tab is located on the top of the fuse box, making it difficult to see. Feel around on the top of the box, toward the left side of the box. Once you locate the tab, push it down and pull back on the box. With the box free of the tab, it can be pulled out and set aside.
Step 4: Change the cabin air filter
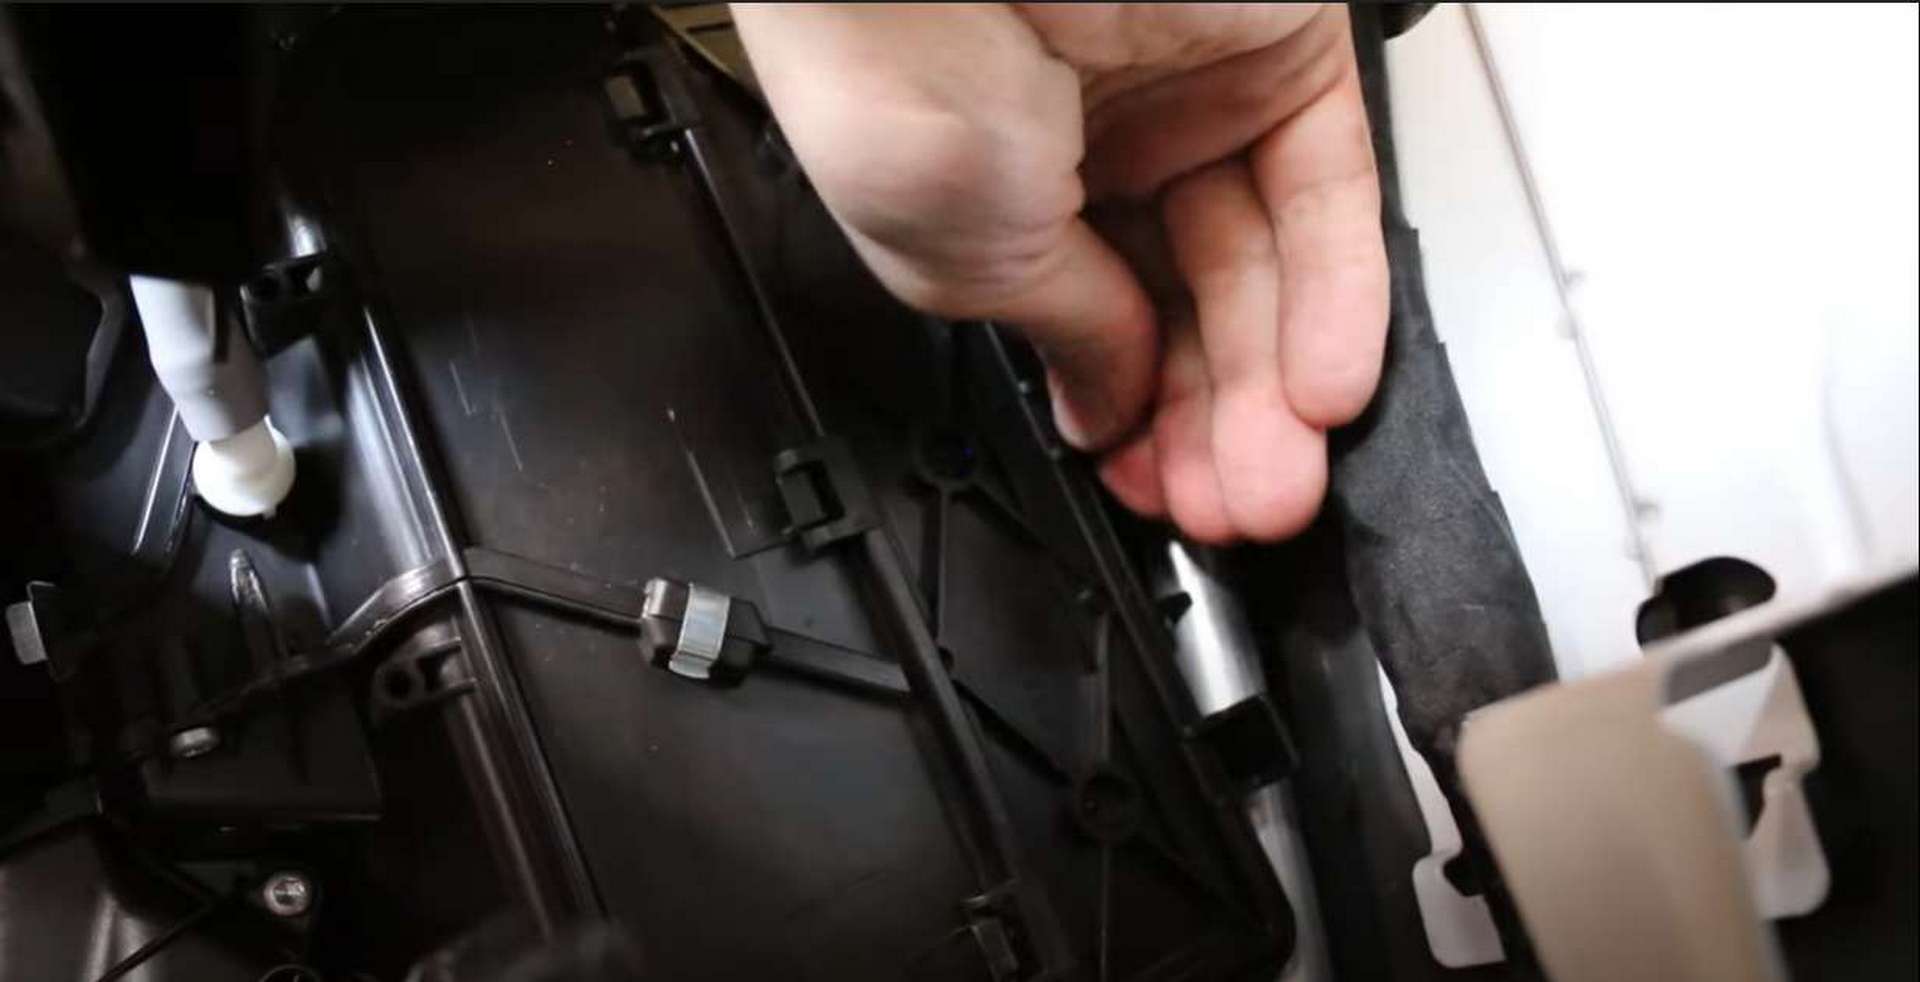
With the cabin air filter now accessible, remove the airbox cover by pushing back on the three clips. With the clips released, pull it forward, out of its locating hooks, and remove the cover.
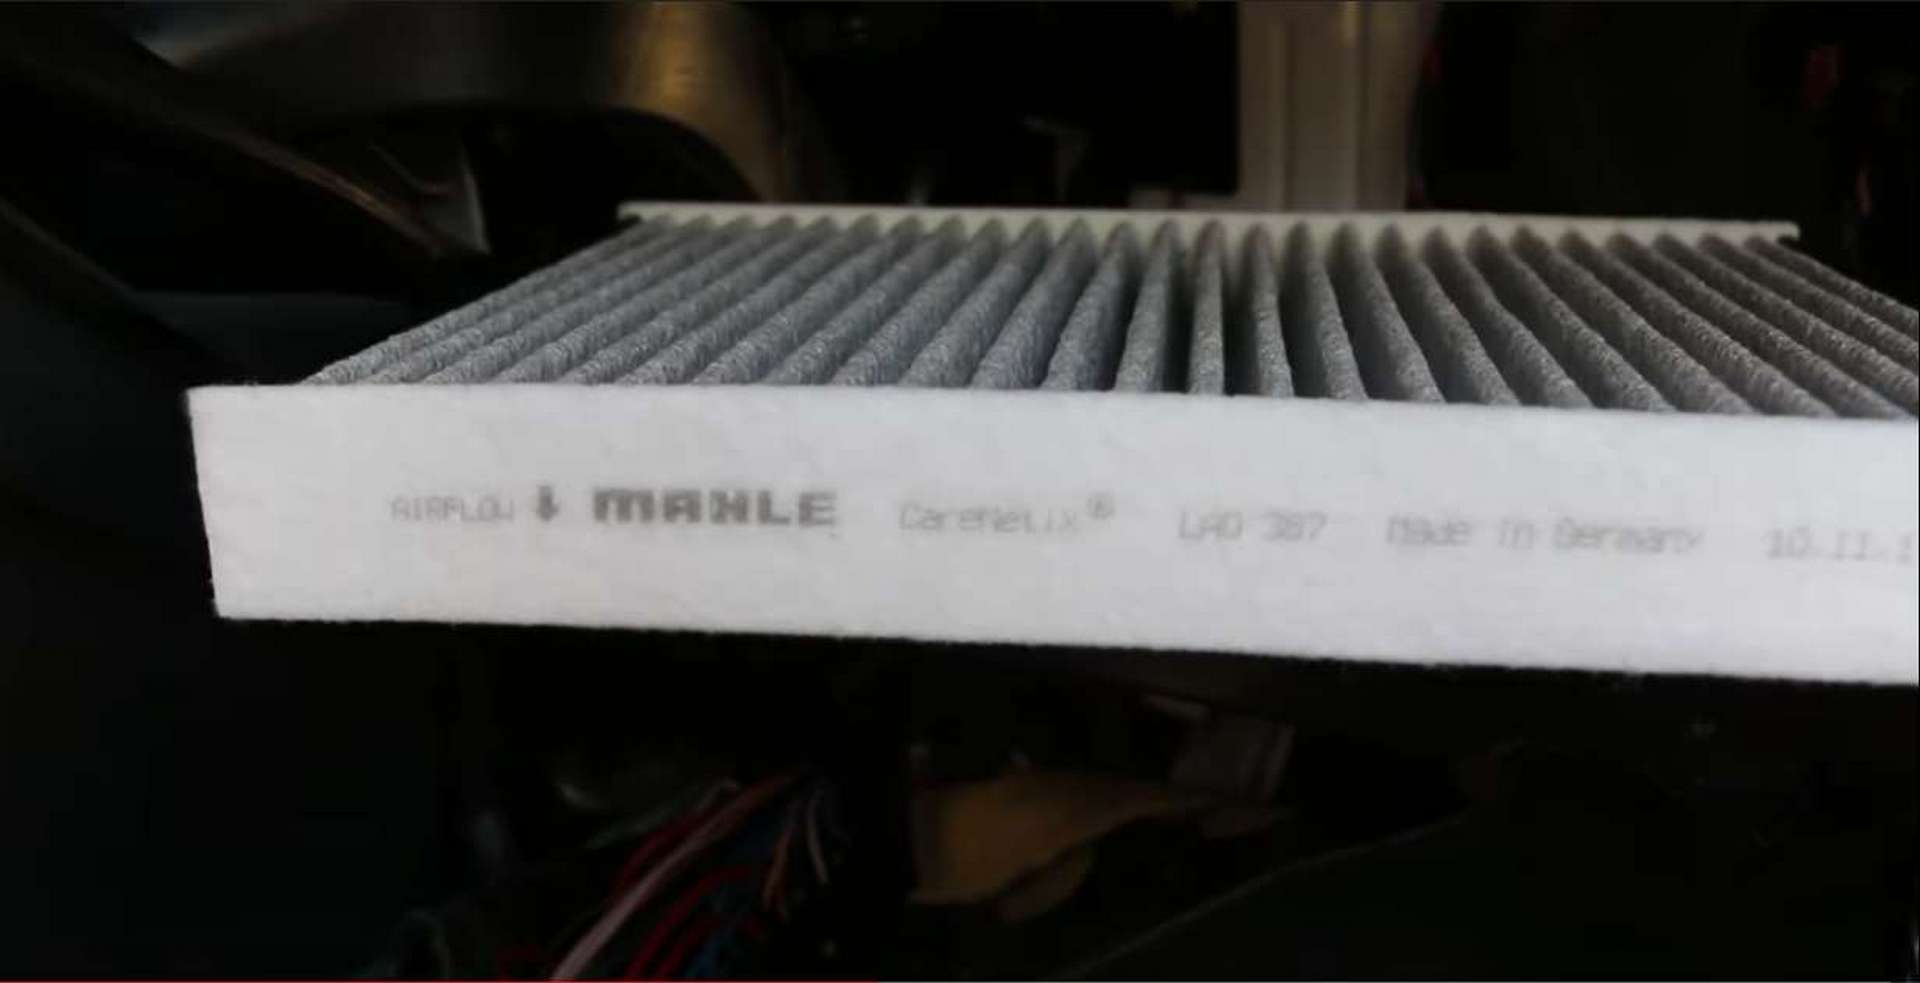
Pull out the old filter and discard it. Pay attention to the orientation of the new filter when installing it. There will be an arrow on the top of the new filter. Make sure the arrow points towards the seats rather than the engine bay when being installed.
Step 5: Repeat the previous steps to reinstall the electrical components and glove box
Now that the filter is changed, go ahead and reverse the steps. When reinstalling the electrical components, make sure each connection is put back in the correct location, and that they are fully seated correctly.
Now that your cabin air filter has been replaced, you can get back to breathing in fresh and clean air when using your HVAC system. If you're interested in more DIYs for your Volvo, you can visit volvo.fcpeuro.com and subscribe to our YouTube channel.


